pies and tarts

Willow Bird Baking’s 13 Best Recipes of 2013

Willow Bird Baking's 13 Best Recipes of 2013

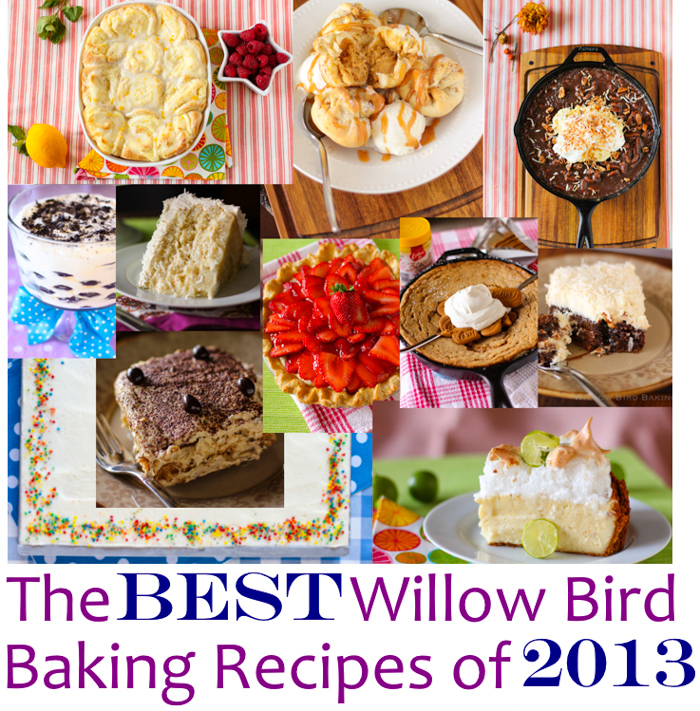
Happy New Year! My head is spinning with thoughts of resolutions and responsibilities for the upcoming year, but let’s relax first and just enjoy some edible reflection, shall we? You guys have good taste. Here are Willow Bird Baking’s 13 Best Recipes of 2013, as chosen by your visits. At the end, I’ve included a few recipes that didn’t make the “Most Popular” list but are actually some of my favorites from the year!

Want to gather lots of amazing recipes from other blogs, too? I’ve just created a Best of 2013 Recipes Pinterest board where you can see “Best of” posts from some of my favorite blogs. This is one of the best times of the year to gather top eats from around the internet! While you’re there, make sure you follow me on Pinterest. I’m kind of a food lover, in case ya didn’t know. My pins are gonna make you hungry.

Without further ado, Willow Bird Baking’s 13 Best Recipes of 2013:

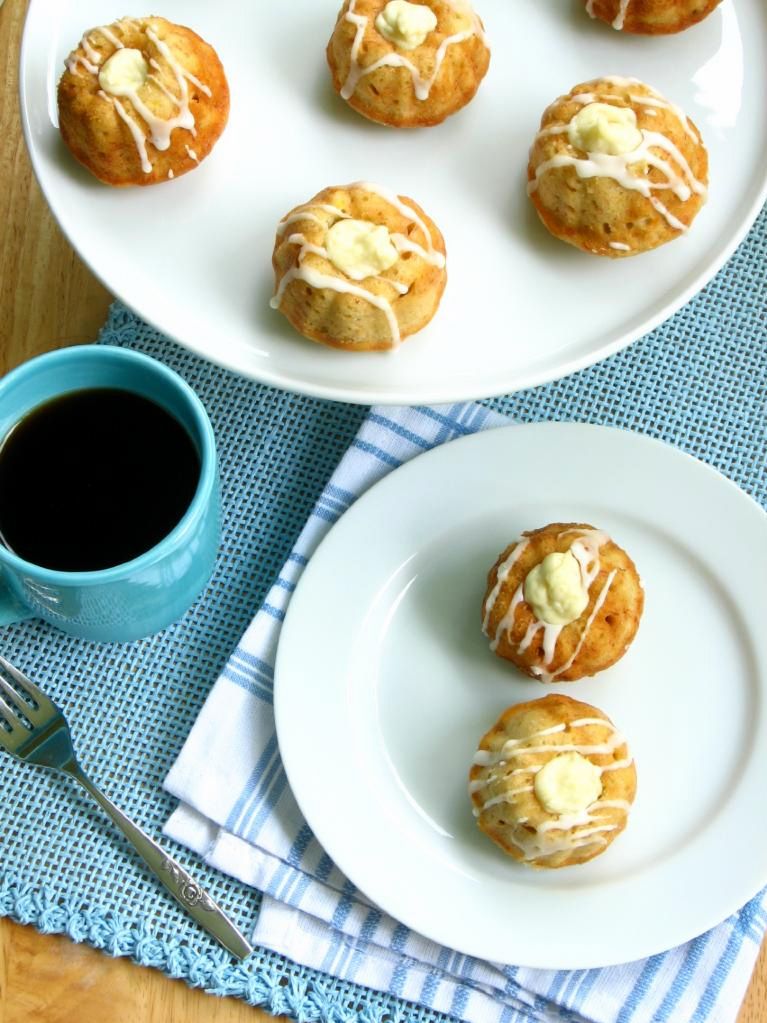
1. Lemon Cheesecake Morning Buns
Lemon Cheesecake Morning Buns

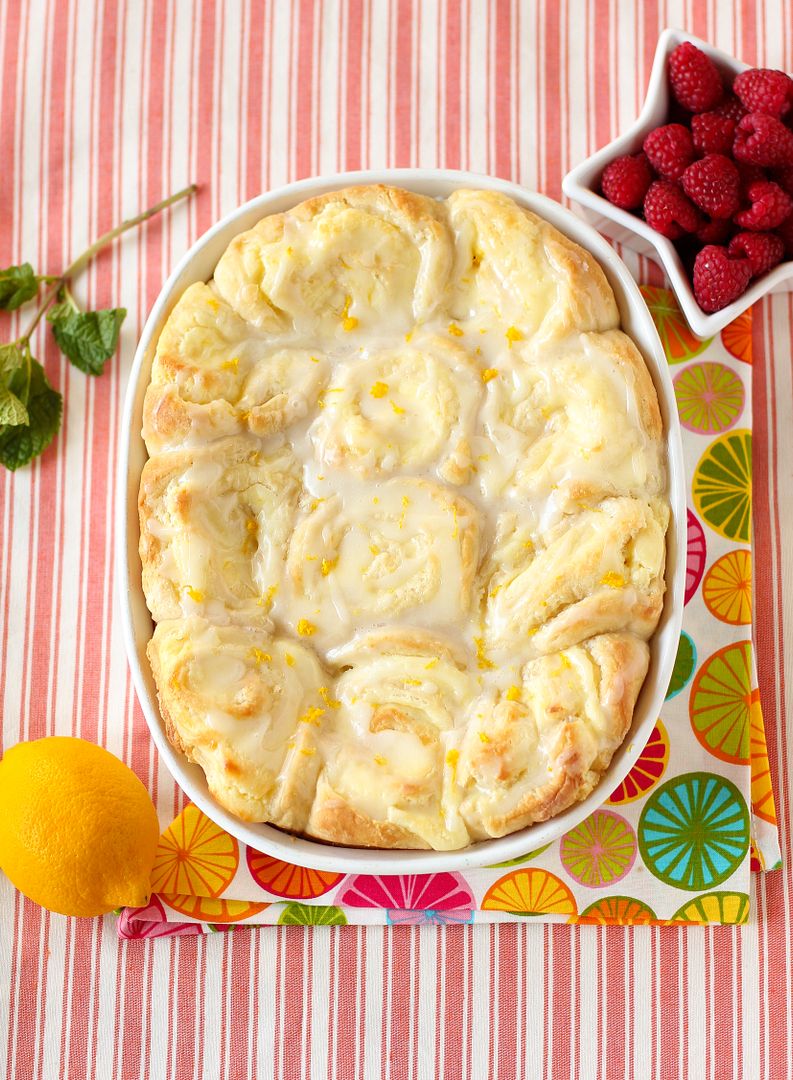
These things totally deserve their “Most Popular” title. They are absurd.

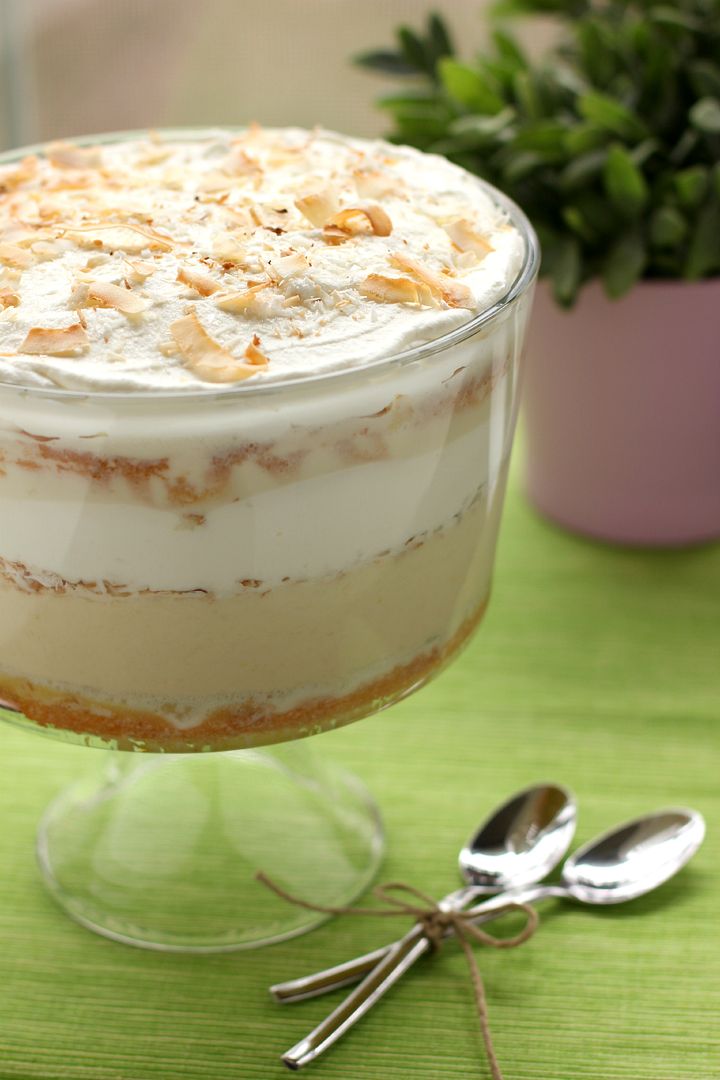
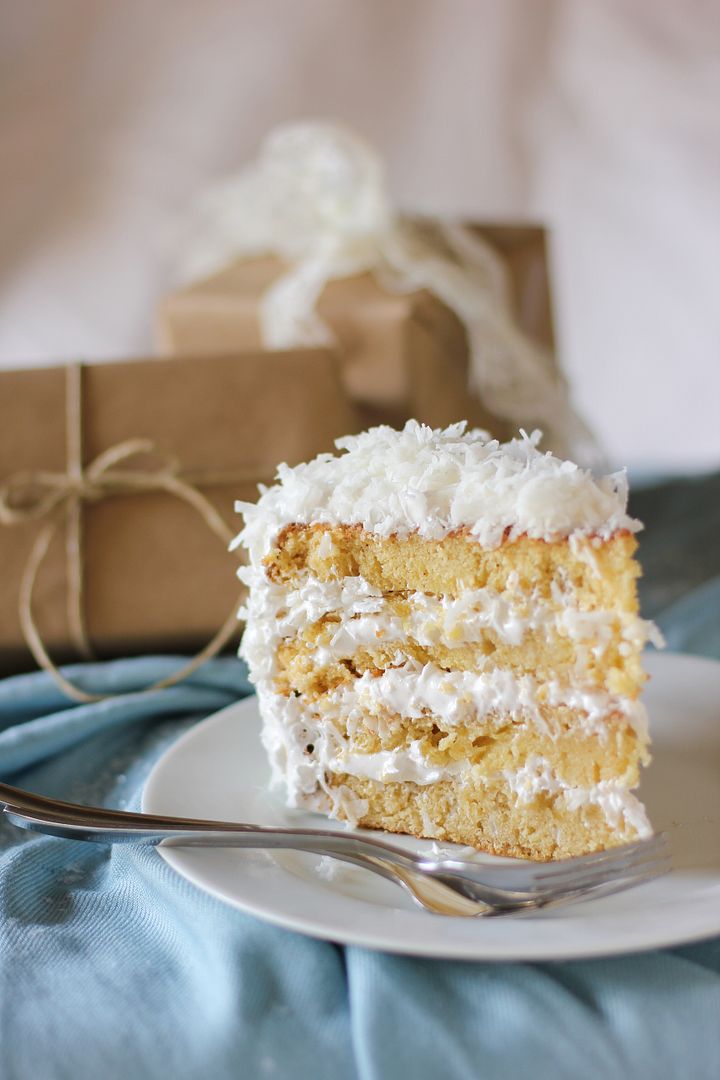
2. The Ultimate Moist, Fluffy, Ridiculous Coconut Cake
The Ultimate Moist, Fluffy, Ridiculous Coconut Cake

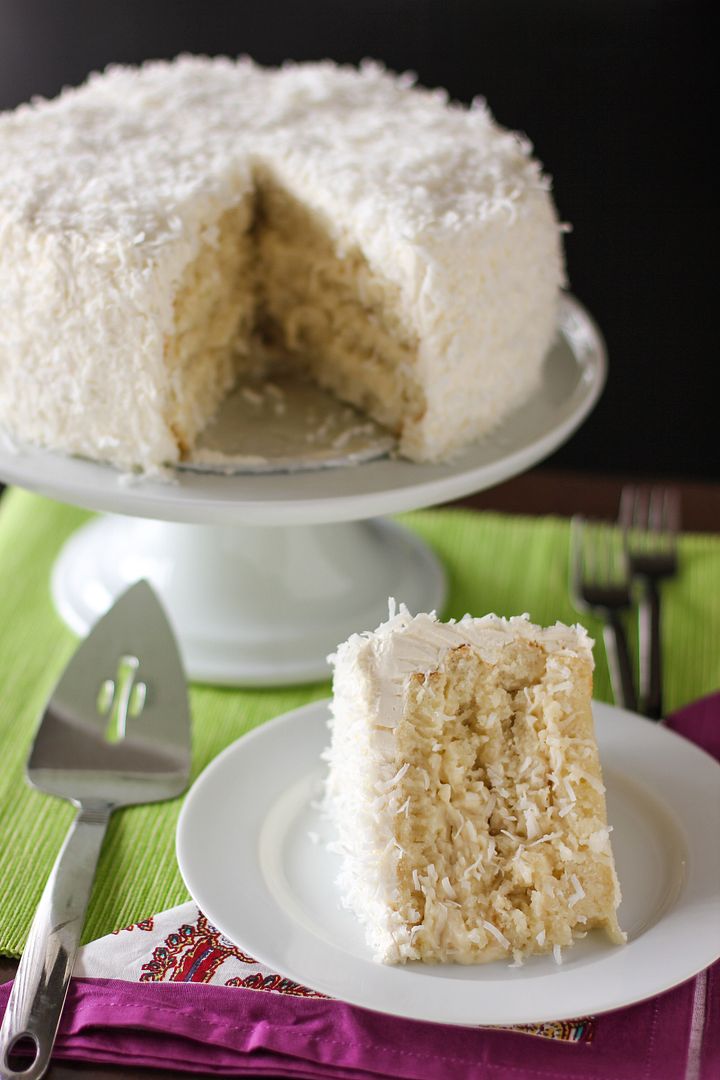
YOU KNOW HOW I FEEL ABOUT COCONUT.

3. Pumpkin Cheesecake Pillow Popovers
Pumpkin Cheesecake Pillow Popovers

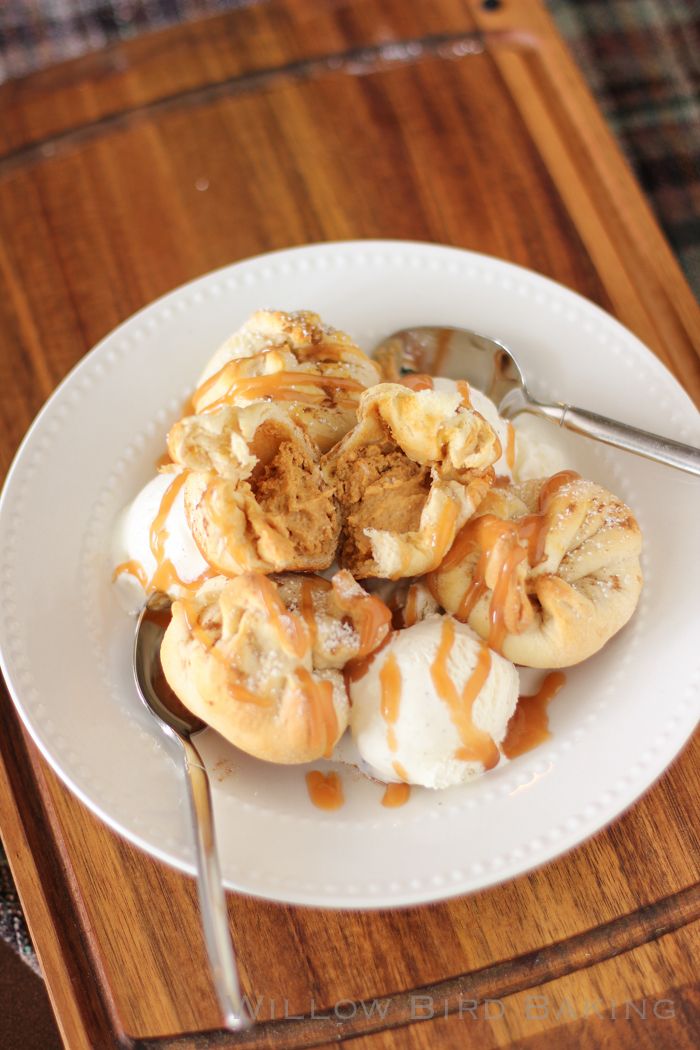
These use premade crescent dough! So easy.

4. Key Lime Pie Cheesecake with Sky-High Meringue
Key Lime Pie Cheesecake with Sky-High Meringue

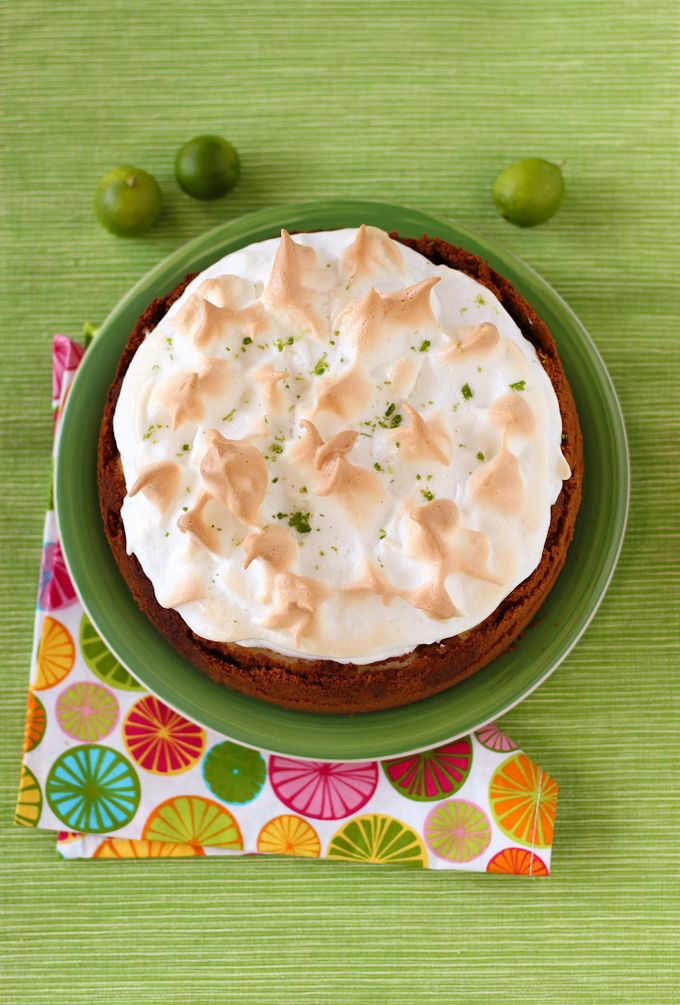
Tangy, sweet, and stunning! Such a show-stopper.

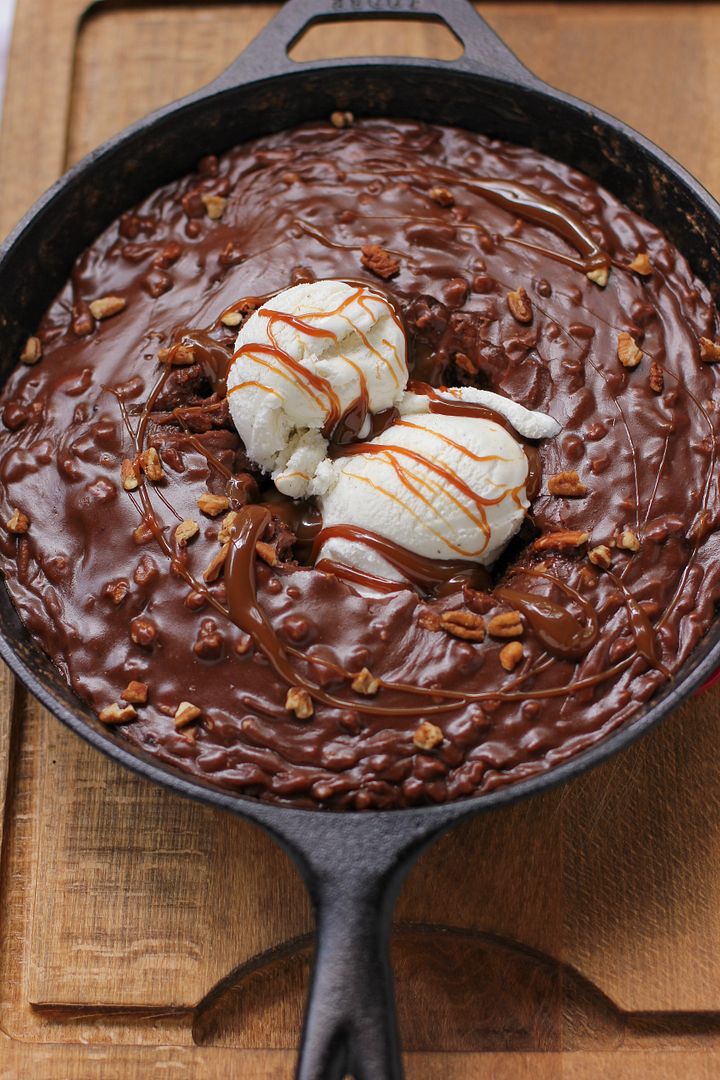
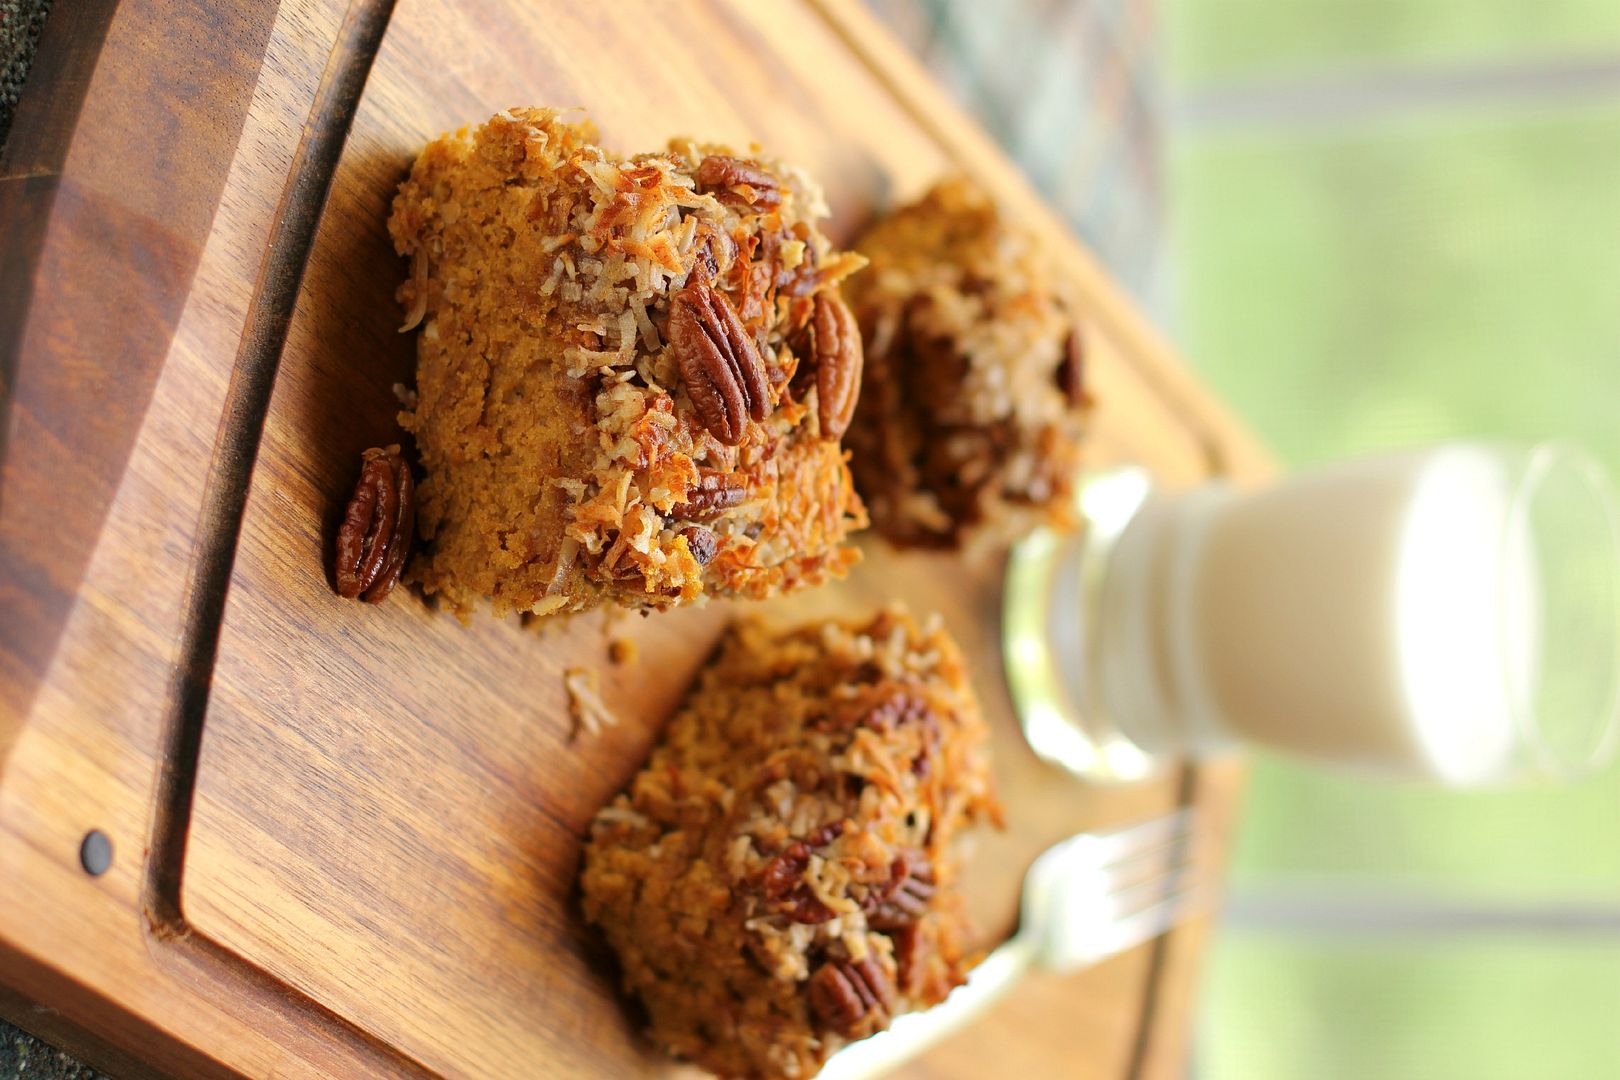
5. Gooey Chocolate Coconut Cream Skillet Cake
Gooey Chocolate Coconut Cream Skillet Cake

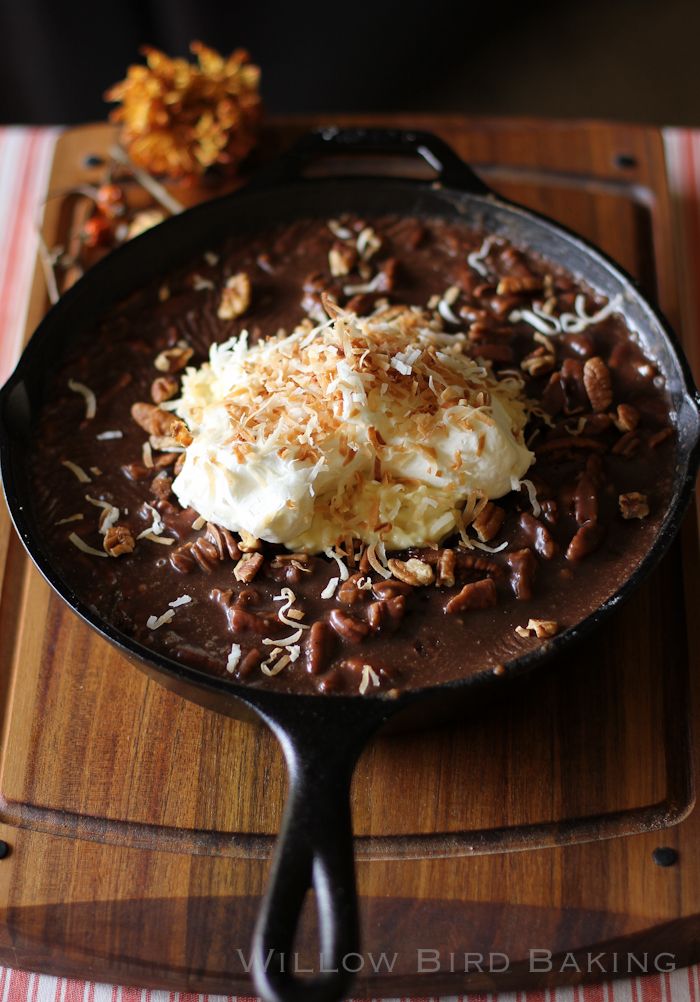
DID I MENTION HOW I FEEL ABOUT COCONUT.

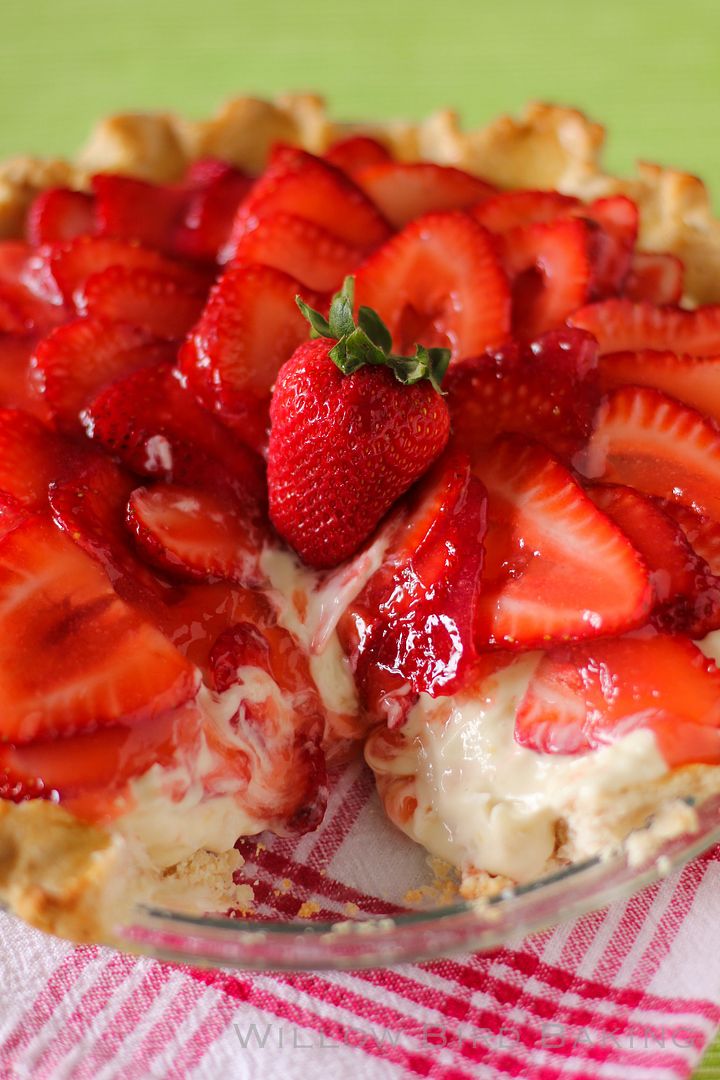
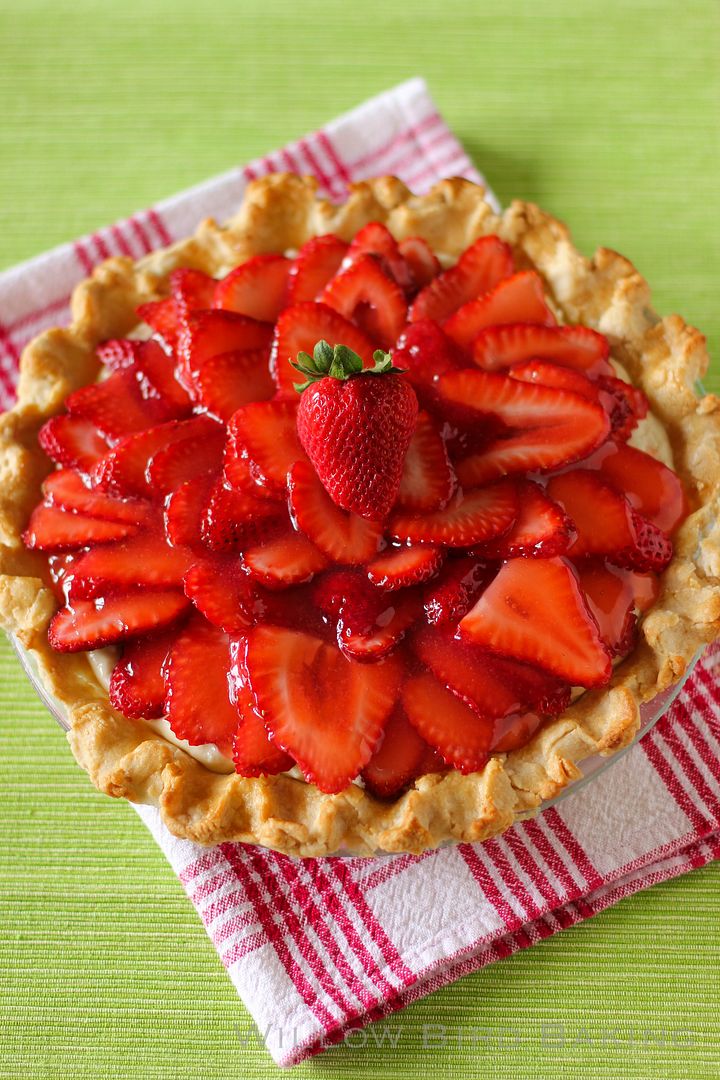
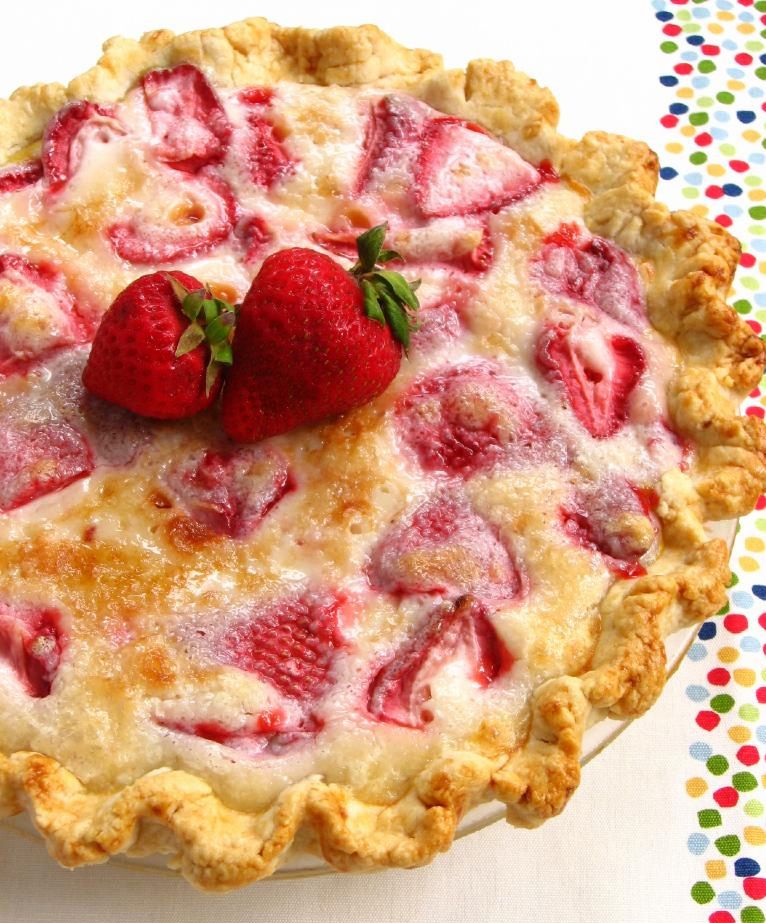
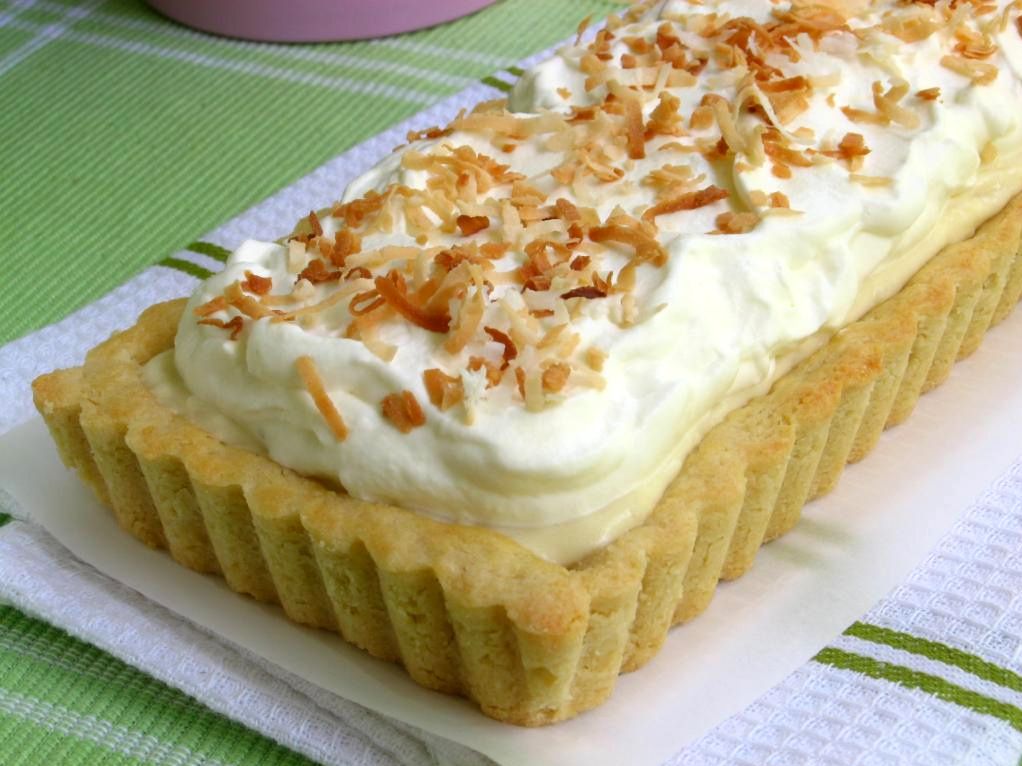
6. Strawberry Coconut Cream Pie
Strawberry Coconut Cream Pie

CO.CO.NUT.

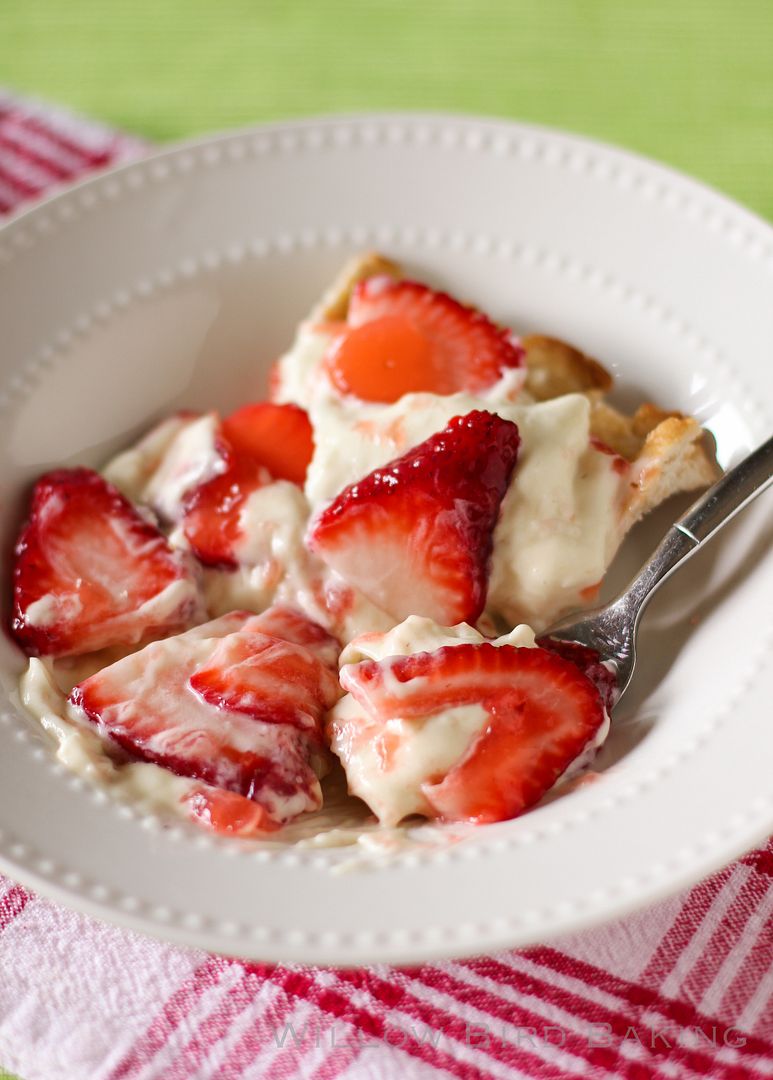
7. Boozy Icebox Cake
Boozy Icebox Cake

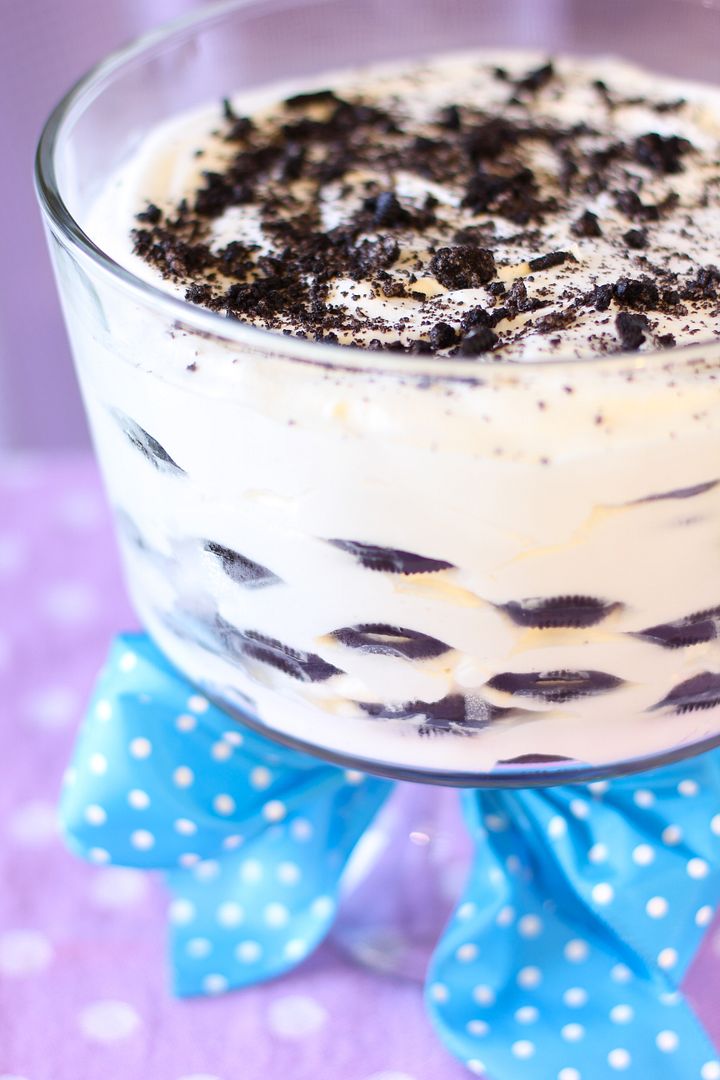
It’s like regular icebox cake, but (duh) better!

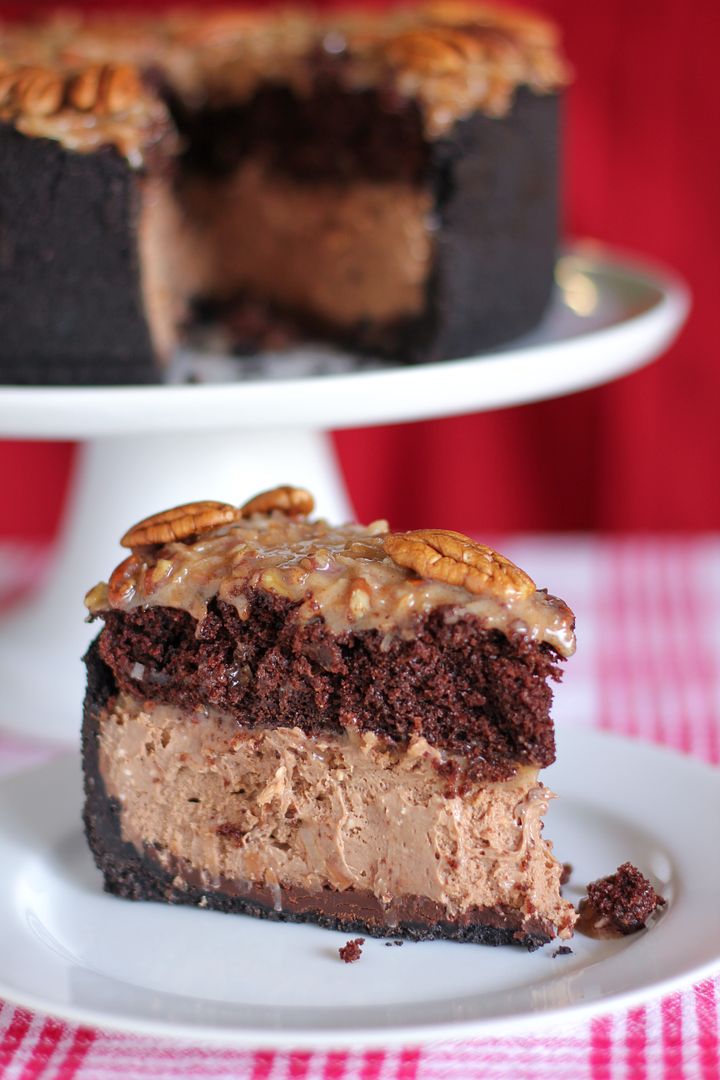
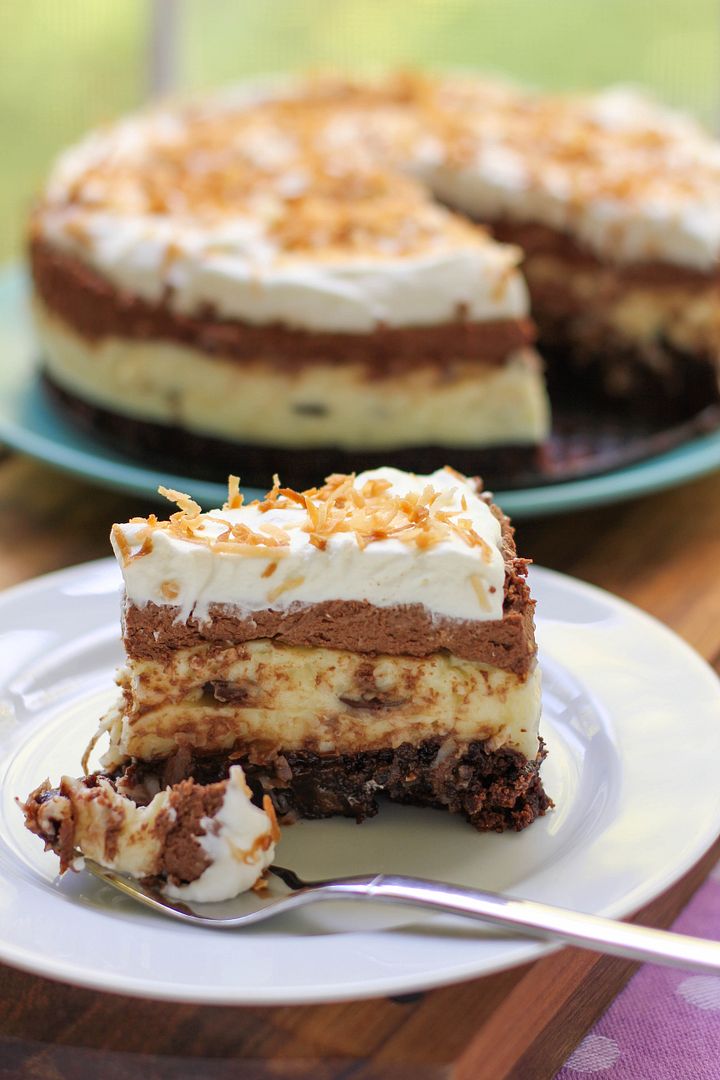
8. Bailey’s Hazelnut Chocolate Tiramisu
Bailey’s Hazelnut Chocolate Tiramisu

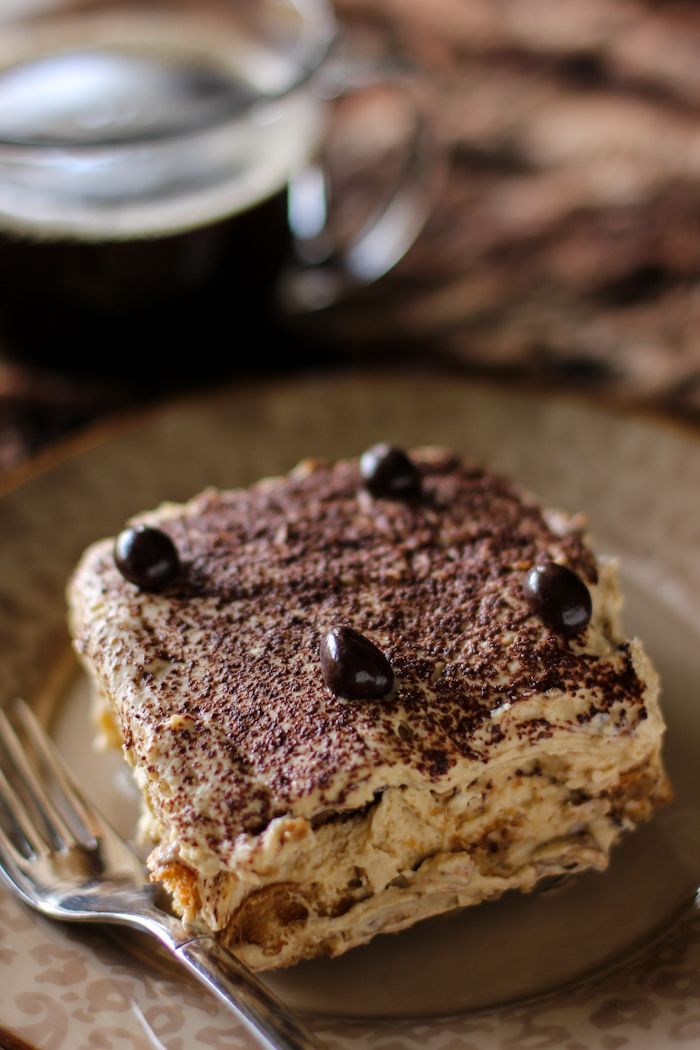
Bailey’s makes any dessert totally nuts.

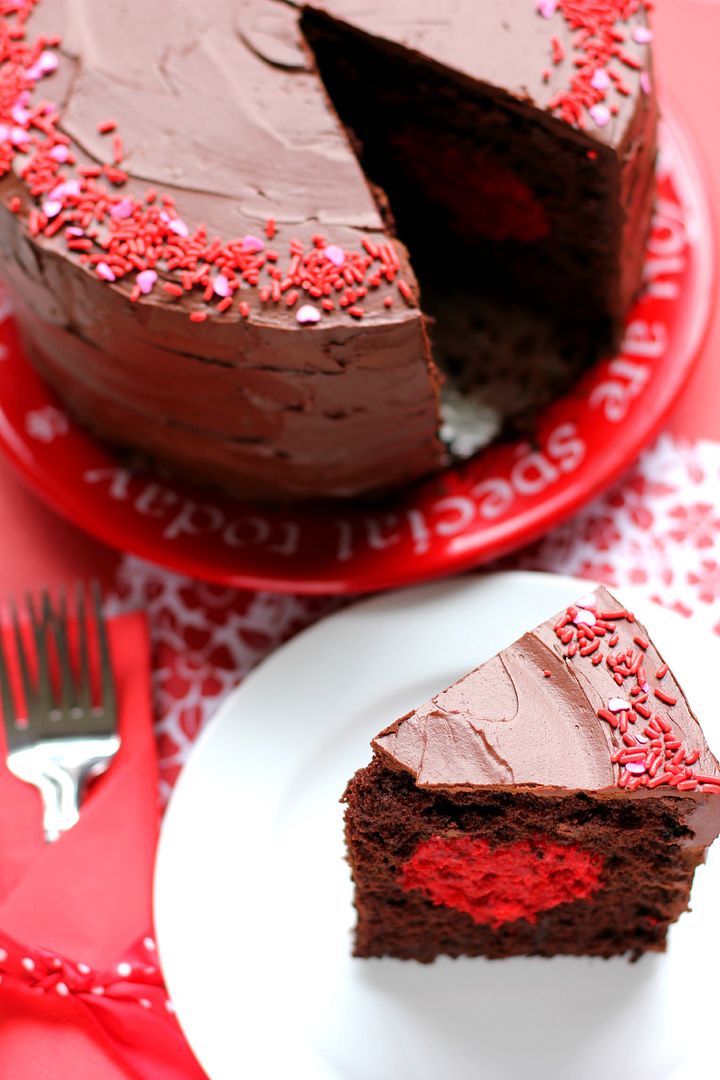
9. Chocolate Poke Cake with Whipped Coconut Icing
Chocolate Poke Cake with Whipped Coconut Icing

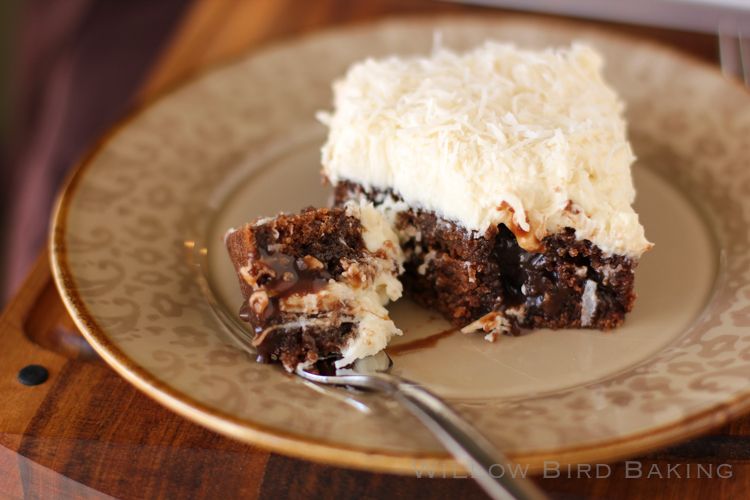
COCONUT, Y’ALL (and my new favorite frosting in the universe).

10. Biscoff Spread Gooey Butter Cake
Biscoff Spread Gooey Butter Cake

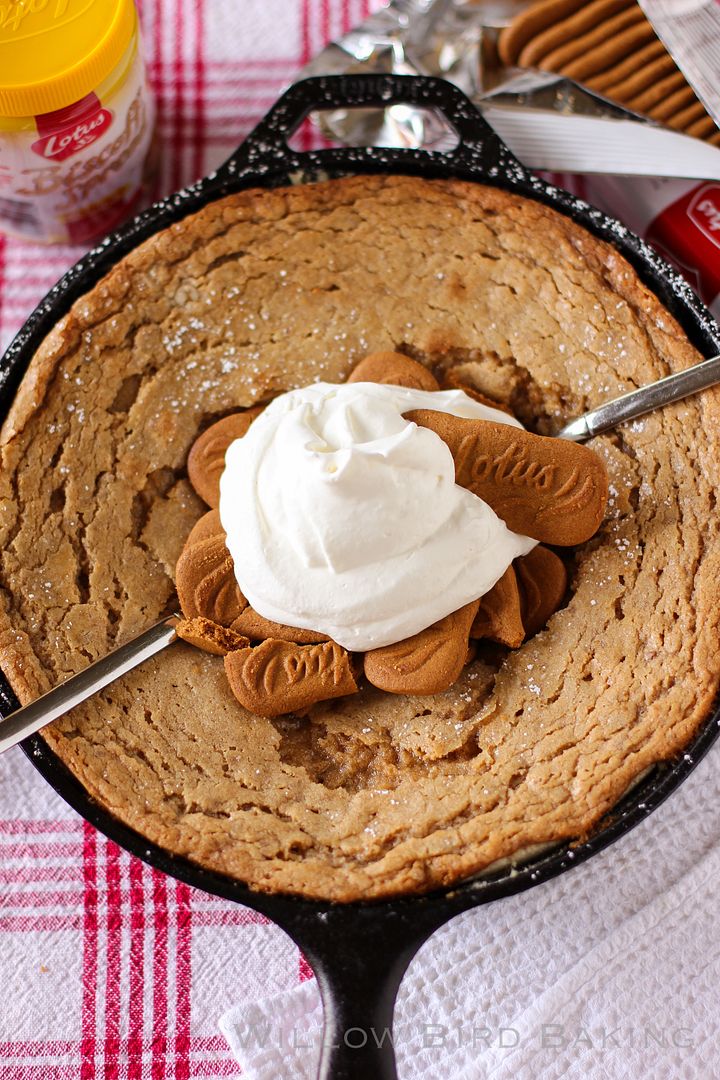
I don’t know what got into me, but I have no regrets.

11. White Sheet Cake with Fluffy Whipped Icing
White Sheet Cake with Fluffy Whipped Icing

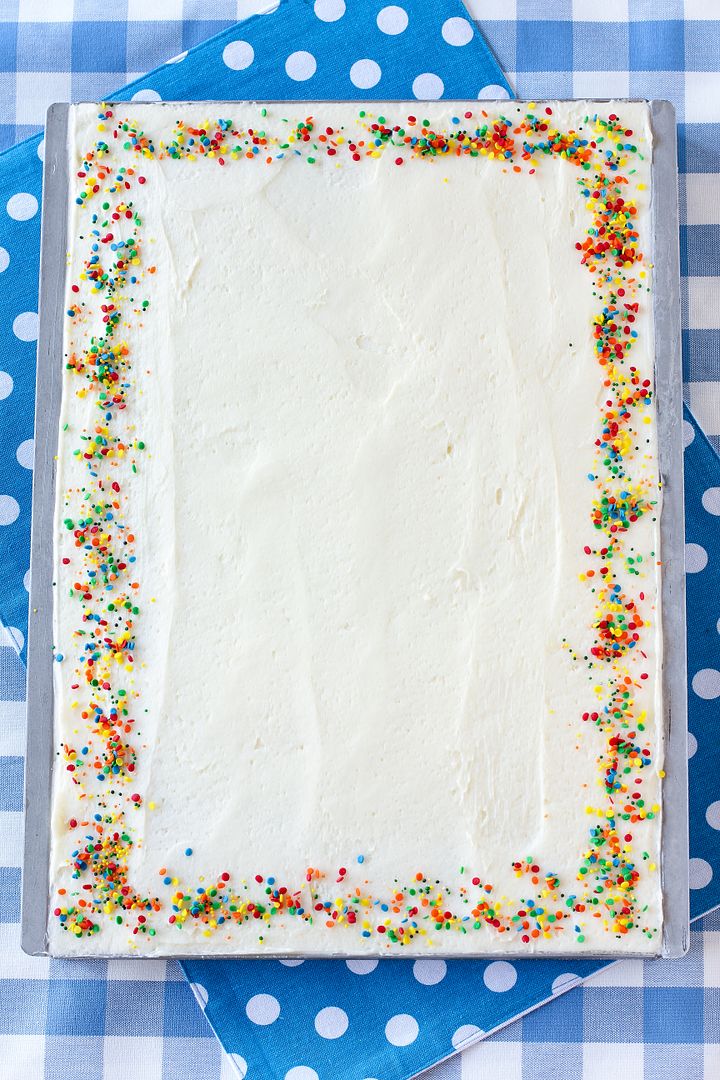
Just like those awesome sheet cakes you buy at the store (with the fluffy frosting, not the weird crusty stuff).

12. Lasagna Stuffed Portobello Mushrooms
Lasagna Stuffed Portobello Mushrooms

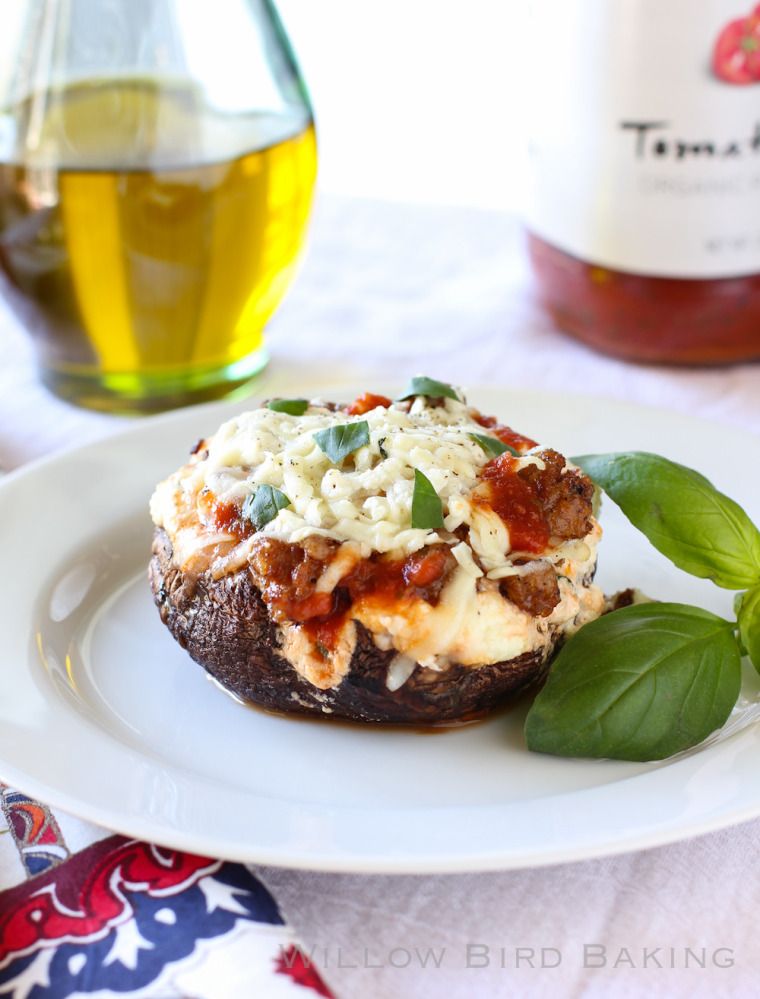
Hearty, delicious meal.

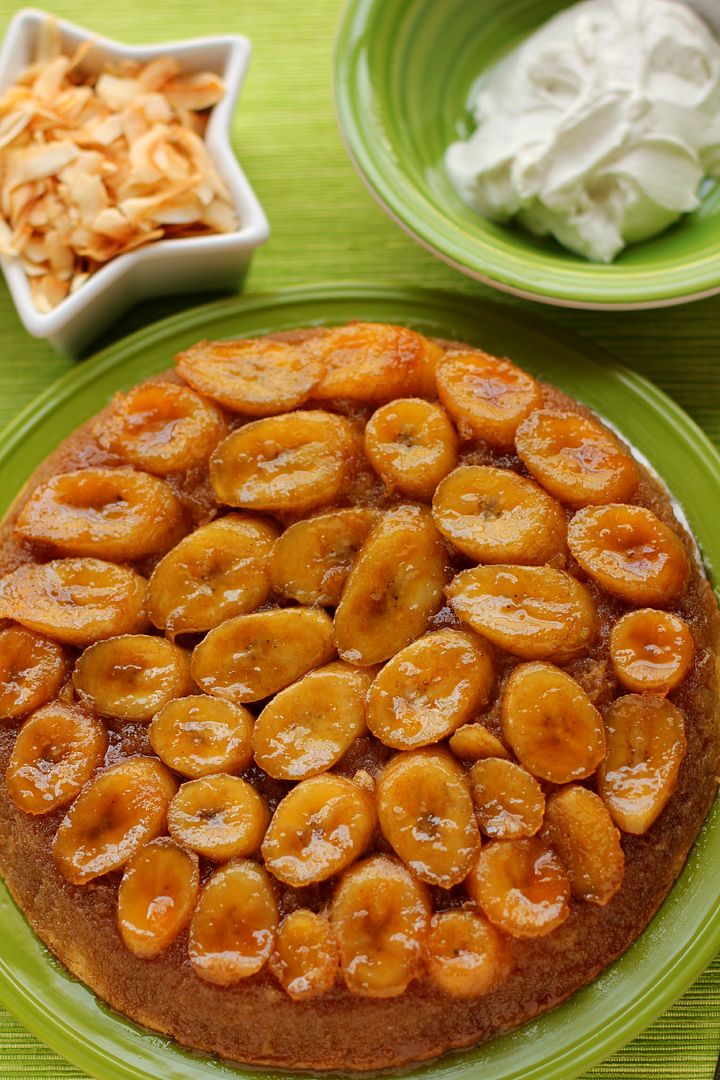
13. Pumpkin Tres Leches Cake
Pumpkin Tres Leches Cake

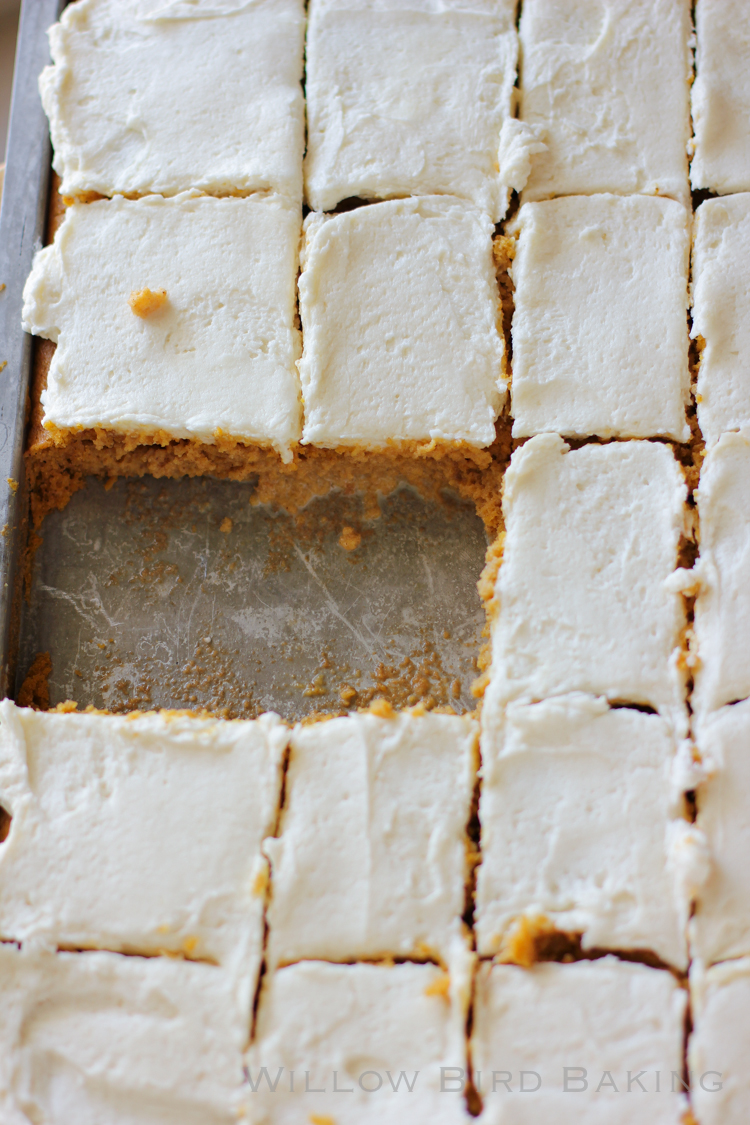
Pumpkin and Tres Leches: two of my faves combined.

…And a few of my personal favorites from this year:

1. Samoa Monkey Bread with Ganache Dipping Sauce
Samoa Monkey Bread with Ganache Dipping Sauce

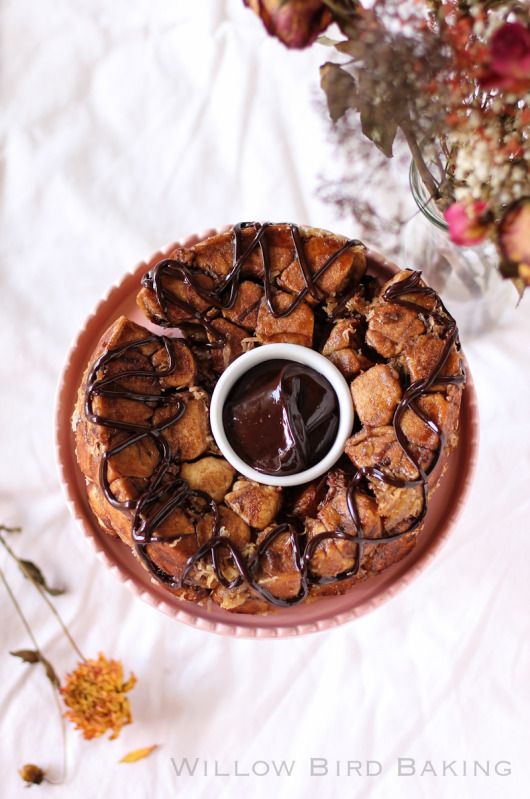
It’s a crime that this recipe didn’t go viral. It’s nuts!

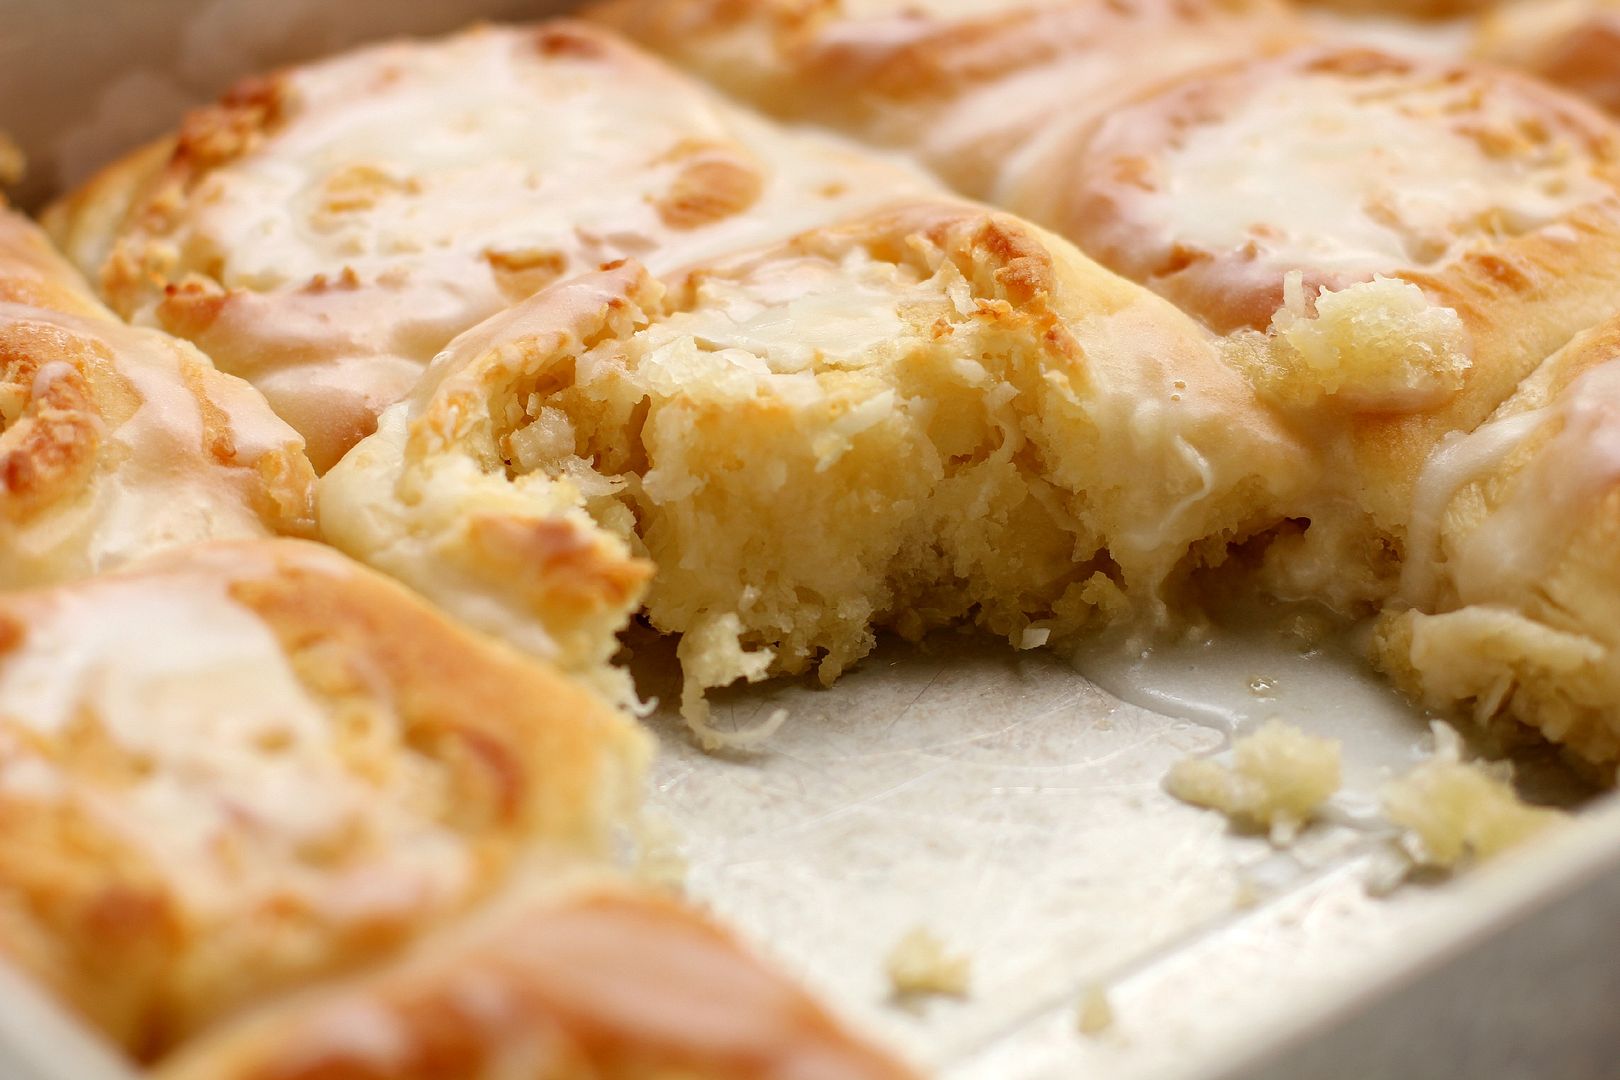
1. Buttery Coconut Almond Pull-Apart Bread (with Heavenly Coconut Cream Glaze)
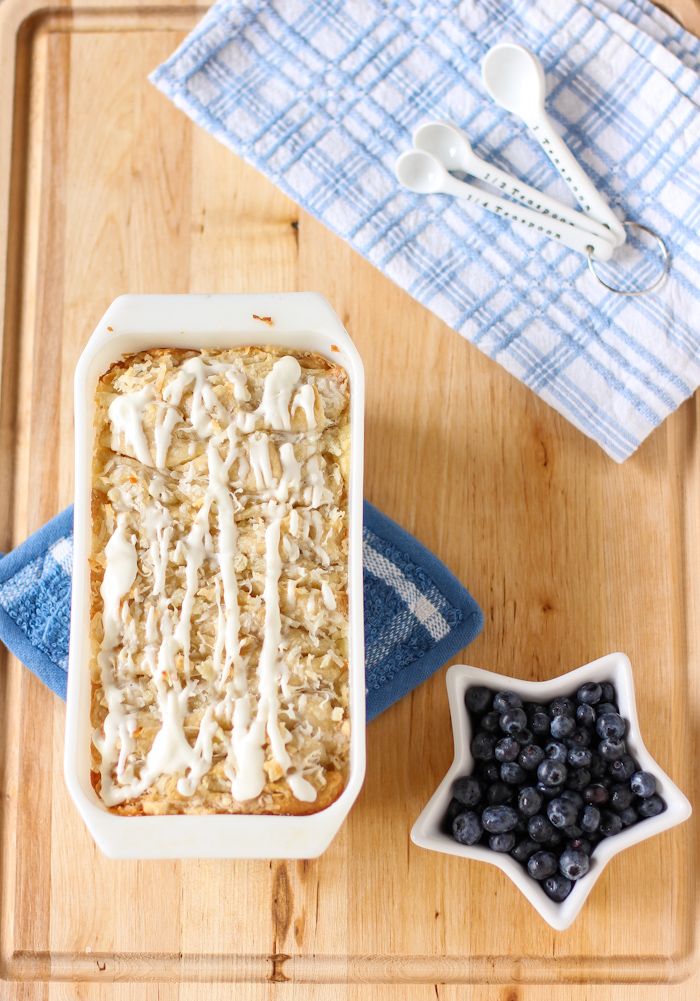
Buttery Coconut Almond Pull-Apart Bread (with Heavenly Coconut Cream Glaze)

Coconuttttt.

1. Flan Tres Leches Cake
Flan Tres Leches Cake

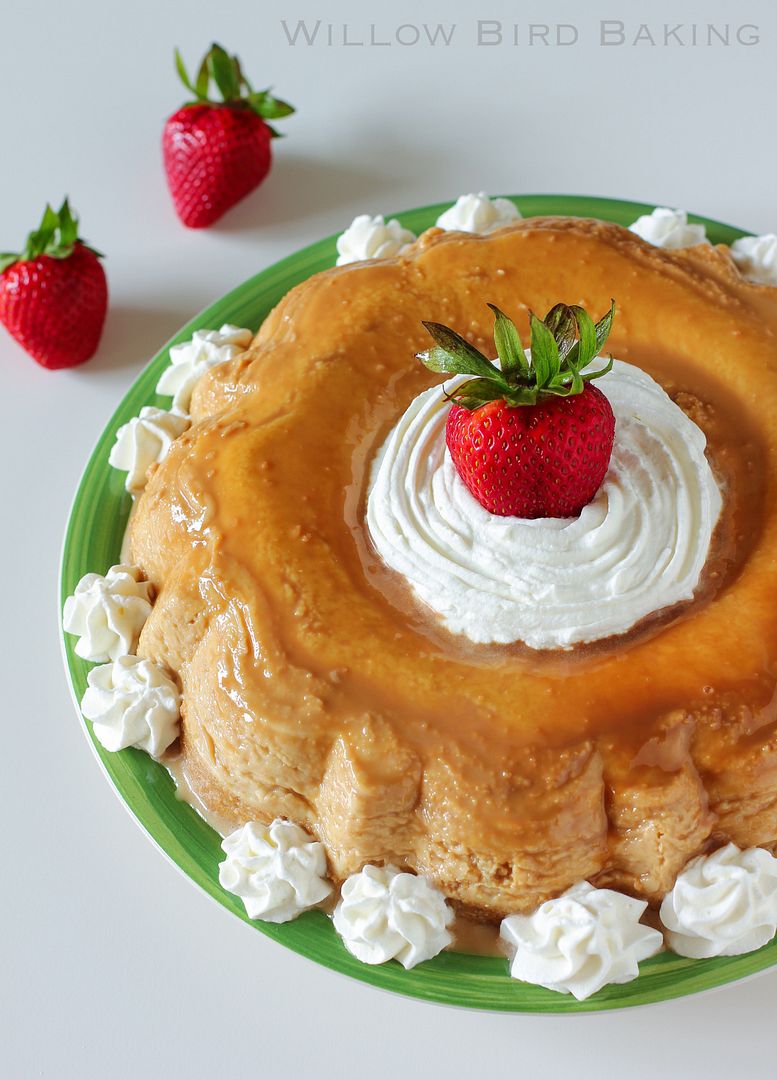
For when you can’t decide between making flan and making tres leches cake, and also you’re feeling a little crazy. So good.

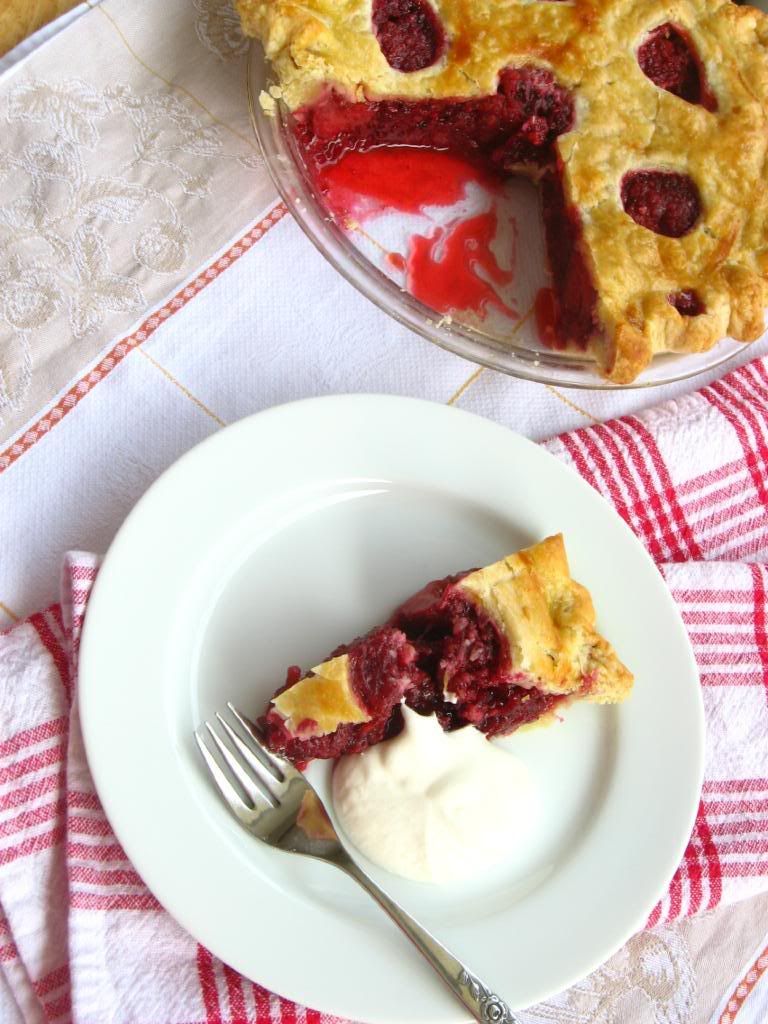
1. Limoncello-Spiked Shortbread Icebox Cake with Fresh Raspberries
Limoncello-Spiked Shortbread Icebox Cake with Fresh Raspberries

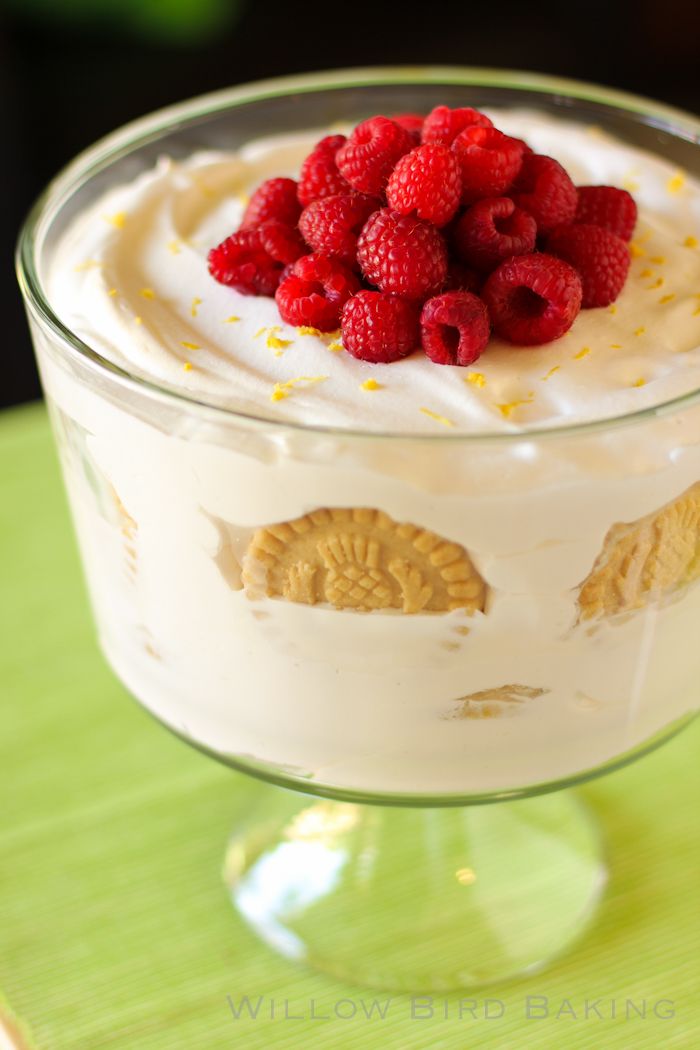
The shortbread makes all the difference here! And the Limoncello, obv.

1. The Ultimate Sausage Breakfast Buns
The Ultimate Sausage Breakfast Buns

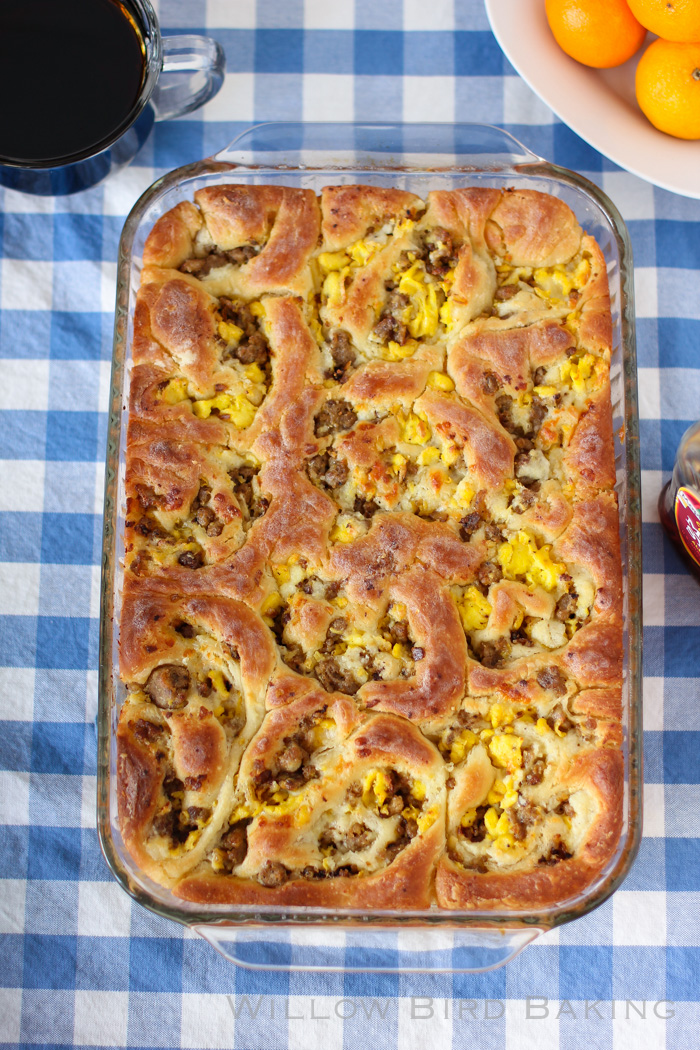
Pure decadence. Don’t skip the syrup drizzle.
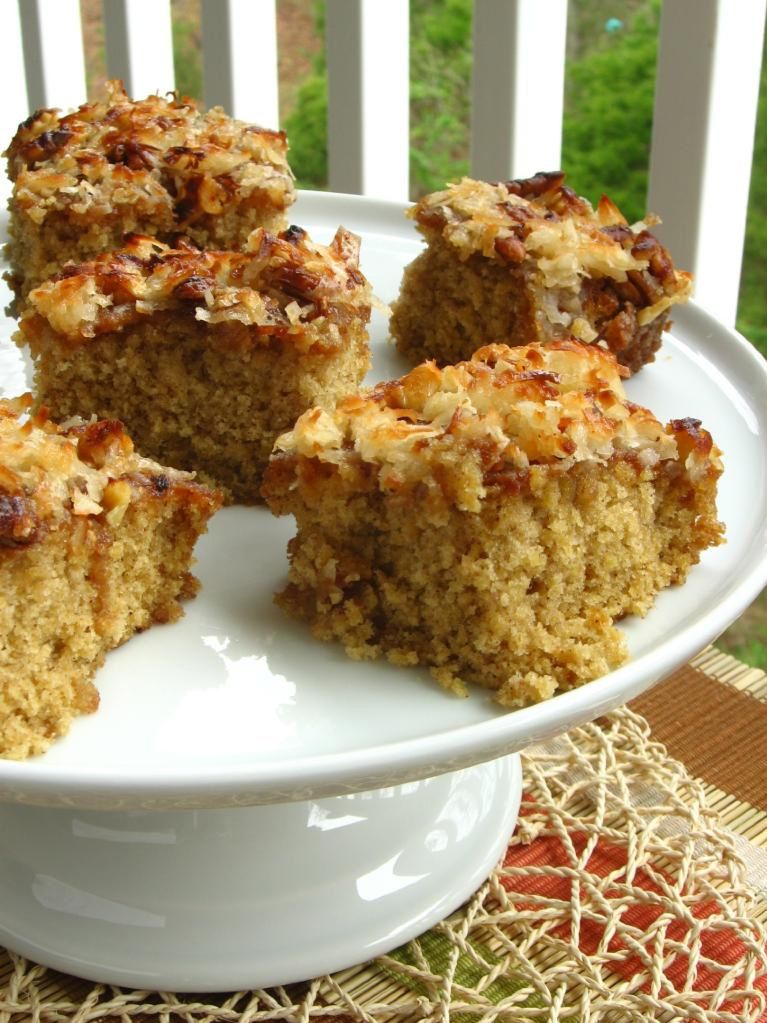
1. Gooey Carmelitas
Gooey Carmelitas

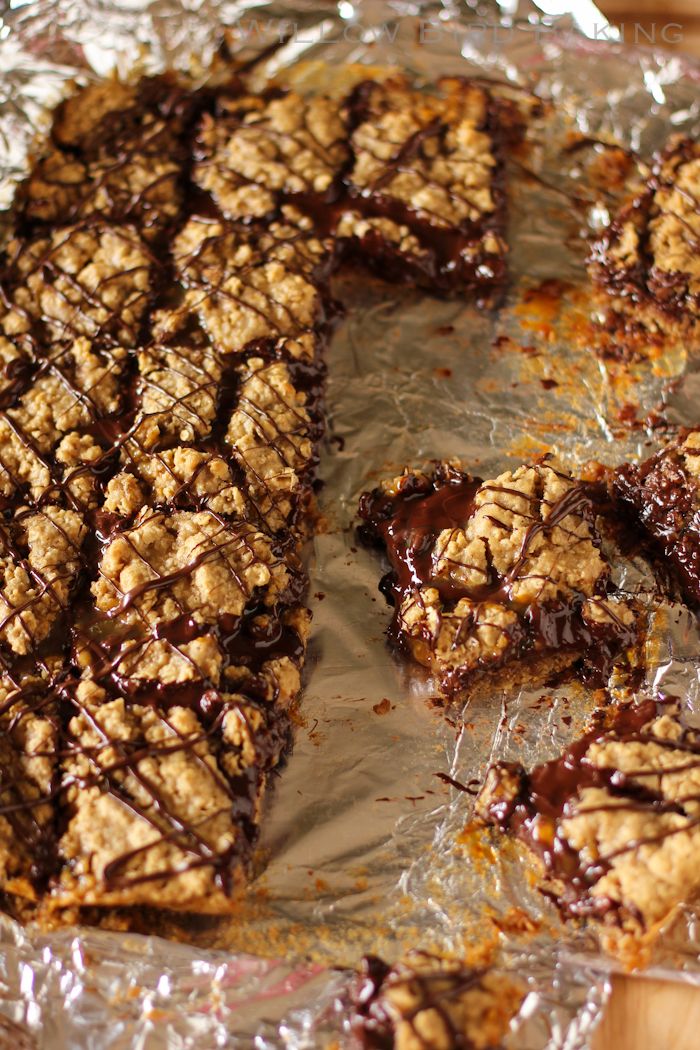
Gooey, chocolatey masterpiece.

1. Lemon Raspberry Gooey Butter Cake
Lemon Raspberry Gooey Butter Cake

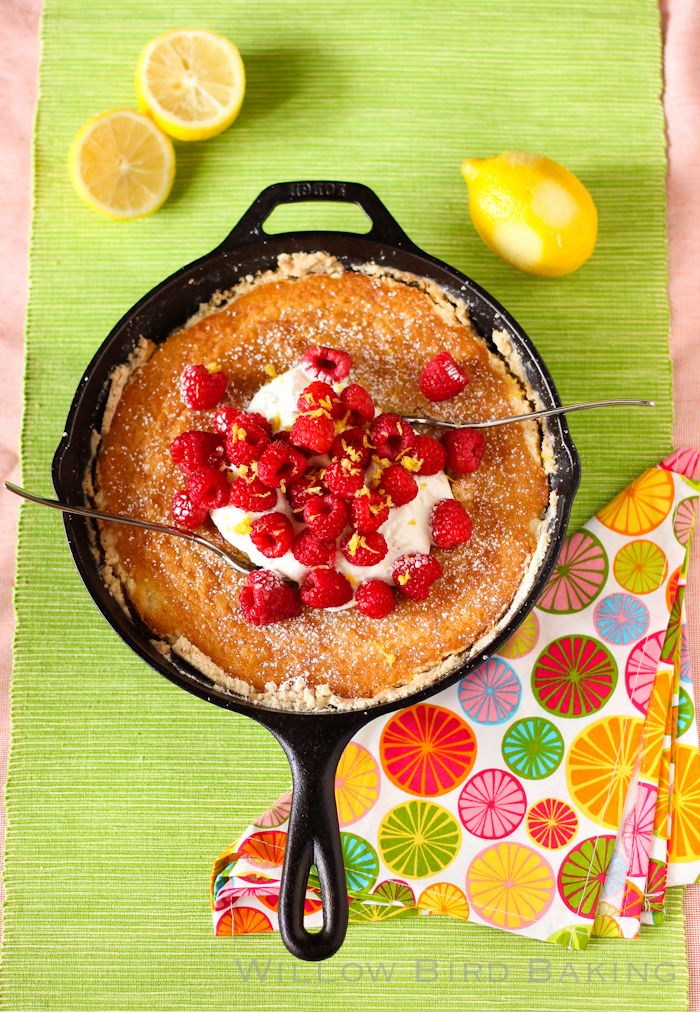
Bright, springy, fresh! I love lemon.

1. Sausage & Corn Chile Con Queso Taco Ring
Sausage & Corn Chile Con Queso Taco Ring

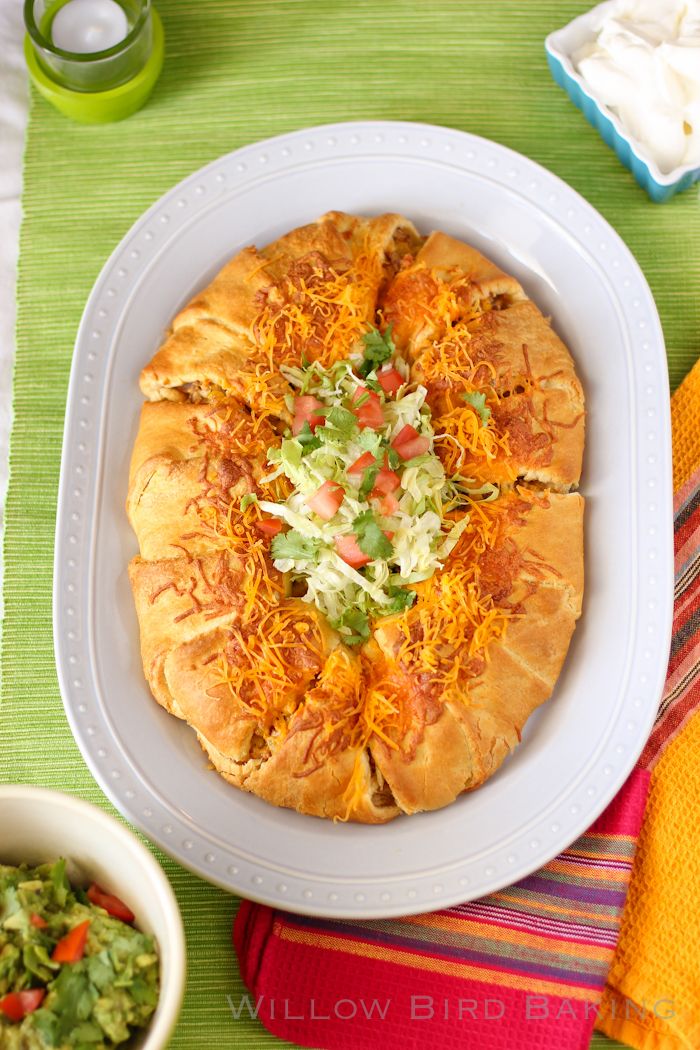
Again, HOW did this recipe not go viral? TASTE IT. JUST TASTE IT. It’s like the best thing I’ve ever eaten.

1. Dutch Roomboter Banketstaaf (Flaky Pastry with Almond Filling)
Dutch Roomboter Banketstaaf (Flaky Pastry with Almond Filling)

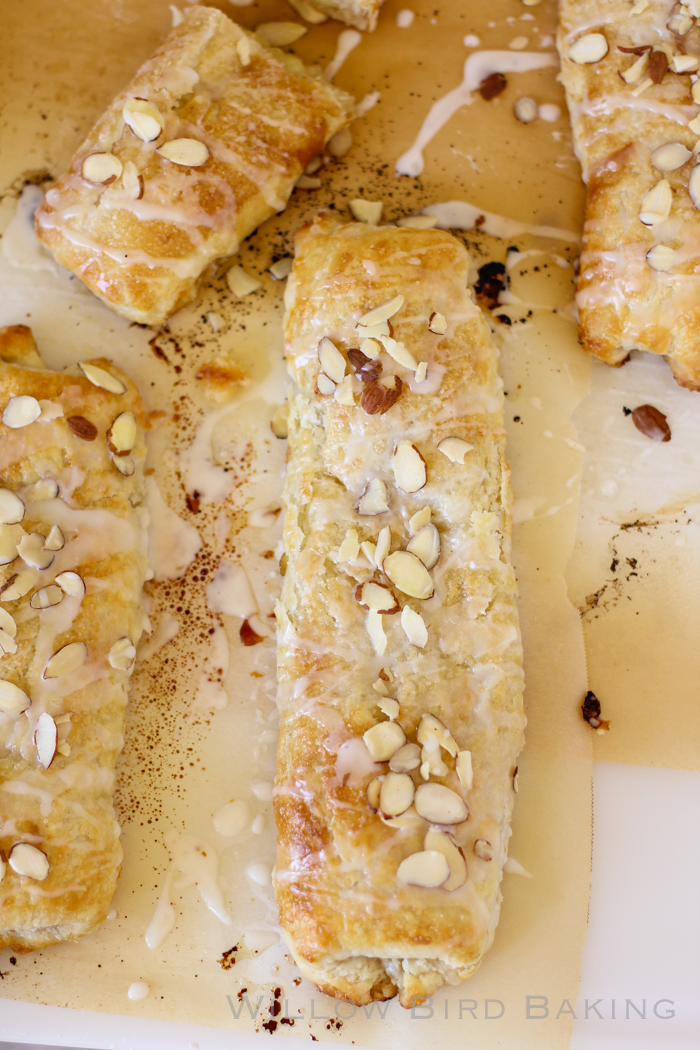
This is also the best thing I’ve ever eaten. Don’t question me.

Don’t forget to see what others have cooked up on my Best of 2013 Recipes Pinterest board. Happy happy happy almost-2014!

Strawberry Coconut Cream Pie

Strawberry Coconut Cream Pie


Recipe by: Willow Bird Baking, with basic pie recipe modeled on my Aunt Pat’s pie and coconut cream from Zoë Bakes
Yield: one 9-inch pie

This pie is one of the best pies I’ve ever eaten, and Mike’s already asked for a repeat appearance! It doesn’t hold it’s shape well — it’s more of a pudding pie — and so I serve it in a bowl. It’s more than delicious enough to make up for that, though.

Pie Crust Ingredients:
1 blind baked (until golden) and cooled pie crust

Coconut Cream Filling Ingredients:
1 can (14 fluid ounces) unsweetened coconut milk
3/4 cup sugar
2 teaspoons vanilla extract
pinch kosher salt
3 large egg yolks
2 tablespoons corn starch
2 tablespoons unsalted butter
1 cup sweetened coconut flakes
1/2 cup whipping cream

Topping Ingredients:
1 1/2 cups fresh strawberries
1/2 cup water
1/4 cup sugar
2 teaspoons cornstarch
red food coloring (optional; I skipped this)
mint leaves or whole strawberries for garnish (optional)

Directions:
To make filling: Heat the coconut milk, sugar, salt and vanilla in a medium saucepan over medium heat. In a bowl, whisk together the egg yolks and corn starch. Add 1/2 cup of the hot cream slowly to the yolks, whisking as you add. Then pour the yolk mixture into the pot of hot cream and whisk. Continue to whisk with heat on medium-high for 3 more minutes. The mixture will turn thick and bubble. You need to continue to whisk for the full 3 minutes or the pastry cream will separate once it is cool. After the 3 minutes, whisk in the butter. Add the coconut flakes. Pour into a shallow dish to cool.

Cover with plastic wrap pressed right against the pastry cream. This will prevent a thick skin from forming on the surface. Refrigerate for at least an hour or freeze for 30 minutes. Once it is cold, stir the pastry cream to loosen. Whip the 1/2 cup cream to medium peaks. Stir in 1/3 to the pastry cream to lighten. Fold in the remaining cream until the pastry cream is nice and light. Fill baked, cooled pie crust with your coconut filling.

Slice 1 cup of strawberries in thin slices lengthwise and layer the slices in pretty concentric circles around the top of the coconut cream. Set this in the fridge to chill while you make your glaze.

Make the glaze: Crush remaining 1/2 cup of strawberries and boil with water in a saucepan over medium-high heat for two minutes. Strain through a fine mesh sieve and discard the pulp. Add the juice back to the saucepan over medium-high heat and gradually whisk in sugar and cornstarch. Cook until thickened. Mine had lumps of cornstarch despite my best efforts, but no worries; I just strained it again once thickened. If you want, you can tint this glaze with food coloring to desired hue, but mine was plenty bright enough!

Cool the glaze slightly (I transferred mine to a heat-proof measuring cup with a pour spout to cool for a bit) and then pour over top of strawberry slices on your pie. Garnish with big mint leaves, if you’d like, or whole strawberries. Chill entire pie for at least a few hours for best results; cut with a knife held under hot water and then dried. It’ll still be a bit puddingy, so I served mine in a shallow bowl! Use a pie gate (or a makeshift pie gate made from aluminum foil) to keep remaining pie from oozing in the pie plate after slicing.

Valentine’s Day Dessert Recipes from Willow Bird Baking

It’s that time again: Valentine’s Day. You either love it or you hate it, but you have to admit . . . at least it’s an excuse to eat dessert? Here are a few that will definitely score you brownie points with your sweetheart (or your own solitary tummy as you sit on the couch and watch reruns of 30 Rock, thank you very much.)

By the way, I’ve included a difficulty rating after each recipe so you can pick one perfect for your skill level and schedule. And how much you love your partner. JUST KIDDING, just kidding.

1. Gooey Butter Strawberry Shortcake (very easy)
2. Thick Chocolate Cake with a Big Red (Velvet!) Heart (not hard, but probably easier as a 2-day process.)
3. Gooey Chocolate Skillet Cake Ice Cream Sundae (very easy)
4. Chocolatey Red Velvet Pull-Apart Bread with Cream Cheese Glaze (includes rising time; a 2-day process)


5. German Chocolate Cheesecake (not hard, but probably easier as a 2-day process.)
6. Red Velvet Cheesecake-Stuffed Cake Balls (advanced; easier as a multi-day process)
7. Heart-Shaped Palmiers (sweet or savory; very easy)
8. Red Velvet Cheesecake (not hard, but probably easier as a 2-day process.)


9. Boozy Icebox Cake (very easy)
10. Caramelized Banana Upside-Down Coconut Cake & Coconut Whipped Cream (intermediate)
11. Red Velvet and Oreo Kisses (advanced; easier as a multi-day process)
12. Valentine’s Truffle Heart (advanced; easier as a multi-day process)


13. Strawberry Sour Cream Pie (very easy)
14. (Freshly Picked!) Strawberry Cream Pie (intermediate; multi-step process)
15. Homemade Hot Chocolate & Marshmallows (easy)
16. Red Berry Pie (intermediate)


…and four more for the coconut lover like me:

1. Chocolate & Coconut Cream Pie Bars (easy, but do require 30-minutes of stirring)
2. Tres Leches Coconut Cake Trifle (intermediate; easier as a multi-day process)
3. Brownie-Bottom Coconut Chocolate Cream Cake (very easy)
4. Moist Fluffy Coconut Cake (intermediate; easier as a multi-day process)


Ten Willow Bird Coconut Recipes

You guys have probably noticed that I’ve been a little coconut nutty (coconutty?) lately. I hated coconut as a child, so now that I understand its unadulterated deliciousness, I have to make up for lost time. If you’re trying to catch up as well, here’s a round-up of 10 delicious coconut recipes for you to try.

1. Banana Coconut Cream Cakes
2. Banana Coconut Cream Cupcakes
3. Pumpkin Oat Snack Cake with Broiled Coconut Icing
4. Caramelized Banana Upside-Down Coconut Cake & Coconut Whipped Cream


5. Brownie-Bottom Coconut Chocolate Cream Cake
6. Tres Leches Coconut Cake Trifle
7. Oatmeal Cake with Broiled Coconut Icing
8. Nanaimo Bars


9. Coconut Cream Tart
10. Buttery Coconut & Almond Morning Buns


If you liked this post, please:
Subscribe to Willow Bird Baking
Follow Willow Bird Baking on Twitter
Follow Willow Bird Baking on Facebook

My Favorite Pie Crust Dough

In light of Willow Bird Baking’s Cooking Hard Stuff Challenge, I’ll be sharing some tips for tackling new or challenging recipes throughout the month of March. If you haven’t signed on for the challenge yet, make sure you read about it and join in the fun.

Cooking Hard Stuff Tip #2: Mise en place. (Pronounce that, roughly, “meez ohn plauce.” Apologies to France.)

Mise en place literally means “putting in place,” and it’s an important step in the cooking process that should take place after you read and visualize the steps in your recipe.

If you’ve ever seen a TV chef whisp through a recipe as simply and quickly as a hot knife through butter, you’ve probably witnessed the benefits of this strategy. Every now and again they might measure an ingredient in the middle of the recipe for effect, but in general, all of their ingredients are prepared and sitting next to their workspace, and all of the equipment they need is close at hand. That’s mise en place: measuring ingredients, prepping materials, and setting up your workspace before you begin to cook. Sometimes while I’m visualizing the steps of my recipe, I’ll even sketch out a plan of the mise en place I’ll prepare before I begin.

If you don’t already do a mise en place for your recipes, you might scoff at this advice. I can hear the faint echoes of your criticism across the interwebz: doesn’t that take too much time? Don’t you have to dirty up more dishes to measure everything out beforehand? First off, stop being so negative, Snarky McSnarkerson. Second off, nothing has changed the amount of joy I get out of Cooking Hard Stuff as much as my mise en place. So I’m going to sell you on this.


These photos were taken forever ago with my old camera, so they’re of
a different quality than you’ve hopefully gotten used to lately!

Here’s why you should mise your place:

1. Far from taking more time than measuring as you go, mise en place can save you time (and energy! and happiness!). Measuring out ingredients is probably my least favorite part of baking, but getting it out of the way in one fell swoop at the beginning allows me to enjoy the actual cooking process so much more. It’s streamlined, relaxed, and a lot faster, because everything I need is at my fingertips. Since I’m checking all of my supplies before I begin, I also avoid frustrating and time-consuming mid-recipe trips to the grocery store.

2. Mise en place can be done intelligently so that it doesn’t drastically increase your dish load. For instance, if you know you’ll be combining dry ingredients immediately, instead of measuring them out into separate prep bowls, measure them out altogether into your mixing bowl itself. Look at your recipe to see which ingredients can be measured out into the same bowls. Ingredients that you’ll use soon could even sit in the measuring cups themselves until you’re ready to add them. By the time you’re finished with your mise en place, ingredients will be laid out so logically that your recipe will almost make itself.

3. Prepping your materials and workspace ahead of time frees you up to clean as you go. Cleaning is the anticlimax after finishing a great recipe: all the fun’s over, and you still have a lot of work to do. If you prepare a mise en place, though, the breaks in a recipe (when something’s chilling, mixing, baking, or cooling, for instance) are freed up for cleaning. Instead of preparing for the next steps, you can rinse dishes and stick them in the dishwasher, put leftover ingredients away, and wipe down counters. This makes cooking a nicer experience, but more importantly, it means you’ll have much less cleanup once the cooking is finished.

If you’ve never tried preparing a mise en place before beginning a recipe, give it a shot. Think of it like this: you’re going to have to measure everything out one way or another, so why not do it all at once in an efficient manner instead of having to constantly pop in and out of the pantry, grab the measuring cups, level the flour, and so on and so forth? I think you’ll find that you’ll stress less and enjoy the process more with everything put in place. Still don’t believe me? Here’s an article I enjoyed and some great discussion on the topic.

Do you usually prepare a mise en place before beginning a recipe? If so, how do you do your mise en place?

Pie Crust Dough


Recipe by: Willow Bird Baking
Yield: pie crust for one 9-inch pie

Homemade pie crust is not hard at all, particularly after you make it a couple of times and get a feel for the dough. There are different schools of thought regarding what fat to use in pie crusts, but I’m a firm believer in going halfsies. All butter crusts can lack a tender, flaky texture, while all shortening crusts can lack flavor and create a waxy mouthfeel. This is the best of both worlds: buttery flavor and a flaky texture. I recommend using lard if you can get your hands on it, but shortening also works fine.

Ingredients:
2 cups flour
1 teaspoons salt
3/8 cup (6 tablespoons) cold lard or shortening (I recommend lard)
3/8 cup (6 tablespoons) cold butter, chopped
3-4 tablespoons cold water
1 egg and 1 teaspoon water, lightly beaten together, for egg wash

Directions:
Pulse flour and salt together to combine. Add the lard in hunks and pulse for about 10 seconds (literally stand there and count!) until it’s the texture of coarse sand. Add in the chunks of cold butter and pulse for about 10 pulses (count ’em!) until butter pieces are no larger than small peas. Add 3 tablespoons of ice cold water and turn food processor on low — the dough should form a dough ball in a few seconds. If the dough remains crumbly and doesn’t come together, add another tablespoon of water. Add as little water total as is required for the dough to form a ball. Scoop the dough onto a sheet of plastic wrap, form into a disk, and chill for at least 20-30 minutes.

Preheat oven to 450 degrees F (if you’re blind baking the crust without a filling in it; otherwise, preheat according to your recipe instructions). Roll the disk of dough out between two sheets of lightly floured parchment paper until it’s around 2 inches larger than your (9-inch) pie plate all around. Use the parchment to help you drape the dough over your rolling pin, and then use the rolling pin to gently transfer the dough to your pie plate. Situate it in the plate without stretching the dough (lift the edges and let it fall down into the corners of the dish). Fold the excess dough around the edges and crimp, trimming where necessary.

If you’re filling the crust prior to baking, fill it and bake according to your recipe. If you’re blind baking the crust to fill later, cover the dough with parchment paper and fill this with pie weights or dried beans, pressing to the edges. Bake for around 20 minutes at 450 degrees F. Remove weights and paper, brush the egg wash onto the crust, and bake 5-10 minutes more until golden brown (shield the edges with foil if they begin getting too dark). Let the crust cool completely. Fill according to your recipe.

TIPS:
– When preparing a mise en place for this recipe, chop your butter, measure out your shortening, and fill a jar with ice water first. Stick all of these ingredients into the fridge to get ice cold while you complete the rest of your mise en place.
– Your goal is to keep your fats and your crust dough cold as you prepare it, so don’t handle it too much. The cold hunks of fat in your dough are what will create the flaky layers in your crust as it bakes.
– I roll out my crust dough between two sheets of parchment paper with a little sprinkling of flour on either side. Periodically I’ll stop to lift the paper from the dough to be sure it’s not sticking and flip the dough to check the other side as well. The parchment allows me to use much less messy flour.
-For a double crust pie, double the recipe form into two disks to chill. Roll out each disk separately. Situate the first half of the dough in the pie plate as usual, fill it, and top with the second half. Trim and fold the edges of the top crust under the lip of the bottom crust, crimping the two together. Cut a vent in your pie.

See all the Cooking Hard Stuff Tips:
The Cooking Hard Stuff Challenge
Tip #1: Read and visualize the recipe.
Tip #2: Mise en place.
Tip #3: Make a schedule.
Tip #4: Try, try, try again — or share your success

If you liked this post, please:
Subscribe to Willow Bird Baking
Follow Willow Bird Baking on Twitter
Follow Willow Bird Baking on Facebook
Give this post a thumbs up on StumbleUpon
Pin It


Shareother ways to share this post with friends

1 3 4 5 6 7 9