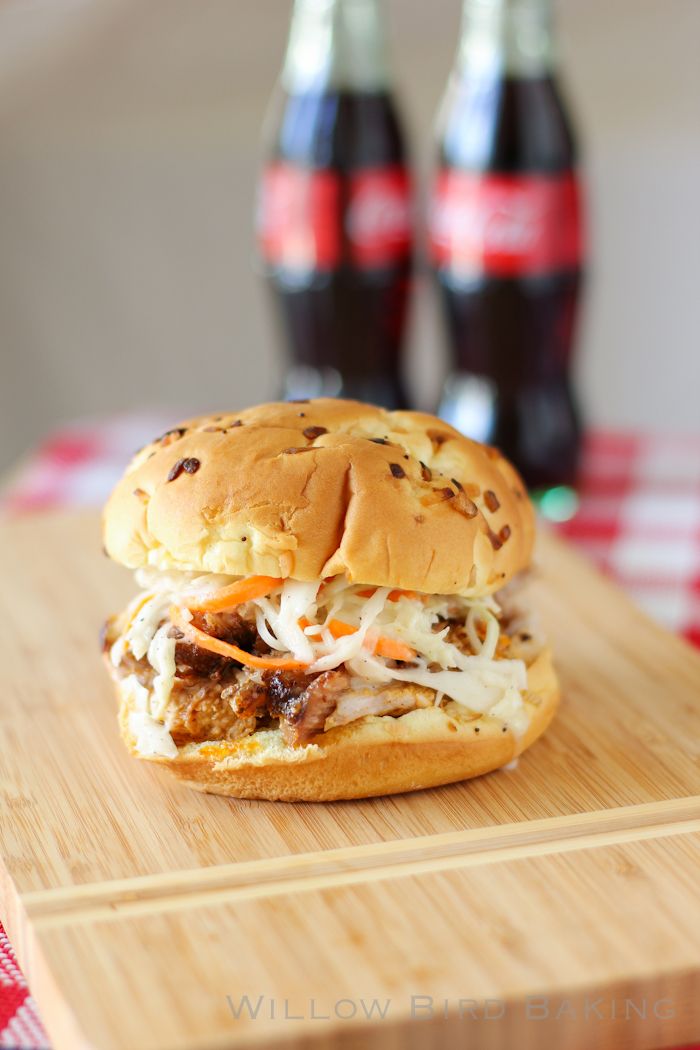
Smoked Pulled Pork Sandwiches with Sweet Coleslaw
Do you know one of those backyard-food-people? One of those people who have attempted to fry a whole turkey in their backyards at great personal peril? Or one of those who owns and employs a device that smokes meat in their backyard all day? Who makes their own beef jerky? What?!
You know one of those people, I’m sure. I know a few. I can’t poke too much fun at them because I do so love the fried turkey my sis- and bro-in-law made, and I’m crazy about the smoked pork butt my dad makes for special occasions. I appreciate those backyard food pioneers.

I also can’t poke too much fun at them because this past weekend, I became one of those people. Masterbuilt sent me their Electric Digital Smokehouse and asked me to try it out. Mike and I wanted to fire it up over Labor Day weekend; alas, it rained. So this weekend it was!
Disclosure: Masterbuilt sent me this electric smokehouse for free so I could try it out. Opinions I share with you are always honest and authentically my own.
I think Mike and I were both skeptical when the smokehouse arrived and we saw how complicated it seemed. It felt a little fussy to put together and it’s certainly not the tool you’d use to churn out a quick weeknight dinner. Now that we’ve actually used it, though, we’re both kind of hooked. And I think we’ve gotten the right perspective: using the smoker is more of an experience, a crafting process, a hobby. You experiment with different wood chips, rubs, meats, cooking times. It feels like developing a special recipe. It’s not just about cooking meat — there are faster ways to do that. It’s about perfecting meat. I can get into this!
And after the setup, it turned out using the smokehouse was a cinch: you preheat it, load your wood chips through an easy loader built into the smokehouse, stick your meat in, set the timer, and wait, adding more chips as needed. As our pork was smoking, Mike started brainstorming what else we could smoke and I started wondering how hickory wood chips might change the flavor of the meat. We were all set to give the smokehouse away after trying it, but neither of us is mentioning it going anywhere anymore!
Since we’re in an apartment complex, we used our new smoker down in our paved courtyard. We were worried that it might produce enough smoke to prompt neighbors to call the fire department, but we needn’t have worried. The smoke really wasn’t so bad. The aroma of smoking pork actually prompted a decidedly positive response from neighbors, instead!
You know what I loved about the smokehouse? It seemed clean and simple. There’s a digital display where you easily set the temperature and timer. There’s a remote control. There’s no gas or anything — it just plugs in an outlet. There’s a window to see inside without having to open the door and smoke yourself. There’s the wood chip loader in the side for the same reason. I just like that it didn’t have to feel like I was stuck in a charcoal pit to join the ranks of the smokeheads (is that what you call people who do this? I hope I didn’t just accidentally make some sort of drug reference. YOU KNOW WHAT I MEAN.)
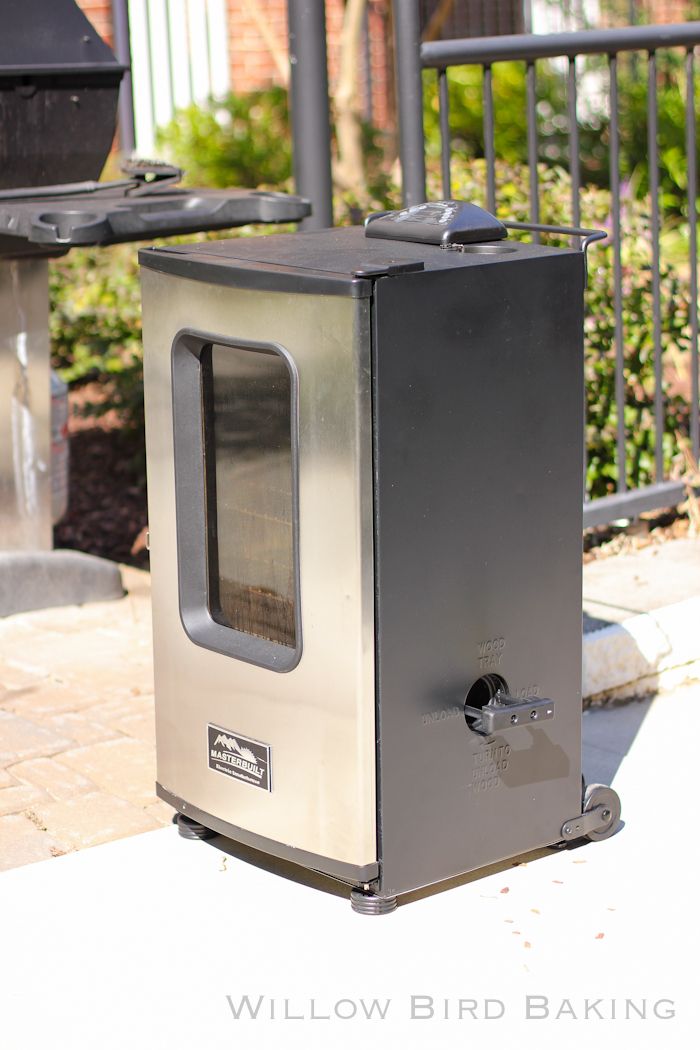
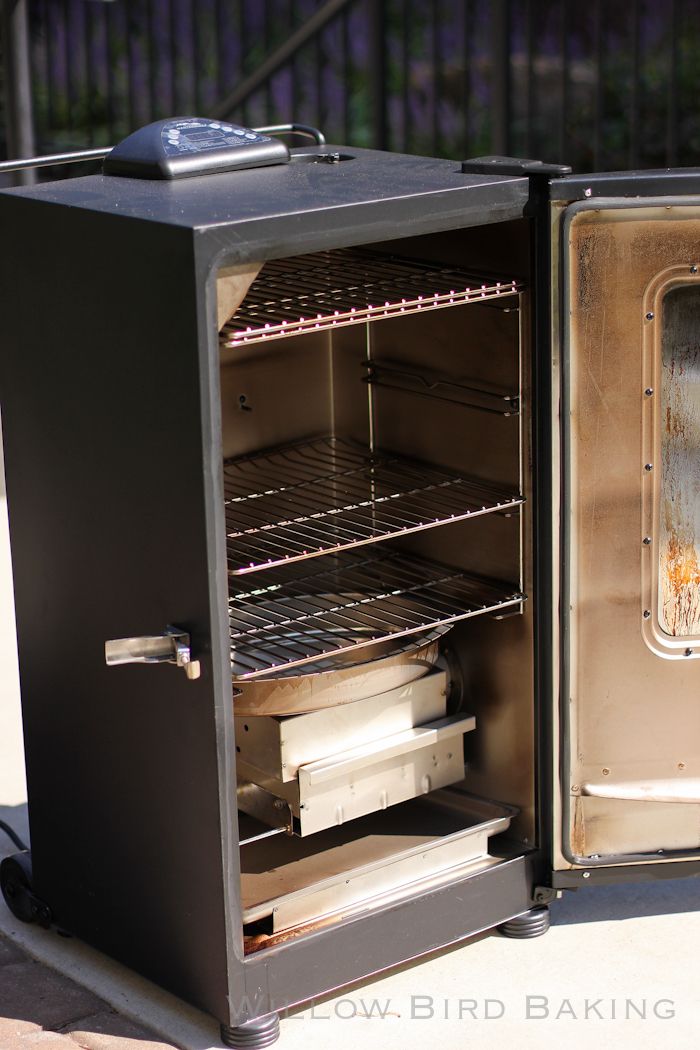
Masterbuilt Electric Digital Smokehouse after smoking
I also love that after letting it smoke away outside all day with minimal effort on our part, we have enough food to last all week. Pork sandwiches, pork wraps, and pork enchiladas all around! And we could’ve fit plenty more veggies and roasts in the smoker if we’d wanted.
The best part about the smoker, though, wasn’t the quantity but the quality of the resulting meat. This pork was juicy, falling off the bone, and flavorful. No barbecue sauce needed here: the best-ever barbecue rub did all the spice work! We stuffed onion rolls full of juicy, tender meat topped with sweet coleslaw. I put some pimiento cheese on mine for good measure (Mike said I was gross.)

Ultimately, I never would’ve forked out the money to buy this smokehouse on my own — but all the more reason I’m glad Masterbuilt sent one over and made me a believer. It’s a considerable investment with models running from $229 to $389, but if you have the money, this appliance certainly pulls its weight. I can’t wait to try it again! What meat should I smoke next, you guys?!
One year ago: German Chocolate Cheesecake
Two years ago: Gooey Cookies & Cream Bars
Three years ago: Bittersweet Marbled Chocolate Cheesecake Brownies
Four years ago: Peach Crisp Pie
Smoked Pulled Pork Sandwiches with Sweet Coleslaw
Recipe by: Willow Bird Baking using a rub by Chris Schlesinger
Yield: a billion servings or pork. Or at least, like, 15.
How I love great pulled pork! This recipe uses a smoker, but you could also smoke your pork roast any way you’re used to smoking (my dad does his with his grill). The key is not to jump the gun in pulling it out — really let it smoke until it’s falling apart. Oh, and don’t forget to use the great spice rub!
Ingredients:
1 (6.5-pound) Boston Butt pork roast
Best Barbecue Rub
a few cups of hickory or mesquite wood chips
1 head cabbage
1 carrot
1 onion
6 tablespoons sugar
4 tablespoons white vinegar
2 teaspoons salt
1/2 teaspoon black pepper
dash cayenne pepper
1-2 tablespoons mayonnaise to taste
buns of your choice
Directions:
The night before you plan to cook your pork, make your slaw: shred the cabbage, onion, and carrot in the food processor. In a medium bowl, whisk together sugar, vinegar, salt, pepper, and cayenne pepper. Pour in shredded veggies and mix well. Cover this and let it sit out while you prepare your pork. Then put it in the fridge (or let it sit out; nothing in it is perishable yet) overnight.
Also the night before, prepare your pork. Trim off some of the fat cap if there is one (I left about half of the thickness on). Generously rub your roast all over with the best barbecue rub. You won’t use the whole batch of rub that you made; you’ll probably use about half of it. Since you’ll want to save the rest, don’t put your raw-porky-hands into the rub’s container, but instead use a spoon to dispense the rub onto the pork before rubbing it in. Place the rubbed pork into a metal pan that you know will fit into your smoker, cover it, and let it sit overnight in the fridge.
Early in the morning before your pork dinner, put wood chips in your smoker and preheat it to 225 degrees for around 30 minutes (or according to manufacturer’s instructions.) Uncover your pork and place it into the preheated smoker, smoking it for around 8 hours (that’s how long it took for our 6.5-pound roast). Replace wood chips in your smoker as needed throughout the day, and also mix your cole slaw every now and again. After 8 hours of smoking, cover the pork roast with foil and cook for another hour.
When pork is almost ready, add 1-2 tablespoons of mayonnaise to your cole slaw and mix well. Chill until ready to serve. Heat or toast your buns. When pork is ready, shred it with two forks and mix it in its juices. Pile it high on a bun, top with sweet slaw, and enjoy!

