meat

Twice Baked Cranberry & Pancetta Sweet Potatoes with Balsamic Glaze

The only time I’ve lived away from my hometown was during my sophomore year in college when I moved to Beaufort, a small town on the coast of North Carolina. I lived there for a few months before traveling for a month down the Eastern seaboard to study marine zoogeography. That semester changed my life, and I’ve continued to process the memories over the years. Periodically I’ll share stories here on Willow Bird Baking from that time.

. . .

I stared willfully at the horizon, waiting for the wave of nausea to subside. As if it were having great fun at my expense, the boat rolled over another giant wave. My stomach followed. I was determined not to succumb to the sensation and end up hanging over the railing like several of my friends, so I squinted even harder at the steady line between sky and land.

We’d woken up at an absurd hour to climb aboard the R/V Susan Hudson that morning. We’d all become accustomed to rolling out of bed, pulling on a pair of salty old sneakers, and plowing through the fog of sleep to begin our adventures. Luxuries like showering and hairstyling and even, say, deodorant had long since been abandoned. There was a high likelihood that on any given day we’d find ourselves traipsing through mud up to our thighs (I’m not exaggerating), swimming to a nearby island, or cuddling with sea cucumbers in the shallows. There was no point in getting pretty.

This was our first deep sea expedition. We were traveling miles out into the ocean to dredge and trawl for invertebrates that we would take back to the lab, observe, and then release. I’d been on the Susan Hudson around Pivers Island, home base for the Duke Marine Lab where we lived, but I soon discovered that this was an entirely different experience: one in which I did not have sea legs. Or a sea stomach.

The briney smell of the critters we poured out onto the ship’s deck didn’t help. We quickly flipped fish back out into the sea and scooped heaps of clams, snails, and squids into buckets of seawater. A cacophony of seagull chatter above us reminded us to toss a bit of our impressively fresh sushi into the air now and then.

On our way back with our spineless loot (the squids’ inky water suggested they were none too happy with their temporary accommodations), we docked near Cape Lookout to explore the seashore for a bit before eating lunch back on the boat. The dining hall had packed us sweet little bag lunches complete with a sandwich, apple, and cookie, but the thought of lunch sent my stomach back into a lurch.

Fortunately, one of the guys in our group had grown up on the water in Charleston. Will had battened down hatches, swabbed the deck, shivered some timbers, and every other nautical cliche I can muster up. He saw my decidedly green gills and said, “Make sure to eat.”

I was skeptical. “Well, I’m feeling really sick — is it a good idea to eat anything? Isn’t that just asking for trouble?”

“Trust me: eat. You’ll feel better.”

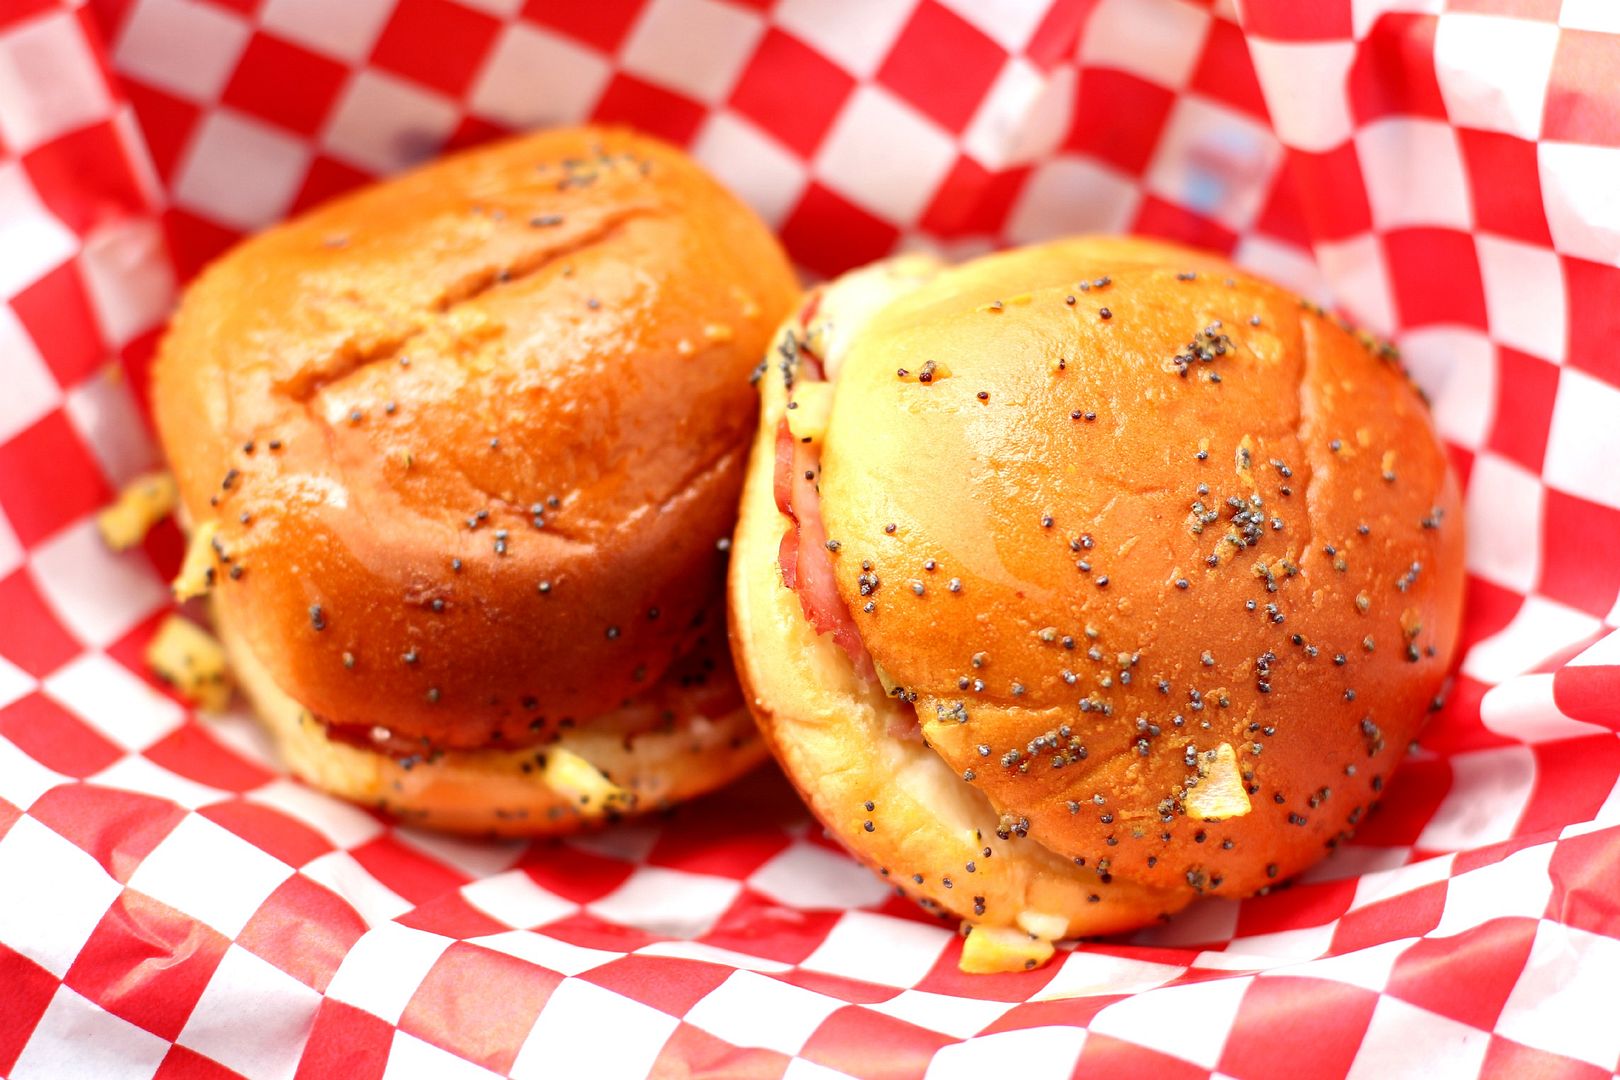
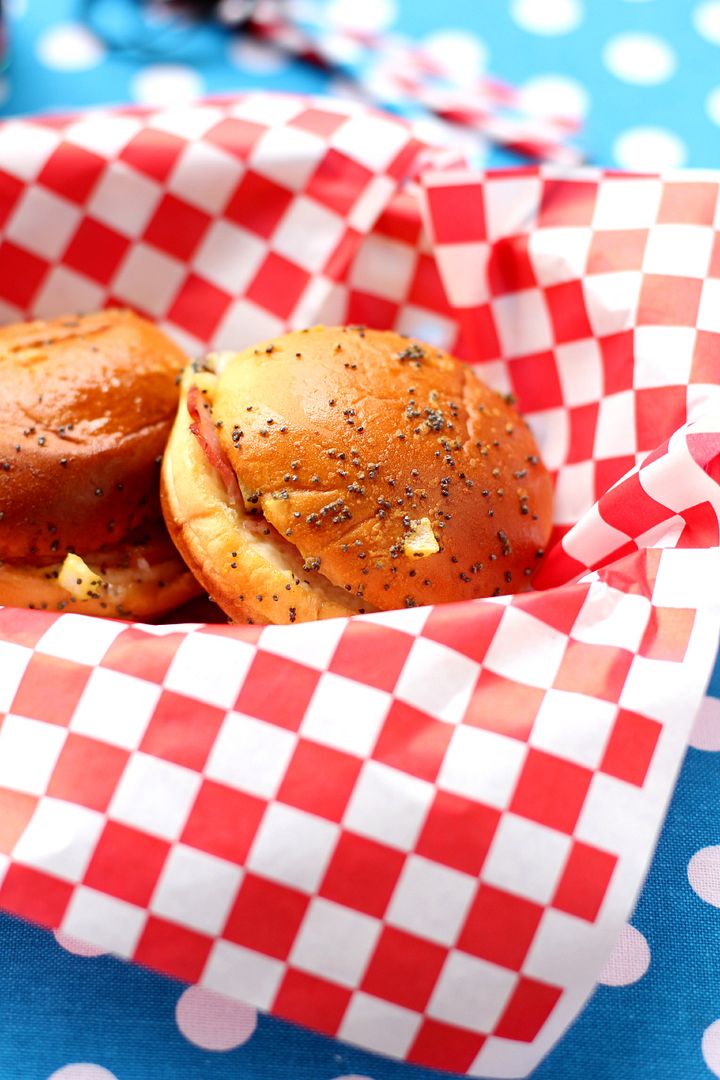
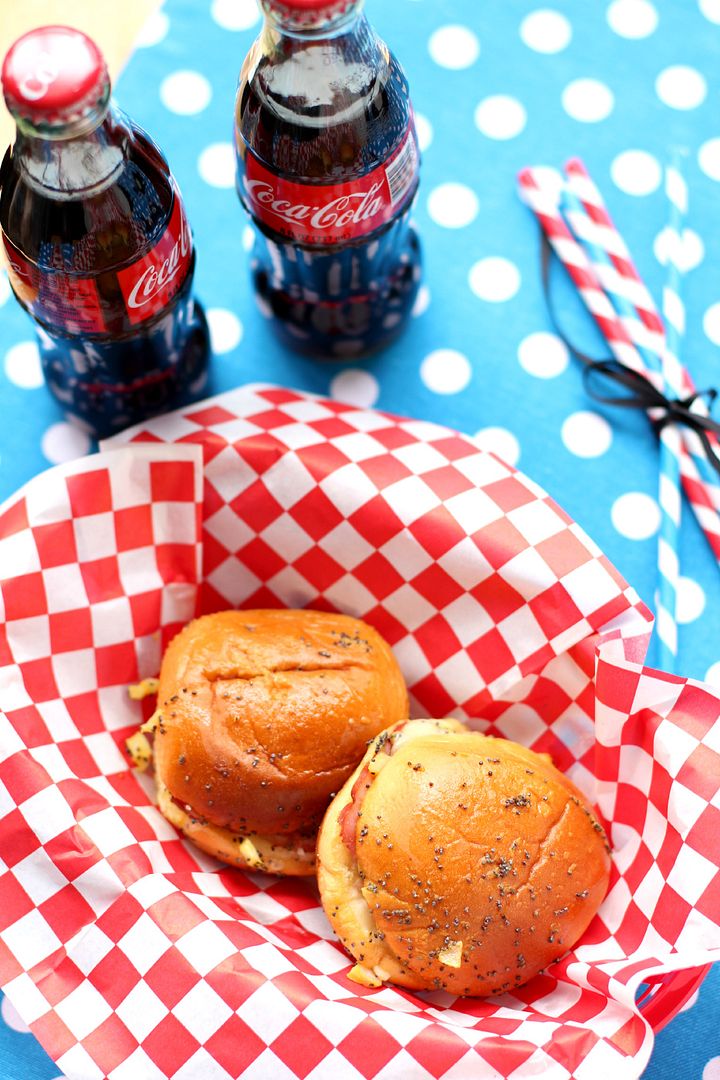
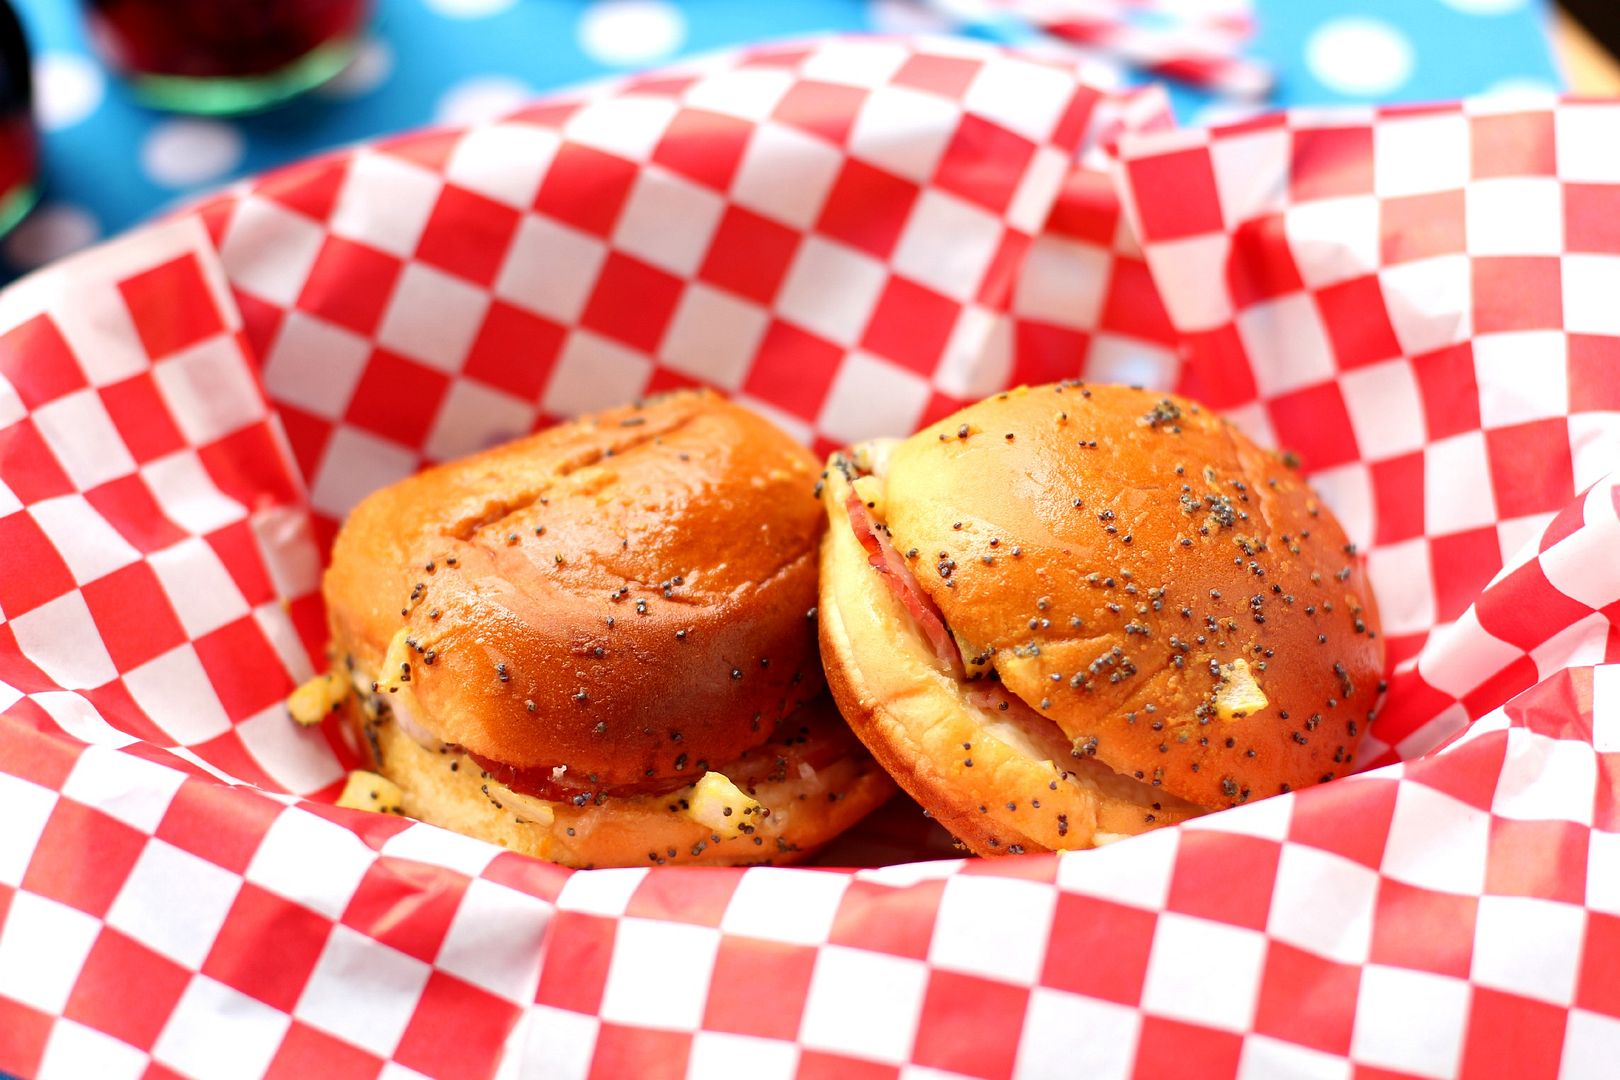
I unfolded the wax paper around my sandwich and took a cautious bite. (By the way, if you’ve never wrapped a sandwich in wax paper for your lunch, you should. The sensory experience of unwrapping that crinkly, smooth paper to eat a humble little sandwich is one of my favorite things in the world.) I don’t remember what sort of sandwich it was, but it tasted otherworldly after an entire morning on the boat. My hunger caught up to me and I finished devouring my sandwich with gusto. I headed for the cookie after that, offering my apple to one of my friends (the peel gets caught in my teeth and drives me batty, so I never eat them).

My trust in Will, given tentatively and mostly out of desperation despite his obvious experience, paid off. I felt better almost instantly. So much so that instead of clenching my bench and staring at the now-bright horizon the entire way back to the lab, I was able to get up and survey the surrounding sea, broken by waves and playful dolphins.

. . .

I’ve moved from research boats to potato boats since my time in Beaufort. In fact, I haven’t stepped foot on an actual boat (unless you count a kayak) in years. And I wouldn’t trust these sweet potatoes to be particularly sea-worthy.

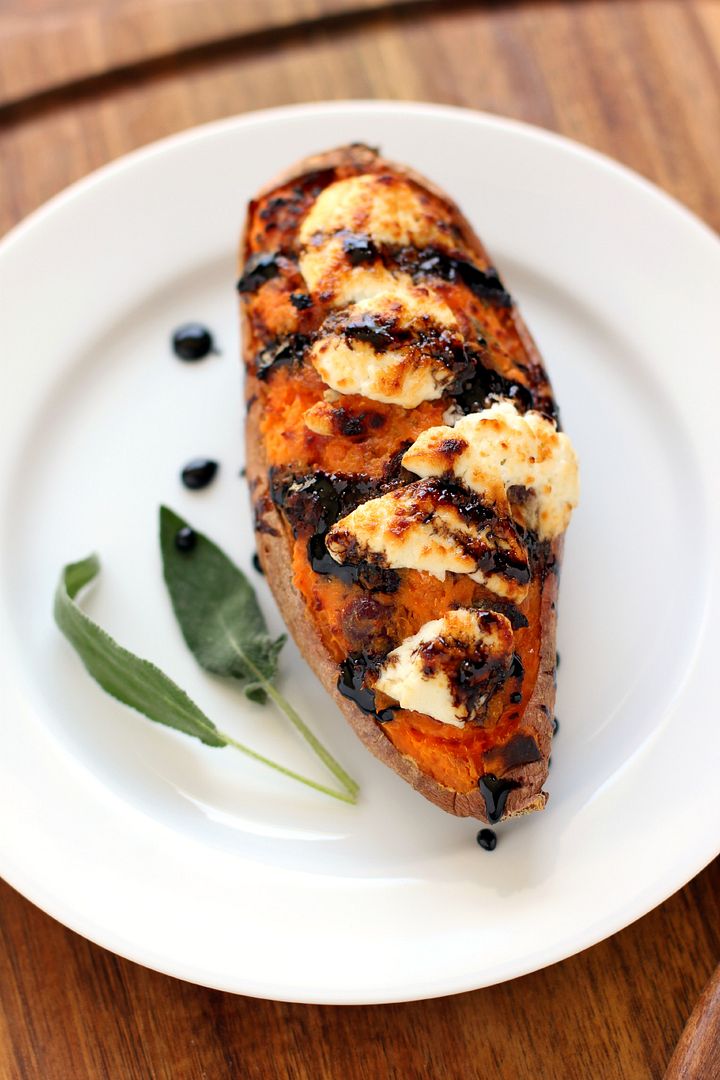
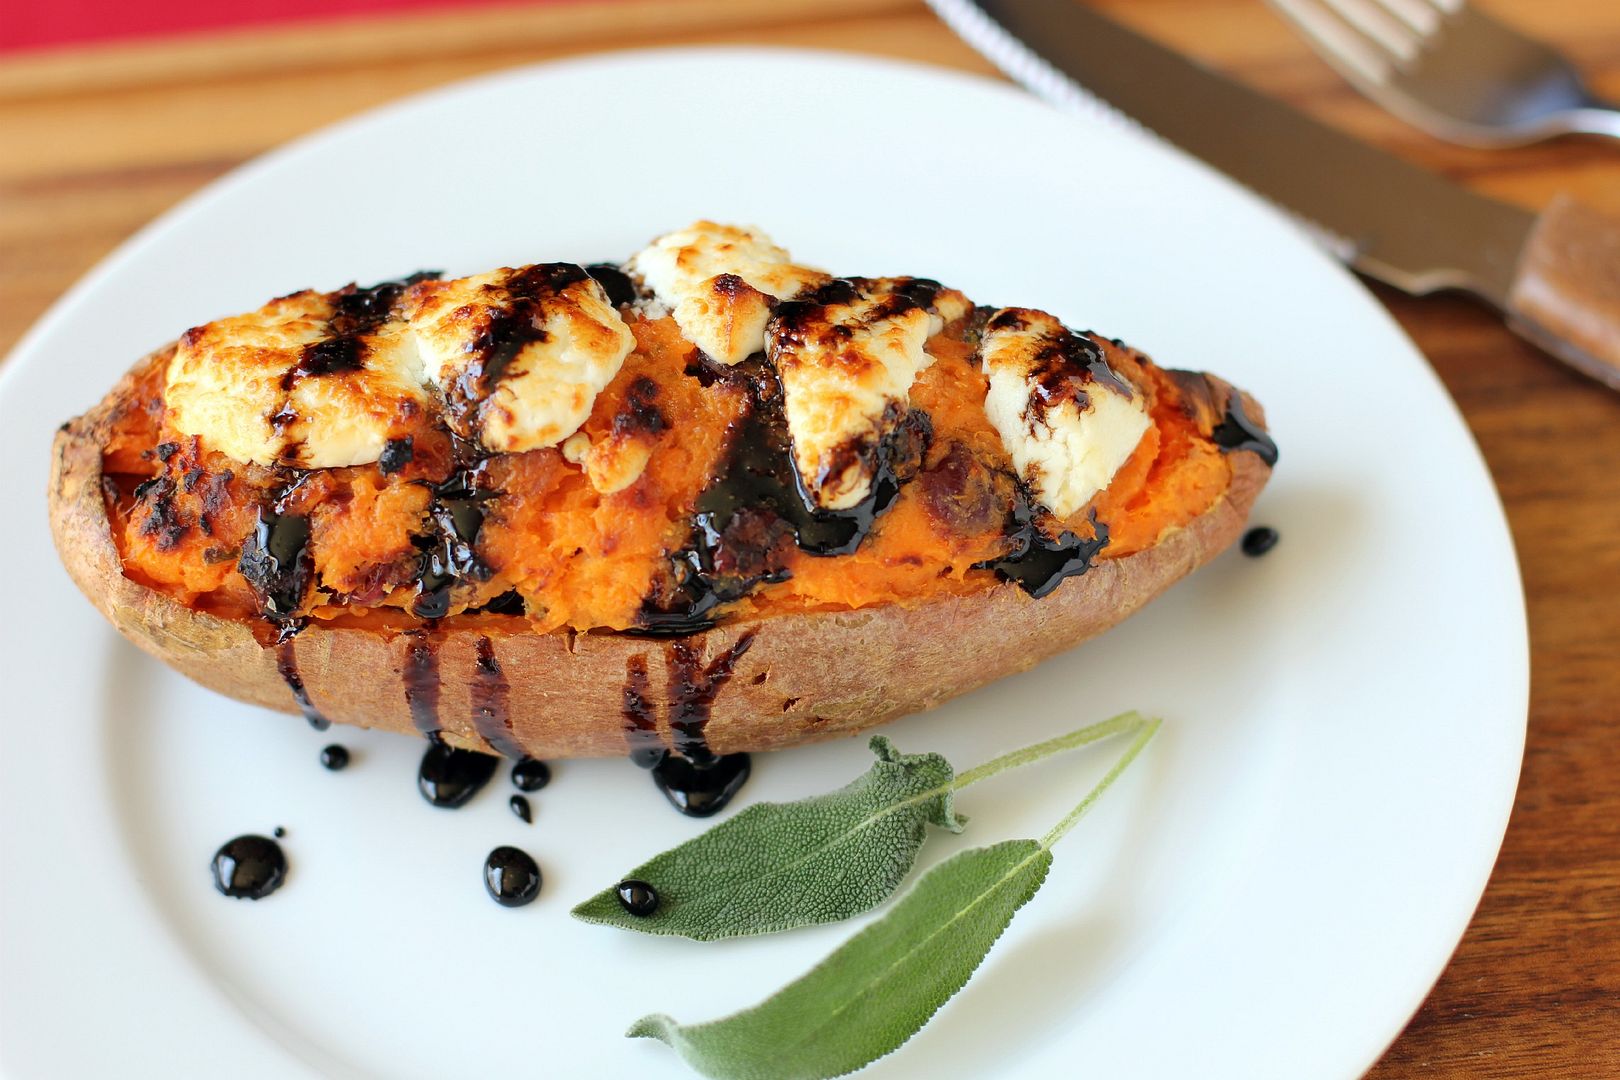
They are fantastic, though. I love twice baked potatoes for their soft, creamy filling, and this play on the theme boasts that same lovely texture. In addition to that, it has a phenomenal collection of flavors: sweet potato, cranberry, salty pancetta, sage, goat cheese, and a sweet balsamic glaze. The pretty presentation is just the icing on the cake.

Twice Baked Cranberry & Pancetta Sweet Potatoes with Balsamic Glaze


Recipe by: Willow Bird Baking
Yield: 2 twice baked sweet potatoes

These gorgeous twice baked sweet potatoes are fancy enough for a holiday meal, but simple enough to make any night. You can even prepare them a day in advance so they’re ready to pop in the oven before a big meal. A few tricks (like using a zip top bag to pipe the mixture into their sweet potato boats) speed up the process. The best thing about them, though, is the fantastic combination of flavors: salty pancetta, sweet and tart cranberries, tangy goat cheese, fresh sage, and a sweet balsamic glaze. It’s every sweet potato’s dream.

Ingredients:
2 large sweet potatoes (look for ones that are shaped like a fat oval)
4 ounces cubed pancetta
2 ounces goat cheese, plus more for crumbling on top
2 tablespoons butter
1 heaping teaspoon of loosely packed sage leaves, finely chopped
1/4 cup dried cranberries
1/4 cup half & half
salt to taste
1 1/2 cups balsamic vinegar
3 tablespoons sugar

Directions:
In a small bowl, cover dried cranberries with hot water. Cover the bowl with plastic wrap and let it sit for about 10 minutes to rehydrate the berries. Drain them and set aside. Preheat the oven to 350 degrees F. Poke each sweet potato several times with a fork and bake them on the oven rack (with a baking sheet on the rack below to catch any oozing) for 1 hour or until a knife will slice them easily.

While they bake, sauté the pancetta in a skillet over medium-high heat for a 8-10 minutes or until crisp. Drain it on a plate lined with a paper towel.

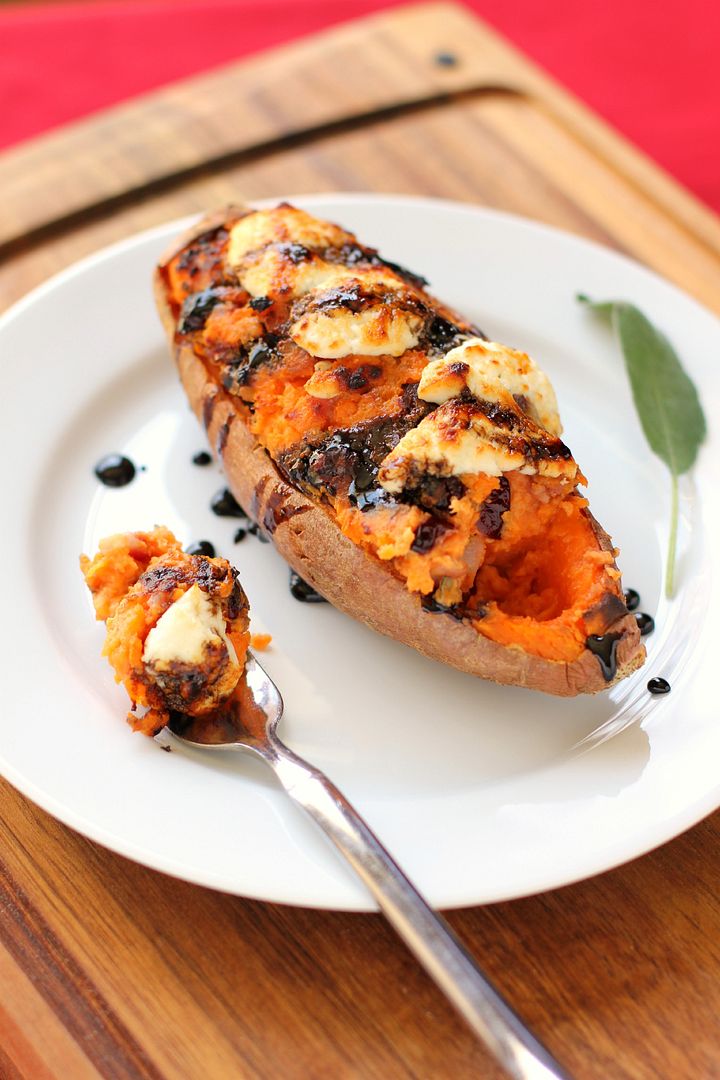
Once they’re ready, let the baked sweet potatoes cool for 10 minutes before slicing the top third off of each. Use a spoon to carefully scoop out the flesh (leave about 1/8 inch of flesh in the skin to give it some sturdiness). Mix the sweet potato flesh in a medium bowl with the butter, 2 ounces of goat cheese, and half & half (add this slowly while mixing so you get the consistency you’d like). Once the mixture is smooth, stir in the cranberries, sage, and pancetta. Salt the mixture to taste. Spoon it into a large zip top bag and cut the bottom corner off. Squeeze the mixture into the sweet potato skins. (At this point you can cover the potatoes and refrigerate overnight or bake immediately. If you chill them overnight, just let them come to room temperature before you bake them the next day.) Bake the potatoes for 10-12 minutes before removing them to a cooling rack.

While the potatoes are baking, combine the balsamic vinegar and sugar in a saucepan and boil them over medium-high heat, stirring occasionally, until the mixture is reduced to about 2/3 cup (this can take anywhere from 18-25 minutes). Be careful — vinegar fumes are strong! When the glaze is about ready, preheat the broiler. Top each potato with a generous amount of goat cheese and broil, watching very closely, until goat cheese is toasty brown and bubbly. Remove the potatoes and drizzle on the balsamic glaze. Serve immediately.

P.S. This dish will be entered in the North Carolina Sweet Potato Commission‘s No More ‘Mallows Recipe Contest. I love me some sweet tater and marshmallow casserole, but I also love that sweet potatoes pack a lot of savory potential.

If you liked this post, please:
Subscribe to Willow Bird Baking
Follow Willow Bird Baking on Twitter
Follow Willow Bird Baking on Facebook
Give this post a thumbs up on StumbleUpon
Pin It

Poppy Seed Ham & Swiss Slider Melts

When Mike was in middle school, his friend Chris decided they needed superhero names. Giving each other superhero names is apparently what adolescent boys were doing when I thought they might be writing me love letters. Oh.

Chris named himself Whopper Man and, inspired by the Dr. Perky soda Mike brought for lunch every day, he dubbed Mike Generics Man.

Even all those years ago, when Mike was in 7th grade and I was in 3rd (okay, well that makes it sound creepy), we were meant for each other — because I’m totally Generics Woman.

Don’t try to tell me that name brand yellow mustard tastes any different than store brand yellow mustard. Or that table salt needs to be produced by a certain company. I do love local and/or quirky and/or artisan products, but at the grocery store, I’d say about 90% of the products I buy are generic. And in case you haven’t noticed, I eat well.

In fact, I’m always a little surprised (but not judgey; don’t be judgey, y’all) to see someone grab the name brand can of tomatoes, or the name brand box of tissues. I’m sure they have their reasons — maybe they were raised in a home where only name brand items were used, maybe they like a flavor or scent that doesn’t have a generic equivalent, or maybe they’ve had a bad experience with the generics at some point — but all I can think of is how many extra dollars they’re shelling out.

Who knows, maybe this is what crazy coupon ladies (a title I use with the utmost affection) think when they look at my cart, right? Don’t I know if I’d just buy 18 more dish soaps, it would actually be cheaper than buying just 2?

Despite my penchant for buying cheap, there are some things that I’ve come to realize you shouldn’t skimp on. I don’t care how cheap the generic brand is. I don’t care how similar it looks to the real thing. For some things, no substitution will do. For instance:

1. Laundry detergent. I spend a bajillion dollars buying fancy schmancy “darks only” laundry detergent to try and save my clothes. I still keenly remember the time when, years ago, ONE WASH with the wrong detergent ruined an awesome pair of jeans. Then again, I have some superhuman knack for ruining clothing, so maybe I did something wrong. Maybe my superhero name should be What Happened To My Sweater Woman.

2. Toilet Paper. Everyone’s had that awkward moment where they realize they bought the 1-ply. Enough said.

3. Hair color. In fact, don’t even buy name brand hair color. Go to the flippin’ salon and PAY SOMEONE WHO KNOWS WHAT THEY’RE DOING. And don’t try to get away with going to the cheapie hair school salon, either.

Trust me on this. You’re either going to end up platinum hooker blonde because your mother leaves the dye in too long (thanks, Mom, for those memories) or you’ll end up with striped hair. Intentional stripes can be cute. Inadvertent stripes are not.

4. Coke. This one brings back fond memories of the time Mike tried to prove to me that I couldn’t differentiate between generic and regular Coke Zero. We did a blind taste test — well, sort of, except that I didn’t even have to taste anything. As soon as the cup got within a foot of my face, I could smell the difference. I think he was pretty impressed (or was that the facial expression for disgusted?) There’s just nothing like the real thing, y’all.

5. Paper towels. I do actually buy generic paper towels, but I kind of hate them. They’re so flimsy that they rip in half when you’re trying to pull them off the roll. How many more times will this happen before I suck it up and spend an extra 50 cents? Only time will tell.

6. Shampoo. I sound like I swallowed a commercial, but my hair really does feel silkier and more manageable with a quality shampoo. I go through a predictable cycle: I’ll get tired of spending so much money, decide to purchase generic shampoo, lament my decision after every shower for a month, and then re-decide to exclusively purchase name brand shampoos.

7. MAYONNAISE. This, much like the timeless debate about rolling the toilet paper over or under, can cause quite the firestorm, as we found out on Willow Bird Baking’s Facebook wall. Listen, I’m all about supporting your unique personalities and tastes. I love you just the way you are. But just to be clear, there is only one appropriate brand of mayonnaise: Hellmann’s, also known as Best Foods.

Now, pardon me while I sign out of my email and hide under my desk to avoid the inevitable mayonnaise fallout.

Unfortunately, the original version of this recipe for Poppy Seed Ham & Swiss Slider Melts called for Miracle Whip. Let’s just say if my superhero name were Mayonnaise Girl, Miracle Whip would be my arch nemesis. I hate the stuff. I still remember sitting at a friend’s house as a child and tasting it for the first time. I had to seriously evaluate whether or not I could bear to finish my sandwich.

Despite my fierce mayonnaise loyalty, I thought perhaps this time around I should stick to the recipe and use the Miracle Whip. What if that awful Miracle Whippy flavor was somehow crucial for the final product? With more than a little shame, I purchased a tiny jar of it just in case.

It was a short lived “just in case.” All it took a microscopic taste of that stuff upon arriving home to remember how much I hate it. I promptly threw it out of the recipe altogether. Turns out I do have some sense.

I’m happy to report that when slathered with the right sort of mayonnaise, stuffed with melty Swiss and honey ham, and smothered in a tangy butter sauce, these sliders really were the bee’s knees. They’re so easy to throw together, but come out of the oven gooey and comforting. And lest I totally offend a portion of my readers, I should add that (sigh) you can use Miracle Whip on them if you really want to. I’ll just look the other way.

Do you roll the toilet paper over or under? And (be gentle!) what’s your preferred mayonnaise?

Poppy Seed Ham & Swiss Slider Melts


Recipe by: slightly adapted from The Girl Who Ate Everything
Yield: 24 sliders

These gooey, cheesy, delicious sliders have all the makings of the perfect recipe: they’re easy to make, fun to eat, and so, so good. They seems to inspire some sweet nostalgia, too — several people who ate them mentioned that they remembered this meal from their childhood! Just make sure to use tasty ham and Swiss cheese — and of course, good mayonnaise!

Ingredients:
24 good white dinner rolls (I like Hawaiian or potato rolls)
mayonnaise for spreading (or half mayonnaise and half Miracle Whip whisked together, if you must!)
24 pieces good honey ham
24 slices Swiss cheese
1/2 cup butter, melted
1 tablespoon poppy seeds
1 1/2 tablespoons yellow mustard
1 tablespoon minced onion
1/2 teaspoon Worcestershire sauce

Directions:
Preheat oven to 350 degrees F and lightly spray a baking dish with cooking spray. Split each roll and spread on a nice layer of mayonnaise (I love mayonnaise on melts, so my layer was thick). Stuff each roll with a slice of ham and the slice of Swiss cheese (I tore larger slices into fourths to make them fit and then poked all four pieces into each roll). Pack these stuffed rolls in close together in a large baking dish.

In a small bowl, whisk together the melted butter, poppy seeds, mustard, onion, and Worcestershire sauce. Pour this sauce evenly over all the sandwiches until they’re all coated (the original recipe notes that you don’t have to use all the sauce, but I did — maybe my rolls were bigger.) Let these sit for around 10 minutes until the butter starts to set up. Cover your baking dish with foil and bake the sliders for 12-15 minutes or until nice and melty. Uncover and bake them for 2 minutes more to toast up the tops. Serve warm and gooey from the oven.

If you liked this post, please:
Subscribe to Willow Bird Baking
Follow Willow Bird Baking on Twitter
Follow Willow Bird Baking on Facebook
Give this post a thumbs up on StumbleUpon
Pin It

Cheeseburger Bāozi (Steamed Cheeseburger Stuffed Buns)

Right or straight? Go straight, go straight, go straight — Ahhh, man. Right.

My frantic inner dialogue seemed to have very little to do with the car’s trajectory as my dad drove us away from church each week. If we turned right, we were on our way home to make a reasonable lunch in our small galley kitchen. If we went straight, though, we were on our way to those beautiful golden arches, where I would order a #4 off the combo menu and immediately begin stuffing hot fries into my face. Later, at home, I would crunch into the crispy chicken sandwich slathered with mayonnaise and topped with crisp lettuce — the crisper the better!

(Funny side story: I first ordered a #4 because of my obsessive compulsive love of the number 4 — stop looking at me like that — and it just so happened I also really enjoyed the meal.)

Those after-church trips to the drive-thru window are one of my earliest memories of fast food, but I’ve always enjoyed it. I can’t imagine ever being one of those people who crinkles their nose in disgust at the mention of fast food. Okay, it’s fatty and chemically. But let’s be honest: that stuff is good.

Beef & cheddars! Curly fries! Chicken biscuits! Those weird little hand pies! McCrunchy Deluxes! Okay, I made that one up. Anyway, the point is, yum.

Don’t get me wrong; I hardly ever eat it anymore. Despite how it may seem, I make careful food choices and only indulge in “bad for you” food in moderation. I eat healthy soups and veggies and oatmeal during the week. I drive determinedly past every single Arby’s. I order only a fountain drink at Chick-Fil-A, turning pointedly away from the menu full of nuggety goodness. You’re probably the same way. So I have a present for you:

Faux Fast Food.

Instead of grabbing a burger at the drive-thru, why not make a drive-thru worthy meal where you control the ingredients and nutrition stats? How about some cute little cheeseburger steamed buns, complete with burger dipping sauce? I’ve been dreaming of this recipe since I saw Julia’s vegan Big Mac Steamed Buns over at her fantastic blog, No Face Plate. Granted, this meal will take a little longer than zipping by for a couple of bacon cheeseburgers, but it’s also a lot of fun to make. If you have the luxury of some time, a few ingredients, and a sense of humor, I think you’ll really enjoy it.


Comparing two different bao doughs — look how much fluffier the one on the right is! That’s the one in the recipe below.

I did some legwork and experimenting and found you the fluffiest bao dough (look at the difference in the above comparison!) Grab your favorite burger recipe and adapt it to yield 12 mini patties. Make sure they’re well-seasoned, stick ’em in your bao dough, and steam ’em up! I can imagine kids would be over the moon for these little “burger pouches.” Enjoy!

How do you feel about fast food?

Cheeseburger Bāozi (Steamed Cheeseburger Stuffed Buns)


Recipe by: Willow Bird Baking with bun recipe adapted from Rasa Malaysia and burger sauce adapted from America’s Test Kitchen. This recipe inspired by Julia’s vegan Big Mac Steamed Buns at No Face Plate.
Yield: 12 buns

Sure, you could make burgers and put ’em on a regular bun. But why would you do that when you could stick them in these slightly sweet, cloudlike steamed buns? I love steamed buns more than is probably reasonable, so I’m in the process of stuffing anything and everything into them. This recipe takes a well-seasoned burger patty and some toppings and makes them portable, delicious, and fun. Make sure to start with a great burger recipe, because it’ll be the main flavor in your dish.

Bun Ingredients:
8 grams active dry yeast
160 milliliters lukewarm water
½ teaspoon white vinegar
280 grams low-protein flour (Hong Kong Flour or Cake Flour)
100 grams wheat or potato starch (I used potato)
100 grams icing sugar
30 grams shortening
10 grams baking powder
10 milliliters cold water
sesame seeds

your favorite cheeseburger recipe, made into mini patties (may I suggest this one?)
cheese slices
Roma tomato slices

Optional Burger Sauce Ingredients:
2 tablespoons mayonnaise
1 tablespoon ketchup
1/2 teaspoon sweet pickle relish
1/2 teaspoons sugar
1/2 teaspoon white vinegar
1/4 teaspoon ground black pepper

Directions:
NOTES: I measured the bun ingredients by weight for accuracy. You can convert them to imperial measures using an online calculator, but I’d use weights if you can.

Make burgers: Prepare your favorite burger recipe (adapted to yield about 12 mini patties), making each mini patty about 1-2 inches in diameter. Make sure your burgers are tasty and well-seasoned, because they’ll be the main flavor in this dish! Go ahead and cook your patties according to your burger recipe, placing cheese on near the end.

Make bāozi: Sift together the flour, wheat or potato starch, and powdered sugar into a mixing bowl. Make a well in the center and gently combine the yeast, vinegar, and warm water in the well. Let this sit and proof for around 10 minutes before slowly mixing in the surrounding flour mixture bit by bit, forming a dough. Add in the shortening and then knead (on a KitchenAid mixer at about speed 4-6, knead for about 4 minutes; by hand, knead for about 10 minutes) until the dough is smooth and elastic. It shouldn’t be sticky to the touch.

Transfer the dough to a bowl lightly coated with vegetable oil. Cover it with a damp cloth and place it somewhere warm to rise (I always put mine into an oven that has been warmed for a few minutes and then left open to drop to just above room temperature) for 30 minutes. I never noticed too much rise, so don’t worry if it doesn’t seem like a huge difference.

After 30 minutes, dissolve the baking powder completely in the water and sprinkle this mixture over the bao dough. Knead it in to fully combine it (I used the dough to mop up any of the mixture that was still on the bowl and kneaded it in well — an uneven distribution of baking powder can cause discoloration of your buns). Recover the dough and let it rest for 10 more minutes.

Fill and shape your buns: Turn the dough out onto wax paper and pat it into an even width. Use a dough cutter or sharp knife to divide it into 12 roughly equal sections. Take one section and gently roll it out to about 1/4 inch thick with a rolling pin (I keep the sections I’m not working with covered with a damp cloth so they don’t dry out.) Holding the dough in your non-dominant hand, place a mini burger patty, a slice of cheese, and a slice of tomato in the center and carefully pleat the edges of the dough together at the top, turning the bun as you work, until it is fully closed (see this video for a demonstration of to shape the buns). Place each bun on a square of wax or parchment paper. Brush the top lightly with water and sprinkle on sesame seeds.

Steam your buns: Preheat your steamer by boiling water and a teaspoon of vinegar over medium-high heat in a saucepan with your steamer on top (here’s a photo of how your steamer setup should look). Preheating the steamer ensures your buns will fully rise. Once it’s steaming, place buns in each tier (being careful not to crowd them), spray them with a bit of water (this help ensure a smooth surface), and close the steamer. Cook for 12 minutes without opening the lid. Remove the buns to a cooling rack to let them cool slightly.

Make burger sauce: Mix all sauce ingredients together. Serve buns warm with burger sauce, or ketchup and mustard.

If you liked this post, please:
Subscribe to Willow Bird Baking
Follow Willow Bird Baking on Twitter
Follow Willow Bird Baking on Facebook
Give this post a thumbs up on StumbleUpon
Pin It


Shareother ways to share this post with friends

Super Bowl Munchies from Willow Bird Baking

I love football, but I don’t have cable (or, uh, a television), so I never get to watch it. This is especially sad because one of my sisters is a Carolina Panthers cheerleader; I have to wait for people to post clips on Facebook to see her cheer! (She was even — sorry, proud sister moment — chosen to cheer at the Pro Bowl, so you may have seen her rocking out in Hawaii recently! I’ll post a photo from the Pro Bowl on Willow Bird Baking’s Facebook page for you to see.)

This year, the Super Bowl is going to be a fun exception to my football famine, because my Sunday school class is having a party. I’ve promised to bring lots of goodies (even though I still haven’t decided which team to pull for — suggestions?)

If you’re still planning your menu, here are some winning ideas:

1. Three Safe-to-Eat Cookie Doughs: Chocolate Chip, Sugar, and Cake Batter!
2. Quick and Easy Beer Bread (great for grilled cheeses!)
3. Gooey Cookies & Cream Bars
4. Easy Sopapilla Pumpkin Cheesecake Bars


5. Deep Fried Cake Batter Cookie Dough
6. Oreo or Red Velvet Truffles
7. Deep Dish Pizza Cupfakes
8. Southern Pimento Cheese with Lavash Crackers


9. Soft Pretzel Dogs (like Auntie Anne’s!)
10. Cake Batter Cookie Dough Truffles
11. Lemon Blueberry Cheesecake Squares
12. Chili-Lime Roasted Chickpeas


13. Easy Taco Stuffed Crescent Rolls
14. Fancy Roast Beef Sliders


If you liked this post, please:
Subscribe to Willow Bird Baking
Follow Willow Bird Baking on Twitter
Follow Willow Bird Baking on Facebook
Give this post a thumbs up on StumbleUpon
Pin It


ShareOther ways to share this post with friends!

Pork Bulgogi Bāozi (Steamed Korean BBQ Buns)

Hands down, my favorite food experience in the universe (so far — who knows, maybe something really awesome is goin’ down on Mars) is going to yum cha, or eating at a dim sum restaurant. Dim sum is a Chinese tea-like meal where a variety of amazing dishes are served as small plates. At a typical dim sum restaurant, carts full of steamed dumplings, fried eggplant, roasted pork buns, custard cakes, Chinese broccoli, sesame balls, and other treats traverse the dining room, replenishing each table.

It sounds pretty heavenly, right? If you haven’t tried it, you really should. That being said, my first dim sum experience was, um, terrifying.

I think the restaurant atmosphere contributed more than a little bit to my anxiety. The interior walls were all painted stark black, and the blinds were mostly drawn. Where sunlight did find a breach, it sliced into the space as bright and sharp as a flashing knife. Grotesque white statues towered in the center of the restaurant and carts crawled down narrow aisles, preventing any retreat. The restaurant owners were apparently going for “horror movie chic.”

My real trepidation, though, came from having no idea how dim sum worked. I saw the carts full of food, but were you supposed to flag them over? Would they just come to you? Were you supposed to write your order on your tab or did the servers write it for you? Was it annoying to ask what each dish was? As the cart rolled towards our table, so did a wave of panic. I didn’t know what I was doing! I turned a frantic face to Mike and literally started plotting an escape: “We’ve already ordered our drinks, but can’t we just pay for them and run out?!”

Mike, thankfully, was calm. He talked me down, helping me to temper my fear by focusing on the food. And oh, the food! I stuffed myself silly with every manner of new and delicious Chinese food, but my favorite dish by far was the char siu bao, or steamed pork buns.

These buns aren’t your average heavy, dense bread. They’re light, cakelike, and inexplicably fluffy. They’re clouds! They’re sheep! They’re cotton! They’re every other fluffy metaphor you’ve ever heard. The sweet pork filling inside the mildly sweet steamed buns was worth every bit of dim sum panic I’d felt. I vowed to make them in my own kitchen someday.

Y’all, that day has come — except, inspired by the McCormick 2012 Flavor Forecast, a report that highlights up-and-coming flavor trends around the world, I decided to mix it up. Two trends the Flavor Forecast describes are Honoring Roots and No Boundaries. These trends — one that showcases regional flavors around the world and another that encourages the blurring of the boundary lines between them — seemed to complement one another in a delicate balance. They were yin and yang, if you will. I chose to encapsulate both by creating a traditional recipe — Chinese steamed pork buns — with an unexpected ingredient. Instead of filling the buns with char siu, the typical Chinese barbecued pork, I opted to fill them with salty, sweet, spicy Korean barbecue, or bulgogi.

Bulgogi combines the spice of Korean Pepper Paste with sultry sesame, fruity Korean pear, and garlic. It’s delicious over rice, but it really shone when it was coated in this delicious sauce and stuffed into these gorgeous buns (ha ha ha, gorgeous buns!) It took me three tries to make the perfect bāozi, but this version really is the tops. I can honestly say that pulling my Fluffy McFluffypants buns out of my new bamboo steamer was one of my proudest kitchen moments to date. Even better, these buns were one of my most delicious kitchen moments to date!

It may require an initial investment to begin cooking and enjoying Asian food if you aren’t used to doing so (I had to buy soy sauce, rice wine, rice vinegar, Korean pepper paste, sesame oil, sesame seeds, and potato starch to stock my pantry). But these ingredients can be used over and over again, and meals like this are so worth the investment!

In fact, I was so excited about this recipe that I made you a video tutorial on how to shape the bāozi. Sophomoric jokes are included at no extra charge:

Have you ever eaten at a dim sum restaurant or cooked a new-to-you cuisine at home?

Pork Bulgogi Bāozi (Steamed Korean BBQ Buns)


Recipe by: Willow Bird Baking with bun recipe adapted from Rasa Malaysia and bulgogi recipe adapted from Food.com
Yield: 12 pork bulgogi buns

Korean BBQ, or bulgogi, is a delicious combination of salty, sweet, and spicy. It’s amazing served over rice, but even better stuffed inside these slightly sweet, light-as-a-feather steamed buns. I did all the legwork for you in this one, trying multiple bun recipes and tweaking quantities until they were just right. So trust me: invest in the ingredients (you’ll use them over and over again) and make these buns! If you don’t have a steamer, here’s an easy way to make one.

Bun Ingredients:
8 grams active dry yeast
160 milliliters lukewarm water (100-110 degrees F; I use a candy thermometer to do a quick check)
½ teaspoon white vinegar
280 grams low-protein flour (Hong Kong Flour or Cake Flour)
100 grams wheat or potato starch (I used potato)
100 grams icing sugar
30 grams shortening
10 grams baking powder
10 milliliters cold water

Pork Bulgogi Ingredients:
1 pound pork loin (cut into thin, wide slices)
5 tablespoons soy sauce
2 cloves garlic, minced
2 sprigs green onions, chopped
1/2 yellow onion, sliced
2 tablespoons McCormick toasted sesame seeds
black pepper
1 tablespoon and 1 1/2 teaspoons honey
2 1/2 – 4 tablespoons Korean red pepper paste (gochujang)
1 tablespoon McCormick red pepper flakes
1 1/2 teaspoons sesame oil
1 teaspoon vegetable oil for cooking
1/2 cup chopped Korean pear

Sauce Ingredients:
1 tablespoon + 1/4 teaspoon soy sauce
1 1/2 teaspoons honey
1 1/2 teaspoons sweet soy sauce
1 1/4 teaspoons sesame oil
1 teaspoon Korean red pepper paste (gochujang)
3/4 teaspoon rice vinegar
1/4 teaspoon packed brown sugar
1/4 teaspoon McCormick toasted sesame seeds
chopped green onions

Directions:
NOTES: I measured the bun ingredients by weight for accuracy. You can convert them to imperial measures using an online calculator, but I’d use weights if you can.

Some of the ingredients for this recipe (Korean red pepper paste, rice wine, sweet soy) are easiest to find at an Asian supermarket. I bought my steamer there as well, for around $13 — a great investment considering how many times I’ve already used it! Finally, you can usually find pork ready-sliced for bulgogi at an Asian supermarket; if not, freeze the loin for a bit before slicing with a serrated knife, which will make it easier to cut through.


Make pork bulgogi: Whisk together marinade ingredients (soy sauce, garlic, green onions, onion, sesame seeds, sesame oil, pepper, honey, pepper paste, and pepper flakes) and toss pork in marinade. Cover and let the pork marinate overnight in the refrigerator (for at least 8 hours).

Heat a skillet over medium heat and add vegetable oil. When oil is shimmery, add some of the pork mixture (don’t crowd the pan — I cooked about 4 slices at a time) and cook, turning occasionally, for about 5 minutes or until brown and done. Remove this pork to a cutting board. Cut all pork into small bite-sized pieces and place it in a bowl. Toss in chopped Korean pear.

Make sauce: Whisk all sauce ingredients together except green onions. Pour about half of the sauce over your pork bulgogi (you want it lightly coated, not swimming in the sauce) and reserve the other half (with green onions sprinkled in) for dipping.

Make bāozi: Sift together the flour, wheat or potato starch, and powdered sugar into a mixing bowl. Make a well in the center and gently combine the yeast, vinegar, and warm water in the well. Let this sit and proof for around 10 minutes before slowly mixing in the surrounding flour mixture bit by bit, forming a dough. Add in the shortening and then knead (on a KitchenAid mixer at about speed 4-6, knead for about 4 minutes; by hand, knead for about 10 minutes) until the dough is smooth and elastic. It shouldn’t be sticky to the touch.

Transfer the dough to a bowl lightly coated with vegetable oil. Cover it with a damp cloth and place it somewhere warm to rise (I always put mine into an oven that has been warmed for a few minutes and then left open to drop to just above room temperature) for 30 minutes. I never noticed too much rise, so don’t worry if it doesn’t seem like a huge difference.

After 30 minutes, dissolve the baking powder completely in the water and sprinkle this mixture over the bao dough. Knead it in to fully combine it (I used the dough to mop up any of the mixture that was still on the bowl and kneaded it in well — an uneven distribution of baking powder can cause discoloration of your buns). Recover the dough and let it rest for 10 more minutes.

Fill and shape your buns: Turn the dough out onto wax paper and pat it into an even width. Use a dough cutter or sharp knife to divide it into 12 roughly equal sections. Take one section and gently roll it out to about 1/4 inch thick with a rolling pin (I keep the sections I’m not working with covered with a damp cloth so they don’t dry out.) Holding the dough in your non-dominant hand, place the pork bulgogi filling in the center and carefully pleat the edges of the dough together at the top, turning the bun as you work, until it is fully closed (see the video below for a demonstration of to shape the buns — and jokes about the word ‘buns,’ of course). Place each bun on a square of wax or parchment paper.

Steam your buns: Preheat your steamer by boiling water and a teaspoon of vinegar over medium-high heat in a saucepan with your steamer on top (here’s a photo of how your steamer setup should look). Preheating the steamer ensures your buns will fully rise. Once it’s steaming, place buns in each tier (being careful not to crowd them), spray them with a bit of water (this help ensure a smooth surface), and close the steamer. Cook for 12 minutes without opening the lid. Remove the buns to a cooling rack to let them cool. Serve warm with reserved dipping sauce.

You don’t see many product reviews on Willow Bird Baking, because I’m choosy with how I share this space. My choosiness reflects my own ideals for Willow Bird in addition to my respect for the community we have here. When I get the opportunity to work with a company I genuinely love and use in my own kitchen, though, I’m always thrilled to share. McCormick is just such a company, and I’m excited to share their forecast of upcoming flavor trends.

Disclosure: McCormick sent me a Flavor Forecast Immersion Kit of ingredients, and compensated me for other ingredients and for my time and creative energy. I value my readers such that all opinions expressed on Willow Bird are always my own.

If you liked this post, please:
Subscribe to Willow Bird Baking
Follow Willow Bird Baking on Twitter
Follow Willow Bird Baking on Facebook
Give this post a thumbs up on StumbleUpon
Pin It


Shareother ways to share this post with friends

1 4 5 6 7 8 11