Before I say anything else, I just want to thank you all so much for your kind words about my engagement! You guys are the best.
This whole ‘getting married’ thing means there’s also a whole ‘moving to Raleigh’ thing I’ve got to attend to. I’ve already been hired at a wonderful school and I know I’ll be telling you all about that before too long, but right now, I have to process leaving Woodlawn.
Woodlawn is the school where I’ve worked for the past 5 years and one of the most important places in the world to me. There are so many things I could say about this small school — things about its innovative curriculum, its beautiful historic campus, its kind-hearted students, its brilliant teachers. But all of that feels too big. I have to piece this out and say it the way I know how to say it: I’ll tell you some stories.
My first year at Woodlawn in 2008 was a crash course in doing things differently. I’m a very confident, driven, and admittedly controlling person. I know how I want to do things, I do them that way, and usually I’m proud of how they turn out. I like to sum it up by saying that I’m effective. When I got to Woodlawn, though, it was a different cup of tea than I was used to. The teachers collaborated and integrated in a way I’d never imagined was possible. They were at least as effective if not more effective than I was. They were creating projects and units that were overwhelmingly creative and brilliant.
I made one of the best decisions I’ve ever made, and one that taught me a valuable life lesson: I swallowed all of my pride, sat back, and listened. I took my cues from their courage and innovation. I tossed some of my ideas that weren’t right for my new environment. I accepted some of their ideas despite my territorial urge to do things my own way. As a result, that year changed my teaching philosophy. I’ve never looked back. Indeed, I’d say one of the tenets of my philosophy these days is humility, because I realize that a fantastic teacher can always learn from other fantastic teachers.
Overhauling my teaching was only one of many adventures that first year. Another was the cranes. Each year the 7th graders hear the story of Sadako, a young girl who died from leukemia after the bombing of Nagasaki and Hiroshima in Japan during World War II. Sadako spent her last months trying to fold 1,000 origami cranes and wishing for peace. In her honor, my students each year try to reach that ambitious goal as well. I teach them how to fold and they dutifully bring in excess paper: newspaper, old wrapping paper, origami paper.
That first year, they were so excited about the task. They folded huge cranes: one student, Morgan, folded a crane at least a foot in length out of metallic wrapping paper. They folded tiny cranes: the boys seemed to be having a contest to see who could fold the most microscopic crane out of a corner of a post-it note. They folded during any free time at school. They folded at home and came in with bags full of angular little birds. They folded with parents and siblings and friends. Surprisingly, we didn’t make it to 1,000 that year (my third year at Woodlawn, a group shot all the way to 1,300), but we made it close.
What we did accomplish, though, was threading every single crane onto strands of like colors. We hung the garlands all across the room: first the reds, then oranges, yellows, greens, blues, indigoes, violets. One corner held all the others: whites, blacks, browns. When you walked in the door, there was a gorgeous rainbow of flight. We were all a little surprised by how lovely it was.

We enjoyed it immensely until the fire marshall made us take it down. Our cranes sat in the corner for awhile before a student took them home to hang in her room (don’t tell the fire marshall.)
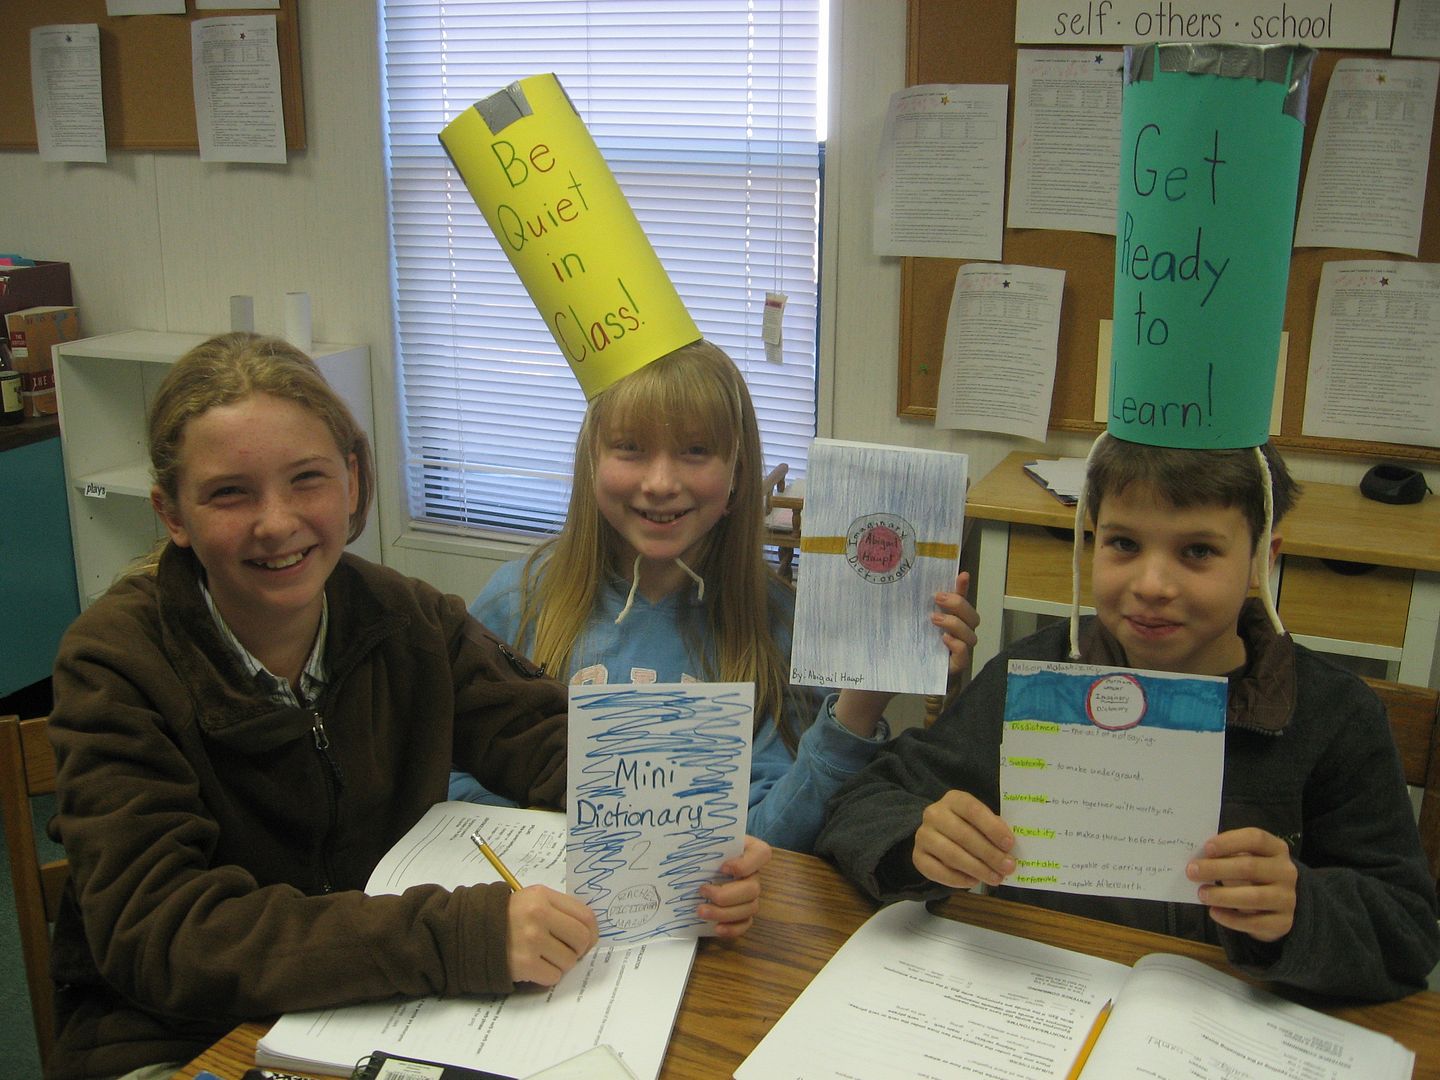
That first year was also the year I told the kids to get on their “ready to learn” caps (my version of the “thinking cap,” I guess? I didn’t think too much about it). I added that they might also need their “be quiet in class” caps. My 6th grader, Abigail, came in the next day with these:
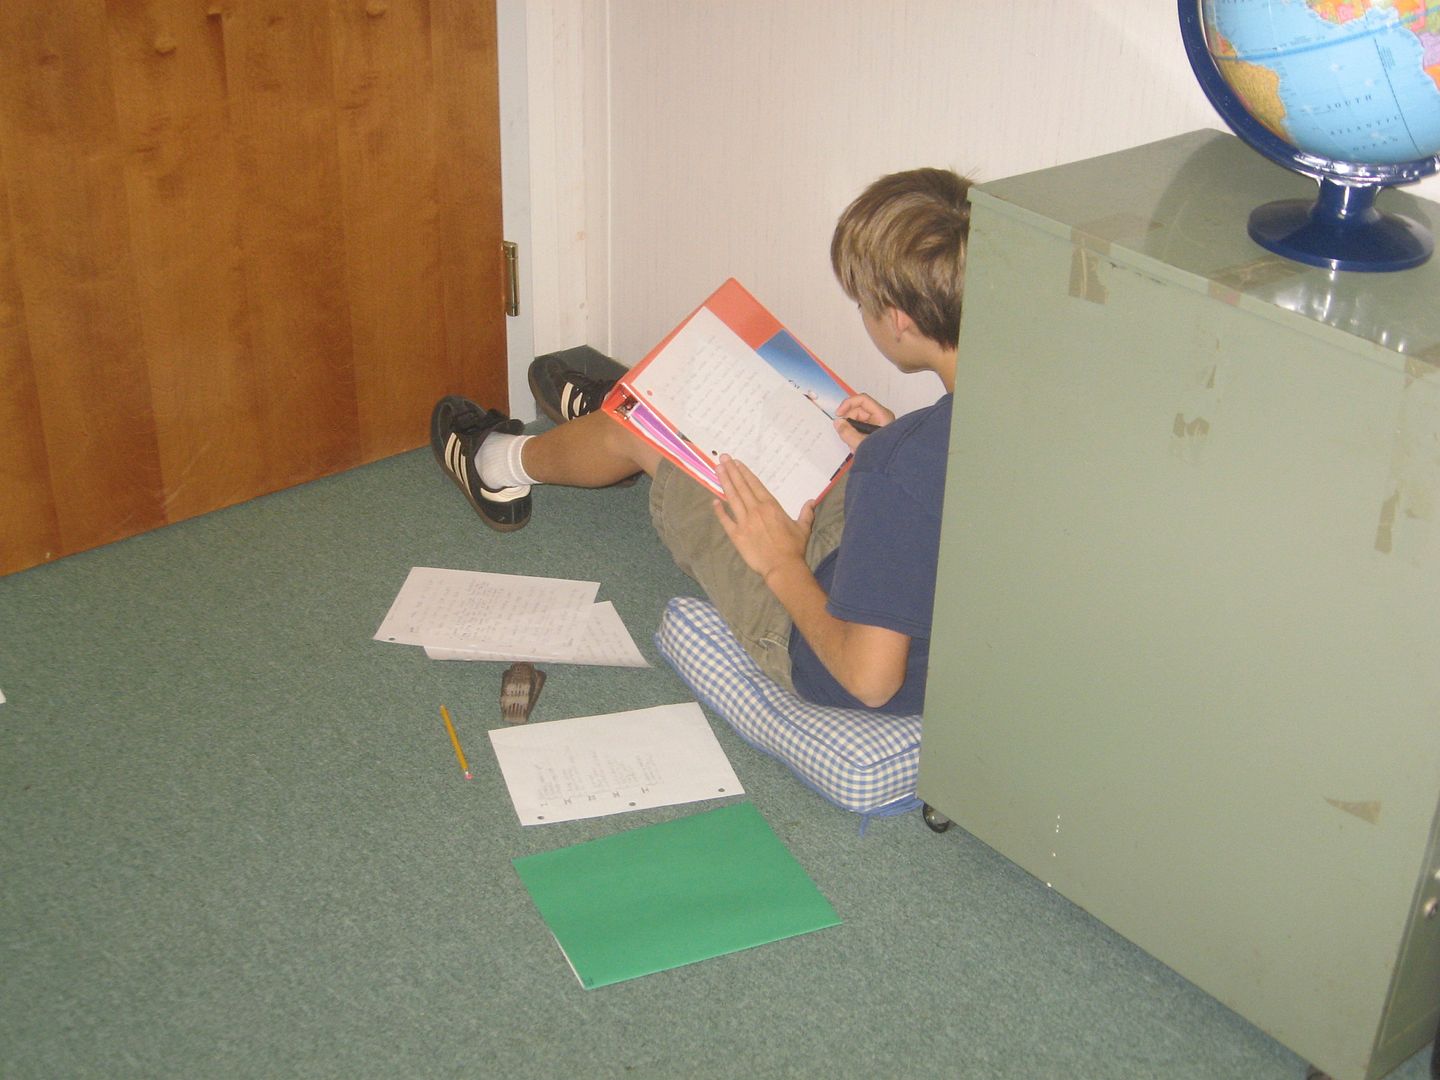
I also remember my first Woodlawn students making liberal use of the cushions I’d bought for their writing workshops. I called them my “floor-sitters” because they’d never sit at a table when they could snag a space on the carpet with a cushion or two.
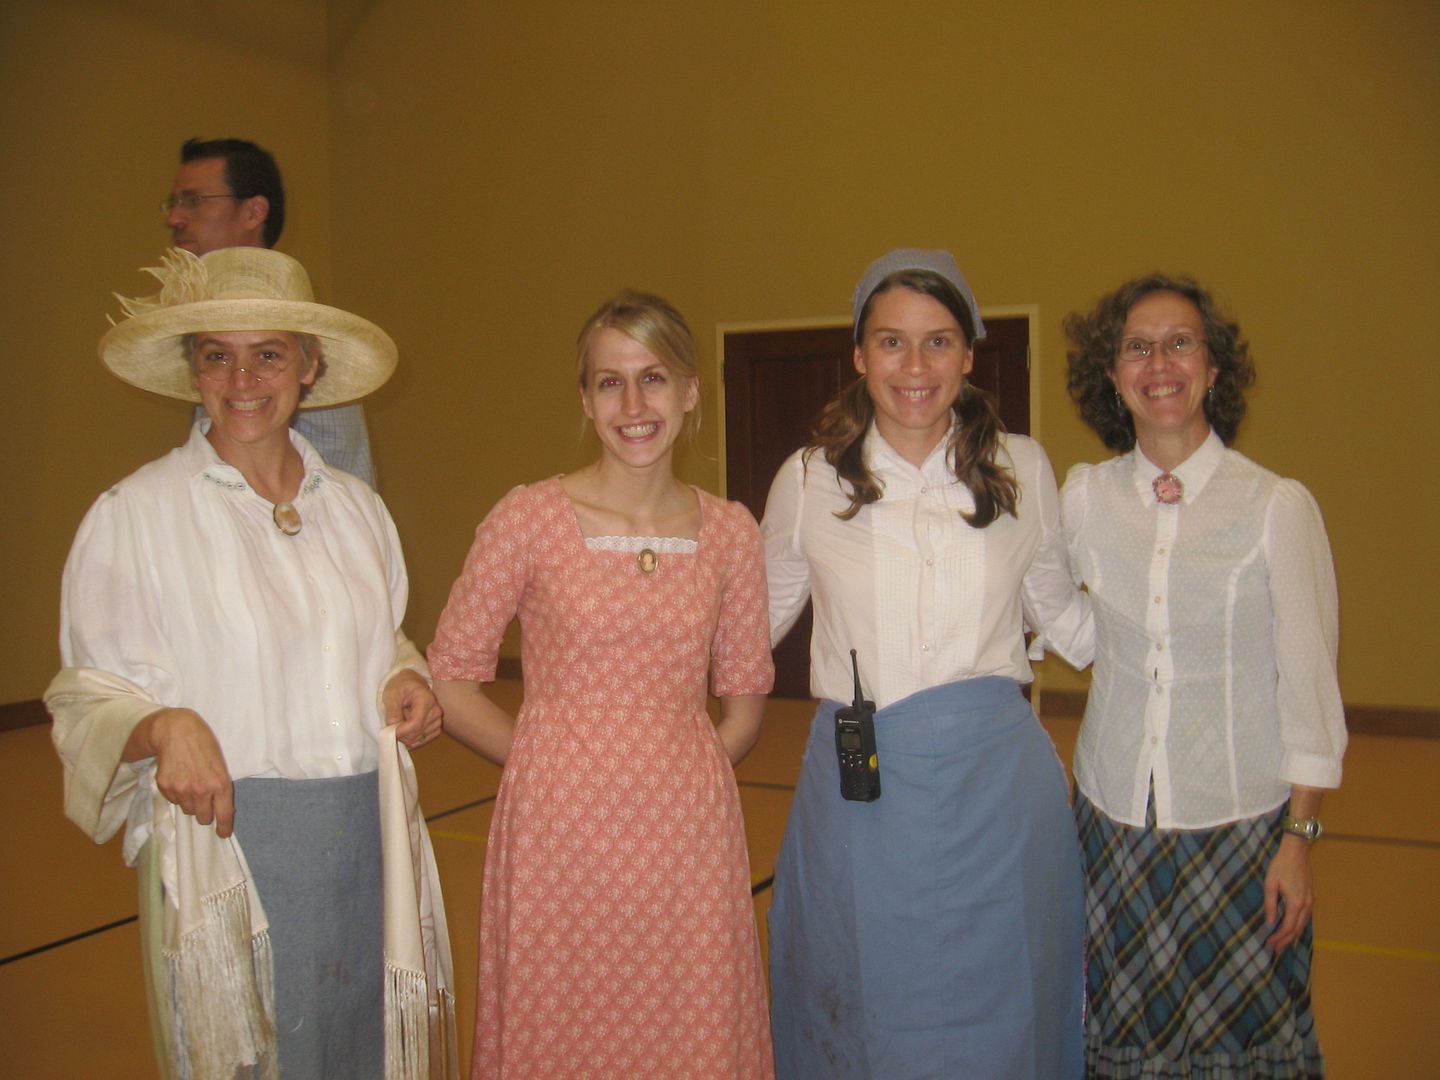
My first taste of Woodlawn Day was also in 2008. We teachers donned costumes and led the students through tours of the old Stinson plantation house, 19th century games, square dancing, gardening, and of course, 19th century popsicles (don’t think too hard about that one).
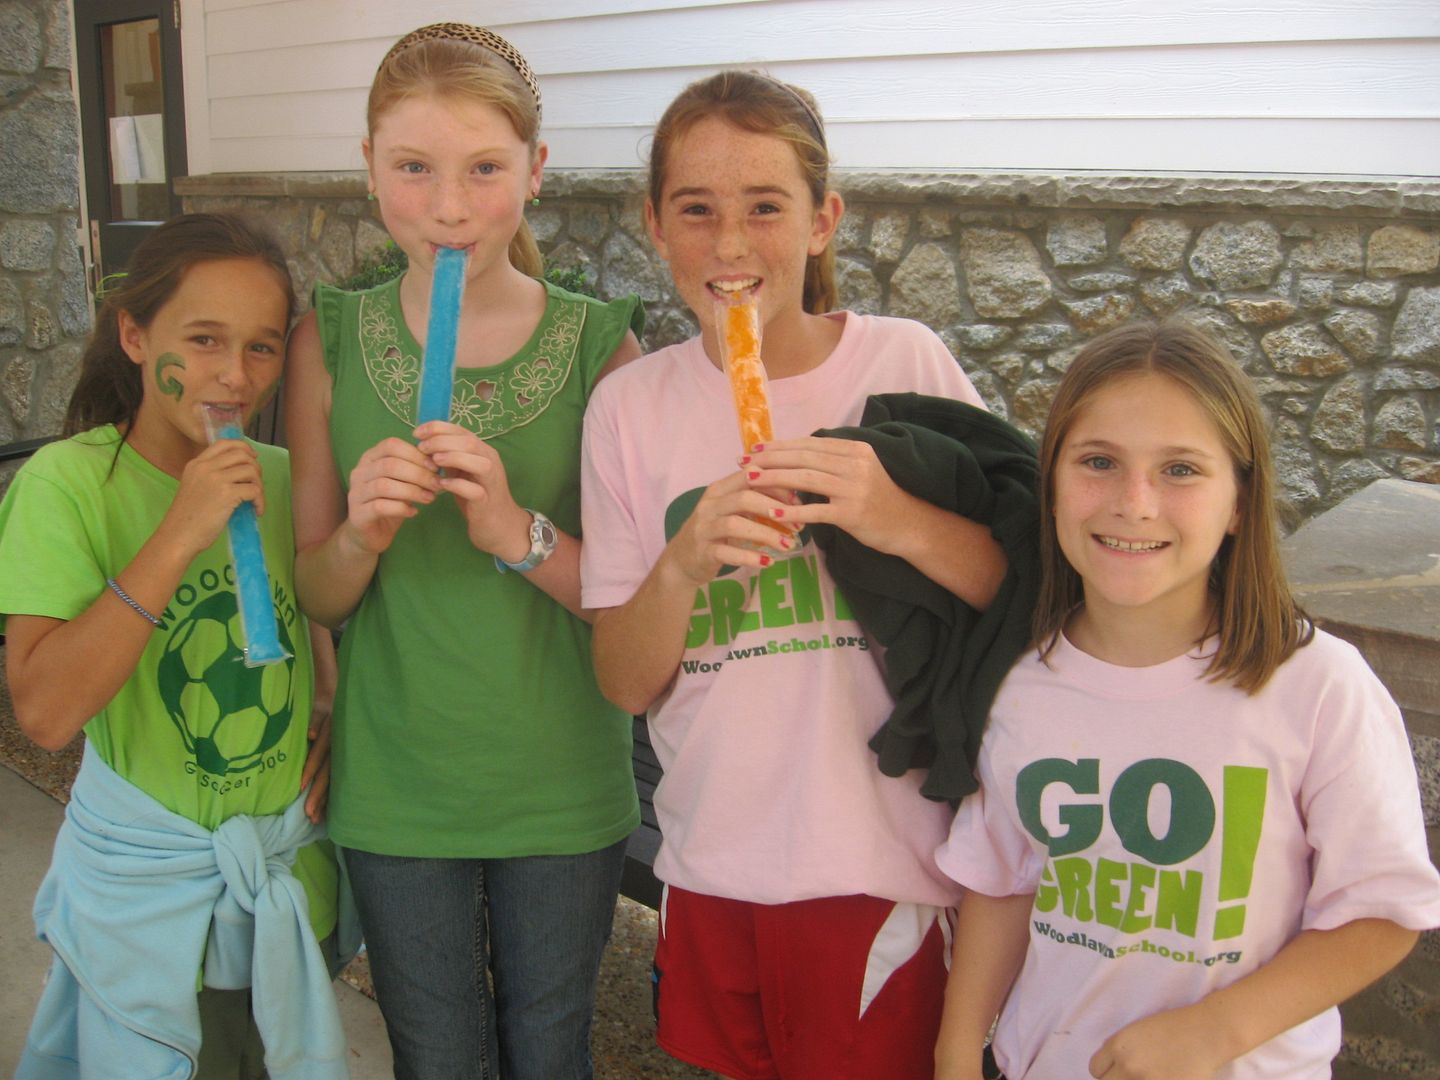
Like our beautiful crane rainbow, all good things must come to an end. That first year did, and I remember the odd, unexpected sadness I felt that June as I realized my time with my students was over. Now, as my time at Woodlawn draws to a close, the sadness isn’t unexpected at all. But it is laced with a lot of sweetness, and a lot of wonderful memories. I hope I gave even half as much to my students and my school as they gave to me.
* * *
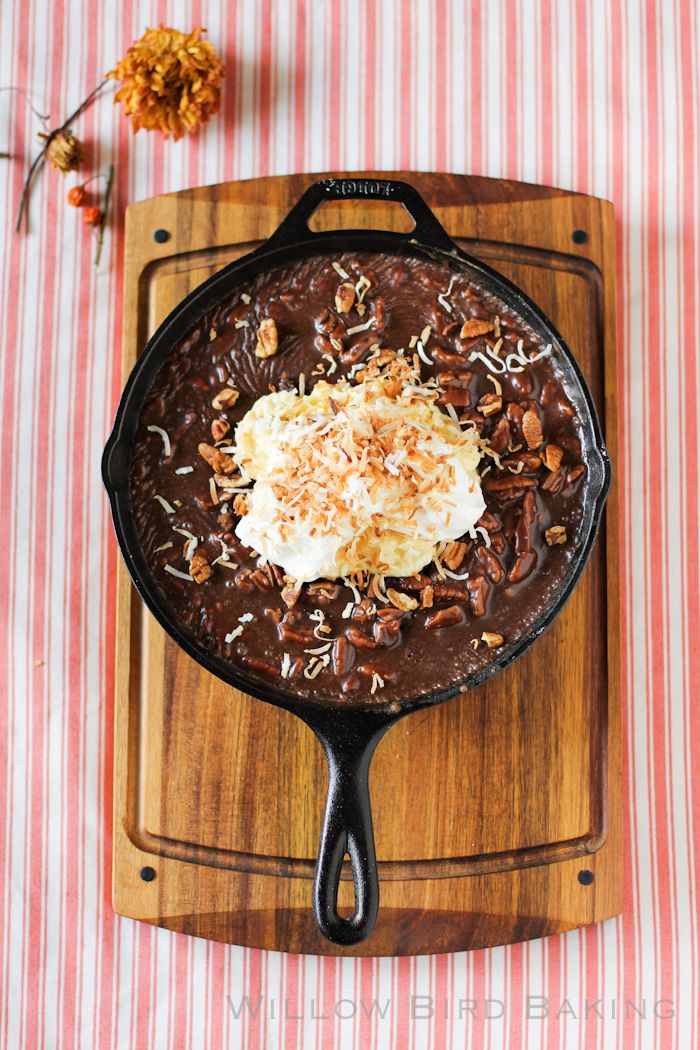
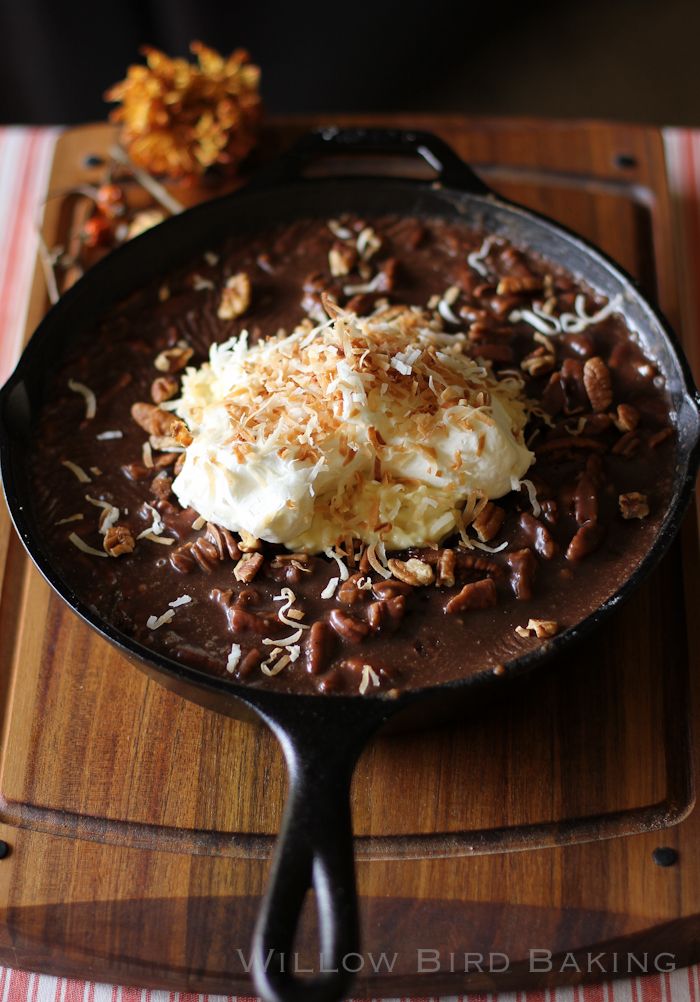
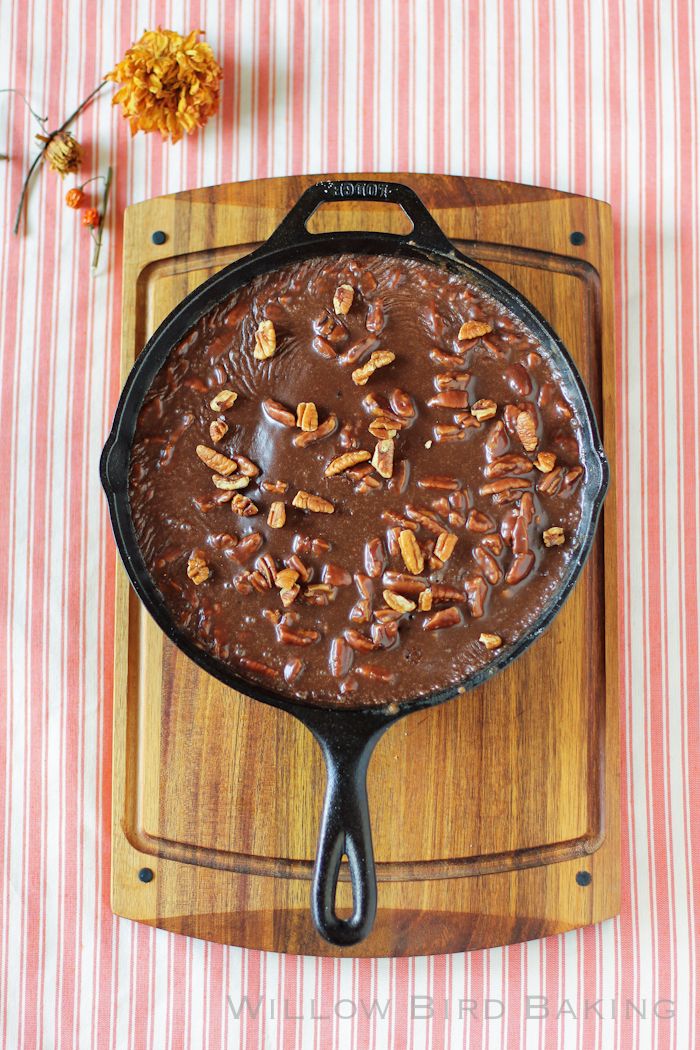
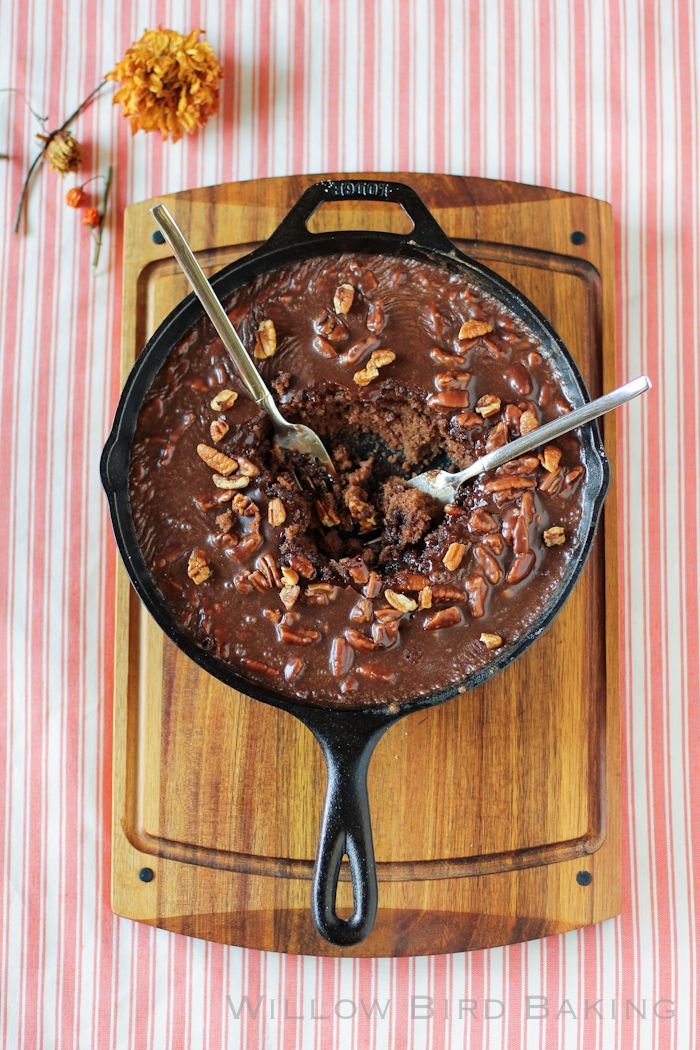
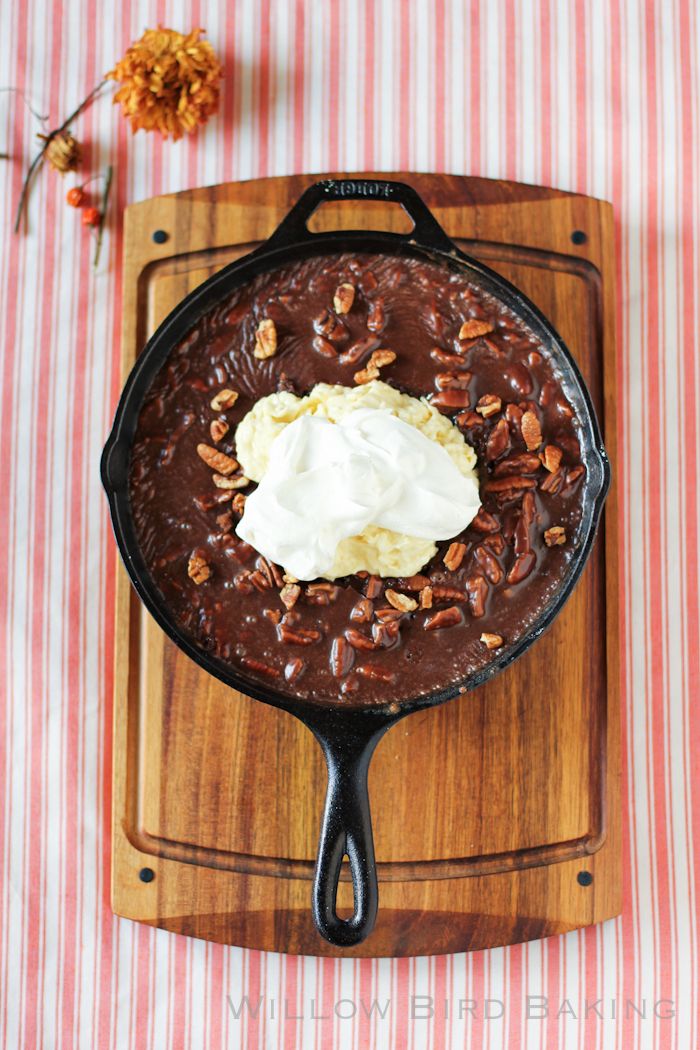
There’ll be more Woodlawn stories to come this summer as I prepare for my move. There’s so much more to tell. In the meantime, here’s some cake! Mike picked out the flavors for this weekend’s dessert and, no surprise, they involved lots of chocolate and coconut. This cake is basically a Texas Sheet Cake scaled down to fit in a skillet. It’s wonderful all by itself, but topping it with a huge mountain of coconut pastry cream and fluffy whipped cream takes it right over the edge. As always, I recommend diving into this dessert straight out of the skillet!

One year ago: Crispy Baked Sweet Potato Fries with Basil Salt and Lemon Garlic Dipping Sauce
Two years ago: Blueberry Cream Cheese Almond Braid
Three years ago: Santa Fe Breakfast Bake
Gooey Chocolate Coconut Cream Skillet Cake
Recipe by: Willow Bird Baking, based on the ubiquitous and absolutely delicious Texas Sheet Cake, with coconut cream from Zoë Bakes
Yield: 4-6 servings
This cake is like you took heaven, put it in a skillet, and added coconut cream. It’s also tremendously fun to eat straight out of the cast iron. What a great treat to pull out for your family after dinner.
Cake Ingredients:
1 cup flour
1/2 teaspoon baking soda
3/4 cup sugar
dash salt
1/4 cup (1/2 stick) butter
1/4 cup vegetable oil
2 tablespoons cocoa powder
1/2 cup water
1/4 cup buttermilk
1 egg
1/2 teaspoon vanilla
Frosting Ingredients:
1/4 cup (1/2 stick) butter
2 tablespoons cocoa
3-4 tablespoons milk (as needed for consistency)
1/2 cup pecans, chopped
2 cups powdered sugar
1/2 teaspoon vanilla
Coconut Cream Filling Ingredients:
1/2 of a 14-ounce can unsweetened coconut milk
3/8 cup sugar
1 teaspoon vanilla extract
pinch kosher salt
2 large egg yolks
1 tablespoon corn starch
1 tablespoon unsalted butter
1/2 cup sweetened coconut flakes
1/4 cup whipping cream
extra whipping cream
toasted coconut (optional)
Directions:
Make coconut cream: Heat the coconut milk, sugar, salt and vanilla in a medium saucepan over medium heat. In a bowl, whisk together the egg yolks and corn starch. Add 1/4 cup of the hot cream slowly to the yolks, whisking as you add. Then pour the yolk mixture into the pot of hot cream and whisk. Continue to whisk with heat on medium-high for 3 more minutes. The mixture will turn thick and bubble. You need to continue to whisk for the full 3 minutes or the pastry cream will separate once it is cool. After the 3 minutes, whisk in the butter. Add the coconut flakes. Pour into a shallow dish to cool.
Cover with plastic wrap pressed right against the pastry cream. This will prevent a thick skin from forming on the surface. Refrigerate for at least an hour or freeze for 30 minutes. Once it is cold, stir the pastry cream to loosen. Whip the 1/4 cup cream to medium peaks. Stir in a third of the whipped cream to the pastry cream to lighten. Fold in the remaining cream until the pastry cream is nice and light. Chill until ready to use.
Make the cake: Preheat the oven to 350 degrees F. In a large bowl, whisk flour, baking soda, sugar, and salt together and set aside.
In a 10-inch cast iron skillet, bring the butter, vegetable oil, cocoa powder, and water to a boil. Remove it from the heat and whisk in the dry ingredients well. Mix in the buttermilk, egg, and vanilla. Bake the skillet cake at 350 degrees F for about 15-20 minutes or until a toothpick comes out with just a few moist crumbs.
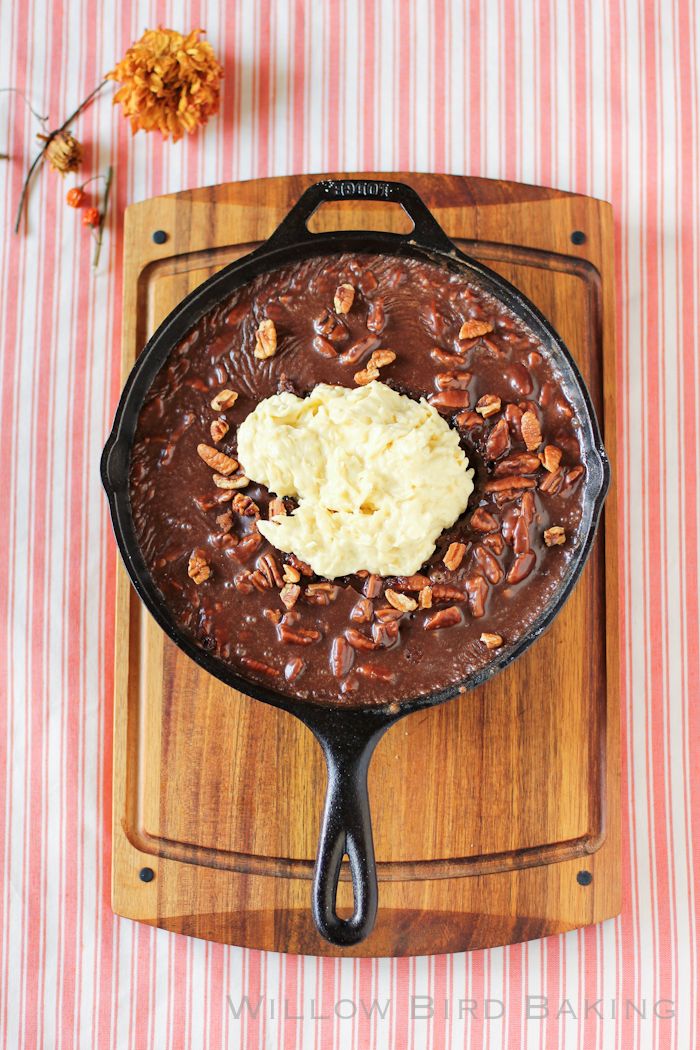
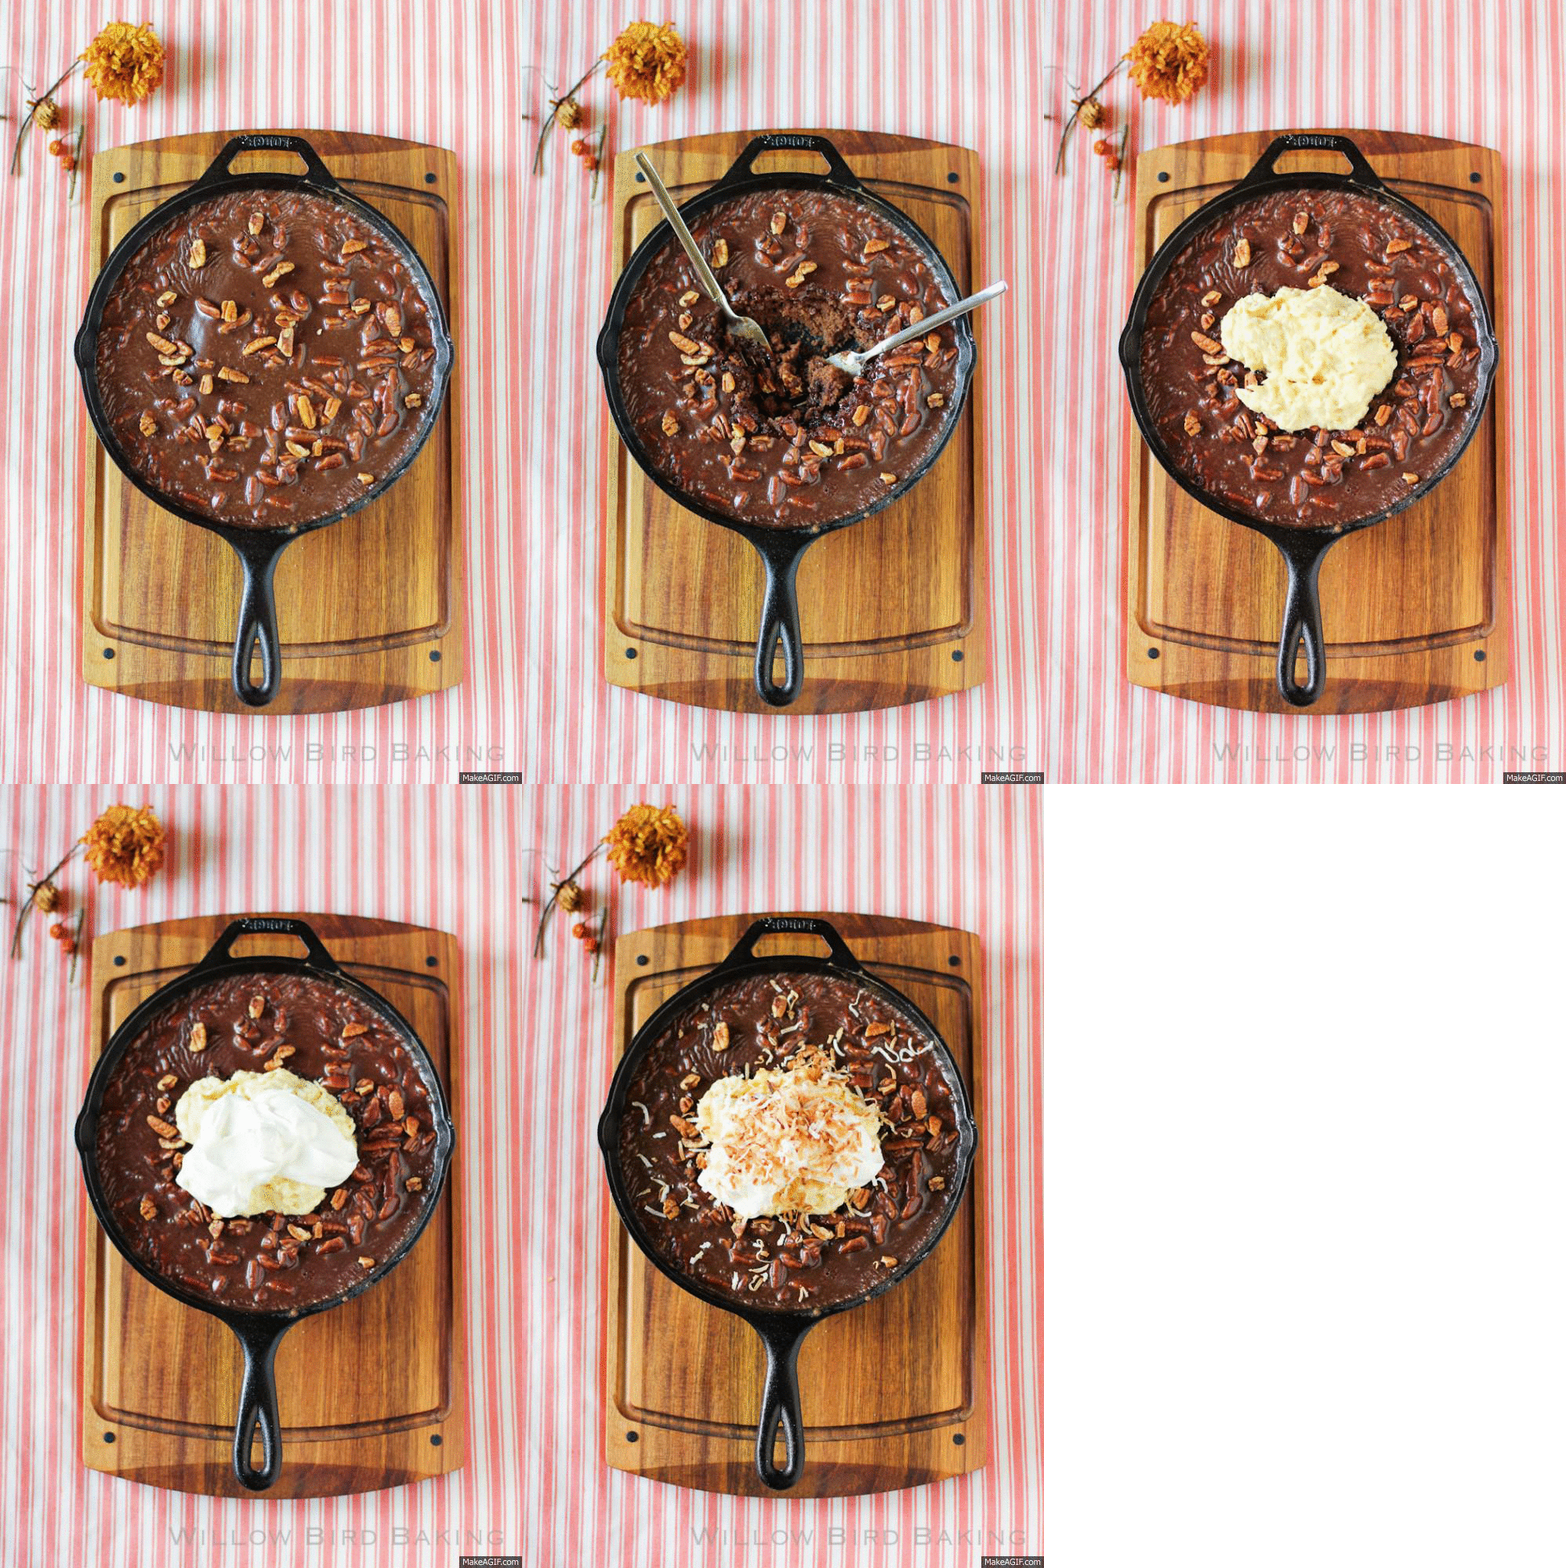
Make the frosting: While the cake starts to cool, bring the butter, cocoa, and milk to a boil in a medium saucepan. Remove them from heat and add the icing sugar, nuts, and vanilla. Stir to combine. Pour over the warm cake, spread with a spatula. Let the cake cool completely. While it cools, whip excess cream to stiff peaks. Toast some coconut on a sheet pan at 350 degrees F, tossing often, for about 5 minutes. Once the cake is cool, scoop out a hollow in the middle of the cake (chef gets to eat the excess cake, of course!) and pour in the coconut pastry cream. Top with whipped cream and toasted coconut. Serve immediately (as you know, I like to eat it straight from the skillet!)
P.S. You know I had to create an animated gif:
Biscoff Spread Gooey Butter Cake
I am so not a therapist. I tell my students’ parents this all the time when discussing their kids’ motivation and social issues, to be sure they take any surmising with a grain (bag) of salt. I am just so not qualified to give psychological advice —
except insofar as I’ve read a lot, felt a lot, analyzed a lot, and pondered a lot throughout the years. One thing I’m thinking about a lot lately is the lost art of validation.
Validation is, to put it simply, affirming that someone else is competent and that their ideas make sense. Validation is not agreement, though it can accompany agreement. I like to think of it as communicating empathy: “I may or may not agree. I may or may not have been in your position before. Either way, I get what you’re saying and can understand why you’re saying it.”
Validation is nice, sure. But it’s important for a reason beyond being “nice”: it’s what makes real, effective, productive discourse possible.
Take the following two examples. In both, Jane and John are arguing about whether the toilet paper should be positioned with the sheets rolling over or under (quite the heated topic, if you guys are any indication.)
WITH VALIDATION
Jane: Can you please put the toilet paper on so that it rolls over?
John: I would rather place the sheets under, because the cat will unroll the roll otherwise.
Jane: Oh, I see what you mean. I understand why you care about that, but the cat has never done it. Can we try it rolling over and see how he does, because I really like it that way?
John: Sure. If he unrolls it, can we go back to “under”?
Jane: That sounds good.
WITHOUT VALIDATION
Jane: Can you please put the toilet paper on so that it rolls over?
John: Nope, the toilet paper should roll under.
Jane: No it shouldn’t! You don’t know what you’re talking about and you barely ever replace the roll anyway. Everyone I’ve ever talked to agrees with me.
John: Whoa, I’ve actually read about this extensively online and I know I’m right. Your opinion isn’t based on anything!
Jane: You’re being so ridiculous and stubborn! Why can’t you do this one little thing right? Why can’t you support me?
John: Because you’re crazy! This is just like that stupid argument about the dishwasher, and you were wrong then, too!
Jane: I hate you.
John: I hate you more.
*divorce*
Okay, it doesn’t necessarily escalate quite that quickly, but you get my meaning.
Invalidation (through name calling, calling into question someone’s credibility/authority/sanity, pulling unrelated issues into the argument, and simply refusing to listen/care for someone else’s point of view) produces frustration. Instead of a discussion where people are on one team working towards some sort of effective outcome, you get two antagonistic teams battling to the death — and any goals are left in the dust on the battlefield. No one’s mind changes, but lots of feelings get hurt. I see this all the time in arguments between friends and especially in arguments online.
The act of validating someone doesn’t give anything away. You don’t have to compromise your ideals in order to validate someone else’s. There are also different levels of validation (I love this article!), and you may not be able to get to the highest level if you really disagree with someone, but even the lower levels are supportive and productive.
I know that a discussion of validation isn’t necessarily the most relevant to dessert, but it’s been in my thoughts for quite awhile. I sort of what to strum a guitar à la Joan Baez and sing, “What the world needs now, is validation, sweet validation.” No? Okay.
But all I’m trying to say is that I think this sort of radical empathy, given just as generously as we can give it, takes nothing from us but adds a lot to the world. We need to acknowledge each other’s points of view as valid* in order to have real discussions and reach real conclusions.

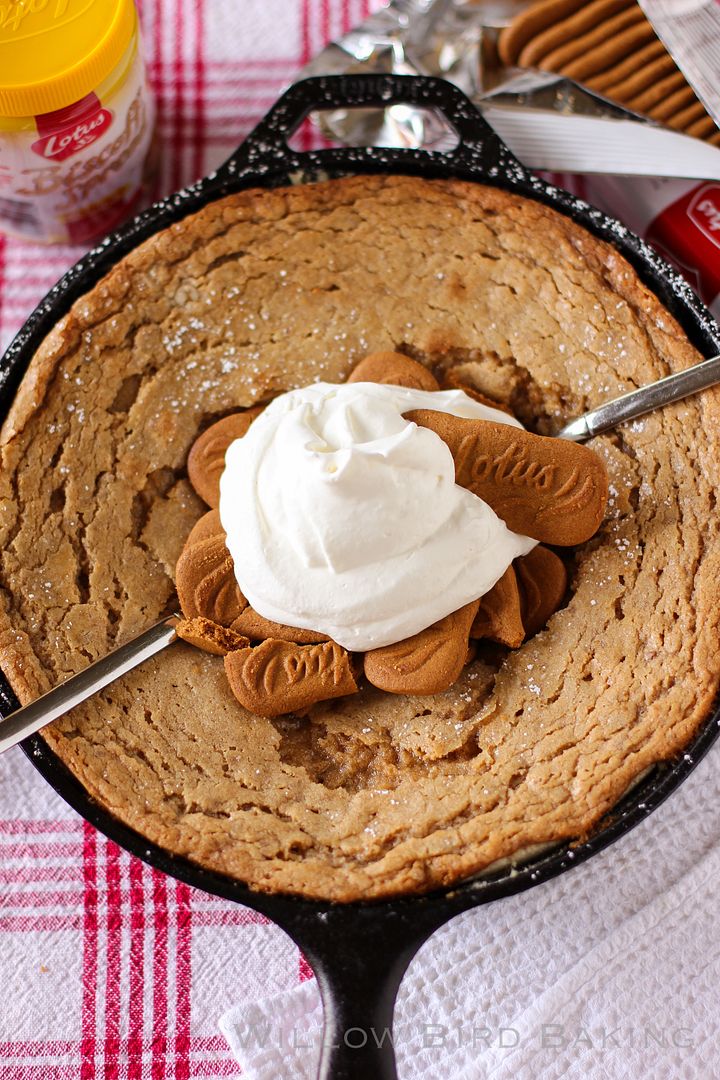
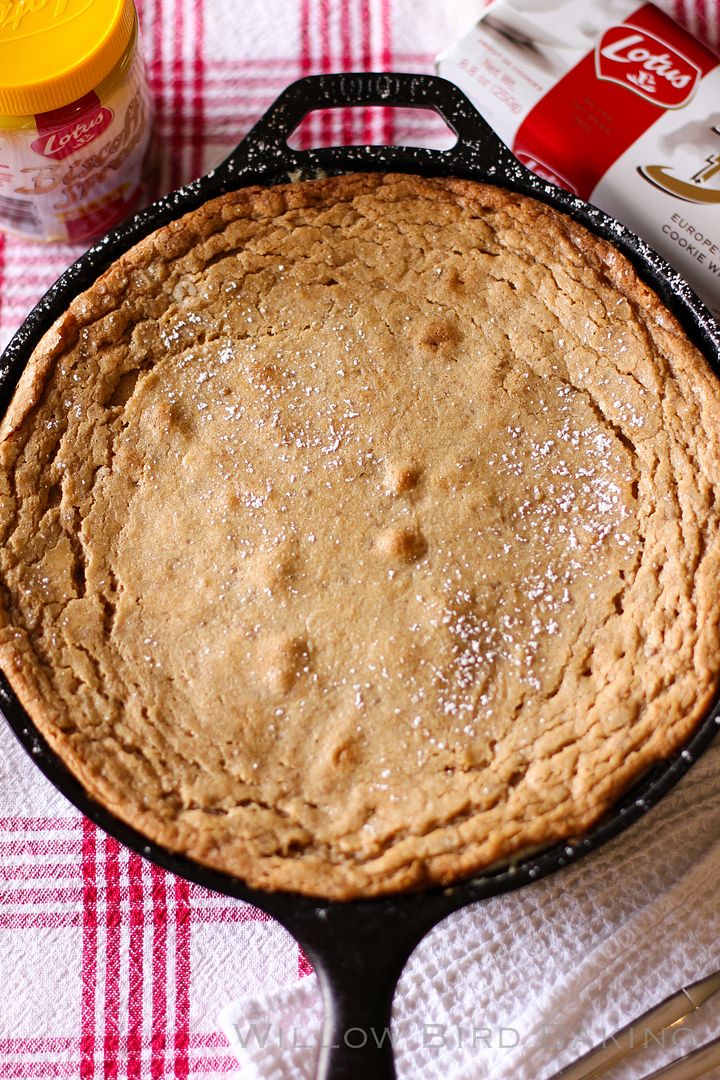
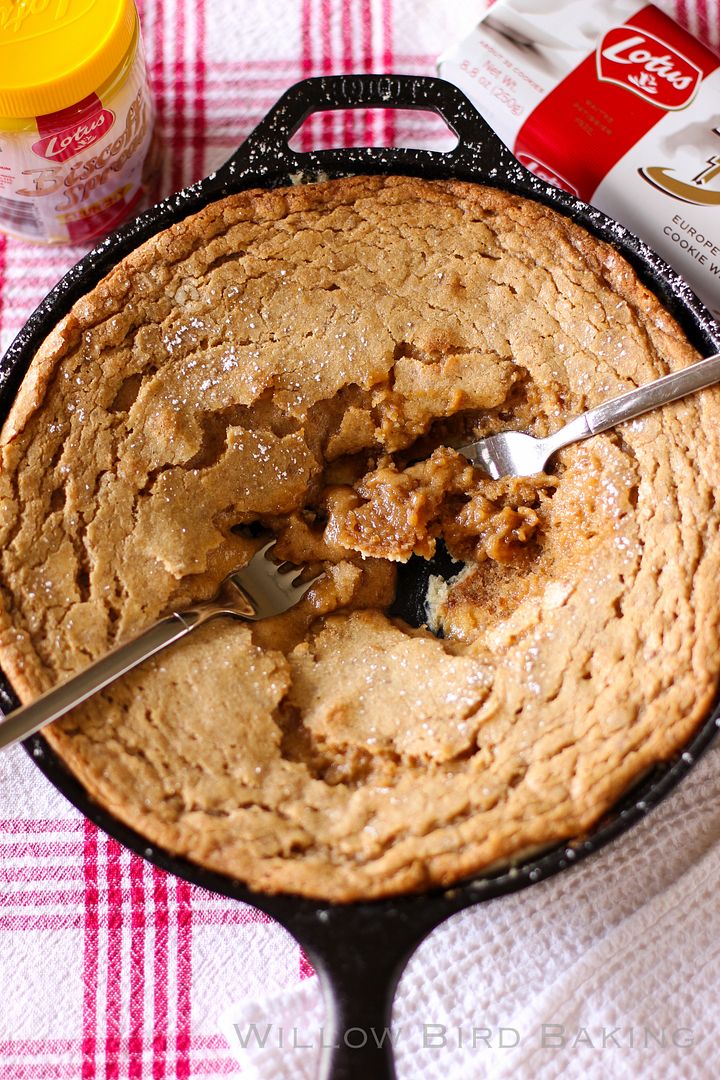
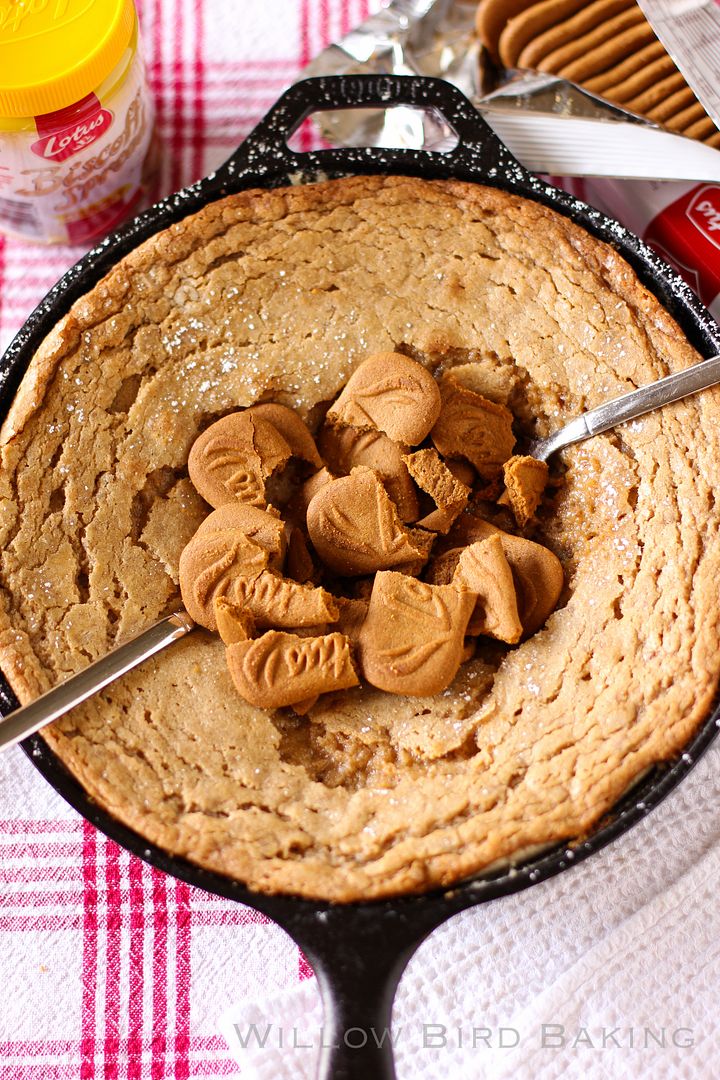
Also, Gooey Butter Cake. There’s no good segue into this, but I made you a Gooey Butter Cake with Biscoff Spread and topped it with Biscoff Cookies and freshly whipped cream. It is pure insanity and you should eat it immediately.
And then go validate someone, of course.
*I personally, however, do believe there’s a limit. For instance, I will not validate discrimination.
One year ago: Blueberry Scones with Maple Glaze
Two years ago: (Freshly Picked!) Strawberry Cream Pie
Three years ago: Eggs in a French Toast Basket
Biscoff Spread Gooey Butter Cake
Recipe by: Willow Bird Baking.
Yield: 6-8 servings
Gooey butter cake is already completely insane, buttery, and delicious, but when you add Biscoff Cookie Spread, things get serious. I thought up this combo when working on my beloved Gooey Butter Cake theme and it is a real crowd-pleaser!
Crust Ingredients:
1 cup cake flour
3 tablespoons granulated sugar
1/3 cup butter, cold
Filling Ingredients:
1 1/4 cups granulated sugar
3/4 cup (1 1/2 sticks) butter, softened
1 cup crunchy Biscoff Spread (or other cookie butter)
1 egg
1 cup all-purpose flour
2/3 cup evaporated milk
1/4 cup light corn syrup
1 teaspoon vanilla
icing sugar
Toppings Ingredients:
more cookie butter!
Biscoff cookies
1 cup heavy whipping cream
Directions:
NOTE: If you don’t have a skillet, I believe you can bake this in a greased 9-inch square baking dish (I’d use a glass one if you have it, and check it early and often. Remove when there’s some jiggle left.) Let us know how it goes if you try it this way for all the other skilletless people!
Make the crust: Preheat oven to 350 degrees. Whisk together cake flour and sugar in a medium bowl. Cut in the butter with a pastry cutter or two knives (I use my food processor) until the mixture resembles fine crumbs and starts to cling together. Press the mixture into the bottom (this step is a lot harder than it sounds, but be patient and use the back of a spoon to help spread/press the mixture down) and up the sides of a 10-inch cast iron skillet.
Make the filling: Cream together the butter and sugar until fluffy and pale yellow (about 2-3 minutes). Mix in the cookie butter. Mix in the egg until just combined. Alternate adding the flour and evaporated milk, mixing after each addition. Mix in the corn syrup and vanilla. Pour the filling into the crust and sprinkle the top with icing sugar.
Bake and assemble the cake: Bake for 45-50 minutes or until cake is nearly set (mine was probably ready around 48 minutes). Some jiggle is fine — do not overcook! It’ll finish setting up as it cools. Let it cool in pan for 2 hours. No really. If you don’t, it’ll just be pudding-y. In the meantime, beat heavy cream to stiff peaks. Top your cake with cookie butter, Biscoff cookies, and whipped cream. Eaaat it.
Flan Tres Leches Cake
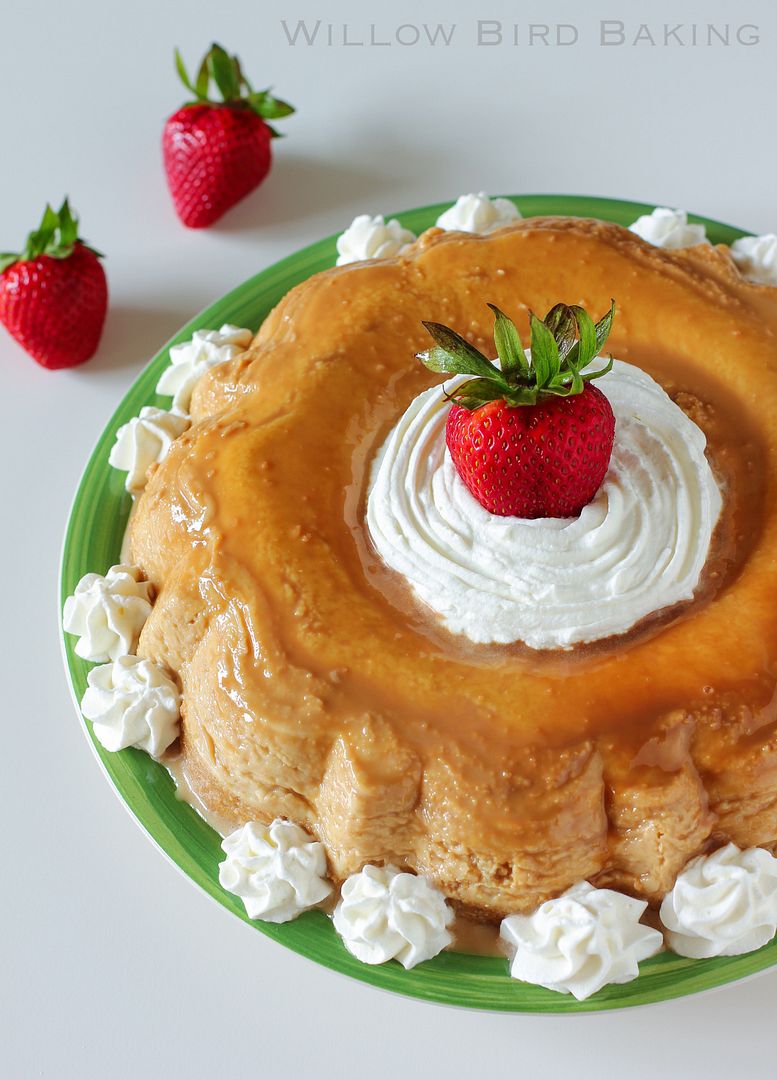
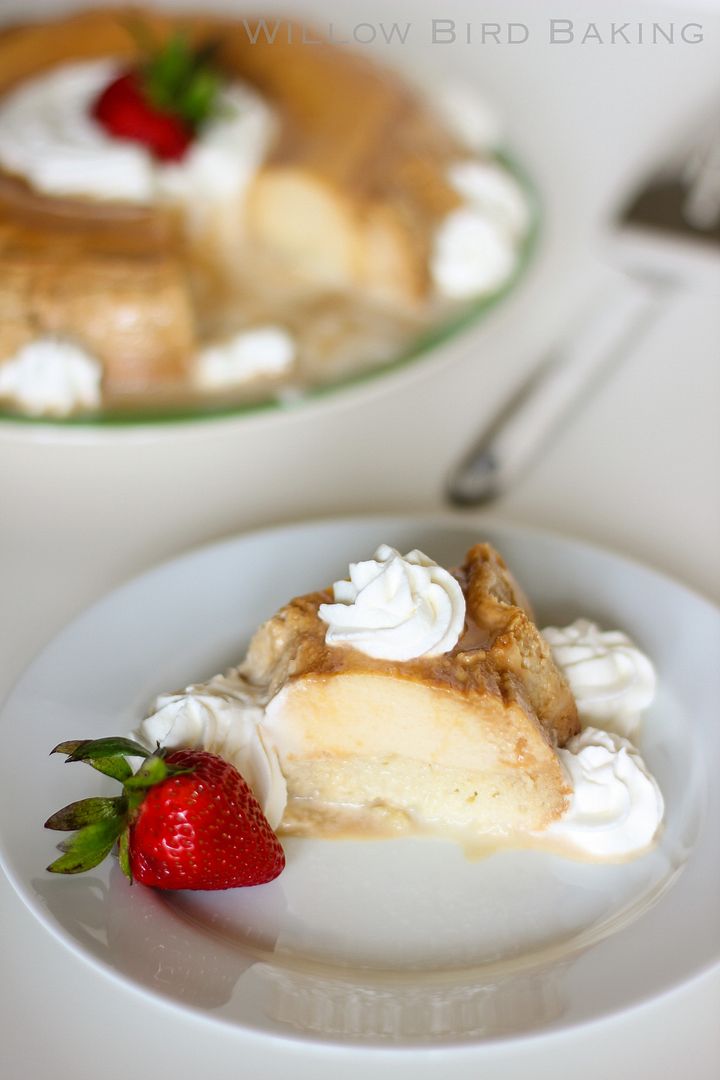
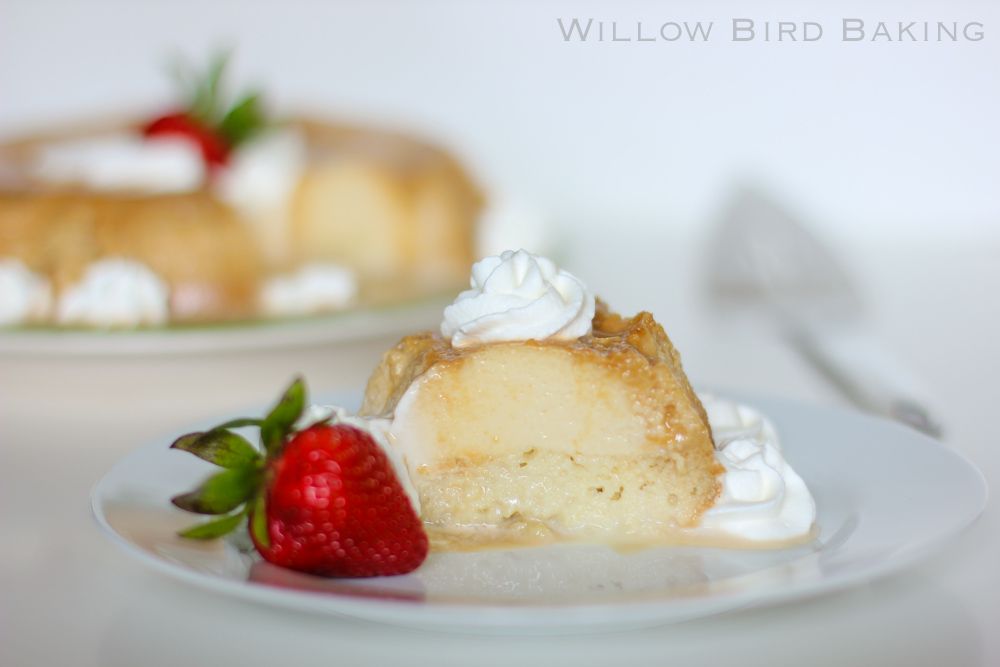
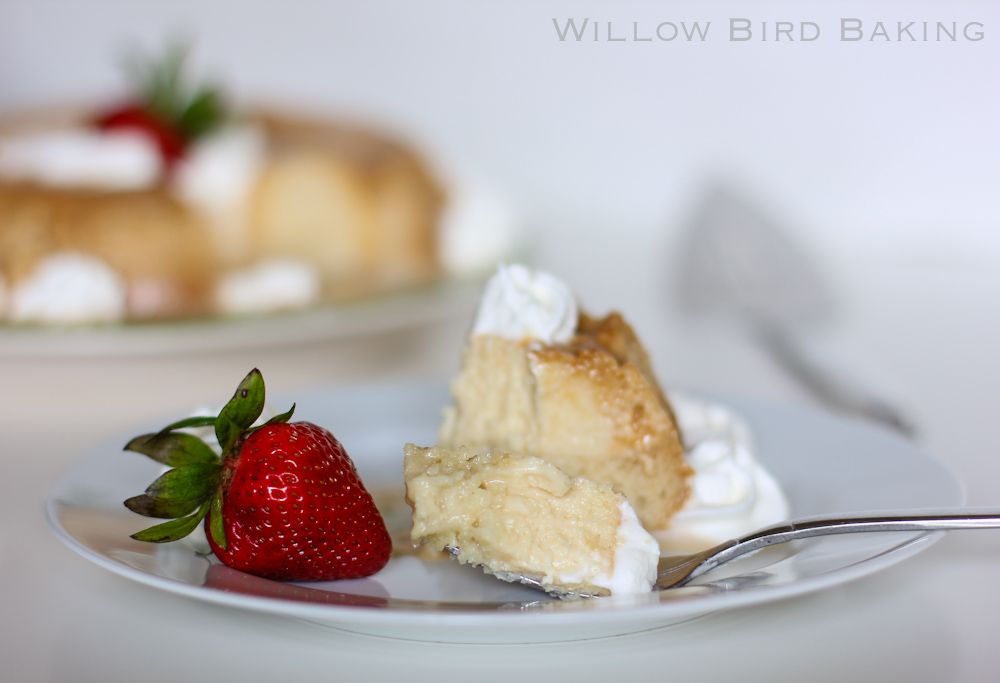
Before I say anything else, I have to make sure you understand that this post contains a recipe for a Flan Tres Leches Cake. Like, Flan and Tres Leches Cake in the same dessert (which turned out even more delicious than it sounds, if you can believe it.) Did you get that? Just checking.
Other than that, this post is about Buckle and my $600 leather couch, which was a hand-me-down from my sister because you guys know I’m a teacher, right? My furniture generally either comes from generous family members or Goodwill. Ikea is my splurge.
So owning a $600 leather couch was decidedly awesome.
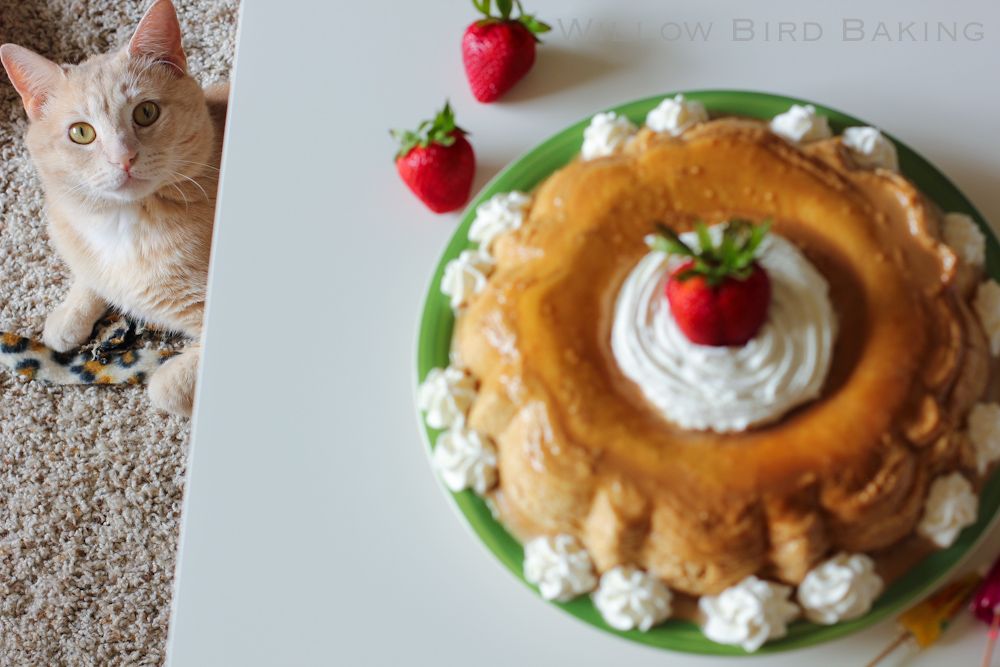
“I was told there’d be cake.”
Buckle is also awesome. He’s a good cat. He’s sweet and fun. He looks and acts just like Milton from Office Space. I really couldn’t ask for anything more. Except, maybe, for him not to ruin my $600 leather couch.
Upon letting him out of his little cardboard carrier when we got home from the Humane Society, as a matter of fact, that was the one thing I was very clear to him about (well, that and not shredding the poodle): Please do not ruin my couch.
The first time I left Buckle alone, I was terrified he would decide my couch was a scratching post. But he met me at the door when I arrived home, purring and cuddly, and I didn’t find a single scratch. It was a kitty cat miracle.
As I left him alone more often and continued coming home to intact furniture, I think I got a little . . . overconfident.
Finally the weekend came where I needed to leave Buckle alone to visit Mike in Raleigh. I hired a petsitter to check in on him (Buckle, not Mike, although perhaps I should consider that), and everything seemed to go fine. I found a cheery note from her when I arrived home. But something just smelled a little off. I figured it was his litter box. Except that when I went to check, the door to his litter box closet was closed. So that couldn’t be it . . .
Wait. Closed.
The door to his litter box closet was closed.
Bless Buckle’s sweet kitty heart (which those of you who are Southern will be able to translate appropriately), he had apparently rubbed against his litter box closet door and closed it. With nowhere to potty, he had made the very best choice he could. You guessed it: to use the couch.
He couldn’t have used the carpet or, even better, the linoleum kitchen floor. It had to be the $600 leather couch.
If you’ve ever tried to deal with the uniquely pungent problem of a cat accident, you won’t be surprised that after a month or so of cleaning the cushions with every method known to humanity, the $600 leather couch ended up by the dumpster. All’s well that ends well, I guess: I received my tax refund, splurged on an Ikea couch and coffee table, and wedged a billion washcloths in Buckle’s litter box closet door so that it will never close again.
Buckle is helping me get used to the new furniture by using it as a jungle gym. One of my students actually asked me after the incident, “Are you going to take him back to the Humane Society?” But I’m happy to say that Buckle’s a part of my family now, flaws and all.
One year ago: Gooey Butter Strawberry Shortcake
Two years ago: Mini Doughnuts for Your Coffee Cup (a creative use for yeast dough scraps!)
Three years ago: Pasta Carbonara
Flan Tres Leches Cake
Recipe by: Willow Bird Baking, inspired by and/or adapted from Bake Love Give and All Recipes
Yield: 10-12 servings
If you love flan and/or tres leches cake, you’re in for a treat. This cake has an incredible flavor and an even more fantastic texture. It’s also surprisingly easy to whip up. It’s perfect for Cinco de Mayo, but I hope you’ll make it all year long.
Flan Ingredients:
1 (13.4-ounce) can can dulce de leche (or make your own)
3 eggs
1 (14-ounce) can sweetened condensed milk
1 (12-ounce) can evaporated milk
1 teaspoon vanilla extract
Cake Ingredients:
3/4 cups all-purpose flour
1/2 teaspoon baking powder
1/4 teaspoon salt
1/4 cup unsalted butter, room temperature
1/2 cup white sugar
2 1/2 eggs (To get 1/2 egg, break one egg into a bowl and lightly beat it; discard half)
1/4 teaspoon vanilla extract
Tres Leches Ingredients:
1/2 cup whole milk
1/4 (14-ounce) can sweetened condensed milk
1/4 (12-ounce) can evaporated milk
2 cups heavy whipping cream
3 tablespoons powdered sugar
1/2 teaspoon vanilla extract
Directions:
Preheat the oven to 325 degrees F and spray a 10-inch bundt cake pan really well with cooking spray. Pour the dulce de leche evenly over the bottom of the pan and set aside.
Make the flan batter: In a large bowl, mix together the 3 eggs, 1 can sweetened condensed milk, 1 can evaporated milk, and vanilla extract until well combined. Pour this mixture evenly over the dulce de leche layer.
Make the cake batter: In a large bowl, whisk together the flour, baking powder, and salt. In a separate bowl (if you used a spatula to scrape all your flan batter out of its bowl, just use that one again), cream together the butter and sugar until pale yellow and fluffy (about 2-3 minutes). Add in the 2 1/2 eggs and 1/4 teaspoon vanilla extract and mix well. Add the dry ingredients slowly, mixing after each addition. Pour batter over the flan layer in the bundt cake pan (it’ll sink in a bit — no worries). Bake for 40-45 minutes or until tester inserted into just the cake comes out with just a few moist crumbs. Pierce the cake several times with a skewer or fork. Let the cake cool.
Drench the cake: Whisk together 1/2 cup whole milk, 1/4 can condensed milk, and 1/4 can evaporated milk. Pour this mixture over the top of the cooled cake. Cover and chill the cake overnight (or at least a couple of hours, I’d say — you want the mixture all to sink into the cake) before loosening with a thin knife or spatula all around the sides. Carefully invert onto a serving plate (caramel and milks will ooze — it’s a saucy dish — so one that has a shallow lip or even a slightly bowl-like platter is ideal). Whip up the heavy whipping cream, powdered sugar, and vanilla extract to stiff peaks and dollop or pipe it all around the cake. Serve chilled with strawberries.
The Ultimate Moist, Fluffy, Ridiculous Coconut Cake
I am very new to indoor cat ownership. Buckle has been with me for a little over a month now, and I’m only just now starting to “get” cats. As much as you can ever “get” cats, I should say. He’s quite the enigma.
Here are some things I’ve realized. And that you should have warned me about, you smug cat owners.

1. Cats are fluffy.
Yes, they are cute-fluffy, but they are also fur-tumbleweeds-on-all-surfaces, must-vacuum-all-the-time, why-is-there-cat-hair-in-my-mouth fluffy. I don’t think I’ve ever used up an entire lint roller in my life, but since Buckle got here, I’ve gone through two. I have to dust, vacuum, and wash all throws/rugs every weekend without fail or the creep of the cat dander will eventually cover me like an evil, carnivorous fur coat.
He also hates his furminator and tries to attack it. Good thing he loves the prickly hairbrush.
2. Cats are busybodies.
If you have cabinets, they need to know what’s in those cabinets. They don’t want a cursory glance. They want to get in those cabinets and roll around until they have fully explored the texture of the cabinet contents.
If you have some dinner, they need to smell that dinner. And paw at that dinner. And if at all possible (for instance, if you have gone to retrieve a forgotten napkin or fork), taste that dinner.
If they hear a noise, see you pick something up, detect a motion in their peripheral vision, or just have a weird hunch, immediate and thorough investigation is essential.
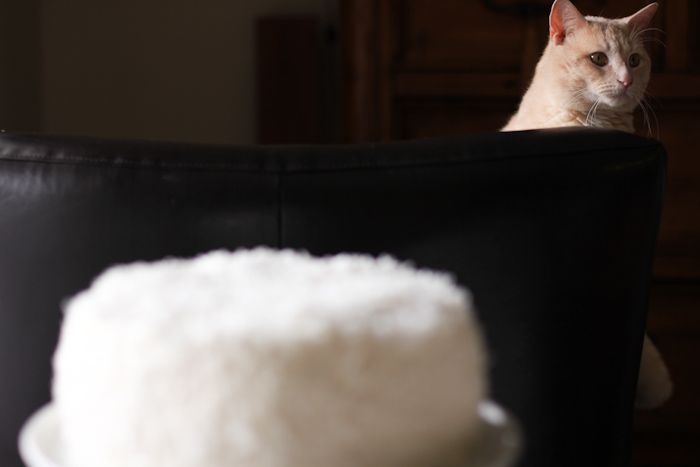
What’s this? Cake? What’s cake? I’m going to need to investigate that…
3. Cats are terrifying.
Every now and then Buckle will go bat-you-know-what-crazy for no apparent reason, dive through the house, tackle an utterly-terrified Byrd, jump on three or four separate pieces of furniture, knock something over, and then hide under the buffet.
During this time, I close my eyes tightly and hope nothing expensive is in his path.
4. Cats sleep a lot. In weird places.
I emailed my friend Jamie shortly after Buckle came home just to make sure he wasn’t sick: “Are cats supposed to sleep, like, 20 hours a day?” Apparently, yes.
Buckle’s favorite spot to sleep is on my bright orange tray, using The Wednesday Chef’s amazing book, My Berlin Kitchen, as a pillow. He’s got good taste in literature, I’ll admit, but there are fluffy pillows and blankets all over the room. And he chooses to sleep squished into a too-small tray with the corner of a book digging into his side. I don’t get it.

5. Cats are worth it.
Worth the fur, worth the terror, worth the furniture cleaning (We had an incident. Don’t get me started.) I’m already forgetting what it was like without Buckle here at home with us. As I punctuated that last sentence, he just stretched out and curled into an even more absurd position in his little book tray, as if to underscore my point. He’s a big sweet baby, and I’m glad he’s mine.
* * *

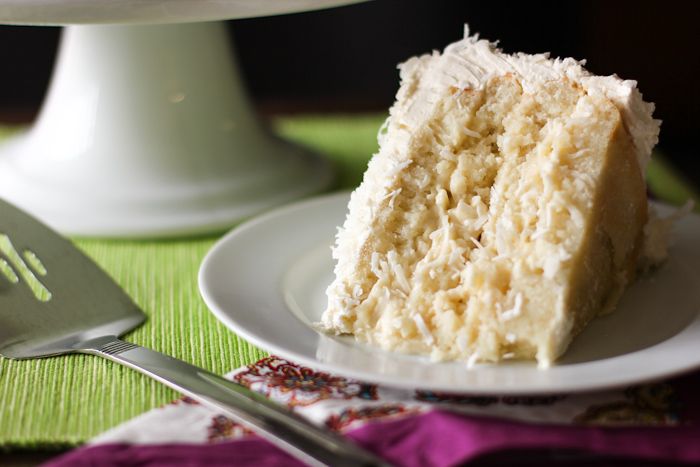
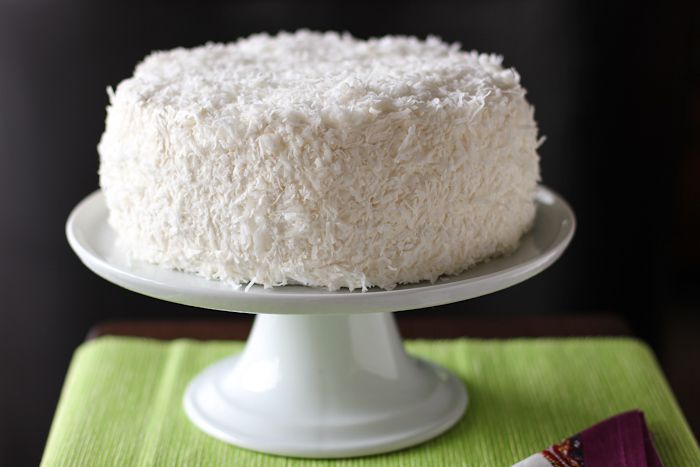
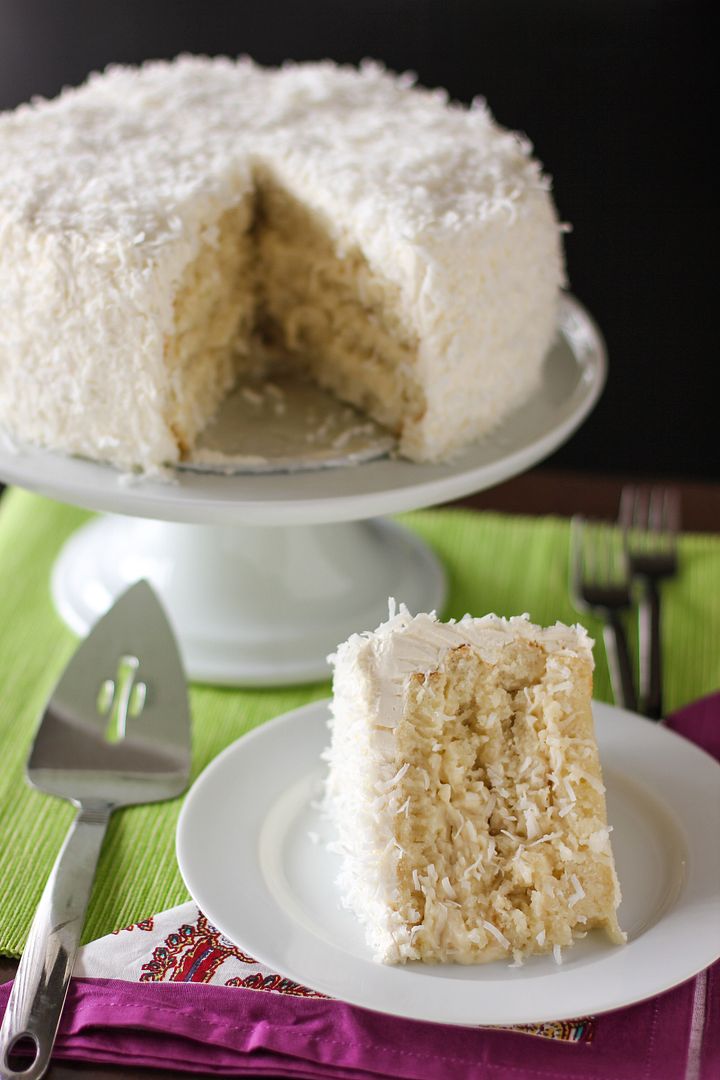
Buckle’s already given his furry “thumbs up” to this cake — he tried his best to reach it during the photo shoot. I love all coconut cakes, and have tried this one and this one. Both were amazing in their own ways, but I knew it was time to Frankenstein together the ultimate coconut cake. And this is it.
This cake combines the perfect white cake from The Way the Cookie Crumbles‘s careful experiments, an insane coconut pastry cream filling from Zoë Bakes, a thick coconut syrup drizzled onto each layer to keep it moist, and a buttery coconut French meringue buttercream to top it all off. It’s a time consuming recipe, but if you’re as crazy about coconut as I am, it’s worth it.
My sweet friend Mara and I were both gunning to make this ultimate treat, so we teamed up to present it to you two different ways! Go see her version of this masterpiece at What’s For Dinner? I love her version so much — not only is it an awesome coconut cake, but it tells a story!

One year ago: Savory Sweet Potato & Chorizo “Cinnamon Rolls”
Two years ago: April Fool’s Day Cupfakes
Three years ago: Lemon Blueberry Cheesecake Squares with Shortbread Crust
- 2¼ cups cake flour (9 ounces)
- 1/2 cup + 2 tablespoons whole milk, at room temperature
- 1/2 cup coconut milk
- 6 large egg whites (¾ cup), at room temperature
- 1 teaspoon coconut extract
- 1 teaspoon almond extract
- 1 teaspoon vanilla extract (or 1 inch vanilla bean seeds)
- 1½ cups + 2 tablespoons granulated sugar (11.35 ounces)
- 4 teaspoons baking powder
- 1 teaspoon table salt
- 12 tablespoons unsalted butter (1½ sticks), softened but still cool
- 1 can (14 fluid ounces) unsweetened coconut milk
- 3/4 cup sugar
- 1 tablespoon vanilla extract
- pinch kosher salt
- 3 large egg yolks
- 2 tablespoons corn starch
- 2 tablespoons unsalted butter
- 1 cup sweetened coconut flakes
- 1/2 cup whipping cream
- 1 cup sugar
- 1/4 cup water
- 1/4 cup coconut water
- 1 cup sugar
- 4 large egg whites , at room temperature
- 24 tablespoons (3 sticks) unsalted butter, at room temperature
- 2 teaspoon vanilla extract
- 1 teaspoon coconut extract
- 3 cups sweetened coconut flakes
- NOTE ON TIMING: This cake has many steps, but none of them are particularly hard. For convenience, I’d split it up over 2-3 days. On the first day, bake the cake layers and let them cool before wrapping and freezing them. Make the coconut syrup and leave it covered in the fridge. On the second day, make the coconut pastry cream and frosting. Assemble the cake. Serve it then or on the third day.
- Make the cake: Set oven rack in middle position. Heat oven to 350 degrees. Grease or butter/flour two 9-inch cake pans very well. Add a parchment paper circle in the bottom of each and grease that too. You don’t want your layers to stick! Pour milk, coconut milk, egg whites, and extracts into a small bowl and whisk gently until blended.
- In a large bowl, whisk together cake flour, sugar, baking powder, and salt. Add the butter and continue beating until mixture resembles moist crumbs, with no powdery streaks left.
- Add all but about 1/2 cup of milk mixture to crumbs and beat at medium speed for 1 1/2 minutes. Add the remaining 1/2 cup of milk mixture and beat 30 seconds more. Scrape down the sides of bowl before beating just a little longer.
- Divide batter evenly between two prepared cake pans and smooth the tops with a spatula before dropping it from about 3 inches high to eliminate any bubbles in the batter. Arrange pans on middle rack. Bake until a thin skewer or toothpick inserted in the center comes out with just a few moist crumbs, 23 to 25 minutes. If you wait until the toothpick comes out totally clean, your cake might’ve gone too long and could be dry; be careful not to overbake! Check early and often.
- Let the cakes rest in pans for a few minutes before running a knife around the edges of the pan and inverting the cakes onto wire racks. Invert them again so they’ll be right-side up and let them cool completeley, about 1 1/2 hours, before wrapping in wax paper and plastic wrap to freeze until pretty firm, about 30 minutes.
- Make the coconut pastry cream: Heat the coconut milk, sugar, salt and vanilla bean or extract in a medium saucepan over medium heat. In a bowl, whisk together the egg yolks and corn starch. Once the cream is hot, remove the vanilla bean (if used), scraping out any remaining seeds and returning them to the cream. Add 1/2 cup of the hot cream slowly to the yolks, whisking as you add, to temper the eggs so they won’t cook into an omelette in the middle of your pastry cream. That would be a bummer. Then pour the yolk mixture into the pot of hot cream and whisk. Continue to whisk with heat on medium-high for 3 more minutes. The mixture will turn thick and bubble. You need to continue to whisk for the full 3 minutes or the pastry cream will separate once it is cool. After the 3 minutes, whisk in the butter. Add the coconut flakes. Pour into a shallow dish to cool.
- Cover with plastic wrap pressed right against the pastry cream. This will prevent a thick skin from forming on the surface. Refrigerate for at least an hour or freeze for 30 minutes. Once it is cold, stir the pastry cream to loosen. Whip the 1/2 cup cream to medium peaks. Stir in 1/3 to the pastry cream to lighten. Fold in the remaining cream until the pastry cream is nice and light. Avoid eating entire bowl of pastry cream with a spoon.
- To make coconut syrup: Combine the sugar, water, and coconut water in a small saucepan over medium heat. Bring to a boil, reduce the heat, and simmer until the sugar has dissolved, about 5 minutes, stirring occasionally. Remove the pan from the heat and allow the syrup to cool completely, about 20 minutes.
- Make Coconut French buttercream icing: Combine sugar and 1/2 cup water in a small saucepan and bring to a boil over medium-high heat, stirring to dissolve sugar. Boil without stirring until syrup reaches 240° on a digital thermometer, about 5 minutes.
- Meanwhile, in a stand mixer with whisk attachment, beat egg whites on medium-high speed until soft peaks form. With mixer on medium speed, gradually pour in hot syrup in a thin stream; avoid pouring syrup on whisk. Increase speed to medium-high and beat until stiff peaks form and mixture is cool, about 8 minutes. Reduce speed to medium and add butter 1 tablespoon at a time, beating after each addition. (If at any time buttercream appears curdled, beat on high until smooth, then reduce speed to medium and continue beating in butter.) Once all butter is added, beat on high speed until buttercream is smooth and fluffy, about 1 minute. Beat in vanilla and coconut extract.
- Assemble the cake: Carefully slice each cake layer in half with a long serrated knife. Drizzle a couple tablespoons of coconut syrup over the “inner” side (the one that seems most porous) of each layer. Spread 1/3 of the coconut pastry cream filling onto the first cake layer. Spread it almost to the edge, but pipe a thick bead of buttercream around the very outside edge of each layer to ensure no spillage. Sprinkle with flaked coconut. Repeat with the other layers. Frost the cake with a very thin crumb coat and set it in the freezer to set for about 15 minutes. Bring it out and continue frosting the rest of the cake generously. Carefully push handfuls of fluffy coconut all over the sides of the cake and on top. Keep the cake in the refrigerator, but let sit out for about 30 minutes before slicing and serving so the frosting will be soft.
Key Lime Pie Cheesecake with Sky-High Meringue
Feet.
It occurred to me, lying in corpse pose and trying to slow the hamster wheel of my thoughts, that my yoga teacher probably touches hundreds of feet each week. Every breath in and breath out, I heard her move to the next mat and take up the next pair of feet.
Before long, the creak of the floorboards that joined with sound of my rhythmic breathing was in front of my own mat. I felt my own feet lifted, gently squeezed, swayed from side to side to loosen my tense hips, pulled into alignment, and set down again. I smiled, like I always do, and wondered if she knew this was my favorite part of her class. Probably. It’s probably everyone’s favorite part.
But is it hers? Touching all those feet, sweaty from practice, rough with callouses? I wondered, like I often do, if she had hand sanitizer waiting in her purse to apply as soon as the last person left, taking with them the last risk of offending anyone. But something about the way she sincerely thanked us for practicing with her made me think that serving us in this way was something she counted as an honor.
That’s when I started thinking about Jesus.
Jesus also knelt to nurture someone’s feet. The night before He knew He would be killed, He took a moment to wash His disciples’ feet. This has always seemed to me a very tender and sacrificial act of love. The man who was fully king of all the world was also fully servant of all the world — by choice.
Jesus later reveals His mindset to the disciples, saying, “Do you know what I have done to you? You call Me Teacher and Lord; and you are right, for so I am. If I then, the Lord and the Teacher, washed your feet, you also ought to wash one another’s feet.”
I want to be like Jesus. So far, though, I’ve always been like Peter. When Jesus knelt to wash Peter’s feet, Peter tried to demonstrate his love for Christ by refusing to let Him do so, perhaps thinking he was protecting Jesus from an act of debasement. But Jesus corrected him, saying, “If I do not wash you, you have no part with Me.”
Peter wasn’t a bad person; he was just trying to worship. I get it. In fact, I see myself in him so clearly. Just like Peter trying to serve or honor Jesus in a misguided way, sometimes I try to serve by controlling, organizing, and managing. I take charge of my acts of service so that they fulfill my own expectations instead of humbly listening to what God’s expectations are for me.
I still remember once in college when, to model service, a small group of Christians met together to wash each others’ feet. I had it all planned in my head: whose feet I wanted to wash, how I wanted to serve. Before the event even really started, I was on my knees getting ready to dip my washcloth in the water. But it turns out the organizers had an agenda for the event and by taking charge of how I wanted it to look, I was jumping the gun. Typical.

I wasn’t trying to be more holy than anyone else, and I wasn’t putting on a show — I was just trying to worship, like Peter. I just went about it the wrong way. Some people might need to step up to serve, but I sometimes need to sit back, let go, and listen. I can’t count how many times in my live I’ve been ready to take charge when God was telling me to surrender, to rest.
That humility is what washing feet — or even my post-yoga foot massage — is all about. Subordinating your impulses and desires to someone who, for that time, you’re putting ahead of yourself. Subordinating yourself so much, in fact, that you will take one of basest parts of their body, their lowly feet, in your hands.
I bet my yoga teacher touches hundreds of feet each week. I also think she probably treasures every pair.
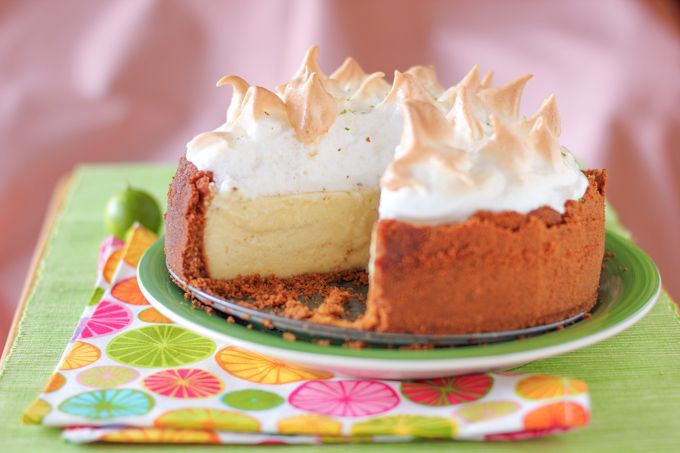
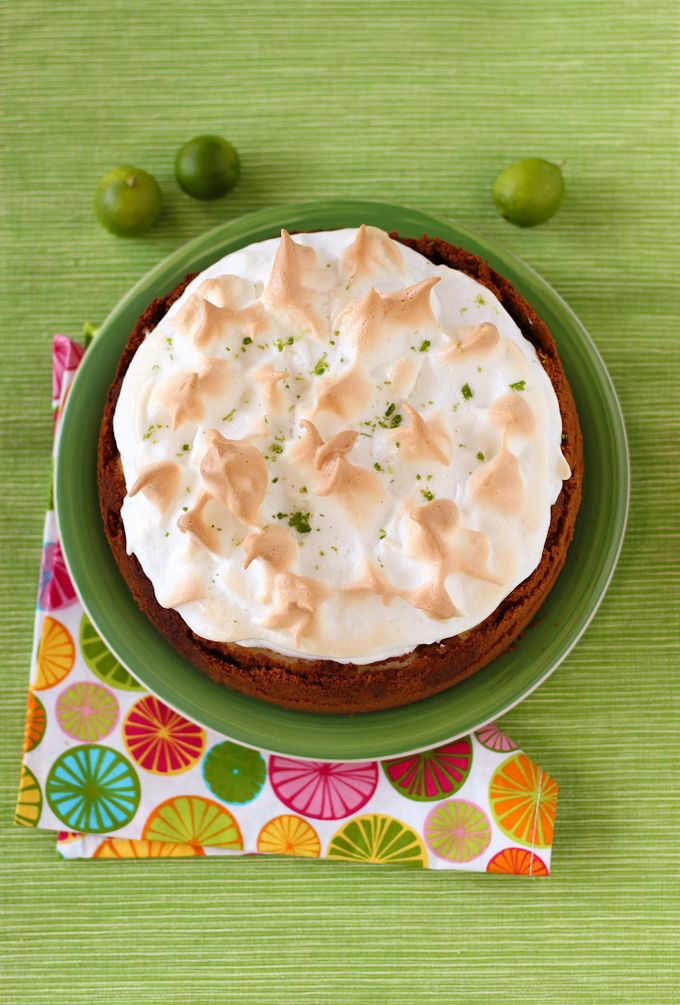
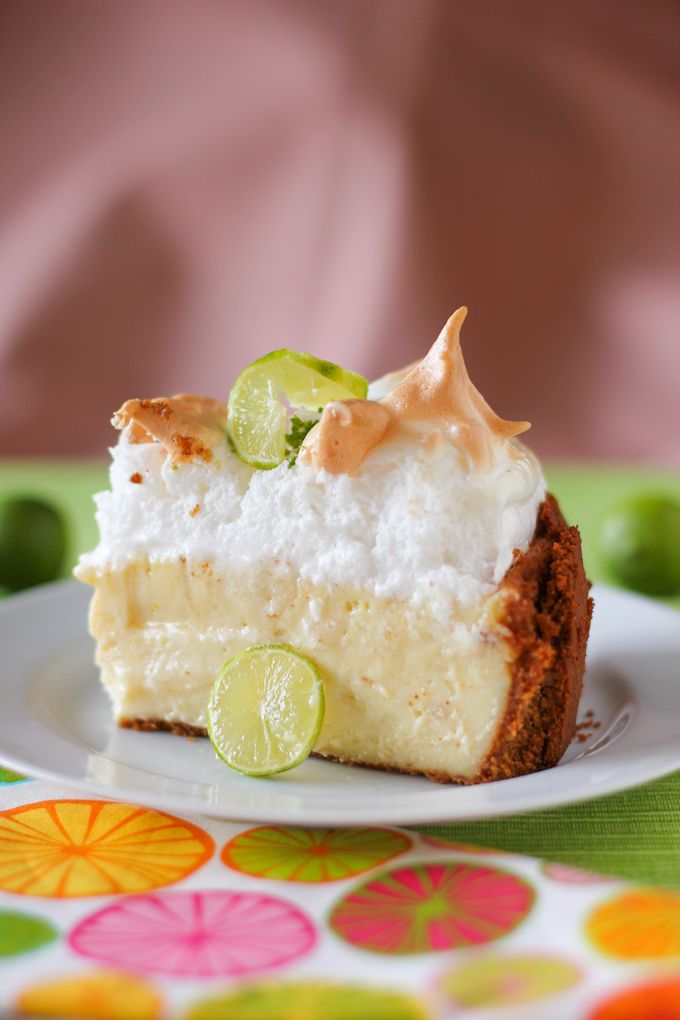
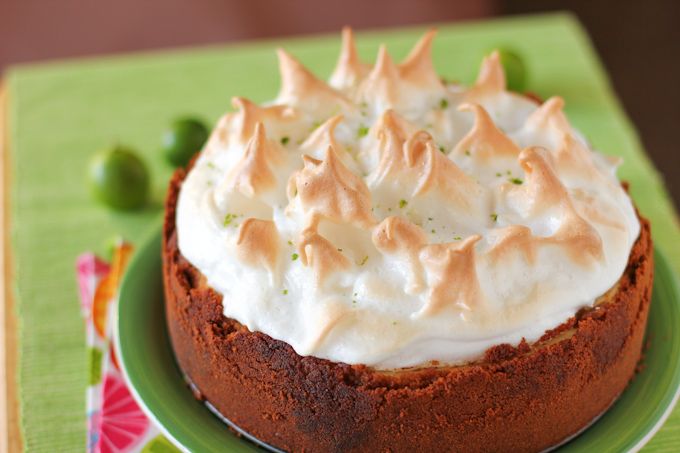
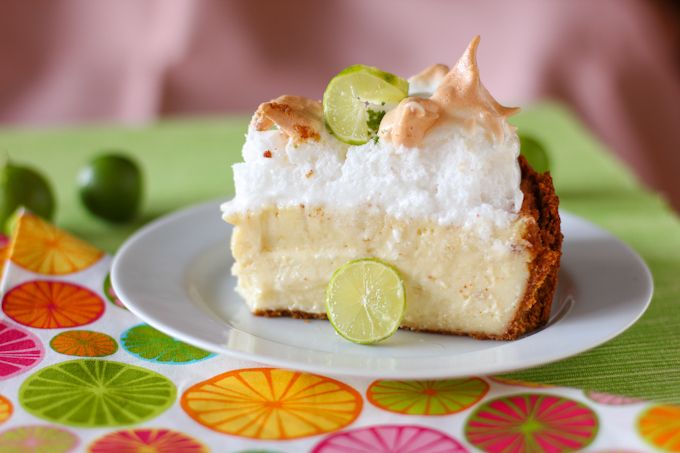
One way I was excited to get to serve some awesome friends of mine recently is by making them this Key Lime Pie Cheesecake. My friend Steven loves key lime, so I made a creamy, plain cheesecake with a tangy, traditional key lime pie custard on top. The whole thing sits in a graham cracker crust and is topped with a huge traditional meringue. I had to prove I could do a meringue after, ahem, previous mishaps. This Key Lime Pie Cheesecake is definitely on the tangy side, so you may want to cut down on the key lime juice if you like a sweeter pie, but it struck the perfect note to me. I hope you have someone in mind to serve it to.
How have you served recently? How could you serve someone soon?
One year ago: Poppy Seed Ham & Swiss Slider Melts
Two years ago: Quick Rosemary, Fig, and Goat Cheese Tarts
Three years ago: Clementine Cake
Key Lime Pie Cheesecake with Sky-High Meringue
Recipe by: Willow Bird Baking, using Nellie & Joe’s Key Lime Pie filling recipe and this meringue.
Yield: 10 servings
Do you like cheesecakey or custardy key lime pie? No matter what your answer is, this recipe will satisfy your craving — because it combines both textures! A creamy cheesecake is topped with a tangy layer of key lime custard and then a traditional meringue. If you don’t want to make a meringue (or if you’re making this on a humid day, when meringues typically don’t fare well), feel free to top this pretty cheesecake with freshly whipped cream.
Cheesecake Ingredients:
2 1/2 cups graham cracker crumbs
7 tablespoons unsalted butter
3 (8 ounce) packages cream cheese, at room temperature
1 cup granulated sugar
1 1/2 tablespoons all-purpose flour
2 teaspoons vanilla extract
3 large eggs
Key Lime Pie Ingredients:
1 (14-ounce) can sweetened condensed milk
3 egg yolks (save the whites for the meringue)
1/2 cup of key lime juice (about 20 key limes)
1 tablespoon grated lime zest (for decorating)
lime slices (for decorating)
Meringue Ingredients:
1/2 cup water
2 tablespoons white sugar
1 tablespoon cornstarch
3 egg whites
1/4 teaspoon cream of tartar
1 pinch salt
1/2 teaspoon vanilla extract
6 tablespoons white sugar
Directions:
Notes: Cheesecakes are simple and super customizable. New to cheesecake making? Watch my 6 minute Cheesecake Video Tutorial for visual assistance! This recipe can be divided up over several days — you can make the cheesecake one day, the key lime layer the next, and the meringue on the day you’re ready to serve. Try to start a few days early, because the key lime layer’s flavor is perfect after chilling for a couple of days.
Make the cheesecake: Preheat the oven to 350 degrees F. Lightly grease a springform cheesecake pan. Combine the graham cracker crumbs and melted butter in a small bowl. Toss with a fork to moisten all of the crumbs. Using a flat-sided glass, press into an even layer covering the bottom and sides of your cheesecake pan (you want it to be tall —- try to get to about 2.5 inches high — and thin). Freeze the crust until the filling is ready.
In a large bowl, beat the cream cheese and sugar on medium-high speed until well blended. Beat in the flour. Add in the vanilla and beat until well incorporated, scraping down the sides of the bowl as needed. Beat in the eggs one at a time, scraping down the bowl between each addition. Pour the filling into your crust very carefully, smoothing the top out.
Bake until the center moves only very slightly when the pan is lightly shaken (about 45 minutes). Check while baking periodically and put a pie shield (or strips of foil) around the top of your pan to protect the crust edges if they’re getting too dark. Just don’t let the shield/foil touch the crust — it’s delicate and might crumble. When you pull the cheesecake out, you can use a sharp knife to score a circle around the top of the cheesecake about an inch inside the crust so that as it cools and chills/sinks, it won’t pull the crust in too much. Don’t worry if it’s pretty, because you won’t be able to see it in the finished product! Let cheesecake cool on a wire rack while you prepare key lime filling. Keep oven preheated.
To make the key lime pie filling: Blend together the milk, egg yolks, and lime juice until smooth before pouring the filling onto your cheesecake. Bake at 350 degrees F for about 15 minutes, keeping the crust shielded with foil. Let cool for about 10 minutes before chilling the cheesecake overnight — or two if you have the time; the flavor really matures and mellows with time. I left mine tented with foil instead of covered tightly with plastic wrap to avoid condensation that would affect the meringue.
Make meringue topping: Preheat oven to 350 degrees F. Stir water, 2 tablespoons sugar, and cornstarch over low heat in a saucepan for around 10 minutes, stirring constantly. Remove from the heat and set aside.
In the very clean bowl of an electric stand mixer (I honestly wouldn’t attempt a meringue with a hand mixer), combine egg whites, cream of tartar, and salt. Whisk until mixture is foamy. Add vanilla and then gradually add the 6 tablespoons of sugar while whisking on medium-high speed. When the egg whites have soft peaks, very gradually drizzle in the cornstarch mixture (while still beating). Turn the mixer to high and beat the meringue to stiff peaks. The meringue should hold clear, firm peaks when you lift it with a spoon or with the whisk.
Very gently pile it onto your cheesecake, spreading it to the sides to seal it to the crust. Take a big glob of meringue and touch it to the top of the meringue on your cheesecake and pull away to form a “spike.” Continue doing this all around the top of the cake. Brown the meringue in the preheated oven. Sprinkle the cake with lime zest. You can also use thin slices of lime to garnish the cake. Serve the day you make the meringue for best results, or store tented in the fridge for no more than 1-2 days (the meringue will fall slightly with each day, but mine held up quite well!)
