
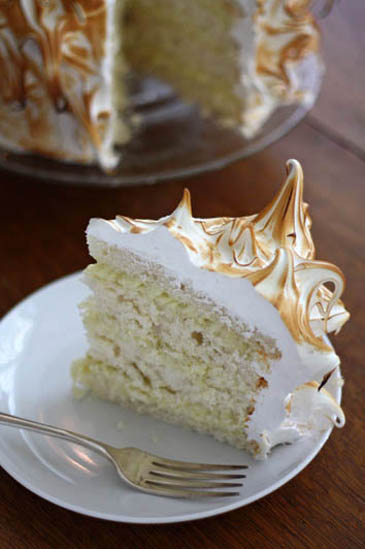
There’s this CAKE. This beautiful, gorgeous, dramatic, heart-stopper of a CAKE. I’ve been dreaming about making it for weeks (2 weeks and 2 days, to be exact): scanning the recipe online, pondering it on my drive home, lying in bed and imagining each step, right down to torching the meringue. I’ve been a little obsessed, but you’ll understand why when you see how lovely it is. Here it is in all its glory, over at Zoë Bakes. I KNOW, RIGHT?! It is stunning.

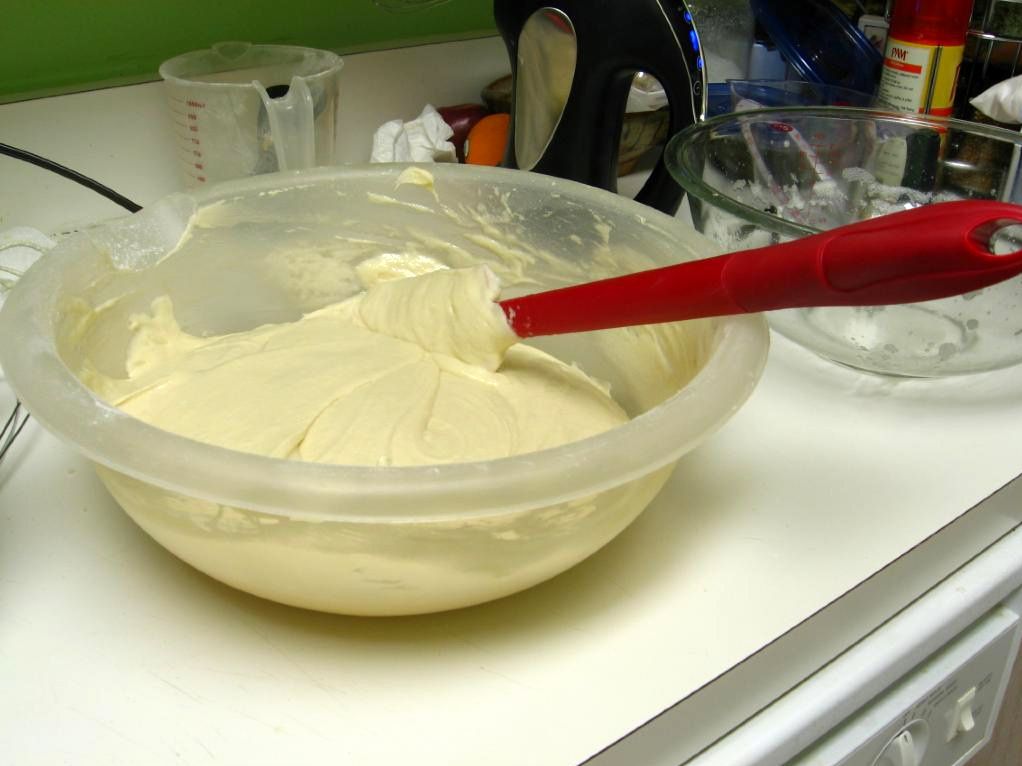
So this past Friday I gathered together all my ingredients, donned the adorable retro apron my mom made for me, and became one busy bumblebee. I left the sour cream out of the recipe accidentally, so that was my first mistake. Ever set your cake out to cool on a wire rack only to turn your head and notice an ingredient still sitting on the counter waiting to be used? Oops. It wasn’t a big deal, as it turns out, because the cake was delicious. The coconut milk added an absolutely heavenly flavor — making this one of the best white cakes I’ve ever tasted.

The filling was similarly amazing: creamy, thick coconut pastry cream folded with rich whipped cream. I knew when stacking this cake up with the delectable filling between each layer that, no matter what, I had a dessert champion on my hands.

That’s about where the success story ends. Well, maybe that’s a bit dramatic — the cake was delicious and we adored every bite. But as the title of this post suggests, my version of Zoë’s lovely cake was ugly as sin. Now, you might be thinking, “Aw, you’re being too hard on yourself; it wasn’t that ugly!” Let me clarify:

It was ugly! Lopsided, striped, U-G-L-Y-it-ain’t-got-no-alibi, UGLY. The real reason I made this cake was to achieve those beautiful burnt meringue curls that Zoë’s cake had. That clearly didn’t happen.

My meringue was runny. At first I blamed it on humidity: it rained for days in Charlotte and I was whisking the meringue up right above my steamy dishwasher. But I tried again the next day in a steam-free kitchen to no avail: same results. I’m relatively sure my bowl and whisk was free of fat or residue, so I don’t think that was a problem. My mom blames the fact that I have a hand mixer rather than a stand mixer. This could be the culprit, but I sure beat until my arm was about to fall off. Maybe the most likely possibility is that I overheated my egg white and sugar mixture. The target temperature is 110-120F, but I’m pretty sure mine was past that when I removed it to whip. I’ll have to give it another shot with a cooler mixture.

Oh well. I love pretty food, cute food, sophisticated food. Mostly, though, I love food that tastes good — and this tastes good. Fantastic, even! If you don’t want to tackle the meringue, it would even be delicious covered in some slightly sweetened whipped cream and coconut. But I hope you’ll grab your stand mixer and give the meringue a try — I know I’ll be trying it again! As you can see from Zoë’s version, it’s worth it.
Coconut Cream Cake with Toasted Meringue Frosting
Recipe by: Zoë Bakes (coconut pastry cream, Swiss meringue) and Fine Cooking (cake), adapted by Willow Bird Baking
Yields: 9-in. 4-layer cake
Cake Ingredients:
8 ounces (1 cup) unsalted butter, softened
13 1/2 ounces (3 cups) unbleached all-purpose flour
1 tablespoon baking powder
1/2 teaspoon kosher salt
1 cup unsweetened coconut milk
2 teaspoons vanilla extract
2 cups granulated sugar
2 large eggs, at room temperature
1/2 cup sour cream, at room temperature (I left this out accidentally; still worked great)
6 large egg whites, at room temperature
Coconut Pastry Cream Ingredients:
1 can (14 fluid ounces) unsweetened coconut milk
3/4 cup sugar
1 vanilla bean
pinch kosher salt
3 large egg yolks
2 tablespoons corn starch
2 tablespoons unsalted butter
1 cup sweetened coconut flakes
1/2 cup whipping cream
Swiss Meringue Ingredients:
1 cup egg whites
2 cup sugar
pinch salt
Directions:
To bake the cake: Preheat oven to 350 degrees with rack in middle of the oven. Grease and line with parchment two 9×3-inch round cake pans. In a medium bowl whisk together the flour, baking powder and salt, set aside. Mix the coconut milk and vanilla, set aside.
In a stand mixer fitted with a paddle attachment, beat the butter and sugar on medium-high speed until light and fluffy, about 4 minutes (scrape down the bowl). Add the eggs one at a time and beat well after each addition.
Add 1/3 of the flour mixture and mix on low speed until incorporated. Add half the coconut milk and mix thoroughly. Continue to add the flour and coconut alternately, ending with flour. Add sour cream and mix until incorporated. Set aside in a large bowl if you don’t have a spare bowl for your mixer.
Beat the egg whites in your stand mixer with the whisk attachment (if you are using the same bowl, be sure it is VERY CLEAN or the whites will not whip up. Any fat on the bowl will prevent the whites from foaming). Beat the whites on high speed for 2-3 minutes, until it forms soft peaks. Don’t overdo it or the whites will get too stiff and not fold into the batter smoothly. Stir 1/3 of the egg whites into the cake batter to lighten it. Gently fold the remaining whites into the batter.
Divide evenly in the prepared pans. Bake for about 25-30 minutes or until the tester comes out clean. Cool on rack in pan and then invert to use.
To make the coconut pastry cream: Heat the coconut milk, sugar, salt and vanilla bean in a medium saucepan over medium heat. In a bowl, whisk together the egg yolks and corn starch. Once the cream is hot, remove the vanilla bean, scraping out any remaining seeds and returning them to the cream. Add 1/2 cup of the hot cream slowly to the yolks, whisking as you add. Then pour the yolk mixture into the pot of hot cream and whisk. Continue to whisk with heat on medium-high for 3 more minutes. The mixture will turn thick and bubble. You need to continue to whisk for the full 3 minutes or the pastry cream will separate once it is cool. After the 3 minutes, whisk in the butter. Add the coconut flakes. Pour into a shallow dish to cool.
Cover with plastic wrap pressed right against the pastry cream. This will prevent a thick skin from forming on the surface. Refrigerate for at least an hour or freeze for 30 minutes. Once it is cold, stir the pastry cream to loosen. Whip the 1/2 cup cream to medium peaks. Stir in 1/3 to the pastry cream to lighten. Fold in the remaining cream until the pastry cream is nice and light. Split the two cakes in half with a knife and add 1/3 of the filling to the first cake layer. Spread it out to the edge and repeat with the other layers.
To make the Swiss Meringue: Whisk together the egg whites, sugar and salt in the bowl of your stand mixer. Rest the bowl over a pot of simmering water to form a double boiler. Scrape down the sides of the bowl so that all the sugar is off the sides of the bowl. Continue to stir the mixture until all the sugar is melted into the eggs and you no longer feel any graininess when rubbed between your fingers, about 3-5 minutes.
Place the bowl onto your mixer and whisk on high speed until the meringue is thick and glossy and the bowl is just warmer than room temperature, about 8 minutes. Using a spatula, spread a nice thick layer of the meringue over the cake, make sure you have at least a cup of meringue left. Don’t worry about how it looks, you will be making spikes over the surface in a minute.
Take a glob of the meringue in your hand and press it against the meringue on the cake (Zoë has a great photo tutorial of this part on her blog). Pull that glob away from the cake and it will break off in a wispy curl. The more of a glob you lay down as a foundation on the cake, the bigger your curls will be. This may take a few times to get the hang of it, but then you’ll be off and running. Once you have the cake fully set with curls you will need a torch to toast the meringue. Hold the blow torch a ways from the cake and touch the flame down between the curls. The curls will set fire and you need to blow them out as you go. The burnt tips are lovely contrast and add a wonderful flavor.

Cake mixed, baked, and sliced into four layers.


Coconut pastry cream cooling and then spread onto a cake layer.


Cooking my Swiss meringue and preparing the cake for frosting!
Enjoy!
 Want to help Haiti relief efforts? Want to learn some fantastic new recipes? Do both at once by purchasing the A Hand for Haiti E-Book (minimum donation of $10) or the hard copy of BlogAid (softcover $25; hardcover $50), two lovely cookbooks created to raise money for Haiti.
29 Comments on Ugly as Sin Coconut Cake
1Pingbacks & Trackbacks on Ugly as Sin Coconut Cake
-
[…] cake was originally modeled after this Ugly as Sin Coconut Cake from Willow Bird Baking. I left out the sour cream as the recipe said the cake would turn out well with or without it and, […]
nutmegnanny
February 8, 2010 at 3:15 am (16 years ago)This cake may have been lopsided but it sure does look great to me! I could totally use a slice right now….yum!
Julie
February 8, 2010 at 8:08 am (16 years ago)Thanks! 😀
Angela
February 8, 2010 at 5:21 am (16 years ago)Ahhh, a prime example of how we should not be too quick to judge – looks aren’t everything, it’s what’s inside that counts! And to be honest, yours looks truely scrummy and we would have been none the wiser had not not shown us a picture of how it was supposed to look! xxx
Julie
February 8, 2010 at 8:00 am (16 years ago)Aw, thanks Angela!
Melissa
February 8, 2010 at 6:50 am (16 years ago)I’ve had this happen to me when the eggs are old-not out of date, but getting there. You can beat it ’til the cows come home and it just won’t set up like it’s supposed to. Try it with a new box of eggs, and I bet you’ll get better results.
(The first time this happened to me, I was making a birthday Baked Alaska. To this day, the Naked Alaska lives in family legend. 🙂 )
Julie
February 8, 2010 at 8:00 am (16 years ago)Ha, I love it! The naked Alaska!
My eggs WERE getting towards their date. Hmm! Thanks for the tip!
Devona
February 8, 2010 at 8:06 am (16 years ago)This cake makes me want to go make it NOW. The cake looks so tender and oh how I love coconut.
I have always had success with using a metal bowl to make my Swiss Meringue, have you tried that?
Julie
February 8, 2010 at 8:09 am (16 years ago)Thanks, Devona! You know, I don’t have a metal bowl — only glass. Wish I could give that a shot! Maybe when I borrow my mom’s KitchenAid!
Mom
February 8, 2010 at 10:04 am (16 years ago)Julie, this cake looks and smells delicious!! It is driving me crazy since I can’t have any. Maybe you can make it again when I can eat it and borrow the mixer? Like My Birthday or something? I have been wanting a piece of good coconut cake! Alex says it is wonderful!
Julie
February 8, 2010 at 11:22 am (16 years ago)Of course, Mom! I might also try a different meringue (i.e. not Swiss), just to see if it’s any easier. Swiss might be more finicky?
Maria
June 22, 2018 at 5:06 pm (8 years ago)I think the problem is one of proportions and not technique. Zoe’s recipe is for a 3-layer 8″ cake (though it looks smaller than 8″) while you are using the exact same ingredient quantities to make a 4-layer 9″ cake.
To have enough filling and frosting for your 4-layer 9″ cake, you need to double the recipe for the filling and I would suggest tripling the amount of meringue to cover the much larger ( and AMAZING sounding) cake.
I say triple because she is talking about reserving a full cup of meringue for the spikes on a shorter, smaller cake; to put the same number of similarly sized spikes on a wider and taller cake you will need more than one cup in reserve. Thank you for highlighting this recipe! I cannot wait to try it.
Julie Ruble
June 22, 2018 at 5:42 pm (8 years ago)Makes sense, but that wasn’t my issue: I had enough meringue but the meringue didn’t stand. If I had to guess now, I’d say my issue was ambient humidity (I tried this in the South) and an inadequate mixer. Good luck when you try it out!
Helen
February 8, 2010 at 11:22 am (16 years ago)You could always add 1/8 tsp of cream of tartar per egg white before you start mixing to create a more stable meringue.
Allison
February 8, 2010 at 5:54 pm (16 years ago)To help stabilize your meringue you can whip the egg whites in a copper bowl (if you have one). Also egg whites should be separated when cold, but whipped when at room temperature. You can try to whip them cold but it will take a lot longer.
Heather Peskin
February 9, 2010 at 8:02 am (16 years ago)This must have been really good – meringue topping; coconut milk; swiss buttercream – yum! I would love to give this one a try.
megan
February 9, 2010 at 1:59 pm (16 years ago)I think I must make this cake. i’m thinking it would be a perfect Easter cake! Bookmarked!
Lorraine @NotQuiteNigella
February 10, 2010 at 6:55 am (16 years ago)OMG Julie no, it is Beeyootiful with a captial B! I kept waiting and scrolling to see an ugly picture but no there was none. Instead I was greeted with picture after picture of gorgeous, soft, creamy yellow coconut cake!
Kitchen Butterfly
February 10, 2010 at 4:17 pm (16 years ago)It is stunning. I actually love the smooth even meringue frosting………………well done!!!!!!!!1
Marcellina
February 10, 2010 at 7:34 pm (16 years ago)Things don’t always turn out how we expect, do they? But don’t judge a book by its cover – this cake looks amazing inside! How delicious – coconut pastry cream. YUM!
Tzviah
February 14, 2010 at 3:38 am (16 years ago)Have you tried an Italian meringue? It’s the most stable of the meringues. It’s easy to pipe and form into shapes, etc.
Julie
February 14, 2010 at 8:33 am (16 years ago)Nope, I wanted to stick to the recipe this time around. I might switch it up next time!
Lauren
February 14, 2010 at 5:28 pm (16 years ago)Well, I think it looks gorgeous! Much more sleek =D.
Meringuelover
February 22, 2010 at 3:38 am (16 years ago)Hi there, just stumbled across your blog and love it. I wanted to give you a meringue-making tip – whisk the egg whites alone, before whisking in the sugar a tablespoon at a time. I’m a hand-whisker too, and the only time I tried to whisk the egg whites at the same time as the sugar it was an absolute flat disaster.
Here’s my favourite recipe:
2 egg whites
125g (4oz) caster sugar
1 tsp cornflour
1/4 tsp vinegar
Whisk the egg whites all on their own to thick, glossy white peaks. Now whisk in the sugar, a tablespoon at a time. Right at the end, fold in 1tsp of cornflour and 1/4 teaspoon of vinegar.
Then you can either blowtorch them, or bake them in a preheated oven at 140 degrees c (275 farenheit), Gas Mark 1, for 40 mins. This will leave them crisp on the outside and squidgy in the middle.
Enjoy! x
Julie
February 22, 2010 at 7:53 am (16 years ago)Thanks, Meringuelover! I think I’ll try something like that rather than a Swiss meringue next time around just to get my feet wet. Would love to master the Swiss meringue eventually, though! One day . . .
Kimberly
October 29, 2011 at 12:44 am (15 years ago)Thanks for sharing this recipe. I tried it today and mine turned out like yours (no nice peaks, just flat and tasty). I’m not really sure what went wrong, but felt frustrated at my lack of peaks. Let us know what you try in the future that works as I would like to master this at some point.
Kimberly
Julie @ Willow Bird Baking
October 29, 2011 at 12:47 am (15 years ago)I know just how you feel, girl! At least it’s tasty, right?! I didn’t have my KitchenAid when I tried this, so eventually I want to try again with that — and maybe some extra cream of tartar. I might even use a whole other recipe for the meringue. I’ll be sure to post it whenever I try! I’d LOVE some beautiful peaks instead of, uh, jailhouse stripes 😉
Rachel
July 13, 2014 at 8:56 pm (12 years ago)Is this a heavy and dense cake, or light and fluffy?
Coco in the Kitchen
July 5, 2018 at 2:47 pm (8 years ago)There’s nothing ugly about this cake!