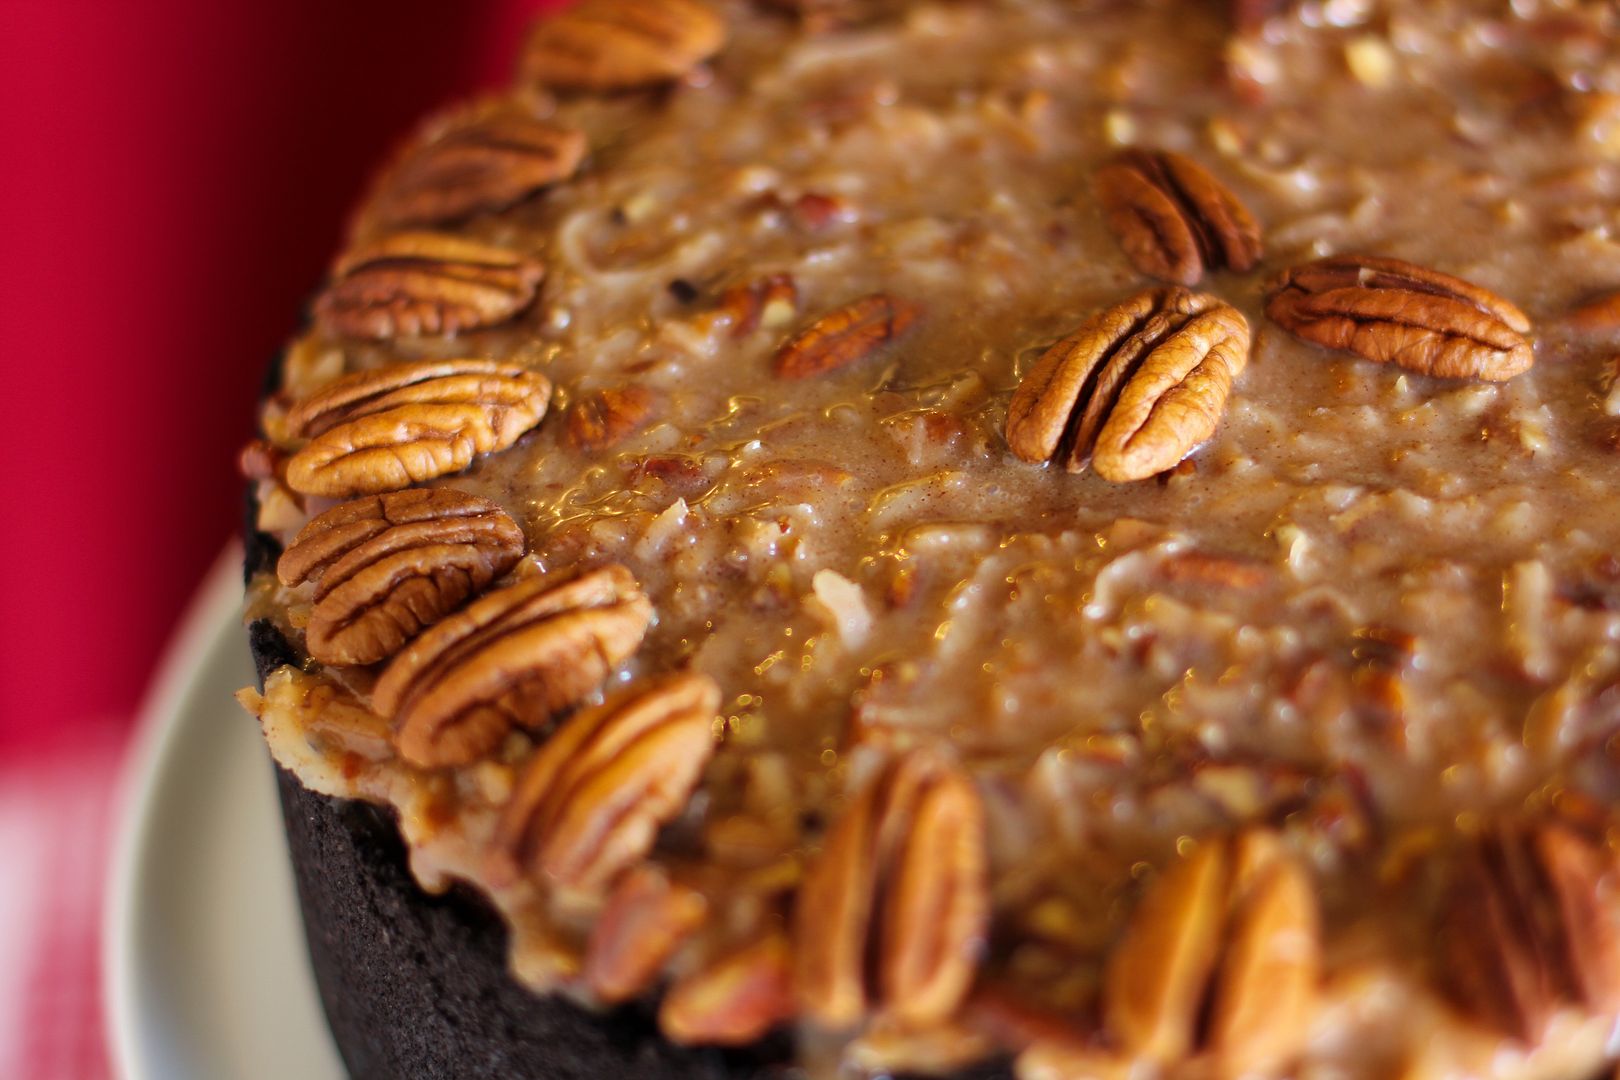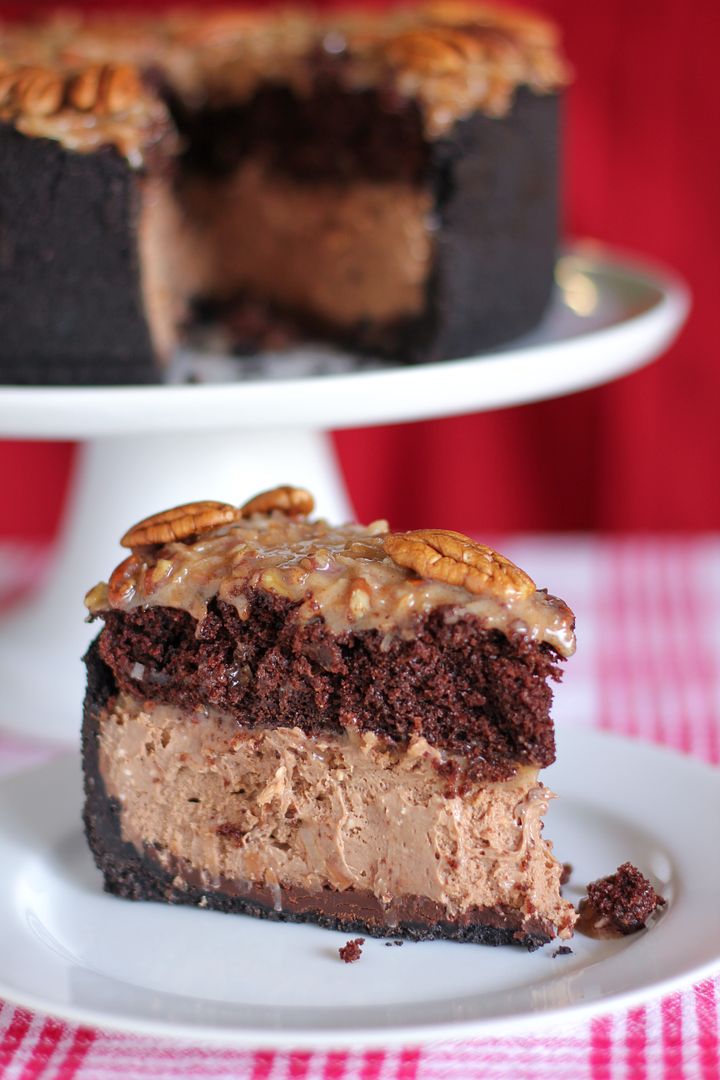
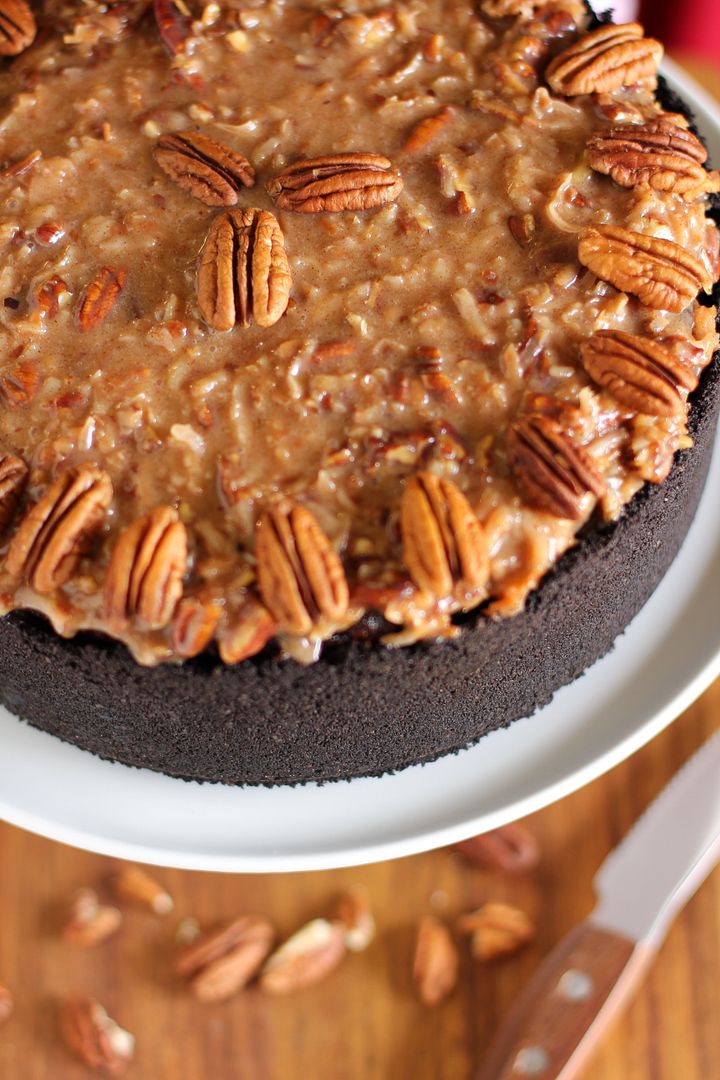
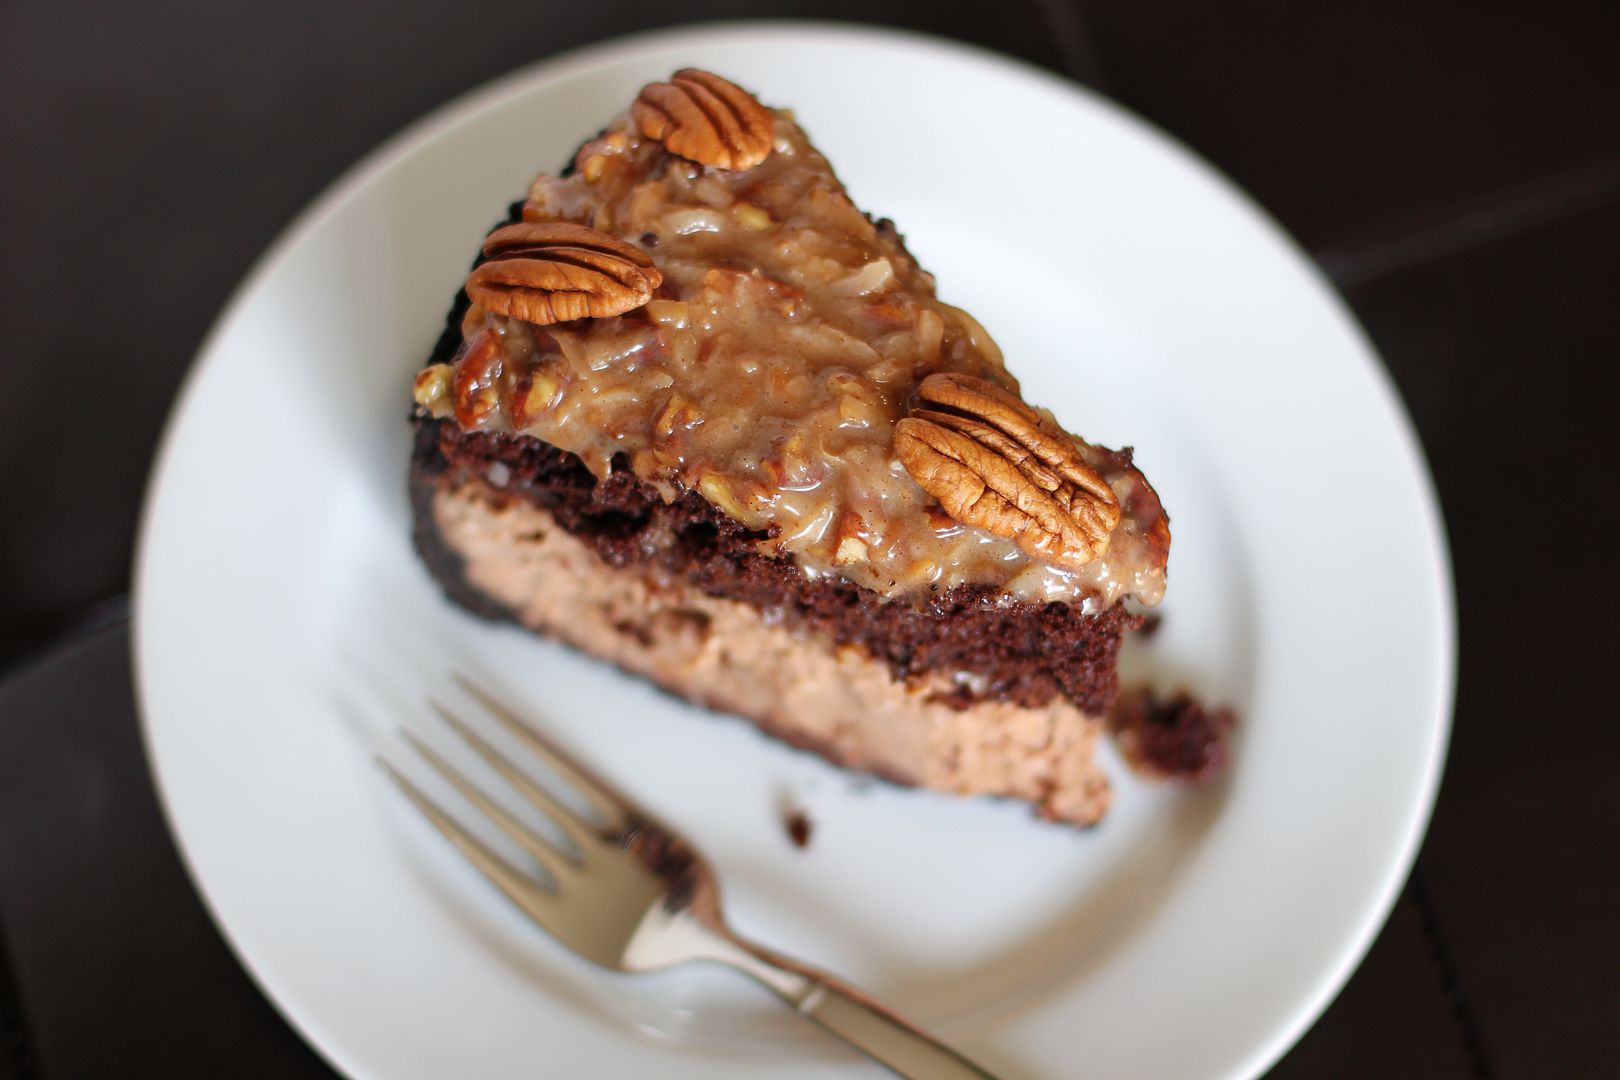
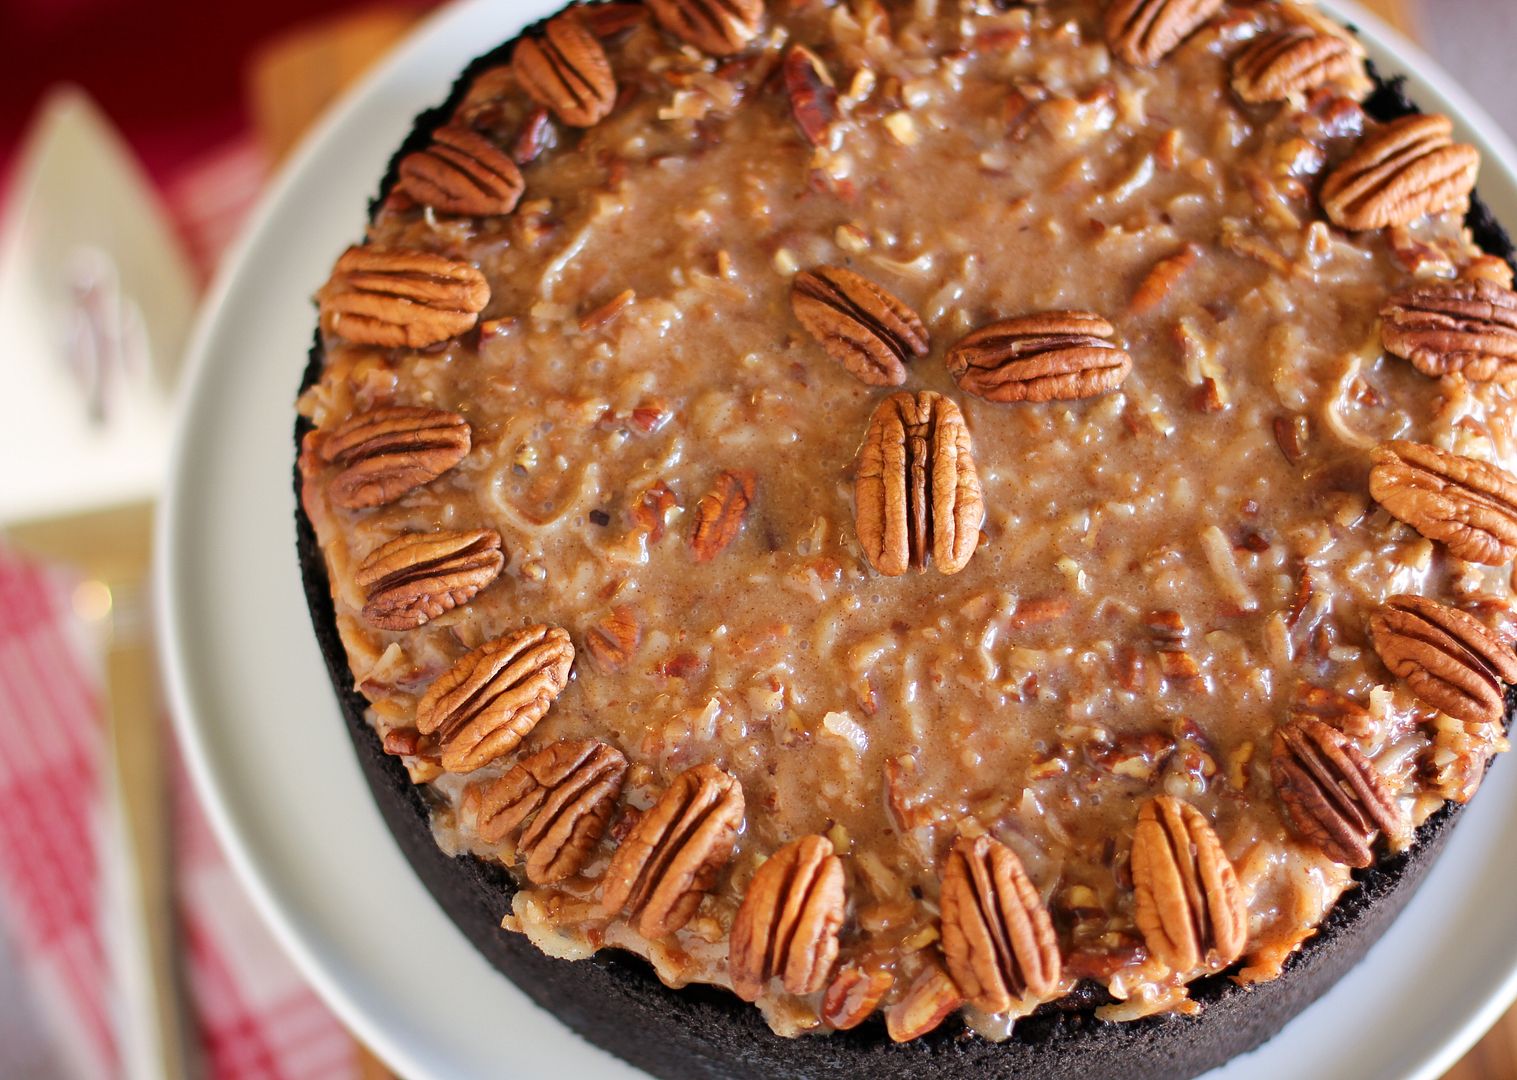
German Chocolate Cheesecake

“You know, it doesn’t really matter,” I said with a shrug.

The AT&T tech looked perplexed by my indifference. I guess customers usually start foaming at the mouth when he tells them he can’t get their internet connection up and running. I explained: “I really don’t want the internet. You’d be amazed at how much you get done without it.”
For instance, things I’ve been getting done:

  • Napping.
  • Reading My Berlin Kitchen (Luisa of The Wednesday Chef‘s amazing new memoir. You have to read it.) on the couch with Byrd beside me.
  • Unpacking a box every now and then.
  • Arranging things in my new apartment.
  • Rearranging things in my new apartment.
  • Throwing all my windows open and lounging in the gorgeous new autumn.
  • Eating popcorn by the bucketful.
  • Trying to be bendy in yoga.

I’m going to be eating these words once my students turn in the first project for me to grade, but for now, I can’t believe how many hours there are in the day. I mean, I don’t know what I did on the internet all day to eat up the amount of time I’ve found myself with in its absence. Some worthy things, obviously: recipe research and development, writing about food, lesson planning, emailing students and their parents. But what consumed the rest of my time? Facebook? People.com? A prolonged email-checking stupor?

Actually, I know exactly why the internet was able to fill my schedule: my insidious addiction to multi-tasking.

I’ve spent the last, oh, sixteen years of my life running around like the proverbial headless chicken, completing each responsibility roughly 5 milliseconds before its due, and dealing with the not-infrequent crisis when a deadline slips by. I work on at least two things at a time, but usually five or six. For instance, right now I’m writing this, posting comments on two friends’ blogs, and reading the comments on Willow Bird Baking’s latest Facebook status. I’ll do each activity for a few seconds before switching to another, throwing in a glance at my email every few cycles for good measure. Why does my brain think this is an efficient way to manage tasks? And why must there be so many useless tasks available on the internet?
I’m going to go ahead and admit to the entire interwebz that I have a therapist. (I’m not even slightly shy about that fact, by the way — because I kind of think everyone should have a therapist. If you have one, you know what I mean! They’re wonderful. It’s like having a coach for life. Yes, please.) One thing she talks a lot about is mindfulness, which is being fully present, aware, and participatory in your every thought and action.

It’s amazing how many things we do mindlessly — things like scrolling through a billion pages of Dog Shaming (baaahaha, okay, I just added that to my list of things-I’m-doing-right-now), eating a whole bag of popcorn while watching a movie, having a phone conversation while working on other things. In fact, I think that if we really examined our daily lives, we’d find that we do most things mindlessly — or at least with split attention. And the internet reinforces that behavior. Time to confess: how many tabs or windows do you have open right now? (I have 13!) How many other activities are you completing while reading this post?
Having one of my favorite mindless-multi-tasking activities (that is, the internet) pulled right out from under me has made me realize how peaceful and productive mindfulness can really be. Sometimes I sit on my couch with a plate of food and do nothing but take bite after mindful bite, feeling the texture of the food, tasting each flavor, and enjoying the process. There’s no book in front of me, no television playing in the background. Nothing but me and the next bite. Eating thus becomes a meditation. Every activity I complete can be distilled down to its sensory components, down to the experience of completing it. And my spirit feels so much calmer and more satisfied.
I can’t go forever without the internet — I’m a food blogger, after all, and I do get tired of having to find a little café with wifi any time I want to check my email — but I will be using it differently when AT&T figures out what’s wrong with my wiring. At least, right after I catch up on Dog Shaming…

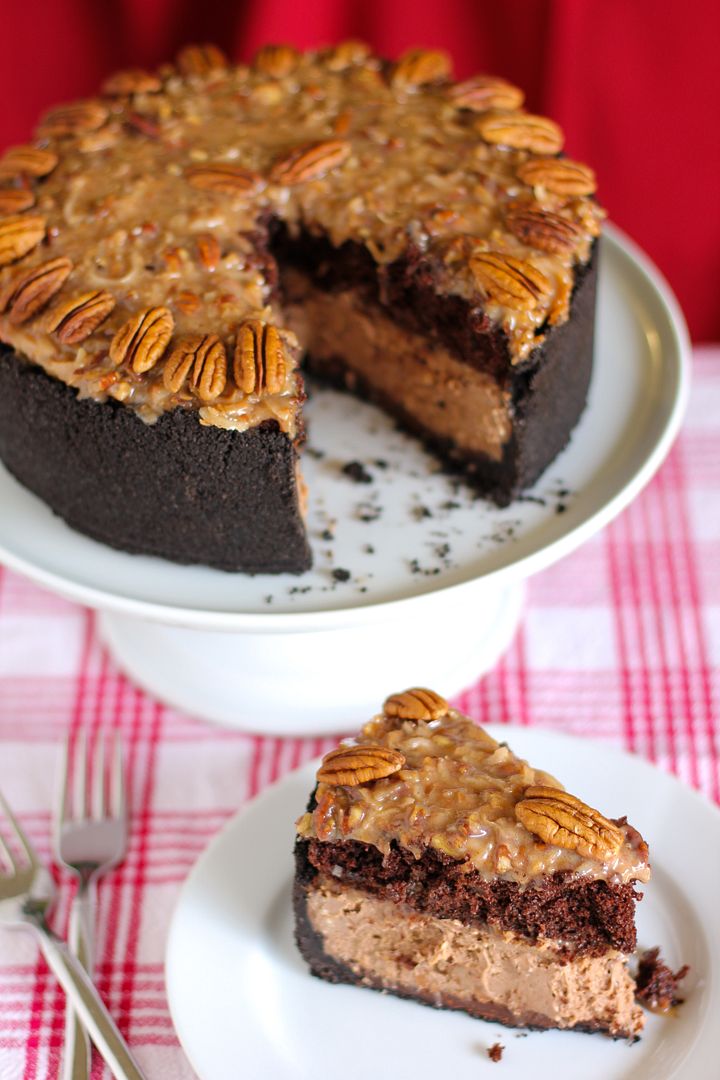
One thing I did (mostly!) mindfully Friday night was bake this German Chocolate Cheesecake. I did have soft music playing in the background, but other than that, it was just me, my new kitchen, and each ingredient. I expected the recipe to take forever, but the process actually went rather quickly — perhaps because I was focused on the tasks. I also have sharper memories of each moment: peeling the blocks of cream cheese off of their silvery paper, sticking the toothpick into the fragrant chocolate cake, stirring the coconut-pecan filling until the cold hunks of butter melted into the hot custard. The experience was just what I needed to make my new apartment into my new home. And I found one of those little wifi cafés just to share it with you!

One year ago: Gooey Cookies & Cream Bars
Two years ago: Bittersweet Marbled Chocolate Cheesecake Brownies
Three years ago: Peach Crisp Pie

P.S. Remembering a very special lady this week and always. We miss you, Rose!

5 from 1 reviews
German Chocolate Cheesecake
 
Prep time
Cook time
Total time
 
Like many of my cheesecakes, this gorgeous German Chocolate Cheesecake would be easy to make over several days. For instance, you could make the chocolate cake layer one day, make the cheesecake the next, and make the filling and assemble the third. Alternatively, you can make it all in one go. Either way, it’s rich, indulgent, and so delicious. Try getting all of your ingredients ready before you begin and baking each component mindfully, letting yourself enjoy the experience. NOTE: This filling calls for 2/3 cup sugar, but I only had about 1/3 cup sugar. I didn’t want to run to the store, so I used some Cinnabon Sprinkle Topping Cinnabon sent me in place of the rest of the sugar, and it was so good! I think you could get the same effect by just using the 2/3 cup sugar below and adding a teaspoon or so of cinnamon, if you’d like. Or just buy the Cinnabon Sprinkle Topping — it really is so yummy. Y’all know I don’t just do product placements for no reason.
Author:
Serves: 14-16
Ingredients
Crust Ingredients:
  • 1 package (about 38) chocolate sandwich cookies, finely processed into crumbs (cream and all – it’ll disappear when you crush them up!)
  • 6 tablespoons unsalted butter, melted and cooled
  • Small pinch of salt
Ganache Ingredients:
  • 3/8 cups heavy cream (6 tablespoons)
  • 5 ounces bittersweet or semisweet chocolate, finely chopped (I used half semisweet and half Ghirardelli 60% Cacao chocolate chips)
Cheesecake Ingredients:
  • 3 packages (8 ounces each) of cream cheese, room temperature
  • 3/4 teaspoon of vanilla extract
  • 3/4 cup sugar
  • 3 eggs, room temperature
  • 3 ounces or about 6 tablespoons chocolate chips, melted and cooled (I used half semisweet and half Ghirardelli 60% Cacao)
Cake Ingredients:
  • 3/4 cup all-purpose flour
  • 3/4 cup granulated sugar
  • 3/8 cups unsweetened cocoa powder
  • 3/4 teaspoon baking soda
  • 3/8 teaspoon baking powder
  • 1/4 teaspoon salt
  • 1 large egg
  • 3/8 cup low-fat buttermilk
  • 1/8 cup plus 1/2 tablespoons vegetable oil
  • 3/8 cups warm water
  • 1/2 teaspoon pure vanilla extract
Filling Ingredients:
  • 2/3 cup heavy cream
  • 2/3 cup sugar
  • 2 large egg yolks
  • 2 ounces butter, cut into small pieces
  • 1/3 teaspoon salt
  • 2/3 cup pecans, toasted and finely chopped
  • 1 cup unsweetened coconut, toasted
Instructions
  1. Make the cheesecake crust: Combine the chocolate cookie crumbs, melted butter and salt in a small bowl. Toss with a fork to moisten all of the crumbs. Press into a thin layer covering the bottom and sides of the springform pan (at least 3 inches up the sides). It’s hard to get the crust up that high, but keep pressing the crumbs up from the bottom with a smooth-sided glass (twisting the glass as you do so, so the crumbs don’t stick) and working them around — you’ll want it that high to hold the cake layer. Patience helps with this step.
  2. Make the ganache: Bring the cream to a simmer in a medium saucepan (or heat in the microwave for about a minute, watching to ensure it doesn’t boil). Place the chocolate in a medium bowl. Once the cream reaches a simmer, pour the cream over the chocolate and let stand 1-2 minutes. Whisk in small circles until a smooth ganache has formed. Pour the ganache over the bottom of the crust. Freeze until the ganache layer is firm, about 30 minutes.
  3. Make the cake: While the ganache is freezing, cut a circle of parchment paper and use cooking spray as “glue” to adhere it to a 9-inch round cake pan. Then grease the pan and the paper (I use Wilton’s Cake Release, but you could also use butter and flour). Preheat the oven to 350 degrees F.
  4. Whisk the flour, sugar, cocoa, baking soda, baking powder, and coarse salt together in a mixing bowl. Beat the dry ingredients on low until combined before increasing the speed to medium and adding the egg, buttermilk, warm water, oil, and vanilla. Beat about 3 minutes until the mixture is smooth. Pour it into the pan.
  5. Place the pan in the oven and bake until a toothpick inserted in the middle comes out with just a few moist crumbs, about 25-30 minutes. Rotate the pan about halfway through so it’ll bake evenly. When you take the cake layer out, leave the oven preheated for the cheesecake. Let the cake layer cool on a wire rack for about 10 minutes before turning it out onto a sheet of wax paper and leaving it to cool completely. Wrap the cake layer and stick it in the freezer to firm it up for assembly.
  6. Make the cheesecake: While the cake layer is baking, mix cream cheese, vanilla, and sugar in a large bowl until well blended and creamy. Add the eggs one at a time, mixing between each, and continue mixing until combined. Add the chocolate and continue mixing until combined. Pour mixture into prepared crust and smooth the top with a spatula.
  7. Bake for 55 minutes or until center of cake is almost set. The top may crack, but it doesn’t particularly matter, since you’ll be covering it anyway. Let the cheesecake fully cool. When almost cool, place it in refrigerator to chill while you prepare the filling.
  8. Make the filling: Place the butter, salt, toasted coconut, and toasted pecans in a medium bowl. In a small saucepan, heat the cream, sugar, and egg yolks over medium heat, stirring constantly, until the mixture is thickened, coats the spoon, and reads 170 degrees F on a candy thermometer. Pour this mixture over the coconut mixture and stir until the butter melts. Let the mixture cool completely (I set mine in the fridge once it was almost cool to thicken it some more.)
  9. Assemble the cake: Place half of the filling on top of the chilled cheesecake and spread it out. Carefully place the chocolate cake layer on top. Spread the rest of the filling on top of the chocolate cake layer. Decorate with pecans. Chill for 3 hours or overnight. When completely chilled, loosen the cake from rim of springform pan by wrapping the pan in warm dishtowels. Remove the springform pan and serve.

Disclaimer: I was sent Cinnabon Sprinkle Topping for free to try, but didn’t plan to use it in this recipe until a cooking emergency inspired me to. I would never mention a product to you unless it was something I truly enjoyed, and boy did I love this one!

Ten Favorite Recipes from Willow Bird Baking This Year

I just moved to a new apartment, and my new kitchen is filled with boxes, boxes, boxes! A new recipe is coming your way soon, but in the meantime, I thought I’d tide you over with some of my absolute favorite recipes so far in 2012. This is a hard post to write, and not just because I don’t have an internet connection at my new apartment yet.

(Did I mention that, by the way? To some of us, not having an internet connection sounds kind of like not having oxygen, but I’m actually enjoying the radio silence. My evenings are spent reading with little Byrd beside me. Nevertheless, I’ve missed quite enough important email, thank you very much. The internet will be installed next week.)

The real reason this post is hard to write, though, is because it’s so hard to narrow my favorite recipes down to just ten! In fact, I started out intending to pick my favorite ten recipes of all time — and quickly realized that was crazy talk. There’s been a lot of internal debate just to narrow it down to ten from this year.

If a recipe is sitting here in this post, it means for all sorts of reasons — a combination of taste, preparation fun/ease, and overall appeal — it left a huge impression on me. These would be perfect recipes for a special occasion, a sweet family breakfast, or to impress that new gal/guy you’re talking to. Or to eat on the couch while watching Honey Boo Boo (oh COME ON, you know you’ve seen it! I can’t decide if I’m morally opposed to watching it or not — it seems exploitative, right? — but it sucked me in.)

Without further ado (or further Honey Boo Boo),and in no particular order, here are my favorite recipes so far this year. What are some of YOUR favorite Willow Bird Baking recipes?

1. Caramelized Banana Upside-Down Coconut Cake & Coconut Whipped Cream
2. Sweet Orange Florentines
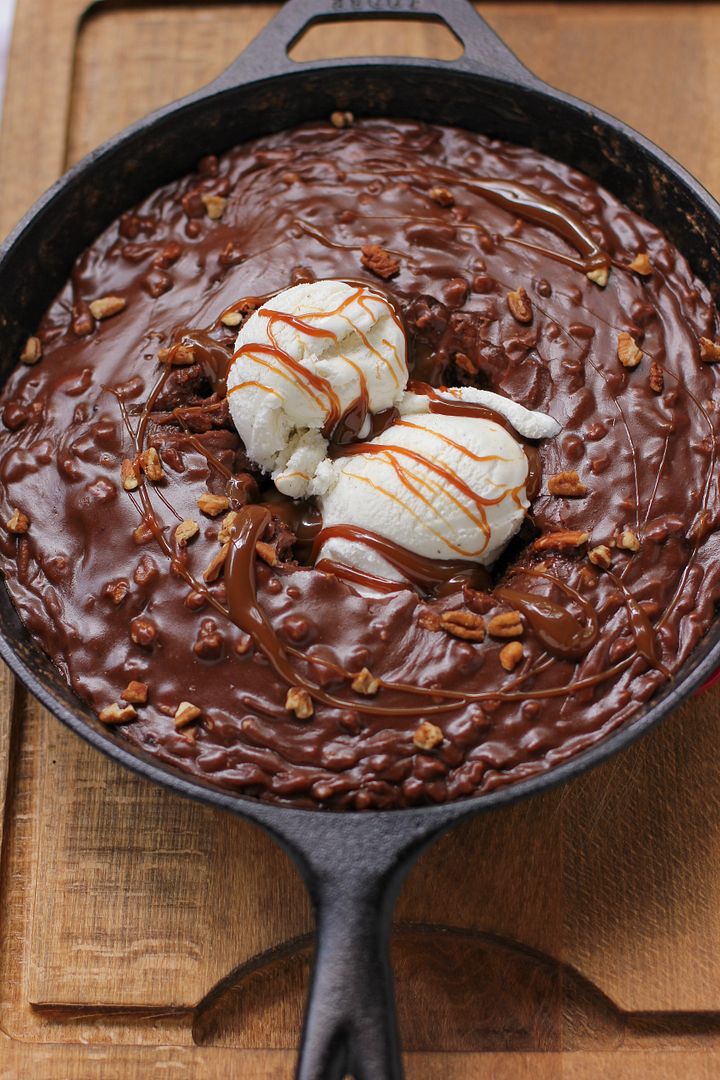
3. Gooey Chocolate Skillet Cake Ice Cream Sundae
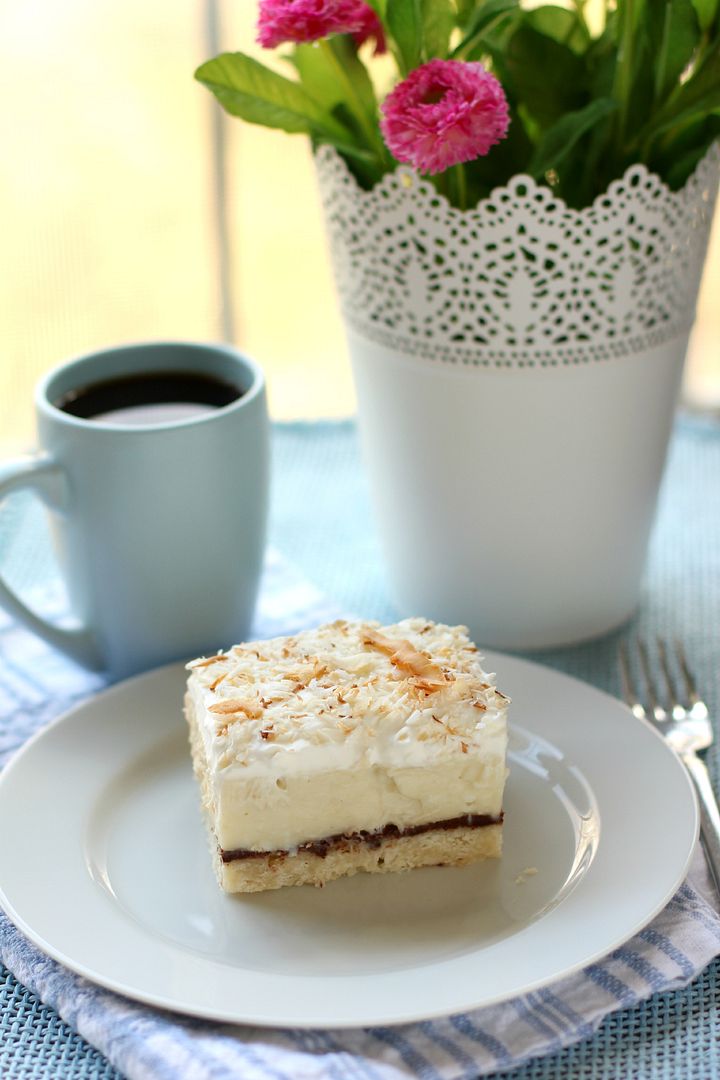
4. Chocolate & Coconut Cream Pie Bars


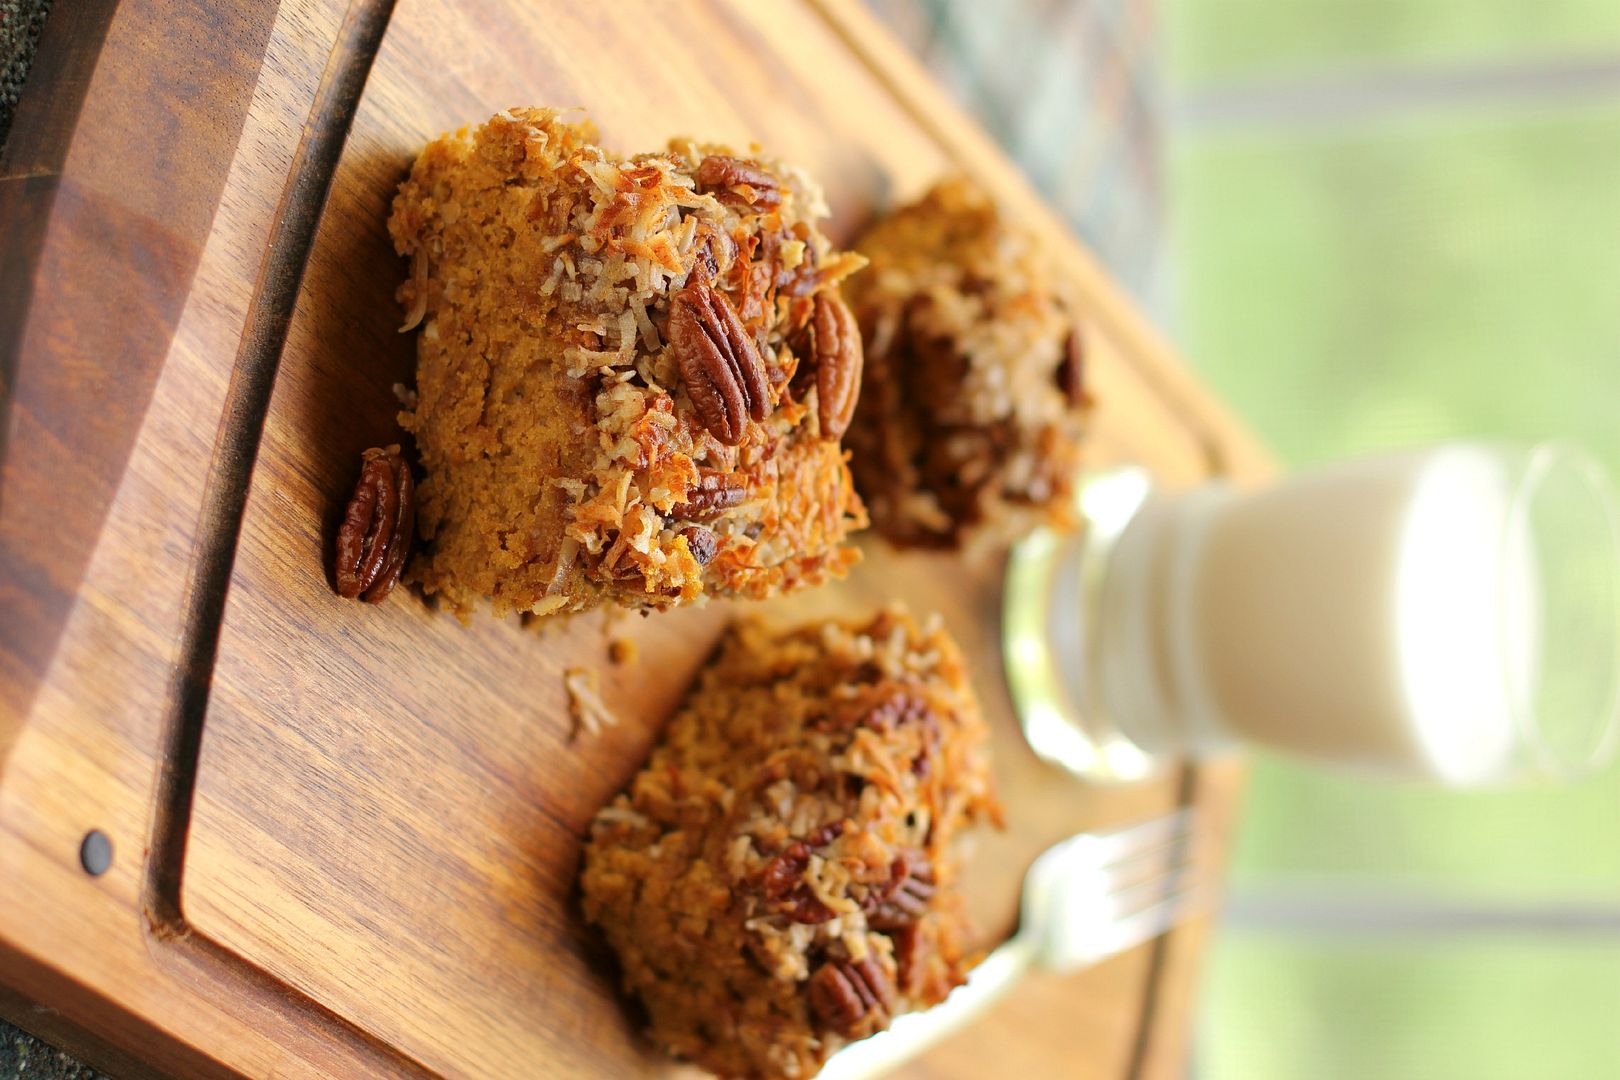
5. Pumpkin Oat Snack Cake with Broiled Coconut Icing (especially when served as an ice cream sundae!)
6. Pork Bulgogi Bāozi (Steamed Korean BBQ Buns)
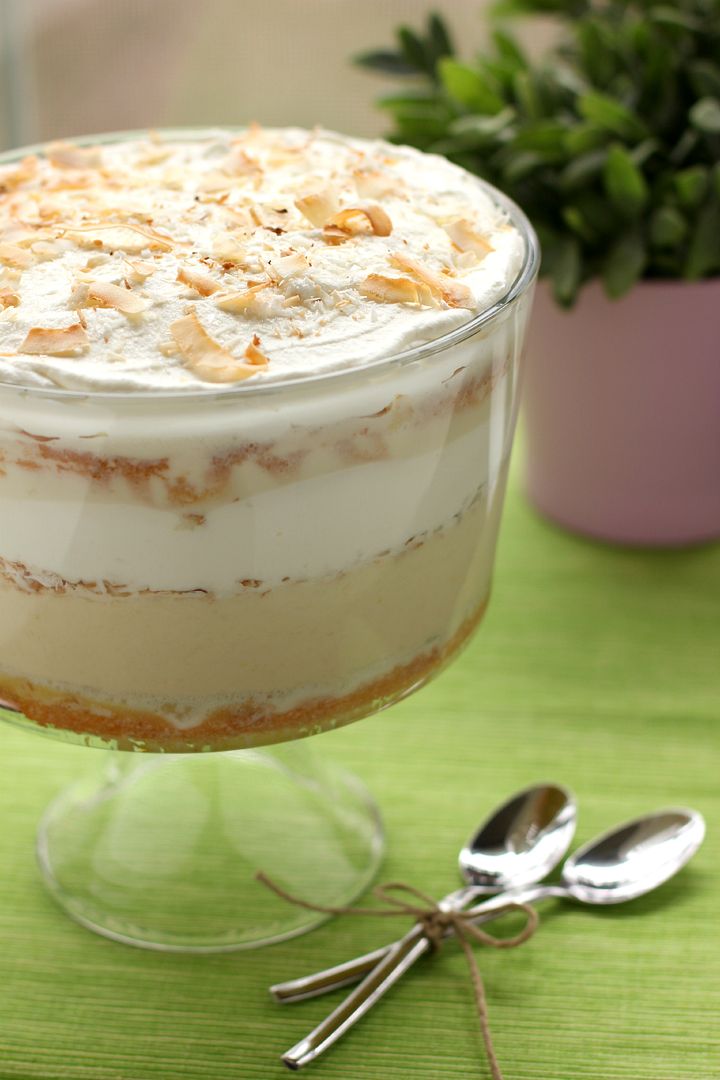
7. Tres Leches Coconut Cake Trifle
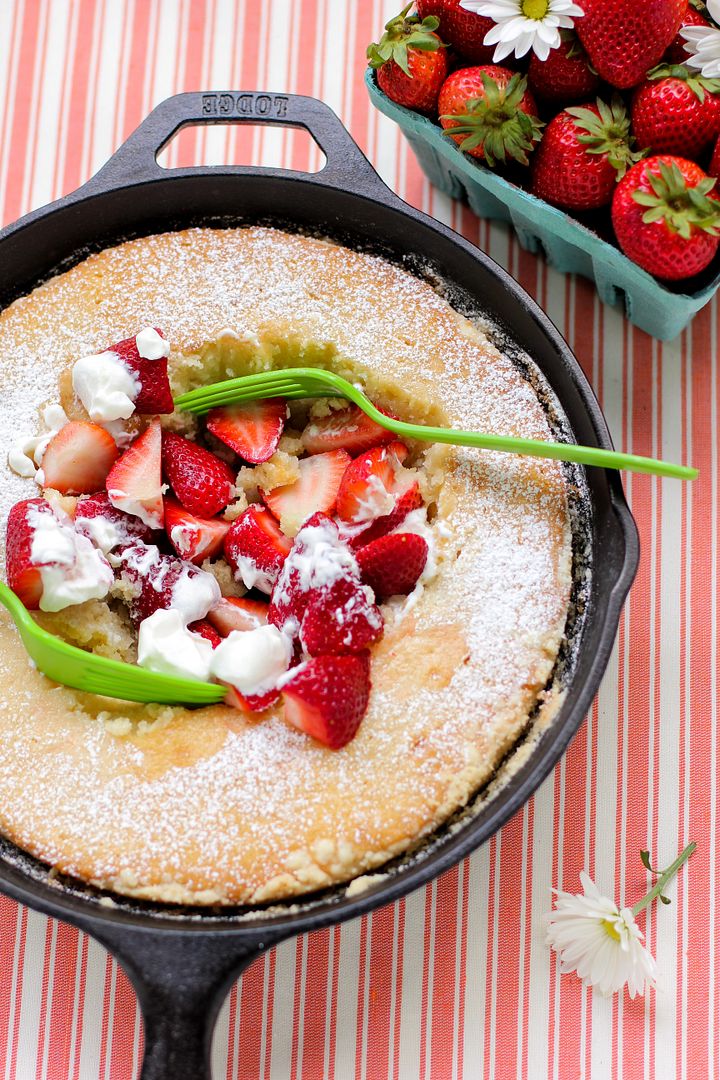
8. Gooey Butter Strawberry Shortcake


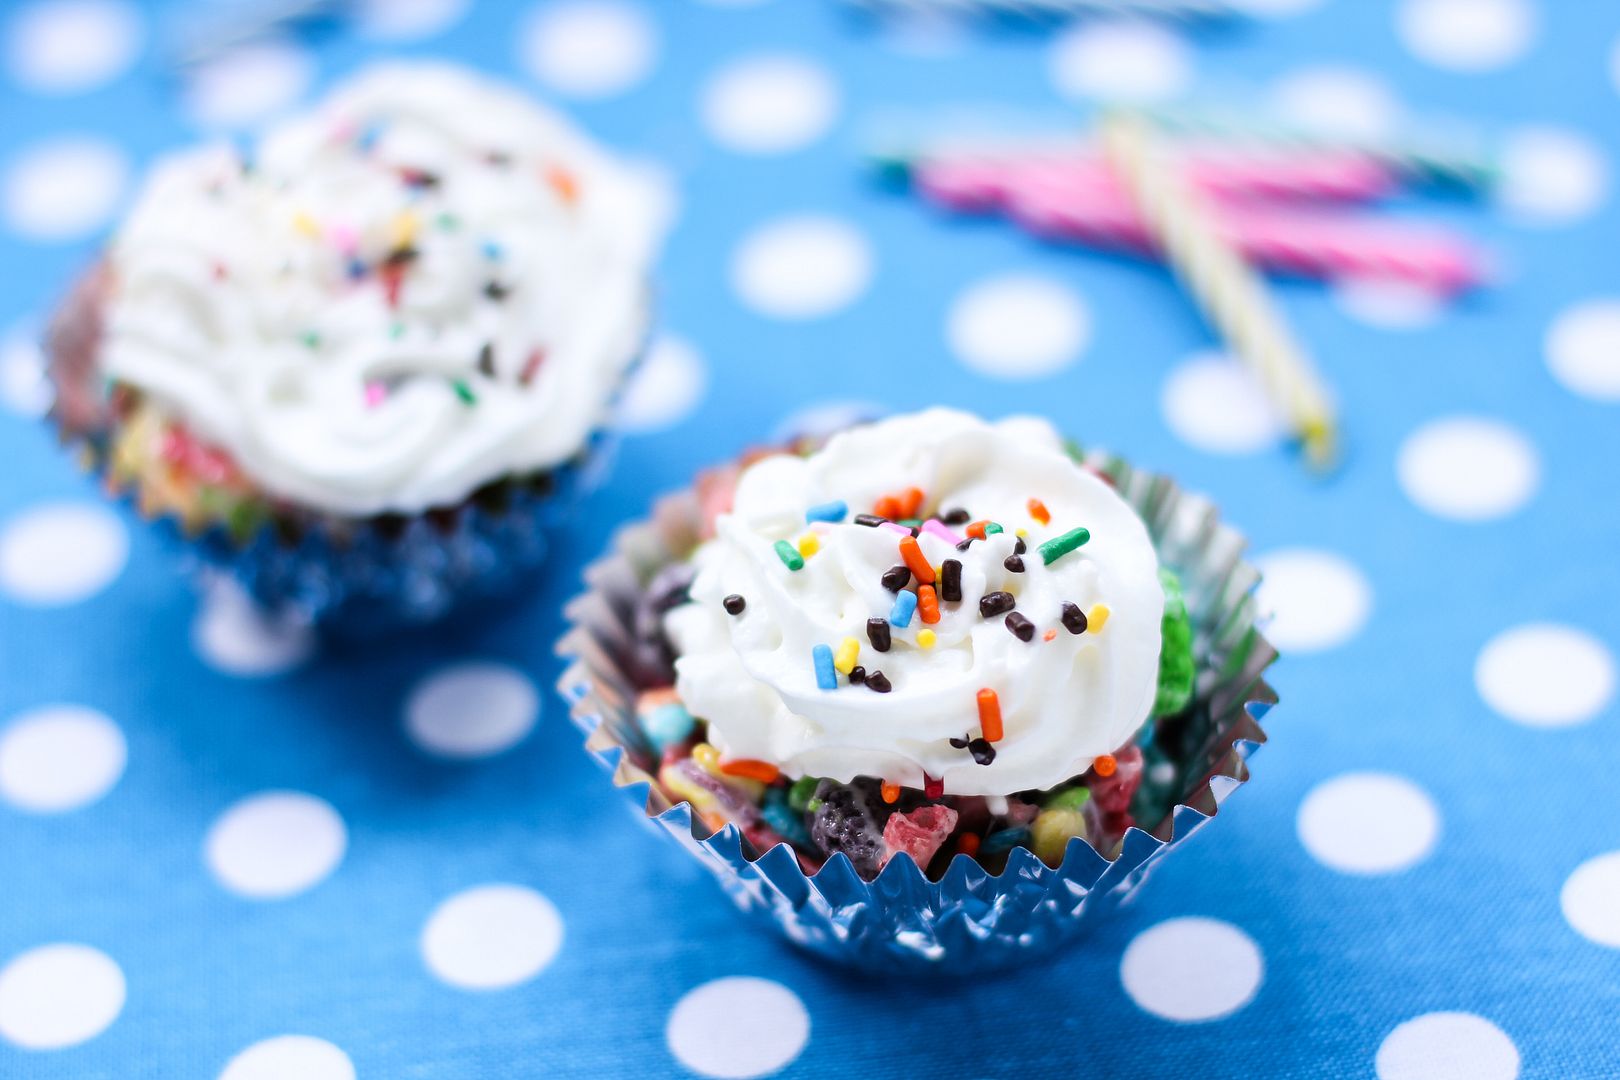
9. No-Bake Fruity Cereal Treat Cupfakes
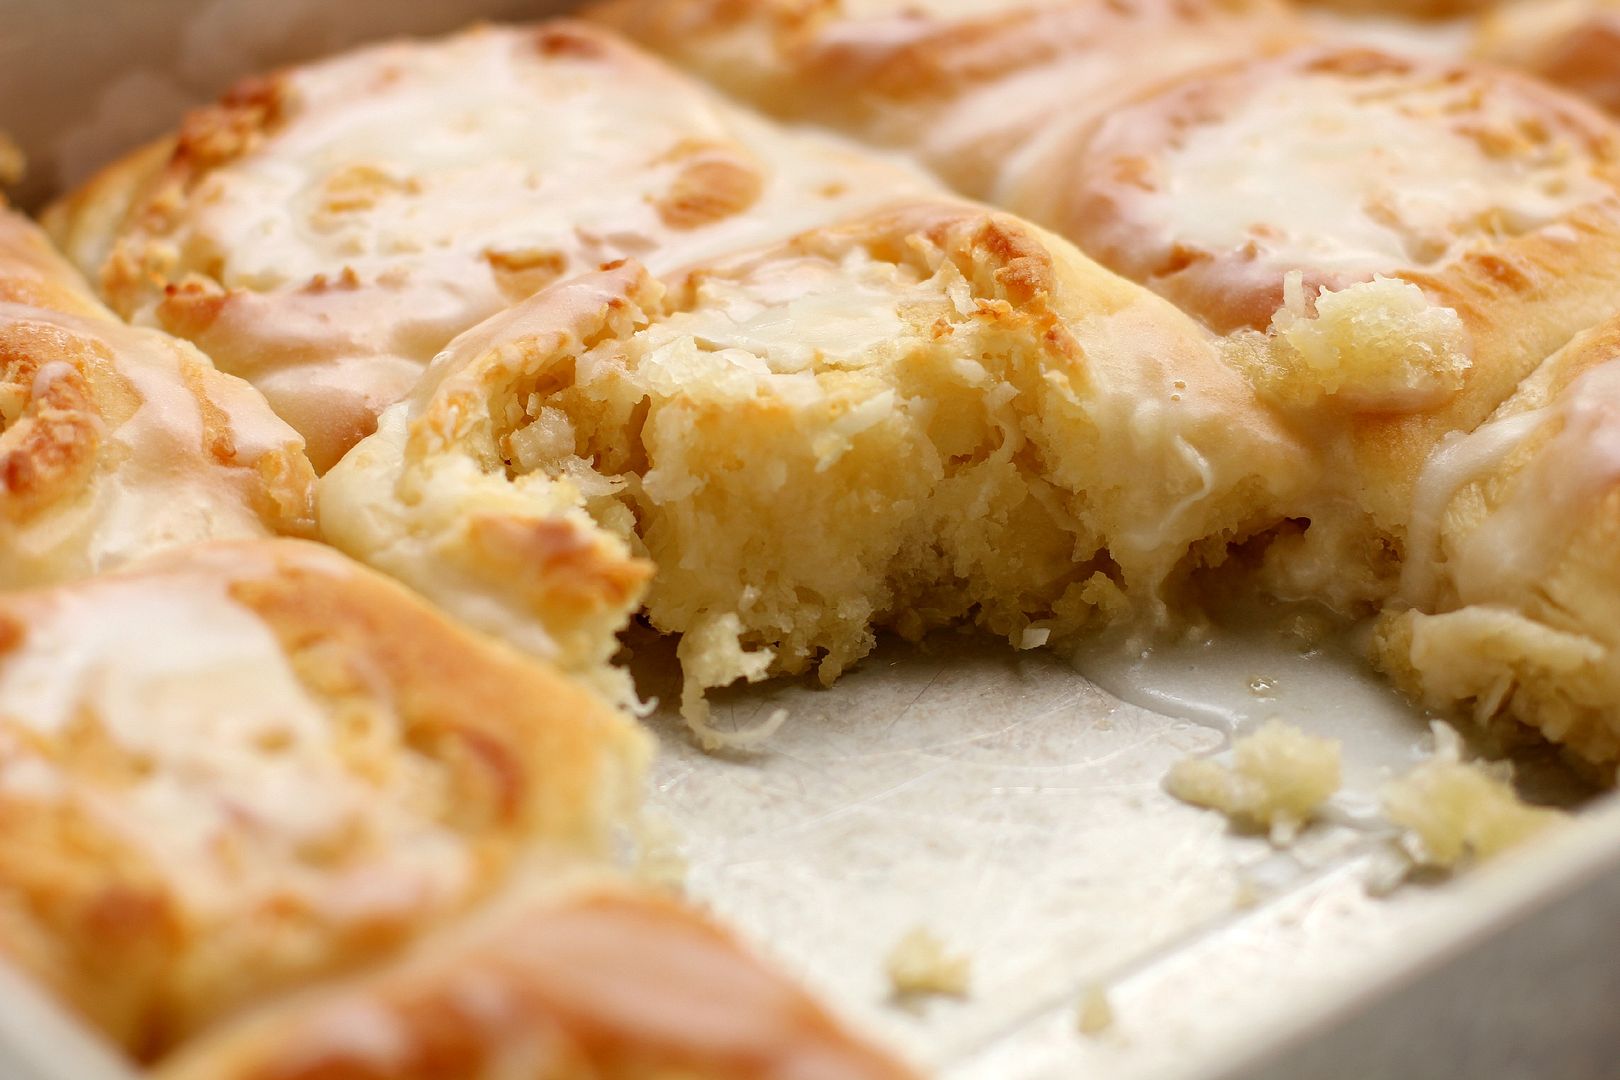
10. Buttery Coconut & Almond Morning Buns


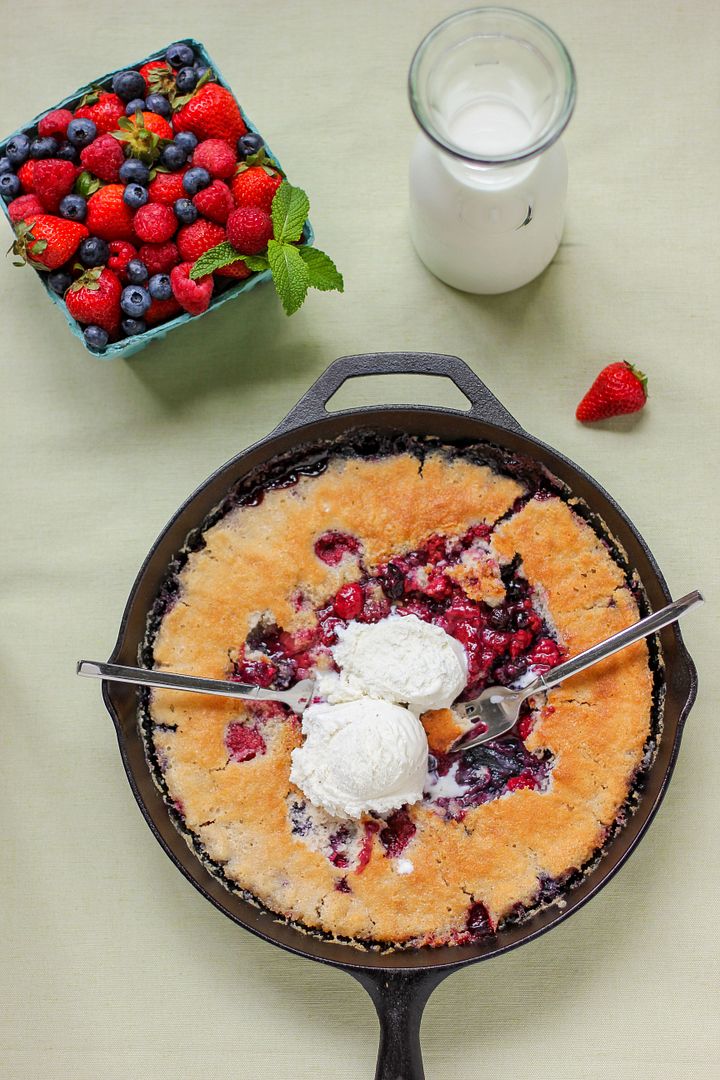
End of Summer Berry Cobbler

Sometimes you meet someone and you just want to sit on a patio for hours chatting with them. Preferably with some strawberry lemonade and a giant bowl of roasted chickpeas. I haven’t met Joanna Goddard in person, but if you read her wildly popular and engaging blog, Cup of Jo, you know why it’s easy to feel like I have. Cup of Jo is one of my favorite blogs because of Joanna’s sweet, casual voice and fantastic content.

Today I’m excited to have a guest post on Cup of Jo, and it’s a recipe I’ve loved for as long as I can remember. My mom often baked this cobbler with a big can of peaches when I was growing up. Here I’ve updated it to use bright, fresh berries. It’s a chance to relish the last drops of summer.

Click here to read more and get the recipe for Summer Berry Cobbler over at Cup of Jo.

Sausage & Toast Breakfast Strata in Baked Tomatoes

I just had the best morning ever.

If someone told me that, I’d assume they got to sleep in, have a big breakfast on the porch, and then maybe eat some cupcakes. With Ryan Gosling.

I didn’t do any of those things (but hey Ryan, call me maybe?)

I went to the gym.

If you know me at all, you’re probably calling my doctor right now to report sudden, inexplicable changes in my mental state. While I tend to remain trim by watching my diet (nobody say one word about those cupfakes down there), I’ve always hated exercising.

HATED. I hated playing kickball with such a passion in elementary school that I constructed elaborate fantasies in the outfield, transporting myself to imaginary tropical locales. I welcomed bodily harm if it excused me from the mile run. I got on the soccer team in 7th grade through sheer pity, and even then I was played where my incompetence could do the least damage. When I finally got to the point during my first year teaching where I was doing the elliptical for 15 minutes a day, I felt like a superstar. And then I quit after a month.

I’ve never been one to push myself physically.

But I’m serious: The reason this morning was the best morning ever was because I went to the gym. After a few Zumba classes, barbell classes, and yoga classes lately, the exercise bug seems to have finally bitten me (I used to regularly tell exercise to “bite me,” so it’s about time.) This morning, I started with a hard cycle class, swam laps for 45 minutes, did some back extensions, and then settled into a relaxing 45 minutes of yoga-pilates. After showering, I headed to my favorite little deli for a leisurely, celebratory lunch. Even though that was probably a little too much exercise for one day (I’m sore and will be doing less tomorrow), I loved every minute.

Don’t get me wrong: I’m not actually good at any of this. Yoga least of all. Everyone’ll be ohming and breathing and stretching while I’m flailing and eventually falling on my face. Today we were in whatevervasana, that meditative part at the end, and my yoga teacher said, “Breathe — feel yourself extending beyond your boundaries.”

I was the middle school kid in the corner with an attention deficit thinking, “I can’t even extend beyond the fact that my face itches. I wonder if everyone’s face itches right now?”

Even though I’m a spaz, I do love that part at the end of yoga where we just lie on our mats for like 5 minutes in a mock kindergarten naptime. Any exercise routine that includes naptime works for me.

I even love the hard stuff, though: pushing myself to climb a hill in cycle, lifting a heavier weight, swimming one more lap. My favorite part of exercising is feeling clean, relaxed, and healthy after working out and showering. I also love eating meals and an occasional treat knowing that I worked hard on my health all week and don’t have to feel guilty. Who knows, this might finally be the turning point in my relatively sedentary life!

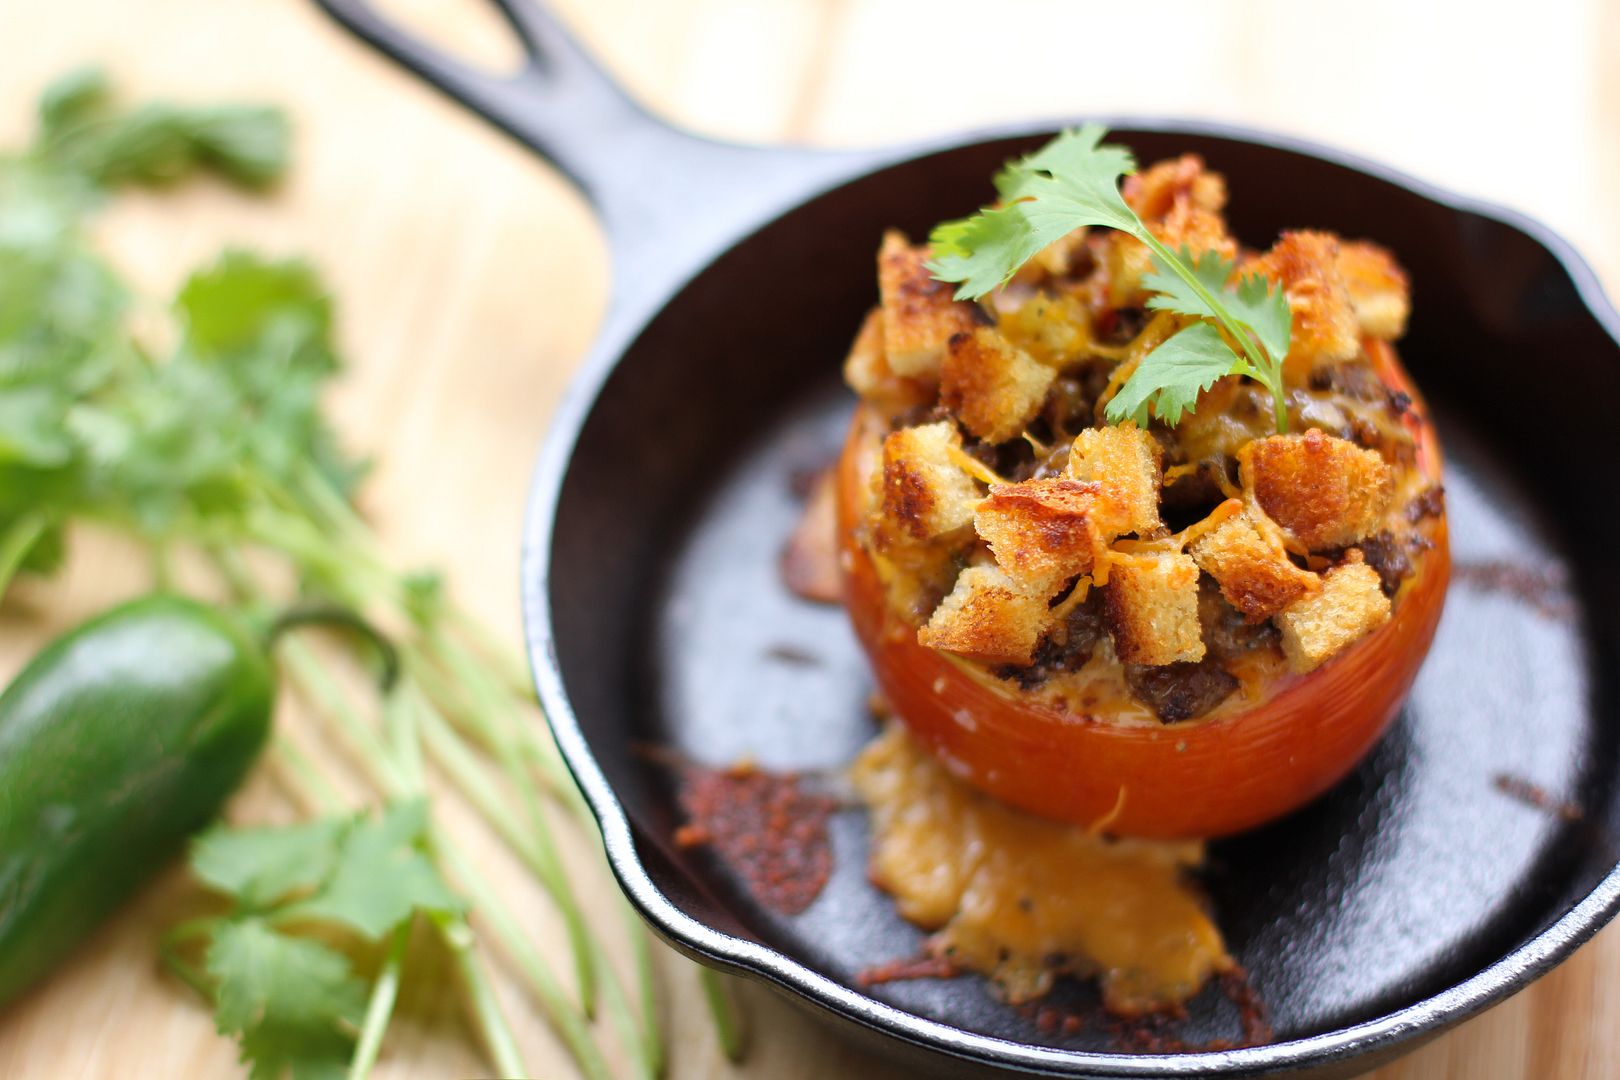
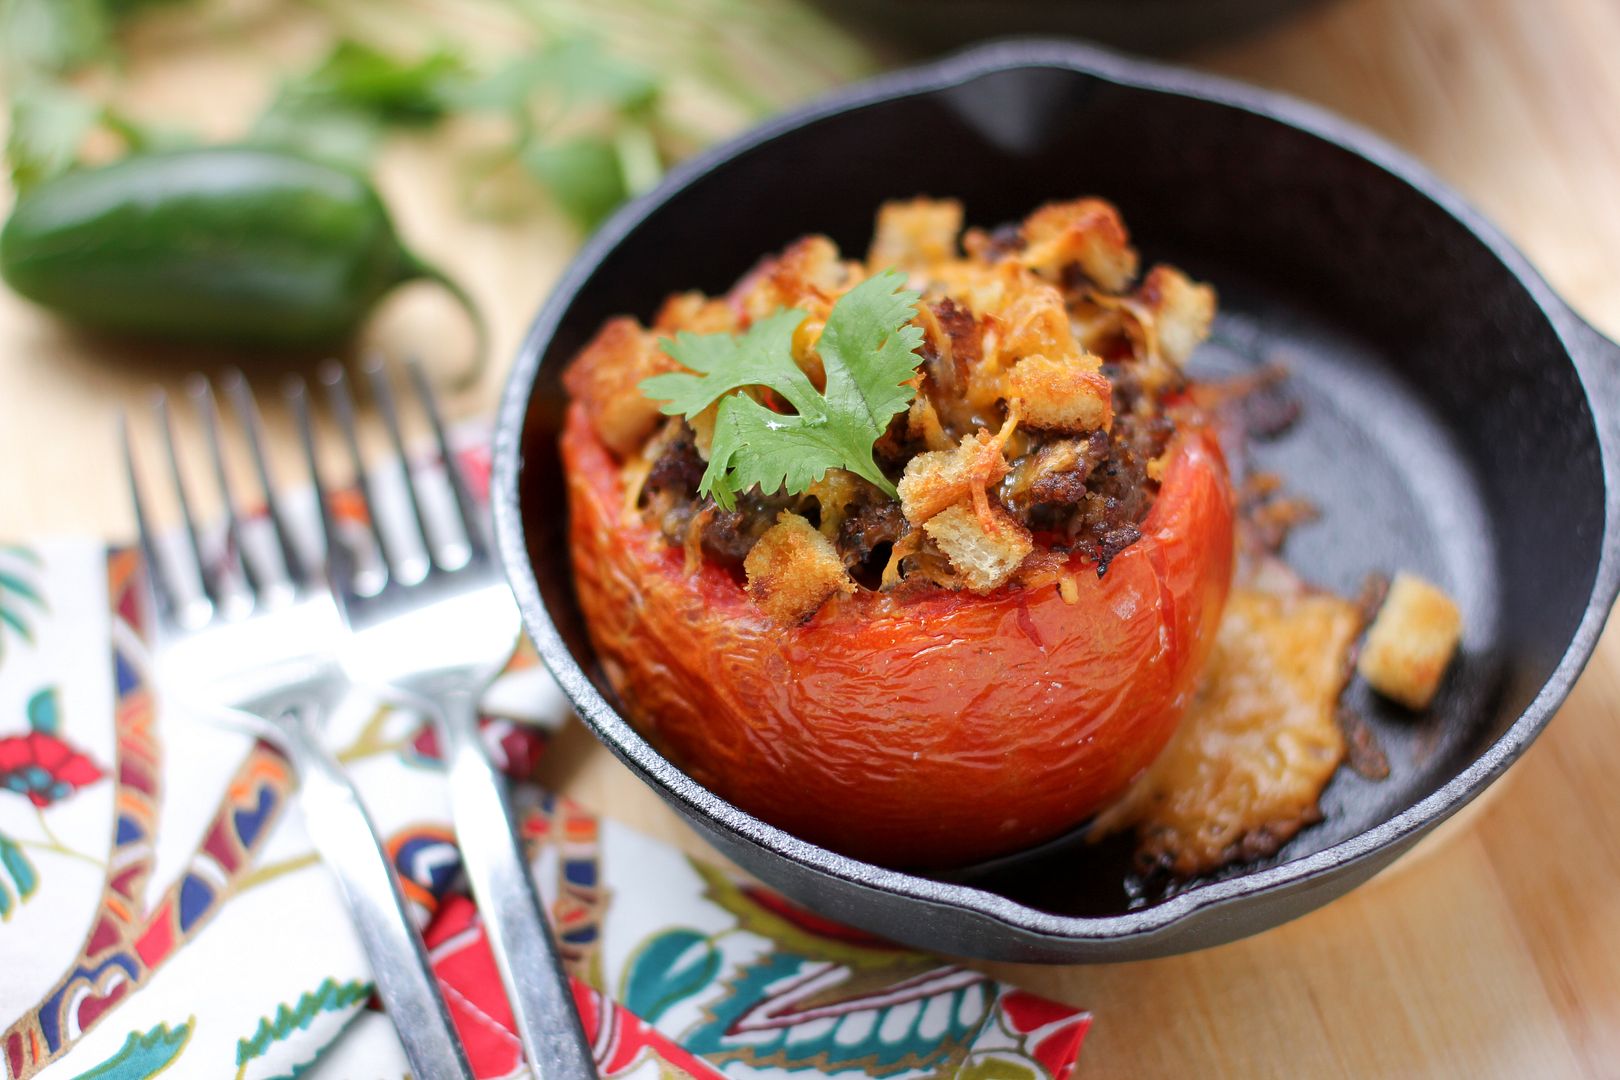
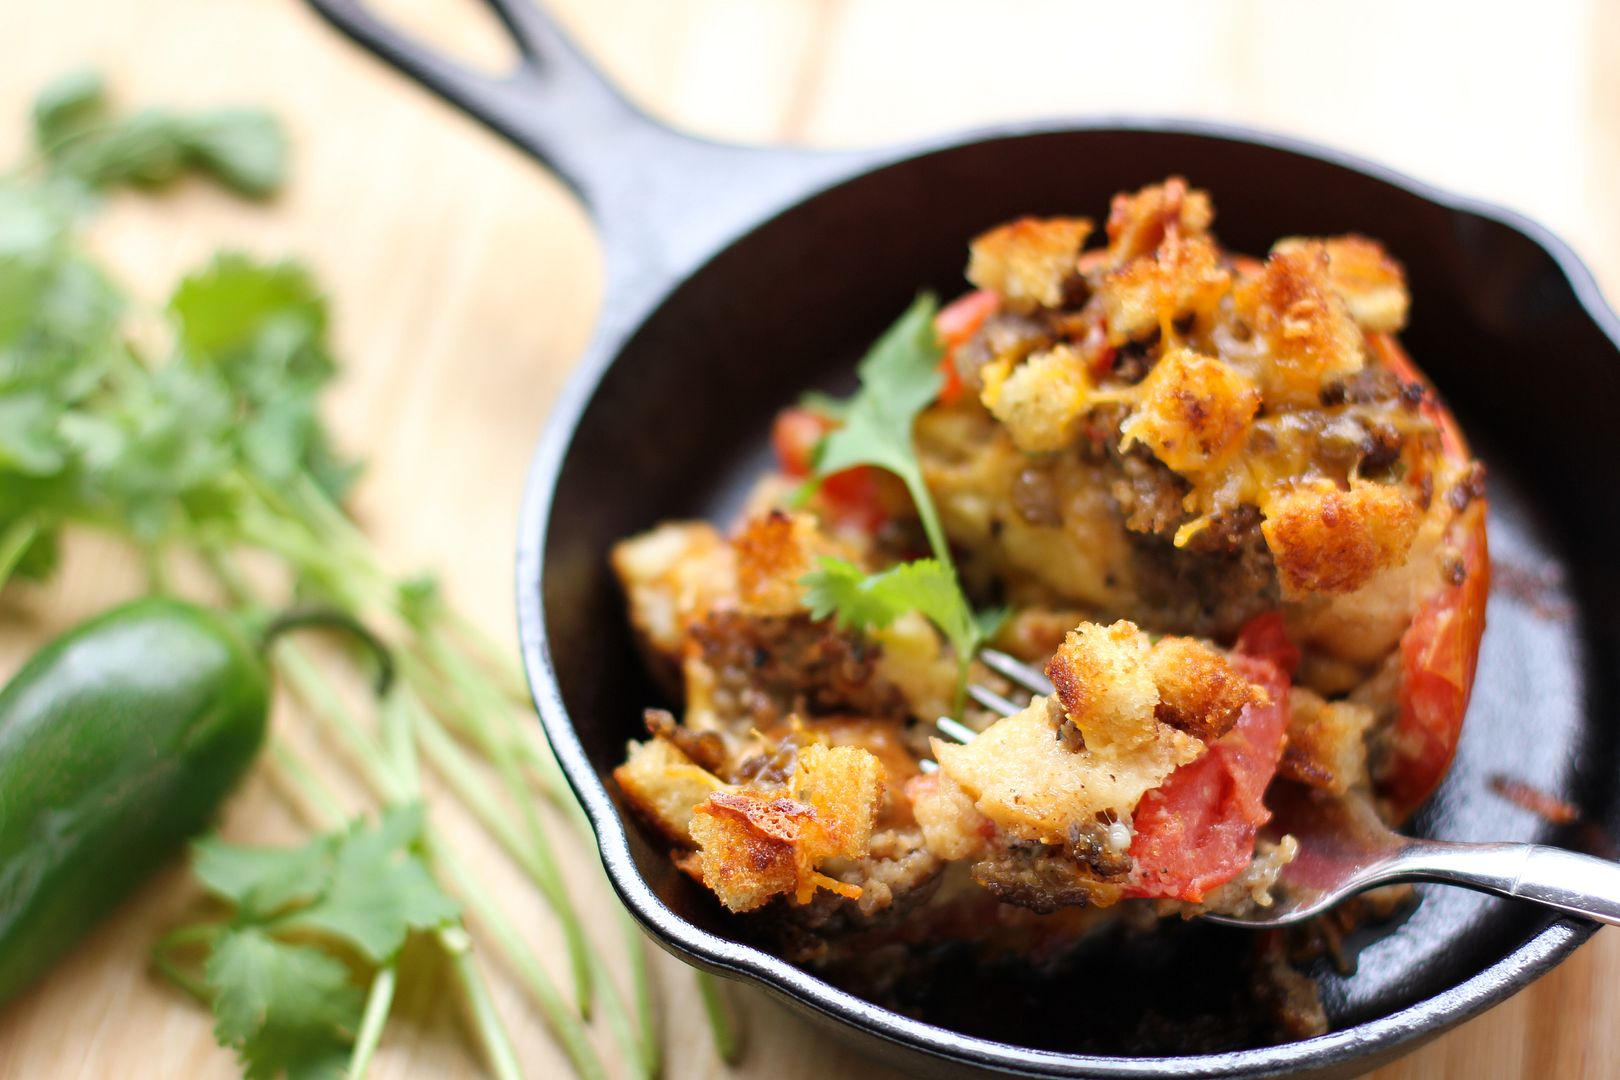
Exercise definitely makes for a great morning in my book, but one thing my morning was lacking was these gorgeous stuffed tomatoes. I made them last week and am sort of obsessing over the memory. If you love a good breakfast strata, you’ll love this cute and tasty presentation. Spicy sausage, buttery toast, eggs, and cheese are layered into ripe, juicy tomatoes. The resulting breakfast is hearty, delicious, and so pretty. Since these tomatoes can be prepared the night before and baked in the morning, they’re perfect for company or any mornings where you want a nice breakfast without the fuss.

What would your perfect morning consist of? Other than these tomatoes, of course!

One year ago: Sweet and Spicy Pickled Grapes with Goat Cheese
Two years ago: 48 Homemade Breakfast Cereals
Three years ago: Chocolate Cheesecake Stuffed Cupcakes with Ganache

Sausage & Toast Breakfast Strata in Baked Tomatoes


Recipe by: Willow Bird Baking
Yield: 4 servings

This gorgeous breakfast can be prepared a night ahead and baked in the morning. It’s hearty, filling, and tasty. Enjoy!

Ingredients:
4 large beefsteak tomatoes
Coarse salt and ground pepper
1 egg
1/2 cup evaporated milk
1/2 cup shredded sharp cheddar cheese, plus more for sprinkling
3 slices of bread (2 thick slices and 1 thin; sourdough or Italian would be nice)
about 3 tablespoons butter, melted for toasting
3/4 cup chopped bell peppers and onions (I used a ready-chopped fajita mix from my grocery store)
1/2 teaspoon minced garlic
1/2 teaspoon minced jalapeño (or to taste)
about 12 ounces hot sausage
1/4 teaspoon cayenne pepper
Toppings: sour cream, diced jalapenos, hot sauce, salsa, chopped green onions, and some fresh cilantro or parsley

Directions:
Note: This is a great make-ahead breakfast! You can prepare the tomatoes and stuff them the night before (leave off the top croutons so they don’t get soggy), covering with a piece of plastic wrap in the fridge. When you’re ready for breakfast, leave them sitting out while the oven preheats. Top with croutons, bake, and serve.

Brush both sides of each slice of bread and toast them in a skillet over medium-high heat, flipping once, until they’re golden brown all over. Set them aside to cool and, when cooled, slice the thick slices into 1/2-inch cubes. Slice the thin slice into smaller cubes (about 1/4-inch maybe?) — these will be the little “croutons” for the top! Preheat the oven to 350 degrees. Line a small baking dish or pie plate with a sheet of parchment paper. You can also use a cast iron skillet (no parchment necessary. Just spritz with cooking spray.) I got my mini ones here.

Use a serrated knife to cut the top off of each tomato. Gently remove the innards (seeds and flesh) of each tomato with a spoon without breaking through the outside flesh — you’ll end up leaving a shell that’s about 1/4-inch thick all around. Sprinkle tomatoes with salt and pepper and place them in the baking dish. If they won’t sit upright, you can carefully slice off a sliver of the bottom to create a flat surface. Just don’t cut all the way through.

In a skillet over medium-high heat, brown the sausage until fully cooked through. Spoon it out with a slotted spoon onto a paper towel-lined plate to drain. Discard all but a couple of teaspoons of the sausage grease on the stove (or add a little olive oil if there isn’t enough grease). Heat the remaining grease over medium-high heat. Place peppers, jalapeños, and onions into the skillet and toss to coat them with the grease. Sauté them for about 3-4 minutes until they’re soft and the onions are beginning to turn translucent. Add the garlic and cook for about 30 seconds, stirring constantly, until it’s fragrant. Remove this mixture to the paper-towel lined plate with the sausage. After letting the mixture drain for a few minutes, place it in a small bowl and toss it together with the cheddar cheese.

Place a layer of thick bread cubes into each tomato. Spoon a heaping spoonful of the sausage mixture over top. Continue layering bread and sausage, ending with a layer of sausage at the top. Really pack it down! In a medium bowl, whisk together the egg, evaporated milk, cayenne pepper, and a little more salt and pepper. Pour this mixture slowly (so it has a chance to soak in) over each tomato, dividing it evenly, until you can’t fill anymore without them overflowing. Place your tiny “croutons” on top of each tomato’s filling, packing them down. Bake the tomatoes for 40 to 45 minutes, or until the casserole is set and the tomatoes are nicely roasted. You might have to tent with foil after about the first 15 minutes so the little croutons don’t get too dark. Top with the remaining cheese and continue baking for 5 minutes or until melted. Serve warm with sour cream, cilantro, and any other fixings you’d like.

If you liked this post, please:
Subscribe to Willow Bird Baking
Follow Willow Bird Baking on Twitter
Follow Willow Bird Baking on Facebook

No-Bake Fruity Cereal Treat Cupfakes

I’m deep in the trenches: sprinkles flying at my face, frosting smeared up to my elbows, dried batter caked on every surface. No, I’m not on the set of Cupcake Wars (though producers should feel free to contact me; I’ll bring my A-game).

I’m in the middle of Cupcake Capers.


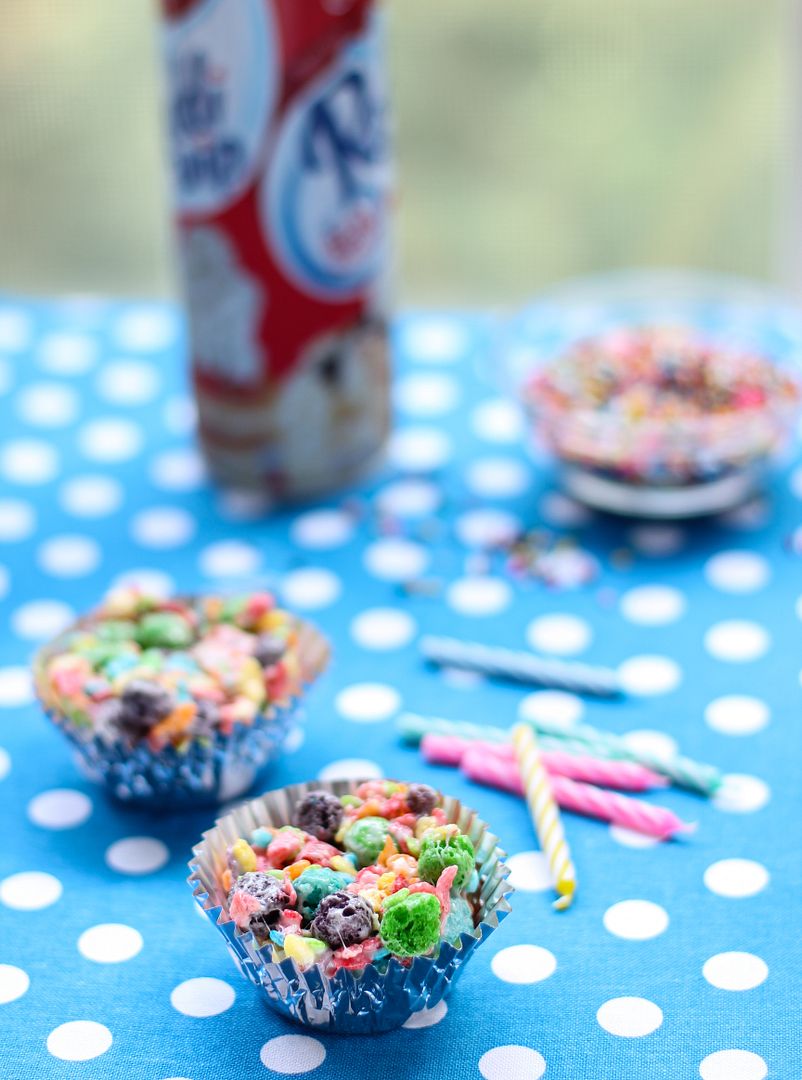
naked cupfakes!

Cupcake Capers is a 5-day camp where I teach campers to bake, fill, and frost cupcakes. You have to admit, cupcake camp beats pup tents and mosquitoes.

Each year at Cupcake Capers, I’m unsurprised by how much kids love cupcakes, oreos, chocolate chips, whipped cream, and sprinkles. That’s normal. I am surprised, however, by how weird kids are. I should probably be used to this by now — after all, I’m a middle school teacher — but I’m still continually impressed.

Last year, if you’ll remember, two of my kiddos created a pet powdered sugar pile. They religiously guarded it, giving it a wide berth when wiping the counters. They used their fingers to scrawl threatening messages to anyone who dared clean it up. They drew a little face on it à la Tom Hanks’s friend Wilson in the movie Castaway.

There weren’t any powdered sugar piles this year, but there was still plenty of weirdness. This time around it all started with an egg and a sharpie. One of my campers was intent on using said marker to give “Mr. Egg” a face. Despite her pleading, I wouldn’t let her do so before we cracked it for sanitary reasons . . . so she gave the empty eggshell a face afterwards, instead. A surprised face, naturally, because he was shocked at having been split open so unceremoniously.

This was strange enough, but the next day she and her friend showed up to cupcake camp with Mr. and Mrs. Lemon. You can probably guess that these were two lemons with faces drawn on in sharpie. Mrs. Lemon has a bow. Oh, but you’re probably pronouncing their names wrong: it’s lem-OHN, with a French accent.

Yeah. These kids are strange.

Strange in the best way, though. So far (besides indulging in their food anthropomorphization), we’ve made Fauxstess Cupcakes, Creamsicle Cupcakes, Cookie Dough Cupcakes, and Red Velvet Cupcakes. The campers are baking fiends! Every day they get tons better at mixing, filling, and piping frosting onto cupcakes.

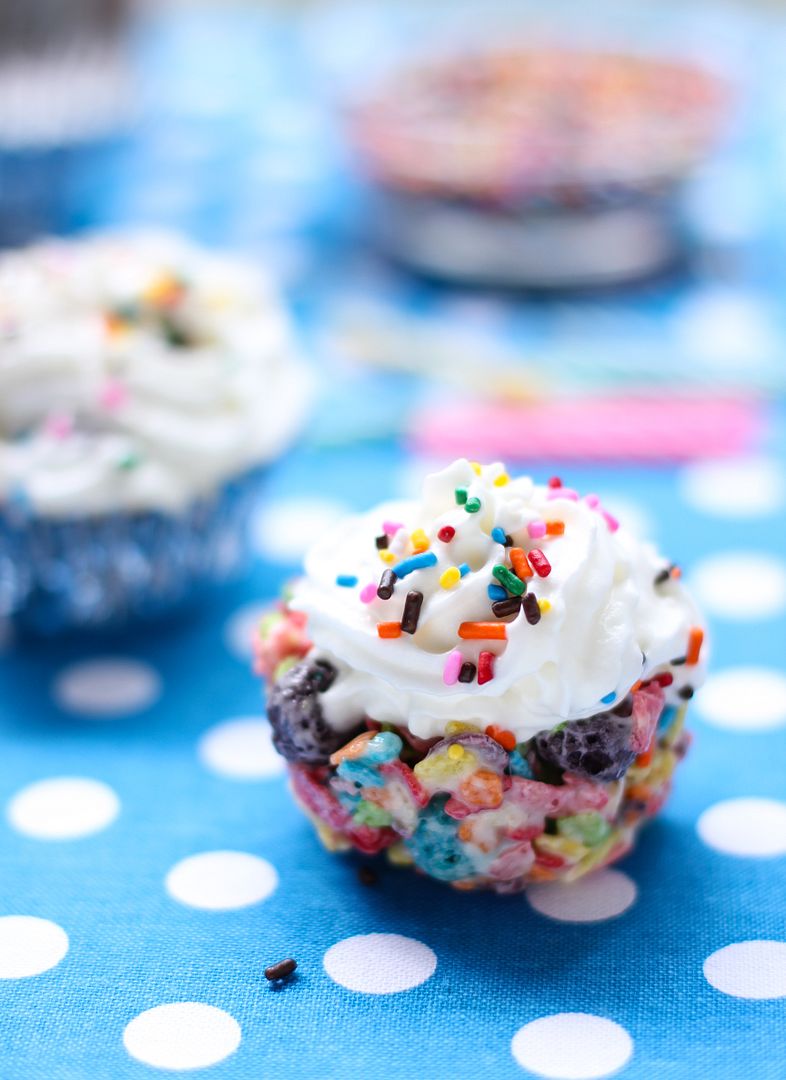
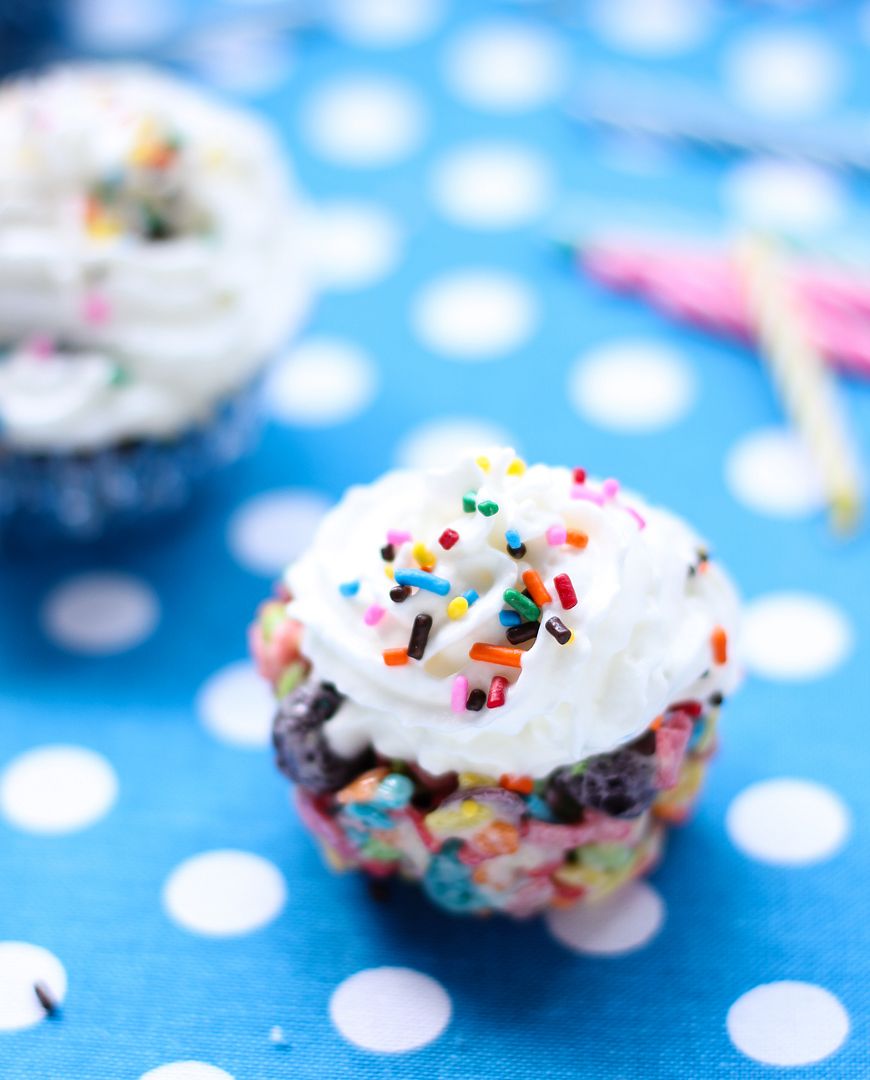
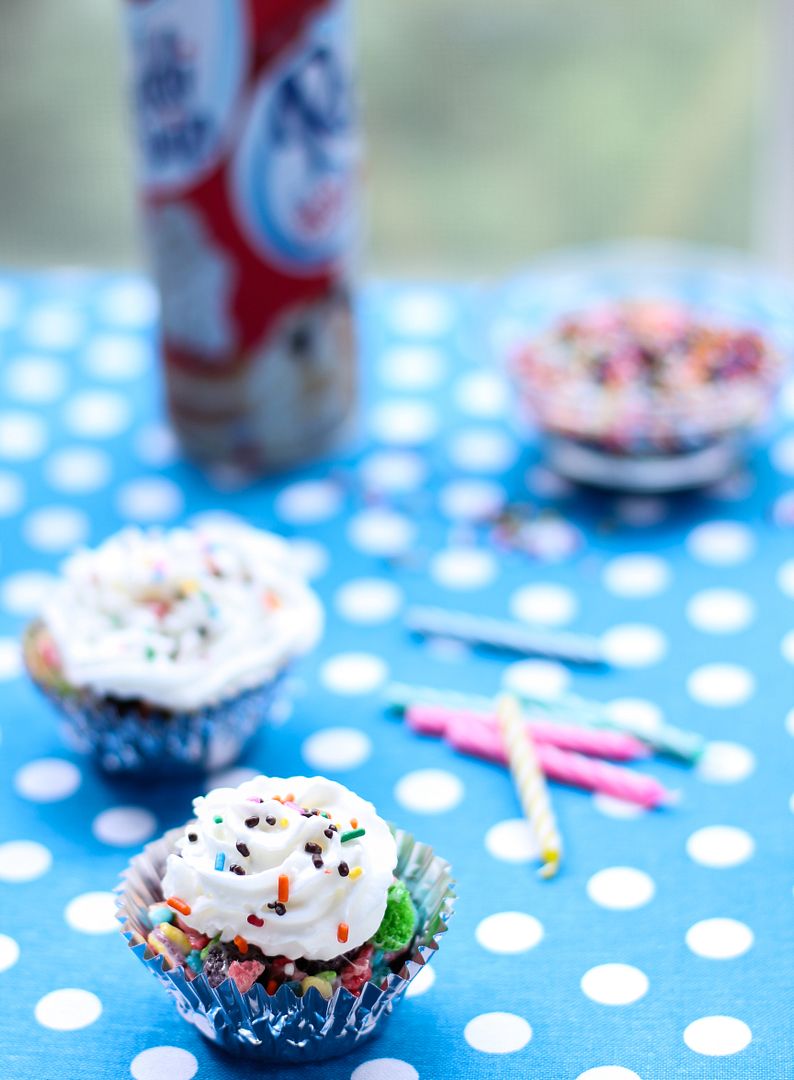
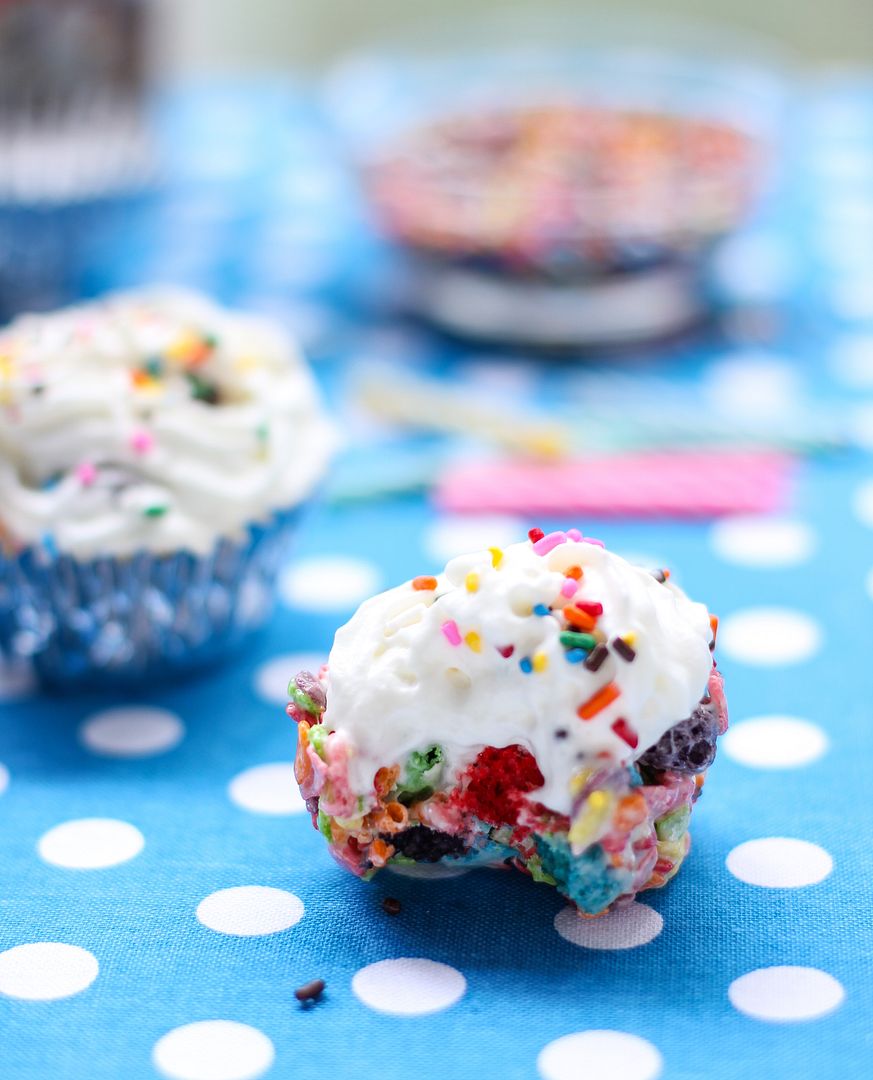
Today we also tried something a little different. With our extra time, we made some cupFAKES. Cupfakes are just cupcakes that aren’t actually made of cake. I make several savory versions, but this cupfake was a dessert treat. We used a regular Rice Cereal Treat recipe molded into a cupcake pan to make little cupfakes that we “frosted” with spray whipped cream and topped with sprinkles. Instead of rice cereal, we used fruity varieties: Fruity Pebbles and Cap’N Crunch’s Oops! All Berries.

Apart from being adorable and extremely easy, I was shocked at how flippin’ awesome these things taste! The fruity cereal treats and whipped cream are pretty insane together. After we’re finished, you know, decorating oranges or whatever the heck the kids come up with tomorrow, I know they’re gonna love chowing down on these!

What weird things did you play with as a kid? What weird things have your kids made into toys?

One year ago: Chocolate Pistachio Cream Cupcakes
Two years ago: Tumbleweed Burger
Three years ago: Mango Raspberry Rosecakes

Easy Fruity Cereal Treat Cupfakes


Recipe by: Adapted from Kellogg’s
Yield: about 10-11 cupfakes

These no-bake treats are super quick, easy, and CUTE! Best of all, they are so, so tasty. They would make sweet little birthday “cakes” for a colorful party.

Ingredients:
1/4 cup butter
4 cups miniature marshmallows or 1 package (10 oz) large marshmallows
4 cups fruity cereal (I used 2 cups of Fruity Pebbles and 2 cups of Cap’N Crunch’s Oops! All Berries)
whipped cream for “frosting”
sprinkles

Directions:
Line a cupcake pan with plastic wrap (press it down into each well) and spray it with cooking spray. In a saucepan over low heat, melt the butter. Stir in the marshmallows until they’re completely melted and then remove the pan from the heat. Add the cereal and stir (I use a spoon coated in cooking spray) until the cereal is completely coated. Spoon a big glob into each cupcake well. Use a sheet of wax paper to press the mixture down and mold it into each well. Let it cool completely.

Remove each “cupfake” and “frost” it with whipped cream. Top with sprinkles. Serve in cupcake papers if you wish! You can store unfrosted cupfakes for two days in an airtight container or in the freezer (separated by wax paper) for up to 6 weeks.

If you liked this post, please:
Subscribe to Willow Bird Baking
Follow Willow Bird Baking on Twitter
Follow Willow Bird Baking on Facebook

1 70 71 72 73 74 127