other

Clementine Curd

I noticed early on in my teaching career that 6th graders do this thing. A discussion with them about a novel might go something like this:

Me: “What was the main character’s opinion on the government?”
Student: (unsure of the answer) “Hm. Uh.” (stares off into space for a few moments) “Ummm.” (gives up) “Well, I don’t know.”

All the while, the novel itself sits like an ironic little nugget in front of them, untouched. I look at it pointedly. The student looks at me blankly.

At this point, I usually get a little heavy-handed. I give my head an exaggerated scratch and give a shrug of cartoon proportions. “Is there any way we could possibly find out? Is there anywhere in the universe we might be able to get a hint about the answer?” Typically after this bit of melodrama on my part, the students catch my drift, grin, and grab their books.

It’s not a personal failing that they don’t immediately use available resources to form their ideas. Instead, it’s part of natural child development — every 6th grader who enters my class needs to build this skill. I’m here to construct a staircase toward resourcefulness and independence.

In keeping with that, I tell my 6th graders all year long that we’re going to work on finding evidence.

We hunted through the novel Crispin to find for evidence to support our opinions about feudalism. We hunted through a biography about St. Giles to find evidence for why the author included him in the story. We read Greek myths to find evidence to build a definition of what a hero quest is. We found evidence in The Giver that Lois Lowry’s “utopia” wasn’t really all that perfect.

Evidence isn’t just for language arts, either. In the after school Cookie Camp I’m leading right now, the following exchange is a common one:

Me: “What’s the next thing we have to do?”
Camper 1: “Maybe add the egg?”
Camper 2: “Oh, or maybe add the flour!”
Camper 3: “Do we have to add the vanilla next?”
Me: (requisite melodrama) “How in the world are we going to decide?! We don’t want to mess up our cookies, but how do we know what to do?!”
Campers: “Oh, the recipe!”

Oh. The recipe, y’all.

Maybe as you accumulate practice and skill, you can begin to deviate from the recipe, combine recipes, or even create recipes. But in those beginning stages when you’re just learning to bake (or form opinions, or understand new subject matter), you have to learn to go back to the source.

6th grade was a long time ago for me, but I still need this reminder sometimes. I’ll find myself fretting about a decision or wondering why events are unfolding like they are. My cloud of anxiety can narrow my perspective. I need to return to the source during those times. I need to increase my time reading the Bible, return to the basics, and remind myself through the words inspired by God Himself who He is and what He’s done. I need to let go of the other ways I try to find my answers — worrying, busying myself with my to-do list, trying on different reactions to the situations I encounter.

That being said, this post isn’t so much a polished prescription (“just go back to the source, duh — problem solved!”) as it is a revelation of where I am in my thought process right now. I’m reading through Job, the most difficult book of scripture for me (and I don’t mean in terms of comprehension), for the second time in a year. I’m finding some answers, but also more questions. And always, always, I’m asking God to take me back to the recipe, to give me evidence — building blocks of information about what I can do (or what I can release) to glorify Him.

There’s a song I love that says, “[A Father’s] whisper’s like a bridge; it’s a river spanned.” It’s true — every whisper of truth He gives me spans a river of need. So I’ll keep collecting His whispers and weaving them into a path, an answer that won’t be complete in this lifetime.

. . .

In the meantime, in the spirit of going back to the basics, here’s a simple, foundational recipe. A lovely fruit curd can play so many versatile roles in the kitchen: a spread for buttered toast, a dip for shortbread cookies, a base for mousse, a filling for cakes and cupcakes, a quick snack on a spoon. I’ve been in love with Fine Cooking’s foolproof lemon curd recipe since I first found it, and I use it as a base for all other curds I create, such as this clementine curd.

While it takes quite a bit of stirring and only lasts a week in the fridge, curd can be frozen for up to about two months. It’s worth the investment of time and your arm muscles.

How do you go “back to basics” in your life?

Clementine Curd


Recipe by: Adapted from Fine Cooking’s foolproof lemon curd recipe
Yield: about 1 1/2 cups of curd

Bright, sweet, tangy clementine curd is lovely spread on toast, stuffed into cupcakes or cakes, or used as a base for mousse. I make a big batch and freeze it, using it in many different recipes over the course of a few weeks. This curd recipe is adapted from one dubbed “foolproof” by Fine Cooking, and it’s perfect for those who have never made curd before and worry about accidentally cooking their eggs or curdling their mixture.

Ingredients:
6 tablespoons unsalted butter, at room temperature
1 cup sugar
2 large eggs
2 large egg yolks
2/3 cup fresh clementine juice
1 teaspoon grated clementine zest

Directions:
Cream butter and sugar together in a large bowl for about 2 minutes or until light, pale, and fluffy. While mixing, slowly add eggs and yolks. Beat the mixture for 1 minute before mixing in the clementine juice. Don’t worry if the mixture looks curdled, because it’ll get smooth as it cooks and the butter melts.

Cook the mixture in a heavy saucepan over medium heat, stirring constantly, for about 20-25 minutes (lemon curd only takes 15, but I’ve found the clementine curd takes me longer), or until it’s thickening and it registers at least 170 degrees on a candy thermometer (I usually end up around 175 before I get it to the thickness I want). Just don’t let the mixture boil. Also, remember it’ll continue thickening as it cools and then chills, so don’t feel like you have to get it to its final thickness on the stove. When it’s done, it should leave a clean path on the back of a wooden spoon when you run your finger down it.

Remove the clementine curd from the heat and stir in the clementine zest. Transfer the mixture to a wide bowl and place a layer of plastic wrap directly on the surface of the curd to prevent a film from developing. Place the curd in the refrigerate to chill it. Cover it tightly and keep if you about a week in the fridge or for about 2 months in the freezer.

If you liked this post, please:
Subscribe to Willow Bird Baking
Follow Willow Bird Baking on Twitter
Follow Willow Bird Baking on Facebook
Give this post a thumbs up on StumbleUpon
Pin It


Shareother ways to share this post with friends

Healthy Roasted Tomato and Onion Bread Soup

The realization that I am a delicate Southern flower who requires thick, humid warmth to survive was not a gradual one for me. I remember vividly the exact moment that confirmed it.

It was my junior year of high school and I was sitting in my first period French class. Our class was held in a portable classroom (read: drafty old trailer) and the door was still open to welcome arriving students. And oh my ever-loving goodness, il faisait froid.*

*It was cold, y’all.

I was sitting in my desk, hunched over and hugging myself in an attempt to protect my vital organs from the piercing morning cold. Despite my efforts and the fact that I was wearing a winter coat (which, as you’ll learn, is basically miraculous for me), I was pretty sure I was dying of hypothermia.

As discomfort gave way to alarm, I wondered how much longer I should wait before raising my hand and asking to be carried into the main building, preferably by burly seniors in puffy coats. I looked around to see if anyone else was on the verge of death. A few people were chatting. A girl was shuffling around in her backpack. Ms. Moran was looking over some papers. Hm.

I began to calculate the distance I would have to walk upright — with vital organs relatively unprotected! — to pull the door shut in one last effort to save myself.

It was during this hellacious class (actually, I wouldn’t have minded a little fire just then — hold the brimstone, though) that I knew I would die if I were ever forced to move to any northern state. I remember realizing that at that very moment, people were walking around and going to work and surviving in, like, Vermont. I was aghast.

Since then, I’ve realized a few things. For instance, I’ve realized that I almost die each winter because I don’t wear enough clothing. I’m not running around in culottes or anything (you guys remember culottes?), but I have an aversion to layering my outfits. I end up pulling and tugging at things all day to get comfortable. Give me a short, lightweight sundress to slip on any old day.

As a result of my layering troubles, I’m often exposed to the elements. I’ll pat myself on the back for wearing a sweater, but then neglect to wear a coat over it. Or I’ll grab my coat on the way out the door, but decide not to worry about scarves or mittens. Or, like, real shoes.

I may or may not have been that person in college wearing rubber ducky flip-flops in the snow.

Anyway, I’m generally bad at cold weather, but I’m not totally hopeless. I may be dressing wholly inappropriately for the temperature, but at least I’ll be eating appropriately. When it’s cold, I start to crave oatmeal, warm drinks, chilis, stews, and soups.

This Roasted Tomato and Onion Bread Soup has been on a regular rotation at my house this winter. Something about serving piping hot soup over a toasty, buttered slice of bread feels rustic and satisfying to me. Best of all, each 1 cup serving of soup is full of veggies and has a little over 200 calories, making this recipe ideal for all the resolutioners out there! When I know I’m having a bowl of this with my dinner, I look forward to it all day long. So grab your snuggies, bundle up, and enjoy!

What are the temperatures like where you live? How do you brave the cold?

Healthy Roasted Tomato and Onion Bread Soup


Recipe by: Adapted from Eating Well
Yield: 6 1-cup servings

This bright soup is served piping hot over a slice of buttered bread. The result is splushy, hearty, and warms you to the soul. I sometimes make a batch of this soup and eat it for several days. When I’m ready to eat a serving, I toast a slice of bread while reheating the soup and then assemble as usual.

Ingredients:
4 cups thinly sliced onions
3 tablespoons extra-virgin olive oil
salt to taste
freshly ground pepper to taste
4 cups cherry tomatoes, halved (I halved most but left some whole)
1/2 cup thinly sliced garlic, plus 1 whole clove, peeled and halved
3 cups reduced-sodium chicken broth or vegetable broth
6 slices hearty bread of your choice
2/3 cup chopped fresh basil
6 tablespoons finely shredded Parmesan cheese
butter for bread
dash of red wine vinegar (optional)

Directions:
Preheat the oven to 450 degrees F. In a large skillet over medium-high heat, heat 1 tablespoon of olive oil. Add thinly sliced onions and top with another tablespoon of olive oil. Add salt and pepper. Toss the onions to coat. Caramelize the onions my cooking them, stirring occasionally (but not constantly, so they can caramelize on the heat) for about 30 minutes or until they’re rich and brown.

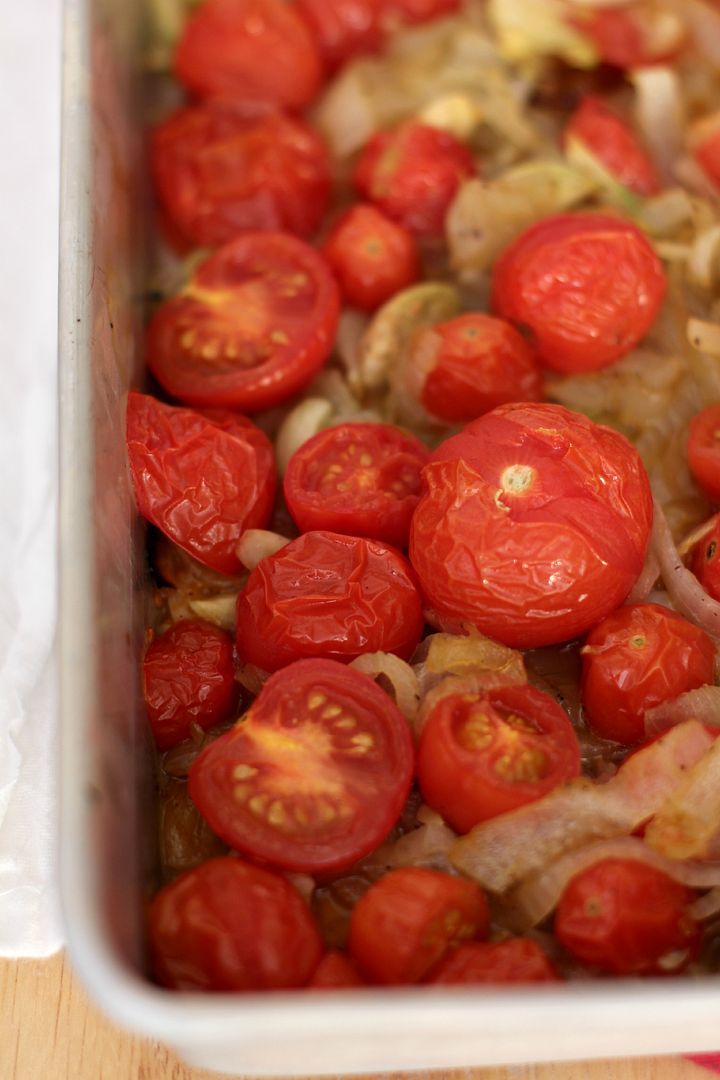
In the meantime, I usually chop my tomatoes and garlic. Spray a 9-by-13-inch pan with cooking spray and add the tomatoes, garlic (except the halved clove), the last tablespoon of oil, and salt and pepper to taste. Gently toss tomatoes to coat. Roast these in the oven until the tomatoes are starting to fall apart and brown in spots, about 20 minutes.

When your onions are caramelized, move them to a big stockpot. Deglaze the skillet by pouring the chicken stock into it and bringing it to a simmer. Use a wooden spoon to scrape up the brown bits from the bottom of the pan. Pour the stock into the stockpot with the onions. Add tomato and garlic mixture to the pot as well, mixing gently to combine. Bring this to a simmer. Remove it from the heat, salt and pepper to taste (sometimes I add a dash of red wine vinegar at the end for a little zing), and cover it to keep it warm.

Meanwhile, line your bread up on a foil-lined baking sheet and bake it for about 10 minutes until it’s toasted (full disclosure: I just toast mine in the toaster). Rub a little butter over it and rub the halved garlic cloves on it while it’s still warm (full disclosure: I use jarred minced garlic here instead for more intense flavor). To serve the soup, place a slice of toast into each bowl and ladle a serving of soup on top. Top with 2 tablespoons of shredded cheese and a sprinkle of fresh basil. Serve immediately.

If you liked this post, please:
Subscribe to Willow Bird Baking
Follow Willow Bird Baking on Twitter
Follow Willow Bird Baking on Facebook
Give this post a thumbs up on StumbleUpon
Pin It


Shareother ways to share this post with friends

Willow Bird Baking’s Top 11 Recipes of 2011

It was only a couple of hours ago that I realized the big ball drops tonight. Mike and I have no plans besides watching more Star Trek: Deep Space Nine. I haven’t thought of a single resolution yet. You could say I’m unprepared.

But actually, I am ready. I may not have all the trappings quite prepared, but I’m more than ready to send 2011 off with a kiss and a wave. There were lovely parts of this year — my time with my students, my trip to San Francisco, and most of all, my reunion with Mike. But there were also many challenges. I’m thankful for where I am, but so ready to charge forward in 2012 and live a life I believe in. How about you? What are your resolutions, goals, or plans?

To conclude a wonderful year on Willow Bird Baking — a year in which I have so appreciated your every visit and every comment to these pages — here are the top 11 recipes from ’11. Thanks for a fantastic year, y’all!

11. Strawberry Cheesecake Stuffed Amaretto Cake Pops (on Pretzel Sticks!)
10. One-Skillet Gooey Pumpkin Cookie Cake
9. Birthday Cake Cheesecake
8. Deep Fried Cake Batter Cookie Dough


7. (Freshly Picked!) Strawberry Cream Pie
6. Cake Batter Cookie Dough Truffles
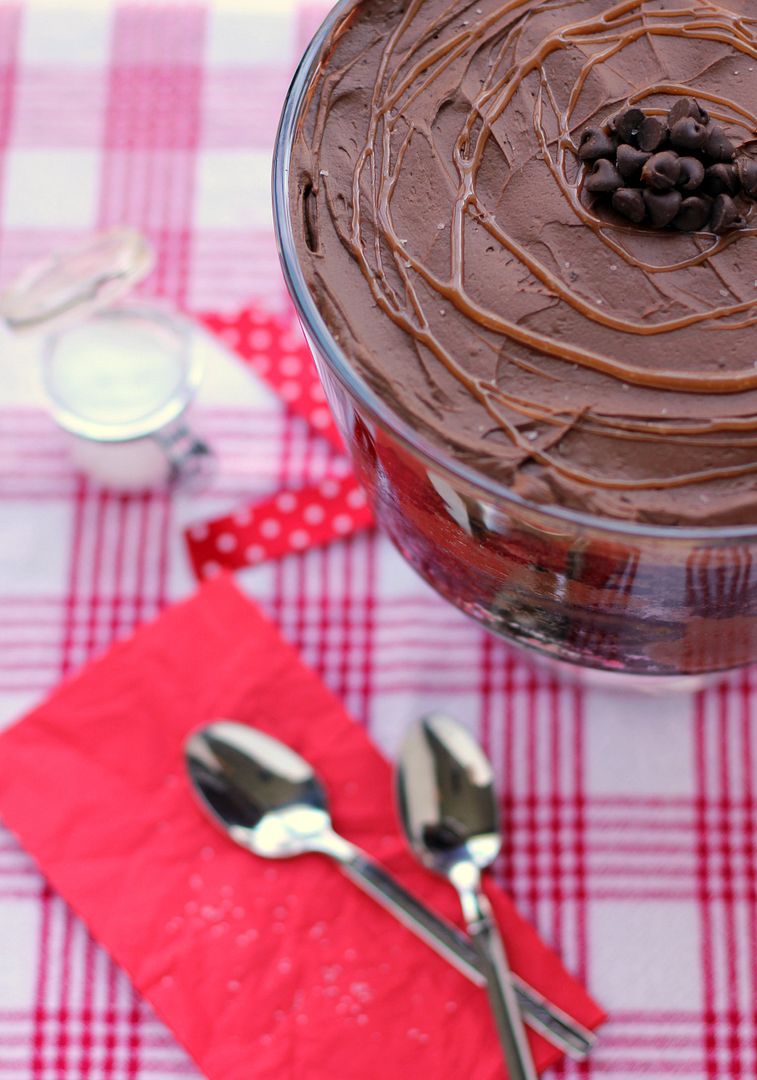
5. Salted Caramel Chocolate Trifle
4. Easy Sopapilla Pumpkin Cheesecake Bars


3. Pumpkin Spice Pull-Apart Bread with Butter Rum Glaze
2. Red Velvet Cheesecake

And the top Willow Bird Baking recipe of 2011 is . . .

1. Three Safe-to-Eat Cookie Doughs: Chocolate Chip, Sugar, and Cake Batter!

Happy New Year!

If you liked this post, please:
Subscribe to Willow Bird Baking
Follow Willow Bird Baking on Twitter
Follow Willow Bird Baking on Facebook
Give this post a thumbs up on StumbleUpon
Pin It


ShareOther ways to share this post with friends!

Make-Ahead Christmas Morning Breakfast Recipes from Willow Bird Baking

You probably would’ve guessed dessert, but breakfast is my favorite meal of the day. I’ve been scheming for a month to bring you this collection of recipes. They’re festive, delicious dishes that are perfect for the most special breakfast of the year: Christmas morning!

Most of these dishes have make-ahead instructions tucked right into the recipe so that you can spend time with your family Christmas morning. There’s also a section of recipes at the end that aren’t make-ahead, but are worth considering anyway because they’re so tasty. I hope you choose one or more of these treats for your holiday table.

1. Sassy Sausage & Hash Brown Breakfast Bake
2. Gingerbread Coffee Cake with Cranberry Pecan Streusel
3. Salted Caramel Mocha Hot Chocolate
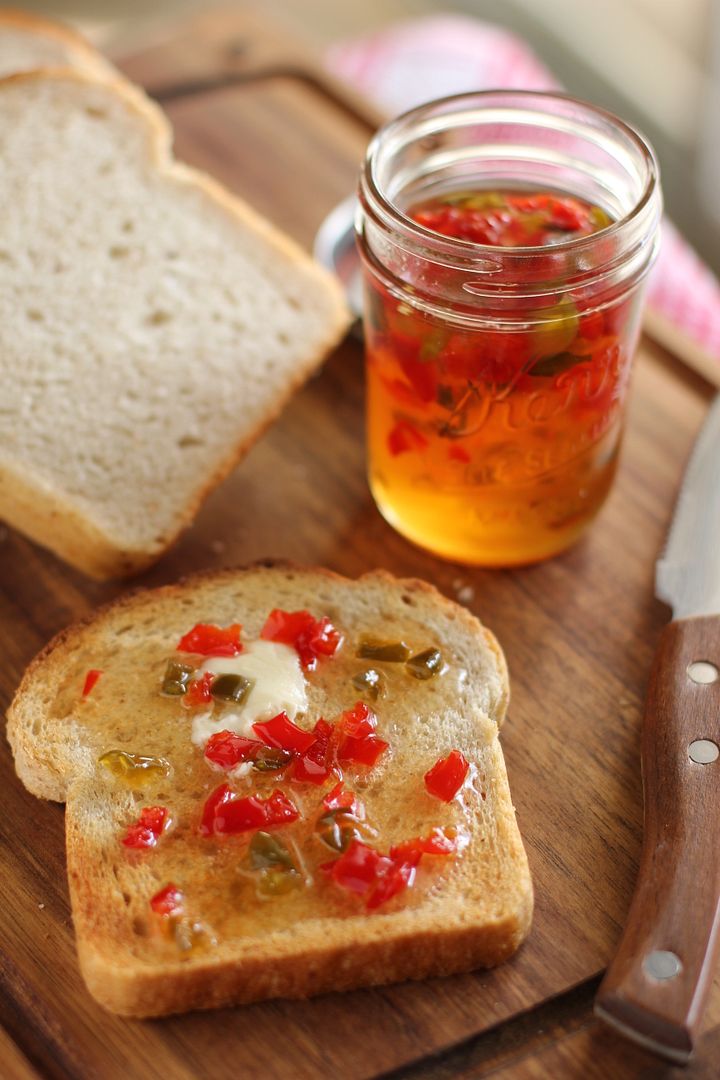
4. Bright Pepper Jelly on Buttered Toast


5. Blueberry Cream Cheese Almond Braid

6. Raspberry Almond Braid
7. Cinnamon Sparkled Pastry Stix with Egg Nog Glaze
8. Buttermilk Cranberry Scones
9. Pumpkin Pecan Streusel Breakfast Braid


10. Winter Breakfast Chili Over Eggs in Sourdough Bowls


The following recipes aren’t make-ahead, but they are fantastic:

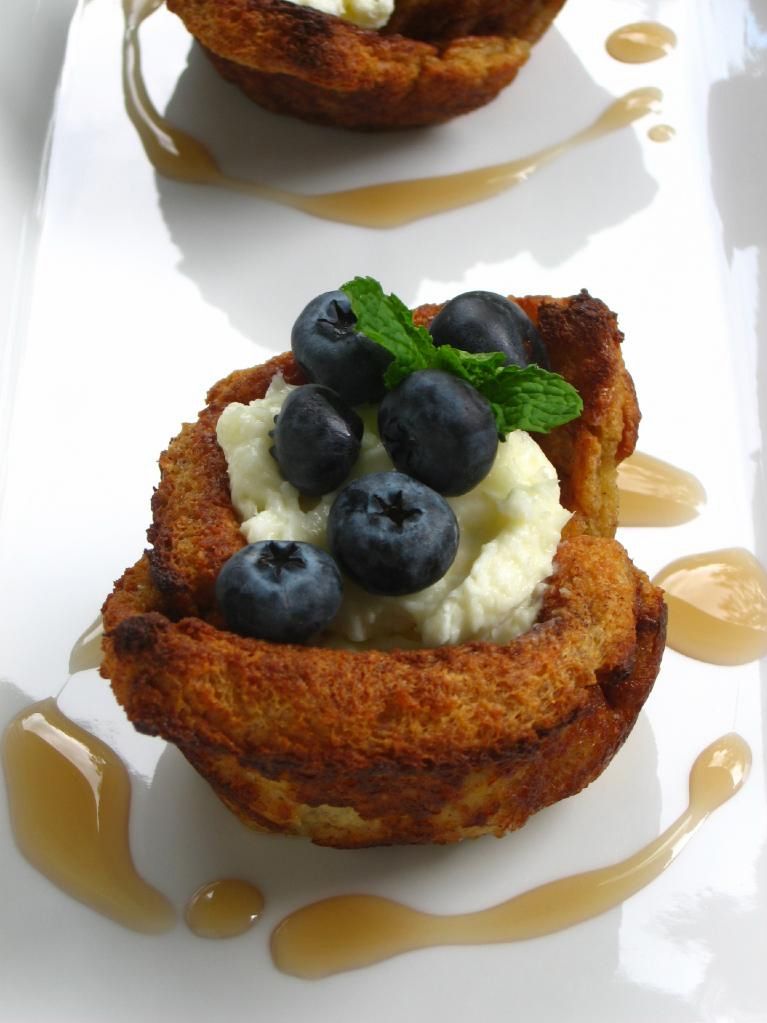
11. Blueberry Stuffed French Toast Bowls (you could prepare the filling in advance)
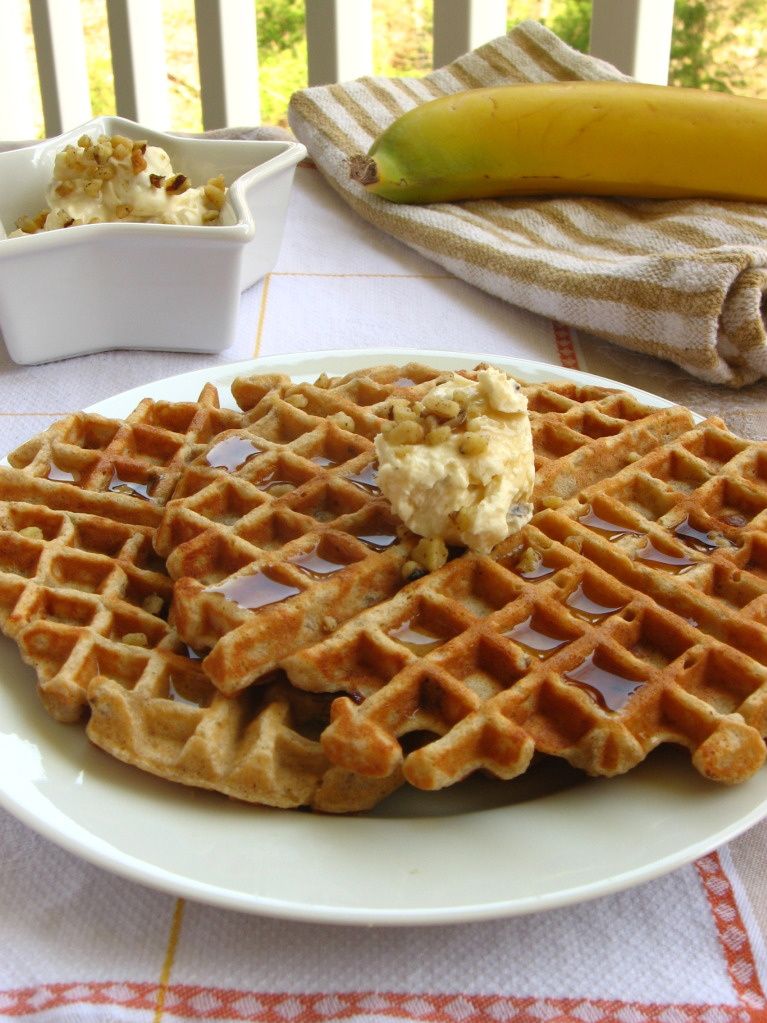
12. Banana Nut Bread Waffles
13. Carrot Cake Waffles
14. Eggs in a French Toast Basket


15. Pecan Maple Bacon Pancakes

Merry Christmas!

If you liked this post, please:
Subscribe to Willow Bird Baking
Follow Willow Bird Baking on Twitter
Follow Willow Bird Baking on Facebook
Give this post a thumbs up on StumbleUpon
Pin It


ShareOther ways to share this post with friends!

Cinnamon Sparkled Pastry Stix with Egg Nog Glaze

My caffeine tolerance has always been one of my favorite hidden talents (right up there with that funny thing I can do with my knuckle. Remind me to show you that sometime.)

The other day, however, I was bragging to Mike (again) about being able to chug a soda right before bed and I realized something. For years I’ve slurped my coke right up until bedtime. And for years I’ve had trouble getting enough sleep. Hrm.

Must be a coincidence.

My soda adoration is not a new thing. An entry in my baby book illustrates its rich history. When I was less than a year old, my mother records that I’d screech with joy upon receiving Coke and get obnoxious when it was taken away.

(We’ll generously assume that my mother was sleep deprived when she offered soda to a toddler. And gleefully recorded my reaction in my baby book.)

My love for cola has only grown. I love classic Coke, Coke in glass bottles, fountain Coke, Coke Zero, and a good diet Sunkist now and again. I love the tingly feeling of drinking soda after eating something sweet or just waking up. I love sodas on hot days and sodas on cold days. I love funky ginger sodas that burn my throat. I love diet orange creme soda. I can get a little carried away.

(The only thing I don’t love is Pepsi. Don’t even get me started on that mess. And sorry, Cheerwine tastes like cough syrup. Did I just get kicked out of the South? Maybe.)

My penchant for soda isn’t particularly healthy, but it’s served me well this week. I needed that caffeine boost. I don’t know about you, but I’ve had approximately eleventy-billion things to do in preparation for the holidays. Gift shopping, gift wrapping, baking, decorating, attending various gatherings, bathing the dog and trying not to kill her after a particularly messy incident involving puppy chow. You know. Typical Christmas preparations.

Good news if you’re a fellow headless chicken: These little Cinnamon Sparkled Pastry Stix are tasty, cute, and easy to make ahead. They can be prepped and refrigerated overnight to pop into the oven for a simple breakfast.

If you can plan a few days in advance to make your own homemade puff pastry, you should. They’re good either way, but I promise I’m not being a snob when I say there’s a pronounced difference between store-bought and homemade in this case! Once you have your pastry, it’s just a matter of brushing it with butter, sprinkling on some goodies, and making your twists. And then pouring yourself a celebratory glass of Coke, of course.

What’s been keeping you busiest this week?

Cinnamon Sparkled Pastry Stix with Egg Nog Glaze


Recipe by: Willow Bird Baking, with pastry inspired by King Arthur Flour and Gale Gand and glaze inspired by Betty Crocker
Yield: 20+ stix

These puff pastry stix are sparkled with cinnamon, sugar, and buttery cinnamon chips. They’re simple to make ahead and chill in the fridge overnight. Pop them in the oven in the morning and drizzle on some sweet eggnog glaze for a quick, festive breakfast. If you can spare the time, make your own homemade puff pastry — it may seem like a lot of effort, but it really does pay off in flavor!

Stix Ingredients:
1 sheet puff pastry, thawed (or make homemade puff pastry!)
1/4 cup unsalted butter, melted
3/4 cup sugar
2 1/2 teaspoons cinnamon
1/4 cup cinnamon chips (you can replace these with more cinnamon-sugar if you don’t have them around)
2 tablespoons milk

Egg Nog Glaze Ingredients:
1/2 cup powdered sugar
2 tablespoons eggnog
cinnamon, nutmeg to taste

Directions:
NOTE: If you’re making homemade puff pastry from scratch, you’ll want to start that process 3 days before your meal.

1 day in advance: Mix sugar and cinnamon in a bowl. On a silicone mat or lightly floured surface, roll your puff pastry sheet out to a 10″ x 15″ rectangle. Brush half of it (a 5″ x 15″ strip) with melted butter and sprinkle on cinnamon chips and half of the cinnamon-sugar mixture. Fold the unfilled side of the pastry over and press to seal around the edges. Brush the top of the now 5″ x 15″ rectangle with the milk and sprinkle on the rest of the cinnamon and sugar.

With a pizza cutter (spray it a little with vegetable spray if it sticks to the dough), cut the square into 1/2″ stix (they’ll be 5″ long). Press them a little to ensure cinnamon chips are snug, but don’t fret when some inevitably fall out. Take each strip by both ends and gently, carefully twist like you’re wringing out a rag. Scoop up cinnamon and sugar that has fallen off the twists and resprinkle them. Place them on a parchment lined baking sheet and cover with plastic wrap. Stick them in the fridge overnight (you could also bake immediately).

The morning of: Take baking sheet out of the fridge and let it sit at room temperature while you preheat your oven to 400 degrees F. Remove plastic wrap and bake stix about 20 minutes, or until puffed and golden brown. Some of the cinnamon chips might leak out, but don’t worry about it. While the stix cool slightly, mix up your glaze. In a small bowl, mix all glaze ingredients until smooth. Add more eggnog if not thin enough to drizzle, tasting as you go. Drizzle over slightly warm pastry stix and serve.

Coca-Cola didn’t sponsor this post, but they probably should’ve, right?

If you liked this post, please:
Subscribe to Willow Bird Baking
Follow Willow Bird Baking on Twitter
Follow Willow Bird Baking on Facebook
Give this post a thumbs up on StumbleUpon
Pin It


Shareother ways to share this post with friends

1 45 46 47 48 49 69