Have you ever pulled something out of the oven and felt like a rock star? Felt giddy and awed at the first bite? Been so incredibly proud of a recipe you were inexplicably able to complete that you thought about framing the resulting photos for your desk at work? Okay, okay, maybe that’s a little much. But all silliness aside, there are turning points in my life as a baker where I feel like I “level up,” or gain a skill or technique that previously seemed too daunting for me to contemplate. This past Daring Bakers challenge was one of those turning points.
The September 2009 Daring Bakers’ challenge was hosted by Steph of A Whisk and a Spoon. She chose the French treat, Vols-au-Vent based on the Puff Pastry recipe by Michel Richard from the cookbook Baking With Julia by Dorie Greenspan.
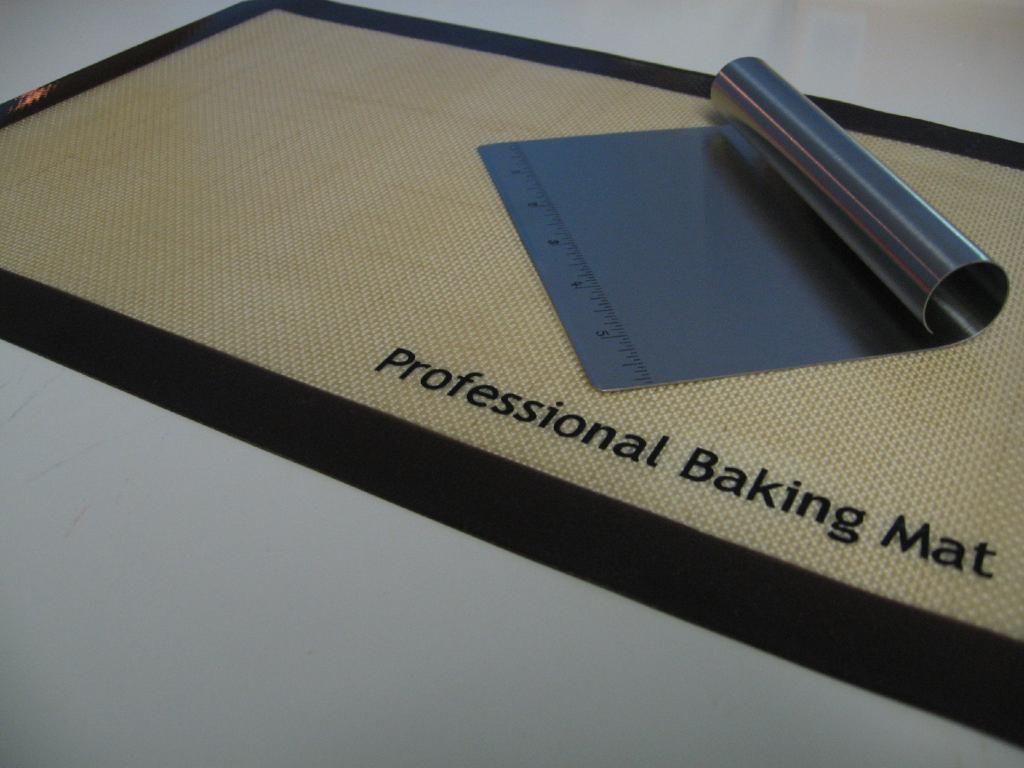
New baking supplies for the challenge.
Vol-au vents are simply cups of puff pastry stuffed with delicious savory or sweet fillings. That part sounds easy. But homemade puff pastry? I have to admit, I was very nervous. The recipe looked especially daunting considering my love-hate relationship with my rolling pin. I think we’ve smoothed things out, but every now and then I still feel like giving him a good whomp against the counter to adjust his attitude. And even apart from rolling pin troubles, puff pastry is just a fickle, time consuming creation. It’s made by enveloping an entire pound of butter (Heyyy, Paula Deen!) in the dough (called a détrempe). Once the butter is wrapped up like a present, you make a series of six “turns” (tri-folds) in the dough, rolling it out between each (and refrigerating often to maintain workability). This website has a useful pictorial of the turning process, but I bet you’d love to see Julia Child and Michel Richard making it in real-time, wouldn’t you? Your wish is my command! Here’s the fun part: once you have all those lovely layers of butter and dough in the oven, the water content of the butter turns into steam, inflating your pastry. If all goes well, you end up with a fluffy, buttery bit of heaven.
After watching the video above several times over, I dragged my load of doubts and worries into the kitchen and set to work with a furrowed brow. My dough seemed too sticky, my butter pounding scared little Byrd to death, and my envelope kept threatening to break and expose my butter. Nevertheless, I trudged on, hoping that somehow, my little pastries would puff their hearts out in the oven. And guess what?
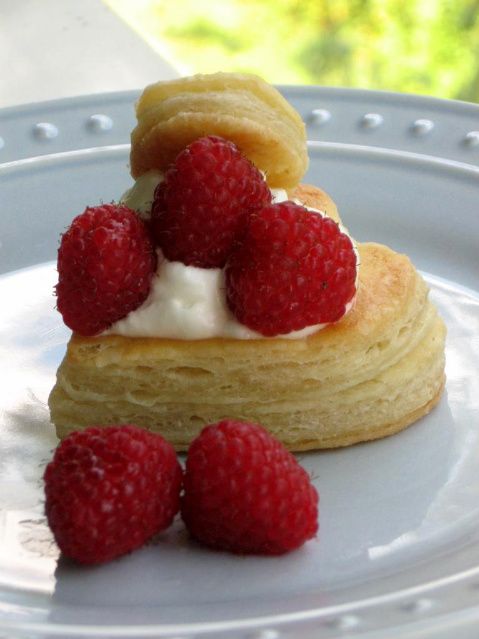
It worked! It worked! It worked! It’s unfortunate (or maybe not, since Mike’s eardrums are probably sore) that you couldn’t hear me shouting those two little words as I leapt around my apartment after taking these out of the oven. It was like magic! Little disks of dough turning into lovely, sophisticated pastries via unseen processes within their layers. And not only were the pastries puffy, they were out of this world delicious. I burned each one of my little fingertips to bits (not to mention my tongue) eating them straight out of the oven. Mike liked them too! Byrd was indifferent.

I chose to stuff my vol-au-vents with both savory and sweet fillings. My savory vol-au-vent was filled with smooth goat cheese mousse with a drizzle of fresh, homemade pesto on top. The pesto was gorgeous — made with toasted pine nuts, extra virgin olive oil, and fresh basil (including some huge sprigs from the garden beside my classroom — did I mention that I love my school?) The tangy goat cheese and rich pesto were such a delicious combination.
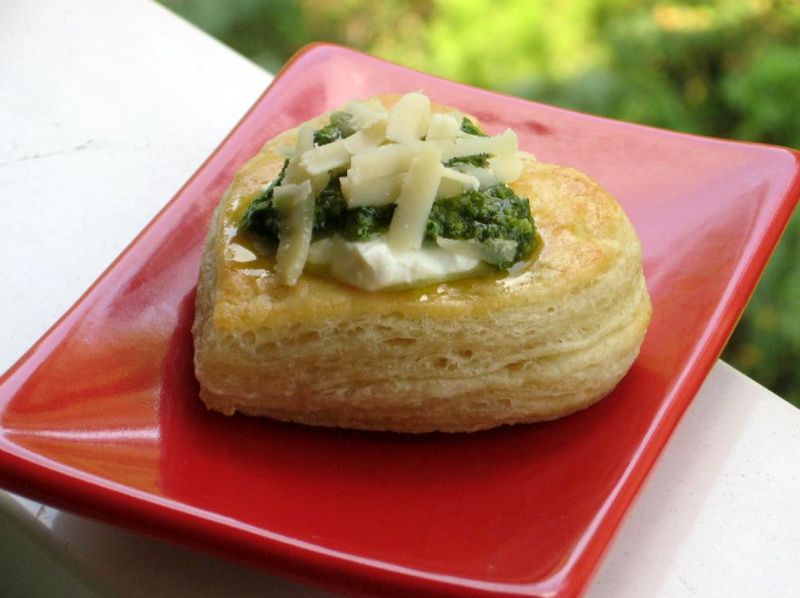
Goat Cheese Mousse and Basil Pesto
Recipe By:–Shirl on RecipeZaar (goat cheese mousse)
–Elise on Simply RecipesYields: About 1/2 cup mousse and 1/2 cup pesto
Goat Cheese Mousse Ingredients:
8 ounces fresh goat cheese
3/4 cup heavy whipping cream, lightly whippedBasil Pesto Ingredients:
1 cups fresh basil leaves, packed
1/4 cup freshly grated Parmesan-Reggiano or Romano cheese
1/4 cup extra virgin olive oil
1/6 cup pine nuts, toasted
1.5 medium-sized garlic cloves, minced
Salt and freshly ground black pepper to tasteDirections:
To make the mousse, process the goat cheese in a clean food processor until smooth. Add the whipped cream and blend just until incorporated.To make the pesto, combine the basil and pine nuts in a food processor. Pulse a few times. Add the garlic, pulse a few times more. Slowly add the olive oil in a constant stream while the food processor is on low (if storing, reserve half the oil — see note below). Stop to scrape down the sides of the food processor with a rubber spatula. Add the grated cheese and pulse again until blended. Add a pinch of salt and freshly ground black pepper to taste. Note: If storing and not using immediately, reserve half the oil. Place pesto in airtight container and drizzle reserved oil over top. Freeze or refrigerate.
My dessert plate was designed as a walk through the seasons. Spring was represented by Smitten Kitchen’s tangy mango curd, a sweet raspberry, and a dollop of homemade whipped cream. Summer was simple: homemade whipped cream and berries.
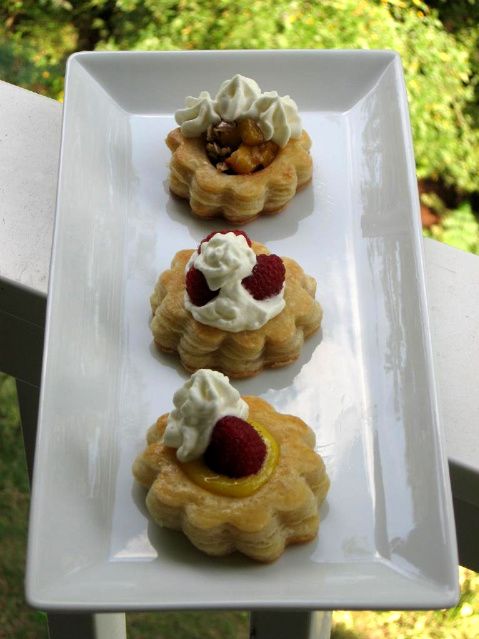
Finally, autumn was one of my favorites (in fact, you’ve seen it a few times here recently!): baked peach crisp. I baked some peaches, brown sugar, white sugar, oats, and toasted pecans in a dish before spooning the hot mixture into my puff pastry and (you know what’s coming, right?) topped it with a dollop of whipped cream! Next time I think I’ll add the toasted pecans over top of the peach mixture at the end. All of these dessert vol-au-vents were incredible in their buttery pastry cups, but our favorite by far was the Mango Curd Raspberry Vol-au-vent!
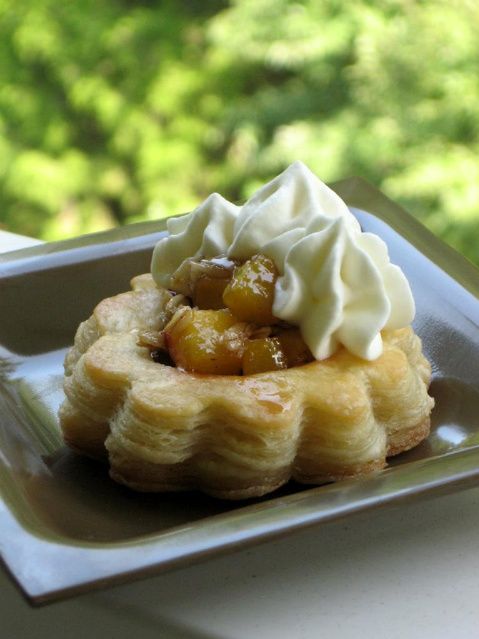
Peach Crisp Vol-au-vent
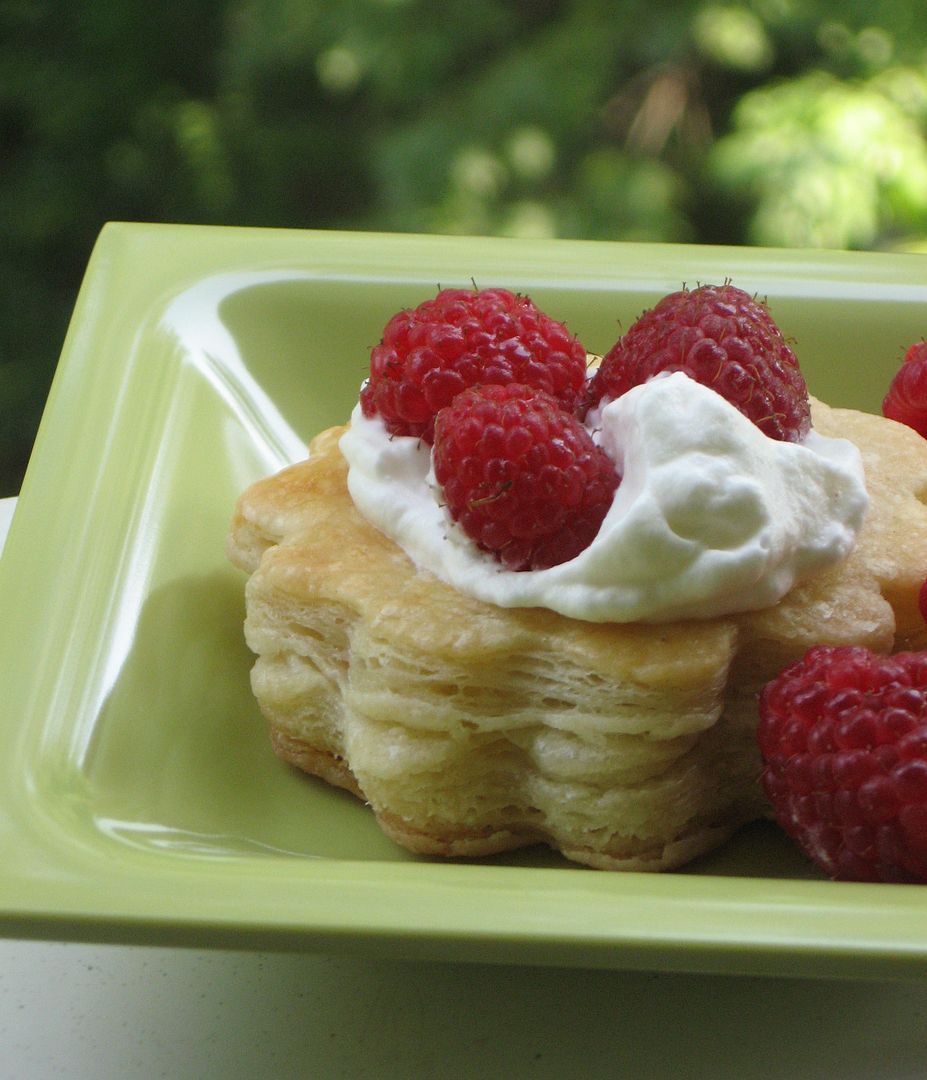
Raspberries and Cream Vol-au-vent
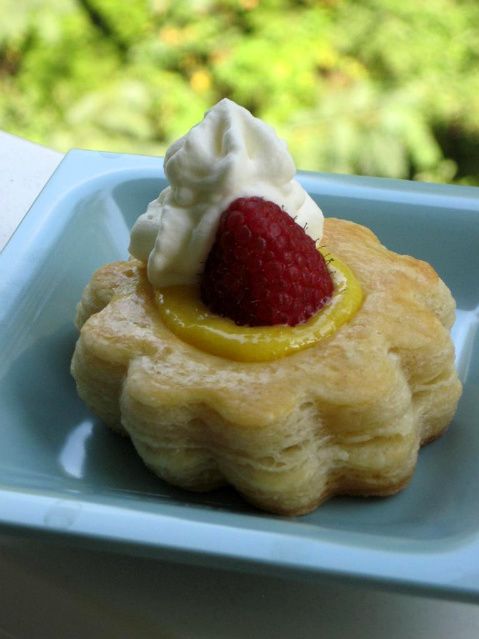
Mango Curd Raspberry Vol-au-vent
Mango Curd
Recipe By: Smitten Kitchen (mango curd)
Yields: About 1 to 1.5 cupsIngredients:
1 15-ounce ripe mango, peeled, pitted, cut into 1/2-inch pieces
1/2 cup sugar (might reduce this to 1/3 cup next time, to keep the curd more tart)
3 tablespoons fresh lime juice
Pinch of salt
4 large egg yolks
1/4 cup (1/2 stick) unsalted butter, cut into small piecesDirections:
Puree mango, sugar, lime juice and salt in processor, scraping down sides of work bowl occasionally. Add yolks; puree 15 seconds longer. Strain through sieve set over large metal bowl, pressing on solids with back of spatula to release as much puree as possible. Discard solids in sieve.Set metal bowl over saucepan of simmering water (do not allow bottom of bowl to touch water); whisk puree until thickened and thermometer registers 170°F., about 10 minutes. Remove from over water. Whisk in butter 1 piece at a time. Cover (place plastic wrap on surface of curd to prevent a skin from forming) and refrigerate overnight. Can freeze for up to 2 months.
I’m grateful for the Daring Bakers for many reasons: the exciting recipes shared, the fantastic friendships made, the gorgeous blogs to visit. For this challenge, though, I especially want to thank Steph and the Daring Bakers for a huge confidence boost! I hope you’ll decide to give puff pastry a try. It’s a manageable beast, and the resulting dough freezes well to use for months to come. Even besides those practicalities, though, it feels like such a satisfying kitchen accomplishment!
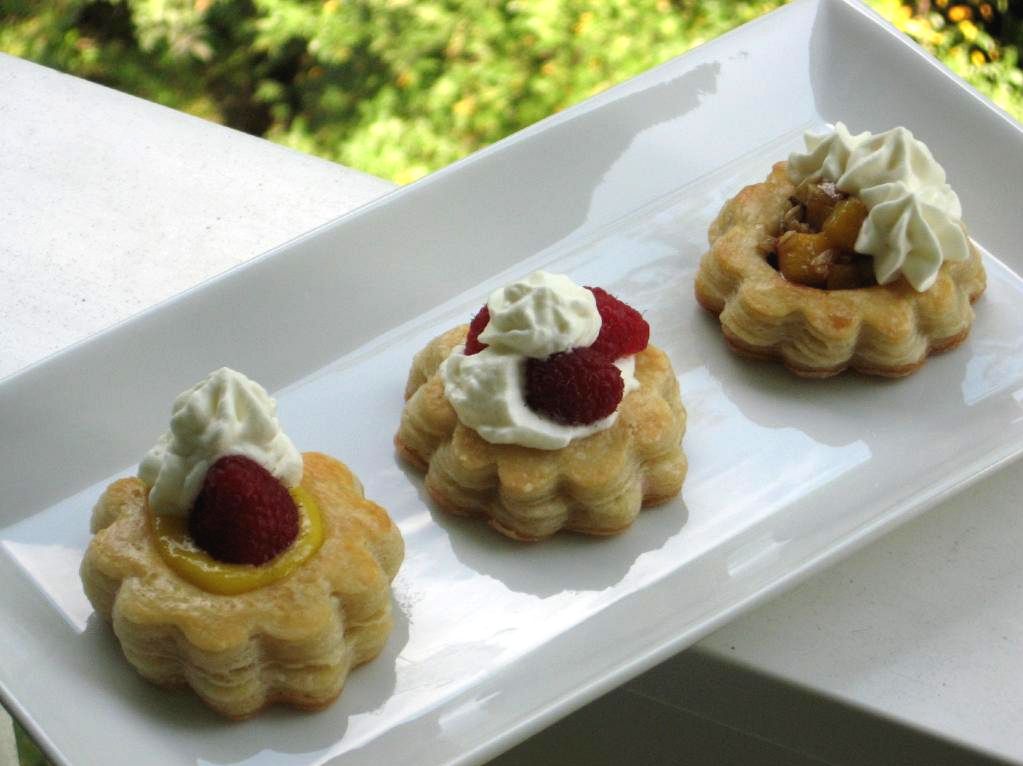
Puff Pastry and Vol-au-vents
Recipe By: Baking with Julia by Dorie Greenspan
Yields: Using 1/3 of the dough yields about 9 2-inch vol-au-ventsIngredients:
2-1/2 cups (12.2 oz/ 354 g) unbleached all-purpose flour
1-1/4 cups (5.0 oz/ 142 g) cake flour
1 tbsp. salt (you can cut this by half for a less salty dough or for sweet preparations)
1-1/4 cups (10 fl oz/ 300 ml) ice water
1 pound (16 oz/ 454 g) very cold unsalted butterplus extra flour for dusting work surface
Directions:
Mixing the Dough:
Check the capacity of your food processor before you start. If it cannot hold the full quantity of ingredients, make the dough into two batches and combine them.Put the all-purpose flour, cake flour, and salt in the work bowl of a food processor fitted with a metal blade and pulse a couple of times just to mix. Add the water all at once, pulsing until the dough forms a ball on the blade. The dough will be very moist and pliable and will hold together when squeezed between your fingers. (Actually, it will feel like Play-Doh.)
Remove the dough from the machine, form it into a ball, with a small sharp knife, slash the top in a tic-tac-toe pattern. Wrap the dough in a damp towel and refrigerate for about 5 minutes.
Meanwhile, place the butter between 2 sheets of plastic wrap and beat it with a rolling pin until it flattens into a square that’s about 1″ thick. Take care that the butter remains cool and firm: if it has softened or become oily, chill it before continuing.
Incorporating the Butter:
Unwrap the dough and place it on a work surface dusted with all-purpose flour (A cool piece of marble is the ideal surface for puff pastry) with your rolling pin (preferably a French rolling pin without handles), press on the dough to flatten it and then roll it into a 10″ square. Keep the top and bottom of the dough well floured to prevent sticking and lift the dough and move it around frequently. Starting from the center of the square, roll out over each corner to create a thick center pad with “ears,” or flaps.Place the cold butter in the middle of the dough and fold the ears over the butter, stretching them as needed so that they overlap slightly and encase the butter completely. (If you have to stretch the dough, stretch it from all over; don’t just pull the ends) you should now have a package that is 8″ square.
To make great puff pastry, it is important to keep the dough cold at all times. There are specified times for chilling the dough, but if your room is warm, or you work slowly, or you find that for no particular reason the butter starts to ooze out of the pastry, cover the dough with plastic wrap and refrigerate it . You can stop at any point in the process and continue at your convenience or when the dough is properly chilled.
Making the Turns:
Gently but firmly press the rolling pin against the top and bottom edges of the square (this will help keep it square). Then, keeping the work surface and the top of the dough well floured to prevent sticking, roll the dough into a rectangle that is three times as long as the square you started with, about 24″ (don’t worry about the width of the rectangle: if you get the 24″, everything else will work itself out.) With this first roll, it is particularly important that the butter be rolled evenly along the length and width of the rectangle; check when you start rolling that the butter is moving along well, and roll a bit harder or more evenly, if necessary, to get a smooth, even dough-butter sandwich (use your arm-strength!).With a pastry brush, brush off the excess flour from the top of the dough, and fold the rectangle up from the bottom and down from the top in thirds, like a business letter, brushing off the excess flour. You have completed one turn.
Rotate the dough so that the closed fold is to your left, like the spine of a book. Repeat the rolling and folding process, rolling the dough to a length of 24″ and then folding it in thirds. This is the second turn.
Chilling the Dough:
If the dough is still cool and no butter is oozing out, you can give the dough another two turns now. If the condition of the dough is iffy, wrap it in plastic wrap and refrigerate it for at least 30 minutes. Each time you refrigerate the dough, mark the number of turns you’ve completed by indenting the dough with your fingertips. It is best to refrigerate the dough for 30 to 60 minutes between each set of two turns.The total number of turns needed is six. If you prefer, you can give the dough just four turns now, chill it overnight, and do the last two turns the next day. Puff pastry is extremely flexible in this regard. However, no matter how you arrange your schedule, you should plan to chill the dough for at least an hour before cutting or shaping it.
Steph’s extra tips:
- While this is not included in the original recipe we are using (and I did not do this in my own trials), many puff pastry recipes use a teaspoon or two of white vinegar or lemon juice, added to the ice water, in the détrempe dough. This adds acidity, which relaxes the gluten in the dough by breaking down the proteins, making rolling easier. You are welcome to try this if you wish.
- Keep things cool by using the refrigerator as your friend! If you see any butter starting to leak through the dough during the turning process, rub a little flour on the exposed dough and chill straight away. Although you should certainly chill the dough for 30 to 60 minutes between each set of two turns, if you feel the dough getting to soft or hard to work with at any point, pop in the fridge for a rest.
- Not to sound contradictory, but if you chill your paton longer than the recommended time between turns, the butter can firm up too much. If this seems to be the case, I advise letting it sit at room temperature for 5-10 minutes to give it a chance to soften before proceeding to roll. You don’t want the hard butter to separate into chuncks or break through the dough…you want it to roll evenly, in a continuous layer.
- Roll the puff pastry gently but firmly, and don’t roll your pin over the edges, which will prevent them from rising properly. Don’t roll your puff thinner than about about 1/8 to 1/4-inch (3-6 mm) thick, or you will not get the rise you are looking for.
- Try to keep “neat” edges and corners during the rolling and turning process, so the layers are properly aligned. Give the edges of the paton a scooch with your rolling pin or a bench scraper to keep straight edges and 90-degree corners.
- Brush off excess flour before turning dough and after rolling.
- Make clean cuts. Don’t drag your knife through the puff or twist your cutters too much, which can inhibit rise.
- When egg washing puff pastry, try not to let extra egg wash drip down the cut edges, which can also inhibit rise.
- Extra puff pastry dough freezes beautifully. It’s best to roll it into a sheet about 1/8 to 1/4-inch thick (similar to store-bought puff) and freeze firm on a lined baking sheet. Then you can easily wrap the sheet in plastic, then foil (and if you have a sealable plastic bag big enough, place the wrapped dough inside) and return to the freezer for up to a few months. Defrost in the refrigerator when ready to use.
- You can also freeze well-wrapped, unbaked cut and shaped puff pastry (i.e., unbaked vols-au-vent shells). Bake from frozen, without thawing first.
- Homemade puff pastry is precious stuff, so save any clean scraps. Stack or overlap them, rather than balling them up, to help keep the integrity of the layers. Then give them a singe “turn” and gently re-roll. Scrap puff can be used for applications where a super-high rise is not necessary (such as palmiers, cheese straws, napoleons, or even the bottom bases for your vols-au-vent).
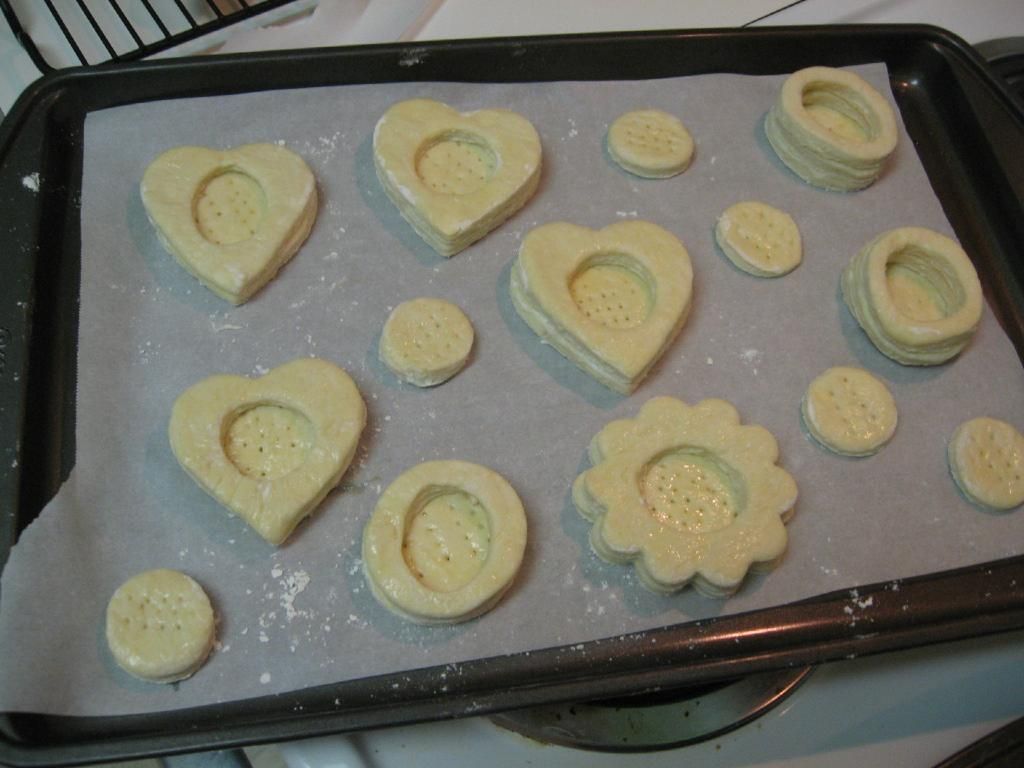
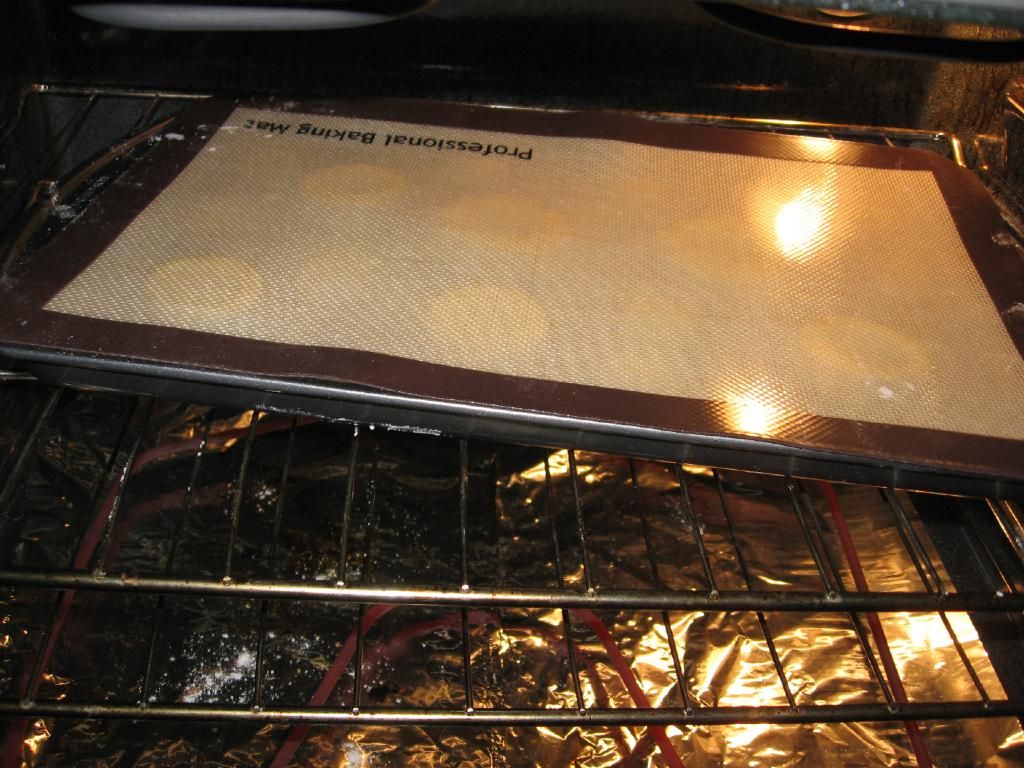
Vol-au-vents ready to go into the oven, and then baking under a silicon mat.
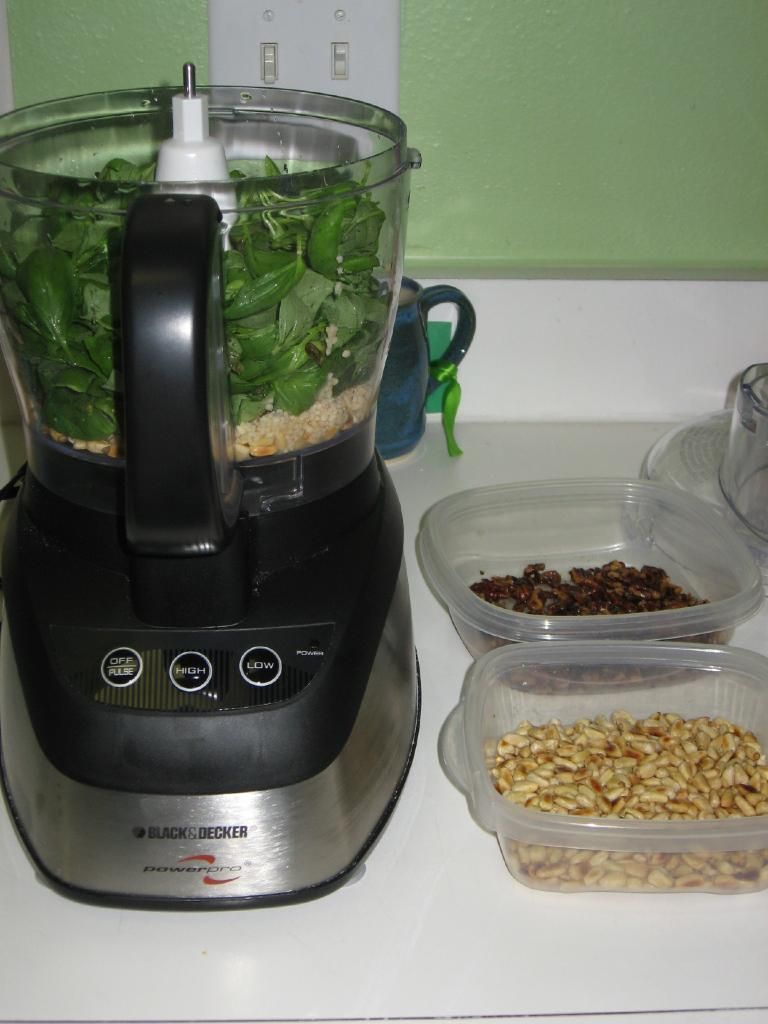
Pesto fixings.
Now I want to hear from you: what was your proudest culinary achievement?
98 Comments on Homemade Puff Pastry and Vol-au-vents
3Pingbacks & Trackbacks on Homemade Puff Pastry and Vol-au-vents
-
[…] some kitchen acrobatics, and actually succeeding that just brightens the whole week. After crossing puff pastry off my to-bake list, my next goal was a tart. Ohhhh, tarts. They’re so gorgeous — those […]
-
[…] Willow Bird Baking Yields: 25-28 palmiers Ingredients: 1 frozen puff pastry sheet, thawed (or use homemade puff pastry!) sprinkle of flour moist spread* toppings** *you can use pestos, jellies, Nutella, thicker sauces, […]
-
[…] fall dessert, this is your tart. If you would like to take a bit more time, try making your own homemade puff pastry. […]

Vivian
September 27, 2009 at 1:38 am (16 years ago)They look delectable! I am very proud that you have taken such an interest in cooking! 🙂
Julie
September 27, 2009 at 1:46 pm (16 years ago)Thanks Mom! I wouldn’t have if it weren’t for you!
Vivian
September 27, 2009 at 1:38 am (16 years ago)Ummm… how about sewing next?
Julie
September 27, 2009 at 1:46 pm (16 years ago)I think I’ll leave that one to you 🙂
Angela
September 27, 2009 at 6:53 am (16 years ago)I love the combinations you produced! I think I would have to go for the goats cheese and pesto option, unusual for me as I have a terrible sweet tooth… Well done (I chickened out this month!)!
Julie
September 27, 2009 at 1:47 pm (16 years ago)Thank you, Angela!
isabelle
September 27, 2009 at 8:05 am (16 years ago)c’est superbe et ton feuilletage est bien réussi ! tes garnitures me mettent l’eau à la bouche 🙂
Julie
September 27, 2009 at 1:47 pm (16 years ago)Merci beaucoup, Isabelle!
Karen
September 27, 2009 at 8:24 am (16 years ago)I love your vou-au-vents especially the basil pesto! Btw your dog is adorable 🙂
Julie
September 27, 2009 at 1:47 pm (16 years ago)Thank you, Karen! Isn’t she the cutest?! She hams it up for the camera 🙂
Barbara
September 27, 2009 at 8:32 am (16 years ago)Love your beautiful hearts and flowers! They all sound like great flavor combinations!
Julie
September 27, 2009 at 1:48 pm (16 years ago)Thanks Barbara! My circle cookie cutters just weren’t the right size, but it worked out for the best!
jo
September 27, 2009 at 9:18 am (16 years ago)Great job on your challenge and it must have been really delicious to burn all your fingers. Love your filing combinations.
Julie
September 27, 2009 at 1:48 pm (16 years ago)It was the best finger burning I’ve ever experienced 😀 Thanks, Jo!
Jenni
September 27, 2009 at 10:27 am (16 years ago)Oh great job! And I totally agree with your first paragraph! Your puff pastry looks fantastic, and your fillings sound wonderful!
Julie
September 27, 2009 at 1:49 pm (16 years ago)Thank you, Jenni!!
s
September 27, 2009 at 11:50 am (16 years ago)so pretty and such creative fillings…
Julie
September 27, 2009 at 1:49 pm (16 years ago)Thanks, S!
heather peskin
September 27, 2009 at 11:55 am (16 years ago)Delightful! I can’t wait to try a savory pastry as well.
Julie
September 27, 2009 at 1:49 pm (16 years ago)Thank you, Heather!
sara
September 27, 2009 at 12:28 pm (16 years ago)Ooooh, delish! I love the idea of mango curd–I’ve never made it before but it sounds totally delicious! Yum!
Julie
September 27, 2009 at 1:51 pm (16 years ago)Thanks, Sara! It is REEEEALLY yummy!
Sue
September 27, 2009 at 1:55 pm (16 years ago)WOW!!! You went all-out! I love all the beautiful shapes and variety of fillings! Bravo!!! Gorgeous photos!
Yep, making puff pastry does make me fill more like a “real” baker too:)
Julie
September 27, 2009 at 2:00 pm (16 years ago)Aw, thank you, Sue! I know what you mean — it’s like we’ve completed some sort of baking rite of passage 😀
Dragon
September 27, 2009 at 3:27 pm (16 years ago)I love your shapes. 🙂 Great job on this month’s challenge.
Julie
September 28, 2009 at 10:03 pm (16 years ago)Thank you, Dragon!
Beth
September 27, 2009 at 3:56 pm (16 years ago)Your enthusiasm is infectious! So glad that you enjoyed this challenge, and that you overcame your fears of homemade puff pastry. They do look gorgeous!
Julie
September 27, 2009 at 9:16 pm (16 years ago)Thank you, Beth!
Amy I.
September 27, 2009 at 4:02 pm (16 years ago)Beautiful work! I adore your walk through the seasons, what a creative idea. I’d have to say that this challenge ranks right up there with my proudest culinary achievements too 🙂
Julie
September 27, 2009 at 9:16 pm (16 years ago)Thank you, Amy!!
Megan
September 27, 2009 at 6:51 pm (16 years ago)I felt the same way — about leveling up. This probably was my proudest moment so far.
I was so afraid that my puff pastry just wouldn’t work. I ran around shouting, “It puffed! It puffed!” Ha ha.
Yours are fabulous. I love your fillings… that goat cheese mousse sounds delightful, especially with pesto. And I’m a big fan of all of those dessert ones!
Julie
September 27, 2009 at 9:12 pm (16 years ago)Thank you, Megan! I know, right?! We should coin a term for the excitement felt by puff pastry makers everywhere upon glancing in the oven and realizing that IT’S WORKING. Maybe “pleased as puff” instead of punch. 🙂
Sabiilaa
September 28, 2009 at 4:30 am (16 years ago)Love your beautiful hearts and flowers! Gorgeous photos! yummmy fillings!
Julie
September 28, 2009 at 10:03 pm (16 years ago)Thank you, Sabiilaa!
marcellina
September 28, 2009 at 8:38 am (16 years ago)I giggled all the way thru your post. Yes, I too felt like a rock star! Very appropiate that your rolling pin is male!! Your vol au vents are fantastic and fillings delish!
Julie
September 28, 2009 at 10:04 pm (16 years ago)Thank you, Marcellina!! Oh, did you catch the gender I assigned my rolling pin?! 😀 Must have been a subconscious slip!
Kim
September 28, 2009 at 12:00 pm (16 years ago)You are too ambitious! Great job, they all look so yummy.
Julie
September 28, 2009 at 10:05 pm (16 years ago)Thanks, Kim!
Meeta
September 28, 2009 at 1:06 pm (16 years ago)wow! mango curd is a dream. i love all these varieties – a brilliant job on this challenge!
Julie
September 28, 2009 at 10:06 pm (16 years ago)Thank you, Meeta! We love that Smitten Kitchen mango curd recipe! Mmm!
sarah
September 28, 2009 at 2:17 pm (16 years ago)Haha I felt EXACTLY the same way when I saw my puffs were rising! Hmm proudest culinary moment…Well, I was stoked when I made swiss meringue buttercream, because my husband made it, and then when I tried it for the first time I completely screwed it up. I felt “behind” until I tried again and got it right!
Julie
September 28, 2009 at 10:07 pm (16 years ago)So funny, Sarah! Nothing like a little competition to make for a great moment in the kitchen 🙂
Leann
September 28, 2009 at 5:56 pm (16 years ago)very lovely and so light and flaky looking! 🙂
Julie
September 28, 2009 at 10:10 pm (16 years ago)Thank you, Leann!
Lauren
September 28, 2009 at 6:08 pm (16 years ago)Beautiful! I love the fillings you made – simply delicious =D. Wonderful job!
Julie
September 28, 2009 at 10:11 pm (16 years ago)Thank you, Lauren!
missfattyfoodie
September 29, 2009 at 12:26 am (16 years ago)they puffed up so nicely! your dog is so cute!
Julie
September 29, 2009 at 12:47 pm (16 years ago)Thank you, Miss Fatty Foodie 🙂
zorra
September 29, 2009 at 3:32 am (16 years ago)Wow, you became a Puff Pastry Pro! Well done.
Julie
September 29, 2009 at 12:47 pm (16 years ago)Thank you, Zorra! Who knows? After this good experience, maybe I’ll be making it again 😀
Lorraine @NotQuiteNigella
September 29, 2009 at 3:48 am (16 years ago)I love yours to death! 😀 The shapes and the flavours are just top notch and I’m not surprised you felt like a rock star, these are truly Grammy award winning vols au vent! 😀
Julie
September 29, 2009 at 12:49 pm (16 years ago)Aww, thank you so much Lorraine!! 🙂 Wonder if Kanye will show up at my acceptance speech?
“Yo, yo Julie, I’mma let you finish — but Dorie Greenspan had the best puff pastry OF ALL TIME.” 😀
shaz
September 29, 2009 at 8:04 am (16 years ago)Wow! Well done – love your walk through the seasons desert plate idea. And I hear you loud and clear – I often have “I did it!” moments (including a bit of dancing) when I pull something off in the kitchen 🙂
Julie
September 29, 2009 at 12:49 pm (16 years ago)I have them so often since joining the DBs! Such a wonderful group 🙂 Thanks, Shaz!
Lusa
September 29, 2009 at 11:19 am (16 years ago)Thanks for visiting my blog. Love your post, I too felt extremely proud and amazed that it worked. I couldn’t stop saying ” look at how pretty these are”, to my husband. I also burnt my tongue while eating one hot out of the oven. 🙂
Julie
September 29, 2009 at 12:49 pm (16 years ago)Thanks, Lusa!
junglefrog
September 29, 2009 at 12:45 pm (16 years ago)They look beautiful!! And I am sure I made a similar dance when I took mine out of the oven..:))
Julie
September 29, 2009 at 12:49 pm (16 years ago)Thank you, Junglefrog!
Aparna
September 29, 2009 at 9:20 pm (16 years ago)These look gorgeous. And mango curd has to be my favourite!
The feeling of seeing those puff pastry cases rising in the oven is probably one of “those” experiences. I know I had one too. 🙂
Julie
September 29, 2009 at 10:46 pm (16 years ago)Thanks, Aparna! We adore mango curd. Mmmm!
Jill
September 29, 2009 at 11:44 pm (16 years ago)You had me at mango curd–they all looked so great and delicious!! GOOD JOB! 🙂
Julie
September 30, 2009 at 12:01 am (16 years ago)Thank you, Jill!! 😀
Jenny Tan
September 30, 2009 at 12:33 am (16 years ago)I V-a-Vs looks yummi-licious! I love the fun shapes you have…and ohhhh the mango curd!!! I’ve gotta try that someday ~ huge fan of mango.
BTW, also love your reply to Lorraine @NotQuiteNigella… totally cracked me up! 😀 You rock! 🙂
Julie
September 30, 2009 at 1:04 am (16 years ago)HA, thanks Jenny!! Couldn’t resist 😉
Rachel
September 30, 2009 at 12:55 am (16 years ago)Yummy! Mango curd sounds and looks good!! 🙂
Julie
September 30, 2009 at 1:04 am (16 years ago)Thanks, Rachel!
natalia
September 30, 2009 at 1:29 am (16 years ago)Ciao ! I was very excited too, it was a scry and fun challenge ! I love the assortment of your fillings !!
Julie
September 30, 2009 at 1:34 am (16 years ago)Thank you, Natalia!
Renato
September 30, 2009 at 4:28 pm (16 years ago)I can’t believe I started watching that Julia Child video and I forgot to leave a comment, here! Really, that was a great finding!
And as good as that movie is your vol au vent! Really, they are amazing! All nice and puffed up! Congratulations!
Julie
September 30, 2009 at 5:04 pm (16 years ago)Aw, thank you, Renato!!
steph (whisk/spoon)
September 30, 2009 at 5:18 pm (16 years ago)awesome puff– you should be so proud!! gorgeous puff, and a fantastic variety of yummy fillings! thanks for baking with me this month 🙂
Julie
September 30, 2009 at 5:38 pm (16 years ago)Thanks, Steph! It was such a great challenge!
Sugar Chef
September 30, 2009 at 7:52 pm (16 years ago)Love all the different shapes and fillings you did for the challenge and your dog, just too cute!!
Julie
September 30, 2009 at 8:02 pm (16 years ago)Thank you 🙂
Blond Duck
September 30, 2009 at 9:07 pm (16 years ago)Popped in to say hello! Those look wonderful. I need to get another silicone baking mat–my husband destroyed mine by mistake!
Julie
September 30, 2009 at 9:54 pm (16 years ago)Oops!! Silly husband! 🙂
Thanks, Blond Duck! Love your fun blog!
Cheri
October 1, 2009 at 4:39 am (16 years ago)Your vol au vents turned out so lovely! And, the fillings sound delicious!
Coconut & Vanilla
October 1, 2009 at 6:28 am (16 years ago)Hi,
found your blog, ’cause you left a comment on my blog :).
Nice bl0g you have. Like your writing and how you blog is structured (like those “frames” you have ’round your recipes).
Well done on the challenge! Especially the goats cheese and pesto filled vol au vents look delicious… getting hungry.
lisamichele
October 2, 2009 at 3:55 am (16 years ago)Julie, wow, what a beautiful job! It was fun reading how you scremed out when it worked. Been there, and I think I’ve broken a few ear drums..lol I love the goat cheese with pesto, and in fact, made a savory vols au vent myself with goat chese and pesto, but pistachio pesto with arugula in lieu of basil. Also adore the raspberries and cream..simple and perfect. Well done all around!
Julie
October 2, 2009 at 6:26 am (16 years ago)Thank you, Lisa! MMMmmm that pistachio arugula pesto sounds AMAZING. Definitely need to try that!
Arugula is one of my favorite flavors.
kellypea
October 2, 2009 at 7:54 am (16 years ago)Super cute shapes and what a variety of fillings! I’m drooling over the goat cheese basil combo. It would work just fine for breakfast for me about now!
Julie
October 2, 2009 at 8:15 am (16 years ago)Thank you, Kelly!! I wish I had more for breakfast too! 😀
Baking Monster
October 2, 2009 at 7:07 pm (16 years ago)Everything looks great! I love puff pastry I alos love your blog!
Julie
October 2, 2009 at 7:13 pm (16 years ago)Thanks, Baking Monster! You have some delicious goodies on your blog! Pumpkin Cream Cheese Muffins?! Mmmm!!
Vera
October 3, 2009 at 10:59 pm (16 years ago)Perfection! Love all of them!
Julie
October 3, 2009 at 11:14 pm (16 years ago)Thank you, Vera!
art and lemons
October 7, 2009 at 9:04 pm (16 years ago)Pesto and goat cheese, a classic with a hint of surprise. Fabulous job!
Julie
October 7, 2009 at 9:29 pm (16 years ago)Thank you!
Jeannie
November 26, 2009 at 11:17 am (15 years ago)Hi there. I am doing some puffed pastry with vegetable cheese strudel today and was looking at your website and noticed that you had poked holes in your shapes prior to cooking. Is there a particular reason you did this – and if so – is it necessary as I have never done it in the past?
Thanks in advance, Jeannie
Julie
November 26, 2009 at 11:31 am (15 years ago)Hi Jeannie,
Do you mean the holes poked with the fork prior to baking? That’s called docking, and you do it to let some of the steam escape. It’s supposed to prevent the steam from over-puffing and deforming pastries. It keeps the base relatively even. I also dock pie crusts, etc., before baking, but some chefs don’t bother. Hope that helps! Good luck with your strudel — sounds delicious!
Ferdinand Roper
May 28, 2010 at 1:17 pm (15 years ago)If only I had a quarter for every time I came here! Great post.
thekalechronicles
October 3, 2011 at 4:06 pm (14 years ago)Those pesto-goat cheese things look like they should be illegal. Wow. I don’t have a food processor, but I’m sure there is a more old-fashioned way to make puff pastry.
Julie @ Willow Bird Baking
October 3, 2011 at 4:12 pm (14 years ago)Oh I’m sure! Grab that pastry cutter! 😀
Rosalind
December 16, 2011 at 3:45 am (13 years ago)It’s so beautiful dear! Thank you so much for sharing .god bless you.
Julie @ Willow Bird Baking
December 20, 2011 at 6:21 am (13 years ago)Thank you, Rosalind! God bless you, too.