tomato

Quick Tomato Baked Eggs Skillet Supper

I know some of you are going to say, “Well, yeah, obviously,” to this little recipe (if it can be called that), but I felt pretty smooth when I thought it up last night. I had a can of tomato parmesan soup that I usually enjoy, but I didn’t feel like eating it alone. I also didn’t particularly feel like cooking anything fancy. With a few little add-ins, I dressed up the soup into a hearty dinner. I plan to do the same tonight with my favorite spinach Florentine jarred tomato sauce.

Please serve it with a bright salad and crusty bread, since these items were sorely missed on my table. I had to forego sauce-sopping for sauce-scraping with a spoon, which was not nearly as effective.

That’s all for today — a quick note with a quick little “recipe” I enjoyed. Hope you do, too.

One year ago: My Favorite Pie Crust Dough
Two years ago: Three Safe-to-Eat Cookie Doughs: Chocolate Chip, Sugar, and Cake Batter!
Three years ago: Oatmeal Cake with Broiled Icing

Quick Tomato Baked Eggs Skillet Supper


Recipe by: Willow Bird Baking
Yield: 3-4 servings

This is more of an idea or suggestion than a recipe — swap ingredients as you like to make your own little quick and dirty supper on the fly. I’d serve this with a bright arugula salad dressed with lemon juice and olive oil and plenty of crusty bread with softened butter and sea salt.

Ingredients:
a tomato sauce or soup that you really love*
some garlic, basil, olive oil, and chili flakes to dress up the tomato sauce
3-4 eggs
a little cream (optional)
grated cheese (I used Gruyère that I had on hand, but choose one you love)
salt and pepper
*Note: I used a tomato parmesan canned soup, but I’m also going to try this with my favorite spinach Florentine jarred tomato sauce. Make sure you already enjoy the taste of it, since it’ll be the primary flavor. I don’t think it would’ve been nearly as good with one of those watery tomato soups you ate with grilled cheese as a kid. If you want to make a tomato sauce from scratch, I suggest this super quick one.
*Note 2: I bet some crispy bacon or pancetta crumbles and a dollop of sour cream on top of this would be fantastic.

Directions:
Preheat the oven to 400 degrees F. Pour your tomato sauce or soup into an oven-safe skillet (but not cast iron like I did, because apparently it can strip the seasoning — oops!) and dress it up with garlic, basil, olive oil, and chili flakes to taste. Crack eggs over the bed of tomato sauce. Pour a little cream on each egg, salt and pepper the whole dish, and bake for 20 minutes or so until the whites are cooked but the yolks are still runny. Sprinkle grated cheese over the top and bake for just a minute or so more for it to melt. Serve immediately with a salad and crusty bread (I ate/scooped it straight out of the skillet, as I am wont to do.)

Cheeseburger Bāozi (Steamed Cheeseburger Stuffed Buns)

Right or straight? Go straight, go straight, go straight — Ahhh, man. Right.

My frantic inner dialogue seemed to have very little to do with the car’s trajectory as my dad drove us away from church each week. If we turned right, we were on our way home to make a reasonable lunch in our small galley kitchen. If we went straight, though, we were on our way to those beautiful golden arches, where I would order a #4 off the combo menu and immediately begin stuffing hot fries into my face. Later, at home, I would crunch into the crispy chicken sandwich slathered with mayonnaise and topped with crisp lettuce — the crisper the better!

(Funny side story: I first ordered a #4 because of my obsessive compulsive love of the number 4 — stop looking at me like that — and it just so happened I also really enjoyed the meal.)

Those after-church trips to the drive-thru window are one of my earliest memories of fast food, but I’ve always enjoyed it. I can’t imagine ever being one of those people who crinkles their nose in disgust at the mention of fast food. Okay, it’s fatty and chemically. But let’s be honest: that stuff is good.

Beef & cheddars! Curly fries! Chicken biscuits! Those weird little hand pies! McCrunchy Deluxes! Okay, I made that one up. Anyway, the point is, yum.

Don’t get me wrong; I hardly ever eat it anymore. Despite how it may seem, I make careful food choices and only indulge in “bad for you” food in moderation. I eat healthy soups and veggies and oatmeal during the week. I drive determinedly past every single Arby’s. I order only a fountain drink at Chick-Fil-A, turning pointedly away from the menu full of nuggety goodness. You’re probably the same way. So I have a present for you:

Faux Fast Food.

Instead of grabbing a burger at the drive-thru, why not make a drive-thru worthy meal where you control the ingredients and nutrition stats? How about some cute little cheeseburger steamed buns, complete with burger dipping sauce? I’ve been dreaming of this recipe since I saw Julia’s vegan Big Mac Steamed Buns over at her fantastic blog, No Face Plate. Granted, this meal will take a little longer than zipping by for a couple of bacon cheeseburgers, but it’s also a lot of fun to make. If you have the luxury of some time, a few ingredients, and a sense of humor, I think you’ll really enjoy it.


Comparing two different bao doughs — look how much fluffier the one on the right is! That’s the one in the recipe below.

I did some legwork and experimenting and found you the fluffiest bao dough (look at the difference in the above comparison!) Grab your favorite burger recipe and adapt it to yield 12 mini patties. Make sure they’re well-seasoned, stick ’em in your bao dough, and steam ’em up! I can imagine kids would be over the moon for these little “burger pouches.” Enjoy!

How do you feel about fast food?

Cheeseburger Bāozi (Steamed Cheeseburger Stuffed Buns)


Recipe by: Willow Bird Baking with bun recipe adapted from Rasa Malaysia and burger sauce adapted from America’s Test Kitchen. This recipe inspired by Julia’s vegan Big Mac Steamed Buns at No Face Plate.
Yield: 12 buns

Sure, you could make burgers and put ’em on a regular bun. But why would you do that when you could stick them in these slightly sweet, cloudlike steamed buns? I love steamed buns more than is probably reasonable, so I’m in the process of stuffing anything and everything into them. This recipe takes a well-seasoned burger patty and some toppings and makes them portable, delicious, and fun. Make sure to start with a great burger recipe, because it’ll be the main flavor in your dish.

Bun Ingredients:
8 grams active dry yeast
160 milliliters lukewarm water
½ teaspoon white vinegar
280 grams low-protein flour (Hong Kong Flour or Cake Flour)
100 grams wheat or potato starch (I used potato)
100 grams icing sugar
30 grams shortening
10 grams baking powder
10 milliliters cold water
sesame seeds

your favorite cheeseburger recipe, made into mini patties (may I suggest this one?)
cheese slices
Roma tomato slices

Optional Burger Sauce Ingredients:
2 tablespoons mayonnaise
1 tablespoon ketchup
1/2 teaspoon sweet pickle relish
1/2 teaspoons sugar
1/2 teaspoon white vinegar
1/4 teaspoon ground black pepper

Directions:
NOTES: I measured the bun ingredients by weight for accuracy. You can convert them to imperial measures using an online calculator, but I’d use weights if you can.

Make burgers: Prepare your favorite burger recipe (adapted to yield about 12 mini patties), making each mini patty about 1-2 inches in diameter. Make sure your burgers are tasty and well-seasoned, because they’ll be the main flavor in this dish! Go ahead and cook your patties according to your burger recipe, placing cheese on near the end.

Make bāozi: Sift together the flour, wheat or potato starch, and powdered sugar into a mixing bowl. Make a well in the center and gently combine the yeast, vinegar, and warm water in the well. Let this sit and proof for around 10 minutes before slowly mixing in the surrounding flour mixture bit by bit, forming a dough. Add in the shortening and then knead (on a KitchenAid mixer at about speed 4-6, knead for about 4 minutes; by hand, knead for about 10 minutes) until the dough is smooth and elastic. It shouldn’t be sticky to the touch.

Transfer the dough to a bowl lightly coated with vegetable oil. Cover it with a damp cloth and place it somewhere warm to rise (I always put mine into an oven that has been warmed for a few minutes and then left open to drop to just above room temperature) for 30 minutes. I never noticed too much rise, so don’t worry if it doesn’t seem like a huge difference.

After 30 minutes, dissolve the baking powder completely in the water and sprinkle this mixture over the bao dough. Knead it in to fully combine it (I used the dough to mop up any of the mixture that was still on the bowl and kneaded it in well — an uneven distribution of baking powder can cause discoloration of your buns). Recover the dough and let it rest for 10 more minutes.

Fill and shape your buns: Turn the dough out onto wax paper and pat it into an even width. Use a dough cutter or sharp knife to divide it into 12 roughly equal sections. Take one section and gently roll it out to about 1/4 inch thick with a rolling pin (I keep the sections I’m not working with covered with a damp cloth so they don’t dry out.) Holding the dough in your non-dominant hand, place a mini burger patty, a slice of cheese, and a slice of tomato in the center and carefully pleat the edges of the dough together at the top, turning the bun as you work, until it is fully closed (see this video for a demonstration of to shape the buns). Place each bun on a square of wax or parchment paper. Brush the top lightly with water and sprinkle on sesame seeds.

Steam your buns: Preheat your steamer by boiling water and a teaspoon of vinegar over medium-high heat in a saucepan with your steamer on top (here’s a photo of how your steamer setup should look). Preheating the steamer ensures your buns will fully rise. Once it’s steaming, place buns in each tier (being careful not to crowd them), spray them with a bit of water (this help ensure a smooth surface), and close the steamer. Cook for 12 minutes without opening the lid. Remove the buns to a cooling rack to let them cool slightly.

Make burger sauce: Mix all sauce ingredients together. Serve buns warm with burger sauce, or ketchup and mustard.

If you liked this post, please:
Subscribe to Willow Bird Baking
Follow Willow Bird Baking on Twitter
Follow Willow Bird Baking on Facebook
Give this post a thumbs up on StumbleUpon
Pin It


Shareother ways to share this post with friends

Healthy Roasted Tomato and Onion Bread Soup

The realization that I am a delicate Southern flower who requires thick, humid warmth to survive was not a gradual one for me. I remember vividly the exact moment that confirmed it.

It was my junior year of high school and I was sitting in my first period French class. Our class was held in a portable classroom (read: drafty old trailer) and the door was still open to welcome arriving students. And oh my ever-loving goodness, il faisait froid.*

*It was cold, y’all.

I was sitting in my desk, hunched over and hugging myself in an attempt to protect my vital organs from the piercing morning cold. Despite my efforts and the fact that I was wearing a winter coat (which, as you’ll learn, is basically miraculous for me), I was pretty sure I was dying of hypothermia.

As discomfort gave way to alarm, I wondered how much longer I should wait before raising my hand and asking to be carried into the main building, preferably by burly seniors in puffy coats. I looked around to see if anyone else was on the verge of death. A few people were chatting. A girl was shuffling around in her backpack. Ms. Moran was looking over some papers. Hm.

I began to calculate the distance I would have to walk upright — with vital organs relatively unprotected! — to pull the door shut in one last effort to save myself.

It was during this hellacious class (actually, I wouldn’t have minded a little fire just then — hold the brimstone, though) that I knew I would die if I were ever forced to move to any northern state. I remember realizing that at that very moment, people were walking around and going to work and surviving in, like, Vermont. I was aghast.

Since then, I’ve realized a few things. For instance, I’ve realized that I almost die each winter because I don’t wear enough clothing. I’m not running around in culottes or anything (you guys remember culottes?), but I have an aversion to layering my outfits. I end up pulling and tugging at things all day to get comfortable. Give me a short, lightweight sundress to slip on any old day.

As a result of my layering troubles, I’m often exposed to the elements. I’ll pat myself on the back for wearing a sweater, but then neglect to wear a coat over it. Or I’ll grab my coat on the way out the door, but decide not to worry about scarves or mittens. Or, like, real shoes.

I may or may not have been that person in college wearing rubber ducky flip-flops in the snow.

Anyway, I’m generally bad at cold weather, but I’m not totally hopeless. I may be dressing wholly inappropriately for the temperature, but at least I’ll be eating appropriately. When it’s cold, I start to crave oatmeal, warm drinks, chilis, stews, and soups.

This Roasted Tomato and Onion Bread Soup has been on a regular rotation at my house this winter. Something about serving piping hot soup over a toasty, buttered slice of bread feels rustic and satisfying to me. Best of all, each 1 cup serving of soup is full of veggies and has a little over 200 calories, making this recipe ideal for all the resolutioners out there! When I know I’m having a bowl of this with my dinner, I look forward to it all day long. So grab your snuggies, bundle up, and enjoy!

What are the temperatures like where you live? How do you brave the cold?

Healthy Roasted Tomato and Onion Bread Soup


Recipe by: Adapted from Eating Well
Yield: 6 1-cup servings

This bright soup is served piping hot over a slice of buttered bread. The result is splushy, hearty, and warms you to the soul. I sometimes make a batch of this soup and eat it for several days. When I’m ready to eat a serving, I toast a slice of bread while reheating the soup and then assemble as usual.

Ingredients:
4 cups thinly sliced onions
3 tablespoons extra-virgin olive oil
salt to taste
freshly ground pepper to taste
4 cups cherry tomatoes, halved (I halved most but left some whole)
1/2 cup thinly sliced garlic, plus 1 whole clove, peeled and halved
3 cups reduced-sodium chicken broth or vegetable broth
6 slices hearty bread of your choice
2/3 cup chopped fresh basil
6 tablespoons finely shredded Parmesan cheese
butter for bread
dash of red wine vinegar (optional)

Directions:
Preheat the oven to 450 degrees F. In a large skillet over medium-high heat, heat 1 tablespoon of olive oil. Add thinly sliced onions and top with another tablespoon of olive oil. Add salt and pepper. Toss the onions to coat. Caramelize the onions my cooking them, stirring occasionally (but not constantly, so they can caramelize on the heat) for about 30 minutes or until they’re rich and brown.

In the meantime, I usually chop my tomatoes and garlic. Spray a 9-by-13-inch pan with cooking spray and add the tomatoes, garlic (except the halved clove), the last tablespoon of oil, and salt and pepper to taste. Gently toss tomatoes to coat. Roast these in the oven until the tomatoes are starting to fall apart and brown in spots, about 20 minutes.

When your onions are caramelized, move them to a big stockpot. Deglaze the skillet by pouring the chicken stock into it and bringing it to a simmer. Use a wooden spoon to scrape up the brown bits from the bottom of the pan. Pour the stock into the stockpot with the onions. Add tomato and garlic mixture to the pot as well, mixing gently to combine. Bring this to a simmer. Remove it from the heat, salt and pepper to taste (sometimes I add a dash of red wine vinegar at the end for a little zing), and cover it to keep it warm.

Meanwhile, line your bread up on a foil-lined baking sheet and bake it for about 10 minutes until it’s toasted (full disclosure: I just toast mine in the toaster). Rub a little butter over it and rub the halved garlic cloves on it while it’s still warm (full disclosure: I use jarred minced garlic here instead for more intense flavor). To serve the soup, place a slice of toast into each bowl and ladle a serving of soup on top. Top with 2 tablespoons of shredded cheese and a sprinkle of fresh basil. Serve immediately.

If you liked this post, please:
Subscribe to Willow Bird Baking
Follow Willow Bird Baking on Twitter
Follow Willow Bird Baking on Facebook
Give this post a thumbs up on StumbleUpon
Pin It


Shareother ways to share this post with friends

Fresh Open-Faced California Sandwich

This past weekend I attended the Foodbuzz Blogger Festival in San Francisco, California, 2,700 miles away from my home. Traveling alone is always a meaningful, reflective experience for me, and over the next couple of weeks, I’ll be sharing vignettes that I hope are meaningful to you, as well.

. . .

“Can you tell we’re tourists?” the gossamer-haired man asked the woman at the BART (Bay Area Rapid Transit) information desk after she guided him through the process of purchasing a ticket. He chuckled toward his smiling wife, and they walked over toward the ticket machine.

I walked up to the information desk, wondering if I was about to annoy the attendant by asking a question she’d already been asked a hundred times this morning. Like everyone else I’d met so far in the Bay City, though, she cheerfully offered detailed advice. With some help from the tourist couple who’d gone before me, I successfully purchased a subway ticket and stepped onto the escalator to descend into the rumbling belly of the city.

After a posing a few more clueless questions to kind San Franciscans, I stepped onto a BART train and settled into my seat with a self-congratulatory sigh. We sped off only to hear a robotic voice a few seconds later announcing the next stop: “Montgomery.”

Oh. Montgomery? I looked at the map on the wall. I was trying to head to the Mission area to visit the gorgeous, iconic Tartine Bakery. Montgomery, however, was in the opposite direction — toward Oakland across the bay. Once again I turned to a stranger. “If I’m trying to get to 16th and Mission–” I began.

“Oh, you’re headed the wrong way,” she said with a smile. “You needed the train on the other side of the tracks.” It suddenly dawned on me that of course the trains, like cars, would go in two different directions. I felt a little sheepish.

“Oh, thanks! I guess it’s a good thing I realized after only one stop,” I said.

“Definitely. You’re fine. You’re not under the water yet!” she replied.

Her reassurance at once comforted me and alerted me to an alarming fact that I hadn’t considered about the trains: they go under the water. Under the San Francisco Bay. Seriously? I could hear my mom’s voice in my head saying, “What if there’s an earthquake while you’re under there?!” I jumped off at the next stop and changed trains, relieved that I didn’t have to go under the water until I visited Oakland later in my trip.

A couple of hours later I stood at a bus stop, blissful after devouring a frangipane croissant, a gruyere and black pepper gougere, and a Mexican Coke at the communal table in Tartine. I hurriedly grabbed $2 out of my pack as the bus pulled up, but I had the good sense to pause on the bus steps and ask, “Do you head toward Lombard?”

I expected the bus driver to wave me onto the bus, impatient with silly tourist questions, but again, I was met with generosity: “Oh, you want the 22 that runs on the other side of the street.” He pointed to the bus stop across the way. A kind man at the bus stop confirmed the bus driver’s words, “Just wait over there and another bus will be along in a moment.” Buses, it seemed — like trains! and cars! and everything else, Julie! — ran in both directions. Since you might be wondering at this point, I promise I’m not dumb.

I walked across the street, once again redirected by the kindness of others.

Are you plowing ahead on your own power lately? Personally, I never grew out of that independent toddler stage of life — the one where you’re constantly insisting, “I’ll do it myself!” There’s nothing quite like being alone in a strange city across the country from your home to break you of that intransigence, though.

I found my way to Tartine and then up to the Golden Gate Bridge on Friday because I was willing to accept the generosity and support of others. (And if I hadn’t found my way to Tartine, what a tragedy that would’ve been!)

Reach out for help when you need to. You don’t have to handle everything alone. And hey, you’re not under the water yet.

. . .

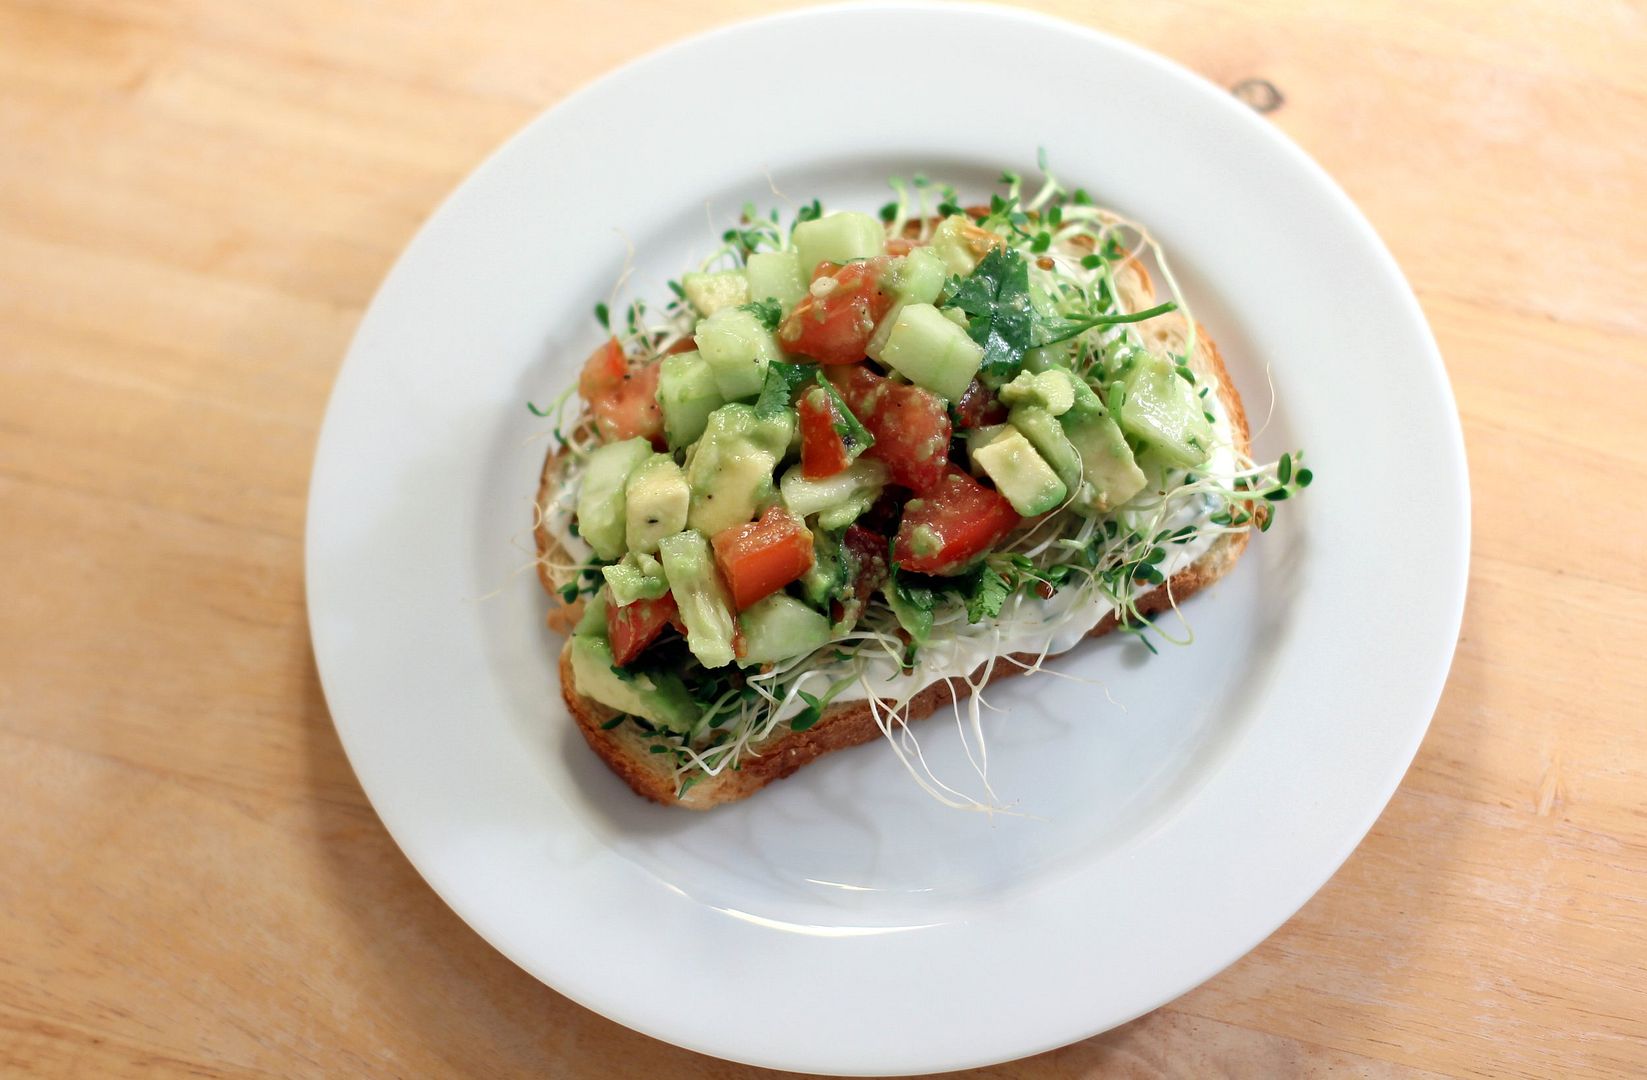
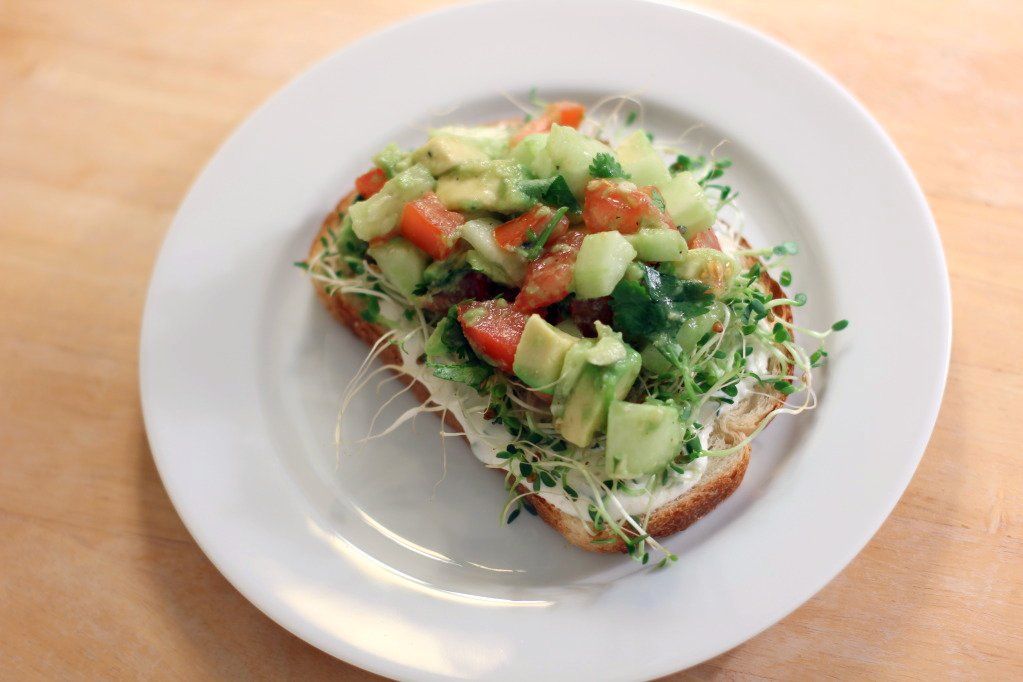
What better way to kick off my California posts than with a gorgeous open-faced California Sandwich? It’s just as healthy as it looks, but don’t worry — it doesn’t lack a thing in the taste department. In fact, it’s one of the best sandwiches I’ve ever made in my kitchen. It’s a fresh, tangy combination of flavors that you just feel good eating. I made it on sourdough bread, which I love — and how appropriate for all this talk of San Francisco.

Was there a time in your life when you’ve had to break down and accept the help and kindness of others?

Fresh Open-faced California Sandwich


Recipe by: Adapted from Ezra Pound Cake
Yield: 2 open-faced sandwiches

This quick sandwich is cool and refreshing. The bright California salad is comprised of tomatoes, cucumbers, cilantro, and avocado bathed in lime juice. It rests on a tangy chive spread and a thick, toasty slice of sourdough bread. I was pleasantly surprised at how delicious the finished product was considering how little effort went into assembly. This sandwich would make the perfect lunch or light dinner.

Chive Spread Ingredients:
2 tablespoons plain yogurt
2 tablespoons mayonnaise
1 tablespoon finely chopped fresh chives
Salt and pepper, to taste

California Salad Ingredients*:
1 avocado, peeled, pitted and diced
1 tomato, cored and chopped
1 cucumber, peeled, seeded and diced
Squeeze of lime juice
2 tablespoons chopped fresh cilantro
Salt and pepper, to taste
*This makes enough salad for 4 sandwiches, if you wanted to put a smaller amount on each, but I really heaped it on. I wanted more salad and less bread per sandwich. Yum!

Other Things You Need:
2 slices of thick sourdough bread
1/2 cup alfalfa sprouts

Directions:
Make the chive spread by mixing the yogurt, mayonnaise, chives, salt, and pepper in a small bowl. Set aside. Toast the 2 slices of bread in toaster or in a buttered skillet over medium heat. Lay these out on a plate.

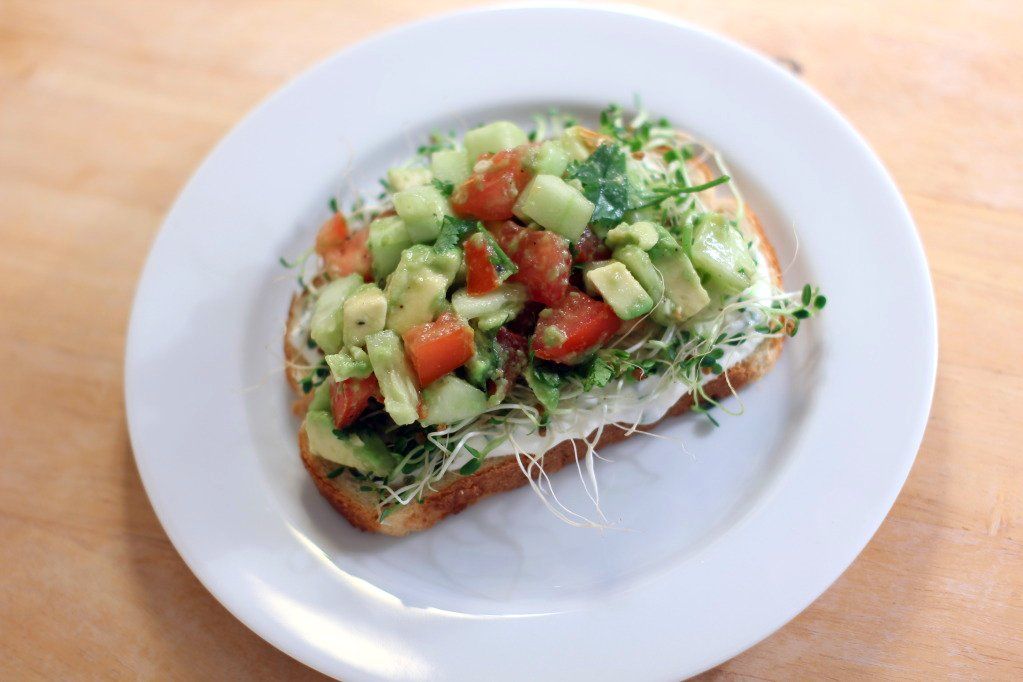
Make the California salad by tossing avocado, tomato, cucumber, lime juice, cilantro, salt, and pepper together in a bowl. Spread each slice of bread with half of your chive spread and pile on half of the alfalfa sprouts. Then top with half of the California salad, piled high. I ate mine with a knife and fork and considerable enthusiasm.

If you liked this post, please:
Subscribe to Willow Bird Baking
Follow Willow Bird Baking on Twitter
Follow Willow Bird Baking on Facebook
Give this post a thumbs up on StumbleUpon
Pin It


ShareOther ways to share this post with friends!

Billion Cheese Ravioli with Red Pepper Pancetta Sauce

Until a couple of days ago, I was planning a romantic takeout Thai feast for my Valentine’s dinner with Mike. Perhaps that seems lazy, but my Clementine Burst Cupcakes were a two-day affair, and I just couldn’t work up the motivation to make a fancy dinner to go with my fancy dessert. Well, at least not until I saw the sweetheart Four Cheese Ravioli over at Annie’s Eats. Food that is adorable can always motivate me.

I’ve had a hankerin’ to make homemade pasta for awhile now, but I don’t own a pasta machine. Some brilliant mind on the interweb recently made the point that old Italian grannies didn’t necessarily have pasta machines either, so when I saw Annie’s ravioli, I decided to throw rationality to the wind. That’s right! I was making pasta by hand!

You’ll hear horror stories about how difficult it is to do so, but I was surprised by how straightforward the process was. It involved some elbow grease (I rolled with all my might!) and some, um, wrist grease (kneading the night away!), but in the end, it was relatively easy. My little ravioli did end up a little tough, so I’ve adjusted the kneading time in the recipe below, and also recommend that you roll out your dough extremely thin. I cut mine into hearts to celebrate my sweetheart (who is currently in a carb coma), but any old shape will do. In fact, you can even grab a ravioli mold to make dozens of ravioli at a time. I can’t help it, though; I’m partial to hearts!

Even though they were a little toothsome (thanks, Kevin from Top Chef!), these little ravioli were the star of the Valentine’s show! Each petite parcel was stuffed full of fresh herbs and (as the title of this post suggests) about a billion cheeses. Specifically: Parmesan, mozzarella, asiago, fontina, Romano, provolone, ricotta, and goat cheese. Most of these were in the form of a 6-cheese blend I picked up at my grocery store — nice!

The sauce was a bit like Dr. Frankenstein’s monster — but what a tasty conglomeration! I wove odds and ends from two tempting recipes together to form a bright, sharp flavor that paired perfectly with the mellow, creamy cheese and herbs inside the ravioli. Delicious sauce calls for some bread for sopping, of course, so I also fixed up some garlic bread. I sliced a loaf of Italian bread from my grocery store’s bakery and sloshed on some melted butter, garlic, and basil. After heating it in the oven, I topped each slice with cheese and heated them again to melt. Cheesy garlic bread: the perfect accompaniment to our fresh pasta!

If you’ve been shying away from homemade pasta because you don’t have a pasta machine, today’s the day to go for it! The taste will be worth it, but the feeling of accomplishment when you bite into your sweet, handmade ravioli is even better.

Billion Cheese Ravioli with Red Pepper Pancetta Sauce


Recipe by: Adapted from Annie’s Eats (pasta and ravioli); sauce adapted from Pioneer Woman, and Lissi
Yield: enough pasta to serve about 2 people

Ravioli Pasta Ingredients:
2 large eggs
1/2 tablespoon water, plus more as needed (I ended up using several full tablespoons)
1/2 tablespoon olive oil
1 3/4 cups sifted all-purpose flour
1/4 teaspoon salt

Filling Ingredients:
1/2 cup whole ricotta
1 cup 6-cheese Italian blend
1/4 cup goat cheese crumbles
fresh basil, chopped, to taste
fresh chives, chopped, to taste
fresh thyme, chopped, to taste
1/4 teaspoon dried oregano
salt and pepper, to taste

Sauce Ingredients:
3 whole red bell peppers, roasted
3 tablespoons pine nuts
pancetta
3-4 tablespoons tomato puree
2 tablespoons olive oil
splash of wine or water
1/2 medium onion, finely diced
2 cloves garlic, minced
1/2 cup ricotta
splash heavy cream
Fresh Parmesan, shaved

Directions:
Make the pasta: In a food processor, combine the eggs, water, olive oil and flour. Mix on low speed until the ingredients are well mixed and a dough begins to form. If the mixture is not coming together, add more water, 1 tablespoon at a time just until the dough is formed. Transfer the dough from the food processor to a work surface. Knead 1-2 minutes by hand. Cover with a clean towel and let rest for 20 minutes. Knead again for 1-2 minutes, or until dough starts to feel more supple and elastic. Let rest for another 20 minutes.

Divide the dough into two equal pieces. If you have a pasta machine, see instructions here for how to prepare the sheets of dough. If not, roll one piece of the dough out on a lightly floured surface, pressing hard and rolling diligently until the dough is very thin. Use a large heart-shaped cookie cutter to cut out ravioli pieces. Let these rest while you mix your filling.

Mix filling: Place all ingredients into a bowl and mix well. Taste and season accordingly.

Assemble ravioli: Place about 1 teaspoon of filling in the middle of half of the heart shapes, leaving a clear edge around the perimeter. Dip a finger in water and lightly brush around the edges of a heart topped with the filling. Place one of the remaining pasta hearts on top and press the edges of the pasta shapes together to seal around the filling, being careful to press out any excess air. Repeat with the remaining dough shapes.

Make the sauce: Lightly toast pine nuts in a skillet. Puree peppers with pine nuts. Set aside. Lightly fry pancetta to release fat. Add onions and garlic and cook until soft. Slide this mixture to the side of the pan. Add 3-4 tablespoons tomato puree and cook until slightly caramelized. (I put my pasta water on to boil right around now). Add a splash of wine and scrape bottom of the pan to get all the good bits into the sauce. Pour in pepper puree and stir together, seasoning with salt to taste. Pour in cream and ricotta and stir to combine. Taste and add more salt, if necessary.

Cook the pasta: Bring a large pot of salted water to boil. Cook the ravioli until al dente, about 5 minutes. Drain well and add ravioli to the sauce, tossing to coat. Serve with a spring of basil and shaved Parmesan.


Valentine’s Day dinner for two.


Share Share this post with friends!