condiment

Easy Whipped Honey Butter (perfect for yeast rolls!)

Easy Whipped Honey Butter (perfect for yeast rolls!)

Sriracha Aioli

Sriracha Aioli
Sriracha Aioli

Broiled Southern Pimiento Cheese

My sandwich sat heavily in my stomach as I watched states turn blue and red Tuesday night, and I wanted to write something beautiful about empathy. I wanted to say it in a way Burt Bacharach didn’t already beat me to. I wanted to lament that that song was recorded in 1965 and we’re still trading barbs about who’s un-American, un-Christian, ignorant, and ill-informed instead of just discussing facts. I wanted to tell you about how my students wrote journals suggesting that folks research their decisions and discuss them compassionately — but then turned around the last period of the day and cheered/heckled about their mock election results.

I wanted to say all of this and ask you for help and give you my prescription and . . .

instead I’m going to talk about Waffle House.


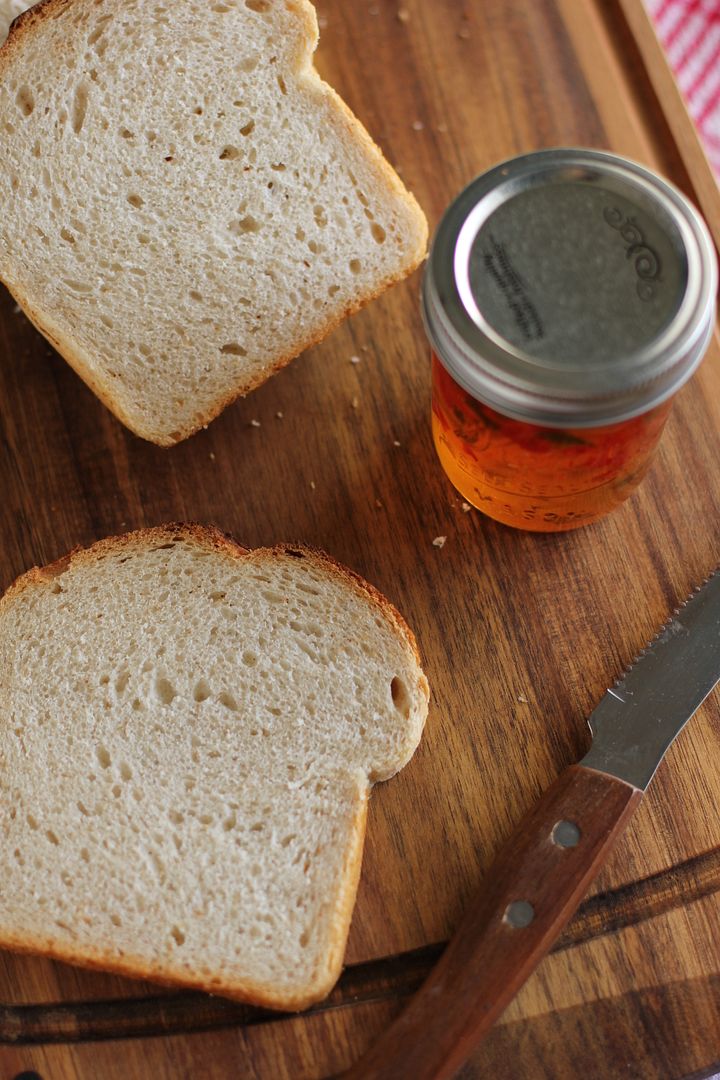
delicious unbroiled, too.

I know this is going to be a confusing post, because I doubt anyone feels the same as I do about Waffle House. But I also know that you have a Waffle House of your own. Not a literal WaHo, as we called it in college, but a figurative place that means to you what WaHo means to me.

Waffle House is my safe house. It’s a weathered yellow, globe-lamped beacon on the darkest, coldest streets on the darkest, coldest nights.

When every other restaurant is closed, it’s open. When every person I see feels like a stranger, it’s open. When my best friend in the world is closed off to me, it’s open. When everyone is asleep and I’m otherwise totally alone, Waffle House is awake.

It’s not only open: it’s welcoming.

A woman works at my Waffle House who has practiced mothering for most of her life. She effortlessly extends that to me as if I might as well be her child, a gesture that astounds me in its generosity but one that she seems to barely consider. She’ll call me sweetie or hon or baby and offer me a soda. She’ll make a joke about where I’m putting all those waffles I’m eating. She’ll ask me how everything tasted.

She doesn’t have to do that. She probably gets paid half of what I do (and I’m a teacher; I don’t get paid that much). My tip — though I’ll tip generously out of gratitude — isn’t going to make up for her lower wages. Her boss isn’t sitting there watching her. She just does it because she’s in the hospitality business, and she feels hospitable toward me. I can’t get over it.

Even in the Waffle Houses where no one mothers me, they extend the basic gestures of hospitality: no matter what time of day I walk in, how I’m feeling, or what I’ve been through, I am offered a drink. I am offered food. Someone prepares it for me and sets it before me. I pray over my food and eat surrounded by a warm blanket of noise: conversations I’m not a part of, laughter, a story told in Spanish, a couple talking in hushed tones, a man flirting with a server, a song I haven’t heard in a decade from the neon jukebox.

Maybe all this seems accidental, but I think the WaHo culture was deliberately created. Have you ever walked into a Waffle House and noticed a laminated list of “House Rules” posted close to the door or above the grill? It proudly proclaims, “You are welcome in Our House,” and notes that they will tolerate no discrimination for any reason. Maybe it’s silly, but I’m always touched by that. I believe it.

WaHo also has it’s very own language, an important part of creating a culture. I can “hold the yolks” and get my hashbrowns “smothered, covered, topped, and capped.” I don’t just order a sandwich or chili: I order Aunt Lib’s patty melt and Bert’s Chili. You’re automatically an insider if you know the lingo — and if you don’t, it’s on the menu. So welcome inside.

I guess that’s what it is — in a world where everyone suddenly seems so combative and self-centered, so willing to divide and exclude, Waffle House is the epitome of inclusivity. My faith alienates some people and my politics alienate the others, so I often feel like I’m on the outside of circles. I just don’t fit. The easy labels don’t work. And since I’m a sensitive person, I really feel the barbs from both sides. No wonder inclusivity means a lot to me.

I feel like I’m writing a grade school essay on my favorite place, but maybe that’s what I needed to go back to tonight. Maybe I needed things to become a little simpler, a little warmer.

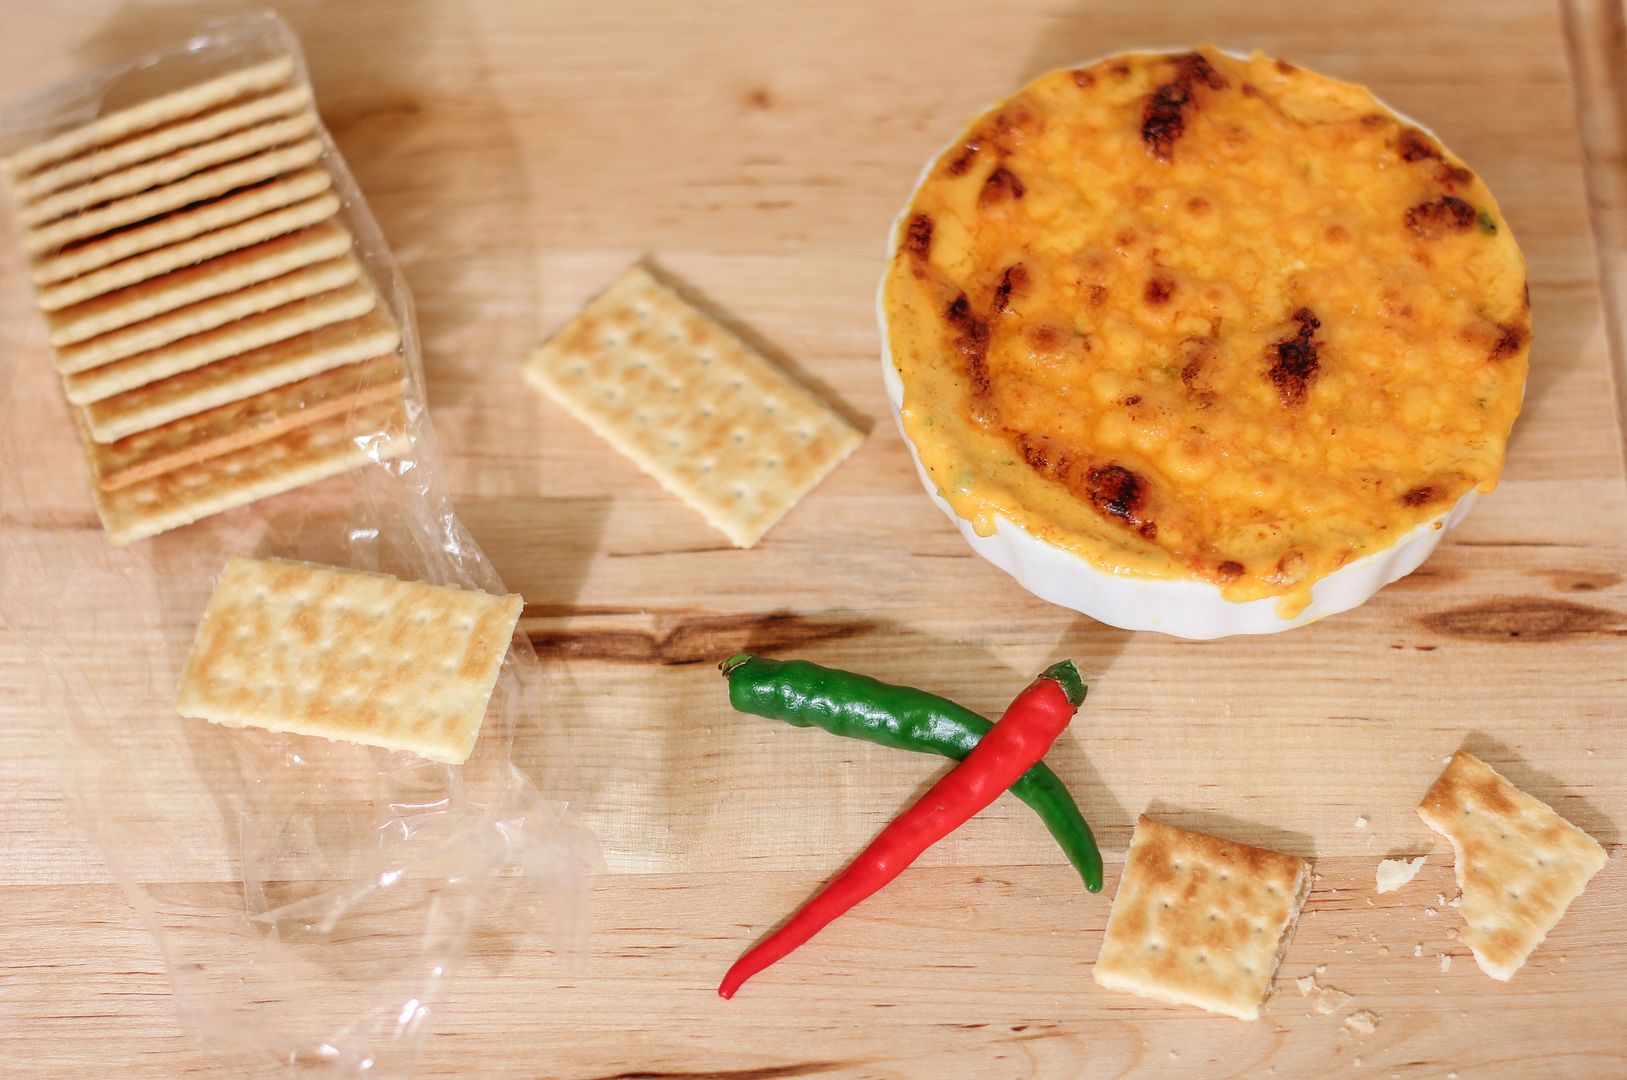
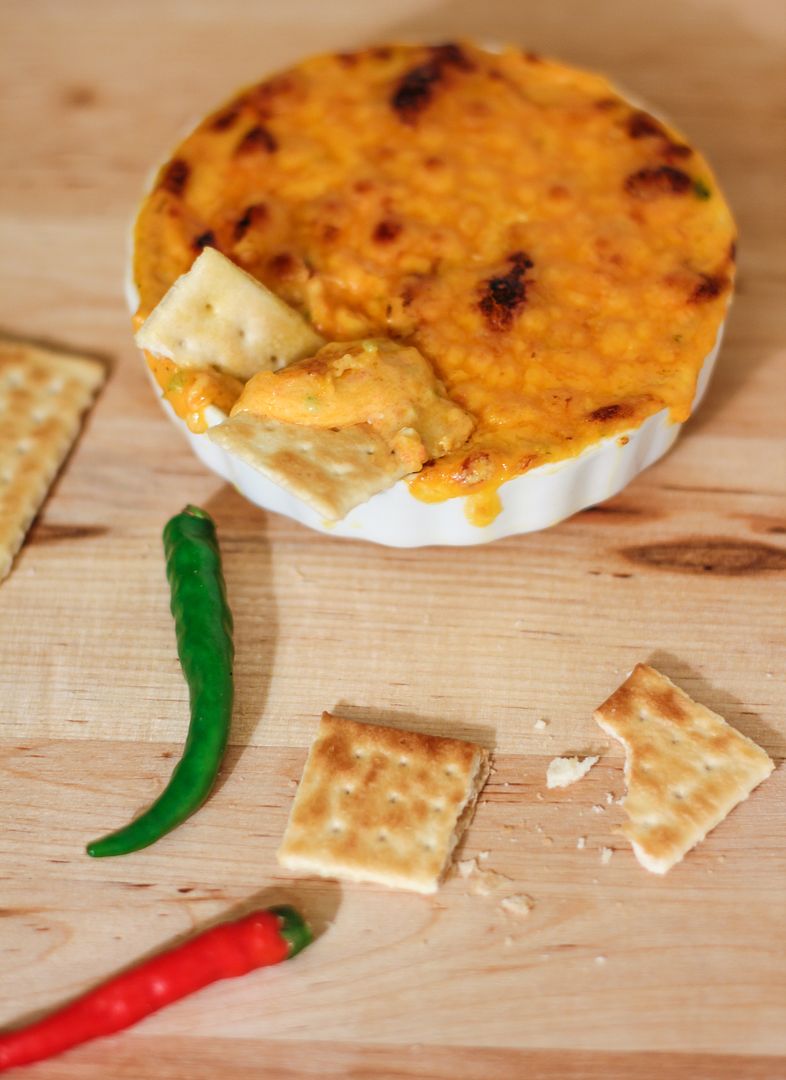
Speaking of warmth, this Broiled Southern Pimiento Cheese goes a long way toward comforting the soul. Just like Waffle House is one of my absolute favorite places, pimiento cheese is one of my absolute favorite foods. I ordered a version that had been topped with a bit of extra sharp cheddar and broiled into a warm dip at a restaurant in Raleigh, and after one bite, I knew I had to recreate it. You’re going to adore it!

What’s your Waffle House?

One year ago: Fresh Open-Faced California Sandwich
Two years ago: How to Make 27+ Cheesecakes and Look Awesome While Doing It
Three years ago: Barefoot Contessa’s Carrot Pineapple Cake

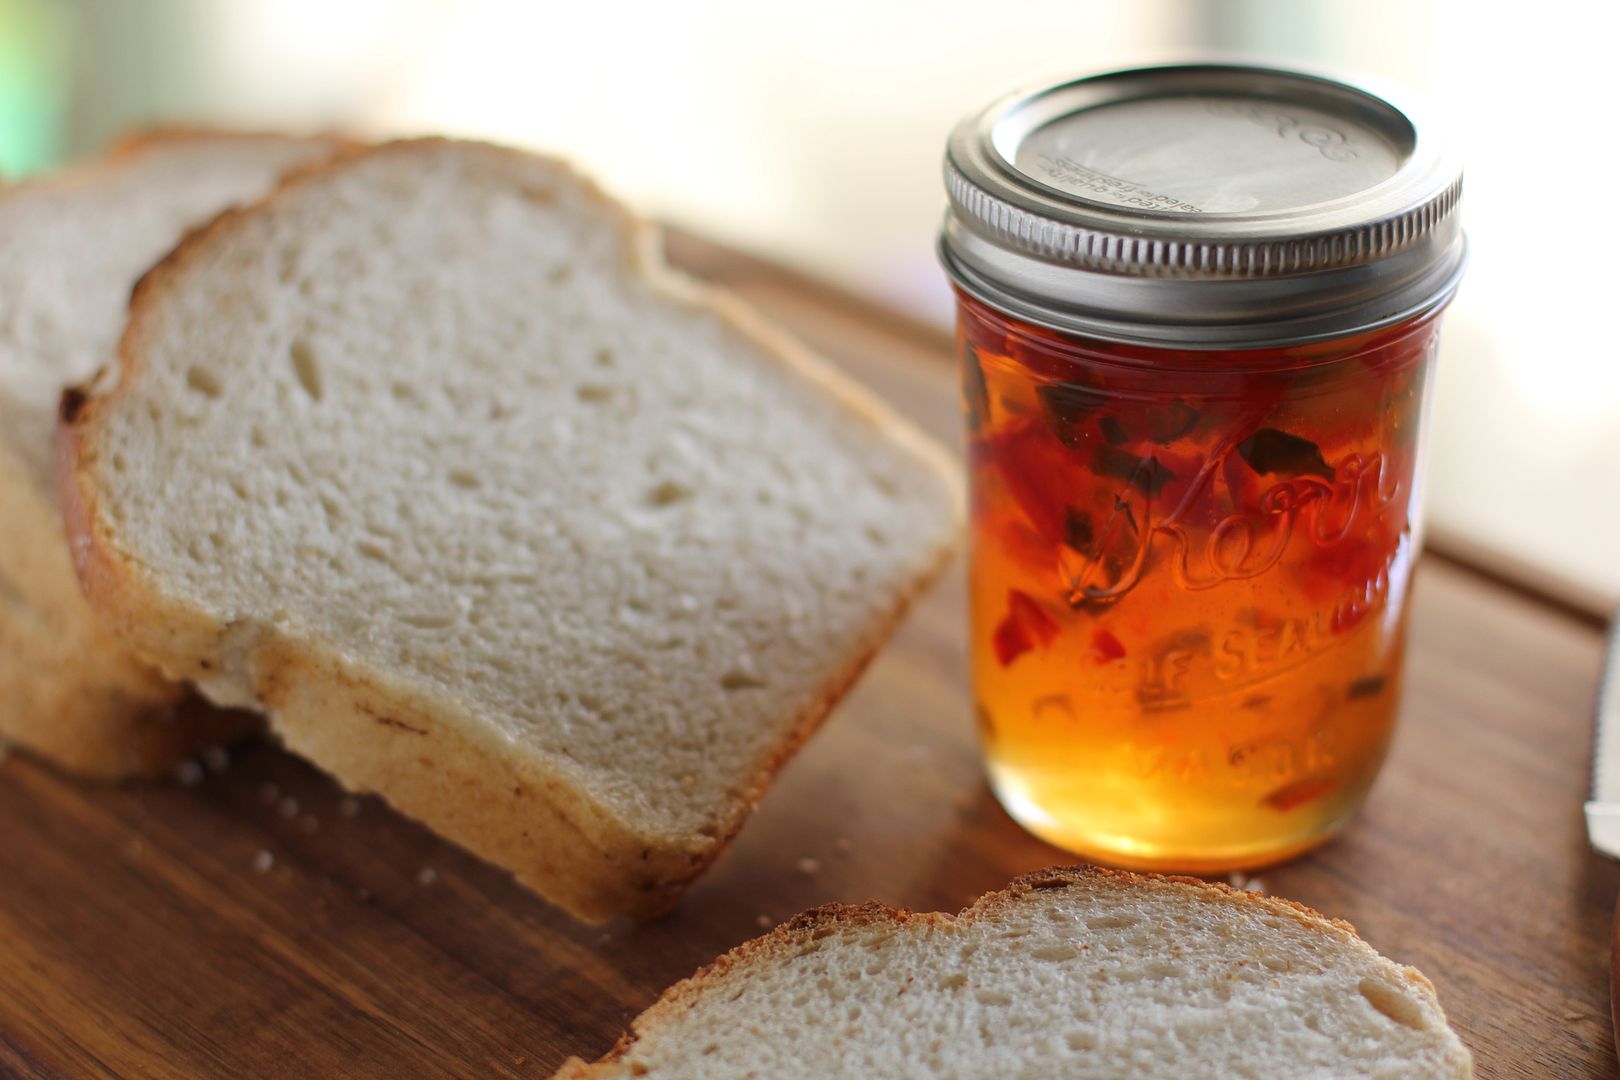
My Favorite Southern Pimiento Cheese


Recipe by: Adapted from Paula Deen, and inspired by NOFO @ The Pig’s broiled pimiento cheese dip
Yield: about 2 cups of dip

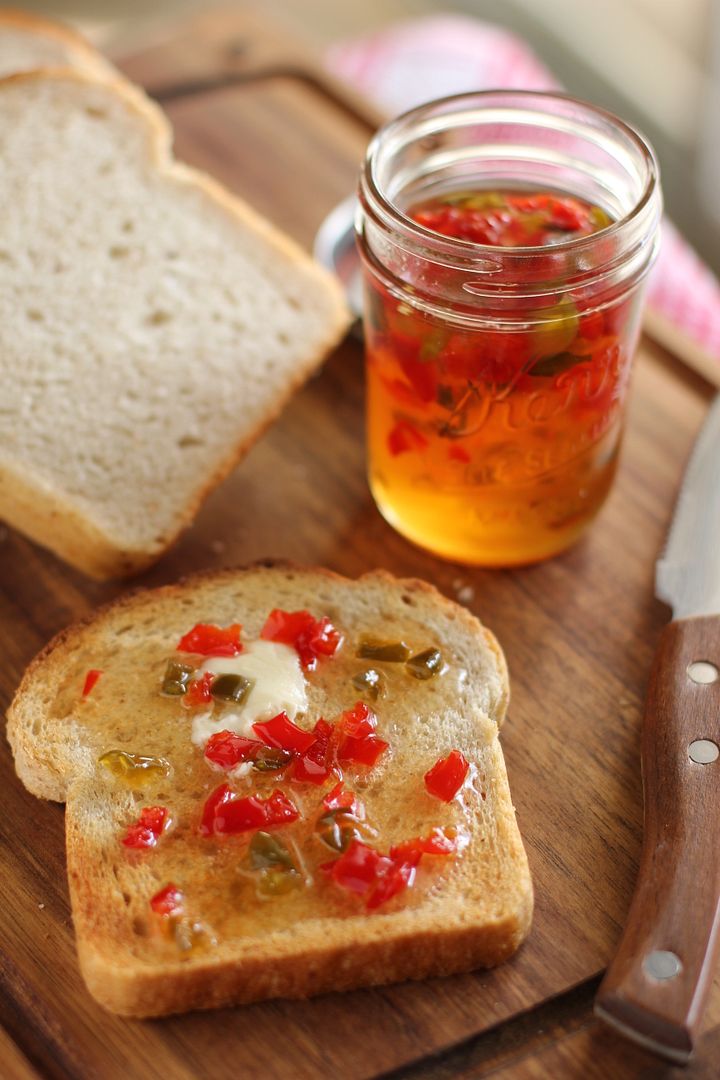
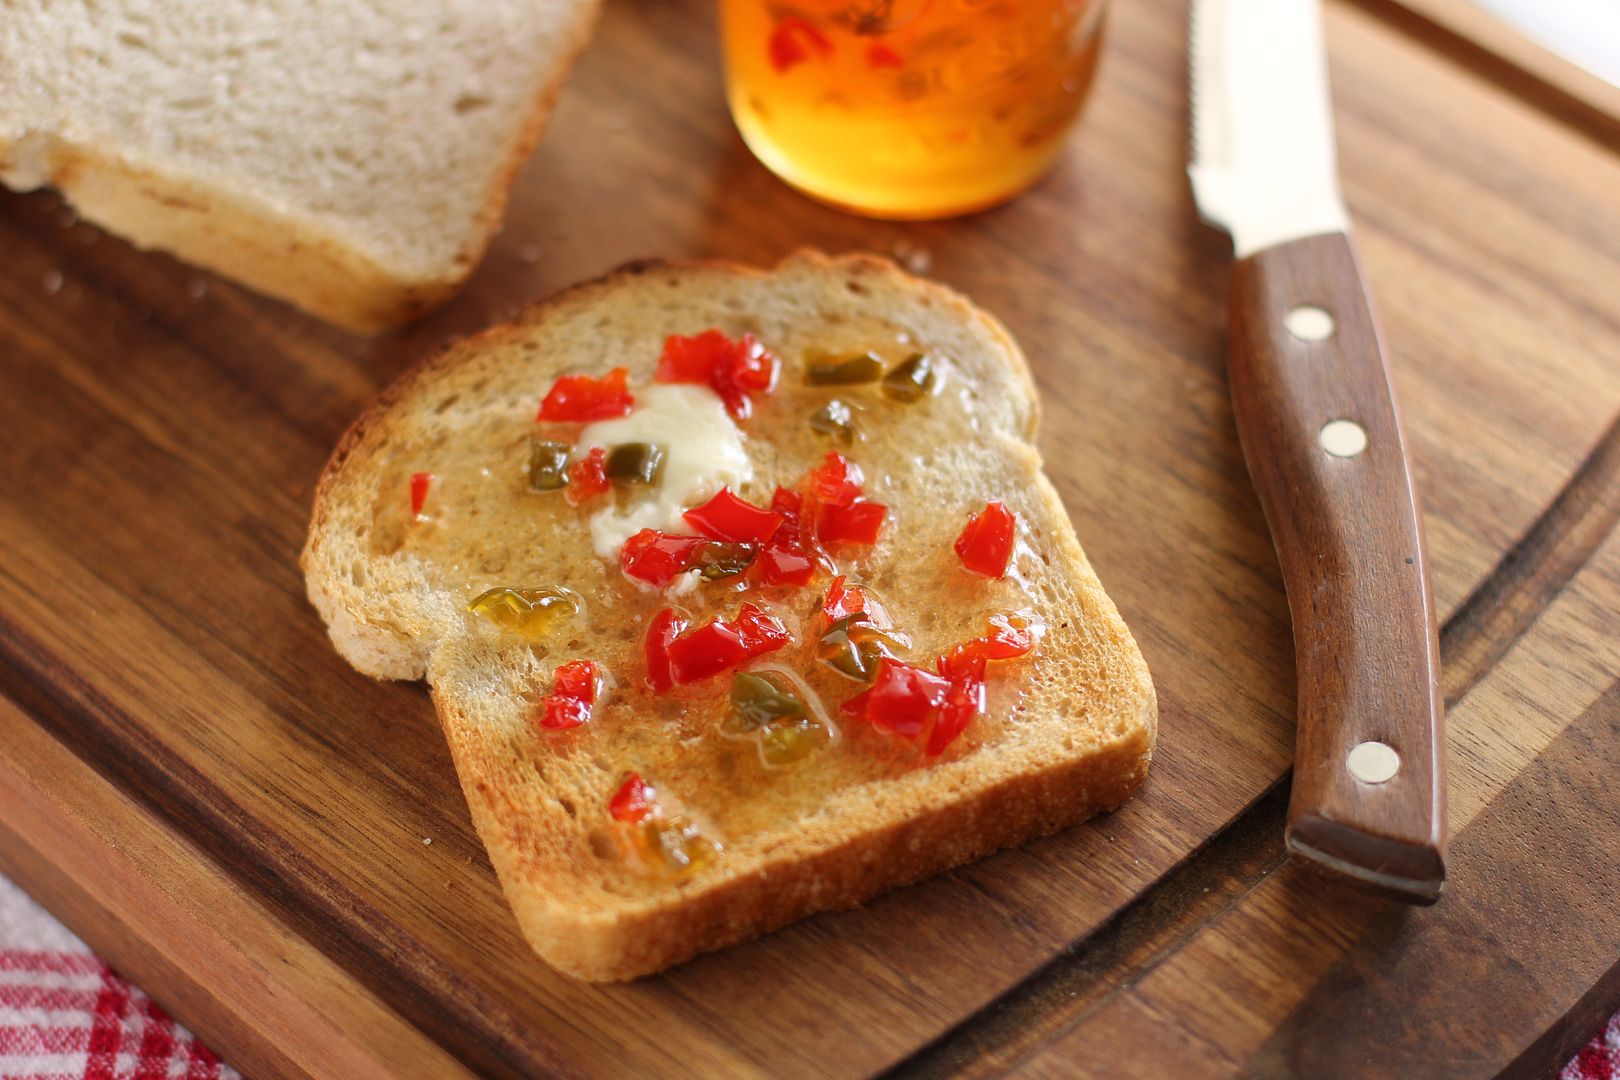
I’m a pimiento cheese addict — I love it slathered on two slices of white bread, baked into something amazing, or just eaten as a fantastic dip. This is the best pimiento cheese I’ve ever had — much better than any I can find in the grocery store for sure! This recipe adds a few hot peppers for heat and then broils the pimiento cheese to create a warm, bubbly, comforting dip you’re going to love.

Ingredients:
3 ounces cream cheese, room temperature
2 cups grated sharp cheddar*, plus extra to mix in and for topping at the end
1/2 cup Hellmann’s mayonnaise**
2 teaspoons minced hot peppers (jalapeños or your favorite), or to taste
1/4 teaspoon McCormick’s roasted garlic salt*** (or regular if you can’t find it)
pinch of ground pepper
2 to 3 tablespoons pimientos, smashed

*I usually use two different cheddars. Food Lion Extra Sharp Cheddar is my favorite cheese ever (and no, they did not sponsor this post) and I usually mix it with another brand of cheddar I enjoy.
**Hellmann’s is the only mayonnaise I ever, ever use, and no, they also did not sponsor this post.
***McCormick also did not sponsor this post, but I haven’t seen roasted garlic salt from anyone else and I like theirs.

Directions:
In a food processor (you can also do this by hand, but the food processor makes it a bit easier), mix the cream cheese until fluffy. Add cheese, mayonnaise, hot peppers, garlic salt, pepper, and smashed pimientos and mix until combined. If serving as a cold dip, spoon the mixture out into a serving bowl, mixing in the unused freshly grated cheese for texture.

If serving as a broiled dip, preheat the broiler. Spoon the mixture equally into shallow ramekins and top with unused freshly grated cheese. Be sure your ramekins are safe for broiling — I chanced it very carefully, but glass is not recommended for broiling — try to find some shallow metal pans or some small cast iron skillets instead. Place the ramekins on a baking sheet and broil until the cheese is browned and bubbly, rotating the pan several times. Allow to cool slightly before serving with crackers, strips of bacon, charred toast, and/or crudites.

Waffle House also did not sponsor this post and doesn’t know I exist (except my favorite servers, who remember me every time!) I just love WaHo and wanted to share my thoughts about it with you.

If you liked this post, please:
Subscribe to Willow Bird Baking
Follow Willow Bird Baking on Twitter
Follow Willow Bird Baking on Facebook

Clementine Curd

I noticed early on in my teaching career that 6th graders do this thing. A discussion with them about a novel might go something like this:

Me: “What was the main character’s opinion on the government?”
Student: (unsure of the answer) “Hm. Uh.” (stares off into space for a few moments) “Ummm.” (gives up) “Well, I don’t know.”

All the while, the novel itself sits like an ironic little nugget in front of them, untouched. I look at it pointedly. The student looks at me blankly.

At this point, I usually get a little heavy-handed. I give my head an exaggerated scratch and give a shrug of cartoon proportions. “Is there any way we could possibly find out? Is there anywhere in the universe we might be able to get a hint about the answer?” Typically after this bit of melodrama on my part, the students catch my drift, grin, and grab their books.

It’s not a personal failing that they don’t immediately use available resources to form their ideas. Instead, it’s part of natural child development — every 6th grader who enters my class needs to build this skill. I’m here to construct a staircase toward resourcefulness and independence.

In keeping with that, I tell my 6th graders all year long that we’re going to work on finding evidence.

We hunted through the novel Crispin to find for evidence to support our opinions about feudalism. We hunted through a biography about St. Giles to find evidence for why the author included him in the story. We read Greek myths to find evidence to build a definition of what a hero quest is. We found evidence in The Giver that Lois Lowry’s “utopia” wasn’t really all that perfect.

Evidence isn’t just for language arts, either. In the after school Cookie Camp I’m leading right now, the following exchange is a common one:

Me: “What’s the next thing we have to do?”
Camper 1: “Maybe add the egg?”
Camper 2: “Oh, or maybe add the flour!”
Camper 3: “Do we have to add the vanilla next?”
Me: (requisite melodrama) “How in the world are we going to decide?! We don’t want to mess up our cookies, but how do we know what to do?!”
Campers: “Oh, the recipe!”

Oh. The recipe, y’all.

Maybe as you accumulate practice and skill, you can begin to deviate from the recipe, combine recipes, or even create recipes. But in those beginning stages when you’re just learning to bake (or form opinions, or understand new subject matter), you have to learn to go back to the source.

6th grade was a long time ago for me, but I still need this reminder sometimes. I’ll find myself fretting about a decision or wondering why events are unfolding like they are. My cloud of anxiety can narrow my perspective. I need to return to the source during those times. I need to increase my time reading the Bible, return to the basics, and remind myself through the words inspired by God Himself who He is and what He’s done. I need to let go of the other ways I try to find my answers — worrying, busying myself with my to-do list, trying on different reactions to the situations I encounter.

That being said, this post isn’t so much a polished prescription (“just go back to the source, duh — problem solved!”) as it is a revelation of where I am in my thought process right now. I’m reading through Job, the most difficult book of scripture for me (and I don’t mean in terms of comprehension), for the second time in a year. I’m finding some answers, but also more questions. And always, always, I’m asking God to take me back to the recipe, to give me evidence — building blocks of information about what I can do (or what I can release) to glorify Him.

There’s a song I love that says, “[A Father’s] whisper’s like a bridge; it’s a river spanned.” It’s true — every whisper of truth He gives me spans a river of need. So I’ll keep collecting His whispers and weaving them into a path, an answer that won’t be complete in this lifetime.

. . .

In the meantime, in the spirit of going back to the basics, here’s a simple, foundational recipe. A lovely fruit curd can play so many versatile roles in the kitchen: a spread for buttered toast, a dip for shortbread cookies, a base for mousse, a filling for cakes and cupcakes, a quick snack on a spoon. I’ve been in love with Fine Cooking’s foolproof lemon curd recipe since I first found it, and I use it as a base for all other curds I create, such as this clementine curd.

While it takes quite a bit of stirring and only lasts a week in the fridge, curd can be frozen for up to about two months. It’s worth the investment of time and your arm muscles.

How do you go “back to basics” in your life?

Clementine Curd


Recipe by: Adapted from Fine Cooking’s foolproof lemon curd recipe
Yield: about 1 1/2 cups of curd

Bright, sweet, tangy clementine curd is lovely spread on toast, stuffed into cupcakes or cakes, or used as a base for mousse. I make a big batch and freeze it, using it in many different recipes over the course of a few weeks. This curd recipe is adapted from one dubbed “foolproof” by Fine Cooking, and it’s perfect for those who have never made curd before and worry about accidentally cooking their eggs or curdling their mixture.

Ingredients:
6 tablespoons unsalted butter, at room temperature
1 cup sugar
2 large eggs
2 large egg yolks
2/3 cup fresh clementine juice
1 teaspoon grated clementine zest

Directions:
Cream butter and sugar together in a large bowl for about 2 minutes or until light, pale, and fluffy. While mixing, slowly add eggs and yolks. Beat the mixture for 1 minute before mixing in the clementine juice. Don’t worry if the mixture looks curdled, because it’ll get smooth as it cooks and the butter melts.

Cook the mixture in a heavy saucepan over medium heat, stirring constantly, for about 20-25 minutes (lemon curd only takes 15, but I’ve found the clementine curd takes me longer), or until it’s thickening and it registers at least 170 degrees on a candy thermometer (I usually end up around 175 before I get it to the thickness I want). Just don’t let the mixture boil. Also, remember it’ll continue thickening as it cools and then chills, so don’t feel like you have to get it to its final thickness on the stove. When it’s done, it should leave a clean path on the back of a wooden spoon when you run your finger down it.

Remove the clementine curd from the heat and stir in the clementine zest. Transfer the mixture to a wide bowl and place a layer of plastic wrap directly on the surface of the curd to prevent a film from developing. Place the curd in the refrigerate to chill it. Cover it tightly and keep if you about a week in the fridge or for about 2 months in the freezer.

If you liked this post, please:
Subscribe to Willow Bird Baking
Follow Willow Bird Baking on Twitter
Follow Willow Bird Baking on Facebook
Give this post a thumbs up on StumbleUpon
Pin It


Shareother ways to share this post with friends

Bright Pepper Jelly (and Welcome to the new Willow Bird Baking)

Last week I did around 8 billion google searches for recipes, and a solid million of those (give or take a few) were for pepper jelly.

I’d recently been inundated with it at restaurants — pepper jelly on fried pimiento cheese balls, pepper jelly on grilled chile cornbread, pepper jelly on fried green tomatoes — and had developed a bit of an obsession with the stuff.

My recipe search yielded tons of pepper jellies, but none were satisfactory. I was willing to experiment with the hot-sweet balance and the tang of my jelly, but I had one non-negotiable: I didn’t want the recipe to involve canning.

I’d never canned before. I didn’t know how to can. I didn’t want to learn a whole new thing in the middle of a busy week. I wasn’t sure if I had all the materials I needed. There were lots of reasons for my stubbornness. But much to my annoyance, recipe after recipe began, “Sterilize six half-pint mason jars . . . .”

Finally, still skeptical, I broke down and read about the process of preserving food. If you’ve ever done any canning yourself, you probably know what I found out:

It’s easy.

Like, super easy. You sterilize some jars (which can be as simple as running them through the dishwasher), pour a simple hot jelly mixture into them, close the lids, and then boil them to create a seal. The “equipment” you needed was limited to jars, a pair of tongs with some rubber bands on the end for gripping, and a big stock pot. Really? This was what I was afraid of?

Running smack into a wall of my own self-doubt forced me to realize that it was comprised of shoddy materials — insecurity, laziness, haste — and needed to be torn down. It also reminded me of Willow Bird Baking’s reason for being: to share life lessons and build kitchen confidence in other home cooks just like me. If I shy away from a new technique, how can I encourage my friends to charge ahead and tackle unfamiliar things?

Feeling admonished by my own website’s mission, I prepared my materials and successfully canned seven lovely jars of bright pepper jelly. Mike and I glopped it onto buttered sourdough toast by the spoonfuls at our Make-Ahead Holiday Breakfast Party on Saturday morning.

My pride in having tackled a new challenge renewed — as it always does — my dedication to the community here at Willow Bird Baking. Every comment or anecdote we share with one another encourages me when my pie crust turns to pie dust, my cake is falling over, or my brownies are lying in the floor. We’re all in this together, and the result is more than just great food. The result is great friendships.

. . . and pepper jelly.

Speaking of the bonds we’ve forged over pepper jelly and other such culinary challenges, I’ve got something to show you. I’ve waited for weeks to reveal what I’ve been working on behind the scenes: Welcome to the new Willow Bird Baking!

We have a brand new home on the web (at willowbirdbaking.com) and a clean, warm new design. Willow Bird Baking is also sporting a new, exhaustive recipe index where you can browse recipes by type, season, meal — and even by color!

This news means more to me than just a makeover. Willow Bird’s appearance finally reflects the comforting, loving, simple environment we’ve created here. The blog become a forum to share everything from family memories to laughter over our mistakes. Really, the fact that I can reveal this new chapter in Willow Bird’s life to you means the world to me. Thank you for reading.

Bright Pepper Jelly


Recipe by: Adapted from (thanks, Erin for this recipe!)
Yield: 7 half-pint jars of jelly

This pepper jelly is bright, tangy, and has the perfect balance of hot and sweet. Feel free to adjust the ratio of peppers to your taste, though, so long as the overall quantity is 4 cups. The consistency is that of a thin jelly — if you like a thicker, spreadable jelly, I hear you can double the amount of pectin in the recipe. Serve this pepper jelly spooned over crackers with cream cheese or slathered on buttered toast. Oh, and don’t worry if you’ve never canned anything before; the recipe below will walk you through the process step by step.

Ingredients:
2 1/4 cups finely chopped red bell peppers
1 1/4 cups finely chopped green bell peppers
1/2 cup finely chopped jalapeno peppers
1 cup apple cider vinegar
1 (1.75 ounce each) package powdered pectin (or 2 if you want a thicker jelly)
5 cups white sugar

Equipment needed:
6 or 7 (8-ounce or half-pint) canning jars
tongs (preferably with rubber bands around the ends to improve grip)
a large stockpot or canner (with room for your jars to be fully submerged with 2 inches of water above the top of the jars)
a dish towel or rack to keep the jars off the bottom of the pot

Directions:
Note: Do not adjust the amount of sugar and vinegar in canning recipes. Always use gloves when chopping jalapenos or other hot peppers and avoid touching your eyes or face. Wash your hands and surfaces immediately when finished.

Prepare ingredients: Chop the peppers by hand and then drain them in cheesecloth to remove excess moisture. Set them aside while you sterilize your jars. You can also measure out sugar and vinegar so that you’re prepared.

Sterilize your tongs and 7 (8-ounce) canning jars: Place rubber bands on the end of the tongs, which will make it easier to grip your jars. Boil the ends of the tongs for 5 minutes to sterilize them. Sterilize your jars, lids, and rings by running them through a short cycle on the dishwasher or using the oven method or boiling water method (see below). No matter which method you choose, time them to be finished when your jelly is ready (preparing the jelly takes about 15 minutes) so that you can put the hot preserves into hot jars.

Oven method: Preheat the oven to 175 degrees F. Wash the lids and jars with hot, soapy water and rinse them. Line the lids and jars up on a baking sheet (open sides up) and bake them for 25 minutes.

Stovetop method: Wash the lids and jars with hot, soapy water and rinse them. Boil the jars and lids covered with water for 15 minutes.

While jars sterilize, make jelly: Place all of the peppers into a large saucepan over high heat. Add the vinegar and fruit pectin and bring the mixture up to a full rolling boil, stirring constantly. Stir in the sugar and return the mixture to a full boil. Boil exactly 2 minutes, continuing to stir constantly. Remove the mixture from the heat and skim off any foam before carefully and quickly ladling the jelly into hot, sterile jars. Fill each jar to within 1/4 inch of its top. Cover each jar with a flat lid and screw on its ring.

Process your jars: Slowly lower the jars with tongs into a large stock pot or canner with a rack or a folded towel inside so the jars do not touch the bottom. Cover the jars with hot water that isn’t boiling (the water depth should be about 2 inches above the top of the jars — and make sure your pot is large enough that it won’t boil over when the water boils). Bring the water to a full boil and process the jars for 5 minutes before removing them with tongs and cooling completely. Hearing the jars pop while they cool is normal — this is the sound they make while they’re sealing!

Store in a cool dark place until you’re ready to serve over crackers with cream cheese, or on hot buttered toast. For best quality, use within a year. Refrigerate jars after opening for up to 1 month.

If you liked this post, please:
Subscribe to Willow Bird Baking
Follow Willow Bird Baking on Twitter
Follow Willow Bird Baking on Facebook
Give this post a thumbs up on StumbleUpon
Pin It

1 2