Billion Cheese Ravioli with Red Pepper Pancetta Sauce

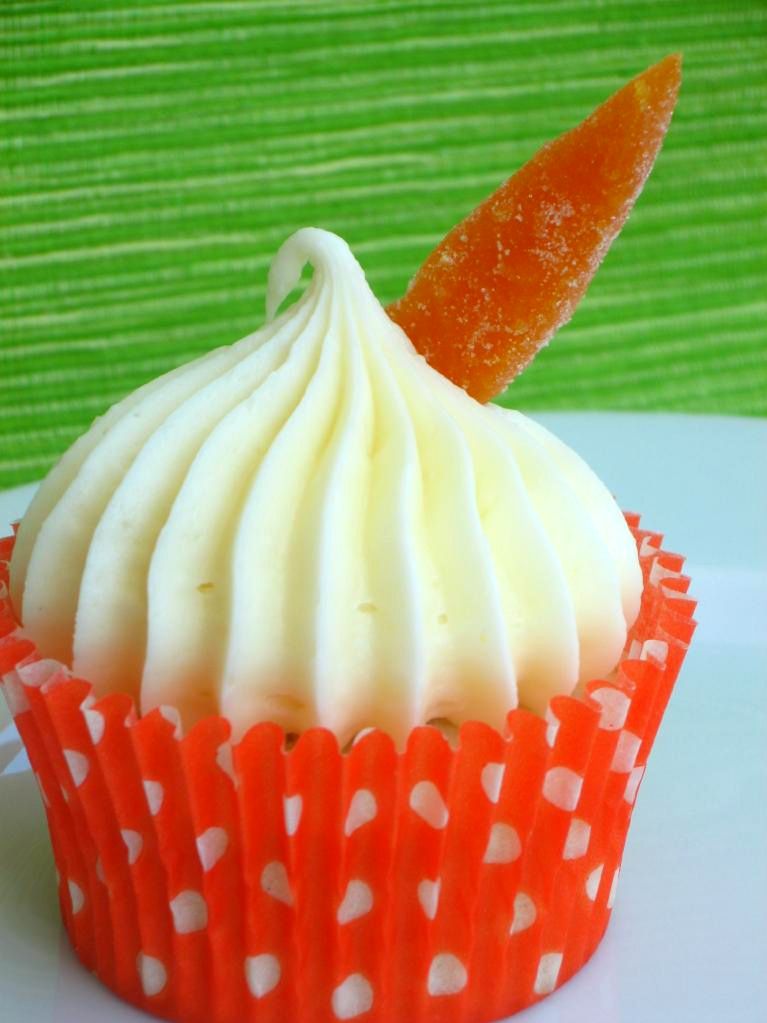
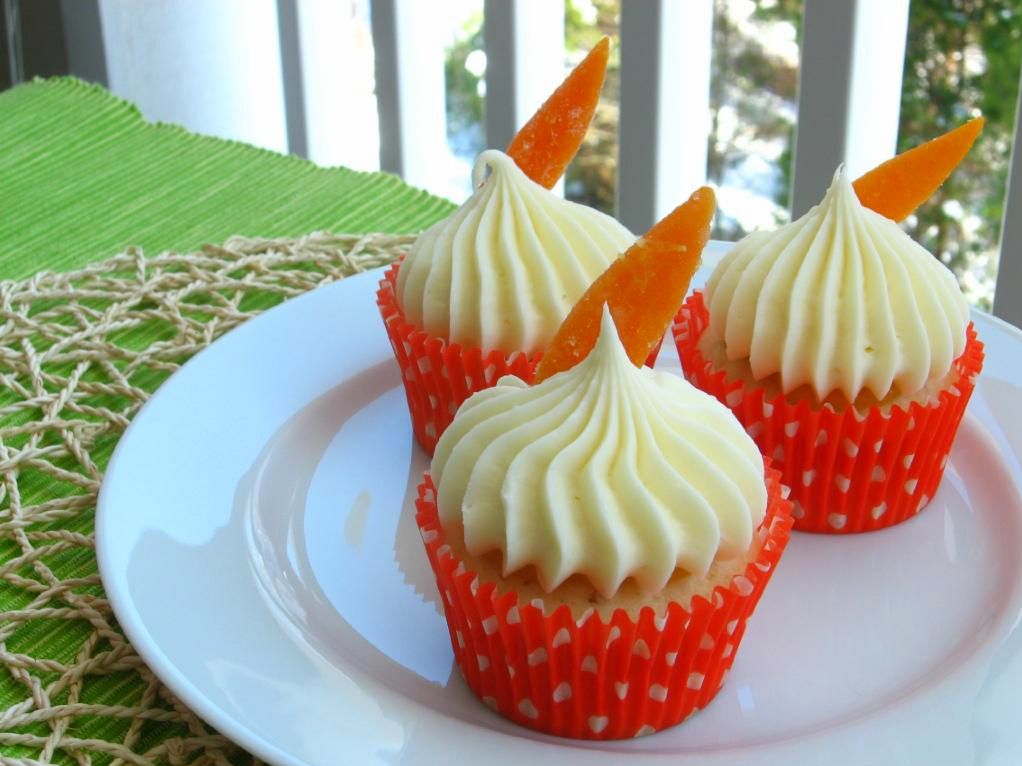
Until a couple of days ago, I was planning a romantic takeout Thai feast for my Valentine’s dinner with Mike. Perhaps that seems lazy, but my Clementine Burst Cupcakes were a two-day affair, and I just couldn’t work up the motivation to make a fancy dinner to go with my fancy dessert. Well, at least not until I saw the sweetheart Four Cheese Ravioli over at Annie’s Eats. Food that is adorable can always motivate me.

I’ve had a hankerin’ to make homemade pasta for awhile now, but I don’t own a pasta machine. Some brilliant mind on the interweb recently made the point that old Italian grannies didn’t necessarily have pasta machines either, so when I saw Annie’s ravioli, I decided to throw rationality to the wind. That’s right! I was making pasta by hand!

You’ll hear horror stories about how difficult it is to do so, but I was surprised by how straightforward the process was. It involved some elbow grease (I rolled with all my might!) and some, um, wrist grease (kneading the night away!), but in the end, it was relatively easy. My little ravioli did end up a little tough, so I’ve adjusted the kneading time in the recipe below, and also recommend that you roll out your dough extremely thin. I cut mine into hearts to celebrate my sweetheart (who is currently in a carb coma), but any old shape will do. In fact, you can even grab a ravioli mold to make dozens of ravioli at a time. I can’t help it, though; I’m partial to hearts!

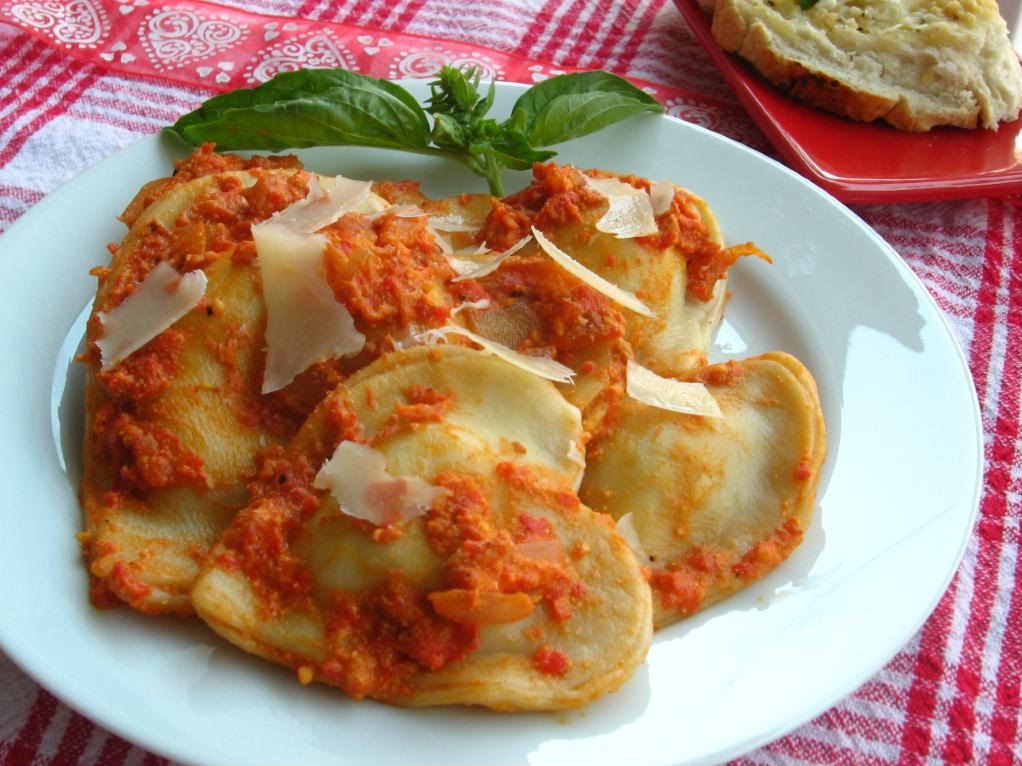
Even though they were a little toothsome (thanks, Kevin from Top Chef!), these little ravioli were the star of the Valentine’s show! Each petite parcel was stuffed full of fresh herbs and (as the title of this post suggests) about a billion cheeses. Specifically: Parmesan, mozzarella, asiago, fontina, Romano, provolone, ricotta, and goat cheese. Most of these were in the form of a 6-cheese blend I picked up at my grocery store — nice!

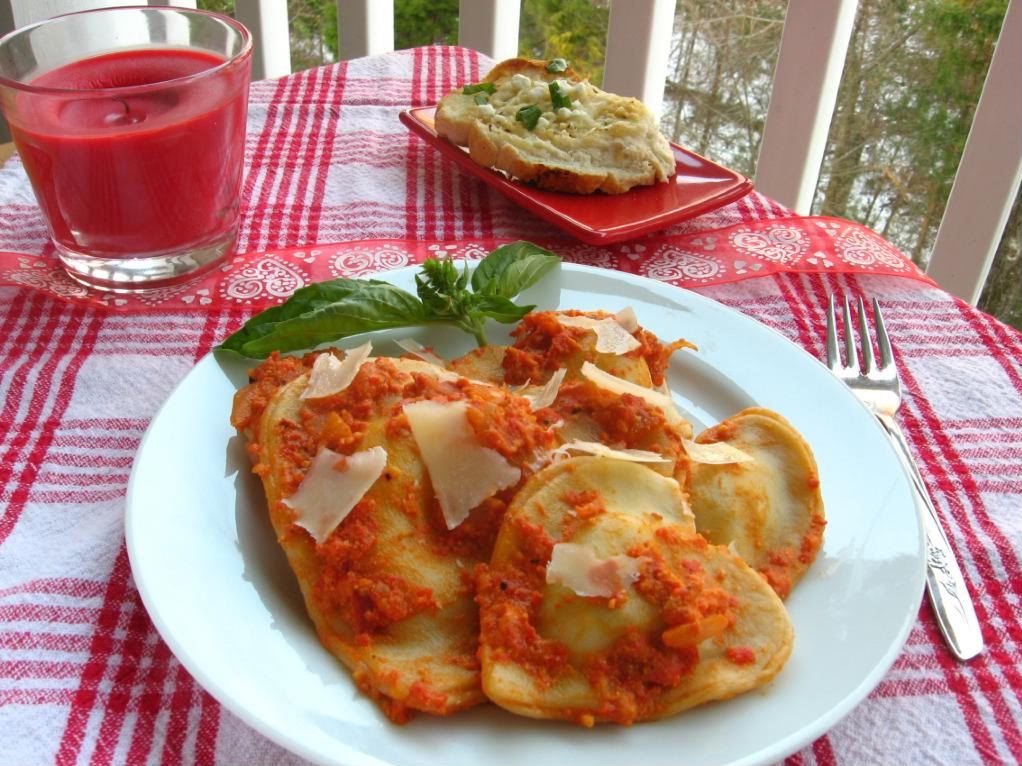
The sauce was a bit like Dr. Frankenstein’s monster — but what a tasty conglomeration! I wove odds and ends from two tempting recipes together to form a bright, sharp flavor that paired perfectly with the mellow, creamy cheese and herbs inside the ravioli. Delicious sauce calls for some bread for sopping, of course, so I also fixed up some garlic bread. I sliced a loaf of Italian bread from my grocery store’s bakery and sloshed on some melted butter, garlic, and basil. After heating it in the oven, I topped each slice with cheese and heated them again to melt. Cheesy garlic bread: the perfect accompaniment to our fresh pasta!

If you’ve been shying away from homemade pasta because you don’t have a pasta machine, today’s the day to go for it! The taste will be worth it, but the feeling of accomplishment when you bite into your sweet, handmade ravioli is even better.

Billion Cheese Ravioli with Red Pepper Pancetta Sauce


Recipe by: Adapted from Annie’s Eats (pasta and ravioli); sauce adapted from Pioneer Woman, and Lissi
Yield: enough pasta to serve about 2 people

Ravioli Pasta Ingredients:
2 large eggs
1/2 tablespoon water, plus more as needed (I ended up using several full tablespoons)
1/2 tablespoon olive oil
1 3/4 cups sifted all-purpose flour
1/4 teaspoon salt

Filling Ingredients:
1/2 cup whole ricotta
1 cup 6-cheese Italian blend
1/4 cup goat cheese crumbles
fresh basil, chopped, to taste
fresh chives, chopped, to taste
fresh thyme, chopped, to taste
1/4 teaspoon dried oregano
salt and pepper, to taste

Sauce Ingredients:
3 whole red bell peppers, roasted
3 tablespoons pine nuts
pancetta
3-4 tablespoons tomato puree
2 tablespoons olive oil
splash of wine or water
1/2 medium onion, finely diced
2 cloves garlic, minced
1/2 cup ricotta
splash heavy cream
Fresh Parmesan, shaved

Directions:
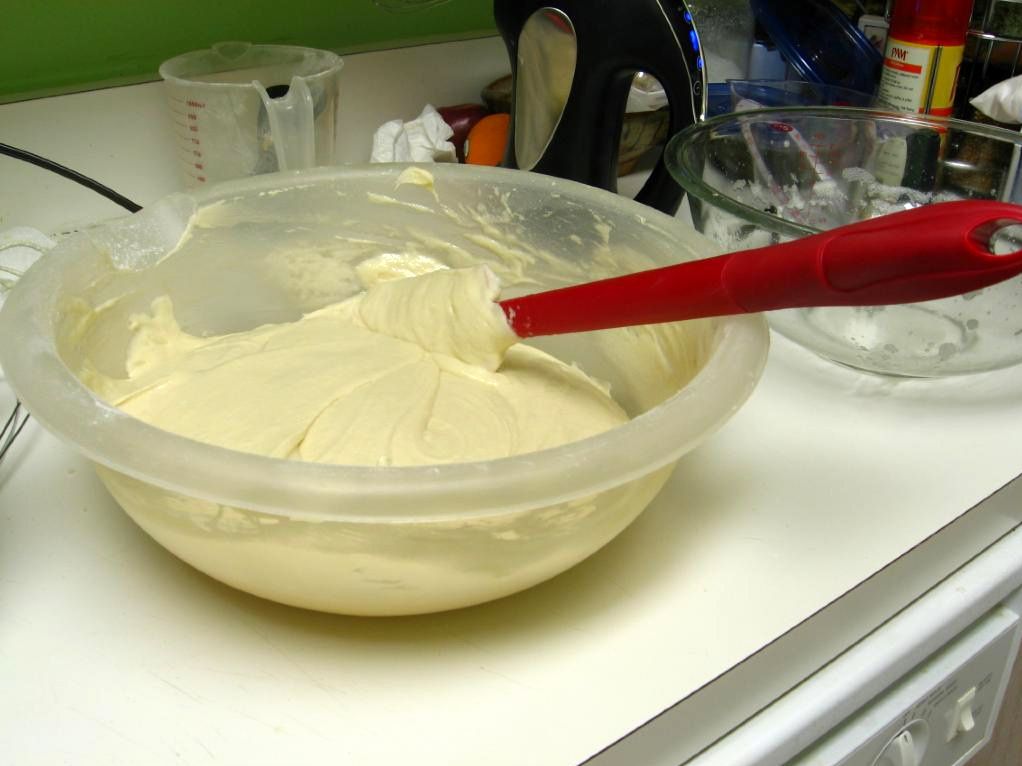
Make the pasta: In a food processor, combine the eggs, water, olive oil and flour. Mix on low speed until the ingredients are well mixed and a dough begins to form. If the mixture is not coming together, add more water, 1 tablespoon at a time just until the dough is formed. Transfer the dough from the food processor to a work surface. Knead 1-2 minutes by hand. Cover with a clean towel and let rest for 20 minutes. Knead again for 1-2 minutes, or until dough starts to feel more supple and elastic. Let rest for another 20 minutes.

Divide the dough into two equal pieces. If you have a pasta machine, see instructions here for how to prepare the sheets of dough. If not, roll one piece of the dough out on a lightly floured surface, pressing hard and rolling diligently until the dough is very thin. Use a large heart-shaped cookie cutter to cut out ravioli pieces. Let these rest while you mix your filling.

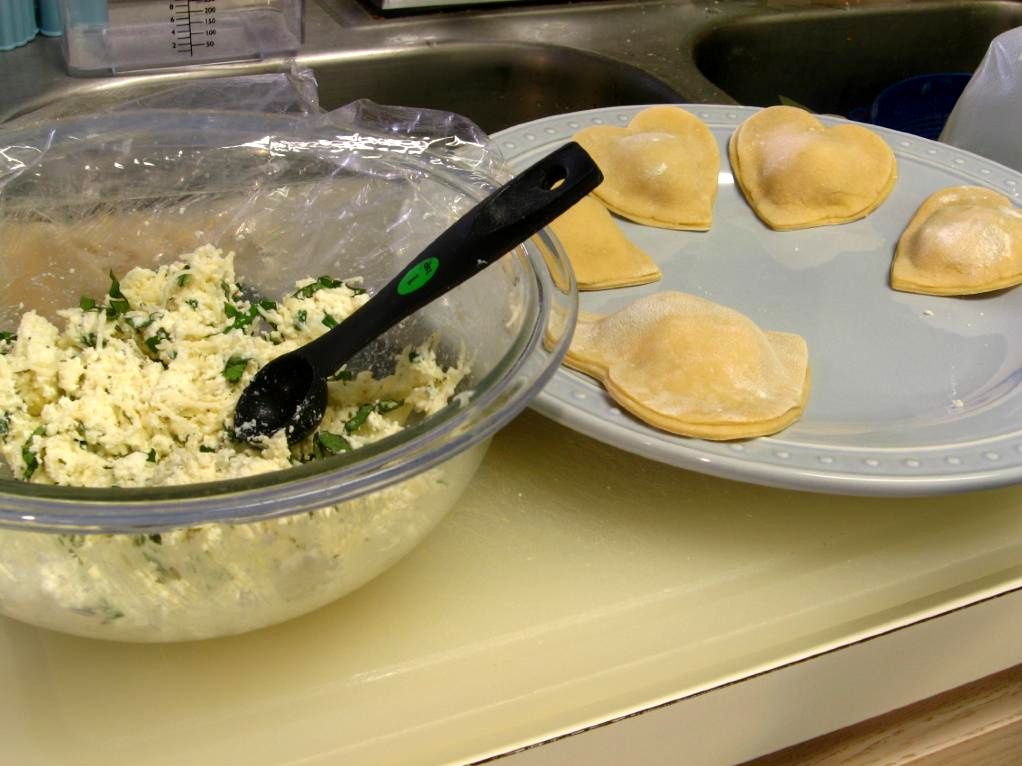
Mix filling: Place all ingredients into a bowl and mix well. Taste and season accordingly.

Assemble ravioli: Place about 1 teaspoon of filling in the middle of half of the heart shapes, leaving a clear edge around the perimeter. Dip a finger in water and lightly brush around the edges of a heart topped with the filling. Place one of the remaining pasta hearts on top and press the edges of the pasta shapes together to seal around the filling, being careful to press out any excess air. Repeat with the remaining dough shapes.

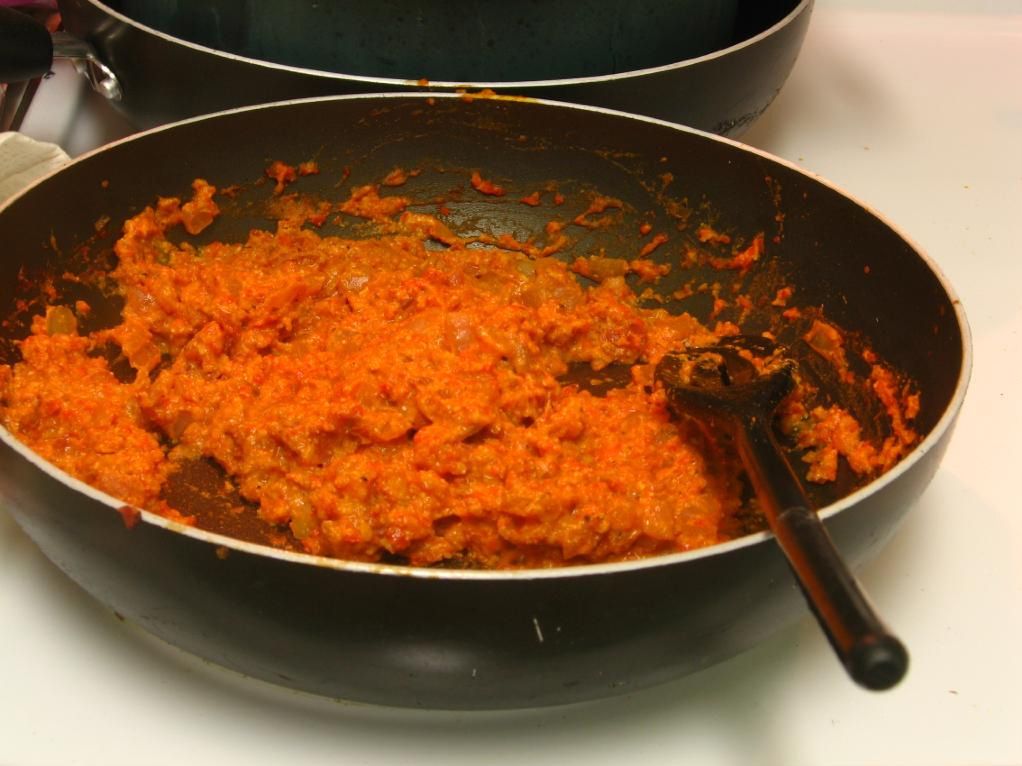
Make the sauce: Lightly toast pine nuts in a skillet. Puree peppers with pine nuts. Set aside. Lightly fry pancetta to release fat. Add onions and garlic and cook until soft. Slide this mixture to the side of the pan. Add 3-4 tablespoons tomato puree and cook until slightly caramelized. (I put my pasta water on to boil right around now). Add a splash of wine and scrape bottom of the pan to get all the good bits into the sauce. Pour in pepper puree and stir together, seasoning with salt to taste. Pour in cream and ricotta and stir to combine. Taste and add more salt, if necessary.

Cook the pasta: Bring a large pot of salted water to boil. Cook the ravioli until al dente, about 5 minutes. Drain well and add ravioli to the sauce, tossing to coat. Serve with a spring of basil and shaved Parmesan.


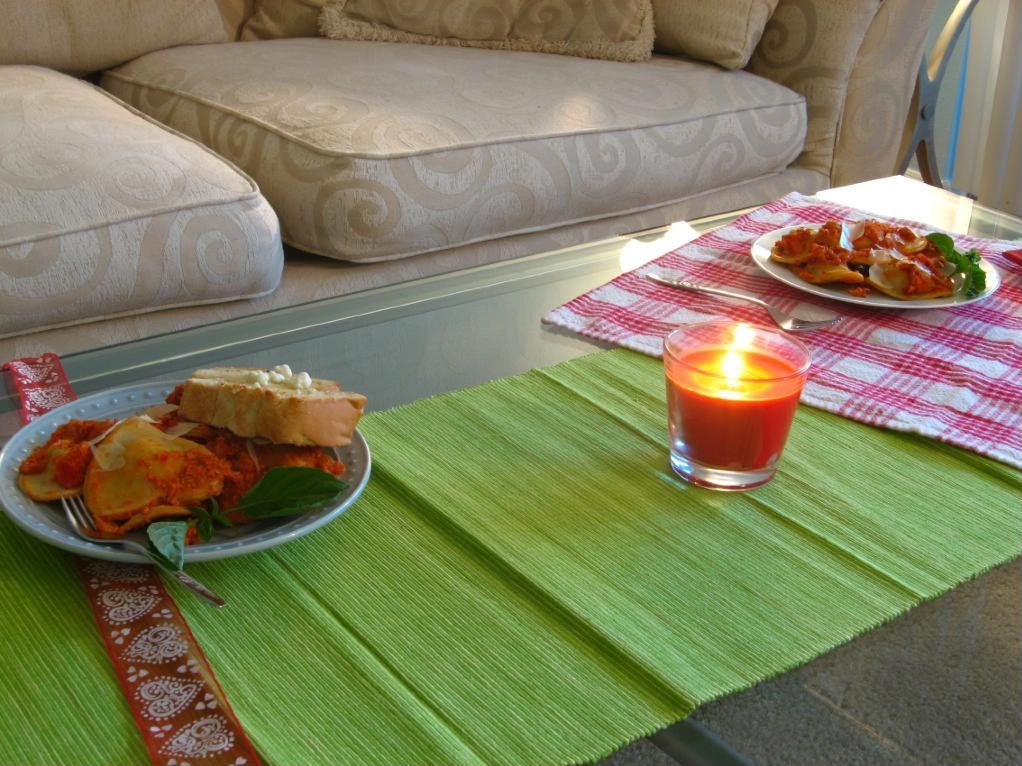
Valentine’s Day dinner for two.


Share Share this post with friends!

Clementine Burst Cupcakes

A few weeks ago, clementines flooded the grocery stores here, much to Mike’s delight. I’m surprised he isn’t sporting an orange tint after eating pounds of the little cuties. While it’s quite common to hear me raving about food, when I noticed him gushing about his clementines on an almost daily basis, I knew he had developed a thing.

I regularly develop a thing. For months I’ll have a thing for sweet potatoes, or a thing for cream cheese. Currently, I have a thing for olives. Mike is typically immune to these cravings, so I assumed they were just a girl thing . . . but he definitely has a thing for clementines. His favorite part is what I affectionately call the splush: when all the fresh, cold juice bursts into your mouth from each little segment.

When pondering his Valentine’s feast, I knew I had to incorporate some clementine. I recently stumbled on a fantastic recipe for clementine curd (I know! swoon!) and what better use is there for a great curd than cupcake stuffin’? Thus the Clementine Burst Cupcakes were born: fluffy, moist, citrus-scented white cake stuffed to the brim with clementine curd, topped with smooth cream cheese frosting, and adorned with a shimmering slice of candied clementine peel.

I’ll introduce you to each component of these fancy pants cupcakes individually. First up is the star of the show, the clementine curd. Curds are one of my favorite things. Perfect for slathering on toast or even eating with a spoon straight from the freezer (not that I would know). They combine the bright flavor of citrus with a buttery, smooth texture. This curd took longer to make than lemon curd (I was stirring for a good 30 minutes), but was definitely worth the wait.

Clementine Curd


Recipe by: Jaime Oliver via Butterflyfood, adapted to use Fine Cooking’s method
Yields: about 850 grams of curd

Ingredients:
6 clementines, juiced
2 lemons, juiced (or about 4 tablespoons lemon juice)
350 g caster sugar (about 1 1/2 cups)
4 eggs, beaten
2 egg yolks, beaten
100 g unsalted butter (about 7 tablespoons)

Directions:
In a large bowl, beat the butter and sugar with an electric mixer, about 2 minutes. Slowly add the eggs and yolks. Beat for 1 minute. Mix in the clementine juice and lemon juice. The mixture will look curdled, but it will smooth out as it cooks.

Place over medium heat. Cook, constantly stirring, until the curd is thick and coats the back of the spoon (this took a long time for me — about 20-30 minutes). Remove from heat. Stir in zest of fruits. Transfer the curd to a bowl. Press plastic wrap on the surface of the lemon curd to keep a skin from forming and chill the curd in the refrigerator. The curd will thicken further as it cools. Covered tightly, it will keep in the refrigerator for a week and in the freezer for 2 months.

The candied clementine peel was gorgeous: jeweled bright orange wedges standing in contrast to the creamy white frosting. They were also fun; they reminded me of the hurt-cheeked grinning of childhood, when mouthfuls of candy were preferable to any fancy dessert. Now we can have our candy and eat our cake too! While the candied peels take awhile to make, they’re content to simmer by themselves on the stove while you work on other food prep.

Candied Clementine Peel


Recipe by: Gourmet
Yields: More candied clementine peel than you can actually eat!

Ingredients:
1 pound clementines (4 to 7)
1 teaspoon salt
2 cups regular granulated sugar
1 1/2 cups water
Vegetable oil for greasing rack
1 cup superfine granulated sugar

Directions:
Halve clementines crosswise and juice them with a citrus juicer, reserving juice for clementine curd or other use. Discard any membranes still attached to peel, then cut each half into eighths.

Bring peel to a boil in a 3-quart saucepan three-fourths full of cold water with 1/2 teaspoon salt and boil, uncovered, 10 minutes, then drain and rinse peel. Repeat procedure with more water and salt, draining and rinsing peel again.

Bring regular sugar and 1 1/2 cups water to a boil in a 2- to 3-quart heavy saucepan, stirring until sugar is dissolved, then reduce heat and simmer 5 minutes. Add peel and gently simmer, uncovered, until tender and translucent and syrup is thickened, about 1 hour (this took 45 minutes for me). Transfer candied peel with a slotted spoon to a lightly oiled rack set in a shallow baking pan, spreading it out so pieces don’t touch, and let drain 30 minutes.

Put superfine sugar in a small bowl and toss peel, a few pieces at a time, in sugar to coat, then transfer with a dry slotted spoon to a sheet of wax paper to dry slightly, about 1 hour.

Candied peel can be left in syrup and cooled, then chilled, covered, 2 weeks. Candied peel tossed with sugar keeps, uncovered, at room temperature 1 day or, chilled between sheets of wax paper in an airtight container, 1 month (you may need to recoat with sugar).

Overall, the components of these cupcakes work together beautifully. The cold curd center of the soft, citrusy cake mimics the splush of a real clementine, and the cream cheese frosting cuts some of the sweetness. I will change the cake I use next time around: I used the Ugly as Sin Coconut Cake and, despite being delicious in cake form, and it simply didn’t translate well to cupcakes. I’ve altered the recipe below to use the perfect, amazing white cake recipe that worked so beautifully with my Mango Raspberry Rosecakes. With this slight change, voila — Mike’s favorite fruit, now available in cupcake form! It’s a little splash of summer on this colllld Valentine’s Day.

Clementine Burst Cupcakes


Recipe by: The Way the Cookie Crumbles (white cake, adapted to cupcakes), Paula Deen (frosting)
Yields: about 19 cupcakes

Cupcake Ingredients:
2 1/4 cups cake flour (9 ounces)
1 cup + 2 tablespoons whole milk, at room temperature (can replace some of this with coconut milk for a nice flavor)
6 large egg whites (3/4 cup), at room temperature
2 teaspoons almond extract
1 teaspoon vanilla extract (or 1 inch vanilla bean seeds)
1½ cups + 2 tablespoons granulated sugar (11.35 ounces)
4 teaspoons baking powder
1 teaspoon salt
12 tablespoons unsalted butter (1½ sticks), softened but still cool
zest of one clementine
Clementine curd (see recipe above)
Candied clementine peel (see recipe above)

Cream Cheese Frosting:
1 pound cream cheese, softened
2 sticks butter, softened
1 teaspoon vanilla extract
4 cups sifted confectioners’ sugar

Directions:
Set oven rack in middle position. Heat oven to 350 degrees F. Spray cupcake pans with nonstick cooking spray or line with cupcake papers.

Pour milk, egg whites, and extracts into 2-cup glass measure, and mix with fork until blended.

Mix cake flour, sugar, baking powder, and salt in bowl of electric mixer at slow speed. Add butter; continue beating at slow speed until mixture resembles moist crumbs, with no powdery streaks remaining.

Add all but 1/2 cup of milk mixture to crumbs and beat at medium speed (or high speed if using handheld mixer) for 1 1/2 minutes. Add remaining 1/2 cup of milk mixture and beat 30 seconds more. Stop mixer and scrape sides of bowl. Return mixer to medium (or high) speed and beat 20 seconds longer.

Divide batter evenly in cupcake pans and smooth tops of cupcakes. Arrange pans at least 3 inches from the oven walls and 3 inches apart. (If oven is small, place pans on separate racks in staggered fashion to allow for air circulation.) Bake until thin skewer or toothpick inserted in the center comes out clean, about 15-16 minutes.

Let cakes rest in pans for 3 minutes. Transfer to wire rack for cooling completely, about 1 1/2 hours.

When cool, fill with clementine curd. Core the middle of the cupcake using something like the cone method (not easy with such a moist cake, but no worries — your frosting will cover any mess you make). Pipe or spoon in as much mango curd as you can fit. Replace your cupcake “cone” and frost.

To make frosting: In a large mixing bowl, beat the cream cheese, butter and vanilla together until smooth. Add the sugar and on low speed, beat until incorporated. Increase the speed to high and mix until very light and fluffy. Pipe on with a large star tip, and garnish with candied clementine peel.


Making the candied clementine peel.


Making the candied clementine peel.


Baking and assembling cupcakes.


Baking and assembling cupcakes.


Want to see what I made for Mike’s Valentine’s dinner to go along with his Clementine Burst Cupcakes? Click here for some sweetheart ravioli!


Share Share this post with friends!

Ugly as Sin Coconut Cake

There’s this CAKE. This beautiful, gorgeous, dramatic, heart-stopper of a CAKE. I’ve been dreaming about making it for weeks (2 weeks and 2 days, to be exact): scanning the recipe online, pondering it on my drive home, lying in bed and imagining each step, right down to torching the meringue. I’ve been a little obsessed, but you’ll understand why when you see how lovely it is. Here it is in all its glory, over at Zoë Bakes. I KNOW, RIGHT?! It is stunning.

So this past Friday I gathered together all my ingredients, donned the adorable retro apron my mom made for me, and became one busy bumblebee. I left the sour cream out of the recipe accidentally, so that was my first mistake. Ever set your cake out to cool on a wire rack only to turn your head and notice an ingredient still sitting on the counter waiting to be used? Oops. It wasn’t a big deal, as it turns out, because the cake was delicious. The coconut milk added an absolutely heavenly flavor — making this one of the best white cakes I’ve ever tasted.

The filling was similarly amazing: creamy, thick coconut pastry cream folded with rich whipped cream. I knew when stacking this cake up with the delectable filling between each layer that, no matter what, I had a dessert champion on my hands.

That’s about where the success story ends. Well, maybe that’s a bit dramatic — the cake was delicious and we adored every bite. But as the title of this post suggests, my version of Zoë’s lovely cake was ugly as sin. Now, you might be thinking, “Aw, you’re being too hard on yourself; it wasn’t that ugly!” Let me clarify:

It was ugly! Lopsided, striped, U-G-L-Y-it-ain’t-got-no-alibi, UGLY. The real reason I made this cake was to achieve those beautiful burnt meringue curls that Zoë’s cake had. That clearly didn’t happen.

My meringue was runny. At first I blamed it on humidity: it rained for days in Charlotte and I was whisking the meringue up right above my steamy dishwasher. But I tried again the next day in a steam-free kitchen to no avail: same results. I’m relatively sure my bowl and whisk was free of fat or residue, so I don’t think that was a problem. My mom blames the fact that I have a hand mixer rather than a stand mixer. This could be the culprit, but I sure beat until my arm was about to fall off. Maybe the most likely possibility is that I overheated my egg white and sugar mixture. The target temperature is 110-120F, but I’m pretty sure mine was past that when I removed it to whip. I’ll have to give it another shot with a cooler mixture.

Oh well. I love pretty food, cute food, sophisticated food. Mostly, though, I love food that tastes good — and this tastes good. Fantastic, even! If you don’t want to tackle the meringue, it would even be delicious covered in some slightly sweetened whipped cream and coconut. But I hope you’ll grab your stand mixer and give the meringue a try — I know I’ll be trying it again! As you can see from Zoë’s version, it’s worth it.

Coconut Cream Cake with Toasted Meringue Frosting


Recipe by: Zoë Bakes (coconut pastry cream, Swiss meringue) and Fine Cooking (cake), adapted by Willow Bird Baking
Yields: 9-in. 4-layer cake

Cake Ingredients:
8 ounces (1 cup) unsalted butter, softened
13 1/2 ounces (3 cups) unbleached all-purpose flour
1 tablespoon baking powder
1/2 teaspoon kosher salt
1 cup unsweetened coconut milk
2 teaspoons vanilla extract
2 cups granulated sugar
2 large eggs, at room temperature
1/2 cup sour cream, at room temperature (I left this out accidentally; still worked great)
6 large egg whites, at room temperature

Coconut Pastry Cream Ingredients:
1 can (14 fluid ounces) unsweetened coconut milk
3/4 cup sugar
1 vanilla bean
pinch kosher salt
3 large egg yolks
2 tablespoons corn starch
2 tablespoons unsalted butter
1 cup sweetened coconut flakes
1/2 cup whipping cream

Swiss Meringue Ingredients:
1 cup egg whites
2 cup sugar
pinch salt

Directions:
To bake the cake: Preheat oven to 350 degrees with rack in middle of the oven. Grease and line with parchment two 9×3-inch round cake pans. In a medium bowl whisk together the flour, baking powder and salt, set aside. Mix the coconut milk and vanilla, set aside.

In a stand mixer fitted with a paddle attachment, beat the butter and sugar on medium-high speed until light and fluffy, about 4 minutes (scrape down the bowl). Add the eggs one at a time and beat well after each addition.

Add 1/3 of the flour mixture and mix on low speed until incorporated. Add half the coconut milk and mix thoroughly. Continue to add the flour and coconut alternately, ending with flour. Add sour cream and mix until incorporated. Set aside in a large bowl if you don’t have a spare bowl for your mixer.

Beat the egg whites in your stand mixer with the whisk attachment (if you are using the same bowl, be sure it is VERY CLEAN or the whites will not whip up. Any fat on the bowl will prevent the whites from foaming). Beat the whites on high speed for 2-3 minutes, until it forms soft peaks. Don’t overdo it or the whites will get too stiff and not fold into the batter smoothly. Stir 1/3 of the egg whites into the cake batter to lighten it. Gently fold the remaining whites into the batter.

Divide evenly in the prepared pans. Bake for about 25-30 minutes or until the tester comes out clean. Cool on rack in pan and then invert to use.

To make the coconut pastry cream: Heat the coconut milk, sugar, salt and vanilla bean in a medium saucepan over medium heat. In a bowl, whisk together the egg yolks and corn starch. Once the cream is hot, remove the vanilla bean, scraping out any remaining seeds and returning them to the cream. Add 1/2 cup of the hot cream slowly to the yolks, whisking as you add. Then pour the yolk mixture into the pot of hot cream and whisk. Continue to whisk with heat on medium-high for 3 more minutes. The mixture will turn thick and bubble. You need to continue to whisk for the full 3 minutes or the pastry cream will separate once it is cool. After the 3 minutes, whisk in the butter. Add the coconut flakes. Pour into a shallow dish to cool.

Cover with plastic wrap pressed right against the pastry cream. This will prevent a thick skin from forming on the surface. Refrigerate for at least an hour or freeze for 30 minutes. Once it is cold, stir the pastry cream to loosen. Whip the 1/2 cup cream to medium peaks. Stir in 1/3 to the pastry cream to lighten. Fold in the remaining cream until the pastry cream is nice and light. Split the two cakes in half with a knife and add 1/3 of the filling to the first cake layer. Spread it out to the edge and repeat with the other layers.

To make the Swiss Meringue: Whisk together the egg whites, sugar and salt in the bowl of your stand mixer. Rest the bowl over a pot of simmering water to form a double boiler. Scrape down the sides of the bowl so that all the sugar is off the sides of the bowl. Continue to stir the mixture until all the sugar is melted into the eggs and you no longer feel any graininess when rubbed between your fingers, about 3-5 minutes.

Place the bowl onto your mixer and whisk on high speed until the meringue is thick and glossy and the bowl is just warmer than room temperature, about 8 minutes. Using a spatula, spread a nice thick layer of the meringue over the cake, make sure you have at least a cup of meringue left. Don’t worry about how it looks, you will be making spikes over the surface in a minute.

Take a glob of the meringue in your hand and press it against the meringue on the cake (Zoë has a great photo tutorial of this part on her blog). Pull that glob away from the cake and it will break off in a wispy curl. The more of a glob you lay down as a foundation on the cake, the bigger your curls will be. This may take a few times to get the hang of it, but then you’ll be off and running. Once you have the cake fully set with curls you will need a torch to toast the meringue. Hold the blow torch a ways from the cake and touch the flame down between the curls. The curls will set fire and you need to blow them out as you go. The burnt tips are lovely contrast and add a wonderful flavor.


Cake mixed, baked, and sliced into four layers.


Coconut pastry cream cooling and then spread onto a cake layer.


Cooking my Swiss meringue and preparing the cake for frosting!


Enjoy!

Want to help Haiti relief efforts? Want to learn some fantastic new recipes? Do both at once by purchasing the A Hand for Haiti E-Book (minimum donation of $10) or the hard copy of BlogAid (softcover $25; hardcover $50), two lovely cookbooks created to raise money for Haiti.


Share Share this post with friends!

Strawberry Walnut Ricotta Muffins

I’m detecting a pattern here: something about cold weather makes me want a big, hot breakfast. Usually my breakfast is a small, rushed affair: a couple of turkey sausages and I’m on my way. This weekend, though, promised inches of snow and icy conditions in Charlotte. Breakfast had to stand up to the cold!

Thankfully, Smitten Kitchen had recently equipped me with a killer muffin recipe. Deb posted these fantastic-looking Ricotta Muffins last week. They were billed as a very slightly sweet, nutty muffin with a surprising hint of fennel. Very intriguing, but I fiddled with the idea a bit to produce more what I was craving. I ditched the fennel, sweetened these babies up a bit, and added in some fresh strawberries. The result is really a whole different beast: sweet, fruity, light, cheesy, nutty, hearty . . . a breakfast superstar!

…but a beast, nonetheless. These things are fussy. The ricotta and sour cream filling is runny (as Deb mentions in her post, perhaps it’d be different if you were to use fresh ricotta and crème fraiche), so the batter has to be piped on top of it, which is quite a mess.

The muffins are also very tender (what with the ricotta mixture in the middle, as well as strawberries breaking up the muffin, in my case) and so they can’t be scooped out of their wells. Instead, I had to let them cool in the pan for about 20 minutes before inverting them onto the cooling rack. They cooled with their cute little muffin bottoms in the air, and finally, they were firm enough to turn over and stick in the fridge. My kitchen was a disaster area — bowls, beaters, pans, cutting boards, berries — but I wouldn’t be writing this if they weren’t worth it.

Like so many fruity baked goods, these were amazing after being refrigerated overnight. Wonderful news, because you probably don’t want to spend the time and effort required to make these first thing in the morning. I popped them into the microwave for 30 seconds before Mike and I managed to devour, oh, 11 of them. Full disclosure! The two of us ate ELEVEN MUFFINS! I told you they were worth the trouble. The ricotta makes for a fluffy, moist, gooey muffin, and the strawberries were lovely with the tang from the yogurt and sour cream. They weren’t too sweet — perfect for breakfast (though who am I kidding . . . I can definitely do dessert for breakfast on occasion).

Muffins freeze well, too, so why not make a double batch and freeze up a few for later? I actually intended to do just that (my double batch made 27 muffins), but at the rate Mike and I are going . . . yeah, we’ll see how many of these make it to the freezer! I hope you’re enjoying some hearty, warm breakfasts of your own this winter (and for all my friends enjoying summer across the globe right now, run through a sprinkler or two for me!)

Strawberry Walnut Ricotta Muffins


Recipe by: Pastries from La Brea Bakery (adapted by Smitten Kitchen, and then by Willow Bird Baking)
Yields: 12-14 muffins

Ingredients:
1/2 cup (2 ounces) walnuts (can substitute pecans)
3 cups unbleached pastry flour or unbleached all-purpose flour
3/4 cup granulated sugar
1 tablespoon plus 1 teaspoon baking powder
3/4 teaspoon baking soda
1 1/2 cups plain yogurt
3/4 cup vegetable oil
1/2 cup (4 ounces) ricotta cheese
6 tablespoons crème fraîche or sour cream
3 tablespoons confectioners’ sugar
1 1/4 cup chopped strawberries
Kosher salt, to taste

Adjust the oven rack to the center position and preheat oven to 325°F. Lightly butter a 1/2-cup capacity muffin tin (I used Cake Release. Butter and flouring the tin will also work. Make sure that when you invert the pans, these babies are going to come out!)

Spread the nuts on a baking sheet and toast in the oven until lightly browned, about 8 to 10 minutes. Shake the pan halfway through to ensure that the nuts toast evenly. Cool, chop finely and set aside. Turn the oven up to 350°F.

In a large bowl, sift the flour, sugar, baking powder and baking soda together to combine. Make a large well in the center and pour in the yogurt and oil. Whisk together the liquids and gradually draw in the the dry ingredients, mixing until incorporated. Fold in chopped strawberries.

To prepare the filling: Place the ricotta in a mixing bowl and, if stiff, break it up wtih a rubber spatula to loosen. Stir in the sour cream or crème fraîche, confectioners’ sugar, and a pinch of salt.

Using a pastry or plastic bag with the corner cut off, fill each muffin tin one-third of the way with batter. Place one tablespoon of the ricotta filling into the center of each muffin. Pipe the remaining batter into the cups, filling them to just below the rim (resist the urge to overfill). Sprinkle about 1 teaspoon of the nuts over the top of each muffin.

Bake for 25 to 30 minutes, until lightly brown and firm to the touch. Let cool in pan for about 15-20 minutes before inverting over a cooling rack. Let cool upside down. When completely cool, refrigerate in an airtight container until it’s time to eat! Heat for a few seconds in the microwave before eating.


Mixing up the batter and some overfilled muffins fresh from the oven.


Cooling off upside down, and then getting packed up for the fridge.


See that snow in the background? Brrr!


Share Share this post with friends!

Nanaimo Bars

You know those commercials where a thin, statuesque model takes a bite of chocolate and all her troubles melt away (usually dramatized by a fancy silk sheet blowing through the scene)? Let’s briefly ignore the physical ironies and textiles, because I have great news: that kind of trouble-melting food does exist! It’s a Nanaimo Bar! Who knew?

The folks in Nanaimo probably did. Nanaimo (pronounced nuh-NYE-moh) is a beautiful town on Vancouver Island famous for a very sweet treat. Local folklore says that around 35 years ago, a woman from Nanaimo entered her bars into a competition, naming them after the city. They were a sensation, and the Nanaimo Bar was born.

The January 2010 Daring Bakers’ challenge was hosted by Lauren of Celiac Teen. Lauren chose Gluten-Free Graham Wafers and Nanaimo Bars as the challenge for the month. The sources she based her recipe on are 101 Cookbooks and http://www.nanaimo.ca.

I love Lauren — her blog is full of delicious recipes and lovely photos. If you haven’t already checked out Celiac Teen, you should — especially if you’re looking for gluten-free goodness!

Nanaimo Bars sound to me like the result of one of those urges (do you ever get these? I do.) to combine as many amazing-tasting things as possible into one dish, and then eat yourself silly. They have a thick, indulgent bottom layer of chocolate-bound pecans, coconut, and crushed graham crackers.

Not just any graham crackers, mind you! We’re daring bakers after all, so we have to add a little oomph. They were homemade graham crackers in this case — yeah, that’s how we roll! No, literally . . . I was rolling, rolling, rolling out dough into the night to bake up my stack of golden crackers. The crisp, fresh, mild crackers were worth the effort, though, and I can’t wait to use the leftovers to make s’mores this weekend! Lauren provides a recipe below for gluten-free graham crackers, which I would’ve loved to make, but I settled for the wheat version this time around due to flour costs. If you’re in a hurry, use some store-bought graham crackers in your Nanaimo Bars. The result will be just as delicious.

The other two layers of a Nanaimo Bar are similarly heavenly. A middle layer of rich vanilla custard balances the chocolate overload, and a thin layer of hardened chocolate on top completes the bar. Each bite has a little crunch, a little cream, and a LOT of sweet, rich, chocolatey goodness.

Graham Crackers


Recipe by: 101 Cookbooks and GF adaptations by Celiac Teen
Yields: varies depending on size of crackers (~10 large)

Ingredients:
2 ½ cups plus 2 tablespoons all-purpose wheat flour, or wheat pastry flour*
1 cup dark brown sugar, lightly packed
1 teaspoon baking soda
3/4 teaspoon kosher salt
7 tablespoons unsalted butter (cut into 1-inch cubes and frozen)
1/3 cup honey (mild-flavored, such as clover)
5 tablespoons whole milk
2 tablespoons pure vanilla extract

Directions:
1. In the bowl of a food processor fitted with a steel blade, combine the flour, brown sugar, baking soda, and salt. Pulse on low to incorporate. Add the butter and pulse on and off, until the mixture is the consistency of a coarse meal. If making by hand, combine aforementioned dry ingredients with a whisk, then cut in butter until you have a coarse meal. No chunks of butter should be visible.
2. In a small bowl or liquid measuring cup, whisk together the honey, milk and vanilla. Add to the flour mixture until the dough barely comes together. It will be very soft and sticky.
3. Turn the dough onto a well-floured surface and pat the dough into a rectangle about 1 inch thick. Wrap in plastic and chill until firm, about 2 hours, or overnight.
4. Divide the dough in half and return one half to the refrigerator. Sift an even layer of sweet rice flour onto the work surface and roll the dough into a long rectangle, about 1/8 inch thick. The dough will be quite sticky, so flour as necessary. Cut into 4 by 4 inch squares. Gather the scraps together and set aside. Place wafers on one or two parchment-lined baking sheets. Chill until firm, about 30 to 45 minutes. Repeat with the second batch of dough.
5. Adjust the rack to the upper and lower positions and preheat oven to 350 degrees Fahrenheit (180 degrees Celsius).
6. Gather the scraps together into a ball, chill until firm, and reroll. Dust the surface with more sweet rice flour and roll out the dough to get a couple more wafers.
7. Prick the wafers with toothpick or fork, not all the way through, in two or more rows.
8. Bake for 10-12 minutes, until browned and slightly firm to the touch, rotating sheets halfway through to ensure even baking. Might take less, and the starting location of each sheet may determine its required time. The ones that started on the bottom browned faster.
9. When cooled completely, place enough wafers in food processor to make 1 ¼ cups of crumbs. Another way to do this is to place in a large ziplock bag, force all air out and smash with a rolling pin until wafers are crumbs.

*For gluten-free graham crackers, substitute the following flours for the all-purpose flour (and beware that no cross-contamination occurs):
1 cup sweet rice flour (also known as glutinous rice flour; plus more for dusting)
3/4 cup tapioca starch/flour
1/2 cup sorghum flour

Baking time will increase to around 25 minutes with these adjustments.

Nanaimo Bars


Recipe by: City of Nanaimo
Yields: About 13-14 bars depending on size

Bottom Layer Ingredients:
1/2 cup unsalted butter
1/4 cup granulated sugar
5 tablespoons unsweetened cocoa
1 large egg, beaten
1 1/4 cups graham cracker crumbs (see recipe above)
1/2 cup almonds (finely chopped) *I used pecans here.
1 cup coconut (shredded, sweetened or unsweetened)

Middle Layer Ingredients:
1/2 cup unsalted butter
2 tablespoons and 2 teaspoons heavy cream
2 tablespoons vanilla custard powder or vanilla pudding mix
2 cups icing or confectioners’ sugar

Top Layer Ingredients:
4 ounces semi-sweet chocolate
2 tablespoons unsalted butter

Directions:
1. For bottom layer: Melt unsalted butter, sugar and cocoa in top of a double boiler. Add egg and stir to cook and thicken. Remove from heat. Stir in crumbs, nuts and coconut. Press firmly into an ungreased 8 by 8 inch pan.
2. For middle layer: Cream butter, cream, custard powder, and icing sugar together well. Beat until light in colour. Spread over bottom layer.
3. For top layer: Melt chocolate and unsalted butter over low heat. Cool. Once cool, pour over middle layer and chill.


A few tips from Willow Bird Baking: Line your pan with parchment paper (not wax, which may melt onto the warm bottom layer) for a quick and easy removal. As opposed to trying to scoop bars out of the pan (we all know how that goes), you’ll be able to pull them out and cut them neatly on a cutting board.

Use white chocolate or white candy melt to create a marbling effect. Pipe on thin stripes and, while still wet, drag a clean toothpick through the stripes in different directions. Wipe toothpick between each “drag.”


Preparing graham crackers.


Assembling Nanaimo Bars and marbling the top layer.


Top marbled, and then Nanimo Bars all chilled and ready to eat!


Enjoy!

Check out the Daring Bakers Blogroll to see other fantastic Nanaimo Bars!


Share Share this post with friends!

1 114 115 116 117 118 127