cherries

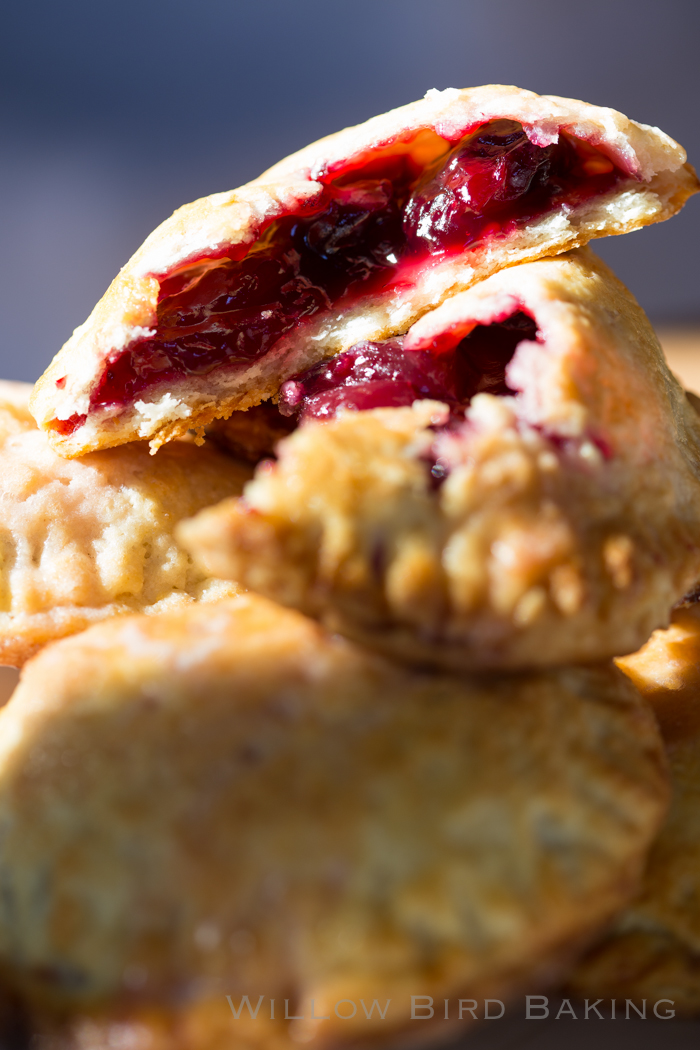
Cheerwine Hand Pies

Cheerwine Hand Pies
Cheerwine Hand Pies

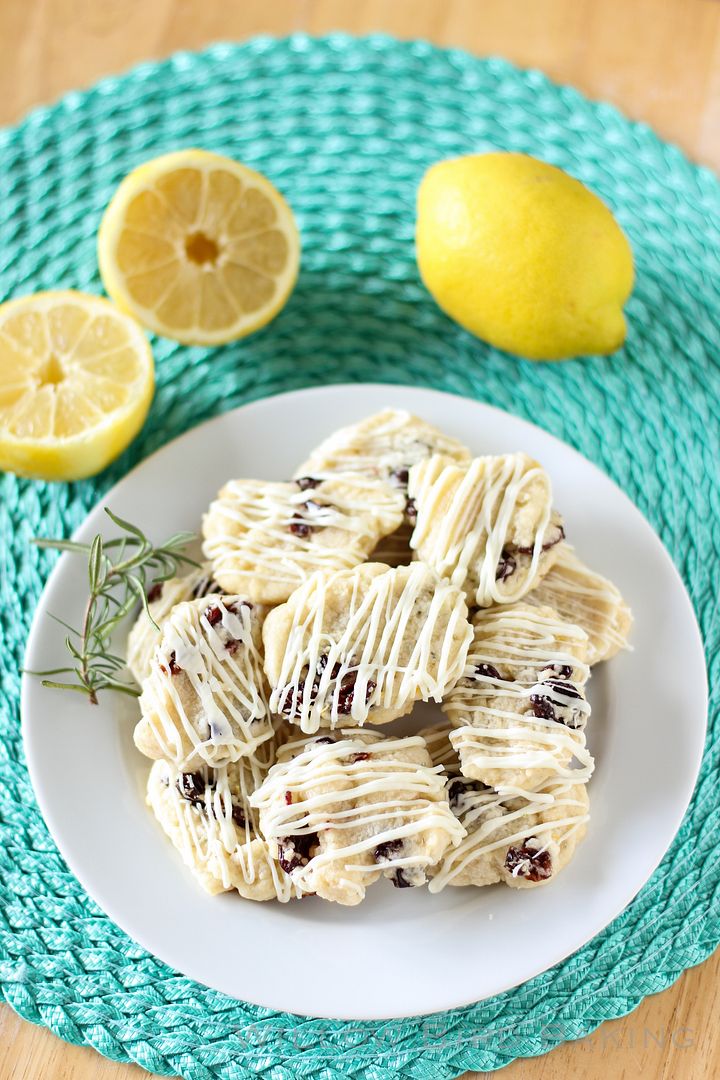
Cherry Lemon Rosemary Shortbread Cookies

Cherry Lemon Rosemary Shortbread Cookies


Recipe by: Willow Bird Baking
Yield: 20-25 cookies

These are tender, buttery shortbread cookies replete with cherries, tangy lemon, and rosemary. Enjoy them hot from the oven and freeze some for baking in a pinch.

Ingredients:
2 cups all-purpose flour
1/4 teaspoon salt
2 1/2 teaspoons dried rosemary leaves, chopped finely
3/8 cup powdered sugar
1 cup (2 sticks) butter, at room temperature
1 1/2 tablespoons finely grated lemon zest (about the zest from one lemon)
1/4 cup freshly squeezed lemon juice
1/2 cup dried cherries, finely chopped
about 1/2 cup white chocolate chips

Directions:
In a large bowl, whisk together the flour, salt, and dried rosemary. In a separate large bowl, cream together the butter, lemon zest, and powdered sugar 2-3 minutes or until pale, light, and fluffy. Mix in the lemon juice. Beat in the flour mixture and then stir in the cherries by hand to be sure everything is combined.

Use a sheet of wax paper to roll the dough into a 1 1/2-inch wide log (if you’re having trouble, chill the dough for a bit in the fridge before rolling it). Wrap plastic wrap or foil around the logs and freeze them until firm (you can also double-wrap them and leave them frozen for up to 3 weeks at this point. When you’re ready to bake, just use a serrated knife to cut the cookies and bake as usual. It make take a few minutes longer since they’ll be baking from frozen, but just keep an eye on them.) While they cookies are freezing, preheat the oven to 350 degrees F and place the rack in the center. Prepare a baking sheet with parchment paper or a silicone baking mat.

Use a serrated knife to slice each log into 1/4-inch slices and place these about 1 inch apart on the prepared baking sheet. Bake until golden, about 8-10 minutes, rotating once halfway through baking. Let the cookies cool for a couple of minutes on the pan before transferring them to a cooling rack to cool completely. In the meantime, melt white chocolate according to package instructions (usually half-power, in small increments, stirring often) and spoon it into a plastic zip-top bag with a tiny corner cut off. Set cookies on wax or parchment paper and squeeze the melted chocolate from the zip-top bag over them in a zig zag design. Let them dry. Store them in an airtight container separated by leaves of parchment or wax paper for up to a week.

Birthday Cake Cheesecake

At 26-going-on-27, I’ve grown to love birthdays that feel like deep crow-footed, cheek-hurting smiles, that sound like clanging dishes and brassy laughter.

On birthdays, I need my family. We need a table to sit around to hold our leaning elbows. We need food, we need each other, but that’s all.

For children, though, birthdays have to involve some sort of event. Kids want to scarf down plasticky pizza, be mildly terrorized by an oversized animatronic mouse playing a banjo, and wallow in a germy ball pit. Or they want to light tiki torches, drink pineapple punch, and marco polo around a swimming pool until their fingers are wrinkly.

When I was little, my mom convinced me that I wanted to throw a cross-stitching birthday party.

Naturally, the most direct avenue to popularity among your elementary school friends is to invite them to something called a “party” and proceed to introduce them to the pastime of 70-year-old ladies everywhere.

When my birthday rolled around, my unsuspecting friends gathered around the coffee table and listened intently to the plan. Our goal was to pick a pattern and each cross-stitch a bookmark before cake and gifts. We dutifully chose the our favorite design, fussed with threading our needles, and got to work.

Well, turns out cross-stitching requires quite a bit of time. And, like, patience and stuff. Things that are in short supply for kids at birthday parties.

My friends faded fast. Soon we were stuffing our faces with cake, our half-finished bookmarks languishing in the needle-and-thread strewn living room.

Oh well. As long as there’s cake, right?

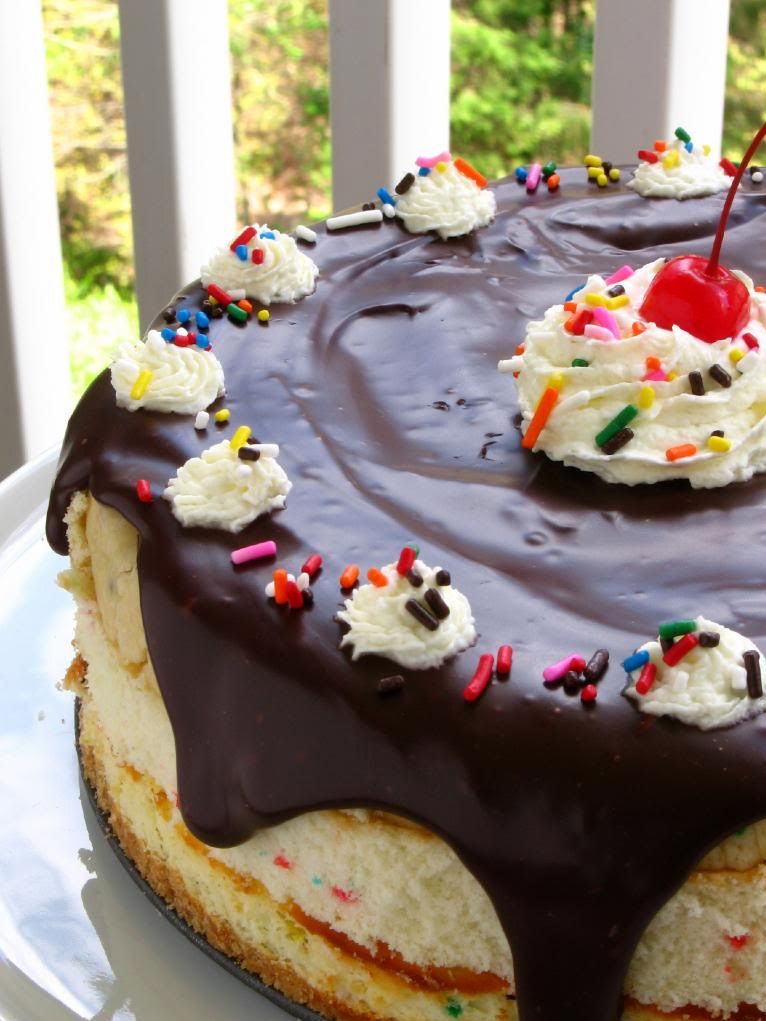
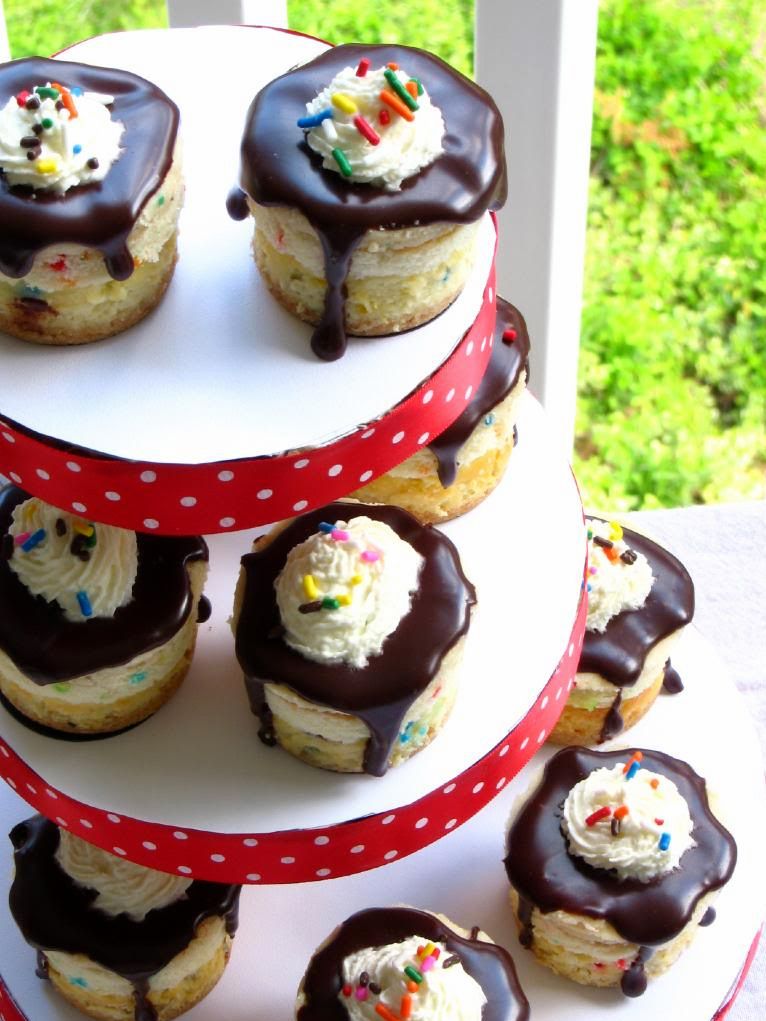
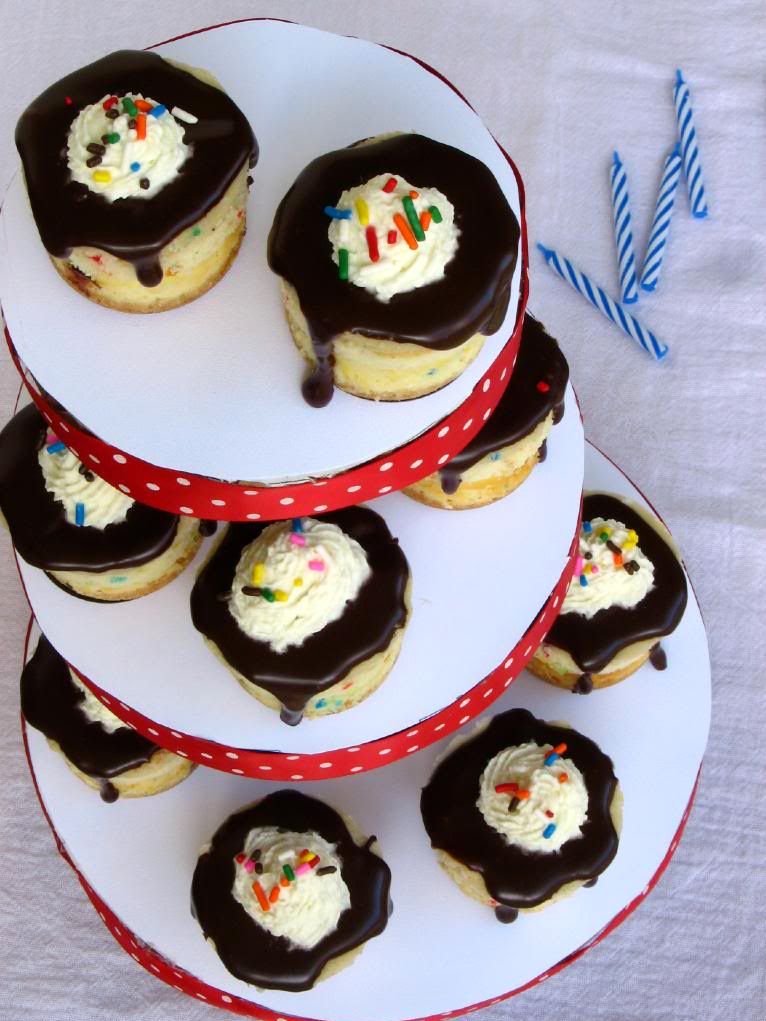
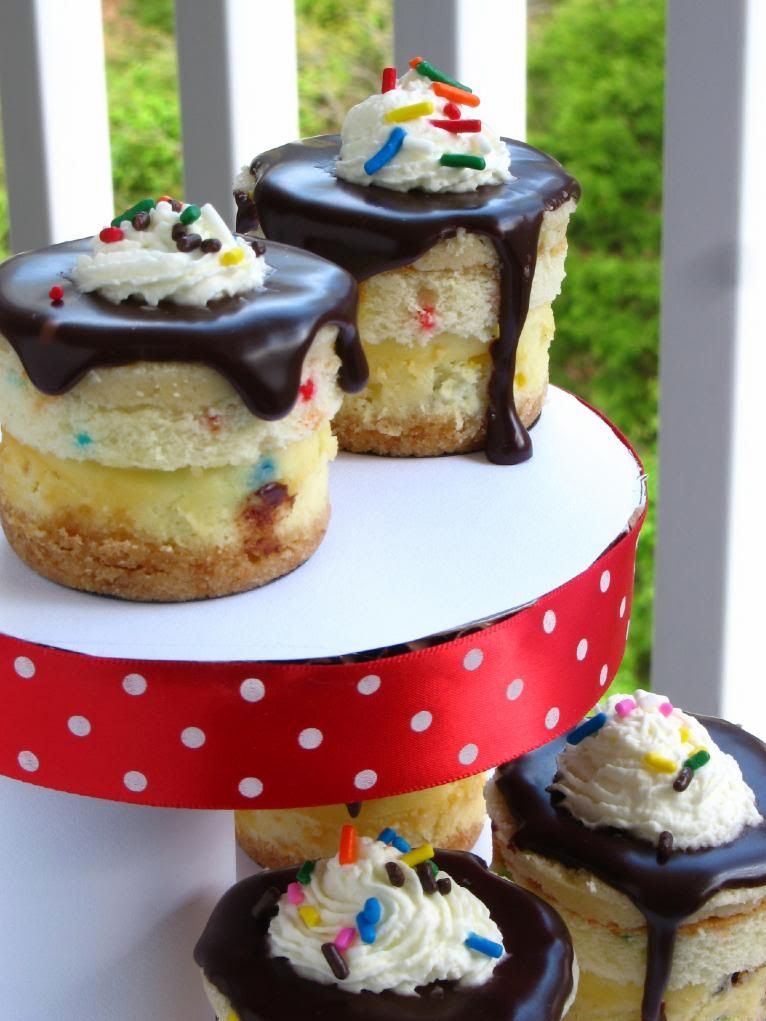
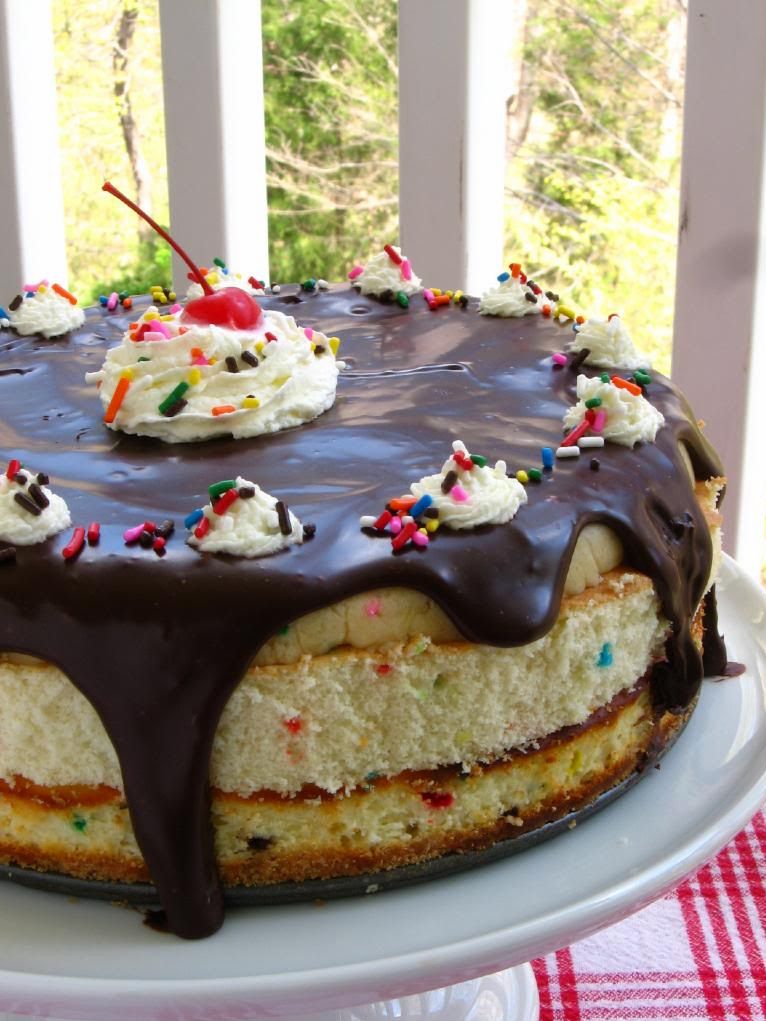
In that spirit, boy do I have a cake for you. This particular cake is an explosion of birthdayness. A “Funfetti” cheesecake on a vanilla wafer crust is topped with a layer of Funfetti cake, a layer of cake batter cookie dough, chocolate sauce, whipped cream, and a cherry. Every layer contributes a little bit of birthday joy. The final product is scrumptious and outrageously festive.

I have more ridiculous birthday stories from when I was a child, because apparently it was impossible for me to have a normal, uneventful birthday party. But I’ll spread the love and save those for later. In the meantime, have some cake.

Describe one of your favorite (or least favorite) childhood birthday memories.

Birthday Cake Cheesecake


Recipe by: Willow Bird Baking, with chocolate sauce adapted from Bakers Royale
Yield: 24 mini cheesecakes or 1 full-sized cheesecake

Crust Ingredients:
45 vanilla wafers, finely processed into crumbs
5 tablespoons unsalted butter, melted and cooled
Small pinch of salt

Cheesecake Ingredients:
2 (8 oz.) packages cream cheese, at room temperature
2/3 cup sugar
1 tablespoons all-purpose flour
1 tablespoon cake mix
1 1/2 teaspoons vanilla extract
2 large eggs
1 tablespoon sprinkles
1 Funfetti cake mix (or homemade yellow cake with sprinkles mixed in), prepared and baked in thin layers
melted chocolate (for topping)
whipped cream (for topping)
maraschino cherries (for topping)

Cake Batter Cookie Dough Ingredients:
1 1/2 cups all-purpose flour
2/3 cup yellow cake mix
1/4 teaspoon salt
1/2 cup unsalted butter, room temperature
1/2 cup granulated white sugar
1 teaspoon pure vanilla extract
2 tablespoons sprinkles
4-8 tablespoons water

Chocolate Pouring Sauce:
2/3 cups dark chocolate
2 tablespoons heavy cream
4 tablespoons powdered sugar, sifted
4-5 tablespoons water, warm

Directions:
Note on Scheduling: This is a great recipe to make over the course of a few days. You can make the Funfetti cake one day and freeze it, make the cookie dough disc another day and freeze it, make the cheesecake one day and refrigerate it, and then make your chocolate pouring sauce and assemble on the day you’ll serve the dessert.

Prepare your Funfetti cake: Mix and bake in 9-inch round cake pans according to box instructions and set aside to cool. Make one of these a pretty thin layer of cake — this will be the one you use on your cheesecake (be careful; a thinner layer will bake for less time). The other layer is extra; I tore mine up and froze it for future cake balls. After cooling, freeze your cake layer — it’s easier to work with when frozen.

Prepare your cheesecake: To make the cheesecake crust, preheat the oven to 350 degrees F. Butter two mini or one full-sized cheesecake pan. Combine the cookie crumbs, melted butter and salt in a small bowl. Toss with a fork to moisten all of the crumbs. Press into a thin layer covering the bottom of your cheesecake pan(s).

In the bowl of an electric mixer fitted with the paddle attachment, beat the cream cheese and sugar on medium-high speed until well blended. Beat in the flour and cake mix. Add in the vanilla and beat until well incorporated, scraping down the sides of the bowl as needed. Beat in the eggs one at a time, scraping down the bowl between each addition. Pour the filling into your cheesecake pan(s), leaving room for a cake and cookie dough layer on top of your cheesecake.

Bake until the top is lightly browned, puffed and cracked at the edges, and the center moves only very slightly when the pan is lightly shaken (about 40 minutes for a full-sized cheesecake or 12-15 minutes for mini cheesecakes). Transfer to a wire cooling rack. Cool at room temperature for at least 30 minutes. Transfer to the refrigerator and let cool at least 1 hour, until completely chilled and set.

Make the cookie dough: In a medium bowl, cream together butter and sugar for 2-3 minutes until light, fluffy, and pale yellow. Mix in salt, flour, cake mix, sprinkles, and vanilla. Add water one tablespoon at a time, mixing after each, until you reach cookie dough consistency. If making a full-sized cheesecake, line a 9-inch cake pan with plastic wrap and spread cookie dough in a disc in the pan. Freeze it until firm, about 15 minutes. If making mini cheesecakes, just chill the cookie dough until you’re ready to assemble your cakes.

Make the chocolate pouring sauce: Heat chocolate and cream together in a bowl set over simmering water. Let them sit for a few minutes before whisking them together to combine. Whisk in powdered sugar and then add 1 tablespoon of water at a time, mixing after each until you reach pouring consistency. Set the sauce aside and let it cool to warm.

Assemble the cheesecakes: If you’re making mini cheesecakes, use a round cookie cutter or a serrated knife to cut circles of Funfetti cake to fit on each mini cheesecake. Spread a little chocolate sauce on the top of each mini cheesecake before placing a cake round on each and gently pressing them down snugly. If you’re making a full-sized cheesecake, spread chocolate sauce over your cheesecake and just place full frozen cake layer on top and gently press down.

If making mini cheesecakes, spread cookie dough into the top of each well with the back of a spoon. If making a full-sized cheesecake, spread another thin layer of chocolate sauce on top of the cake layer to act as glue, and then take your frozen cookie dough disc and place it on top. Chill cheesecake(s) for about 30 minutes before gently unmolding them. Drizzle with melted chocolate and top with a dollop of whipped cream, sprinkles, and a maraschino cherry.

If you liked this post, please:
Subscribe to Willow Bird Baking
Follow Willow Bird Baking on Twitter
Follow Willow Bird Baking on Facebook
Give this post a thumbs up on StumbleUpon


ShareOther ways to share this post with friends!

Toasted Almond Cake with Mascarpone Cream and Amarena Cherries

Don’t worry — I did go see my wonderful mom on Mother’s Day and take her a special gift. But (despite the fact that Mother’s Day is now over), I also thought it would be nice to brag on her here a bit and show you the decadent birthday cake she made me. I’ve loved reading blog posts all over the internet about why others’ mothers were so great. Now it’s my turn!
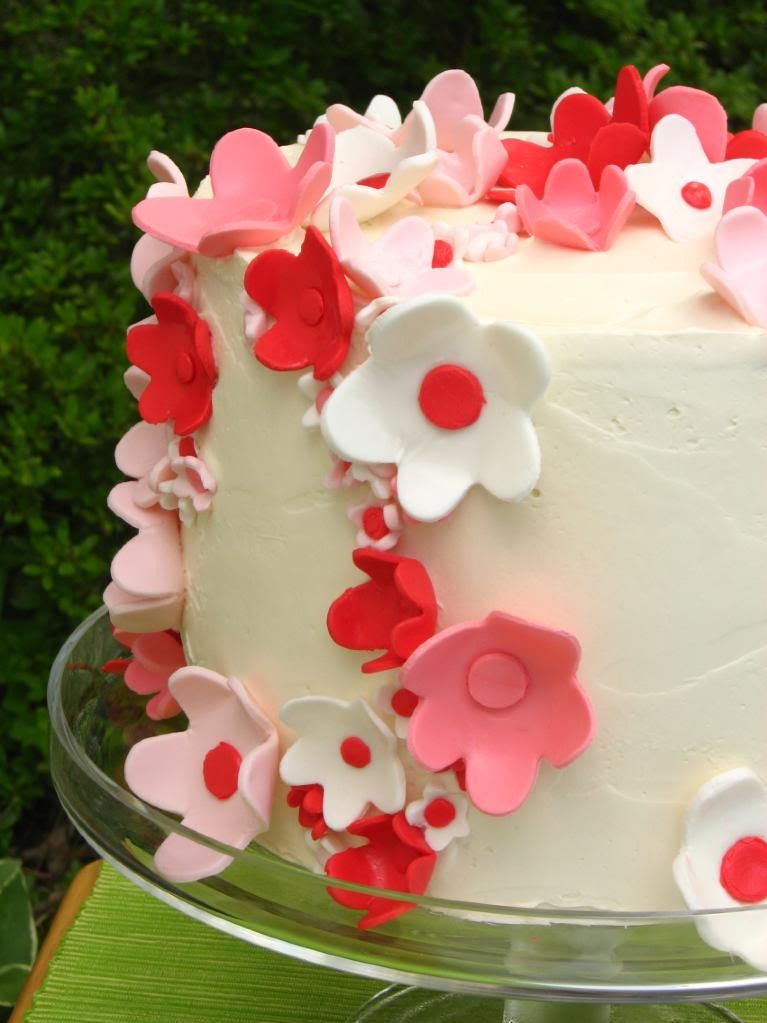
Why do I love my mom?

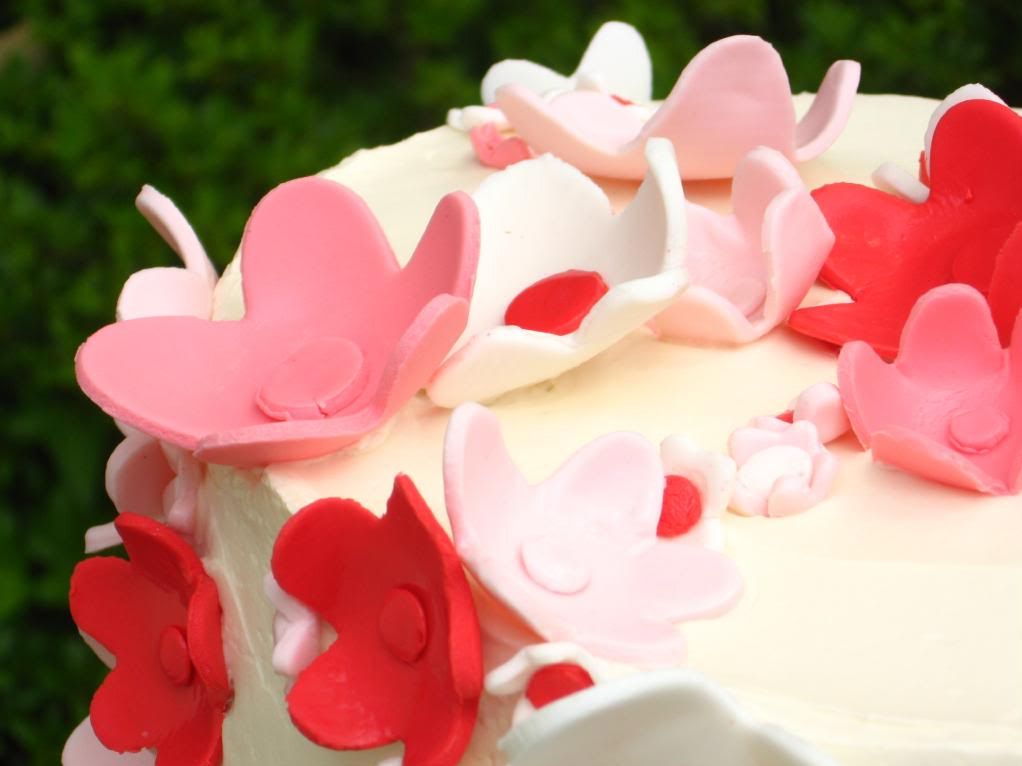
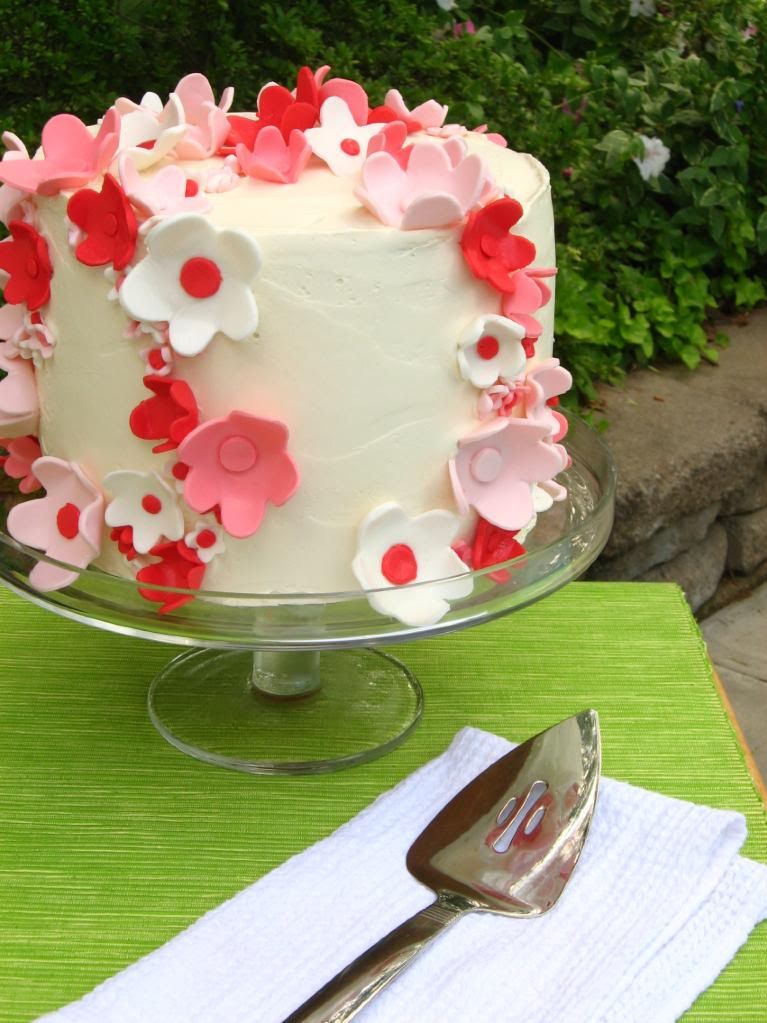
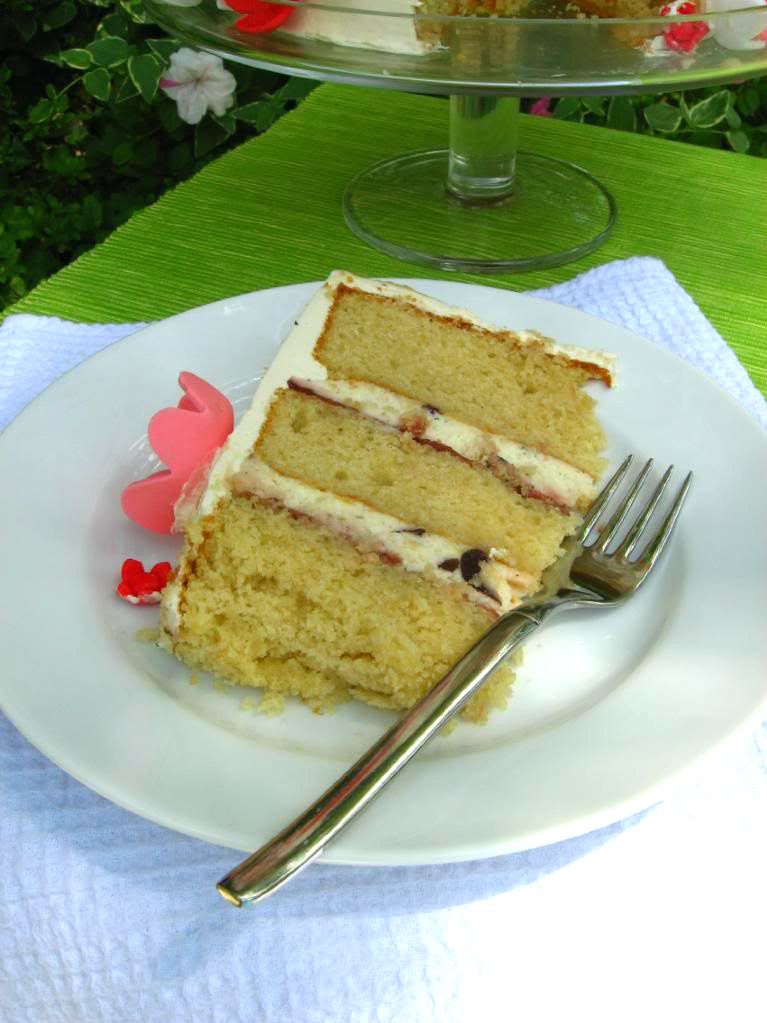
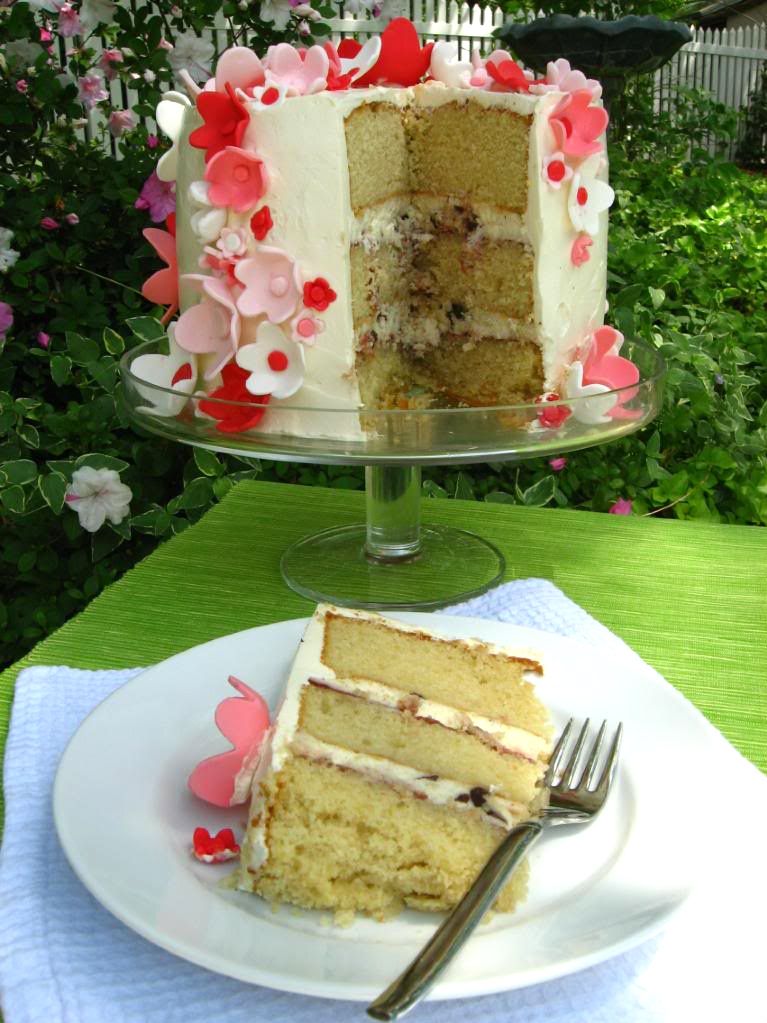
1. She made me this cake. Enough said (but you know I’ll say more)! This three-layer dessert was a masterpiece of toasted almond, slightly tart cherry, and light-as-a-feather buttercream. Many joyous exclamations were uttered while we plowed through our three-story pieces.
2. She went back to college with four kids (insert appropriate gasp!) in the 80’s to earn her nursing degree. Even with four kids, she managed to graduate magna cum laude from UNCC’s nursing program.

3. She sews: she has created special quilts for me and my siblings, as well as other family members. She also makes clothes for my niece and nephews. Look for a picture of my quilt at the end of this post!
4. She taught me how to cook. It was under her auspices that I made my first Chocolate Sheet Cake, my first pan of Oven Baked Macaroni, and she is always on-call for cooking emergencies. As I mention on my About page, she is my main culinary influence, and I learn new things from her every meal.

5. She (and my little brother — Hi, Alex!) hung out with me for 3-4 hours while waiting for Pioneer Woman to sign our books last week. More on the Pioneer Woman booksigning later!
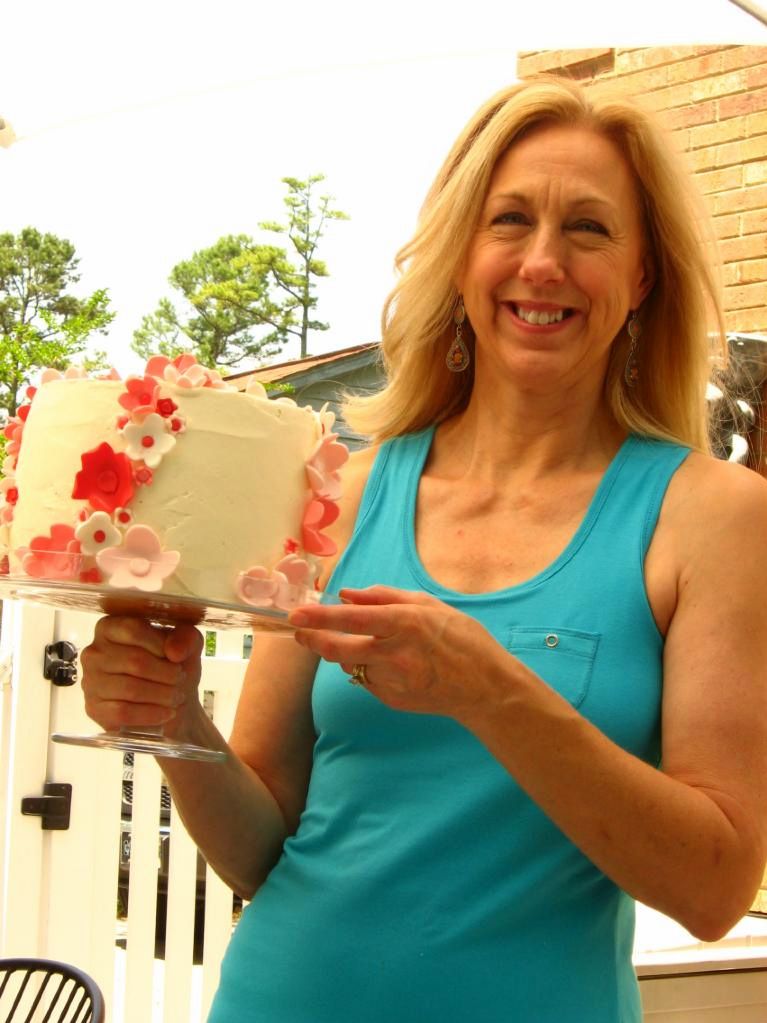
6. She’s beautiful.

7. She crafts: lately, her creative craft has been homemade chalkboards from antique or recycled frames. See her handiwork at her Etsy store, Posh Pilfer.
8. She decorates. She and my dad have single-handedly (well, double-handedly, I guess) renovated and redecorated their home to be a gorgeous oasis. Once again, photo evidence at the bottom of this post!

9. She cares about her children. A few years ago, she wrote each one of us poems. Every April Fools’ Day, she makes my little brother a wacky meal to celebrate. She has bandaged wounds, baked cakes, worked hard, and sacrificed to make us happy.

10. She rose above a difficult childhood to become an amazing mother of 5 children.

…And did I mention that she made me this cake? This heavenly confection is truly a “special occasion” cake: it’s expensive, it’s time consuming and involved, and it’s positively dreamy. If you want to feel like you’ve been transported to an almond-cherry cloud of joy, you should invest in some fancy Italian cherries and make this baby. It was the grand finale to a fantastic birthday meal, which I’ll share with you soon!
Toasted Almond Cake with Mascarpone Cream and Amarena Cherries


Recipe by: Gina DePalma
Yields: 12-16 servings

Cake Ingredients:
2 cups almond flour
3 cups unbleached all-purpose flour (not self-rising)
1 1/2 teaspoons kosher salt
3/4 teaspoon baking powder
3/4 teaspoon baking soda
1 1/2 cups sugar
1 can or tube (7 to 8 ounces) almond paste, cut into small chunks
24 tablespoons (3 sticks) unsalted butter, at room temperature
6 large eggs, at room temperature
1 cup whole milk, at room temperature
1 tablespoon Amaretto liqueur
Finely grated lemon zest (from 1 lemon, about 2 teaspoons)
2 teaspoons vanilla extract

Mascarpone and Amarena Cherry Filling Ingredients:
1 1/2 cups mascarpone
1 cup heavy cream
1/4 cup sugar
1/2 vanilla bean, split and seeds scraped
2 tablespoons kirsch or grappa
1 cup amarena cherries in syrup, well drained and coarsely chopped
3/4 cup cherry jam

Buttercream Ingredients:
1 cup sugar
4 large egg whites, at room temperature
24 tablespoons (3 sticks) unsalted butter, at room temperature
4 teaspoons vanilla extract

Directions:

Note: Amarena cherries are a sweet-sour varietal from Northern Italy. DePalma uses Agrimontana’s and also recommends those from Fabbri, available at Amazon.com. Almond flour is available on Amazon.com and at specialty grocers. This recipe is for a classic, one-tiered layer cake.

To make cake: Adjust 2 oven racks to divide oven into thirds. Preheat oven to 350°. Grease 3 (9″ x 2″) round cake pans. Line bottoms with parchment paper; grease paper and dust pans with flour, tapping out excess. Spread almond flour on a rimmed baking sheet and bake until toasted, stirring once, 8 to 10 minutes. Let cool.

In a large bowl, whisk together almond flour, all-purpose flour, salt, baking powder, and baking soda; set aside. Combine sugar and almond paste in a food processor and blend until almond paste is finely ground, with the texture of fine sand.

In a stand mixer with paddle attachment, combine almond paste mixture and butter. Beat on medium speed until light and fluffy, about 2 minutes, scraping bowl occasionally. Beat in eggs one at a time until well blended. With mixer on low speed, beat in milk, Amaretto, lemon zest, and vanilla until well blended. Beat in flour mixture, scraping bowl. Beat on medium speed until well blended, about 30 seconds. Divide batter among prepared pans and spread evenly. Stagger pans on 2 racks in oven so pans are not directly above one another. Bake 30 to 40 minutes, rotating pans halfway through, or until a toothpick inserted in center of cakes comes out clean. Let cool in pans 10 minutes. Run a knife around sides of pans and turn cakes out onto wire racks. Remove parchment paper and flip again; cool completely.

To make filling: In a stand mixer with whisk attachment, combine mascarpone, heavy cream, sugar, vanilla bean seeds, and 1 tablespoon kirsch or grappa. With mixer on low speed at first and increasing to medium, beat just until firm peaks form; do not over beat. Fold in cherries. Refrigerate 30 minutes. In a bowl, stir together cherry jam and remaining 1 tablespoon kirsch or grappa.

To make buttercream icing: Combine sugar and 1/2 cup water in a small saucepan and bring to a boil over medium-high heat, stirring to dissolve sugar. Boil without stirring until syrup reaches 240° on a digital thermometer, about 5 minutes.

Meanwhile, in a stand mixer with whisk attachment, beat egg whites on medium-high speed until soft peaks form. With mixer on medium speed, gradually pour in hot syrup in a thin stream; avoid pouring syrup on whisk. Increase speed to medium-high and beat until stiff peaks form and mixture is cool, about 8 minutes. Reduce speed to medium and add butter 1 tablespoon at a time, beating after each addition. (If at any time buttercream appears curdled, beat on high until smooth, then reduce speed to medium and continue beating in butter.) Once all butter is added, beat on high speed until buttercream is smooth and fluffy, about 1 minute. Beat in vanilla.

To assemble cake: Spread 1 side of 2 of the cake layers with jam and let stand 10 minutes, so cakes absorb some of jam. Place 1 cake layer, jam-side up on cake stand or plate. Spread with half of mascarpone filling. Top with second cake layer, jam-side up. Spread with remaining filling. Top with third cake layer, top-side up. Frost cake with about 1 cup buttercream to crumb coat cake; refrigerate 1 hour. Frost cake with remaining buttercream. Serve immediately or refrigerate; if refrigerated, let stand at room temperature 1 hour before serving.

Note: My mother’s cake is decorated with marshmallow fondant flowers in various shades of pink.


Clockwise from upper left:My mom, my dad, and the family toy poodle, Abbey; the quilt mom made for me; mom’s redecorated bedroom; Mom on Christmas morning, 2007.


Happy (late) Mother’s Day!


Share Share this post with friends!