raspberry

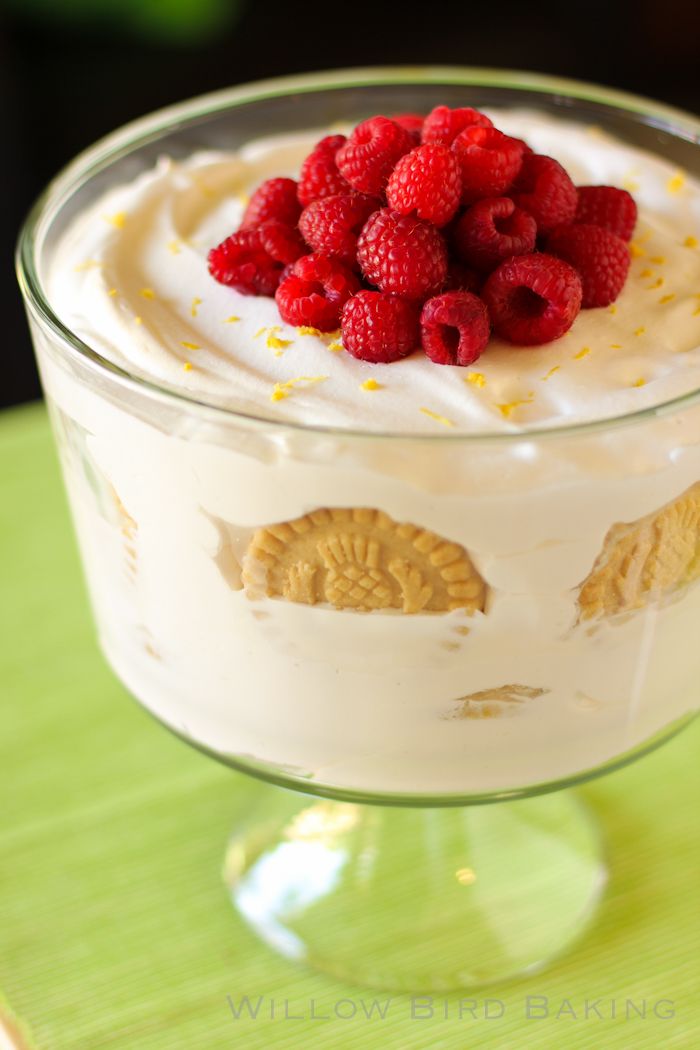
Limoncello-Spiked Shortbread Icebox Cake with Fresh Raspberries

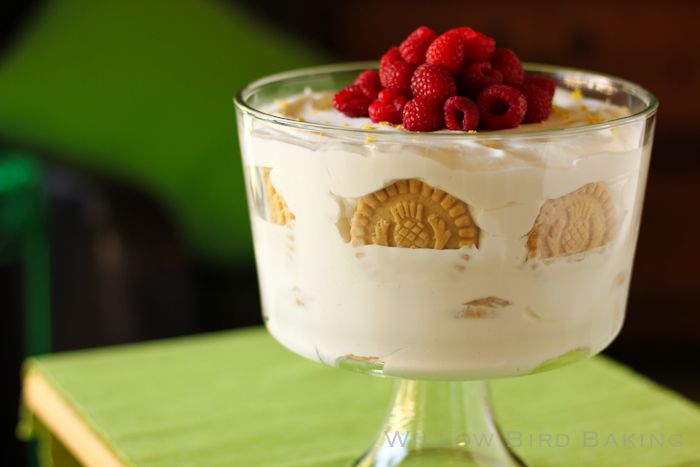
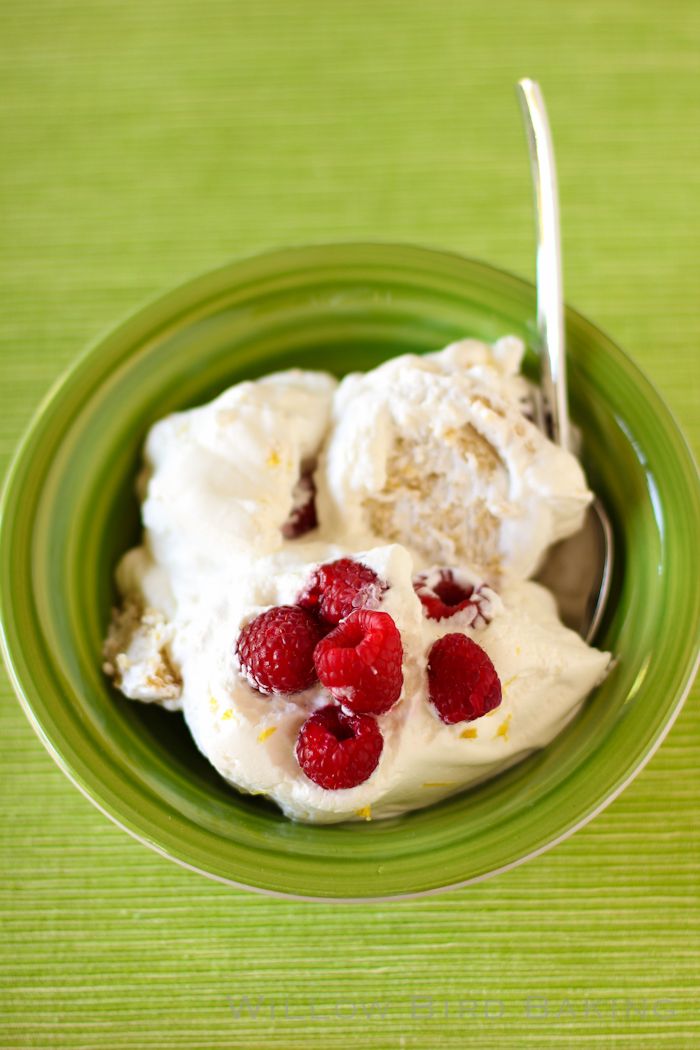
Limoncello-Spiked Shortbread Icebox Cake with Fresh Raspberries


Recipe by: Willow Bird Baking
Yield: 10 servings

Icebox cake traditionally layers oreo cookies and whipped cream. Upon chilling, the dessert turns into a velvety, indulgent masterpiece — with no cooking and no fuss. This version is updated for spring, using buttery Walker’s shortbread cookies, whipped cream spiked with limoncello, and a pile of fresh berries.

Ingredients:
6 tablespoons limocello
4 tablespoons sugar
1/2 teaspoon vanilla extract
1 teaspoon lemon juice
4 cups cream
4 (150 g) packages Walkers Shortbread rounds
fresh berries of your choice
lemon zest for topping (optional)

Directions:
In a large, chilled bowl, combine limoncello, sugar, vanilla extract, lemon juice, and cream. Beat with chilled beaters to stiff peaks. Place a layer of shortbread rounds in a large trifle dish. Top with about an inch of cream. Continue layering, ending with cream. Cover and chill this overnight in fridge. Before serving, sprinkle lemon zest over the top and pile high with berries of your choice.

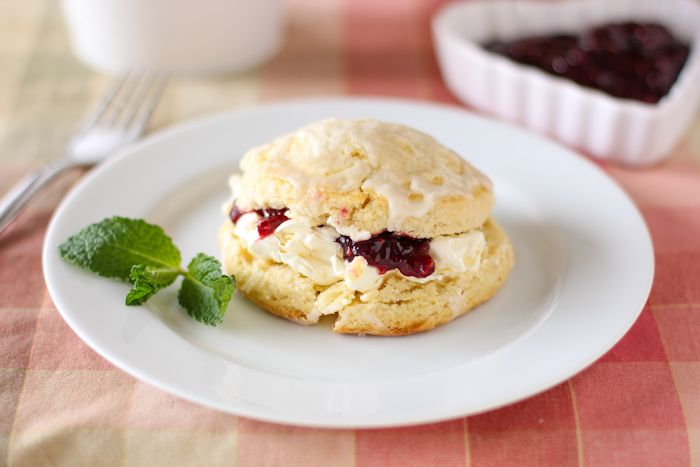
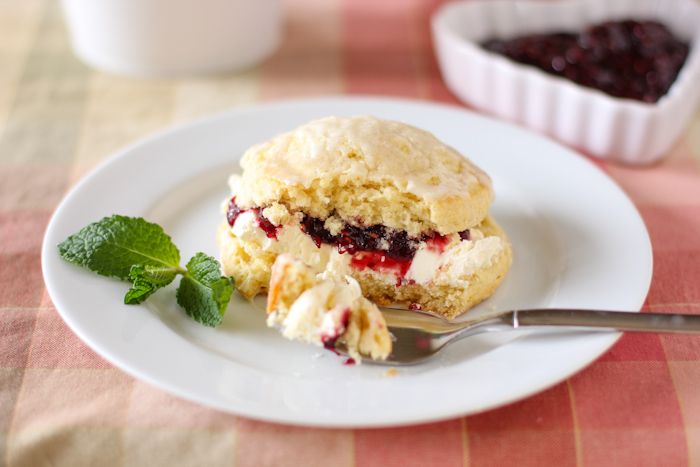
Almond Scones with Raspberry Jam and Clotted Cream

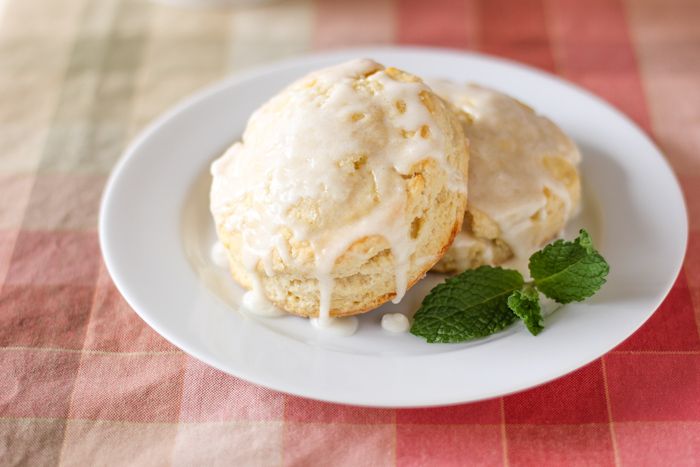
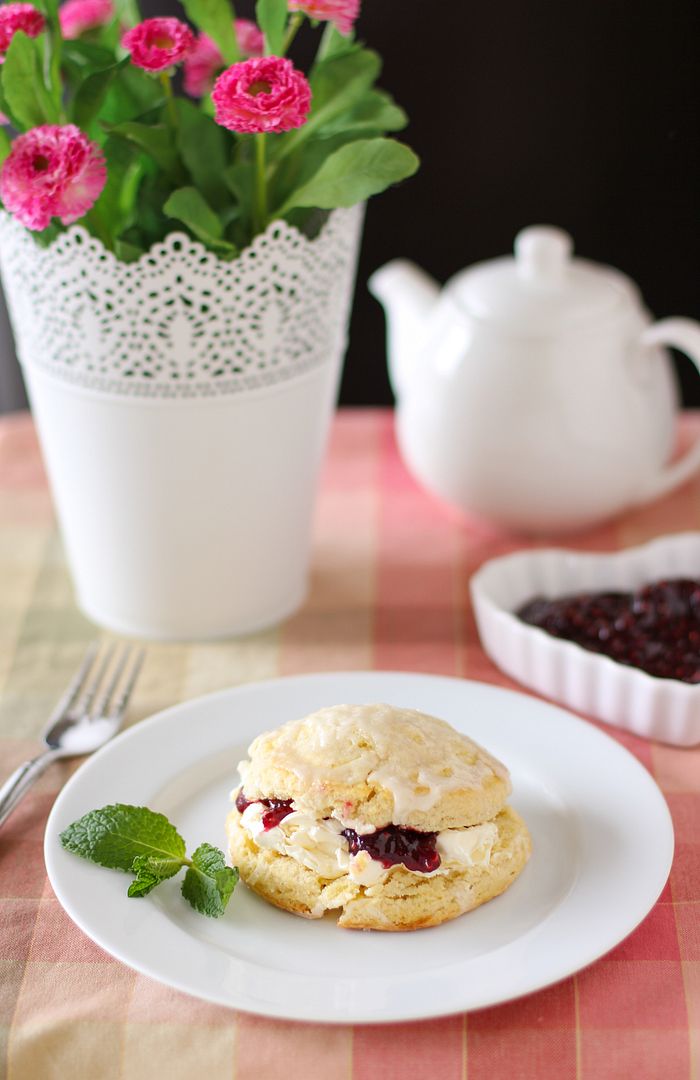
Almond Scones with Raspberry Jam and Clotted Cream


Recipe by: Adapted from Barefoot Contessa’s Cranberry Orange Scone recipe
Yield: about 14 scones

I love scones because they’re so quick and easy, but are absolutely divine in terms of texture and flavor. These scones are very lightly sweet, and the glaze adds a much needed dimension, along with a sprinkle of crunchy sugar. Serve with clotted cream and raspberry jam while hot out of the oven. This recipe also provides instructions for freezing the scones for amazing, speedy weekday breakfasts!

Ingredients:
4 1/4 cups all-purpose flour
1/4 cup sugar, plus additional for sprinkling (I used coarse sanding sugar for sprinkling)
2 tablespoons baking powder
2 teaspoons kosher salt
3/4 pound cold unsalted butter, diced
1 cup cold heavy cream
1 teaspoon almond extract
4 large eggs, lightly beaten
1 egg beaten with 2 tablespoons water or milk, for egg wash

Glaze Ingredients:
1 cup powdered sugar
1 teaspoon almond extract
1/4 cup milk (or cream — I used cream, but it does separate and probably isn’t quite as pretty as milk)
raspberry jam, for serving
clotted or Devon cream, for serving (or substitute whipped mascarpone)

Directions:
Note: You can make scones, shape them, egg wash them, and then freeze them on a baking sheet. Once frozen, you can drop them in an airtight container or bag separated by sheets of wax paper. You can then bake them straight from frozen any morning you want one — just by baking a few minutes longer than normal. So convenient!

Preheat the oven to 400 degrees F and line two baking sheets with parchment paper. In the bowl of a food processor, mix together flour, 1/4 cup sugar, baking powder, and salt. Add cold butter and pulse about 10 times or until the butter is the size of small peas (you can also do this by hand in a large bowl, using a pastry cutter or two knives to cut in the butter). In a small bowl or measuring cup, mix together lightly beaten eggs, heavy cream, and almond extract. While mixing the flour mixture on low, pour in the wet ingredients slowly. Keep mixing on low until the mixture forms a dough and begins to form a ball. Turn it out onto a floured surface and knead a turn or two, forming into a disc.

Roll the dough out to 3/4-inch thick, moving it around on the floured surface often to make sure it’s not sticking. Flour a 3-inch round cookie cutter and cut round scones, laying each on the prepared baking sheets. Re-roll the dough and continue cutting scones. When all scones are cut, egg wash just the tops of each one and sprinkle on the coarsest sugar you can find (the crunch is so nice). Bake in the 400 degree oven for 20-25 minutes until risen, lightly golden, and done on the inside.

While the scones bake, whisk together all glaze ingredients. Add more sugar or milk as needed for consistency. Drizzle over hot scones and serve immediately with raspberry jam and clotted cream (also called Devon cream). If you can’t find clotted cream, grab some mascarpone cheese and whisk it a bit until fluffy. Use that instead.

*Darius’s name has been changed to protect his privacy.

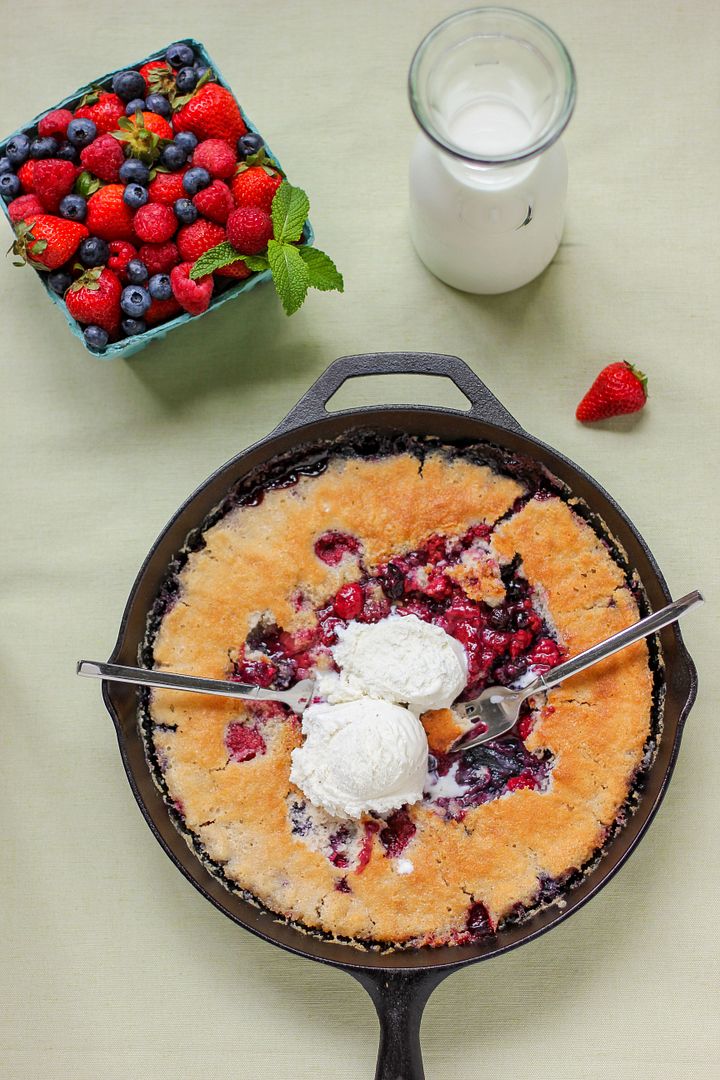
End of Summer Berry Cobbler

Sometimes you meet someone and you just want to sit on a patio for hours chatting with them. Preferably with some strawberry lemonade and a giant bowl of roasted chickpeas. I haven’t met Joanna Goddard in person, but if you read her wildly popular and engaging blog, Cup of Jo, you know why it’s easy to feel like I have. Cup of Jo is one of my favorite blogs because of Joanna’s sweet, casual voice and fantastic content.

Today I’m excited to have a guest post on Cup of Jo, and it’s a recipe I’ve loved for as long as I can remember. My mom often baked this cobbler with a big can of peaches when I was growing up. Here I’ve updated it to use bright, fresh berries. It’s a chance to relish the last drops of summer.

Click here to read more and get the recipe for Summer Berry Cobbler over at Cup of Jo.

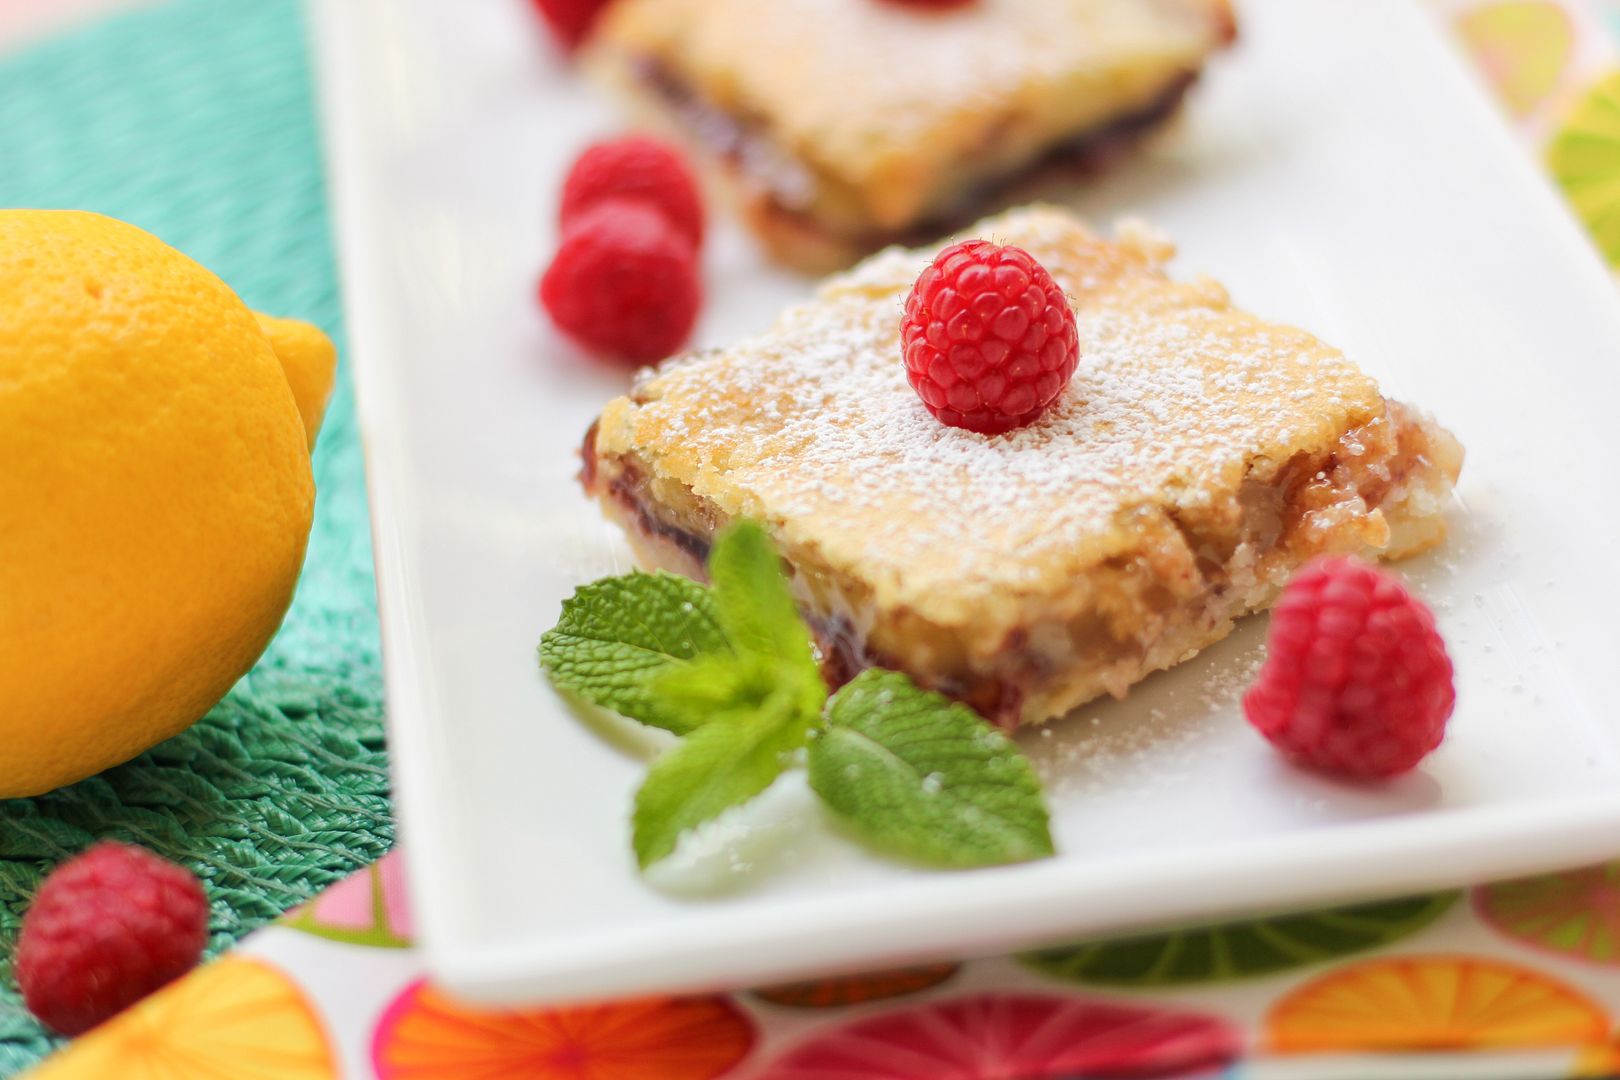
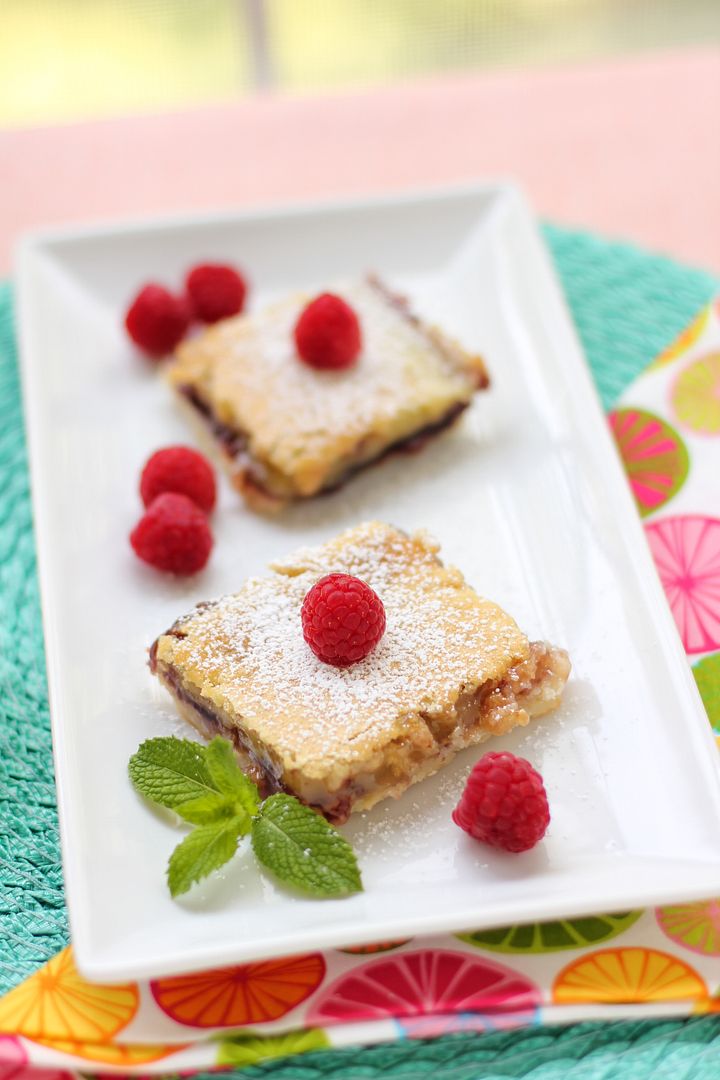
Lemon Raspberry Squares

I know I said that sometimes you need to settle in and let the hard times wash over you like waves. And that’s true. You need to do this the most when you’ve been running like a hamster in a wheel, trying by virtue of your own power to get somewhere.

Other times, though — those times when you’re exhausted and overwrought — it’s okay to build a boat.

Not a canoe. I’m talkin’ a big, sturdy boat. And it’s okay to get in that boat and put on some headphones. And a blindfold. It’s okay to sing at the top of your lungs, to willfully drown out the sight, sound, and persistent pressure of the waves until you forget they exist altogether. We both know that someday you have to get out and face the ocean. But it doesn’t have to be today.

I recently asked you on Facebook to help me build a boat and distract myself from the waves. We shared funny stories on a hard day, and oh dear, you are a witty bunch! I thought I’d share my own funny story in more detail here, in case you need a distraction today. I present to you The Tale of The Wayward Underwear.

(Did I just lose my sponsors? Oh well. Anyway…)

Back in college, I had a sweet apartment above my professor’s garage (hi, Dr. Peroni). It didn’t have a full kitchen, but I hadn’t really started baking yet anyway. I made chili in my electric skillet, hot dogs in my microwave, and that was all I needed. That and The Fresh Prince of Bel-Air on television. And my blue couch from Goodwill, which had no back legs and thus reclined. Awesome.

The washer and dryer downstairs was icing on the cake. I did laundry about once a week, but was usually too busy to bother putting the clean clothes away. Instead, I grabbed things straight from the dryer and threw them on before class.

One day I was late to my American Lit class and I did just that. I absentmindedly tugged on a pair of jeans and a t-shirt before hopping on my bike and pedaling furiously to my class. I made it in time, slid into my seat, and adroitly navigated the discussion of a text I hadn’t actually had time to read (ah, college). Everything seemed fine . . . until I began the ride back to my apartment.

About halfway there, I noticed something lying in the middle of the sidewalk. As I approached the object, it started to look familiar. Too familiar. Unacceptably familiar. I stopped a few feet away and stared at it, aghast.

There, lying in the middle of the sidewalk of one of the busiest streets in Davidson, was a pair of my underwear.


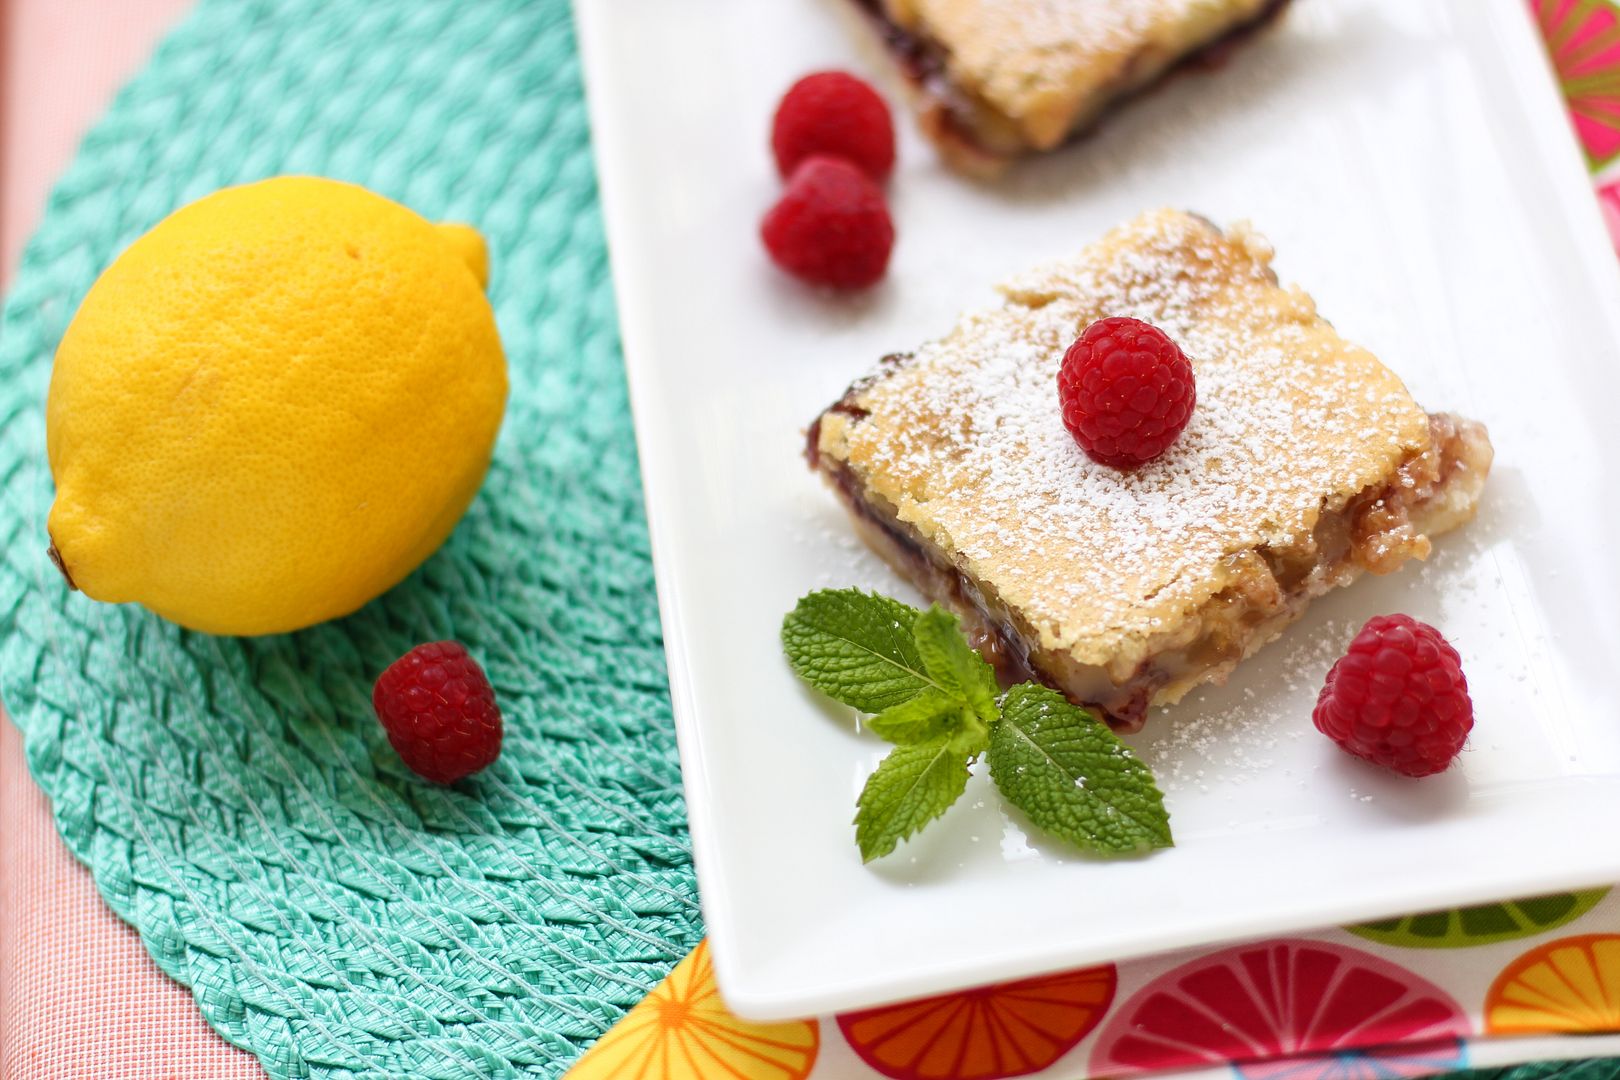
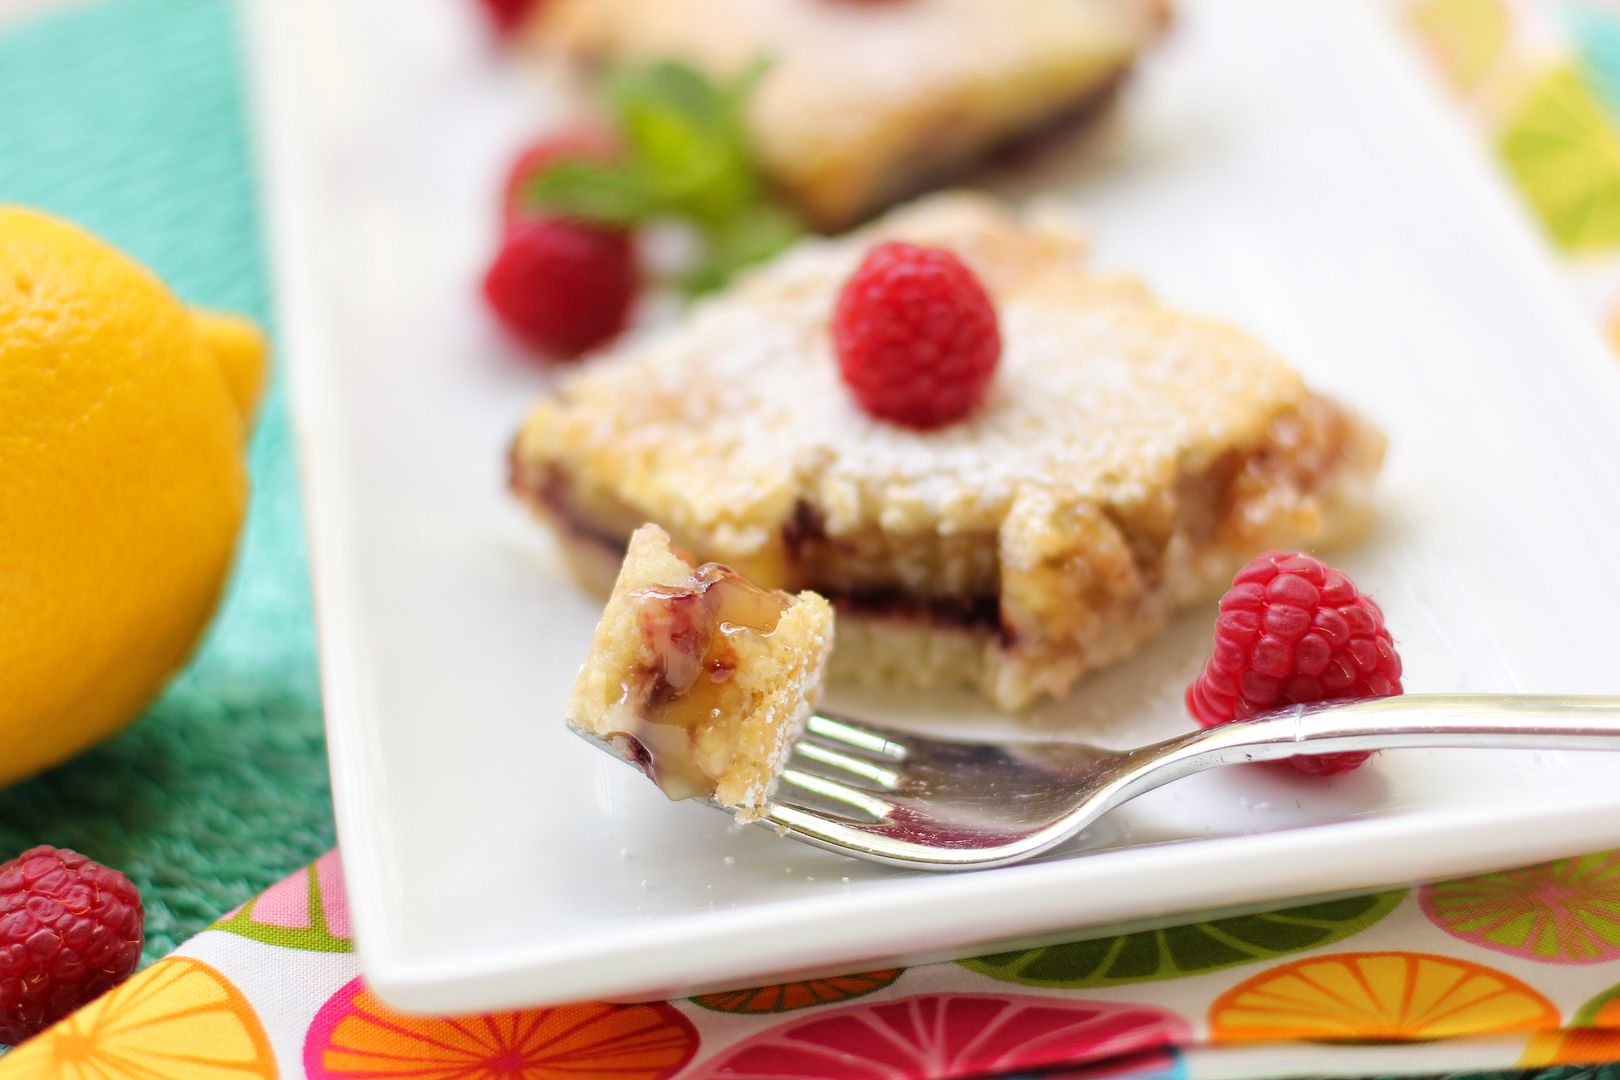
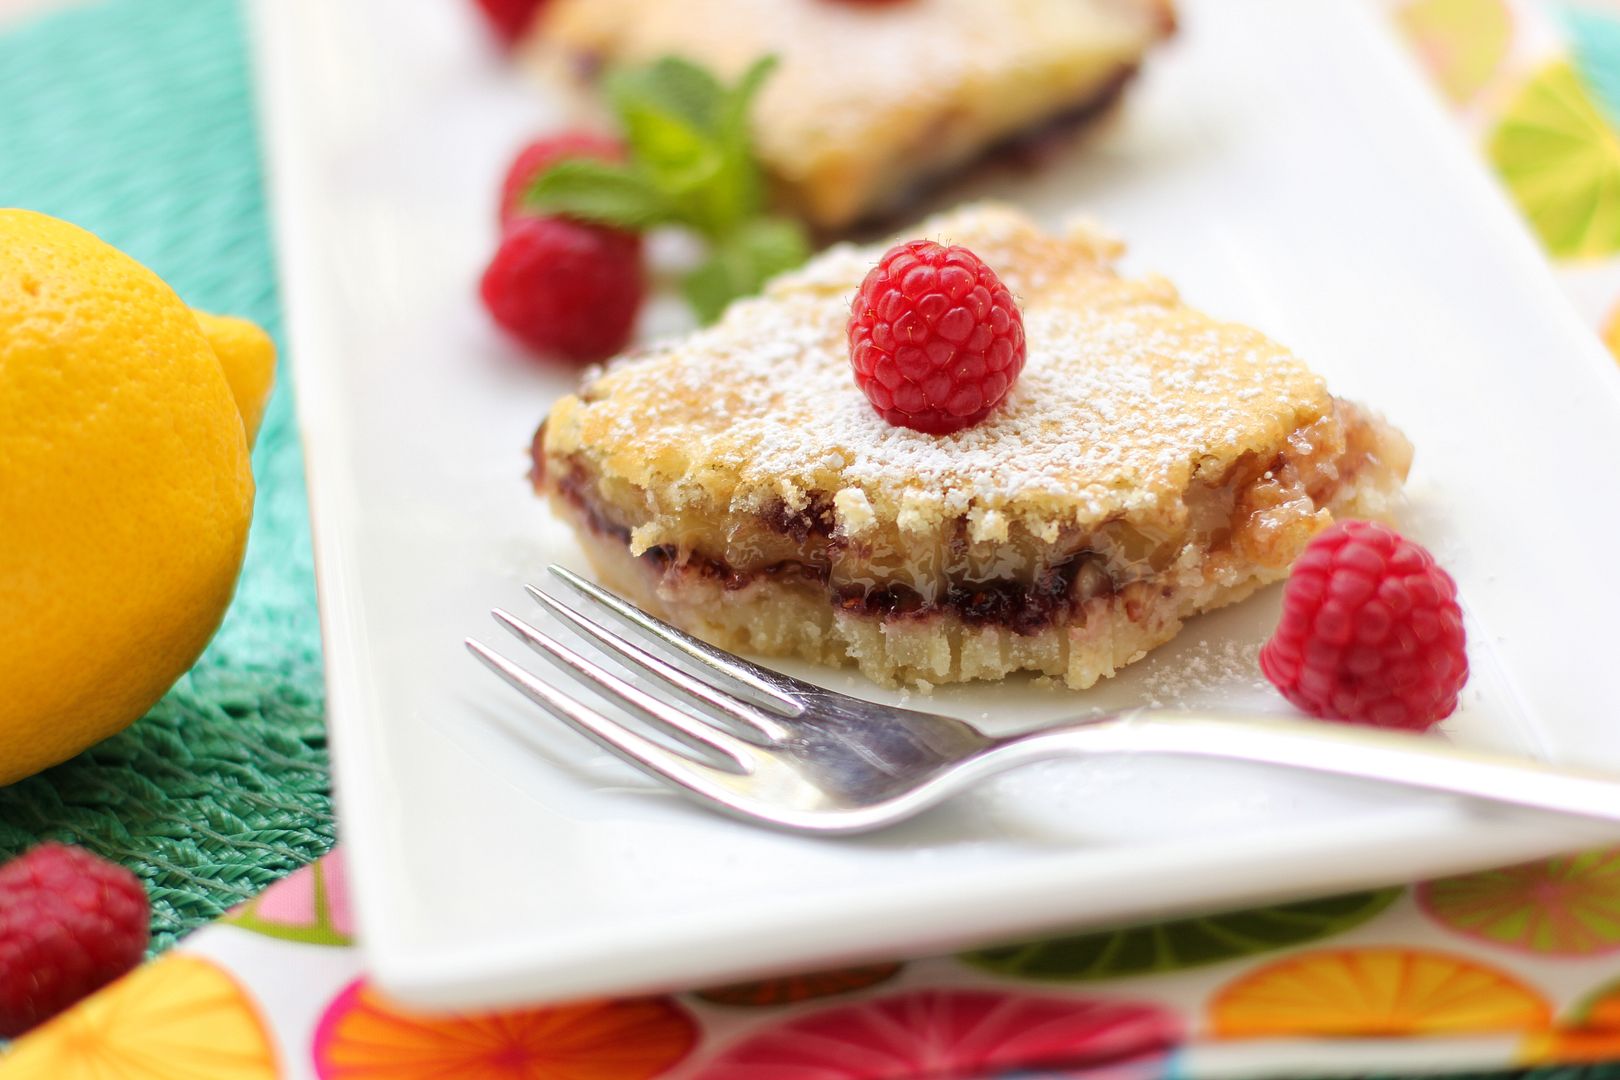
I know it’s traumatic. Just try to think of lemon raspberry squares.

My brain could not process the visual information it was receiving. Instead, it was cycling through myriad half-formed thoughts: Wha–? How in the world–?

I finally pieced together that my underwear must have been clinging to my jeans when I grabbed them out of the dryer. The fact that they fell off in the middle of the sidewalk was bad enough, but it was nothing compared to the realization that they might not have fallen off — that I might’ve worn them straight into class!

Just to make sure you have a clear picture in your brain, these were not my nice, normal underwear. They were my cute underwear, with little purple trim all over them. And they were lying about 100 feet from a college campus. This situation had no doubt been conjuring up images of drunken debauchery in passersby’s minds for the past hour while I’d sat in class, blissfully unaware.

And if there’s anything I was not, it was drunken, debauched, or scandalous in any way. I was as straight-laced as a new sneaker.

Standing there, staring at this pair of underwear on the sidewalk for way too long to seem inconspicuous, I tried to get a handle on my racing thoughts. However improbable, the idea that someone could link this undergarment to me and misunderstand how it arrived on the sidewalk made me flush with embarrassment.

Also, what was I supposed to do about this situation? I began to debate: could I possibly pick them up? They were some of my favorite underwear, after all. But if anyone saw me picking up a pair of underwear off the flippin’ street and taking them home, what would they think? Could I possibly leave them there? And let more people see them? And who would eventually have to pick them up?! I almost died.

After several minutes of standing with my mouth agape, I finally got myself together and rode home — without my wayward underwear. They were gone the next day and I don’t ever, ever want to know where they went or how they got there.

If you’re in need of even more fun after that humiliating tale, don’t worry. I have another distraction for you: Lemon Raspberry Squares. Think of your typical gorgeous, sweet-tart lemon squares on a buttery shortbread crust. Now mentally slather a layer of raspberry jam right down the middle. Now eat about 50 of them.

See? All better.

What’s your favorite way to get your mind off of troubles?

One year ago: Soft Sugar Cookies
Two years ago: Secret Garden Craft: Simple Luncheon Napkins

Lemon Raspberry Squares


Recipe by: Slightly adapted from Heather Christo Cooks
Yield: 12-15 bars

This is a dessert for folks who have a sweet-tooth! They’re sweet, buttery, tart, and downright delicious. They taste like sunshine.

Ingredients:
2 cups all-purpose flour
1 cup powdered sugar
1 cup cold butter, cut into small pieces
1/2 teaspoon salt
4 eggs
2 cups white sugar
1/3 cup flour
1/2 cup fresh lemon juice
raspberry jam (I think I used about a cup — just eyeball enough for a thin layer), room temperature

Directions:
Note: You want your jam at room temperature here because in regular lemon squares, the lemon mixture is poured onto a hot crust. If you pour it onto cold jam instead, it takes longer for the middle to cook (don’t ask me how I know this.) I think having the jam at room temperature will help the whole dish cook more evenly.

Preheat the oven to 350 degrees F and spray a 9 x 13-inch baking dish with cooking spray. You could also place parchment paper in the dish to form a sling if you’d rather — this will make the bars easier to remove.

Pulse the flour, powdered sugar, and salt together in a food processor to combine. Add the cold butter chunks and pulse about 10-12 times until you have the texture of coarse sand (you can also use a pastry cutter or two knives to accomplish this if you don’t have a food processor). Pour this mixture into the prepared dish and use a spatula or the bottom of a glass to press it down into an even layer. Bake it for about 15 minutes or until it’s lightly browned.

While it’s baking, stick a spoon in your jam so it’s ready to spread on quickly. In a medium bowl, whisk the eggs until fluffy before adding sugar while whisking constantly (if you stop whisking here, the sugar will “cook” the eggs, and you don’t want that!) Once the sugar and eggs are combined, add in the flour and the lemon juice, continuing to whisk. Spread the jam in a thin layer over the entire hot crust. Then pour the lemon mixture over the jam.

Stick the entire dish back into the oven and bake 15-25 minutes (this is such a wide range because the temperature of my jam might’ve made my baking time longer — it took my bars around 25 minutes to get pretty set.) Start checking at 15 minutes by giving the pan a little jiggle. The lemon mixture should be about set (slight jiggle only) and a light golden brown. If it starts to get too dark before it’s set, cover the pan with foil as it finishes baking.

When the bars are done, remove the dish to a cooling rack to cool completely before cutting (if you don’t cool them completely, I’m betting they’ll be runny, so be patient!) Use a sharp knife to cut the bars and serve them. You can sprinkle powdered sugar from a sifter over the top for decoration, but the bars are very sweet already, so go easy!

If you liked this post, please:
Subscribe to Willow Bird Baking
Follow Willow Bird Baking on Twitter
Follow Willow Bird Baking on Facebook

Straw-Raspberry Basil Fruit Leather

I’m a writer, personally and professionally. I write poetry (my first literary love), I keep a journal, I write essays and articles. I even have this blog — I don’t know if you’ve heard of it — where I write about food and stuff. Cough.

I love well-chosen words, purposeful syntax, concrete images, a sturdy grammatical infrastructure. I even love the thoughtful absence of words, the careful economy of constructing meaning.

But in second grade, let’s just say I didn’t know what syntax was just yet. And I was a twerp.

By twerp, I mean I was one of those flippant kids who think they’re immeasurably witty. You’ve probably run across a twerp or two in your own life. Hopefully you’ve resisted the urge to kick them, or at least haven’t gotten caught doing so.

My beloved second grade teacher, Mrs. Shaughnessy, was adept at resisting the urge to kick me. In fact, that amazing woman seemed to genuinely love me and want me to explore my talents.

Our daily journal assignment was supposed to give me the opportunity to do so. We’d all receive a sheet of that burlap-brown paper ruled with inch-wide lines — the only kind hospitable to the malformed block letters second grade hands produce. It was the sort with a blank space up top for an illustration, so the required length of our journal entries was automatically halved. Apparently, though, having to fill 3 whole lines with text was too fussy for me.

Every single day, I’d grab my sheet of paper and my great big honkin’ pencil — which had both the girth and color of a dingy school bus — and write some variation (ha ha, pun intended) of the following:

Today I was very, very, very, very, very bored.

The number of veries (verys? “very”s?) changed depending on how large I was writing that day — I’d just keep adding them until I filled up the page. Then I’d slap a half-hearted illustration of a teddy bear or a heart on that baby and stick a fork in myself, ’cause I was DONE. Time to color.

God bless my teachers.

One day, Mrs. Shaughnessy addressed the subject of my journal writing strategy by hacking off its legs. With a stern look, she declared that I was officially limited to two veries per page. The end. No arguments. I would just have to find it within myself to meet the length requirements without my crafty adverbs, and I might even have to, like, actually describe my day or something. The horror.

I look back now and think this shows saintly restraint on her part. If I’d been her, I might have also added, “And stop saying my class is boring, and stop drawing hearts just because they’re easy, and stop being such a twerp!”

Okay, okay, I guess I’d nix the twerp part.

Ah, second grade. The year of twerpitude, of learning that shortcuts don’t pay off, of Mrs. Shaughnessy’s encouragement. And the year of fruit roll-ups.

Really, I loved all of the tangy, sweet incarnations of processed fruit leather throughout my childhood: old school fruit roll-ups, fruit roll-ups with shape cut-outs, fruit-by-the-foot. I’d unroll them from their thin plastic wrappers and stuff a huge hunk in my mouth, pick the sweet stickiness out of my teeth with my tongue for a few minutes, and then repeat the process.

Because of all of my fond fruit snack memories, I knew my recent elementary school throwback picnic wouldn’t be complete without a grownup version of the fruit roll-up.

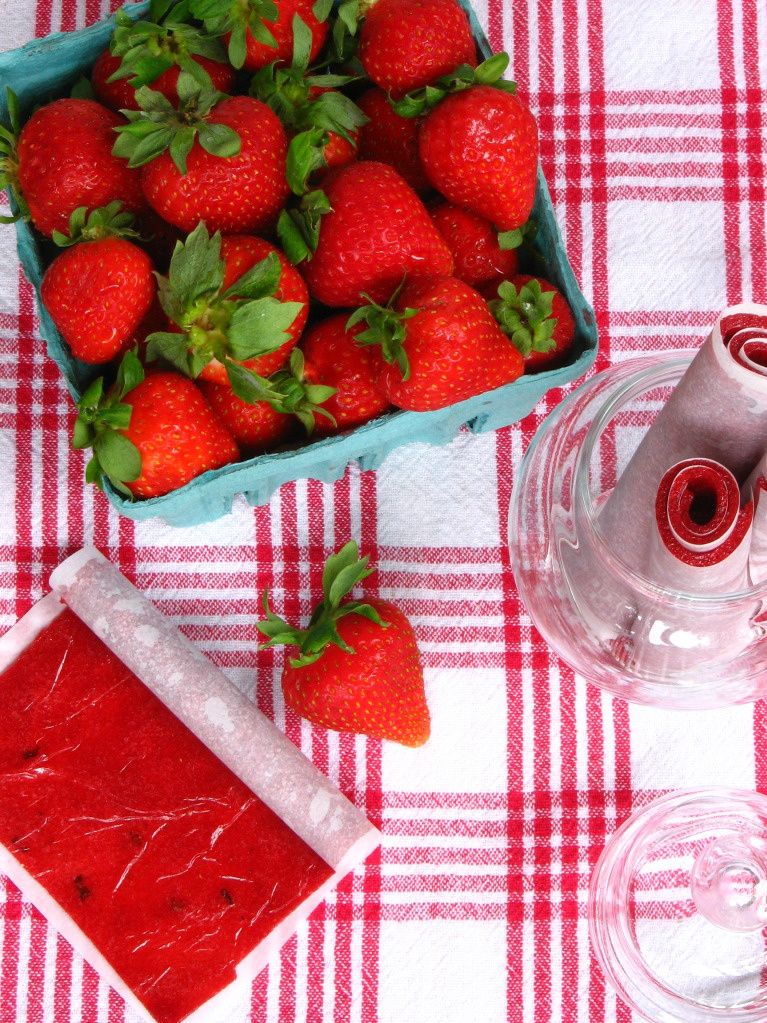
This recipe uses a combination of strawberries and raspberries with some minced basil thrown in for herbal brightness. The resulting fruit leather tastes more like a burst of tangy fruit than the processed kind. The recipe does take quite awhile (though not too much active work time) and only produces about 5 fruit roll-up sized portions, so you may want to work on two pans at once.

I’m not sure that I’d make this all the time given the amount of fruit required, but I enjoyed the fun results. I also love that it packs a ton of fruit into a single snack; if I had children, being able to control what was in their lunchboxes might motivate me to make it more often.

Were you a twerp as a child? Know any twerps? Do tell.

P.S. Dear Mrs. Shaughnessy, your class was very, very, very, very, very, very engaging. I promise.

Straw-Raspberry Basil Fruit Leather


Recipe by: adapted from Gourmet, with tips from Simply Recipes
Yield: about 5 “fruit roll-up” sized squares

Ingredients:
about 3 cups halved strawberries
about 1 cup raspberries
spritz lemon juice
1 tablespoon minced fresh basil
scant 1/2 cup sugar

Directions:
Preheat the oven to 200 degrees F and line a sheet pan with microwave-safe plastic wrap.

Place berries, spritz of lemon juice, and sugar in a food processor or blender and purée. Strain into a heavy saucepan using a fine-mesh sieve and bring it to a boil, stirring occasionally. Reduce heat to medium-low and simmer for about 10 minutes, continuing to stir occasionally. Stir in the basil and simmer for about 10 more minutes, stirring more frequently towards the end.

Pour the purée onto prepared baking sheet and use an offset spatula to spread it out as thinly and evenly as possible. Dry in oven for 2 to 3 hours until it’s slightly tacky but doesn’t stick to your fingers. At this point I turned the oven off and left it in for about 5 more hours. Then take it out and let it continue drying on a cooling rack for up to 19 more hours until completely dry and set. If some still-sticky purée exists around the edges where the plastic wrap prevented drying, just scrape that off and discard.

Lay a sheet of parchment or wax paper on the counter and invert sheet pan onto it. Slowly and carefully peel plastic wrap off of the back of the fruit leather and then roll it up in the parchment/wax paper, cutting it into portions if you’d like. Store in a sealed bag at room temperature for up to 1 month, or in the fridge.

If you liked this post, please:
Subscribe to Willow Bird Baking
Follow Willow Bird Baking on Twitter
Follow Willow Bird Baking on Facebook
Give this post a thumbs up on StumbleUpon


ShareOther ways to share this post with friends!

1 2 3 4 5 6 8