Month: August 2013

Brûléed Twinkie Ice Cream Sundae

Brûléed Twinkie Ice Cream Sundae

Brûléed Twinkie Ice Cream Sundae


Recipe by: Willow Bird Baking
Yield: 2-3 servings depend on how much ice cream you use

Celebrate Twinkies’ comeback by setting them on fire and sticking them in ice cream.

Ingredients:
2-3 Twinkies (full disclosure: I couldn’t find Twinkies, so I used Cloud Cakes)
1/4 cup sugar
1/4 cup coconut milk (or other liquid of your choice)
ice cream (I used Birthday Cake ice cream, but pick your favorite flavor)
white chocolate chips (or toppings of your choice)
sprinkles (or toppings of your choice)

Directions:
Pour coconut milk in one small, shallow bowl. Pour sugar in another. Set these up as an assembly line. Dip each Twinkie briefly in coconut milk to coat before rolling them in sugar to coat and placing them on a plate. Use a kitchen torch to “brûlée” the Twinkie until the sugar is bubbly and caramelizing.

Place a few servings of ice cream in a bowl and top with brûléed Twinkies (slicing one in half makes for a pretty presentation), white chocolate chips, and sprinkles. Put a few spoons into the bowl and serve!

Brown Sugar Pop-Tart Ice Cream Sundaes

Brown Sugar Pop-Tart Ice Cream Sundaes

Brown Sugar Pop-Tart Ice Cream Sundaes


Recipe by: Adapted from Cuisinart with glaze inspired by Epicurious
Yield: 5 cups, or 10 servings

Remember eating Pop-Tarts every morning before school? Now you can relive your Pop-Tart memories with dessert. These sundaes were so amazing!

Ice Cream Ingredients:
1 cup whole milk
2/3 cup sugar
pinch salt
2 cups heavy cream
1/2 tablespoon vanilla extract

Brown Sugar Glaze Ingredients:
1/2 cup (packed) golden brown sugar
1/4 cup (half stick) unsalted butter
1/2 cup whipping cream
1/2 teaspoon vanilla extract
1/4 teaspoon salt
4 brown sugar Pop-Tarts, chopped into 1/4-inch cubes, plus more for garnish

Directions:
Make sure your ice cream maker’s bowl is frozen per manufacturer’s instructions. In a medium bowl, beat together the milk, sugar, and salt until the sugar is dissolved. Add the heavy cream and vanilla, mixing well. Cover and refrigerate 1 to 2 hours or overnight.

Mix brown sugar glaze ingredients in a small saucepan over medium-high heat until they boil, stirring constantly. Boil for about 30 seconds to be sure brown sugar is dissolved. Pour into a heat-proof bowl and let cool completely before chilling overnight with your ice cream base.

When ready to make your ice cream, turn on your ice cream maker and pour the vanilla mixture into its frozen bowl. Let the ice cream churn until thickened (mine takes about 20 minutes but it depends on your ice cream maker’s instructions). Spoon the ice cream out into an airtight resealable container and freeze until firmer (I skipped this step and stirred in my glaze right away and it mixed all the way into the ice cream. It was still super tasty, but it didn’t have the “marbled” look I was going for. So freeze the ice cream until firmer if you want it to be marbled.) Stir in Pop-Tart pieces and brown sugar glaze, mixing just until the ice cream is “swirled” with the glaze. Serve with whipped cream, caramel sauce, and Pop-Tart stick garnish.

Gooey Carmelitas

Gooey Carmelitas


Recipe by: Adapted from Our Best Bites
Yield: 20 carmelitas

These are gooey, chocolatey, caramelly, and amazing! They’re quick and simple to make, and served warm with a scoop of vanilla bean ice cream, they’re to die for.

Ingredients:
1 cup butter, softened
1 3/4 cups packed brown sugar
1/4 cups packed dark brown sugar (or you can use all light)
2 eggs
2 teaspoons vanilla
1 teaspoon baking soda
1/4 teaspoon salt
2 1/2 cups all purpose flour
3 cups quick-cooking rolled oats
1 cup mini semisweet chocolate chips
1 Ghirardelli dark chocolate bar (I used 86%)
1/2 cup chopped toasted pecans (optional)
store-bought caramel sauce, warmed according to package directions

Directions:
Preheat the oven to 350 degrees and line a 9 x 13-inch baking dish with parchment paper, leaving an overhang that will help you to pull the bars out later. Spray the paper a little with cooking spray.

Beat butter in a large mixing bowl until fluffy. Add brown sugars and cream until fluffy, 2-3 minutes, scraping down the bowl as needed. Beat in eggs, vanilla extract, baking soda, and salt. Add the flour slowly, mixing until just combined, and then stir in the oats. Press about 2/3 of the dough into your prepared pan, covering the bottom. Sprinkle chocolate chips, pieces of the chocolate bar, and nuts (if using) over the top. Pour caramel sauce over top just until the bars are all nice and drizzles (you probably won’t use the whole jar).

Take pinches of the rest of your oat mixture and flatten them into “shingles” in your hands, laying them over top of your chocolate and caramel filling until it’s roughly covered. Bake the bars for 22-25 minutes or until top is light brown. Don’t overbake them. Let the bars cool in the dish until they are room temperature. Lift them out and onto a cutting board and slice (I like to drizzle them with melted chocolate at this point). You can store them in an airtight container until you’re ready to serve them — and at that point, I recommend heating them up and adding a big scoop of vanilla bean ice cream!

Our Wedding Day


(Photo by Todd Sumlin)

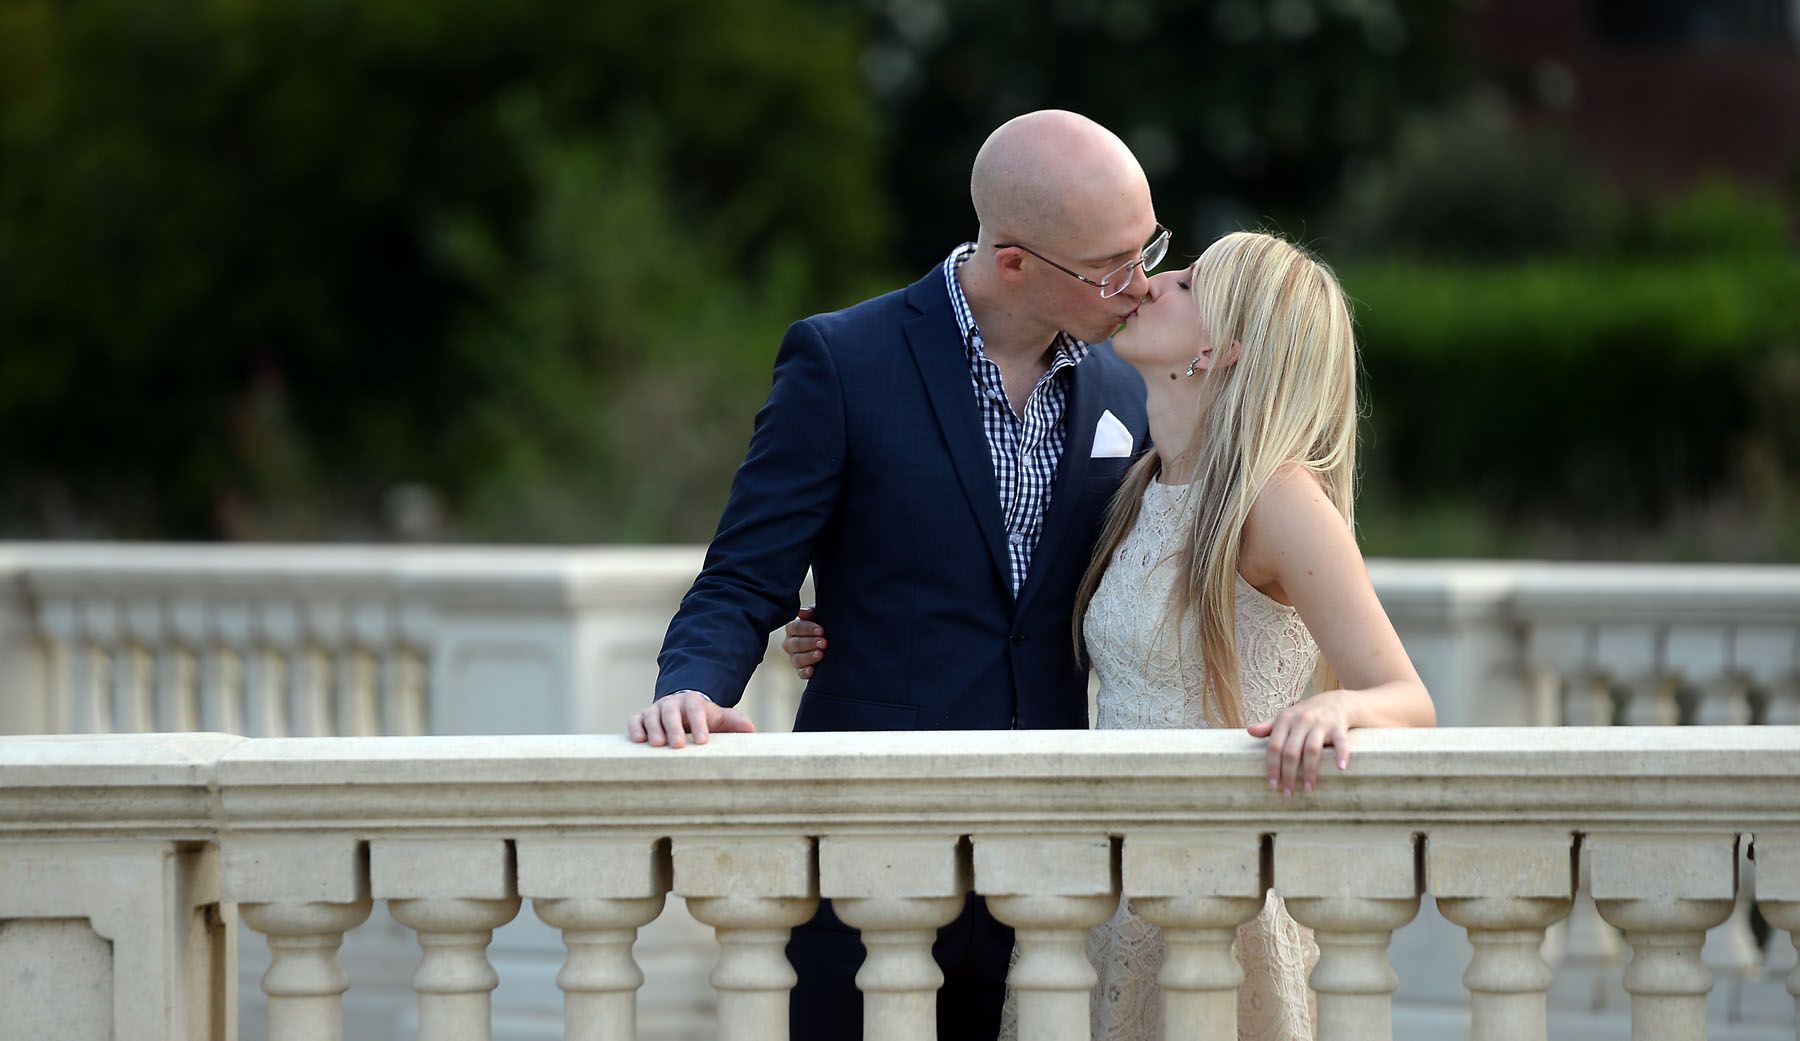
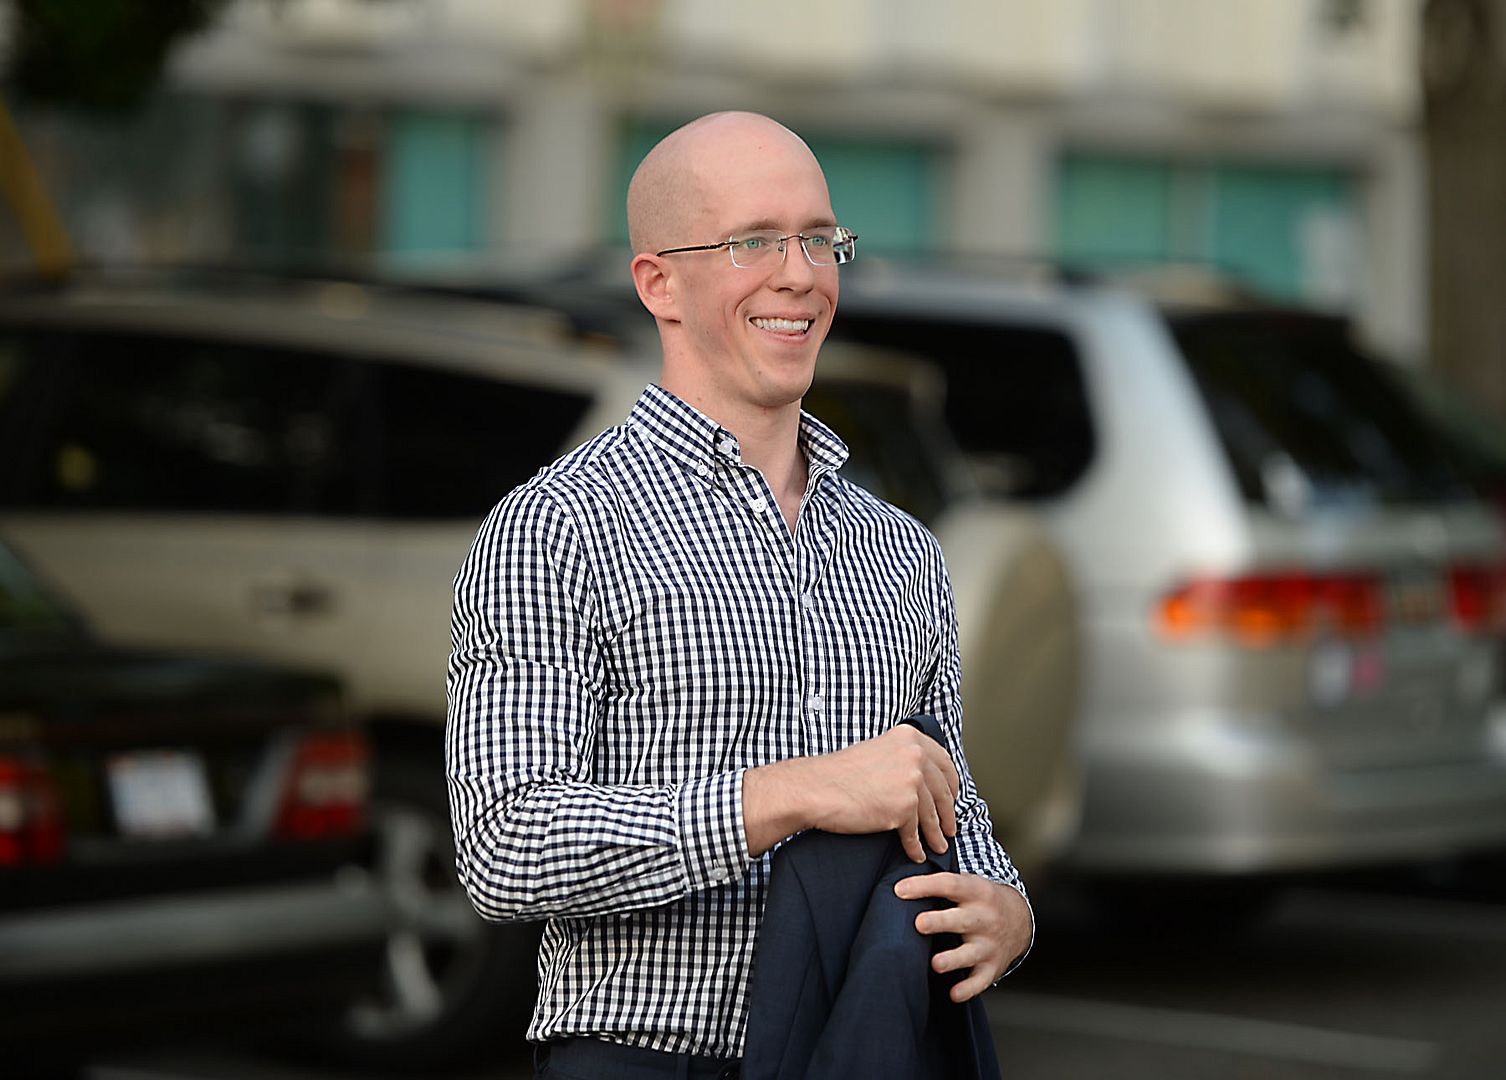
I saw Mike’s car turning onto Kings Street as I blew past in my little red Nissan. I hoped he hadn’t caught a glimpse of me — I wanted to see his face when he had a real “first look.” I jumped out of my car at Mama Ricotta’s, an iconic and well-loved Italian restaurant in Charlotte. The best photographer in the universe (Charlotte Observer photojournalist and a great family friend Todd Sumlin) met me with a big hug and an even bigger camera. I told him Mike was just about to pull in and then, sure enough, his black car pulled into the parking lot. I hid (and did considerable hair-floofing, dress smoothing, and smile-adjusting) until Mike got out of the car, whereupon he turned and there it was — the moment I’d imagined a million times: our first sight of each other, complete with him (absolutely killing it in his blue suit) walking quickly over to me with a broad smile, saying, “Julie, you look beautiful.”


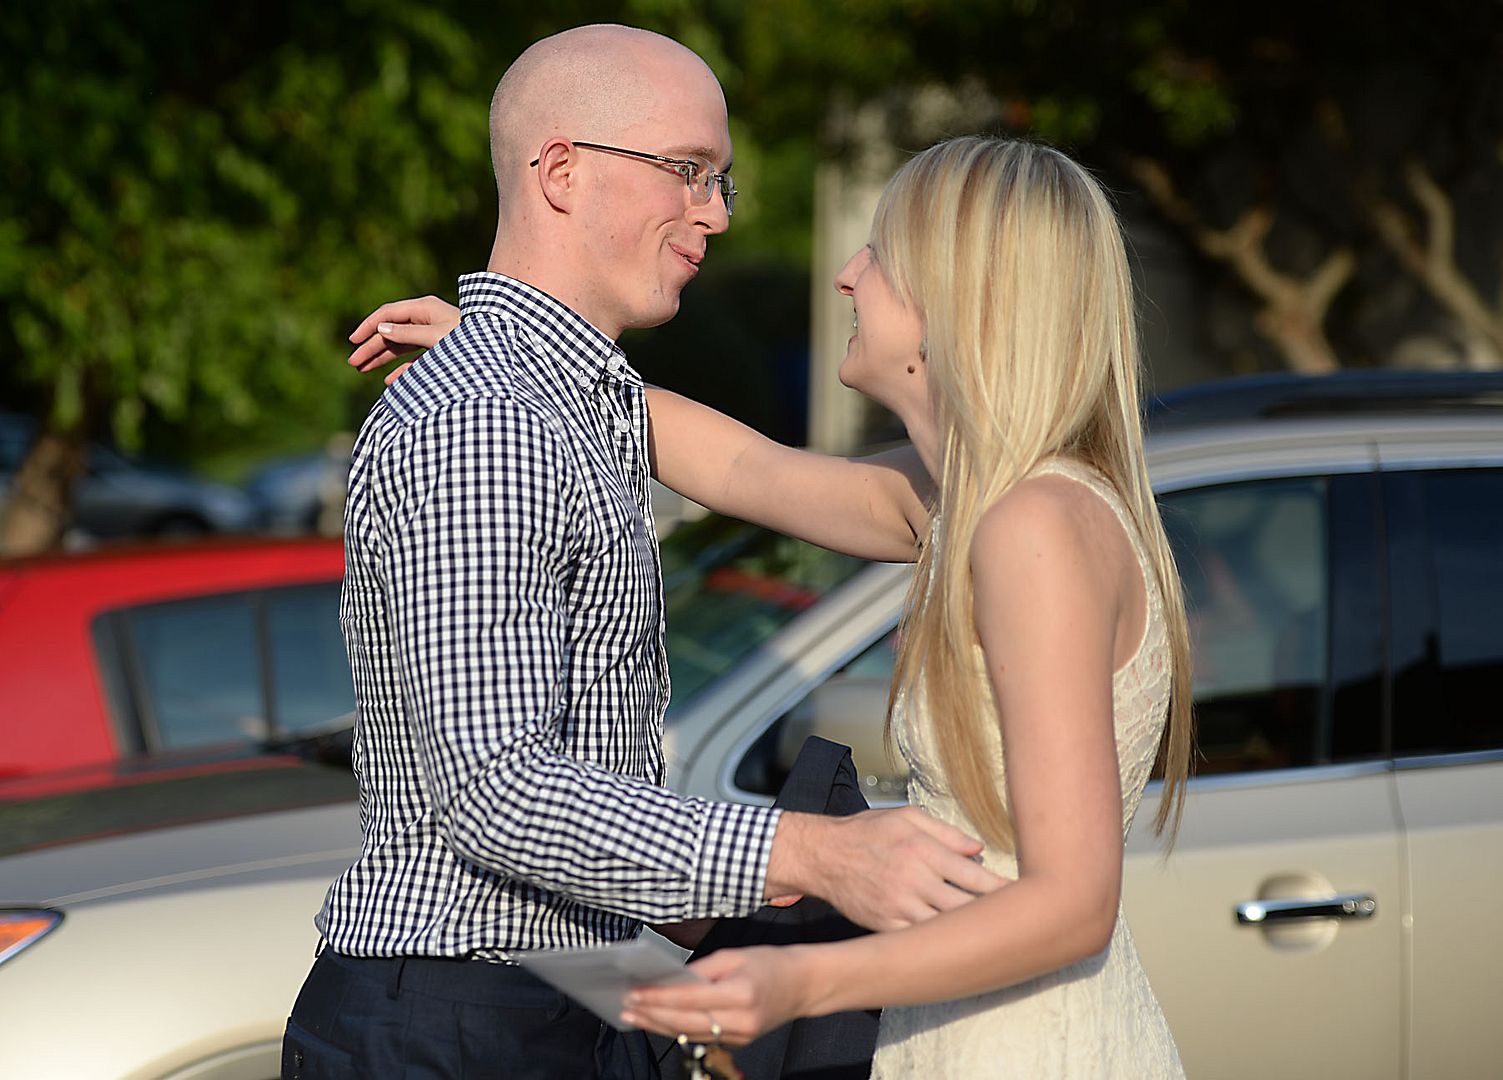
The first look (Photo by Todd Sumlin)

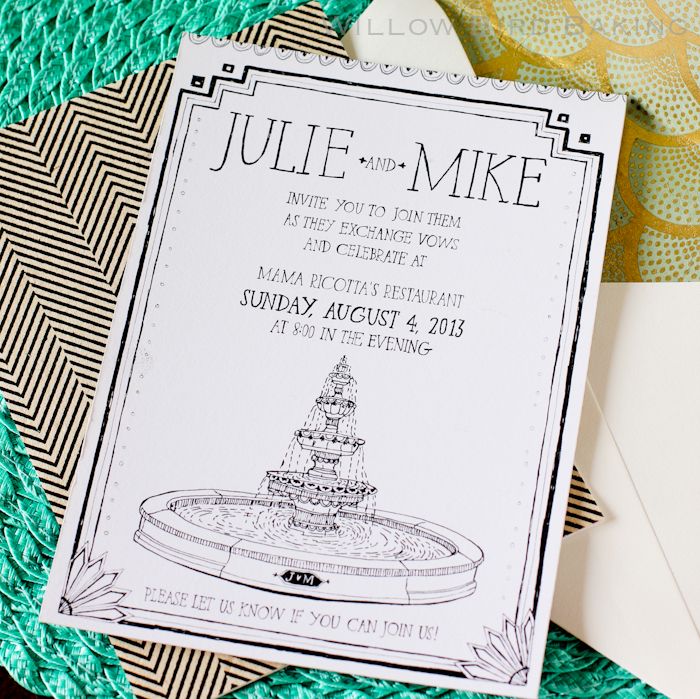
Our wedding was picture perfect for me, from proposal to the last goodnight. One of my favorite details was the beautiful custom invitation that illustrator Lana Frankel created. I have to brag on Lana for a bit, because this girl worked tirelessly to make sure these were perfect: she included our special fountain, hand addressed our envelopes, and even lined them with metallic art deco inspired paper (to match my vintage ring)! She went above and beyond — and that’s what I love about working with a small, passion-driven business like hers. We were so tickled with the invitations and they’re now one of our most special wedding mementos.

Another perfect detail was our ceremony. I wanted to retain a few wedding traditions that were meaningful to us and ditch the many that weren’t. Mike and I opted for a small exchange of vows at the restaurant itself followed by a big feast — the food was a very important detail for me, of course! No aisle, no long ceremony, no separate dancing reception. I love those things at others’ weddings, but for us, it really fit to do a big family dinner instead. That’s more who we are.

Mama Ricotta’s seated us in the back of the restaurant with a heavy red/gold metallic curtain drawn behind us. My mom worked magic with $20 worth of hot pink baby roses I’d picked up at Trader Joe’s the day before, making it look like we’d actually planned some décor. After fretting for a week or so about who would officiate our ceremony (we wanted someone special to us who knew a bit about us personally), Mike and I convinced my dad to get ordained and do the job! It was the most wonderful twist I could’ve imagined: I’ll never forget that my dad not only “gave me away,” but actually led us through our vows on my wedding day.

After our vows — which we giggled and sniffled our way through — the servers brought us tray after tray overflowing with amazing food (some of which is pictured in our wedding album, below). Here’s the menu we enjoyed surrounded by our close family:

My lovely new in-laws (who have really felt like family for years) jokingly asked whether we’d also paid for the servers to roll us all out with handtrucks after the meal. Despite having just eaten a huge amount of food, Mike and I happily cut the cake: a huge sheet cake from Sam’s Club with fluffy whipped icing. Perhaps that doesn’t sound too fancy, but to me, there’s nothing more decadent than a ton of fluffy icing that I didn’t mix up myself! I had a hard decision to make, though, as I tried to determine which piece had the maximum amount of icing.


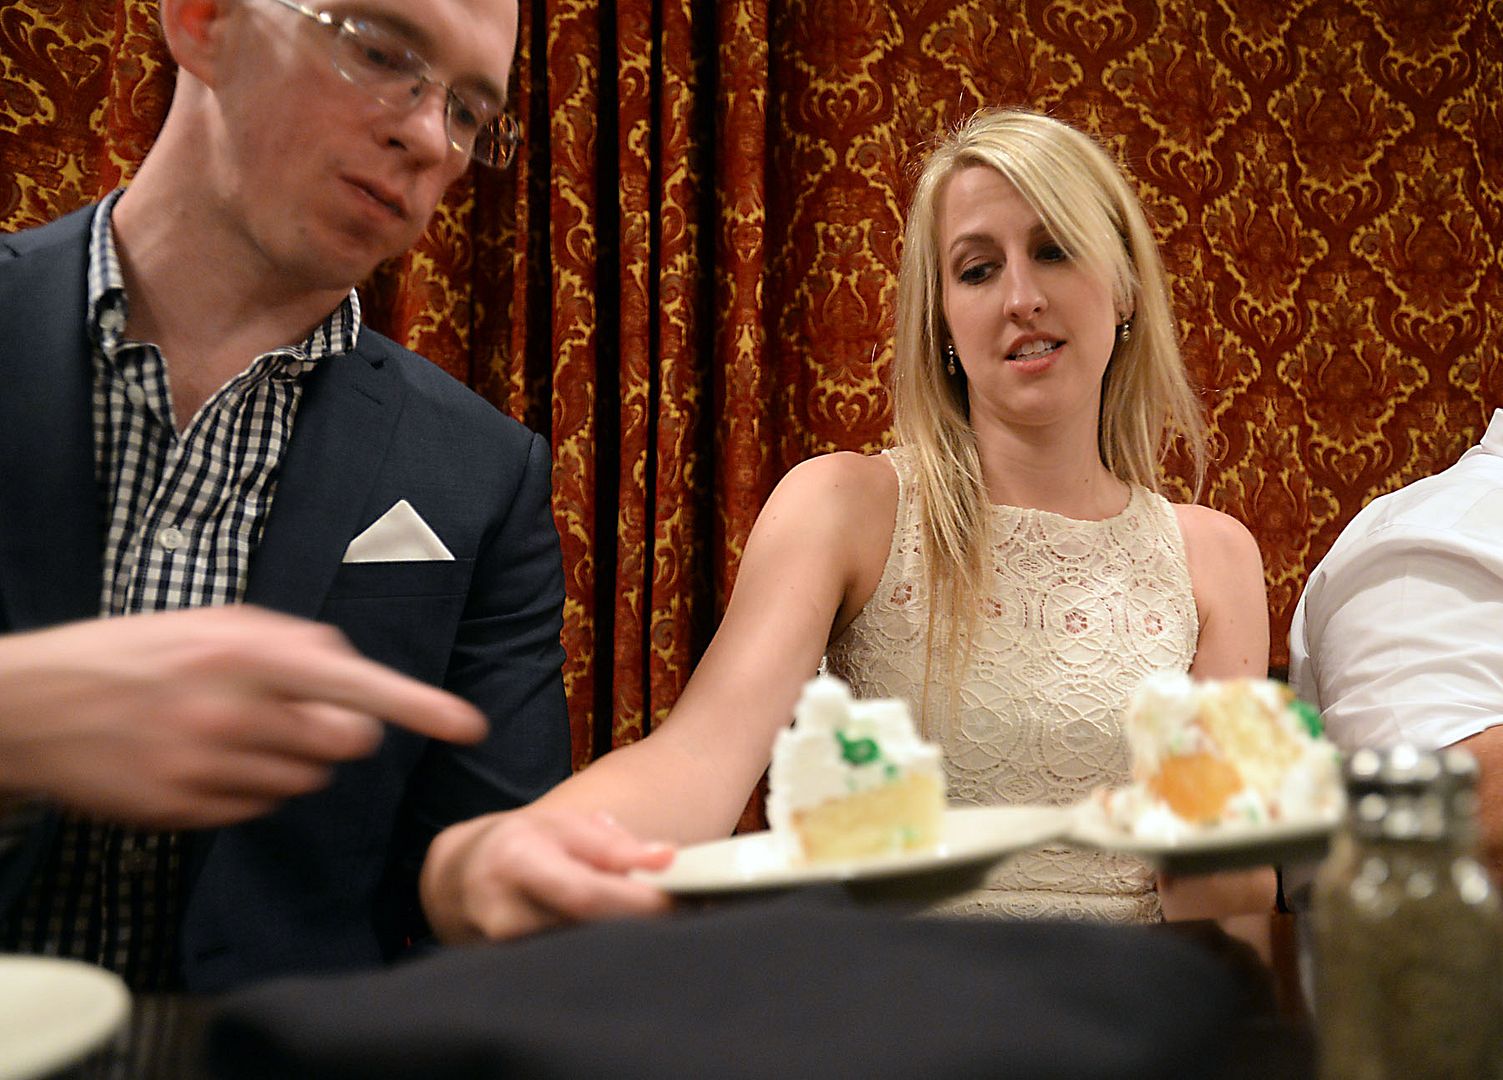
Mike helps me decide which piece of cake I want. Pretty sure this is important practice for being my husband. (Photo by Todd Sumlin)

At the end of the night, the marriage license was signed and hugs and kisses given all around. Mike and I found ourselves buckled into his car, husband and wife. I read him the cards we’d received from our family as he drove us through the streets of Charlotte. Three days later, we still turn to each other every now and then and laugh, realizing again how surreal it is that we’re married. I don’t know how long it’ll take for that to wear off, but I’m in no hurry. It has been a truly lovely union so far.

I thought I’d share a few photos from our wedding album with you. Thank you so much, again, to our wonderful photographer and friend, Todd Sumlin, for taking these photos. If you’re in Charlotte and need a photographer, I can’t recommend him enough! (You can click the “full screen” button to make the slideshow larger.)


layers_of_eli's weddingphotosubset album on Photobucket

Just like that, on August 4, 2013, all my dreams came true. Thank you all for your love, congratulations, and support!

* * *

Disclosure: Lana and Todd both generously gifted portions or the entirety of their services to me for my wedding; however, I value my readers such that all opinions expressed on Willow Bird are always my own. I share these lovely folks and their businesses with you because they are absolute gems and I know you’ll appreciate the quality of their work as much as I do.

Fruity Pebble Strawberry Ice Cream Sundaes

Fruity Pebble Strawberry Ice Cream Sundaes


Recipe by: Adapted from Cuisinart
Yield: 5 cups, or 10 servings

Strawberry ice cream is already an amazing summertime treat, but this ice cream mixes in fruity, fun kid cereals. It makes a surprisingly delicious ice cream sundae!

Ingredients:
1 1/2 cups fresh or frozen strawberries, hulled
3/4 cups whole milk
2/3 cup sugar
pinch salt
1 1/2 cups heavy cream
1 1/2 teaspoons vanilla extract
1 cup Fruity Pebbles (or similar cereal)
1 cup Cap’n Crunch Oops! All Berries (or similar cereal)

Directions:
Make sure your ice cream maker’s bowl is frozen per manufacturer’s instructions. Process the strawberries in a food processor until they’re finely chopped. In a separate medium bowl, blend together the milk, sugar, and salt until the sugar is dissolved. Mix in the heavy cream and vanilla. Stir in the strawberries (with juice). Cover this mixture and chill it overnight.

Turn on your ice cream maker and pour the mixture into its frozen bowl. Let the ice cream churn until thickened (mine takes about 20 minutes but it depends on your ice cream maker’s instructions). Pour in the Fruity Pebbles and Oops! All Berries cereal and let the mixture continue churning until mixed. Spoon the ice cream out into an airtight resealable container and freeze until firm according to your preference. Serve with extra cereal sprinkled over top, whipped cream, and strawberries.