Birthday Cake Cheesecake

At 26-going-on-27, I’ve grown to love birthdays that feel like deep crow-footed, cheek-hurting smiles, that sound like clanging dishes and brassy laughter.

On birthdays, I need my family. We need a table to sit around to hold our leaning elbows. We need food, we need each other, but that’s all.
For children, though, birthdays have to involve some sort of event. Kids want to scarf down plasticky pizza, be mildly terrorized by an oversized animatronic mouse playing a banjo, and wallow in a germy ball pit. Or they want to light tiki torches, drink pineapple punch, and marco polo around a swimming pool until their fingers are wrinkly.
When I was little, my mom convinced me that I wanted to throw a cross-stitching birthday party.

Naturally, the most direct avenue to popularity among your elementary school friends is to invite them to something called a “party” and proceed to introduce them to the pastime of 70-year-old ladies everywhere.

When my birthday rolled around, my unsuspecting friends gathered around the coffee table and listened intently to the plan. Our goal was to pick a pattern and each cross-stitch a bookmark before cake and gifts. We dutifully chose the our favorite design, fussed with threading our needles, and got to work.
Well, turns out cross-stitching requires quite a bit of time. And, like, patience and stuff. Things that are in short supply for kids at birthday parties.

My friends faded fast. Soon we were stuffing our faces with cake, our half-finished bookmarks languishing in the needle-and-thread strewn living room.

Oh well. As long as there’s cake, right?

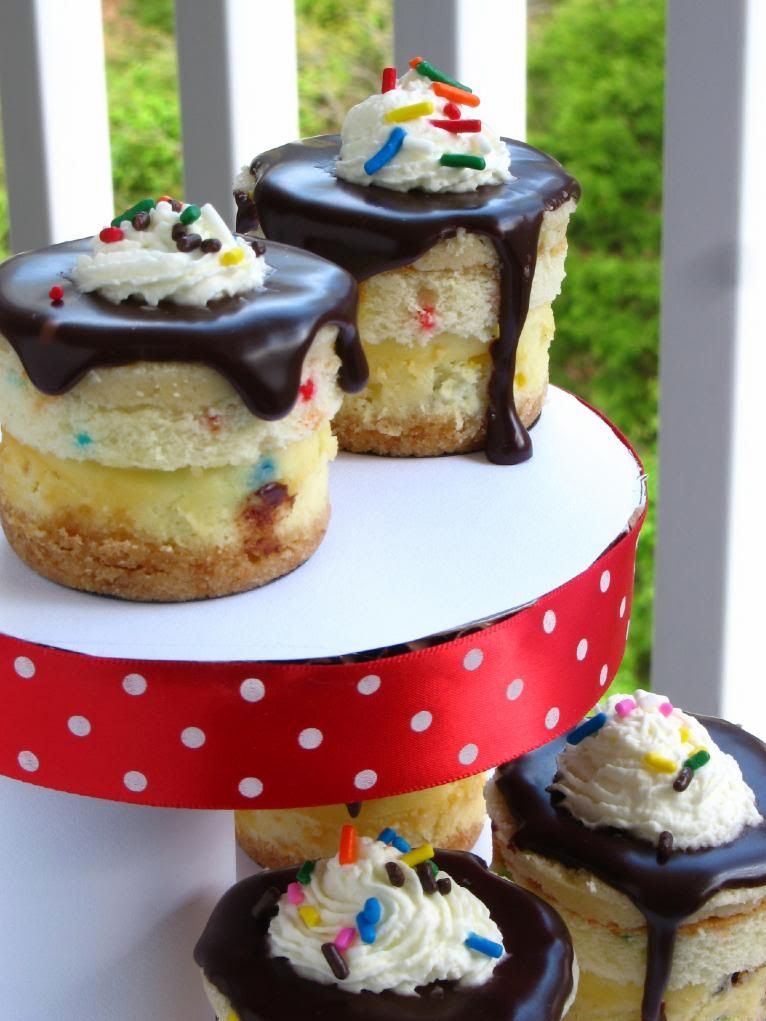
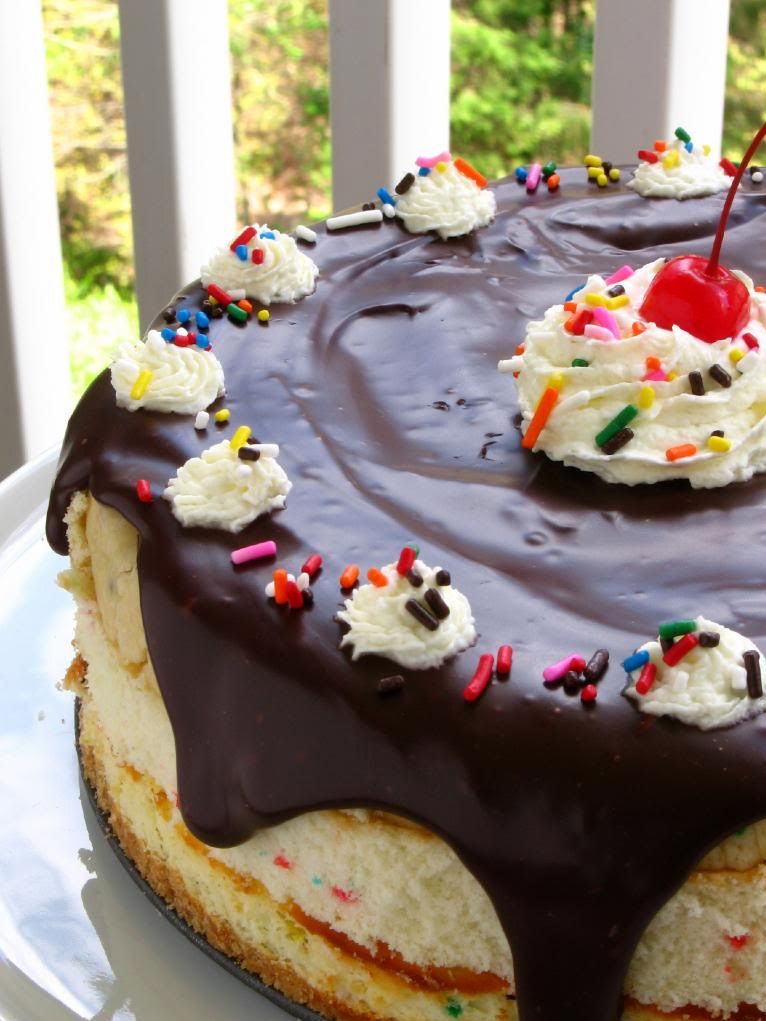
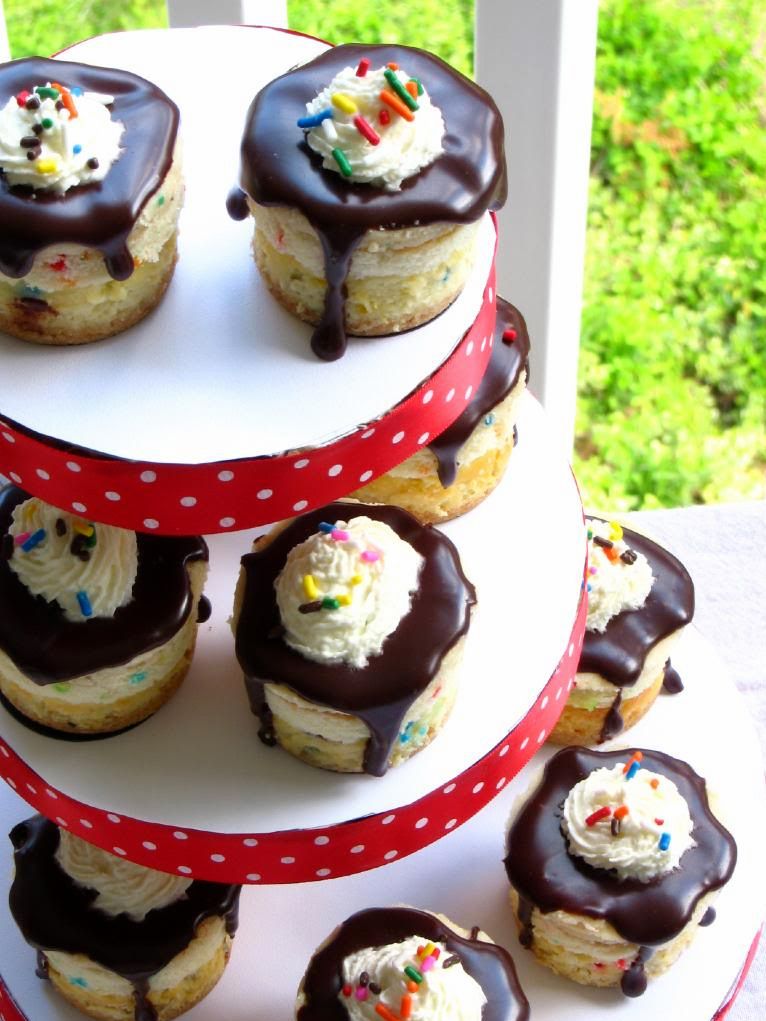
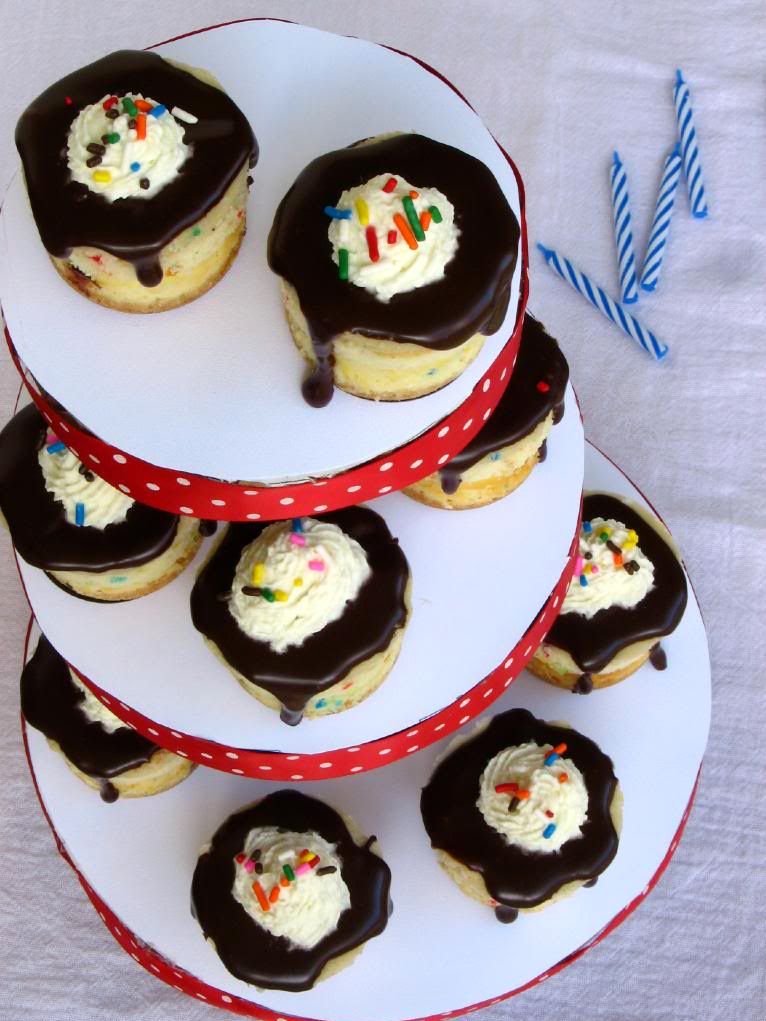
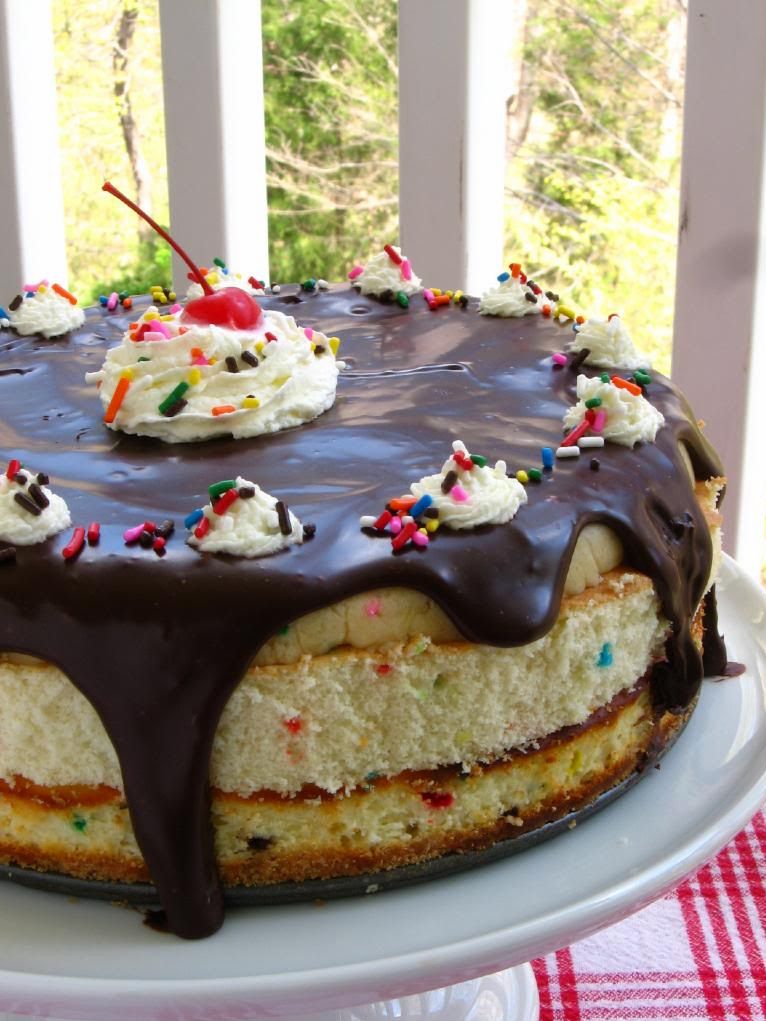
In that spirit, boy do I have a cake for you. This particular cake is an explosion of birthdayness. A “Funfetti” cheesecake on a vanilla wafer crust is topped with a layer of Funfetti cake, a layer of cake batter cookie dough, chocolate sauce, whipped cream, and a cherry. Every layer contributes a little bit of birthday joy. The final product is scrumptious and outrageously festive.
I have more ridiculous birthday stories from when I was a child, because apparently it was impossible for me to have a normal, uneventful birthday party. But I’ll spread the love and save those for later. In the meantime, have some cake.

Describe one of your favorite (or least favorite) childhood birthday memories.

Birthday Cake Cheesecake


Recipe by: Willow Bird Baking, with chocolate sauce adapted from Bakers Royale
Yield: 24 mini cheesecakes or 1 full-sized cheesecake

Crust Ingredients:
45 vanilla wafers, finely processed into crumbs
5 tablespoons unsalted butter, melted and cooled
Small pinch of salt

Cheesecake Ingredients:
2 (8 oz.) packages cream cheese, at room temperature
2/3 cup sugar
1 tablespoons all-purpose flour
1 tablespoon cake mix
1 1/2 teaspoons vanilla extract
2 large eggs
1 tablespoon sprinkles
1 Funfetti cake mix (or homemade yellow cake with sprinkles mixed in), prepared and baked in thin layers
melted chocolate (for topping)
whipped cream (for topping)
maraschino cherries (for topping)

Cake Batter Cookie Dough Ingredients:
1 1/2 cups all-purpose flour
2/3 cup yellow cake mix
1/4 teaspoon salt
1/2 cup unsalted butter, room temperature
1/2 cup granulated white sugar
1 teaspoon pure vanilla extract
2 tablespoons sprinkles
4-8 tablespoons water

Chocolate Pouring Sauce:
2/3 cups dark chocolate
2 tablespoons heavy cream
4 tablespoons powdered sugar, sifted
4-5 tablespoons water, warm

Directions:
Note on Scheduling: This is a great recipe to make over the course of a few days. You can make the Funfetti cake one day and freeze it, make the cookie dough disc another day and freeze it, make the cheesecake one day and refrigerate it, and then make your chocolate pouring sauce and assemble on the day you’ll serve the dessert.

Prepare your Funfetti cake: Mix and bake in 9-inch round cake pans according to box instructions and set aside to cool. Make one of these a pretty thin layer of cake — this will be the one you use on your cheesecake (be careful; a thinner layer will bake for less time). The other layer is extra; I tore mine up and froze it for future cake balls. After cooling, freeze your cake layer — it’s easier to work with when frozen.

Prepare your cheesecake: To make the cheesecake crust, preheat the oven to 350 degrees F. Butter two mini or one full-sized cheesecake pan. Combine the cookie crumbs, melted butter and salt in a small bowl. Toss with a fork to moisten all of the crumbs. Press into a thin layer covering the bottom of your cheesecake pan(s).

In the bowl of an electric mixer fitted with the paddle attachment, beat the cream cheese and sugar on medium-high speed until well blended. Beat in the flour and cake mix. Add in the vanilla and beat until well incorporated, scraping down the sides of the bowl as needed. Beat in the eggs one at a time, scraping down the bowl between each addition. Pour the filling into your cheesecake pan(s), leaving room for a cake and cookie dough layer on top of your cheesecake.

Bake until the top is lightly browned, puffed and cracked at the edges, and the center moves only very slightly when the pan is lightly shaken (about 40 minutes for a full-sized cheesecake or 12-15 minutes for mini cheesecakes). Transfer to a wire cooling rack. Cool at room temperature for at least 30 minutes. Transfer to the refrigerator and let cool at least 1 hour, until completely chilled and set.

Make the cookie dough: In a medium bowl, cream together butter and sugar for 2-3 minutes until light, fluffy, and pale yellow. Mix in salt, flour, cake mix, sprinkles, and vanilla. Add water one tablespoon at a time, mixing after each, until you reach cookie dough consistency. If making a full-sized cheesecake, line a 9-inch cake pan with plastic wrap and spread cookie dough in a disc in the pan. Freeze it until firm, about 15 minutes. If making mini cheesecakes, just chill the cookie dough until you’re ready to assemble your cakes.

Make the chocolate pouring sauce: Heat chocolate and cream together in a bowl set over simmering water. Let them sit for a few minutes before whisking them together to combine. Whisk in powdered sugar and then add 1 tablespoon of water at a time, mixing after each until you reach pouring consistency. Set the sauce aside and let it cool to warm.

Assemble the cheesecakes: If you’re making mini cheesecakes, use a round cookie cutter or a serrated knife to cut circles of Funfetti cake to fit on each mini cheesecake. Spread a little chocolate sauce on the top of each mini cheesecake before placing a cake round on each and gently pressing them down snugly. If you’re making a full-sized cheesecake, spread chocolate sauce over your cheesecake and just place full frozen cake layer on top and gently press down.

If making mini cheesecakes, spread cookie dough into the top of each well with the back of a spoon. If making a full-sized cheesecake, spread another thin layer of chocolate sauce on top of the cake layer to act as glue, and then take your frozen cookie dough disc and place it on top. Chill cheesecake(s) for about 30 minutes before gently unmolding them. Drizzle with melted chocolate and top with a dollop of whipped cream, sprinkles, and a maraschino cherry.

If you liked this post, please:
Subscribe to Willow Bird Baking
Follow Willow Bird Baking on Twitter
Follow Willow Bird Baking on Facebook
Give this post a thumbs up on StumbleUpon


ShareOther ways to share this post with friends!

Your Flippin’ Awesome Cheesecakes!

OH MY GOODNESS, am I one proud blogger! One month ago, I issued a Cheesecake Challenge in which I encouraged you to choose a WBB cheesecake recipe and tackle it in the kitchen. Was I ever impressed at the splendid results! Y’all are courageous, inspiring, and sweeter than fresh-picked strawberries. I kinda like ya.

Know what else I like? Even though you were all making some of the same recipes, your kitchen experiences were diverse: Some of you baked at the last minute. Some of you baked your cheesecake before the challenge even officially began. Some of you are experienced bakers. Some of you baked your first cheesecake ever for this challenge.

My students even jumped in to participate. Alexander in the 7th grade made two different cheesecakes, and Ava in 6th grade chose to make a red velvet cheesecake. Speaking of young’uns, there may have even been a toddler involved in the production of one of these cheesecakes.

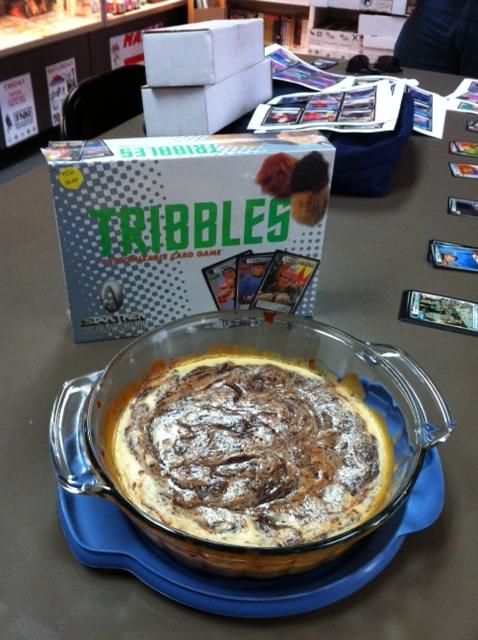
Despite your very different circumstances and skill levels, you all succeeded. There were obstacles and “creative” presentations (Nathan’s brownies didn’t set up in the circular pan, so they ate them as pudding). There were hours of work. But you made it — and accomplished something lovely for your family and friends. Congratulations on gorgeous work, and thank you for making this such a rewarding experience for me.


Priscilla the Powerful

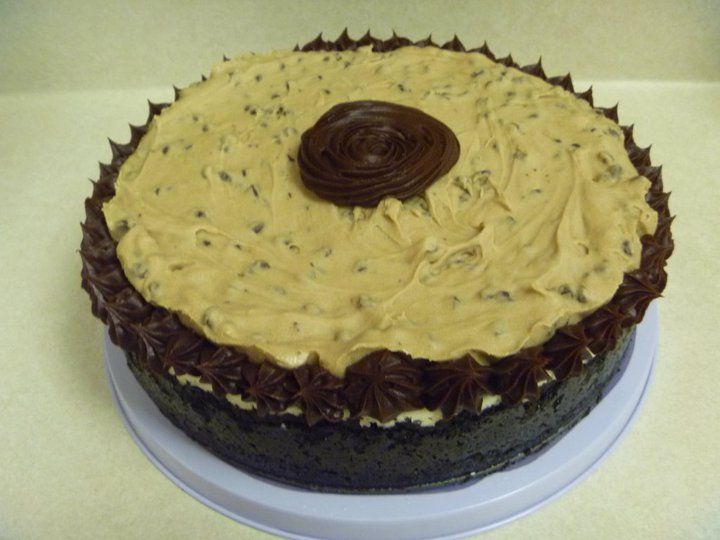
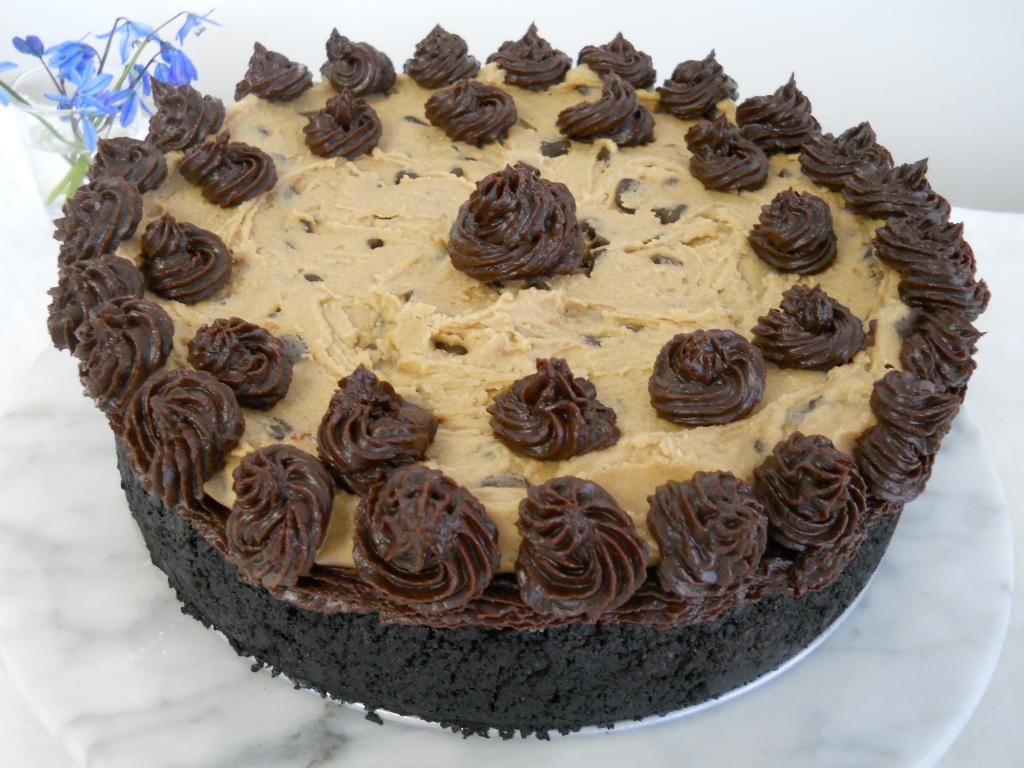
Priscilla Made: Coffee Cookie Dough Fudge Cheesecake
Comments:“This is only the second homemade cheesecake that I have ever done! It was fun and exciting to be doing something like this with so many different layers of yummy goodness!”


Mollie the Magnificent

Mollie Made: Coffee Cookie Dough Fudge Cheesecake (go see her blog post)
Comments: “Oh man. Seriously. Best thing ever. There are a lot of components, but it really doesn’t seem like too much when you’re eating it. The cheesecake itself is the best cheesecake I’ve made (I think thanks to the water-bath cooking process). And the ganache and cookie dough. I mean, yes.”


Janet the Jumpstarter

Janet Made: Coffee Cookie Dough Fudge Cheesecake (without cookie dough layer)
Comments: “This cake was the most delicious dessert I ever made! It was so yummy, and pretty too. I made it for a dinner and everyone thought I had bought the cake somewhere.”


Gio the Genius

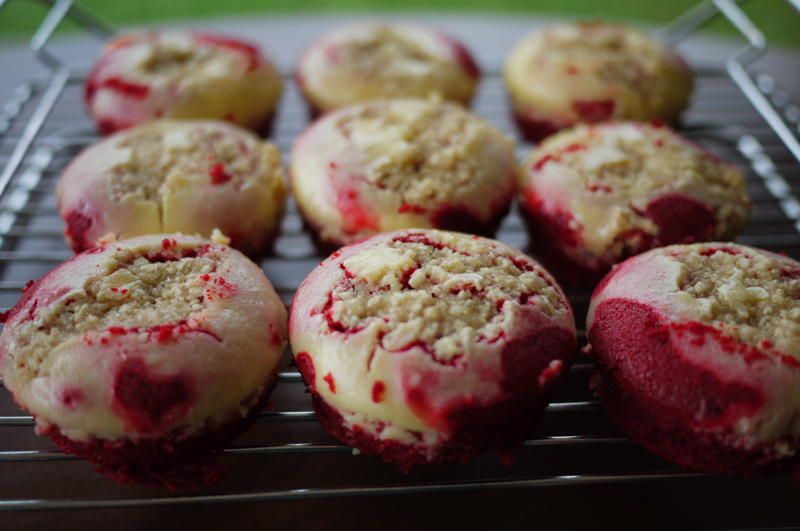
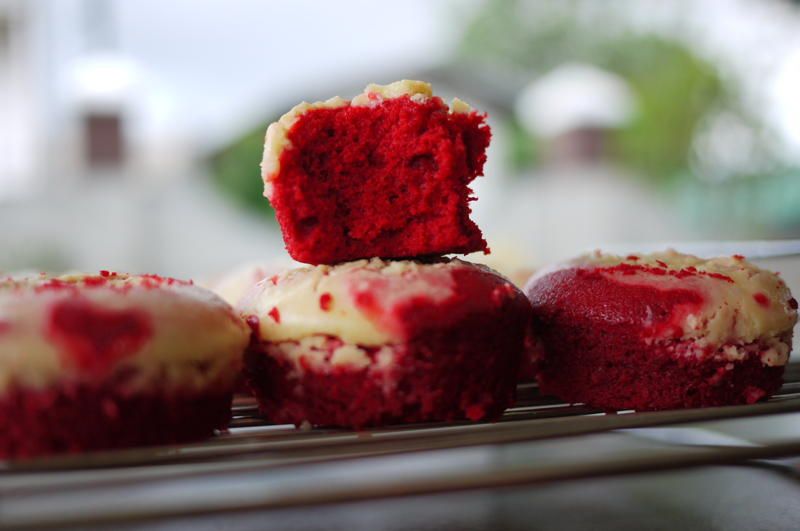
Gio Made: A cross between Chocolate Cheesecake-Stuffed Cupcakes and Red Velvet Cheesecake! (go see his blog post)
Comments: “The cake was soft, moist and the hint of chocolate was there. The slightly tart cream cheese topping really set well and complemented the cake. The streusel was just as I imagined it to be – sweet, slightly crunchy and not overpowering at all. It was, all in all, the perfect topping. I was glad I joined the Cheesecake Challenge since I think I really kicked —“ (I’ll leave that to your imagination – ha!)


Allyson the Awesome

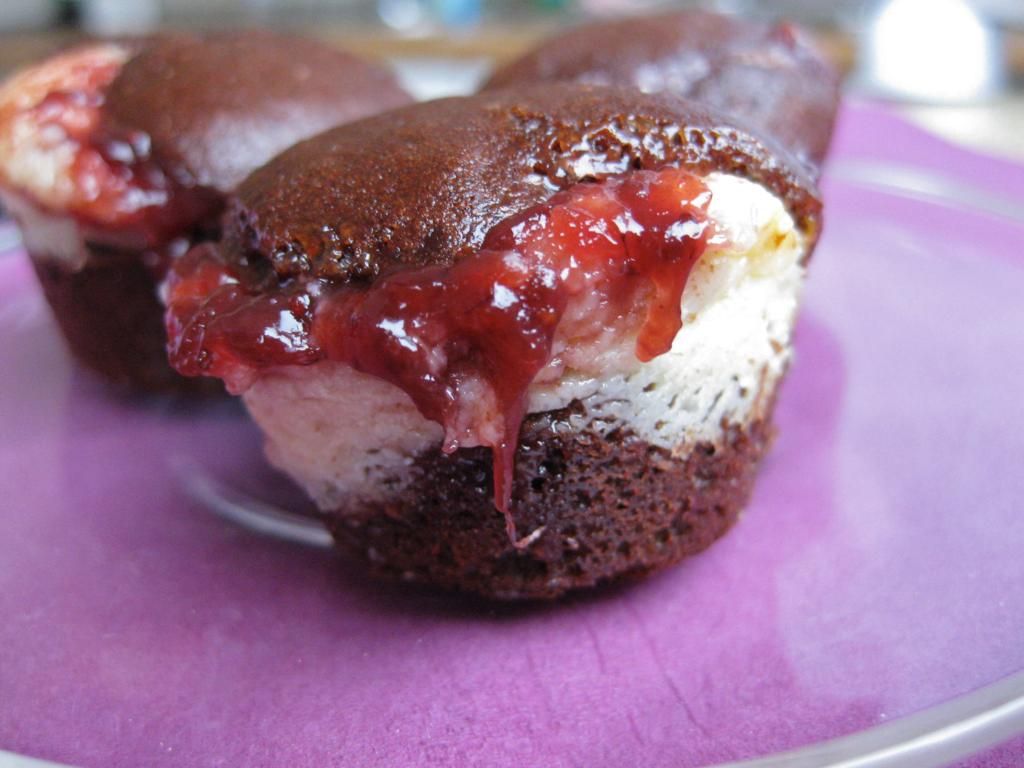
Allyson Made: Chocolate Cheesecake-Stuffed Cupcakes (go see her blog post)
Comments: Allyson added coconut oil to her batch of Chocolate Cheesecake Stuffed Cupcakes, and a layer of strawberry jam for good measure!


Lauren the Laudable

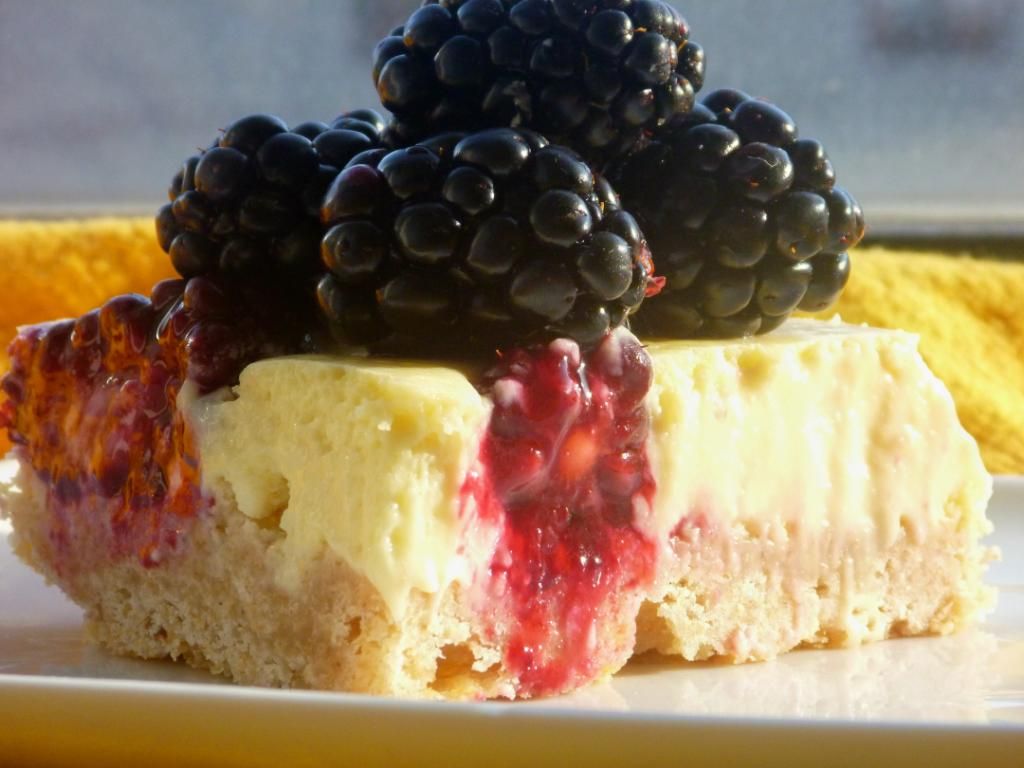
Lauren Made: Lemon Blackberry Cheesecake Squares (go see her blog post)
Comments: “I made your lemon blueberry cheesecake bars and they turned out delicious! […] My husband is a happy man:-)”


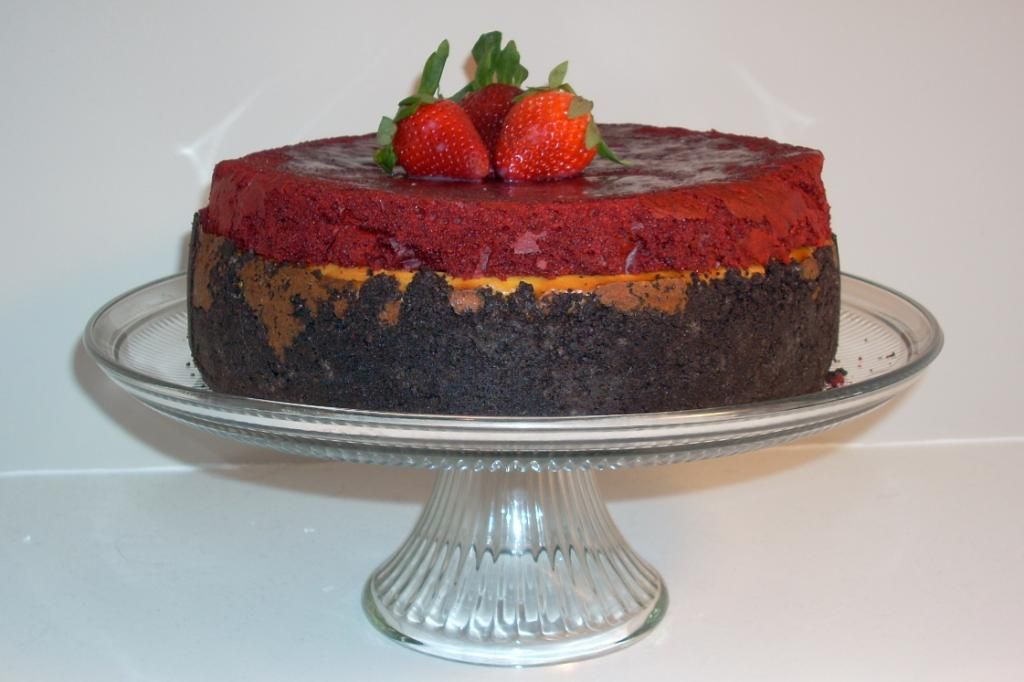
Ava the Adventurous

Ava Made: Red Velvet Cheesecake
Comments: “Dear Miss Ruble, The cheesecake was amazing! I’m really glad I tried your recipe.”


Alexander the Able

Alexander Made: Coffee Cookie Dough Fudge Cheesecake and Chocolate Peanut Butter Bliss Cheesecake
Comments: “Imagine! A 7th grade boy, with little to no help, executing a gorgeous cheesecake. No one ever informed him that this was a daunting task, and after watching your video, he was confident that he could pull it off–and wanted to!” — Alexander’s Mom


Muppy the Magical

Muppy Made: Pumpkin Cheesecake Bread Pudding (go see her blog post)
Comments: “It was amazing, I cannot believe how good it tasted, I thought the spices and the pumpkin went so well with the cream cheese. The brioche perfectly matched the cheesecake custard. I thought it tasted its best straight out of the fridge the day after making it.” Muppy made her own homemade brioche for this recipe!


Dee the Delightful

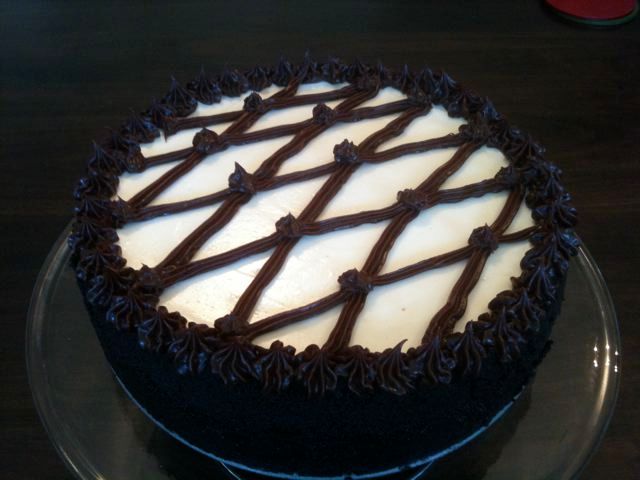
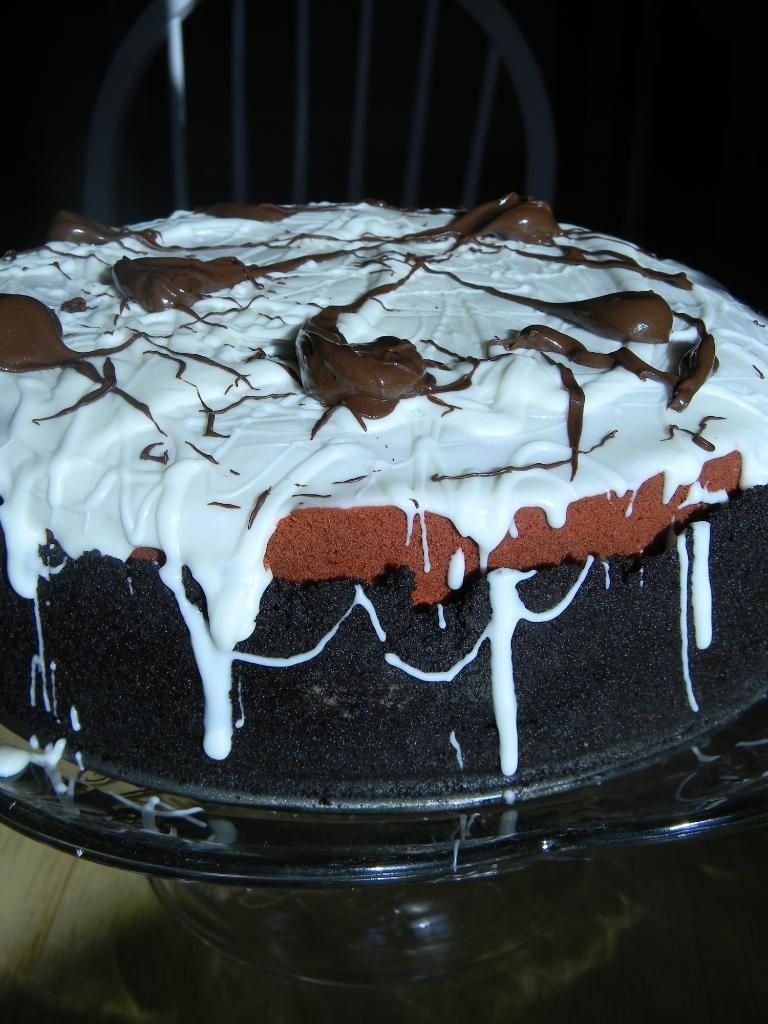
Dee Made: Red Velvet Cheesecake (go see her website)
Comments: “It was so much fun being part of your cheesecake challenge. The red velvet tasted divine and my husband and all our friends just loved it. The fresh smell out of the oven was so incredible. Our puppy, Monty, kept whiffing the air; it was hilarious. I used plain graham cracker crust instead of oreo just so that the chocolate ganache layer could be seen underneath. […] Thank you from the heart for a wonderful time and opportunity.” Dee chose to have a “Cheesecake Sunday” party and made several more cheesecakes to serve alongside this one!


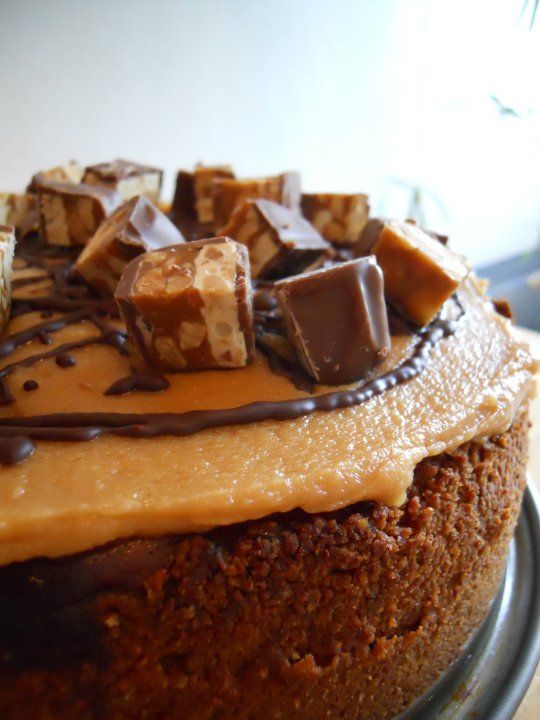
Cassie the Conqueror

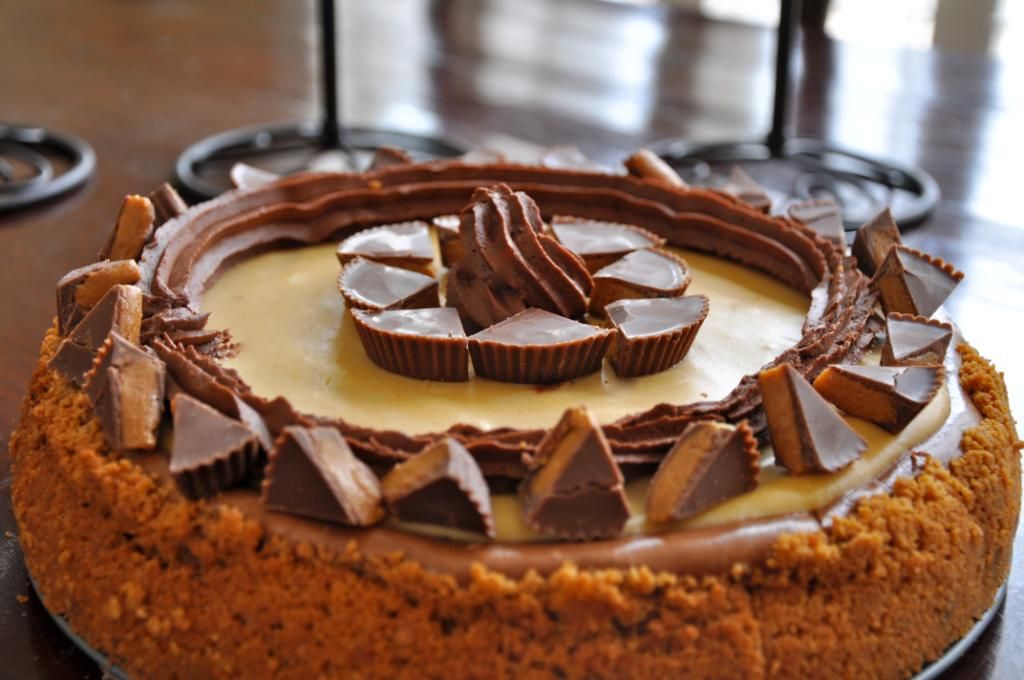
Cassie Made: Chocolate Peanut Butter Bliss Cheesecake (go see her blog)
Comments: “First off, let me just say what a delicious recipe this was. I’m a cheesecake freak, and I’m always in search of great cheesecake recipes with rich thickness. This was exactly it. It took me a couple of days to prepare because of my hectic schedule, but i’m glad I did it. My friends and family are too!”


Jade the Joyful

Jade Made: Chocolate Peanut Butter Bliss Cheesecake (go see her blog post)
Comments: “In my daughter’s words: ‘Mmm, tasty!'” Jade made this dessert vegetarian and provides a list of tasks her toddler was able to perform!


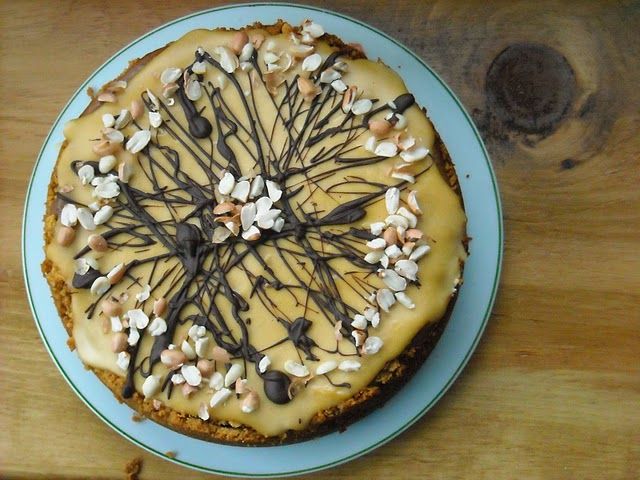
Nathan the Nimble

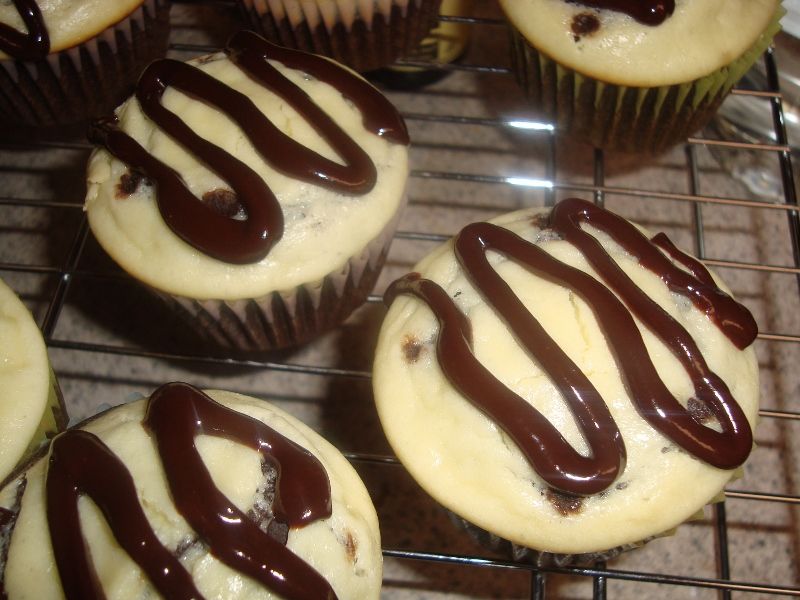
Nathan Made: Marbled Chocolate Cheesecake Brownies
Comments: “We celebrated a friend’s birthday yesterday, and he really liked them. Since they did not set up properly, and given my online nickname (GooeyChewie – actually a double reference to Star Wars and Star Trek), we called them ‘gooey chewie brownies.’ Later we played a few rounds of that Tribbles game in the background, and I think part of the reason I won was because two of my opponents had eaten gobs of the brownies and could probably have fallen to a sugar-induced coma at any moment.”


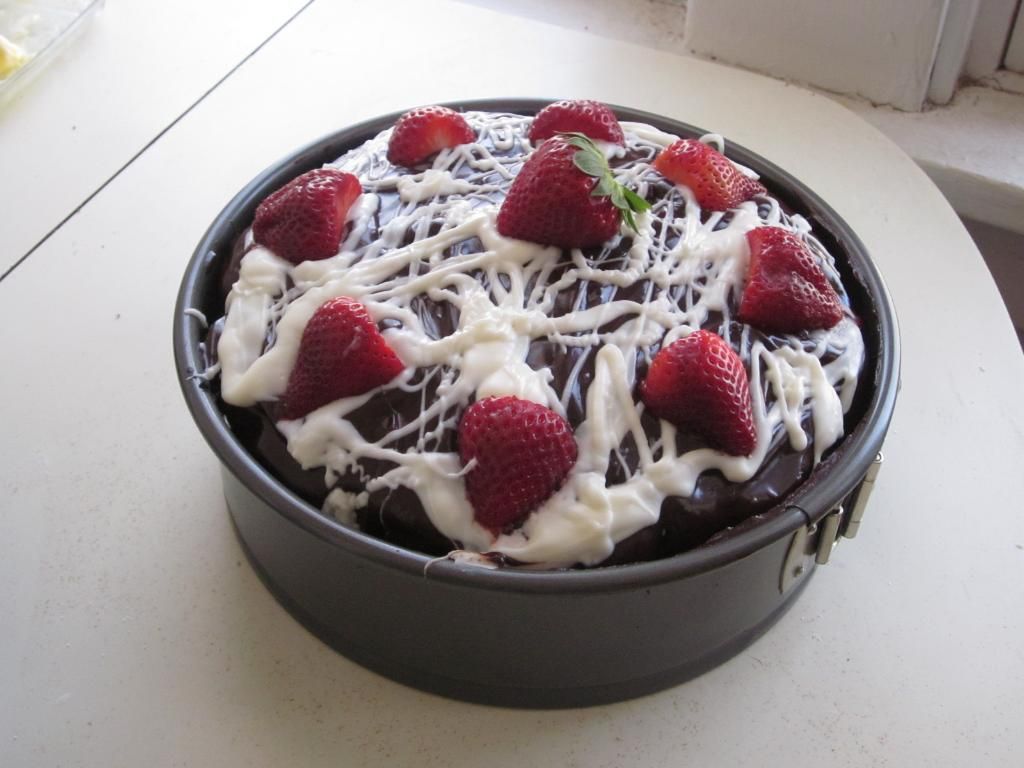
Pam the Perfect

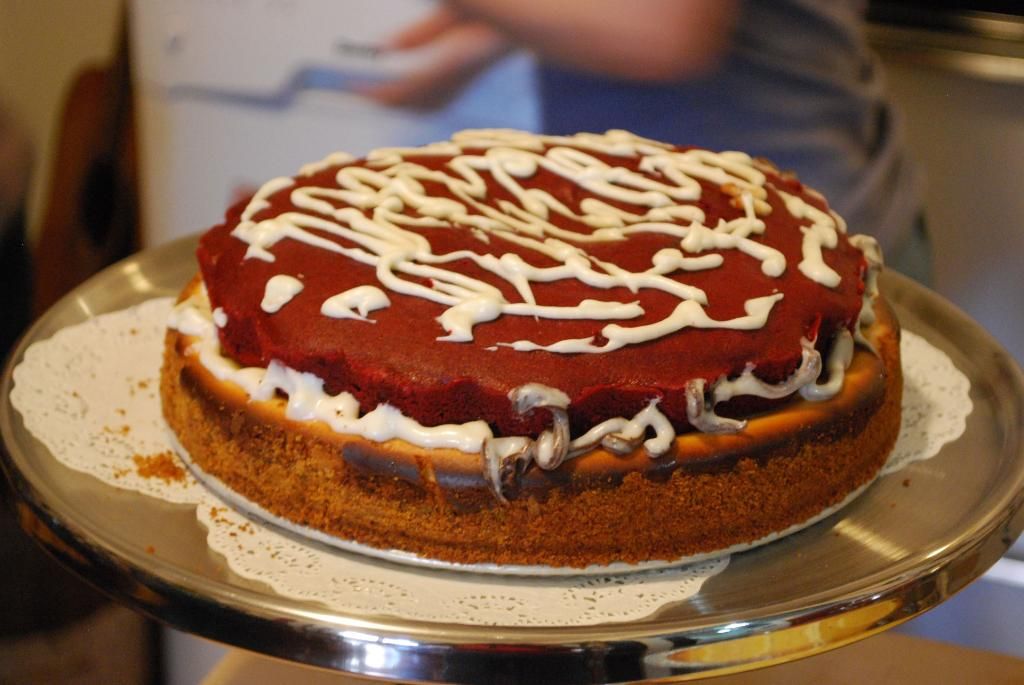
Pam Made: Red Velvet Cheesecake
Comments: Pam overcame lots of obstacles to make her cheesecake — I love her story: “I decided to make this for my dad’s birthday this year, because it looked delicious and challenging. It wasn’t until I put all the ingredients out in front of me and realized: Crap. I’ve never made a cake from scratch. I’ve never made a cheesecake. I’ve never made ganache. I ended up grabbing the wrong measuring cup for the flour for the cake, and had to use my amateur baking instincts to add the right amount of buttermilk to make it work. Oh, and I didn’t have nearly enough red food dye to make it red, so I guess it was more of a mauve velvet cake! I also realized I misread the ingredient list when I picked up cream cheese, because I was short an entire 8 oz. Once again, I fixed some things with the cheesecake, and it came out a little dark, but still wonderful. The ganache was easy, and I had a hard time not eating spoonfuls of it as I was decorating. My final hurdle was the frosting, which came out terribly, so I ended up throwing it out and covering the cake in ganache and white chocolate. I did not hear anyone complaining about that little detail 😉

I got a call from my Dad and his girlfriend after they had taken it home to tell me it was one of the best cakes they’d had in their life! They said it was rich and sweet, and could only handle a little bit at a time, but found themselves coming back for more even when they didn’t think they could handle it.

I’m sure you hear these stories all the time, but this challenge has inspired me to take more risks in the kitchen, which is something I’ve never done. I’ve never made cheesecake before because I was always overwhelmed by the idea of it, and now I can’t wait to start experimenting with all kinds of cheesecake. Thank you so much for your blog and your creations, I look forward to taking on more of your challenges, testing more of your recipes, and being inspired to make my own. I already have a plan for a cake like this one…but cookies and cream.”


Becca the Bold

Becca Made: Red Velvet Cheesecake (go see her blog post)
Comments: “Even though I was slightly overwhelmed and maybe a little frustrated with the process (since I had NO IDEA), I am really glad I did this! I actually got a little surge of triumph thinking about it reminiscent to my days in AP classes when I aced a test. Thanks Julie for the challenge! I may actually try to challenge myself a little more in the kitchen. (Just a little)”


Maranda the Masterful

Maranda Made: Coffee Cookie Dough Fudge Cheesecake (go see her blog post)
Comments: “I chose to make her most famous cheesecake of all. Coffee Cookie Dough Cheesecake. Doesn’t that sound utterly delicious?? Well I’m here to tell you…it is! […] Now, I’m not a cheesecake person. The only other cheesecake I’ve ever loved and continued to fantasize about is this goat cheese cheesecake with pineapple vanilla compote. Believe me when I tell you that this cheesecake is well worth the effort and time to make!” Maranda also weighed this cheesecake and found it weighed a whopping 7 pounds!


Katie the Courageous

Katie Made: Chocolate Cheesecake-Stuffed Cupcakes
Comments: “I […] wanted to tell you how much you’ve inspired me in the kitchen. I really enjoy baking, but until reading your blog I was pretty nervous about making things ‘from scratch’ out of fear of ruining someone’s birthday/wedding shower/happy occasion (…or my midnight craving for chocolate), especially without my Mom on hand to help me fix my mistakes. Your writing and encouragement makes me think ‘YES! I CAN make cupcakes myself that are from scratch, taste delicious, and don’t look like they were made by a three year old with poor motor skills!’ Ok I’m still working on the ‘not-embarrassing-looking’ part, but…there’s progress :)” I don’t think they’re embarrassing looking at all, Katie!


Andrea the Amazing

Andrea Made: Coffee Cookie Dough Fudge Cheesecake (go see her blog post)
Comments:“It was an awesome challenge to make this cake today, as I have never made a cheesecake using the water bath to keep the cake from cracking. Never had to create a ganache to for a cake and decorate with it before. (Just used ganache for truffles.) And never have made an egg-less cookie dough crust before! YUM! So, if you have an event that calls for a high end cake or you just want to indulge, like me, I encourage you to try it!”


Erin the Energetic

Erin Made: Coffee Cookie Dough Fudge Cheesecake (go see her blog)
Comments: “It’s amazing! A VERY big hit! Thanks so much for the recipe!”


If you liked this post, please:
Subscribe to Willow Bird Baking
Follow Willow Bird Baking on Twitter
Follow Willow Bird Baking on Facebook
Give this post a thumbs up on StumbleUpon

ShareOther ways to share this post with friends!

Cream of Ketchup and Mustard Soup

I almost experienced the most embarrassing moment of my culinary life last weekend. I’d gotten together with my dear friend Sonya, a connoisseur of crazy scarves and — lucky for me — cheeseburgers, to plan a cookout extravaganza. The weather has been so nice in Charlotte lately, and we wanted to celebrate.

We piled hamburgers, hot dogs, and cheddarwursts on the grill as our friends started to arrive. That’s when we realized the problem.

One of the gals we invited is a passionate vegetarian, a fact that had somehow completely slipped my mind. As soon as I saw her walking into the backyard with a pitcher of iced tea to share, I remembered her dietary restrictions like being hit with a freight train.

You’re probably thinking this was not a big deal. She can just eat side dishes, right? She can have dessert, right? WRONG. We didn’t have a single vegetarian option. The potato salad had sausage in it. The macaroni and cheese was made with chicken broth. The cupcakes were flippin’ maple bacon cupcakes! DRAT.

I panicked. At first I piled some lettuce, tomatoes, and onions on a plate to make a salad of sorts. That seemed insulting, though, and I knew I had to whip her up a more impressive vegetarian entrée. I scurried into the kitchen as Sonya sipped some lemonade and chatted to keep everyone occupied.

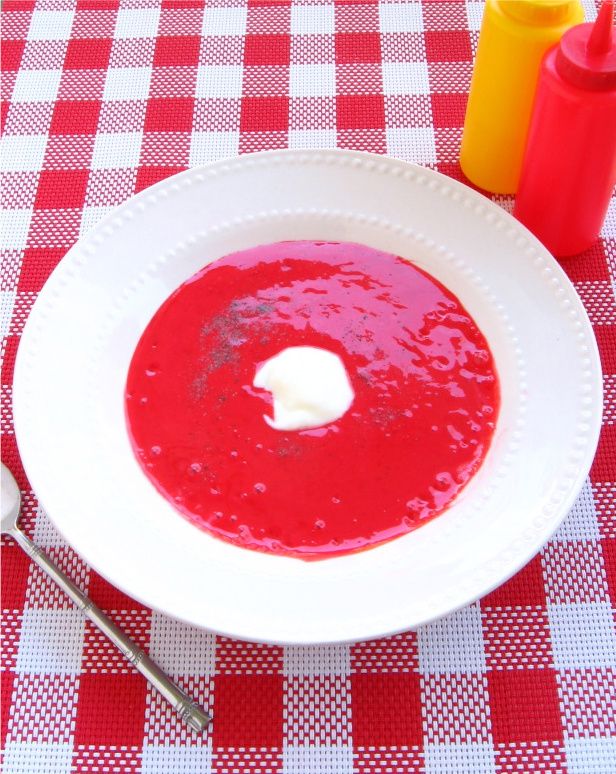
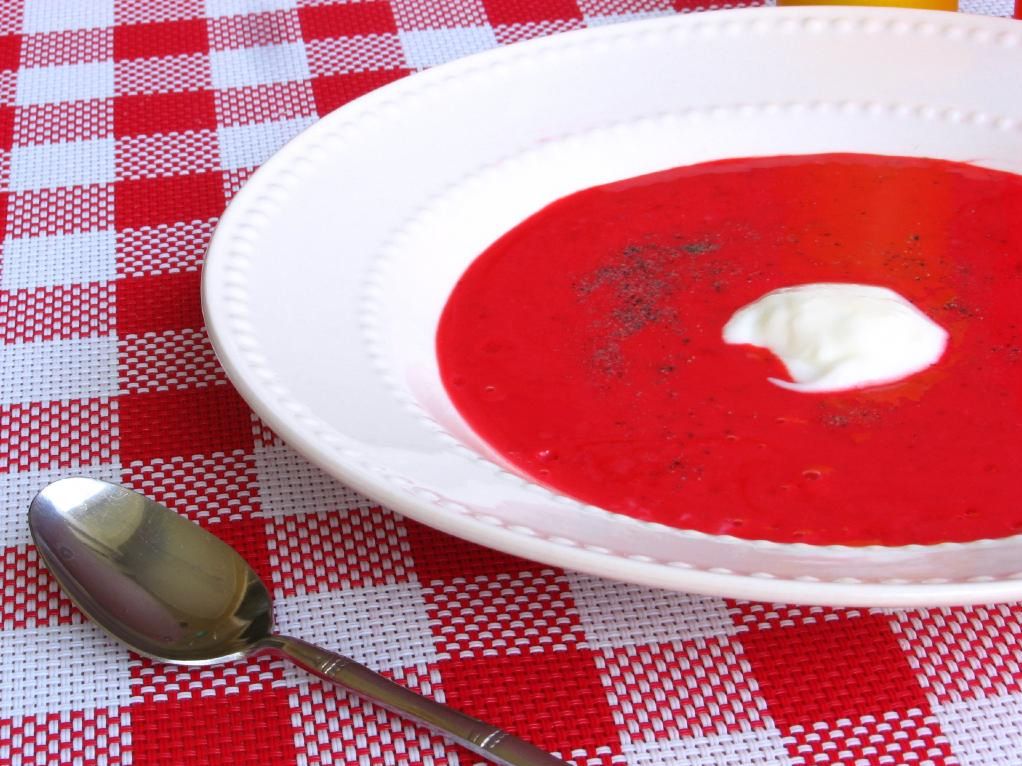
That’s when this masterpiece occurred to me. It’s the perfect vegetarian option at a cookout, because it tastes like a burger-free burger. It’s Cream of Ketchup and Mustard Soup! The ketchup is bright but undercut by the tang of the sultry mustard. Just a smidge of pepper for bite, and this soup was a carnival of creamy condiment deliciousness.

Our vegetarian friend raved with every sip, and asked for the recipe before she left. What a sweet success! I hope you’ll try it for yourself and enjoy.

Cream of Ketchup and Mustard Soup*


Recipe by: Willow Bird Baking
Yields: 2 servings

Ingredients:
1 cup ketchup
1 cup yellow mustard
1/2 cup heavy cream
salt and pepper to taste
sour cream for serving (optional)

Directions:

Mix ingredients together over medium-high heat. Simmer for 10 minutes before separating soup into two soup bowls, topping with sour cream, and serving.

*April Fool’s! I did not hold a cookout, the weather has been cold and rainy in Charlotte, I do not own a grill, I did not make this soup, I definitely did not ingest this soup, and I don’t even know anyone named Sonya (unfortunately — what a fun name).

This soup is probably gross, so for Heaven’s sake, please don’t serve it to your vegetarian friends as a meat alternative at a cookout. Unless you don’t want to have any more vegetarian friends, that is.


If you liked this post, please:
Subscribe to Willow Bird Baking
Follow Willow Bird Baking on Twitter
Follow Willow Bird Baking on Facebook
Give this post a thumbs up on StumbleUpon


ShareOther ways to share this post with friends!

April Fool’s Day Cupfakes

Ah, April Fool’s Day! The perfect occasion to show someone you love them by playing nasty tricks on them and guffawing as they stand, bewildered, trying to figure out what just happened.

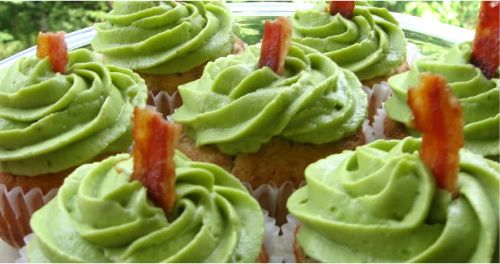
Orrrr you could play a sweet (well, savory) trick instead! Cupfakes are adorable, savory treats masquerading as their sweet cousins. At one time or other, I’ve had people mistake each one of the dinnertime cupfakes below for dessert! In reality, though, Deep Dish Pizza Cupfakes are fun Chicagoan deep dish pizzas topped with fluffy ricotta and a cherry tomato. Meatloaf Cupfakes are moist meatloaf with mashed potato “frosting” and colored salt sprinkles. Finally, my favorite: Cheddar, Chive, and Bacon Cupfakes with Avocado Frosting are slightly sweet, cornbready dinner muffins full of goodies.

One warning: when people are expecting to bite into a sweet cupcake and it turns out to be a cupfake, their brains do a little backflip of revulsion no matter how good your treats taste. It’s probably best to reveal your trick right before they take a bite!

Deep Dish Pizza Cupfakes

Meatloaf Cupfakes

Cheddar, Chive, and Bacon Cupfakes with Avocado Frosting

P.S. Only 1 week left in my Cheesecake Challenge! Choose any one of 9 cheesecake recipes to prepare within the next month. Email a photo to me by 4/5/2011 to be featured on Willow Bird Baking! Get more details about the challenge here.

If you liked this post, please:
Subscribe to Willow Bird Baking
Follow Willow Bird Baking on Twitter
Follow Willow Bird Baking on Facebook
Give this post a thumbs up on StumbleUpon

ShareOther ways to share this post with friends!

Deep Fried Cake Batter Cookie Dough

Cake Batter Cookie Dough is like a birthday party. A sweet, colorful, happy birthday party with balloons and trick candles.

Cake Batter Cookie Dough Truffles are like a birthday party that, in addition to those things, has a bouncy house and pony rides from a pony named Whinny.

That’s nice and all.

But Deep Fried Cake Batter Cookie Dough is like a birthday party with all of those things — held on a flippin’ yacht in the French Riviera, with David Beckham serving you lemonade while Posh Spice feeds Whinny sugar cubes.

Oh, and with Prince performing “Raspberry Beret” in one of his funky outfits.

And with Nigella Lawson in the galley whipping up cupcakes.

And with one of those little bendy straws in the lemonade.

What I’m trying to say is that Deep Fried Cake Batter Cookie Dough is one of the best things I’ve ever had the pleasure of devouring. I mean, it was so good — an absolutely magical bite. I think it tasted a little like Heaven would taste.

And now that I’ve accidentally equated Heaven to a nautical birthday party with assorted celebrities (and Whinny!), I’m going to stop with that train of thought.

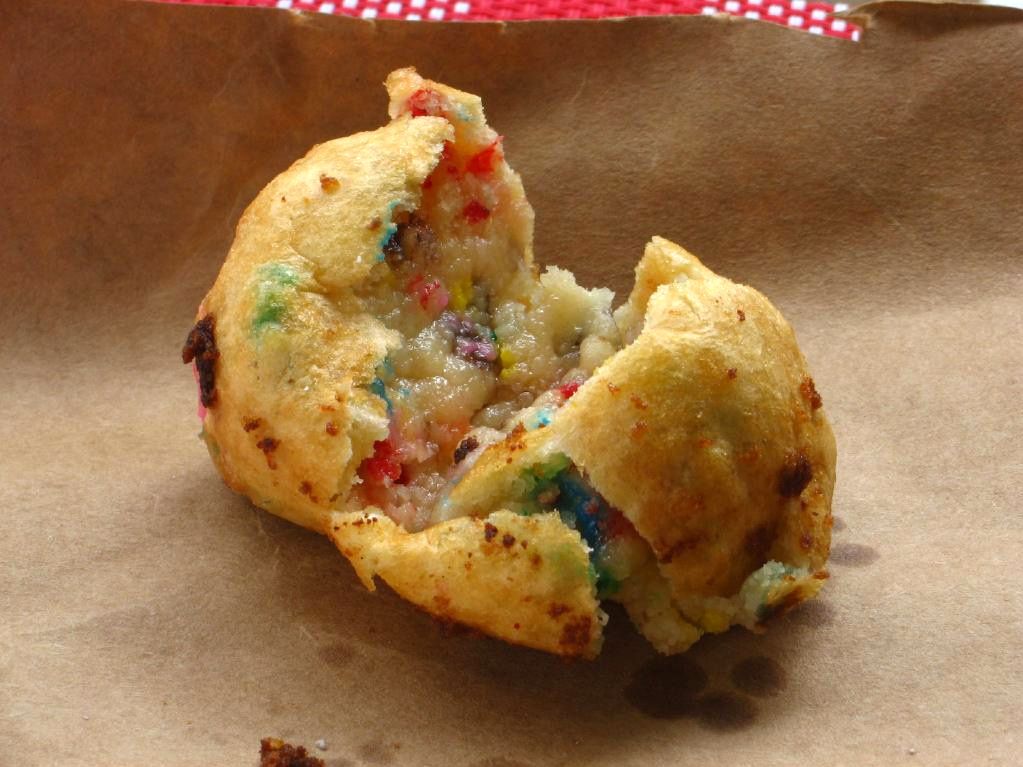
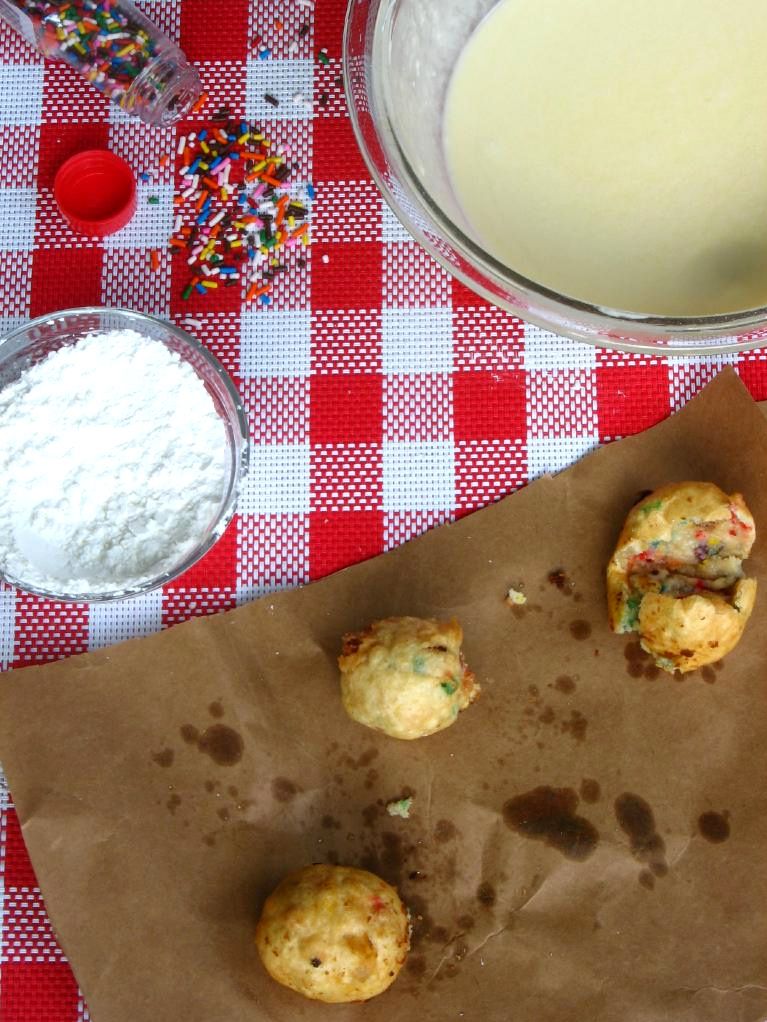
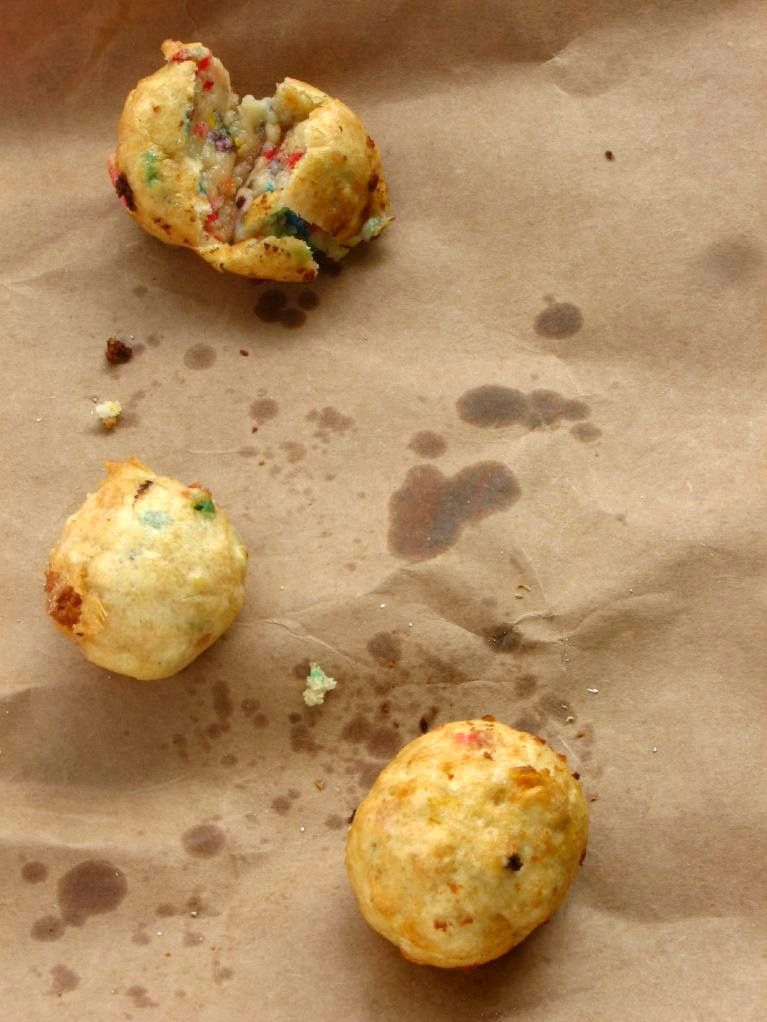
Back to deep fried dough. The buttery, cake batter-flavored dough encased in a thin, crispy shell was surprisingly light and pop-able. Despite being indulgent, it didn’t feel heavy or overwhelming.

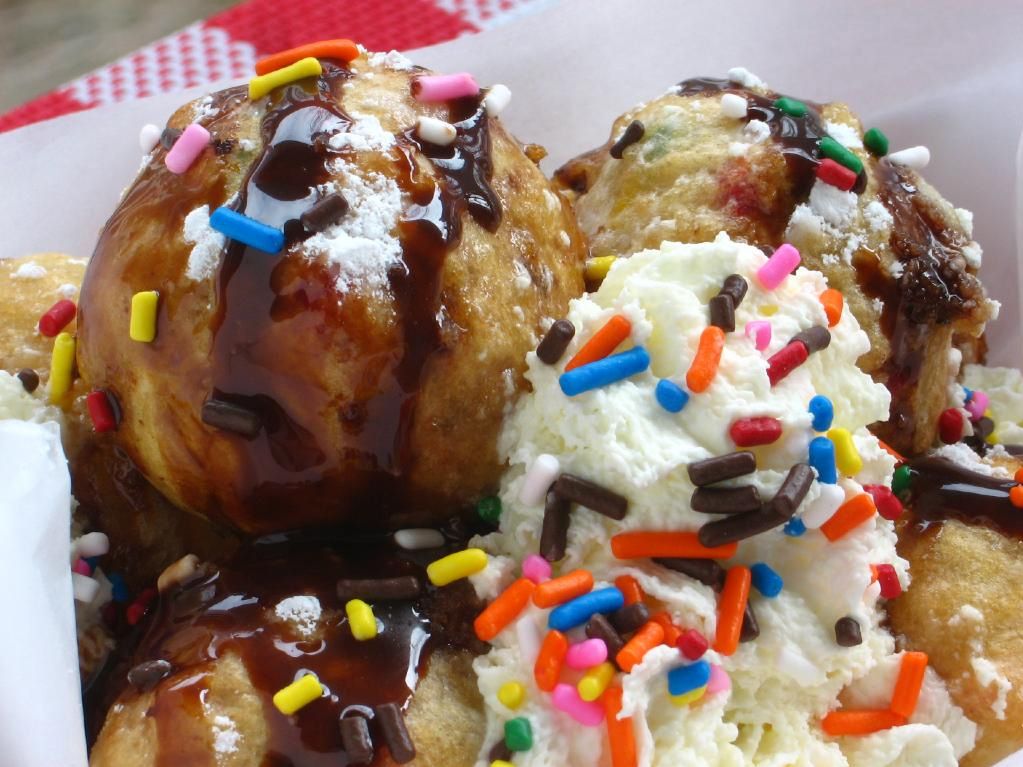
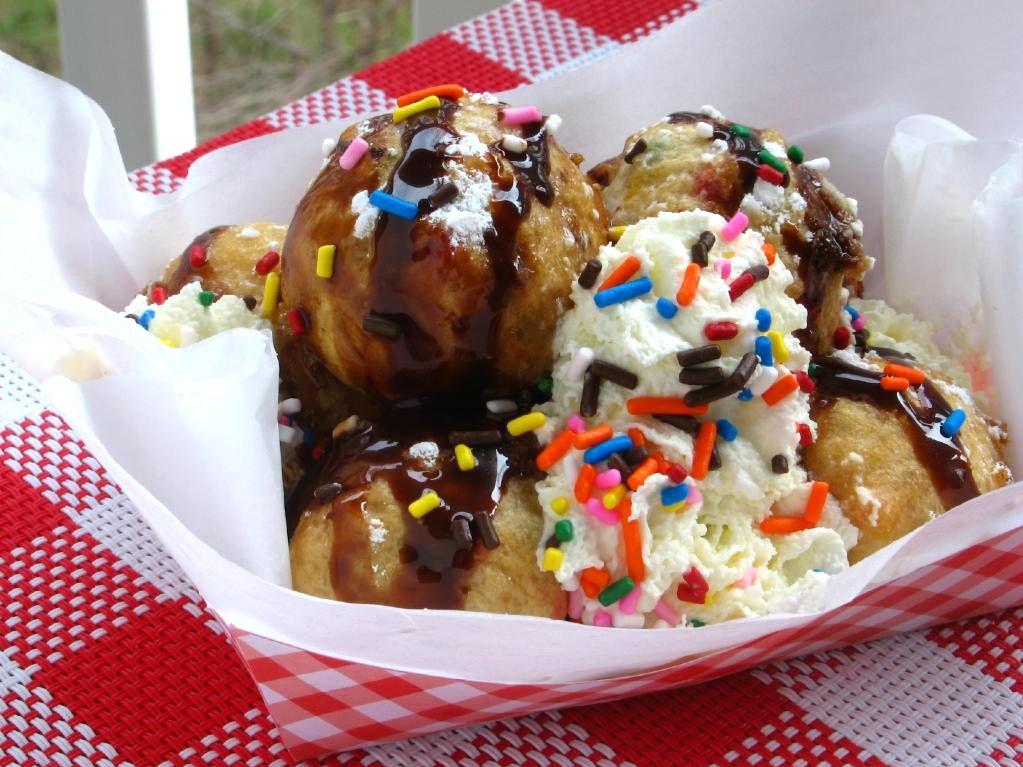
Of course, I stuck several of them in a paper tray with chocolate sauce, whipped cream, and sprinkles to really round out the experience.

I know some of you are going to say, “Well, I’m not really a fan of frying things.” Me neither! Frying things is scary business. Hot oil splatters can result in burnt fingers and forearms, and the whole process kind of smells weird. And maybe you’re health conscious and frying is a dirty word in your house.

Listen, these fried dough balls are beyond worth it! I suited up in goggles, put my hair up, plugged in my GranPappy, got down to business — and came out unscathed. And maybe, in terms of health, we shouldn’t eat deep fried dough balls every day; but then again, we shouldn’t have tricked out birthday parties every day either. It would spoil the fun of the occasional indulgence.

I want to leave you with a parting plea. Turn on your inner state-fair-attending, carnival-loving, birthday-party-throwing child and deep fry some cookie dough.

Time to get a little crazy: What’s your ideal birthday party?

Deep Fried Cake Batter Cookie Dough


Recipe by: Willow Bird Baking (cake batter cookie dough) and Taylor Takes a Taste (deep frying)
Yields: about 12 fried dough balls, depending on size

Dough Ingredients:
1 1/2 cups all-purpose flour
2/3 cup yellow cake mix
1/4 teaspoon salt
1/2 cup unsalted butter, room temperature
1/2 cup granulated white sugar
1 teaspoon pure vanilla extract
2 tablespoons sprinkles
4-8 tablespoons water

Batter Ingredients:
1 egg
1 cup ice cold water
1 cup self-rising flour
2 tbsp confectioners’ sugar

Other Ingredients:
small bowl of cornstarch for rolling dough balls in
oil or shortening for frying
confectioners’ sugar for sprinkling (optional)
chocolate sauce (optional)
whipped cream (optional)
sprinkles (optional)

Directions:
To make dough, in a medium bowl, cream together butter and sugar for 2-3 minutes until light, fluffy, and pale yellow. Mix in salt, flour, cake mix, sprinkles, and vanilla. Add water one tablespoon at a time, mixing after each, until you reach cookie dough consistency. Roll your dough into balls and chill until your batter and oil are ready.

Heat your oil to 375 degrees. To make batter, mix together egg and water. Add flour and sugar and mix. Roll each dough ball in cornstarch, shaking off the excess, and then dip into the batter, making sure the ball is entirely coated. Use a slotted spoon to place 3 or 4 balls at a time into the hot oil. Fry for 1-3 minutes or until golden brown. Drain on paper towels and serve with confectioners’ sugar, chocolate sauce, whipped cream, and sprinkles.

P.S. Love that cute little checkered paper tray? Download the template here, print it on cardstock, cut around the outside borders, fold the tabs over and glue them.

P.S. 2 Only 1 week left in my Cheesecake Challenge! Choose any one of 9 cheesecake recipes to prepare within the next month. Email a photo to me by 4/5/2011 to be featured on Willow Bird Baking! Get more details about the challenge here.

If you liked this post, please:
Subscribe to Willow Bird Baking
Follow Willow Bird Baking on Twitter
Follow Willow Bird Baking on Facebook
Give this post a thumbs up on StumbleUpon

ShareOther ways to share this post with friends!

1 93 94 95 96 97 127