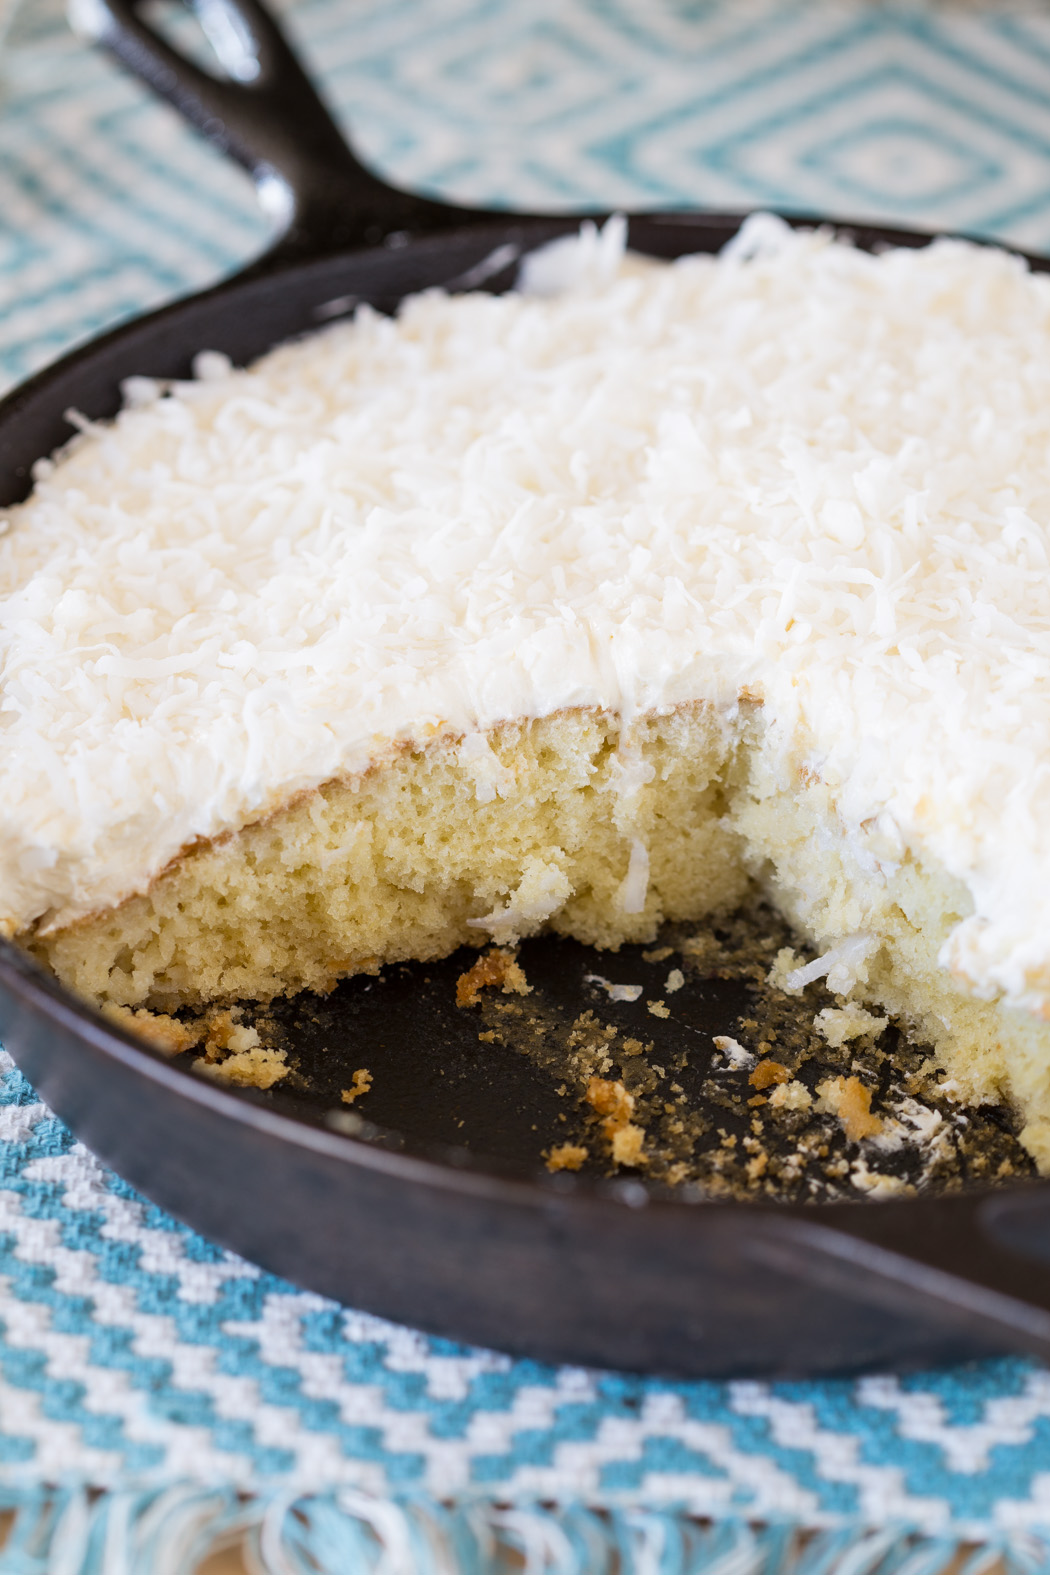
Brownie-Bottom Coconut Chocolate Cream Cake

I was floored to see that Willow Bird Baking is a finalist for SAVEUR Magazine’s Best Baking & Desserts Blog. Thank you so much for making this happen. If you’d like to vote for Willow Bird Baking (there are only 3 days left), you can do so here. You all are truly wonderful.
I watched the side of the VHS tape disappear into the gaping maw of the VCR, waiting for the whirring confirmation that it was well-received before skipping back to the kitchen. I knew there was plenty of time during the previews to complete my next task, so my haste was more due to my excitement than any real need to hurry.

It was time to prepare a culinary masterpiece. I began opening cupboards and surveying their contents with gusto.
This was my absolute favorite time of day. Or, really, night. Everyone in the house was asleep except the lone insomniac (that would be me, and I didn’t mind a bit). I had probably spent “bedtime” reading delicious horror stories or maybe one of my favorite Lucy Maud Montgomery books. Now, wide awake, I was ready for midnight movies and munchies.
My 10-year-old version of mise en place began collecting on the counter: a jar of salsa, some cheddar cheese, and, for lack of tortilla chips, some sliced bread. I deftly stirred the salsa and cheese together like a chef, microwaving it for a few seconds at a time until I had a passable bowl of queso. After pouring a huge glass of Coke (full sugar! the memory makes me want to brush my teeth!), I set up a chair as my personal table, sat down on the floor, and tuned in to the movie.

(I should mention, since my mother is reading, that I was not sitting in the living room. I’d have been an absolute fool to step foot on that pristine beige carpet with a morsel of food. It was my mom’s anniversary gift from my dad and she kept that rug spotless for over a decade until they put in hard floors throughout the house. So, just so we’re clear, I was watching the living room television from the kitchen doorway.)
I picked the movies I watched based on how many food scenes they included. The Little Princess was a great choice because of the Indian feast scene in the attic. The Secret Garden had some nice garden picnic scenes. My favorite midnight movie, though, was Bedknobs & Broomsticks, which included a scene with a cat eating gorgeous sausages. He smacked and gnawed on each plump link with such satisfaction — I loved to eat along with that one!

No matter how much I’d eaten, whenever a food scene came on, I had to make sure I had something to munch on. I sometimes paused the movie to make another bowl of faux queso or to scavenge through the pantry for a sweet dessert.
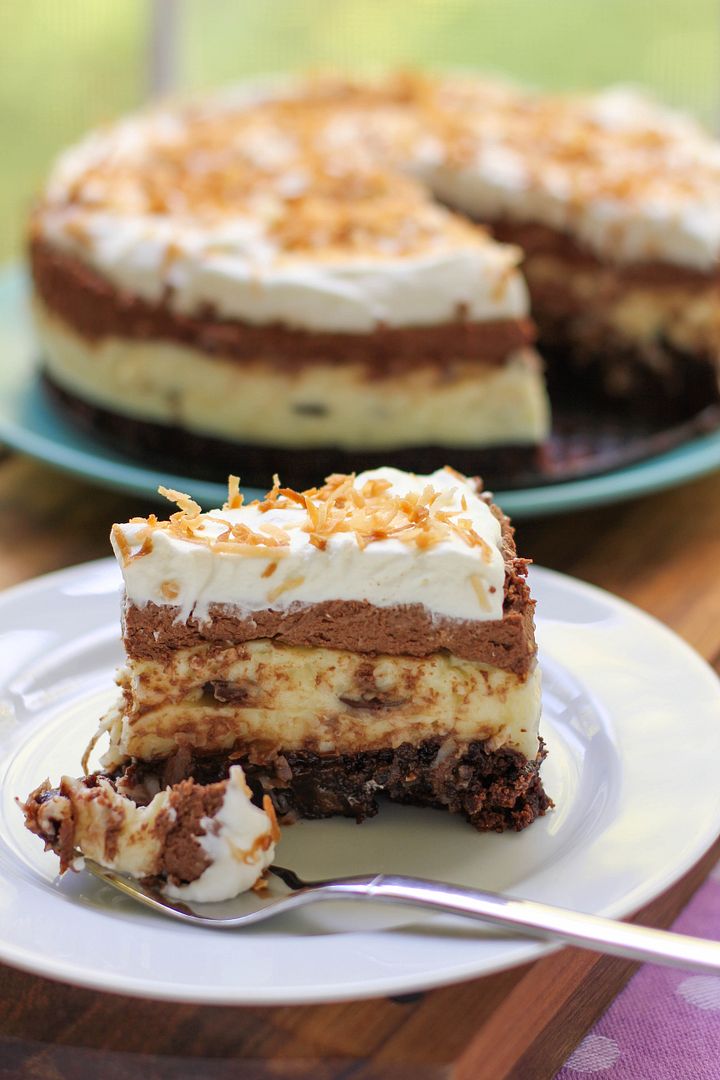
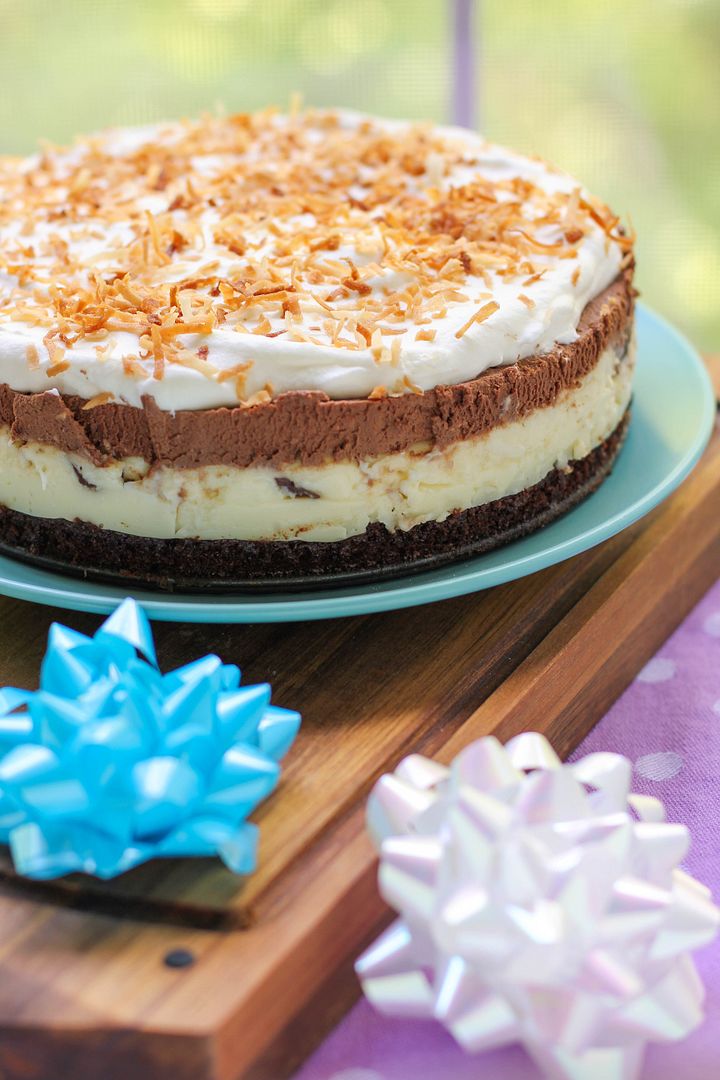
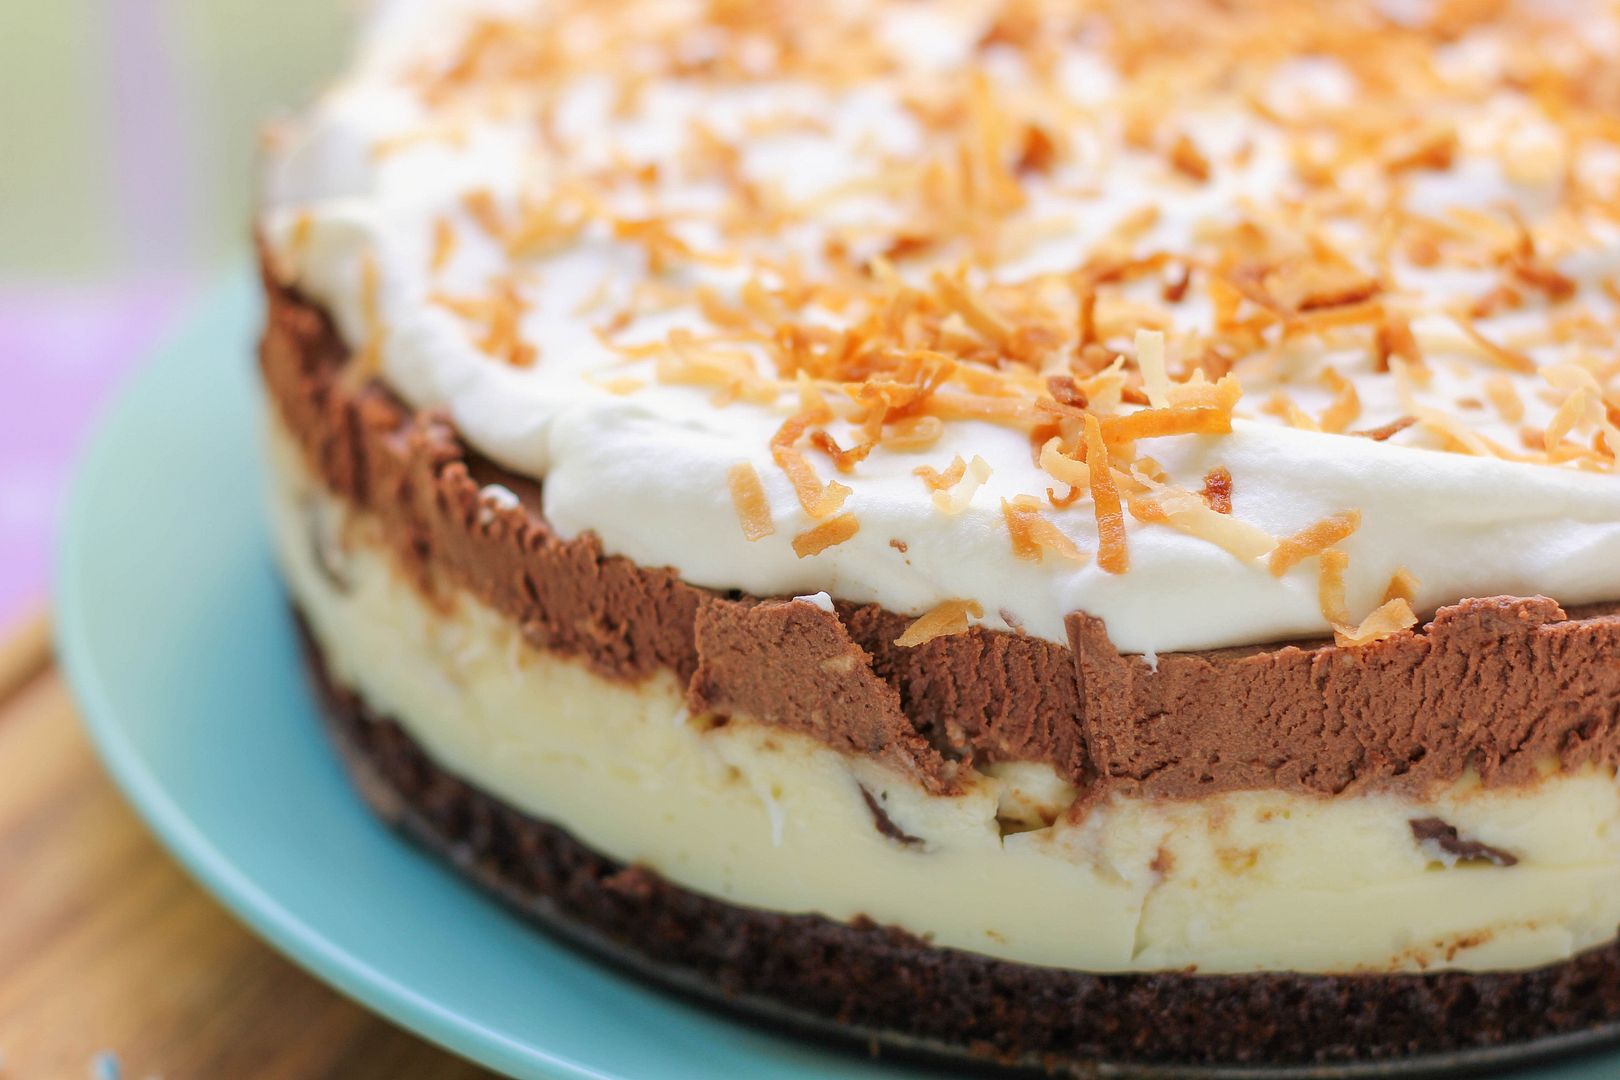
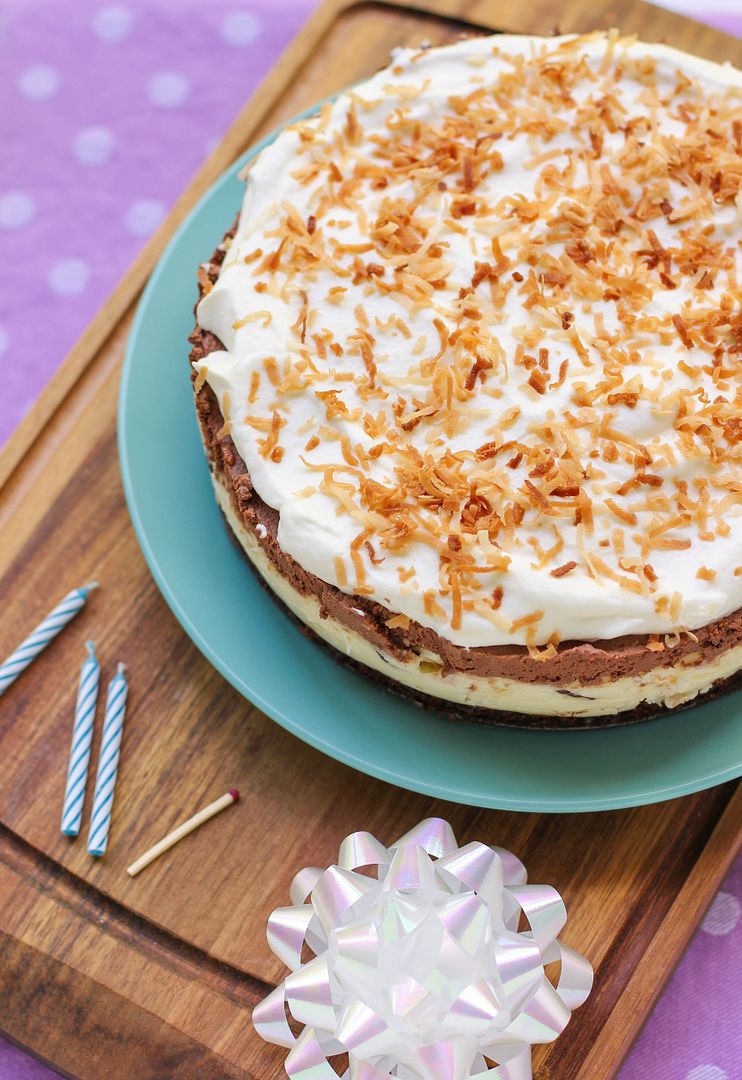
I’ve grown up in a lot of ways, but I still love to eat a meal while watching food scenes from a movie or cooking show. I’m also still an incurable night owl, though I have to be more conscientious with my midnight snacks nowadays. And of course, I still love to concoct absurd things in the kitchen. This Brownie-Bottom Coconut Chocolate Cream Cake was my crazy creation for Mike’s birthday party last weekend.
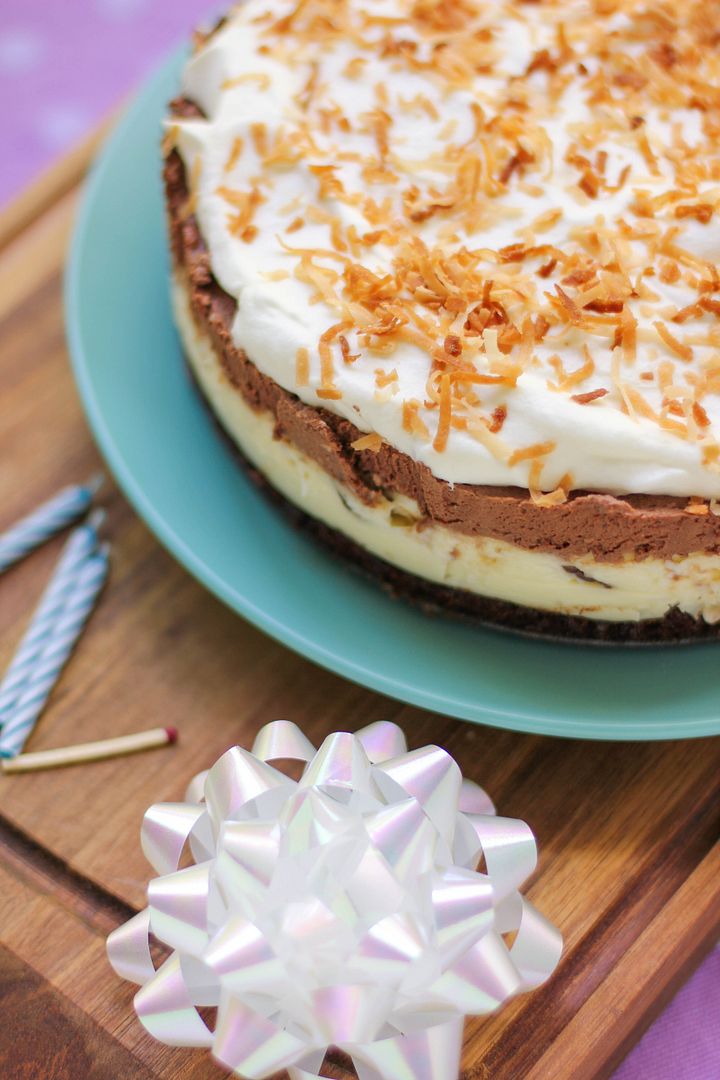
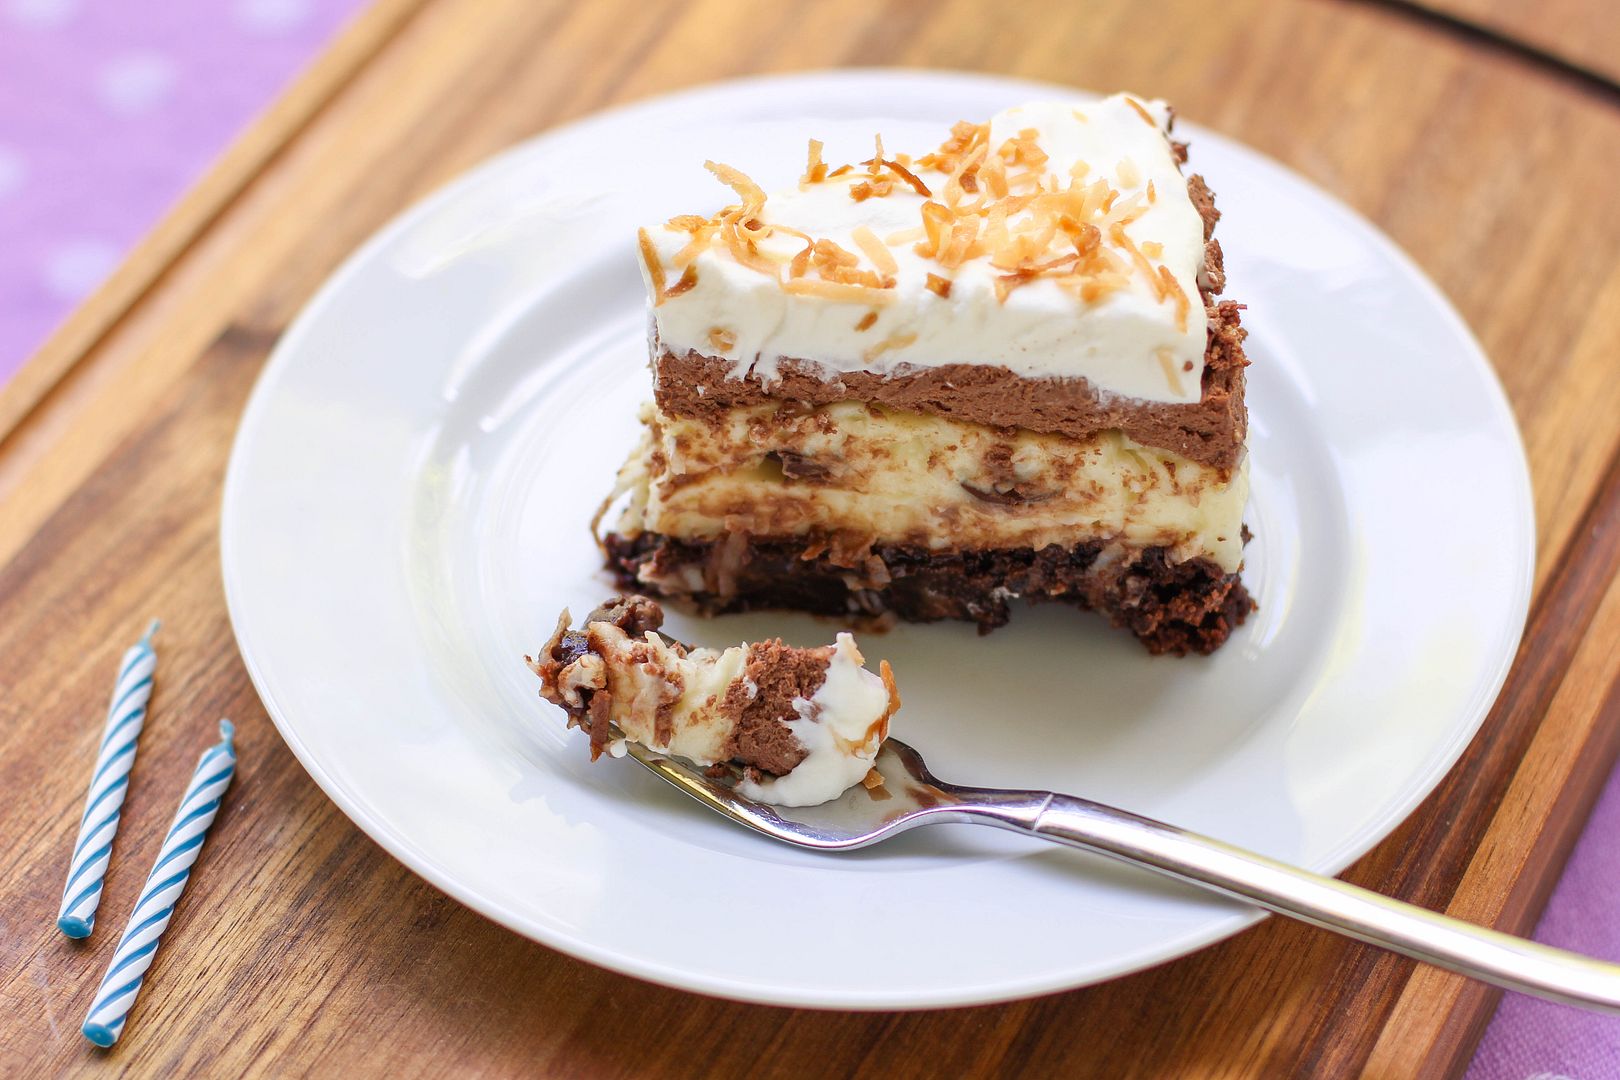
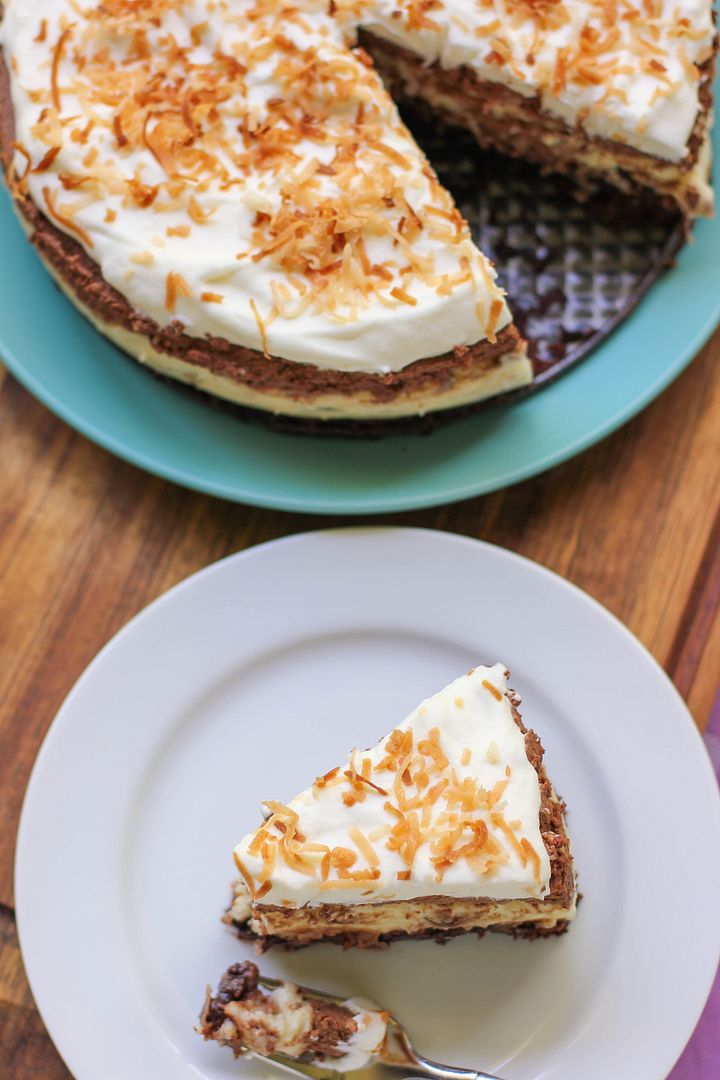
This cake would make Dr. Frankenstein proud. It’s a layer of good stuff on top of a layer of better stuff on top of a layer of insane stuff on top of brownies. Basically. Or, to be more specific: there’s some heavenly chocolate mousse and some decadent coconut cream involved. The best part is that even though it looks intense, my 10-year-old self could’ve whipped this thing up with ease. You can even use a brownie mix for the base if you’re short on time.

But actually, the real best part is the taste. As if the ingredient list didn’t clue you in, this thing is delicious.
How about you? Are you the early bird or the night owl?

5 from 1 reviews
Brownie-Bottom Coconut Chocolate Cream Cake
 
Prep time
Cook time
Total time
 
This “cake” actually doesn’t include a single bit of cake. It does include brownies, coconut cream, chocolate mousse, whipped cream, chocolate bits, and toasted coconut. It’s one of the many desserts on Willow Bird Baking born out of the “more is more!” mentality. This cake sounds complicated, but is remarkably easy! If you can bake a pan of brownies and push some buttons on your microwave, you can make this baby. It’s even easy to divide up the work, since many of the steps can be done on separate days. You can make the brownie and coconut layer one day, make the chocolate mousse layer on day two, and top and serve the cake on day three. Enjoy!
Author:
Serves: 10-12
Ingredients
Brownie Layer Ingredients:
  • 1 recipe of your favorite brownies (baked in a 9-inch springform pan)
Coconut Cream Filling Ingredients:
  • 1 1/2 cup half-and-half
  • 1 1/2 cup coconut milk
  • 2 eggs
  • 3/4 cup white sugar
  • 1/4 cup plus 4 teaspoons cornstarch
  • 1/4 teaspoon salt
  • 3/4 cup flaked coconut
  • 1/4 teaspoon coconut extract
  • 1/4 teaspoon vanilla extract
  • 2 tablespoons bittersweet chocolate chips (I use Ghirardelli 60% cacao)
Chocolate Mousse Layer Ingredients:
  • 2 ounces semisweet chocolate chips
  • 2 ounces bittersweet chocolate chips (I use Ghirardelli 60% cacao)
  • 1/3 teaspoon vanilla extract
  • 1 cup chilled whipping cream
  • 2 tablespoons powdered sugar
  • 1/2 teaspoon gelatin
  • 1 1/2 teaspoon cold water
Whipped Cream Topping Ingredients:
  • 3/4 cup chilled heavy whipping cream
  • 2 tablespoons powdered sugar
  • 3/8 teaspoon gelatin
  • 1 1/8 teaspoon cold water
  • toasted coconut
Instructions
  1. Make coconut cream filling: Combine the half-and-half, coconut milk, eggs, sugar, cornstarch, and salt in a medium microwave-safe bowl. Microwave it for 4-6 minutes, whisking well after each minute, until it’s thickened (I tried this microwave trick for the first time in this recipe, and it does work well if you’re short on time, though I think you might end up with a slightly better creamy texture if you whisk the mixture constantly in a saucepan over medium-low heat; not sure how long it’ll take on the stove with this volume, but just whisk until thickened.) Once the mixture is thickened, add coconut and vanilla extracts and the untoasted coconut and stir. Pour half of this filling over your brownie layer, sprinkle on the 2 tablespoons of bittersweet chips, and then pour the rest of the filling. Stick the whole thing in the fridge to chill until firm, about 2 to 4 hours.
  2. Make the chocolate mousse: Place the bittersweet and semisweet chips in a medium bowl. Bring 1/3 cup cream to boil in heavy small saucepan or in a microwave-safe dish in the microwave. Pour it over the chocolate and let it sit for 2 minutes before gently whisking it to a smooth ganache. Cool to room temperature, stirring occasionally.
  3. Place cold water in a small dish and sprinkle gelatin over it to soften for 10 minutes. Heat it for 30 seconds in the microwave and whisk it with a fork to dissolve the gelatin. In a chilled mixing bowl, beat 2/3 cups cold whipping cream and powdered sugar in to stiff peaks, adding gelatin mixture and vanilla extract halfway through. Fold the cream into the chocolate mixture and pour the mousse onto set coconut filling. Chill until set, about 6 hours or overnight.
  4. Make whipped cream topping: Place cold water in a small dish and sprinkle gelatin over it to soften for 10 minutes. Heat it for 30 seconds in the microwave and whisk it with a fork to dissolve the gelatin. In a chilled mixing bowl, whip the cream and powdered sugar to stiff peaks, adding gelatin mixture halfway through. Top the cake with the whipped cream and sprinkle with toasted coconut.

 

Pure Insanity: Pumpkin Oatmeal Cake Ice Cream Sundae

Just in case you’re not sure if you want to make the Pumpkin Oat Snack Cake with Broiled Coconut Icing, I thought I’d make up your mind for you.

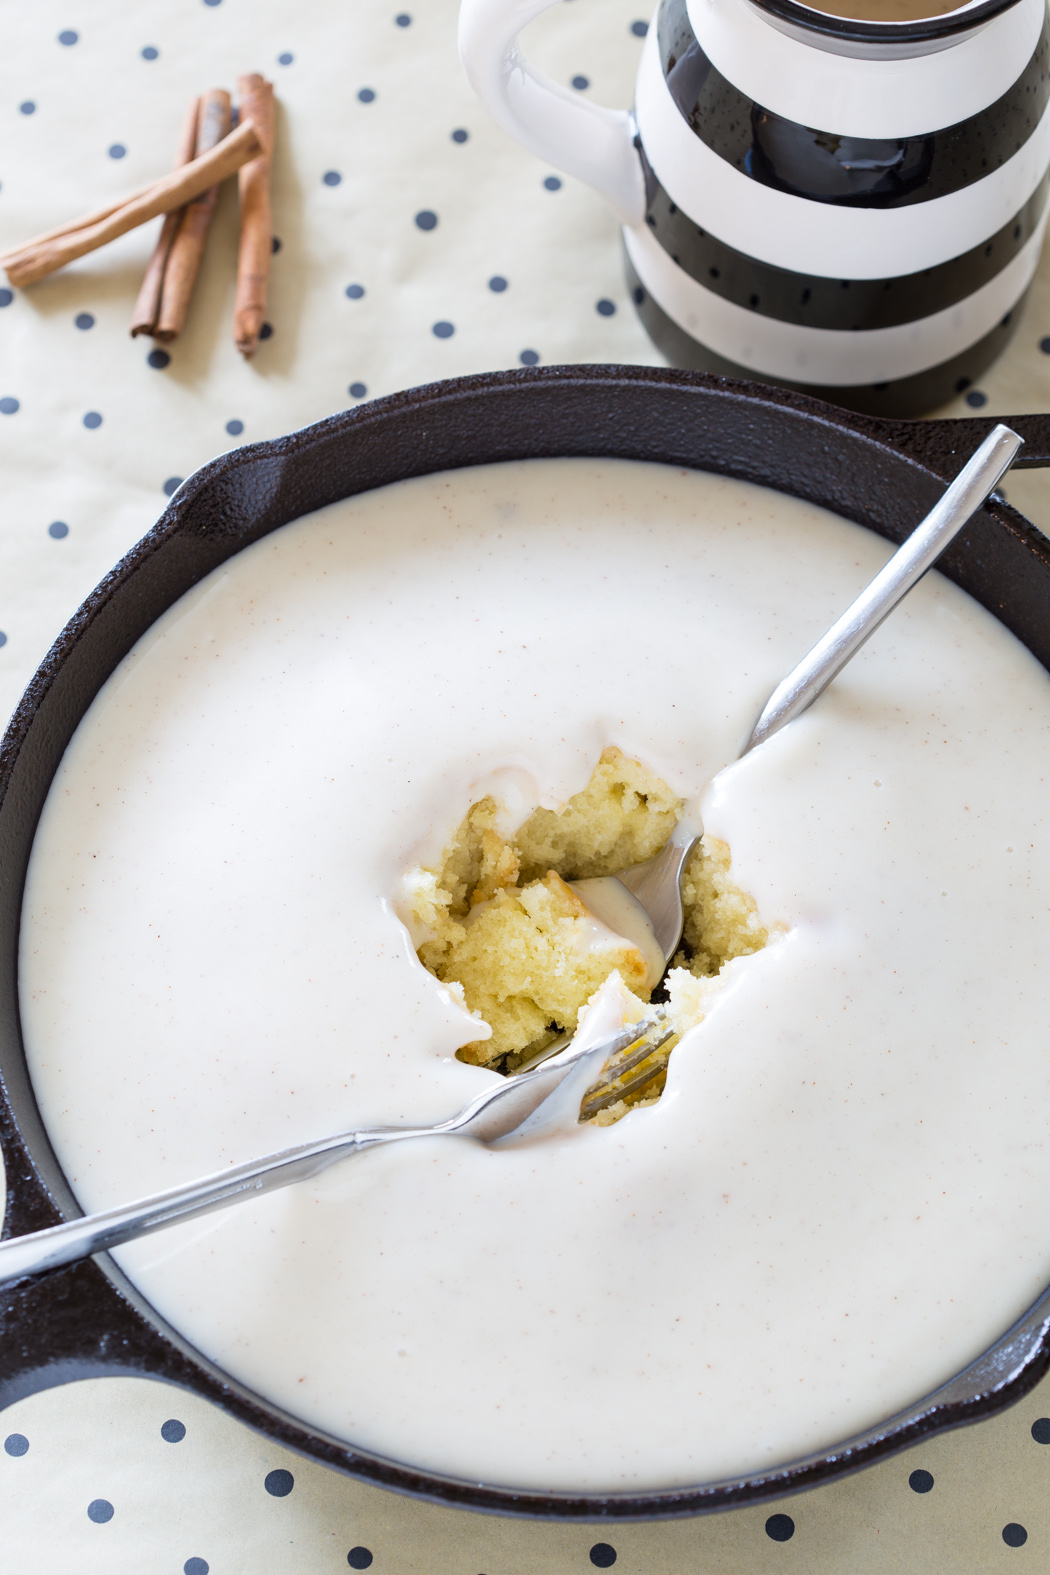
Maybe I should be embarrassed to show you, but I’m not. This is how I served my cake:

That’s hot Pumpkin Oat Cake couched in heaps of vanilla bean ice cream with hot caramel sauce drizzled all around. It was probably one of the best things I’ve ever eaten.

I think you should go for it.

If you liked this post, please:
Subscribe to Willow Bird Baking
Follow Willow Bird Baking on Twitter
Follow Willow Bird Baking on Facebook
Give this post a thumbs up on StumbleUpon
Pin It


Shareother ways to share this post with friends

Pumpkin Oat Snack Cake with Broiled Coconut Icing

I was floored to see that Willow Bird Baking is a finalist for SAVEUR Magazine’s Best Baking & Desserts Blog. Thank you so much for making this happen. If you’d like to vote for Willow Bird Baking, you can do so here. You all are truly wonderful.

I could feel his eyes on me from the table to my right. He obviously wanted to strike up a conversation. Being an introvert by nature, I nursed a healthy flurry of paperwork all around me and kept my eyes on my computer screen. My work was a comforting wall between me and his social overtures.

However, I quickly realized as he walked over that he was unfazed by walls. He sat down on the couch next to me in the bustling coffee shop. I slurped my soda noisily as a last-ditch effort to appear busy. He set down his carton of milk and walked over to stand next to my seat. He peered at my computer screen.

“Um, hi,” I said, obviously unable to avoid a conversation any longer.

“Hi. What’s your name?” He replied.

“Julie. What’s yours?”

“Brian.”

“How old are you, Brian?”

He danced a little and held up 4 pudgy fingers. “Almost 4. My birfday’s in a coupla weeks.” I smiled. His cute delivery and guileless demeanor warmed me up to the idea of a conversation. I was starting to feel glad that he’d walked over after all.

I pointed to my computer screen. “See this cake? It’s a pumpkin cake. Do you like pumpkin?” (He does not.) “Are you going to have a pretty cake like this at your birthday?” (He is.) “What else are you going to do for your birthday?”

My own birthday, incidentally, is coming up in just a week, but trust me: compared to the monologue Brian launched into about his upcoming birthday party, my birthday will be tame. Just to give you an idea, he mentioned something about a castle and a road trip with his Me-Me and Paw-Paw for his birthday. I asked Mike for a car wash (with wax, please) for mine.

But really, Brian wasn’t just enthusiastic about a party. Indeed, he went on to tell me about his mom, his dad and Paw-Paw who were both “at deir jobs,” and his own job, by which I finally figured out he meant preschool. He noticed my marker and excitedly related that he loved markers, too! He drained his milk as we talked, and inched over repeatedly to eye this pumpkin cake with great interest. He was enthusiastic about life.

Looking around with my Brian lens on, I realized how wonderful it was to have spent the morning eating a bowl of fresh greens with a big scoop of tuna salad on top. How privileged I was to be sipping a soda and working on my new laptop (I named it Esmerelda — Zelda for short — and I’m ecstatic about it.) How blessed I am that my parents are taking me out for brisket next week (when they ask if I want fatty or lean, I’m saying fatty.) How amazing it is that I am dating the man of my dreams after having been separated from him for way too long. How delicious buttered toast is!

I’m with Brian, man. Life is pretty great!

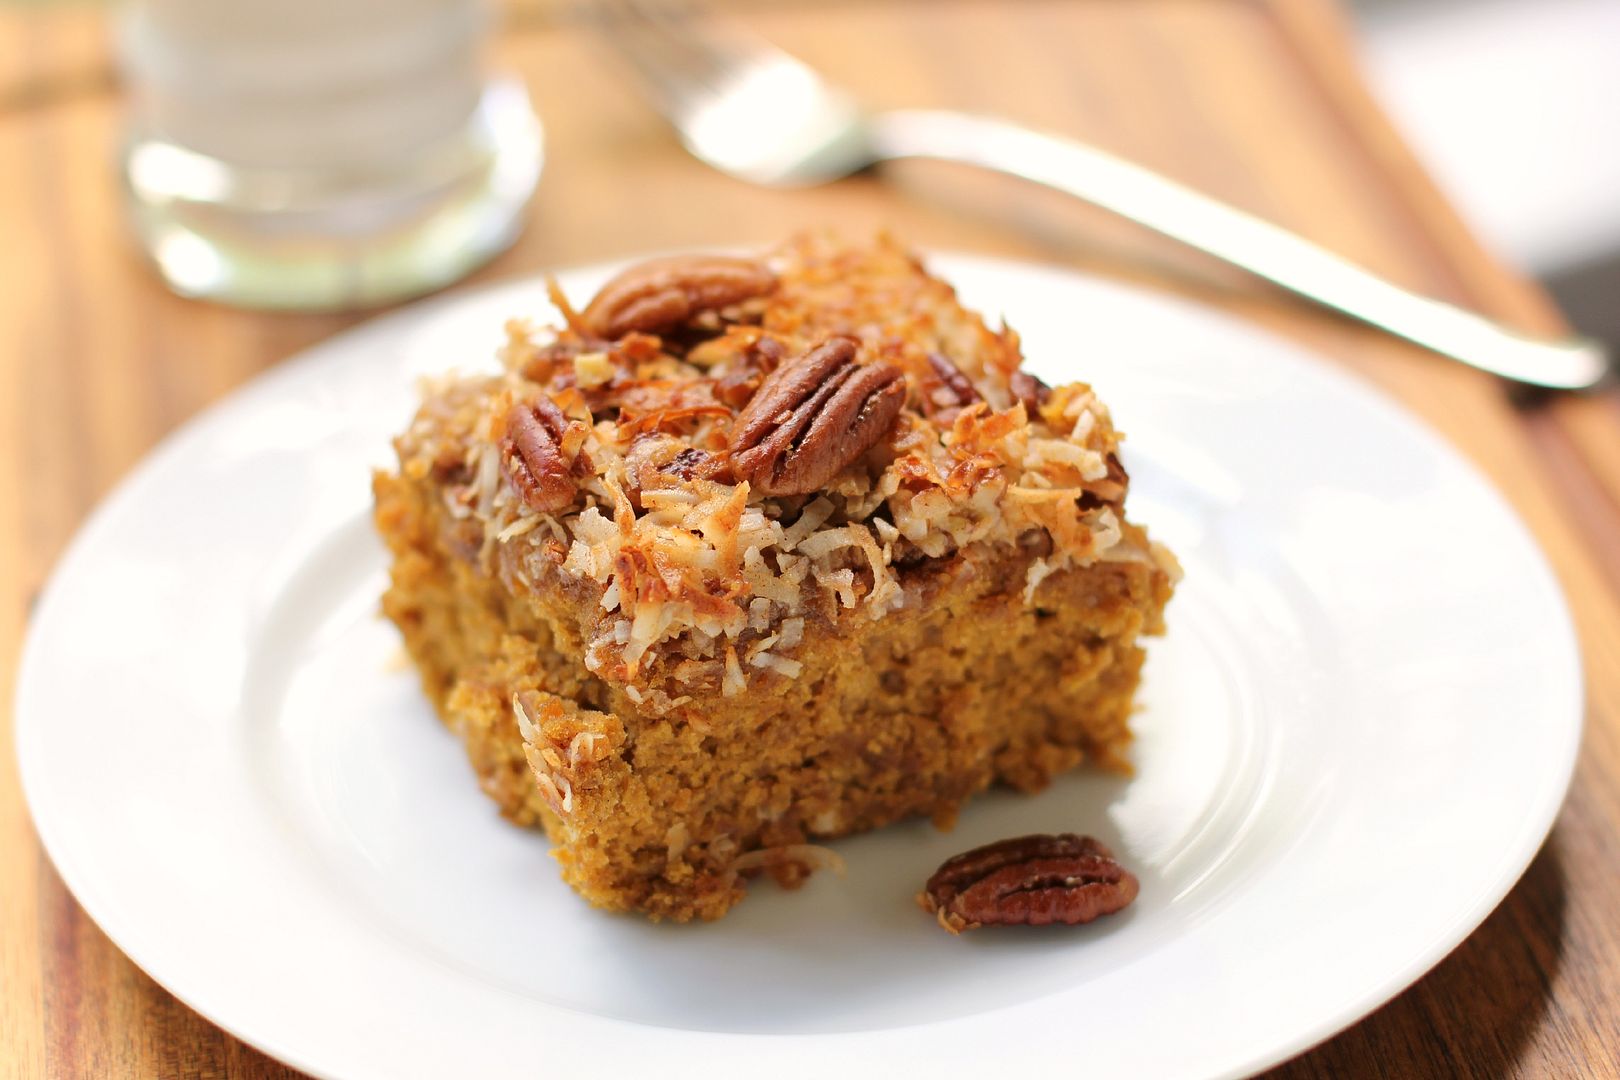
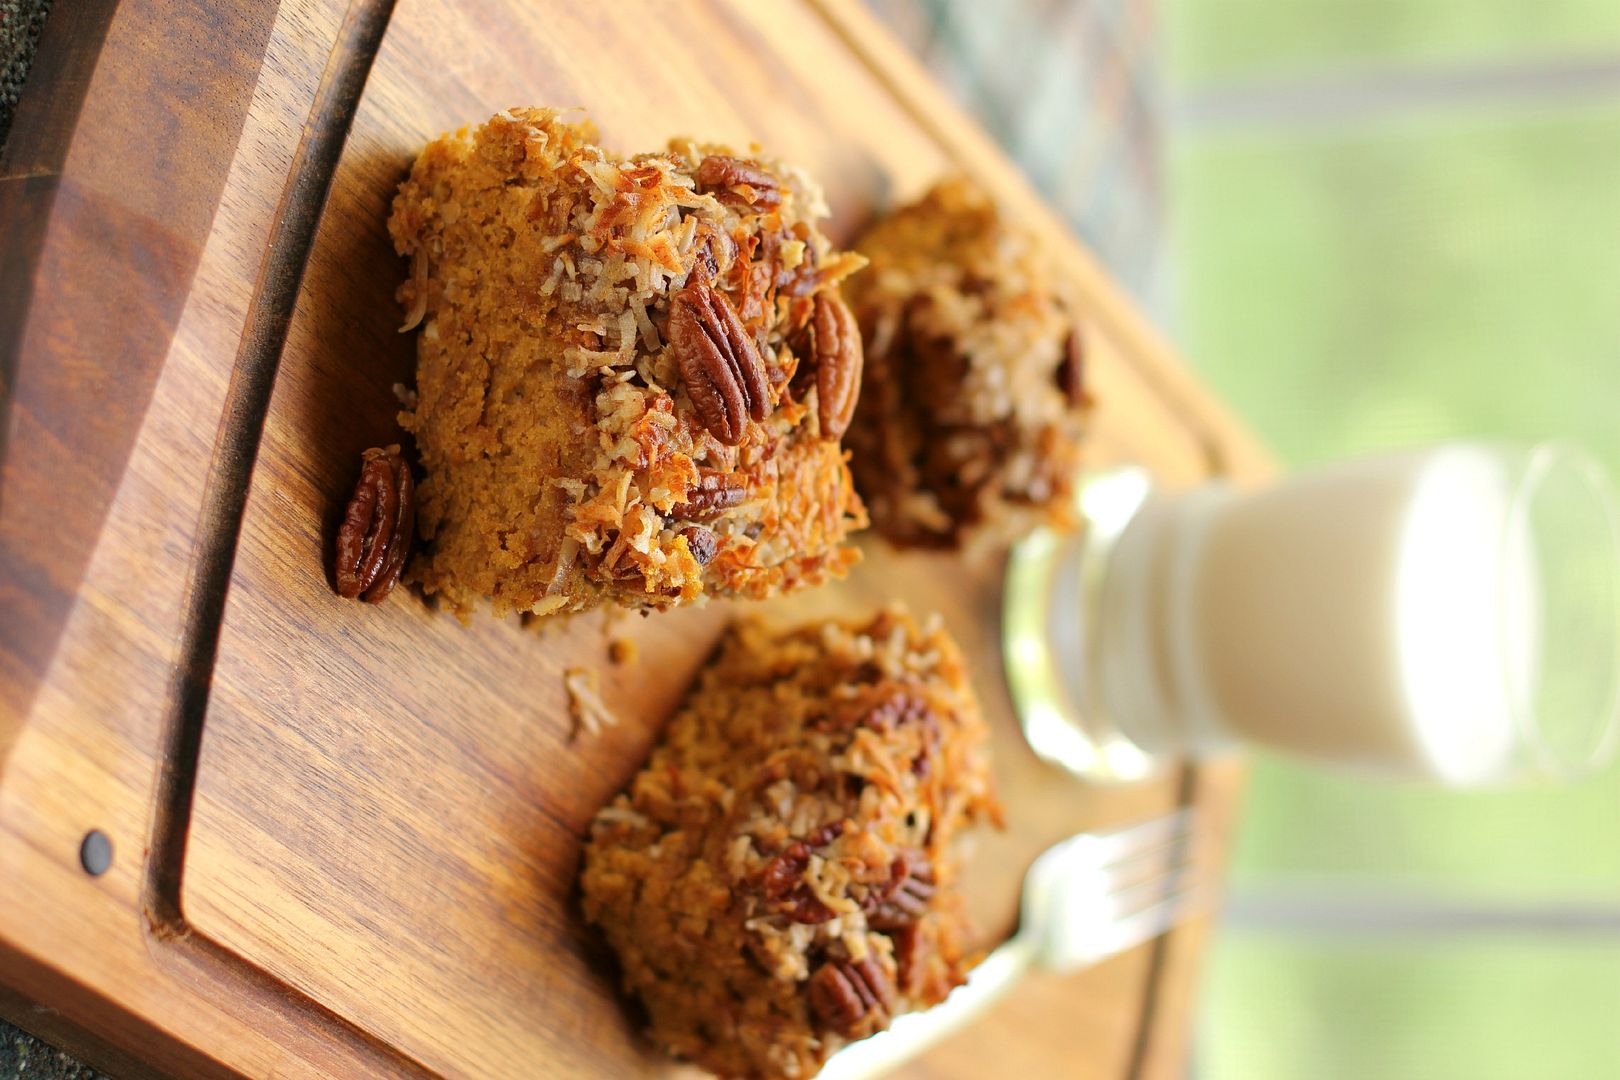
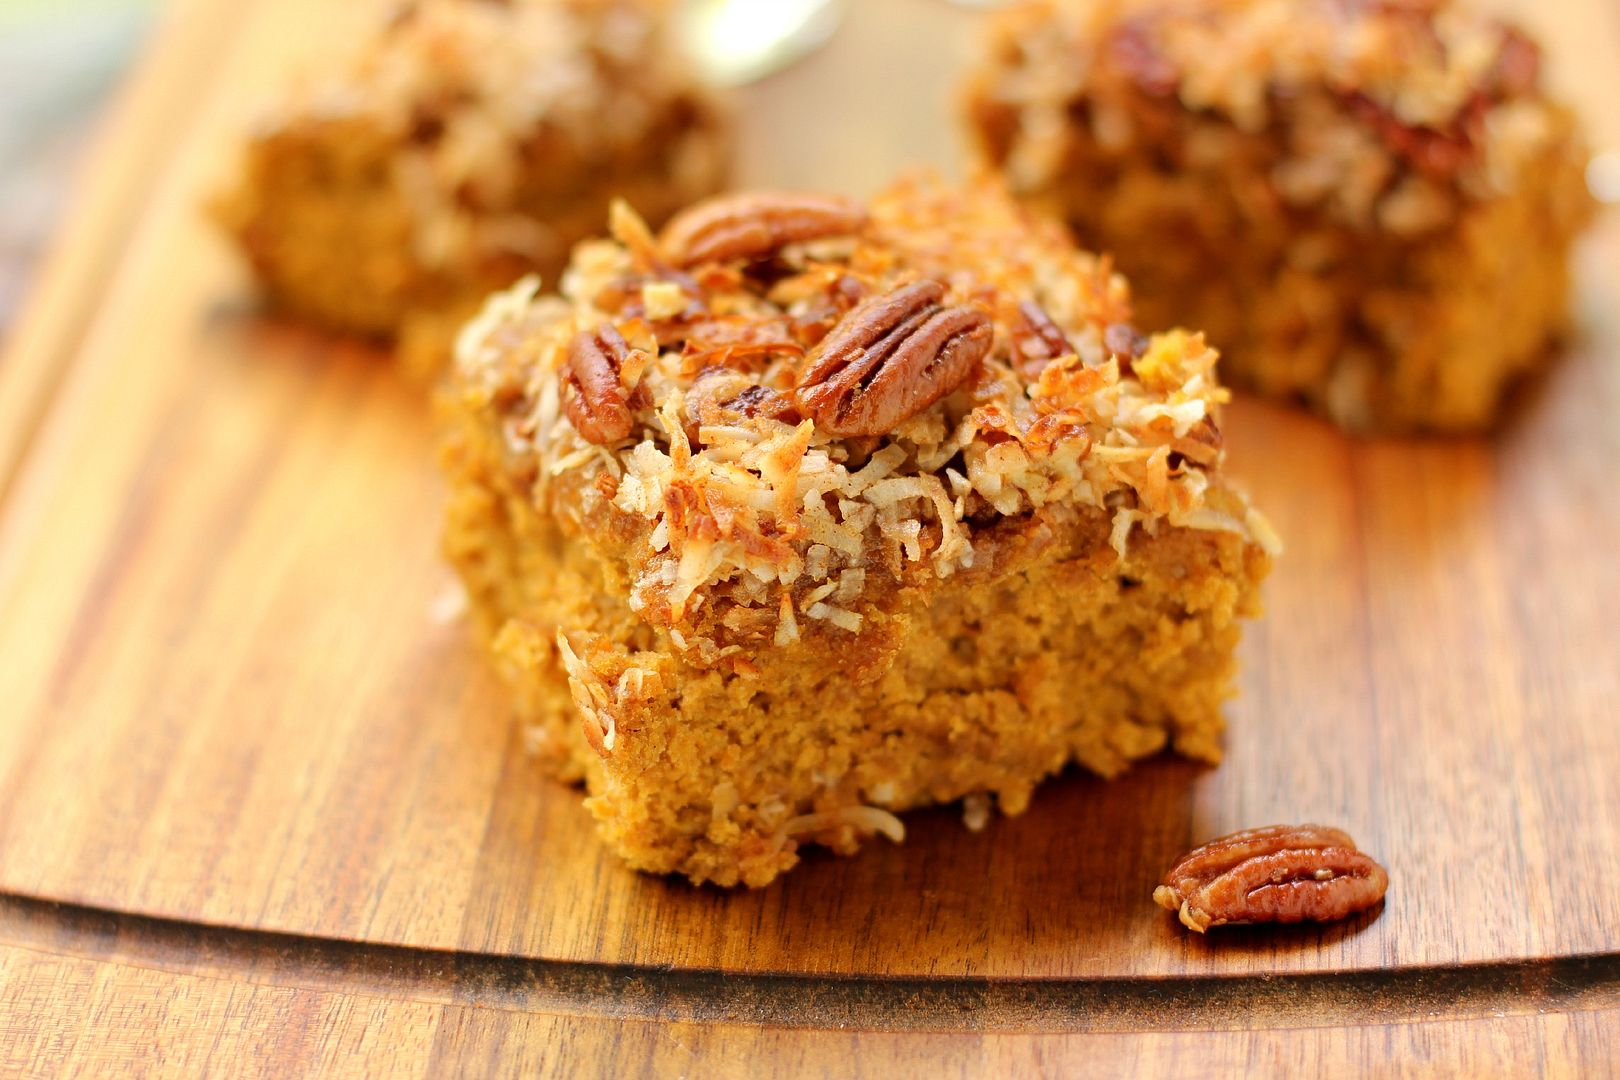
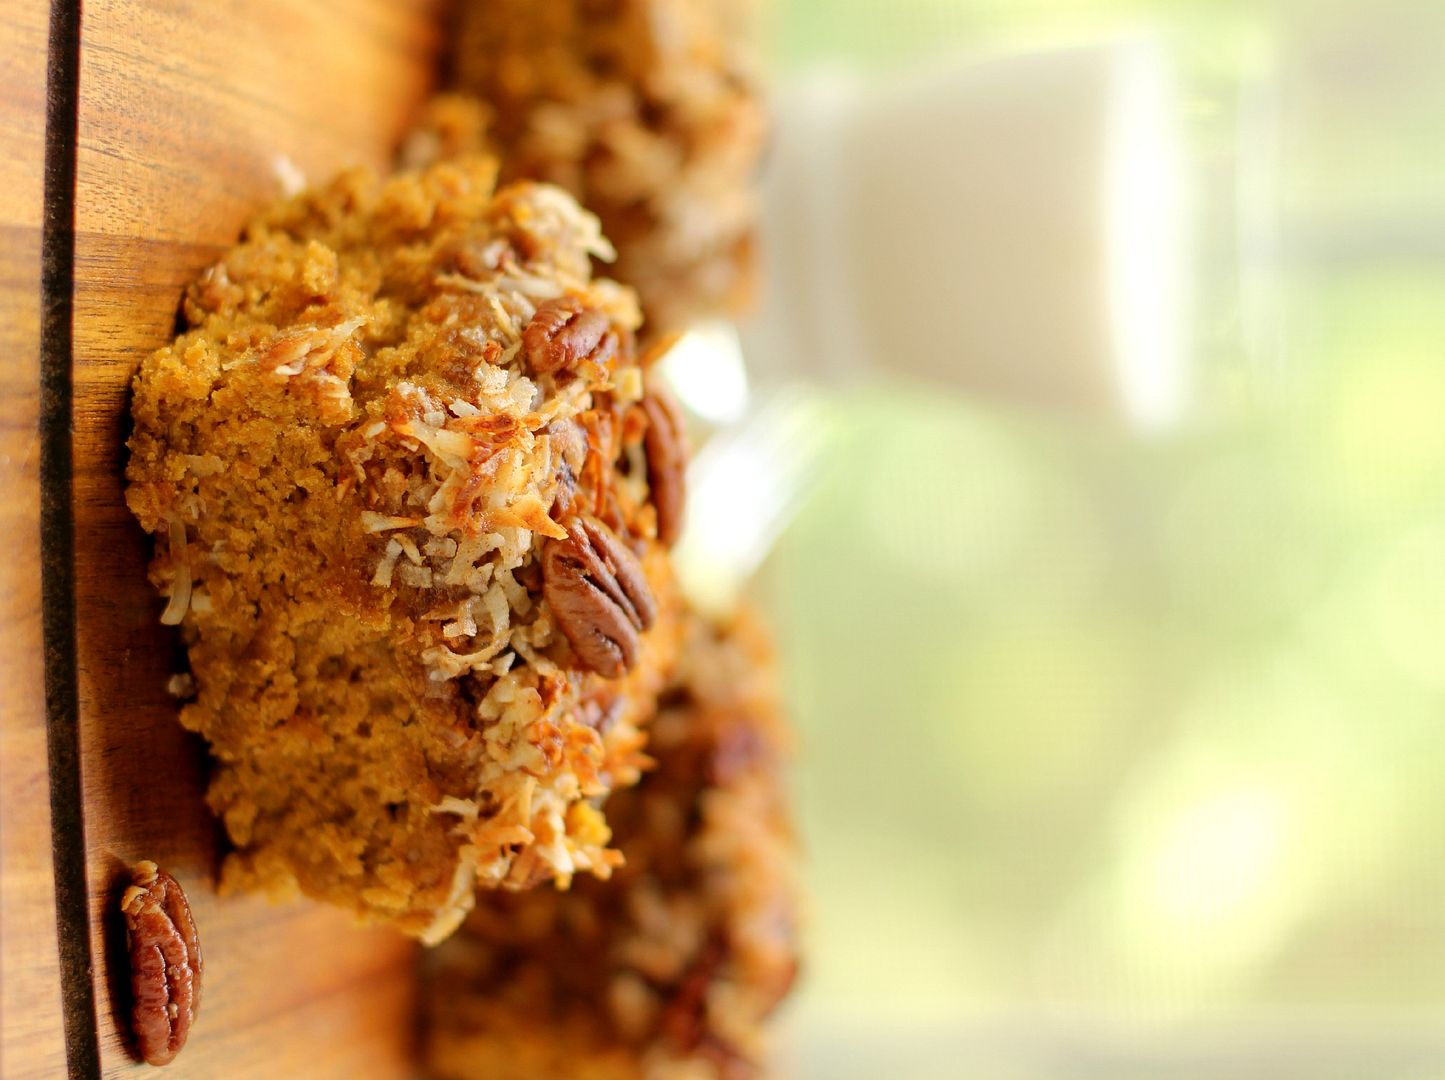
This Pumpkin Oat Snack Cake is just another great thing in an otherwise great life. It’s quick and simple to whip up, just as a snack cake should be, but it’s also birthday-bouncy-house delicious: moist, tender, and sporting a crispy toasted topping. And since we’re calling it a snack cake, you can slice yourself off a piece any old time. Right?

What are some little things in life you’ve been appreciating lately?

Pumpkin Oat Snack Cake with Broiled Coconut Icing


Recipe by: Adapted from America’s Test Kitchen’s Oatmeal Snack Cake with Broiled Icing
Yield: 9 servings

This little snack cake whips up in a jiffy and boasts so much bang for its buck! It’s a delicious pumpkin-oat spice cake with a toasty coconut and pecan broiled topping.

Cake Ingredients:
1 cup (3 ounces) quick-cooking oats*
3/4 cup water, room temperature
3/4 cup (3 3/4 ounces) unbleached all-purpose flour
1/2 teaspoon baking soda
1/2 teaspoon baking powder
1/2 teaspoon salt
1 teaspoon ground cinnamon
1/2 teaspoon ground nutmeg
1/2 cup pumpkin
4 tablespoons (1/2 stick) unsalted butter, softened
1/2 cup (3 1/2 ounces) granulated sugar
1/2 cup packed (3 1/2 ounces) dark brown sugar
1 large egg, room temperature
1/2 teaspoon vanilla extract

Broiled Icing Ingredients:
1/4 cup packed (1 3/4 ounces) dark brown sugar
1/2 teaspoon cinnamon
3 tablespoons unsalted butter, melted and cooled
3 tablespoons milk
3/4 cup sweetened shredded coconut
1/2 cup (2 1/2 ounces) pecans, chopped

Directions:
Make the cake: Preheat oven to 350 degrees. Create a foil sling for an 8-inch square pan: cut two 16-inch lengths of foil and fold them to widths of 5 inches each. Fit foil pieces into baking dish, one overlapping the other, pushing them into corners and up sides of pan; allow excess to overhang pan edges. Cut two more pieces of the same size and arrange them in the same way, except perpendicular to the first two. This creates a sling that will help you remove the cake after baking and cooling. Spray foil lightly with nonstick cooking spray.

Combine the oats, pumpkin puree, and water in medium bowl and let sit until water is absorbed, about 5 minutes. In another medium bowl, whisk the flour, baking soda, baking powder, salt, cinnamon, and nutmeg together.

In a separate large bowl, cream together the butter and sugars for a few minutes until the mixture resembles damp sand (scraping down the bowl as needed). Add the egg and vanilla and mix until combined. Add the flour mixture in 2 batches, mixing until just incorporated after each addition. Add the oat mixture and mix until just combined. Stir the mixture by hand to make sure everything is combined.

Glop the batter into the prepared pan and tap it against the counter a few times to ditch any air bubbles. Smooth the surface with a spatula. Bake the cake, rotating halfway through baking, until a toothpick inserted into center comes out with few moist crumbs attached, about 28 to 32 minutes. Let the cake cool in the pan for about 10 minutes while you mix the icing.

Make the icing: Move the oven rack to around 9 inches away from the broiler heating element and preheat the broiler. In a medium bowl, whisk together the brown sugar, cinnamon, melted butter, and milk. Stir in the coconut and pecans before spreading mixture evenly over the top of the cake. Broil the cake, keeping a close eye on it and rotating as needed, until topping is bubbling and golden, about 3 to 5 minutes. Let the cake cool in pan for 1 hour. Use the sling to pull the cake gently out of the pan. Cut it into squares and transfer to a platter or serving plates; discard the foil.

*ATK’s notes: Do not use old-fashioned or instant oats for this recipe. Be sure to use a metal baking dish; glass pans are not recommended when broiling. A vertical sawing motion with a serrated knife works best for cutting through the crunchy icing and tender crumb.

If you liked this post, please:
Subscribe to Willow Bird Baking
Follow Willow Bird Baking on Twitter
Follow Willow Bird Baking on Facebook
Give this post a thumbs up on StumbleUpon
Pin It


Shareother ways to share this post with friends

Buttery Coconut & Almond Morning Buns

I was floored to see that Willow Bird Baking is a finalist for SAVEUR Magazine’s Best Baking & Desserts Blog. Thank you so much for making this happen. If you’d like to vote for Willow Bird Baking, you can do so here. You all are truly wonderful.

Batik . . . Issei . . . Caballero . . . Kuchen . . . Coffle . . . Lariat . . . Trepak . . . Twoling . . .

The spelling bee pronouncer carefully enunciated one word after another, round after round. The dwindling pool of contestants seethed: a child was always approaching the microphone timorously, bouncing back to their seats triumphantly, or moping over to their consoling families. I sat in the audience rigid with excitement, scribbling each word on the back of an old envelope I’d found in my cavernous purse.

Watching my student compete in the 72nd annual Winston-Salem Journal Regional Spelling Bee was already an ideal afternoon for a logophile like myself, but making the event even more wonderful was the fact that Mike was at my side. Since the Bee took place about halfway between our two cities, he agreed to meet me for a nerdy date! As I frantically attempted to spell each word before the contestant had a chance, he did math in his composition book. (We’re quite the exciting pair.)

My student did a phenomenal job. She got out (with only 5 contestants left!) on the word ringent. If you’re being honest, you’ll probably admit that you didn’t really know how to spell ringent, either, so that’s not bad at all for a 12-year-old. She was disappointed, but I was thrilled with her performance. She still has two full years of eligibility, and since we were so close this year, I fully expect to travel to D.C. eventually to watch her in the National Bee.

After she left with her family, Mike and I set out to explore Winston-Salem. We scanned every restaurant on the main thoroughfare (to appease me; Mike would’ve been happy just to choose one) before finally settling in for pizza and more nerd talk. Mike taught me about hyperbolic conservation laws. We then ambled down the street looking for dessert (or in my case, two desserts, ’cause that’s how I roll.)


ha ha, get it?

One of our dessert stops was at a little coffee shop and bakery where Mike ordered a coconut roll. The flaky pastry was reminiscent of a cinnamon roll, but stuffed instead with toasted coconut. We both enjoyed it, but as soon as I tasted it I told him, “I can do better. I’m going to make you one of these and it’s gonna be insane.” I tucked the mission down into my heart while he promptly forgot about it.
The afternoon was also filled with other lovely things. After buying me a coffee-flavored frozen custard cone, we ambled until we found ourselves seated on a rickety bench outside of a beautiful Moravian church. About a dozen cherry trees heavy with blossoms surrounded us and swayed in the breeze. The sky was a pretty slate blue that belied the sunshine and hinted at an impending spring shower. I think we talked about Moravian chicken pies and guinea hens (one sauntered by us nonchalantly while we were talking — maybe that’s normal in Winston-Salem?), but more important than the conversation was my hand in his, my head on his shoulder.

It was a perfect date. I’m sure Mike drove away thinking about partial differential equations or something in that vein, but I drove away thinking of coconut rolls (oh, okay, and love and hearts and romance and stuff).

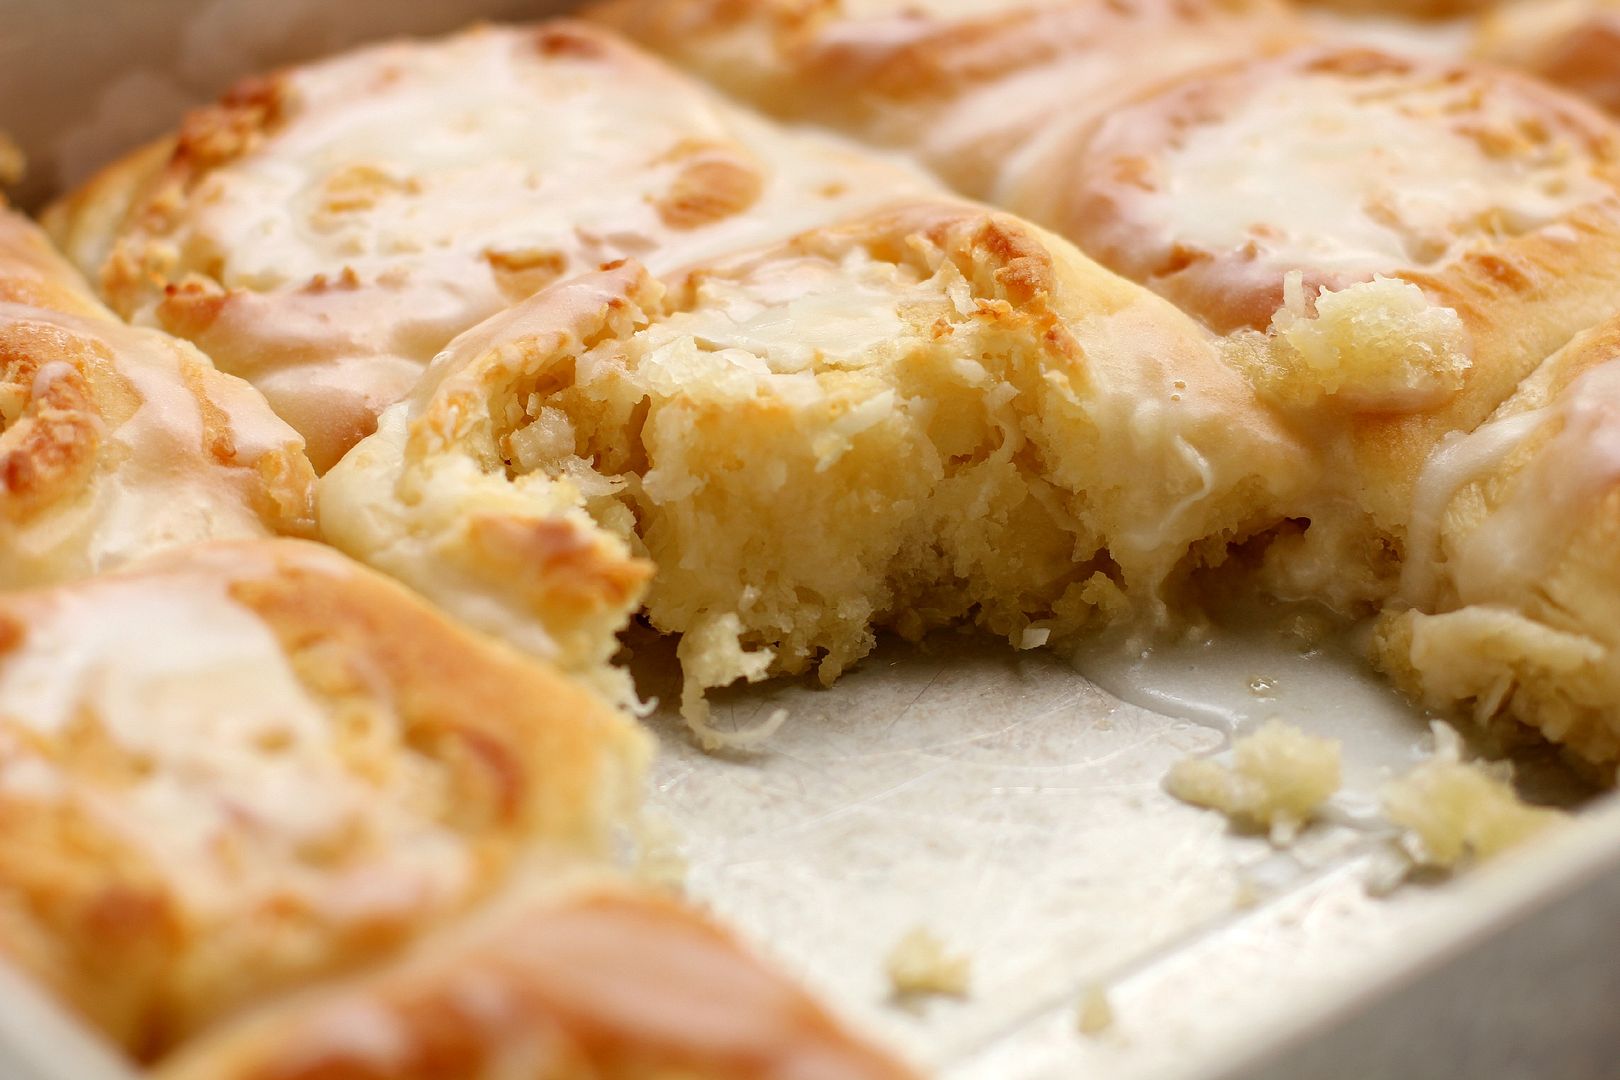
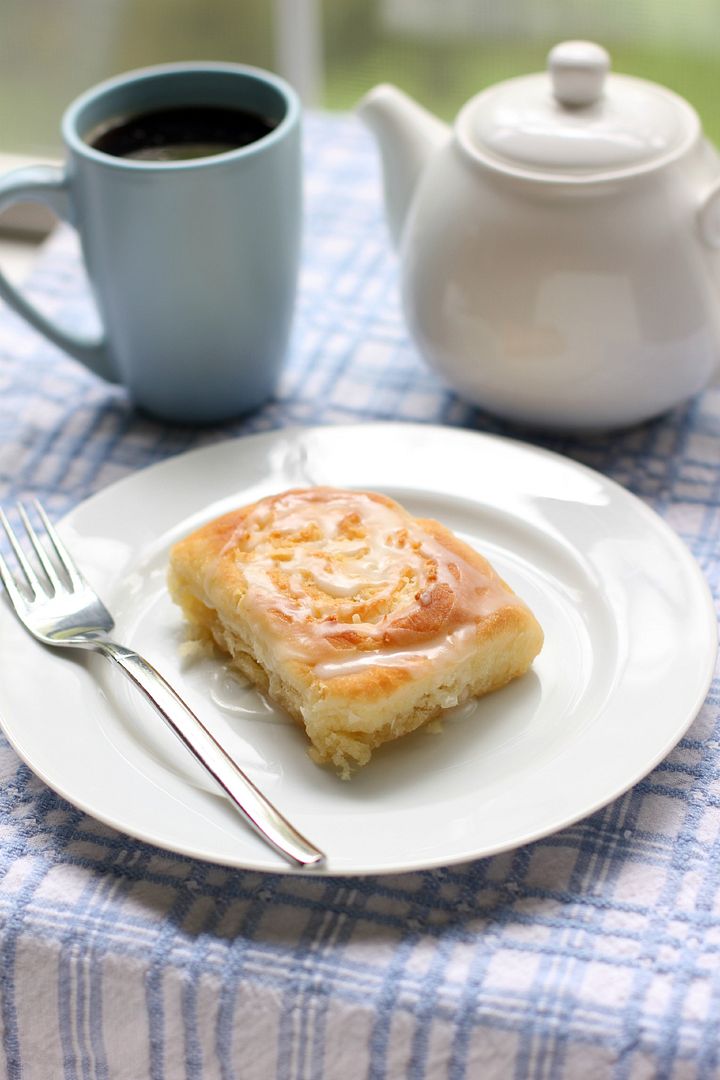
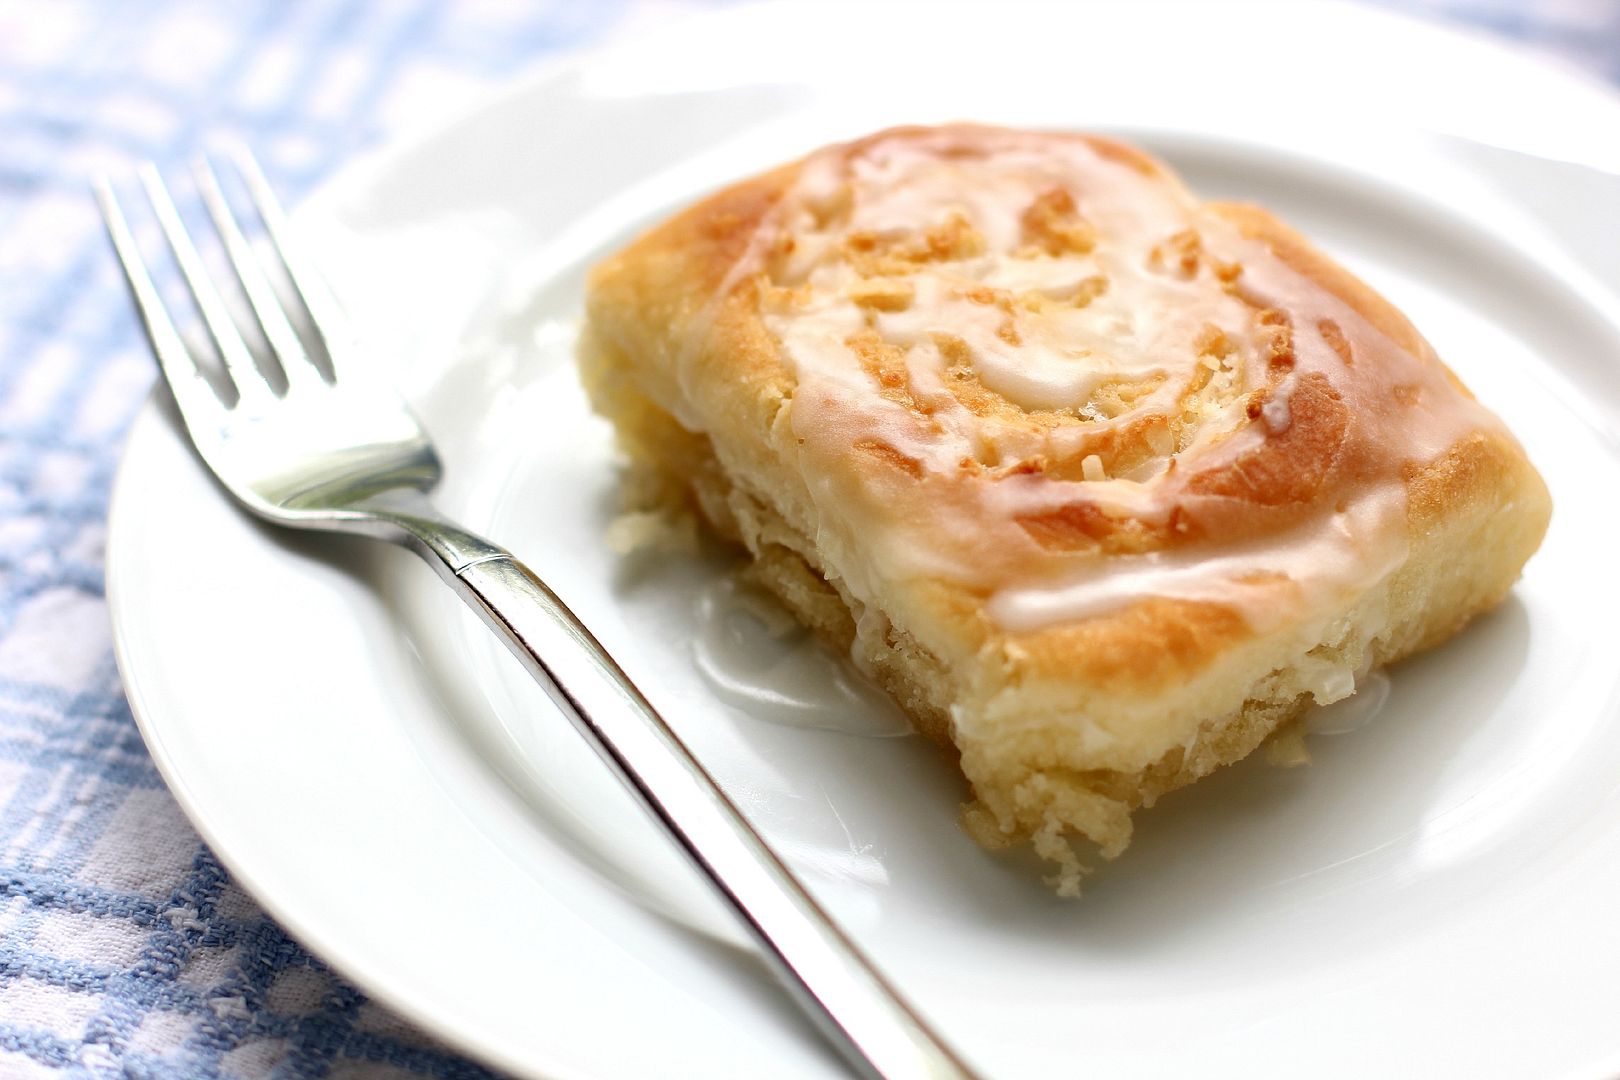
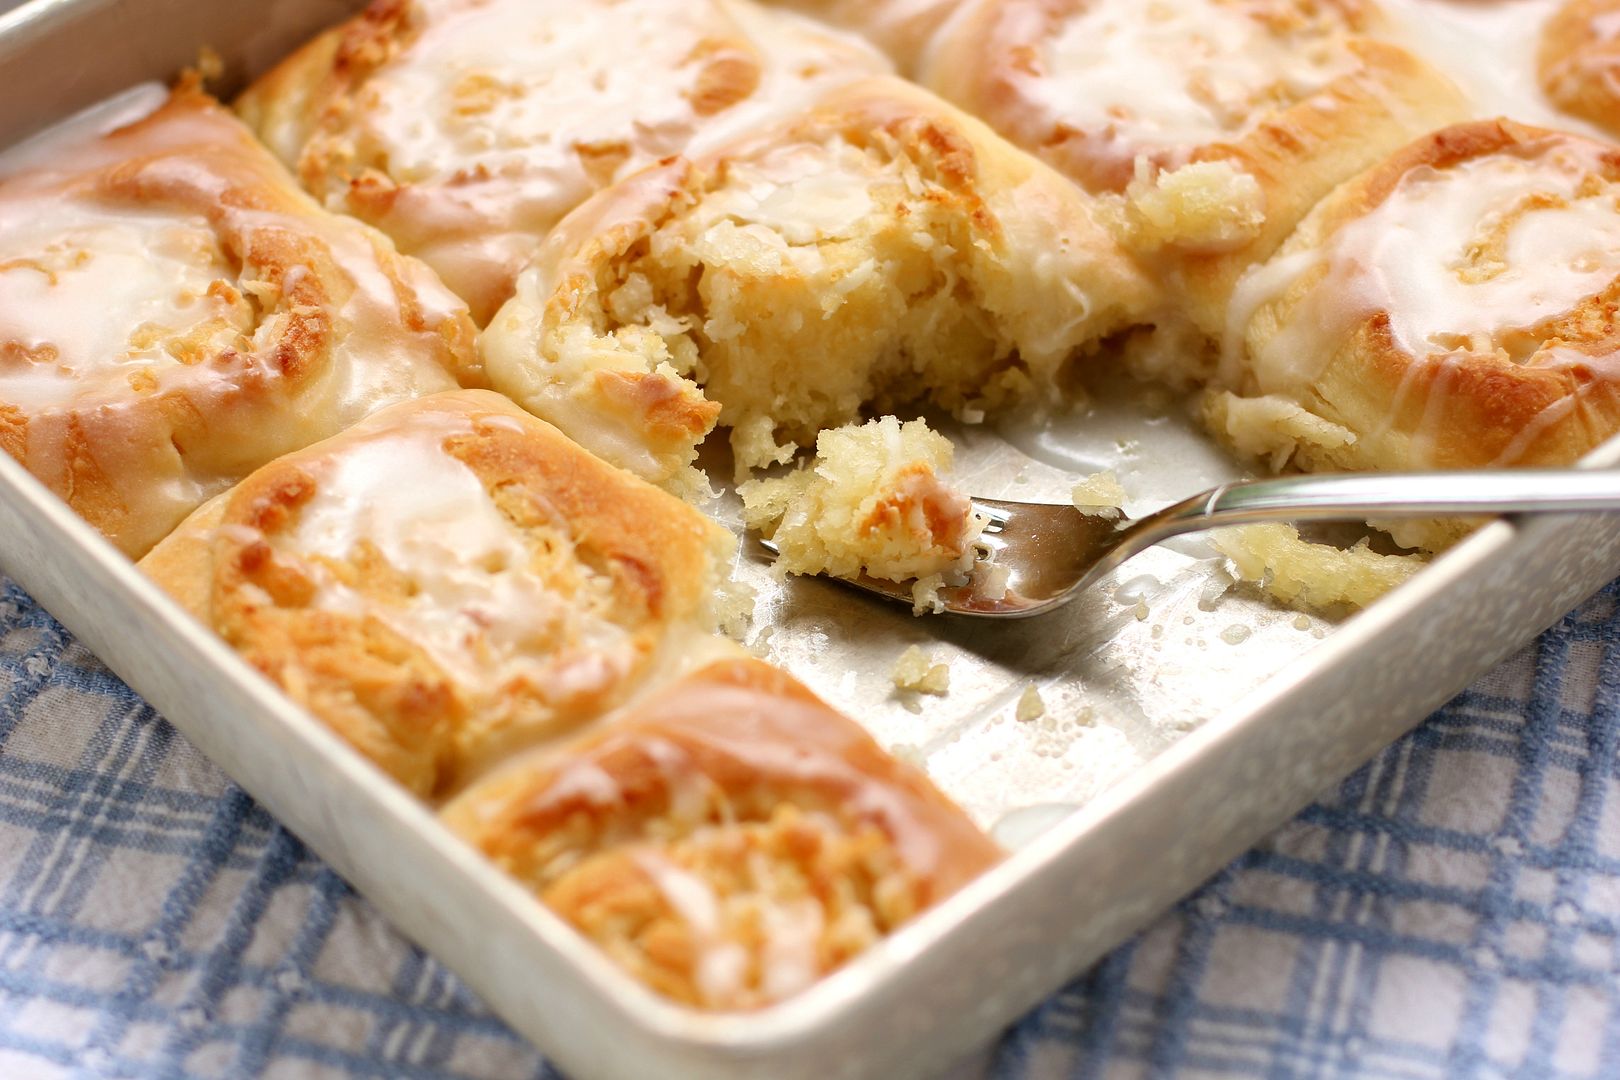
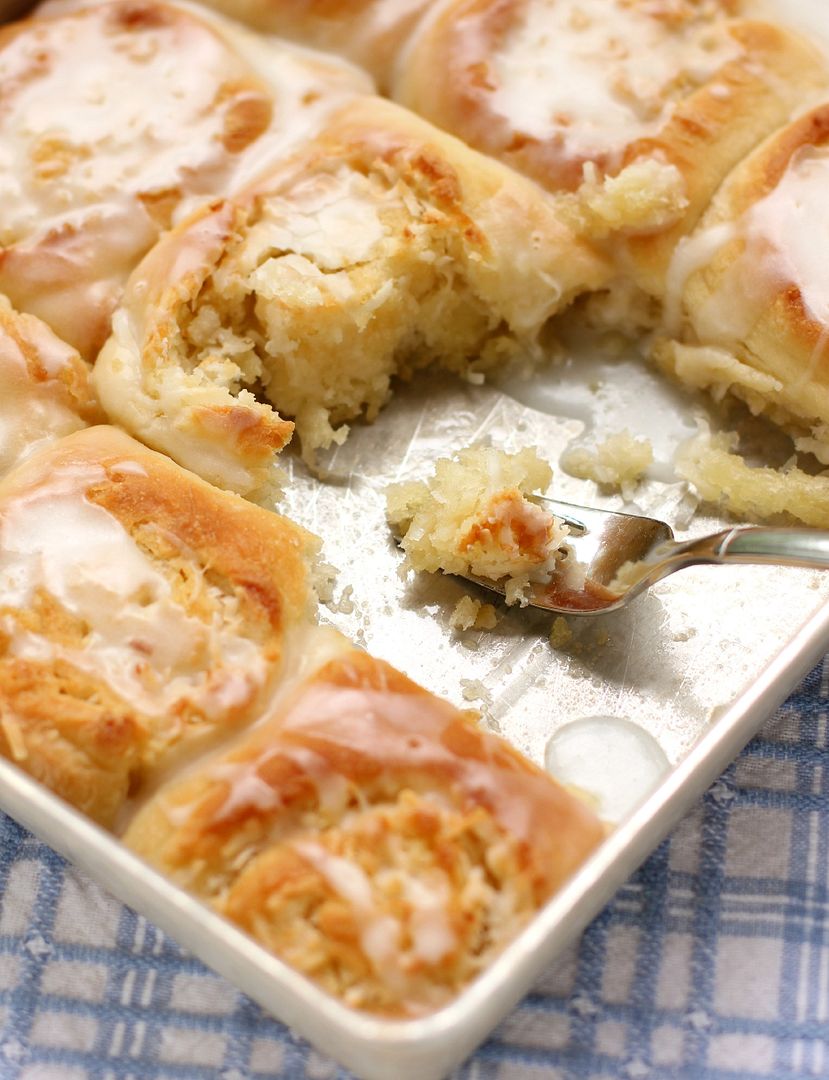
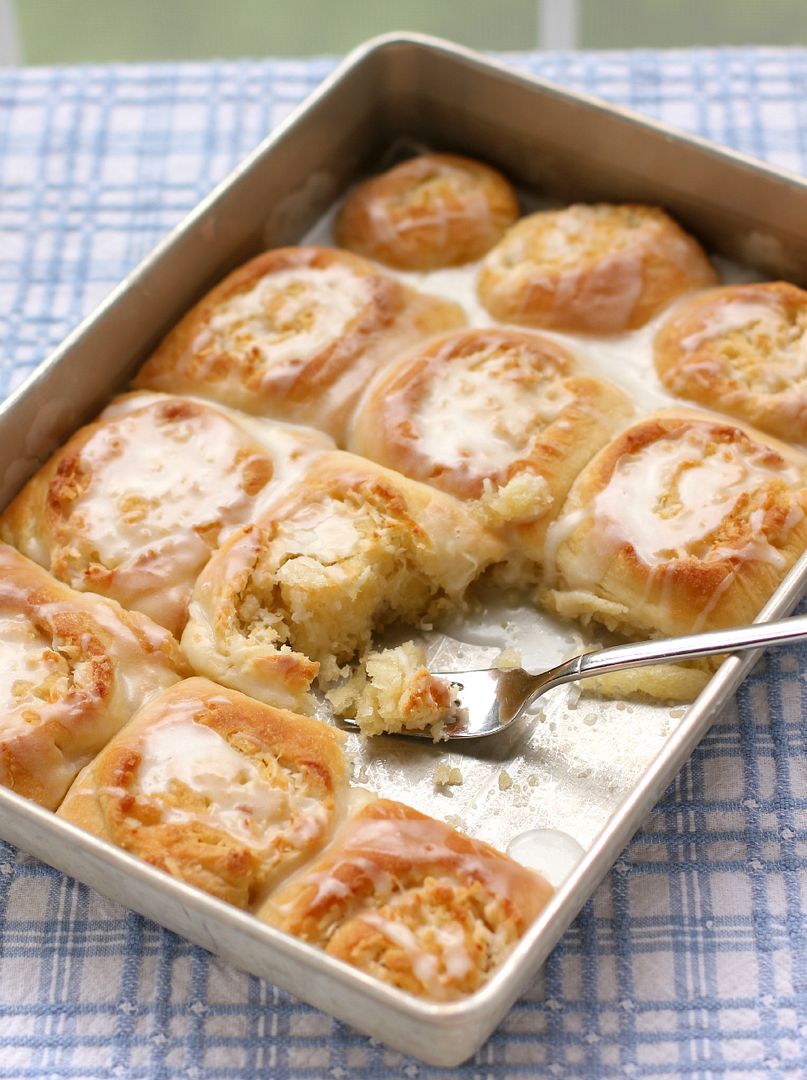
It took me a couple of weeks to get around to experimenting, but when I finally did, these lovely Coconut & Almond Morning Buns were the result. They were even more phenomenal than I’d imagined: buttery, gooey, and delicate, with a gorgeous balance of sweet coconut and subtle almond. I proudly presented them to Mike, who had forgotten all about the Winston-Salem coconut roll but wholeheartedly enjoyed my revamped version nonetheless.

By the way, if you’re wondering: yes, these buns whipped the coffee shop’s coconut rolls right out of the mixing bowl. Not that I’m competitive or anything.

Everyone remembers the word they got out on in their childhood spelling bee. What was yours? (I got out on “eclipse” in 5th grade and “monotonous” in 6th.)

Buttery Coconut & Almond Morning Buns


Recipe by: Willow Bird Baking
Yield: 24 buns

These morning buns could easily double as dessert. They are fluffy, gooey, buttery, and beyond delicious. There’s a lot of butter in this recipe, making it a special occasion treat, but I hope you’ll find a space for these rolls on your Easter brunch table. They definitely belong in the spotlight.

Roll Ingredients:
1 package (2 1/4 teaspoons) active dry yeast
1/4 cup warm water (100-110 degrees F)
2 tablespoons white vinegar
2 cups milk minus 2 tablespoons, room temperature
2/3 cup cold shortening (I use butter flavored Crisco)
3 tablespoons sugar
1 teaspoon salt
1 teaspoon baking soda
1 teaspoon baking powder
5 cups flour
2 tablespoons butter, melted, for after baking

Filling Ingredients:
1 1/2 cup (3 sticks) butter, melted
1/2 teaspoon coconut extract
1/2 cup sugar
2 cups sweetened coconut flakes
7 ounces almond paste, frozen until firm and then grated with hand grater

Glaze Ingredients:
1 1/4 cups confectioners’ sugar
1/4 teaspoon almond extract
1/4 teaspoon coconut extract
2-3 tablespoons milk (to thin to drizzling consistency)

Directions:
Note: I don’t recommend halving yeast recipes; instead, if you don’t want 24 rolls at once, consider freezing some for later. To freeze some of the unbaked rolls, just wrap them well before the second rise and freeze them. Once frozen, pop them out of the pan all together and store in the freezer, wrapped in plastic wrap and in a zip top bag or wrapped in foil. When you want to bake them, stick them back in a greased pan, thaw them in the fridge overnight, proof for the instructed amount of time, and bake like usual.

Mix the warm water and yeast in a medium bowl and let the yeast foam for about 10 minutes. Put 2 tablespoons white vinegar in a measuring cup and then add milk up to the 2 cup line. Set this aside. In a separate large bowl (or the bowl of a mixer fitted with a dough hook), whisk together flour, sugar, salt, baking soda, and baking powder and cut the shortening into the mixture with two knives or a pastry cutter until the shortening looks like small peas. Stir yeast mixture and milk mixture into the dry ingredients and mix well, kneading just a few turns. Transfer the dough to a bowl lightly sprayed with cooking spray, cover tightly with plastic wrap, and store in refrigerator overnight.

The next morning, preheat the oven to 400 degrees F and lightly spray two 9 x 13-inch baking dishes with cooking spray. Turn the chilled dough out onto a floured surface and roll it into a large rectangle about 1/8-inch thick (I carefully cut the dough in half and worked with half at a time to make it more manageable; if you do this, just spread on half of the filling ingredients for each half you roll). Stir the coconut extract into the melted butter; then spread the melted butter all over the top of the dough. Sprinkle on the sugar, sweetened coconut, and almond paste flakes. Gently roll the dough up into a spiral and cut it into rolls, placing them close together in your prepared baking dishes (at this point, you could wrap and freeze the rolls for later if you wanted).

Cover the rolls with a clean dish cloth and let them rise in a warm spot until they’ve nearly doubled, about 1 1/2 – 2 hours. Bake them for about 15-20 minutes or until browned on top (if you take them out at just lightly golden brown, they may still be doughy in the center). Brush with 2 tablespoons melted butter and return to the oven for 1 more minute. Whisk together the glaze ingredients (adding milk to get it to drizzling consistency) and drizzle the glaze over the warm rolls. Serve immediately.

If you liked this post, please:
Subscribe to Willow Bird Baking
Follow Willow Bird Baking on Twitter
Follow Willow Bird Baking on Facebook
Give this post a thumbs up on StumbleUpon
Pin It

The Cooking Hard Stuff Showcase

One month ago, I posted a challenging but incredibly worthwhile Tres Leches Coconut Cake Trifle on Willow Bird Baking. It frustrated me to think of all the folks who would love the flavors and textures but might never attempt the recipe — not because they couldn’t, or even because they wouldn’t enjoy the process if they did, but because they were intimidated by Cooking Hard Stuff.

No one wants to Cook Hard Stuff just for the sake of difficulty, but I know there’s so much to be gained in the process (and result). For this reason, I issued the Cooking Hard Stuff Challenge. During the month of March, I asked you to pick one “hard” recipe to try. Maybe it had a list of ingredients that would normally send you running for the ramen noodles. Maybe it had a technique you’d never tried before. Maybe it required days of work to complete. Whatever the reason, the recipe had to present some sort of challenge to you.

The brave souls below stepped out of their comfort zone to take on the challenge. There were some hiccups in their respective journeys, some altered plans, lots of lessons learned, and even a fire alarm for good measure. But just look at their marvelous results and the fun they had!


Kelly the Courageous

Kelly Made: Sweet Potato Braided Challah and Whiskey Chocolate Mousse Pie (with a homemade crust!)

Comments:“I make a loaf of bread almost every weekend and I pretty much do the same thing. It was time to venture outside my comfort zone. I settled on a braided loaf – a challah. I did some research and decided it would be a Sweet Potato Sourdough Challah – I LOVE potato bread. It was surprising that I hadn’t made one yet. So here’s my Sweet Potato Sourdough Challah. The braid wasn’t perfect but I loved this so much that I can’t wait to make it again. […] And apparently, that wasn’t enough. I decided to tackle something else which I usually avoid – pie crust.”


Crystal the Conqueror

Crystal Made: Mole Skillet Pie with Greens (see more at her blog, TriFoodieMD

Comments: “I came across this recipe for a mole sauce that sounded intriguing. The ingredient list, however, was quite lengthy and included many spices that I didn’t have in my cabinet. I kept flipping the pages and soon found myself tempted by a Mole Skillet Pie with Greens that featured this sauce. […] I just finished enjoying a plate of this ‘Cooking Hard Stuff Challenge’ recipe, and I declare it a success!”


Rhyann the Radiant

Rhyann Made: Braided Challah

Comments: “Turns out, baking challah is wayyyy easier than I thought. I even did the ‘hard’ 6 stranded braid! I think I was most intimidated about the whole yeasty aspect of the recipe, but really it was no different than any other quick bread recipe that I’ve tried, I just had to wait a few hours in between steps. I would have to say the most challenging part was the braid, but I did find some super helpful tutorials on youtube which made it so much easier. Thanks for this idea, it really encouraged me to move outside of my comfort zone.”


Abby the Able

Abby Made: Chinese BBQ Pork Steamed Buns (Char Siu Bao) (see more at her blog, Seaweed & Sassafras)

Comments: “I just loved this post! It’s one of the top reasons I got into food blogging, to try new things, which is usually borderline terrifying. I find the more I do – the more I challenge myself in the kitchen and other areas of my life as well.

“I took on Chinese BBQ Pork Steamed Buns {Char Siu Bao} which my husband and I fell in love with while stationed on Guam (although it’s originally a Chinese dish). I wanted to learn how to recreate these so that we could have them no matter where we lived. They are that good 🙂 It was hard for me well because I’ve never steamed dough before. And anything involving yeast results in me holding my breath until the very end. I could go on about how it was new flavors, etc. But I really, really enjoyed cooking these. I found myself lost in the moment making these, just love that feeling. The dough was a little dry but they still came out fluffy and the filling was spicy and rich. Now I’m coming up with all kinds of filling ideas for these!! So excited!”


Jeremy the Jumpstarter

Jeremy Made: An entire feast! Cocktail potato samosas with spicy mango chutney, tandoori chicken with sweet peppers and onions, raita, and onion relish, Basmati rice pilaf, garlic naan, and for the grand finale, brown butter pumpkin cake with white chocolate chai mousse!

Comments: “Every year for Christmas my gift to my parents is a menu of six meals that I’ll cook for them over the course of the year. […] I had planned on the full croquemcake, but that was before I discovered how involved making the samosa skins would be. The recipe came from a guest post at Indian Food Rocks written by Jen Yu, author of my other favorite food blog, Use Real Butter.

“I’ve made many kinds of dumplings and pastries, but rolling out circles of dough, stacking them, then rolling out the stack, par-cooking, and peeling it apart was a process that took me a long time to grasp. The finished product was worth the effort, though!

“I was unsure about creating a tunnel in the cake for the mousse, so I made use of two Pampered Chef torte pans that bake up with wells in the center for a layer of filling. I piled the first cake layer high with mousse and then carefully flipped the second layer upside down on top. It worked like a charm.

“Other than setting off the smoke alarm baking the naan in a hot cast-iron pan, it came off without a hitch. My father raved about the white chocolate chai mousse!”


Nina the Nimble

Nina Made: A towering fondant birthday cake!

Comments: “My son turned 6 this month and I went all out for this birthday cake! This was my first fondant covered cake and my first stacked cake. I will admit, the top cake is from a mix, the birthday boy asked for Strawberry and it was just easier to use a box mix. The bottom cake is Smitten Kitchen’s Best Birthday Cake Recipe. In the week before making this cake I made lists, thought out a schedule for assembly and went shopping.

“I broke down making the cake over two days. On Thursday I baked the cakes, made the frosting and crumb coated the cakes leaving them to sit in the fridge overnight. I also cut out most of the fondant details and wrapped them well in plastic on cake boards to keep them soft so I could shape them to the cake. On Friday I gave both cakes a final coat of frosting and covered them in fondant. Friday night I stacked the cakes and put on the finishing details and added the figurines which I found on Amazon.

“Being able to do the work over two days really made it manageable, as did making a list and knowing exactly what colors of fondant I would need and going through my cake decorating supplies beforehand to decide what to use and put aside what I would need. I hit a small snag when the fondant on the the top cake started to tear, but I took a deep breath and decided I could find a way to cover it instead of starting over! The top cake had a large group of clouds over the back! I didn’t feel as overwhelmed by this process as I thought I would, it was really fun to do and the cake was a huge hit at the party!”


LeAndra the Lovely

LeAndra Made: Lemon Gratins (see more at her blog, Love & Flour)

Comments: “Not only did I make a gratin, but I also gained grace. Since the gratins did not turn out looking exactly as I had imagined, I might have ordinarily gotten frustrated. Fortunately, the cooking hard stuff post helped put in the mindset to give the gratins my best go and to be open to the experience and the outcome, no matter what each might be. I’m definitely glad I tried this recipe sooner rather than later!”


Amanda the Artful

Amanda Made: Rick Bayless’s Red Mole

Comments: “I’ve been meaning to do this for a while, but seeing your posts […] motivated me to try it this weekend. It was an ordeal, but it made a lot, which makes cooking something this effort-intensive worth it.

“Tips: The recipe calls for a medium mesh strainer. Don’t use a fine mesh strainer for straining or you will be straining for hours and possibly crying in frustration. Medium mesh is perfectly capable for this task. Also, if your mole is still looking a little thin after two hours of simmering, throw in 1-2 very darkly toasted slices of bread (half a slice at a time) and take a stick blender to it. It doesn’t seem to effect the taste much and will go a long way towards thickening up the sauce. Thanks for the challenge and thanks for all the innovative recipes you post.”


Abigail the Ambitious

Abigail Made: Clementine Mousse Cheesecake (see more at her blog, Lab Notes from Abby’s Kitchen)

Comments: “Again, this is an incredible recipe. The clementine mousse was out-of-this-world! […] I started making this around 5:30 pm and finally finished up at 1:30 am. The great part is, I went to the gym while the cheesecake was cooling and stayed on the treadmill long enough to watch an entire movie (great way to make up for some of the calories I was about to eat)! I suggest whoever makes it starts early in the day or has better planning skills than I do! For people who aren’t up for the whole recipe, I suggest just trying the clementine mousse. That eliminates the crust, cheesecake and candied clementines. Plus, it’s the most incredible citrus dessert I’ve ever had!”


Congratulations to all of the participants on their fantastic work! What hard stuff will you cook up?

See all the Cooking Hard Stuff Tips:
The Cooking Hard Stuff Challenge
Tip #1: Read and visualize the recipe.
Tip #2: Mise en place.
Tip #3: Make a schedule.
Tip #4: Try, try, try again — or share your success

If you liked this post, please:
Subscribe to Willow Bird Baking
Follow Willow Bird Baking on Twitter
Follow Willow Bird Baking on Facebook

1 74 75 76 77 78 127