Baking to Freeze: Mexican Lasagna

Mexican Lasagna is the first recipe in my “baking to freeze” series (see the introduction post here, if you missed it!)


Two dishes of Mexican Lasagna with thawing/baking instructions and green onions on the side

Baking to Freeze Recipe #1: Mexican Lasagna


Recipe by: Adapted from Rachael Ray
Yields: About 6-8 servings

2 pounds ground beef
1 packet taco seasoning, such as McCormick’s
Cheesy Taco Seasoning
1 tablespoon chili powder
1 teaspoon ground cumin
1/2 red onion, chopped
1 15-ounce can black beans, drained
1 14-oz can fire roasted tomatoes
1 cup frozen corn kernels
Salt
8 8-inch flour tortillas
2 1/2 cups shredded cheddar
2 scallions, chopped

Directions:
Preheat the oven to 425 degrees F. Preheat a large skillet over medium high heat. Brown ground beef and drain the fat. Return beef to pan and add taco seasoning (and water, if the seasoning packet calls for such) chili powder, cumin, and red onion. Mix and cook for 2-3 minutes. Add fire roasted tomatoes, black beans, and corn. Heat the mixture through, 2 to 3 minutes, then season with salt to your taste.

Spray a shallow baking dish (disposable oven-proof baking dishes are wonderful for freezing in) with nonstick spray. Cut the tortillas in half or quarters to make them easy to layer with. Build lasagna in layers of meat and beans, then tortillas, then cheese. Repeat: meat, tortilla, cheese again. If freezing, wrap tightly and freeze, keeping bag of scallions and side of salsa in the fridge ready to serve on the side. Lasagna will keep for up to 3 months. If not freezing, simply bake lasagna 12 to 15 minutes until cheese is brown and bubbly. Top with the scallions and serve.

NOTE: if you’re freezing the lasagna but don’t have a disposable baking dish, you can also line a glass baking dish with foil and leave the ends hanging over the dish. Assemble your lasagna in the dish and bake only about 10 minutes. Then, after it’s cooled, you can freeze the casserole, pull it out using the ends of the foil, and store it in a large ziplock bag. When you’re ready to thaw and bake, you can use the original dish.

Thawing Instructions: Thaw overnight in refrigerator. Preheat oven to 425 degrees. Cook 30 minutes or until casserole is heated through and cheese is brown and bubbly. Top with scallions (to taste) and serve.


Mexican Lasagna filling: browned ground beef, red onions, taco seasoning, extra chili powder and cumin, corn, black beans, and fire-roasted tomatoes.

Click here to download thawing/baking instruction labels and recipe card to include with this dish.

Preview:

Lemon Burst Fairycakes

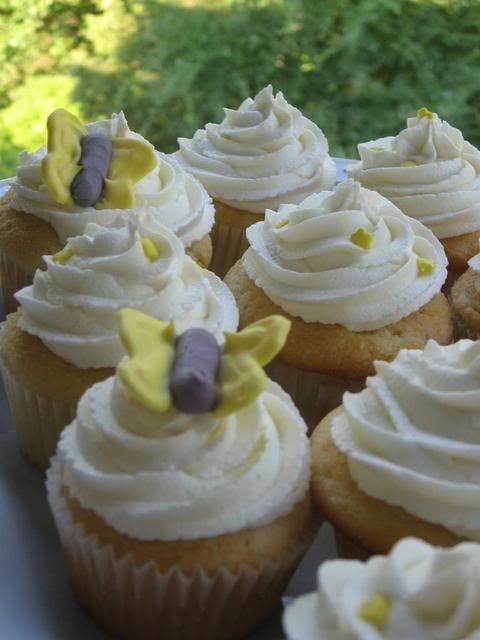
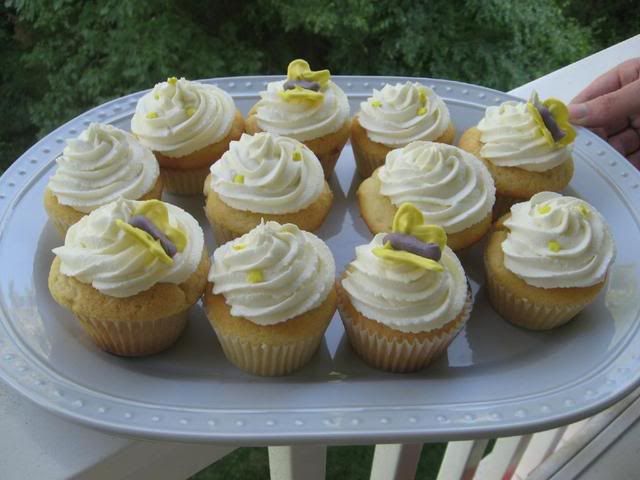
I want to sing a song about these cupcakes. They’re the most scrumptious combination I’ve tried to date: delicious little almond cakes, filled with creamy lemon and raspberry tartness and frosted with light-as-a-feather lemon buttercream. They tasted too BRIGHT to be called plain old cupcakes. I borrowed a bit from the British and named them fairycakes instead: Lemon Burst Fairycakes. I think you’re really going to love these.

When you think of curd, perhaps you think of the nursery rhyme where an unfortunate child is accosted by an alarming arachnid; that is:

Little Miss Muffet
Sat on a tuffet,
Eating her curds and whey;
Along came a spider,
Who sat down beside her
And frightened Miss Muffet away.

The little rhyme refers to a cottage cheese like substance, but there are much more pleasant curds to be had. Fruit curds, to be exact, and lemon curd, to be even more exact. Lemon Burst Fairycakes are named such because they’re bursting with creamy lemon curd.


Lemon curd filling before the raspberry “surprise.”

From what I’ve read about making lemon curd, some folks have trouble with the mixture curdling, but thankfully, I stumbled on a fantastic recipe that seems relatively fool-proof. Even if you’re not planning on making the full cupcakes, do try the lemon curd. It’s delicious on toast, on cookies, or on a spoon straight from the freezer, where it’ll keep for 2 months! This homemade lemon curd is much better than the store bought kinds I’ve tried, by the way. Since it’s so easy, it’s worth making your own.

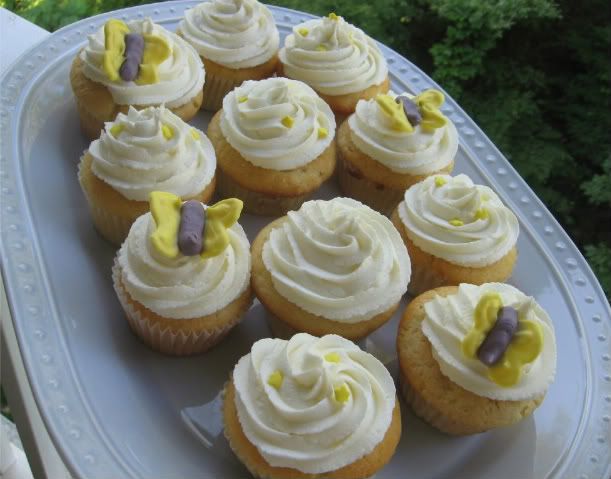
A word about the butterfly decorations on these fairycakes: they’re, uh, not perfect. This was my first attempt at royal icing decorations, and I’ve decided it’s not something you should do on a whim! I think I’ll be better prepared next time. They’re cute, but definitely . . . homemade. We’ll say they have “character.” Wait until you see the mess involved in creating them (in the process photos below)! I do hope you’ll try some royal icing decoration, but maybe with a little more forethought than I gave. There are some tutorials online for creating lovely butterflies, as I discovered after I’d already piped mine!

If you’re in a summery mood and would like some lovely lemon, whip up a batch of these fairycakes and enjoy! The recipe looks long because of the multiple parts (butterfly decorations, lemon curd filling, cupcakes, and frosting), but remember that you can leave the decorations out and still have a fantastic fairycake. I love to read about your results (and see photos!), so feel free to comment below.

Lemon Burst Fairycakes


Recipe By: Compiled and adapted by me, from:

Cupcake Ideas Now! (cupcakes, slightly adapted)
Nigella Lawson (royal icing for butterfly)
-Mom (buttercream, slightly adapted)
Fine Cooking (lemon curd)

Yields: 24-30 cupcakes

Royal Icing Butterfly Ingredients:
2 large egg whites (or substitute powdered egg whites)
3 cups confectioners’ sugar
1 teaspoon lemon juice
food coloring in desired colors

Cupcake Ingredients:
1 cup butter flavored shortening (at room temperature)
3 1/2 cups all-purpose flour
2 cups sugar
5 teaspoons baking powder
1 teaspoon salt
2 eggs
1 1/2 cups milk
1 teaspoon vanilla
1 teaspoon almond flavoring
1 teaspoon butter flavoring
2 tablespoons lemon juice (can use more, to taste)
grated lemon zest
30 raspberries for filling

Lemon Curd Ingredients:
3 oz. (6 tablespoons) unsalted butter, softened at room temperature
1 cup sugar
2 large eggs
2 large egg yolks
2/3 cup fresh lemon juice
1 teaspoon grated lemon zest

Buttercream Frosting Ingredients:
1 cup crisco (white) shortening
1 cup butter, softened
8 cups confectioner’s sugar
1 teaspoon pure vanilla extract (can use clear if you want the frosting to be snow white)
1 teaspoon imitation almond flavoring
1 teaspoon imitation butter flavoring
2 tablespoon lemon juice
lemon zest, if desired
4-6 tablespoons sweet milk for thinning
royal icing butterflies for decoration

Directions:

Royal Icing Butterflies: Make your royal icing butterflies the night before you frost your cupcakes. Combine the egg whites and confectioners’ sugar in a medium-size mixing bowl and whip with an electric mixer on medium speed until opaque and shiny, about 5 minutes. Whisk in the lemon juice, this will thin out the icing. Beat for another couple of minutes until you reach the right consistency. Separate frosting into separate bowls for each color you want and add food coloring; mix. Put frosting in pastry bag and pipe out individual butterfly wings. Once fully dry, create a “valley” by creasing wax paper or foil (see picture below) to lay each wing in. Pipe body in the middle. Let dry overnight.

Lemon Curd: Make lemon curd in advance as well so it has time to chill and thicken. In a large bowl, beat the butter and sugar with an electric mixer, about 2 min. Slowly add the eggs and yolks. Beat for 1 min. Mix in the lemon juice. The mixture will look curdled, but it will smooth out as it cooks. In a medium, heavy-based saucepan, cook the mixture over low heat until it looks smooth. (The curdled appearance disappears as the butter in the mixture melts.) Increase the heat to medium and cook, stirring constantly, until the mixture thickens, about 15 min. It should leave a path on the back of a spoon and will read 170°F on a thermometer. Don’t let the mixture boil. Remove the curd from the heat; stir in the lemon zest. Transfer the curd to a bowl. Press plastic wrap on the surface of the lemon curd to keep a skin from forming and chill the curd in the refrigerator. The curd will thicken further as it cools. Covered tightly, it will keep in the refrigerator for a week and in the freezer for 2 months.

Cupcakes: While butterflies are resting and curd is thickening, make cupcakes. Pre-heat oven to 375 degrees. Put shortening in a mixing bowl. Sift dry ingredients together in separate bowl. With a mixer, mix the dry ingredients in slowly with the shortening. Add 1 cup milk and the eggs to the dry ingredients and beat until flour is fully moistened. Add the remaining milk and the vanilla, almond, and butter flavoring. Add the lemon juice and lemon zest and beat for about another minute. Place paper liners in muffin pan and fill halfway full with the batter. Bake at 375 degrees F for 15 to 18 minutes or until a toothpick inserted into the middle of a cupcake comes out clean.

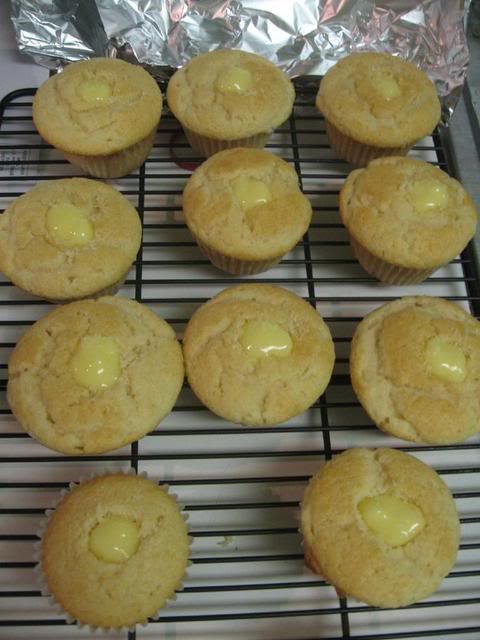
When cupcakes are cool, cut a small hole in the center of each. Pipe or spoon in chilled lemon curd and top with one plump raspberry.

Lemon Buttercream frosting: Finally, make the buttercream frosting. Cream all ingredients together. Can add more sweet milk if needed. Frost completely cool cupcakes, using a pastry bag if available. I used star tip 1M. Use butterflies (dried overnight) to decorate!

Process Photos:


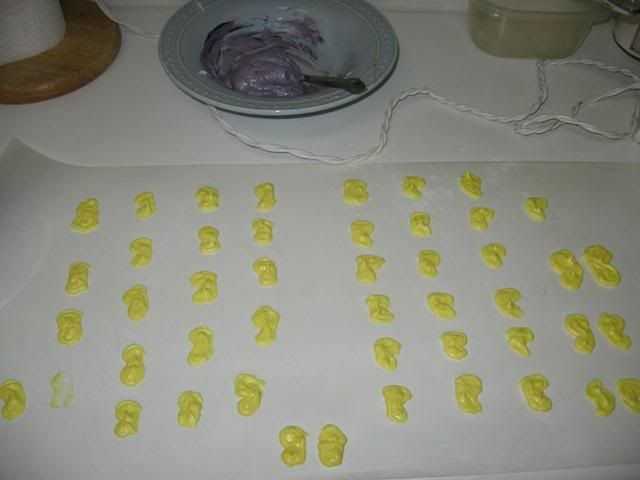
Royal icing butterfly wings piped out.


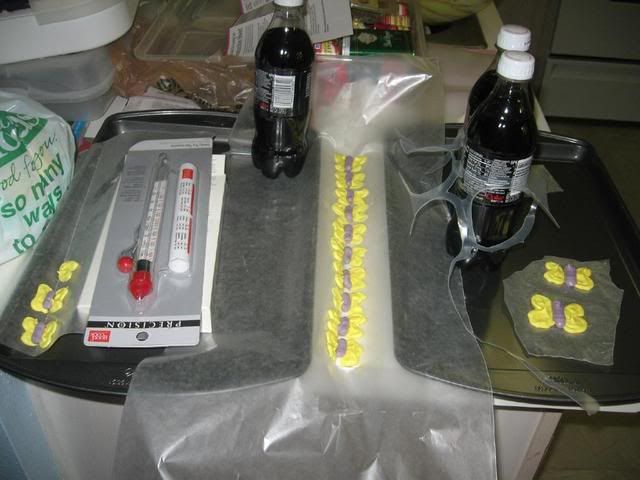
The crazy setup I used to create a “trench” for my butterfly wings. Butterfly
wings sit in the wax paper trench so that when their bodies are piped out, they
look like they’re in flight. Notice the use of Coke Zero to hold the wax
paper in place. That delicious beverage is so useful.


Cupcakes ready for baking.
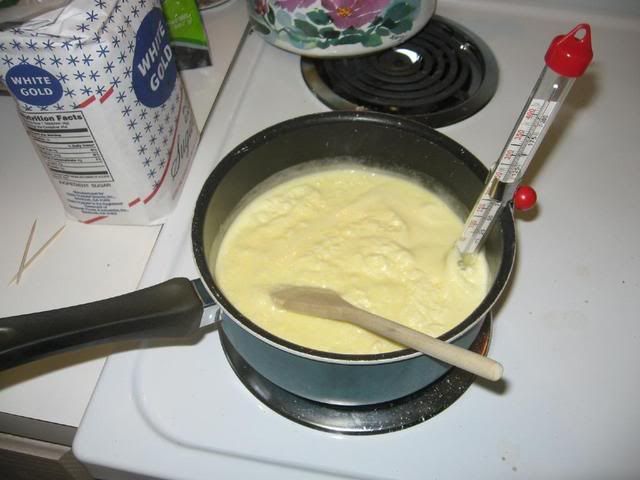


Lemon curd cooking.


Finished lemon curd!


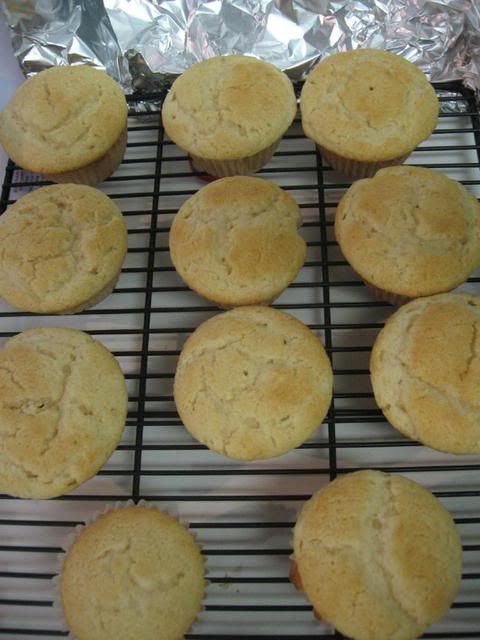
Fresh from the oven.


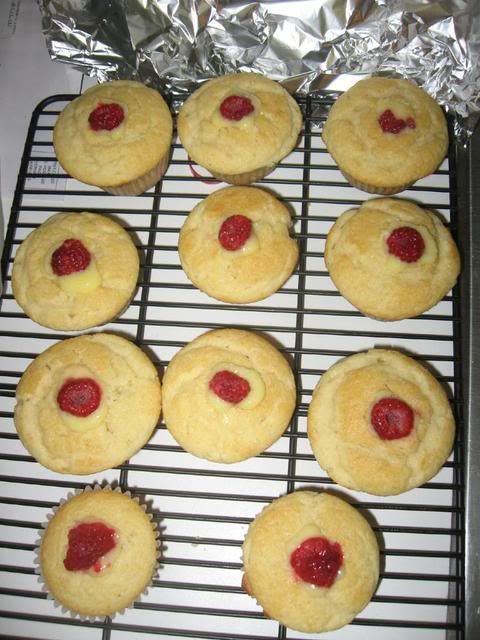
Filled with lemon curd and raspberries.


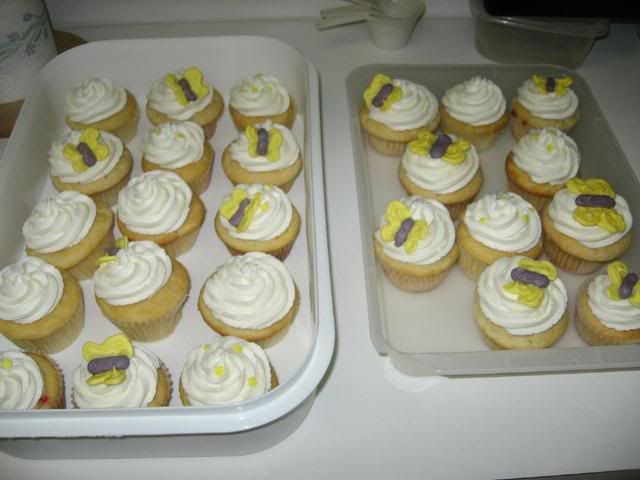
All frosted and decorated!


Enjoy!

Oven Baked Macaroni and Cheese

After reliving the lovely memories associated with fresh yeast rolls, I want to share another special family recipe with you: Oven Baked Macaroni and Cheese. My love of macaroni and cheese runs deep. After all of the amazing things I’ve eaten, I still feel like I can say it’s my favorite food.

In fact, I can remember many of the macaroni and cheeses I’ve enjoyed throughout the years. Apart from raiding the macaroni on the buffet at Quincy’s, I remember getting double helpings when my family visited K&W, a cafeteria style restaurant. I also fondly remember when I finally endeavored to make the blue box macaroni on my own as a child, and proceeded to eat most of it on my own as well. The delicious soul food macaroni and cheese at Charlotte’s historic restaurant, the Coffee Cup. The gourmet lobster macaroni and cheese at a restaurant in south Charlotte. The decadent, bready macaroni and cheese Mike’s mom makes. Perhaps I should write a poem on the subject: my life in macaroni.

Over the years, one recipe tops the list as my favorite macaroni and cheese. I guess you’d expect it to be a labor intensive recipe with numerous cheeses and a mile-long list of ingredients. But you know what’s funny? Sometimes the simplest things really are the best. This Oven Baked Macaroni and Cheese (with optional sausages) takes all of 5 minutes to throw together, bakes for 45 minutes, and is truly outstanding. I’ve had people ask if I put ricotta in it because it’s so creamy, and I’ve had people request that I bring two pans of it to a party instead of just one. You’re going to love this recipe, just like my family has for years.


Oven Baked Macaroni and Cheese

I often serve this as a main course with the optional breakfast sausages on top. You can serve it with big spinach salads. In one particularly fabulous meal, I just made a big pan of this macaroni and a big pan of homemade yeast rolls and Mike and I loaded up on carbs! It also goes wonderfully as a side dish, of course. Here are my serving suggestions in photograph form (can you tell we eat this a lot?):


One serving suggestion: big spinach salads with Oven Baked Macaroni and Cheese (and some goodies in the background as a teaser — that post is coming soon!)


Another delicious way to eat Oven Baked Macaroni: with a big bowl of yeast rolls!


Last but not least, another carb indulgence: Oven Baked Macaroni and Cheese acting as a side dish to our Taco Stuffed Crescent Rolls (another great and easy recipe I’ll have to post soon!)


Oven Baked Macaroni and Cheese


Recipe By: unknown
Yields: a large casserole dish; serves about 4.

Ingredients:
3 tablespoons butter
2 cups dry macaroni
4 cups milk
1 block sharp cheddar cheese, grated (or about 4 cups)
1 package breakfast sausage links or bulk sausage, cooked (optional)
salt and pepper
a sprinkle of fresh chopped chives (optional)

Directions:

Preheat oven to 400 degrees. Spray large, rectangular pyrex dish with nonstick cooking spray. Put butter into dish and set it in the oven as it preheats. When butter is melted, take the dish out and add macaroni. Stir until macaroni is coated. Add milk, cheese, salt, and pepper. Stir and make sure ingredients are evenly distributed. Bake at 400 for 45 minutes, stirring twice during baking. Place cooked breakfast sausages on top (and sprinkle a little extra cheese if desired) and heat in oven until hot. Sprinkle on fresh chopped chives if desired.


Ready for the oven!


Ready to eat!


As a bonus, will you just LOOK at my adorable cooking buddy’s sleeping position as I type this? I had to capture it with my grainy Photobooth since my camera is nowhere in sight. Isn’t she the cutest?!


Sleepy little Byrd helping Mom post recipes and dreaming of belly rubs!

Overnight Yeast Rolls

When I was little, my family enjoyed packing into the car and driving to Quincy’s Buffet. I don’t even know if Quincy’s exists anymore. Even if it does, it’s probably not the magical wonderland of food my childhood brain made it out to be. At any rate, I so loved making the pilgrimage to it back then. My memories from the all-you-can-eat buffet include ravaging the macaroni and cheese and visiting the soft-serve ice cream dispenser. I’d get a chocolate vanilla swirl cone with lots of random candy, sprinkles, nuts, and goo for good measure. But the most memorable part of Quincy’s — the part we all raved about before and after our visit — were the warm, fluffy yeasts rolls with honey butter smeared all over them.

Those are fond memories, but even Quincy’s yeast rolls were just a pale imitation of the light, soft, and buttery rolls my mother would make from scratch a few times a year. In the middle of the nights following Thanksgiving, I would creep out of my downstairs bedroom and warm up some leftover rolls with butter, turkey, and gravy tucked in each one. It might be easier to head to a restaurant, but you won’t regret spending a bit of time in the kitchen to make these homemade rolls. As a bonus, this same dough can be used to make phenomenal cinnamon rolls, as my mother does each Christmas morning.


Overnight Yeast Rolls

My rolls in the pictures below are a bit darker than normal because, for this batch, I used part wheat flour in an attempt to make these healthier. While they’re good either way, I’ll stick with all-purpose flour all the way next time around. No reason to mess with a good thing!

Overnight Yeast Rolls


Recipe By: Clyta Lundsford
Yields: Makes a big, rectangular pan and a half

Ingredients:

2 packages active dry yeast
2 1/2 cups lukewarm water (between 95 and 110 degrees F on a candy thermometer)
2 eggs
3/4 cup sugar
3/4 cup shortening, cut into cubes
2 1/2 teaspoons salt
8 cups all-purpose flour (You can use 5 cups all-purpose flour and 3 cups wheat flour for a slightly healthier, slightly less delicious version.)
1/2 cup butter, melted, for brushing over the tops

Directions:

Soften yeast in water for 10-15 minutes to activate it and be sure it foams (if it doesn’t, it might have died and you’ll want to start over with fresh yeast). Add sugar, salt, eggs, shortening and 4 cups of flour and mix until smooth. Let sit 1 minute, then add rest of flour and mix well. Cover tightly with plastic wrap and refrigerate overnight.

The next day, preheat the oven to 400 degrees F and spray a 9 x 13-inch baking dish and a 9-inch round cake pan (or an 8-inch square baking dish) with cooking spray. Pinch off dough and form into rolls, placing them in the pan. Cover the pans with a towel. Let rise for 1 hour (or until doubled in size) in a warm place, such as on top of the preheating oven. Bake at 400 degrees for 15-20 minutes. Let the tops get a little browner than you think they should to ensure the rolls aren’t doughy in the middle. Brush the tops with melted butter when the rolls are done to soften them (yes, use all the butter). Serve warm with softened butter (or honey butter!) and jam for spreading.


Dough rising in the refrigerator.


Rolls rising on top of the oven.

Recipe Index and Posh Pilfer

We interrupt our regularly scheduled programming for this brief announcement: I added a recipe index to the site for easier navigation. I always have different motives when visiting a food blog. Sometimes I just want to peruse the updates and see what’s new, but sometimes I’m looking for a specific recipe. The index will hopefully make Willow Bird Baking more useful for folks who want to find a recipe quickly.

Also, while this isn’t cooking related (at first, I typed “cookie related,” so you can see where my mind is), it is craft and style related, and I’m sure many of you are interested in that as well. My mom has opened her new shop on Etsy: Posh Pilfer. She has hand-sewn and hand-crafted, quality offerings for kids, babies, pets, and family. My personal favorite is the dog kerchief that threads onto your dog’s collar to stay in place. Byrd loves hers, as you can tell; she even got to model for some of the shop’s photos. Please hop on over to Posh Pilfer and take a look!


Byrd lounging in her Posh Pilfer kerchief


1 122 123 124 125 126 127