$10 late last night for an impulse buy: a cookie-butter waffle purchased from a tiny restaurant on South Boulevard, eaten hastily in Mike’s car (using fingers instead of forks) as we talked about our big plans.

$5 this morning to park Mike’s car in a dusty gravel lot before walking a few city blocks hand in hand, dodging construction tape and ducking into the wrong building before finally finding our way.

$60 passed to a woman wearing a rhinestone heart ring and gold eye shadow, who typed a few things into the computer before printing, signing, and handing over our marriage license in a clear cellophane bag.

$30 for a celebratory lunch — orecchiette with sausage for me, pan-fried trout for Mike — at a little Italian restaurant buzzing with businesspeople at business lunch meetings.
$1.89 for a fountain Coke Zero from Chick-fil-a on the way home after baking our way through the city all afternoon.

The costs added up this weekend, but the total doesn’t come close to what I received in return: the memory of spending the-weekend-before-our-wedding with my fiancé, getting our marriage license and realizing together that this is really happening. What a crazy, surreal, tricky, scary, wonderful life.
* * *

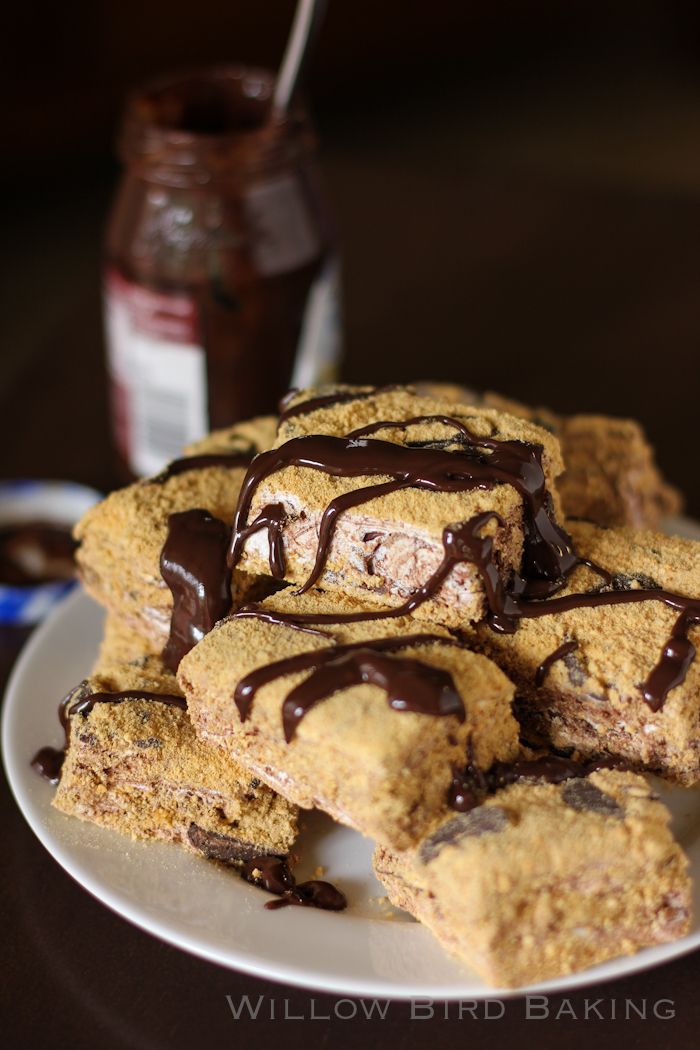
Have a little celebration of your own with these indulgent homemade S’mores Marshmallows. The marshmallows are marbled with melted chocolate, rolled in graham cracker crumbs, and topped with a hot fudge drizzle. If you’re thinking that homemade marshmallows sound difficult, by the way, think again. If you can heat something on the stove and turn on your mixer, you got this — just use a candy thermometer and be careful with the hot sugar.
One year ago: Anthony’s Cinnamon & Walnut Zucchini Bread (gluten-free adaptation included)
Two years ago: Fig, Prosciutto, and Arugula Pizza
Three years ago: Chocolate Mousse Pie
Four years ago: Mango Raspberry Rosecakes
Homemade S’mores Marshmallows
Recipe by: Willow Bird Baking
Yield: 100+ 1-inch marshmallows!
These S’mores Marshmallows are homemade marshmallows marbled with chocolate and rolled in graham cracker crumbs. For a cute party treat, cut them into 1-inch cubes, drizzle them with hot fudge, and stick a toothpick in each one.
Ingredients:
3 packages unflavored gelatin
1 1/2 cups granulated sugar
1 cup light corn syrup
1/4 teaspoon kosher salt
2 teaspoons pure vanilla extract
1/2 cup Hershey’s Baking Melts*, chopped
1 1/2 cups chocolate chips, melted and cooled (I used 1 cup semisweet and 1/2 cup 60% cacao Ghirardelli chips)
graham cracker crumbs, for dusting
hot fudge, for topping
*Karly turned me on to these and they’re perfect for this application, but you can use chocolate chips or even chocolate kisses if you need to.
Directions:
NOTE: Homemade marshmallows are easy if you do a few things. First, spray any measuring cups or tools you’ll be using with cooking spray. Greased measuring cups are great for easily measuring sticky corn syrup, and greased spatulas make working with the marshmallow mixture a lot easier. Second, get all your ingredients and pans measured and prepared before you start. Finally, once the marshmallows are all whipped up and you’re ready to swirl in the melted chocolate and pour the mixture in the pan, work quickly — if you wait too long, they are harder to work with.
Prepare a 9 x 12 inch glass baking dish by sprinkling in a layer of graham cracker crumbs (don’t be skimpy — this will prevent the marshmallows from sticking). Sprinkle the chopped baking melts over this layer and set the dish aside.
Place 1/2 cup cold water into the bowl of a stand mixer fitted with a whisk attachment (marshmallows are a ton easier with a stand mixer) and sprinkle all the gelatin over top to soften it. Let this sit while you make your syrup.
In a heavy medium saucepan, combine corn syrup, sugar, salt, and 1/2 cup water. Cook this over medium-high heat until the sugar dissolves, swirling periodically, and then turn the heat up to high. Cook it until it reaches 240 degrees on a candy thermometer (softball stage). Turn your mixer onto low and drizzle the hot syrup into your softened gelatin. When it’s all poured in, turn the mixer up to high and whip it until the mixture is thick and cooled, about 15 minutes. Then mix in the vanilla well.
Quickly remove the mixing bowl and using a greased spatula, fold in the melted and cooled chocolate. Don’t mix it in all the way — I think it looks pretty if it stays “marbled.” Then quickly scrape all the marshmallow mixture out into your prepared pan and smooth the top. Sprinkle on another solid layer of graham cracker crumbs (again, no skimping!). Let your marshmallows dry, uncovered, overnight. Run a knife around the edges and turn them out onto a cutting board, slicing them as desired (mine pictured above are probably too big — they are super rich and sweet! I recommend 1-inch squares). Then dip the sides into graham cracker crumbs to coat.

