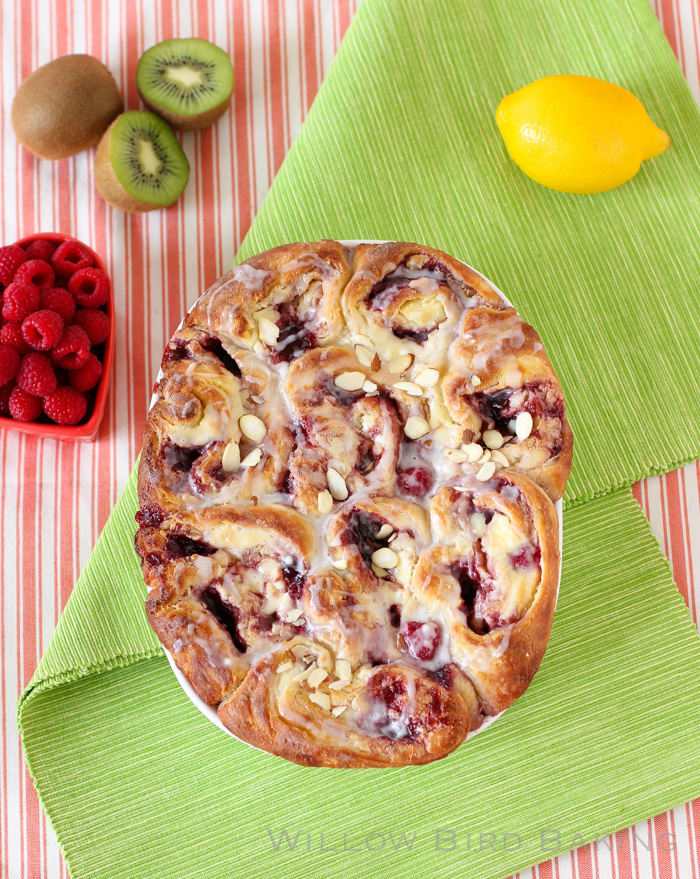
Raspberry Cheesecake Morning Buns
I WENT INTO TARGET FOR ONE THING.
See, Target has a new line of products, Simply Balanced, and I was excited to pick one or two items from it to try. The line is designed to “take the guesswork out of eating well” by including only foods that meet these basic nutritional requirements: low sodium and fat, zero trans fat, no hydrogenated oils or high fructose corn syrup, and no synthetic colors, artificial preservatives, flavors or sweeteners.
 It’s way too much trouble for me to manage all of these criteria on my own during my busy workweek, so I usually just end up chuggin’ down the aspartame and red dye 15 or whatever all week long. I pick a few nutritional criteria to manage (calories, carbs, and dairy intake for me) and tune out everything else. So Simply Balanced is a healthier way for me to pick up a quick grocery item: they managed all the considerations that I don’t have time to.
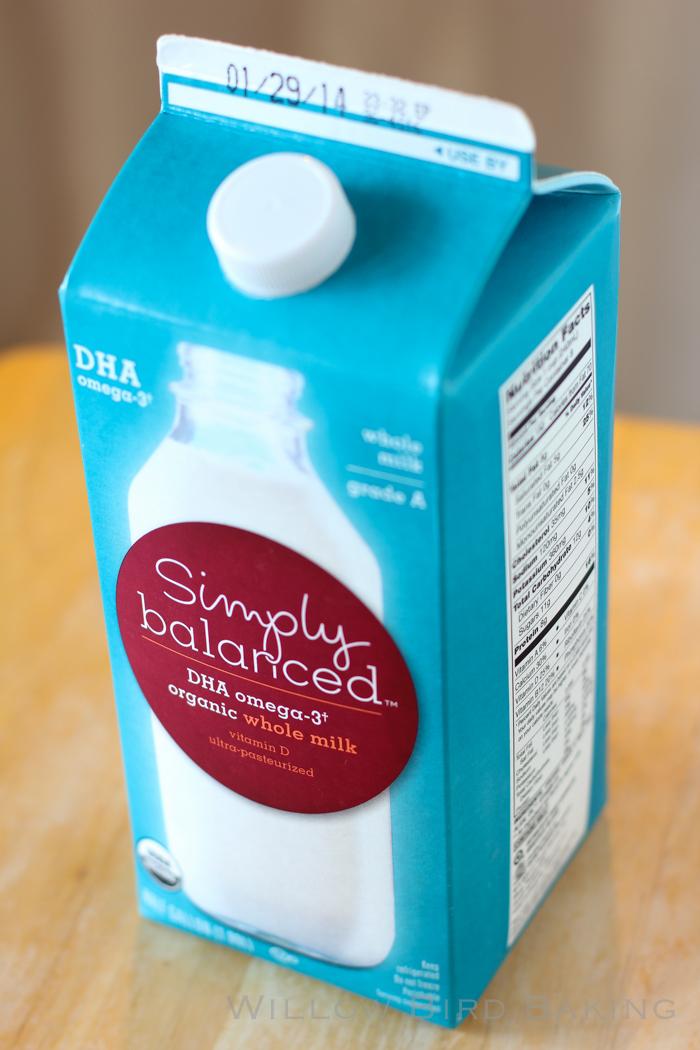
When I first looked at the line a few months ago, they only had a few items, but they’ve since expanded it to dozens of simple, healthy staples. I chose to use their Simply Balanced DHA Omega 3 Organic Whole Milk for this recipe.
Which brings me back to how I went to Target for ONE THING.
You know what happened, right? I saw (insert my husband’s huge eye roll here) A RAMEKIN. You may not understand the significance of this if you aren’t hanging out with us over on Willow Bird Baking’s Facebook page, but let’s just say I have, um, a strong affinity for ramekins. This particular ramekin was a gorgeous red heart. And then I saw a heart plate. And a pink bird mug. And a white mug. And.
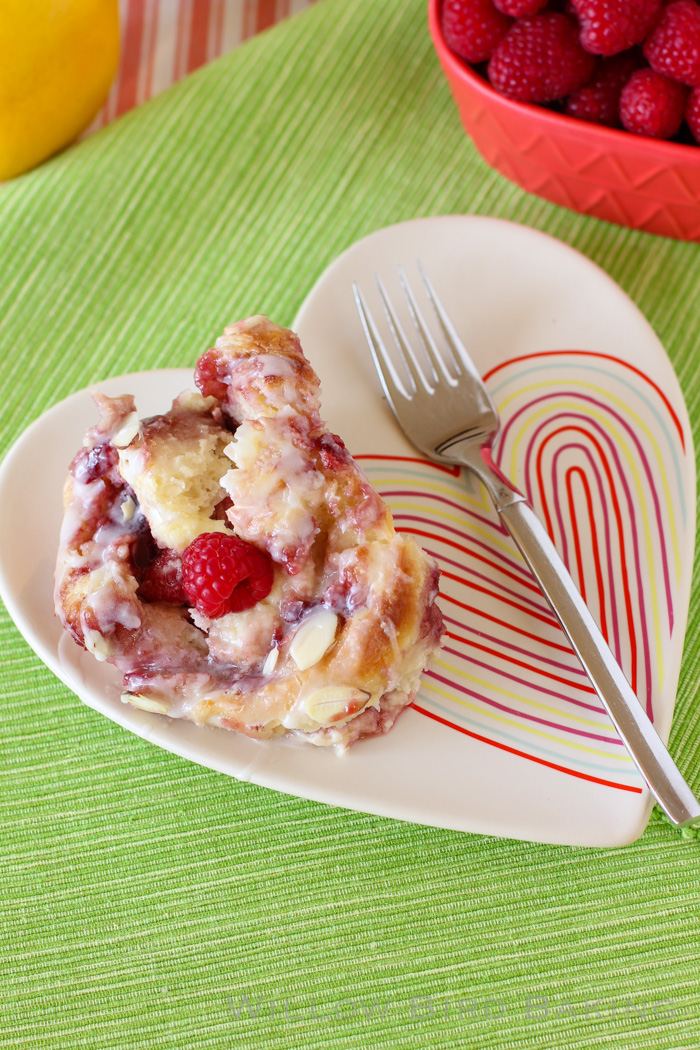
Put it this way: I have a lot of new dishes. And from now on, I’m not allowed in Target alone.
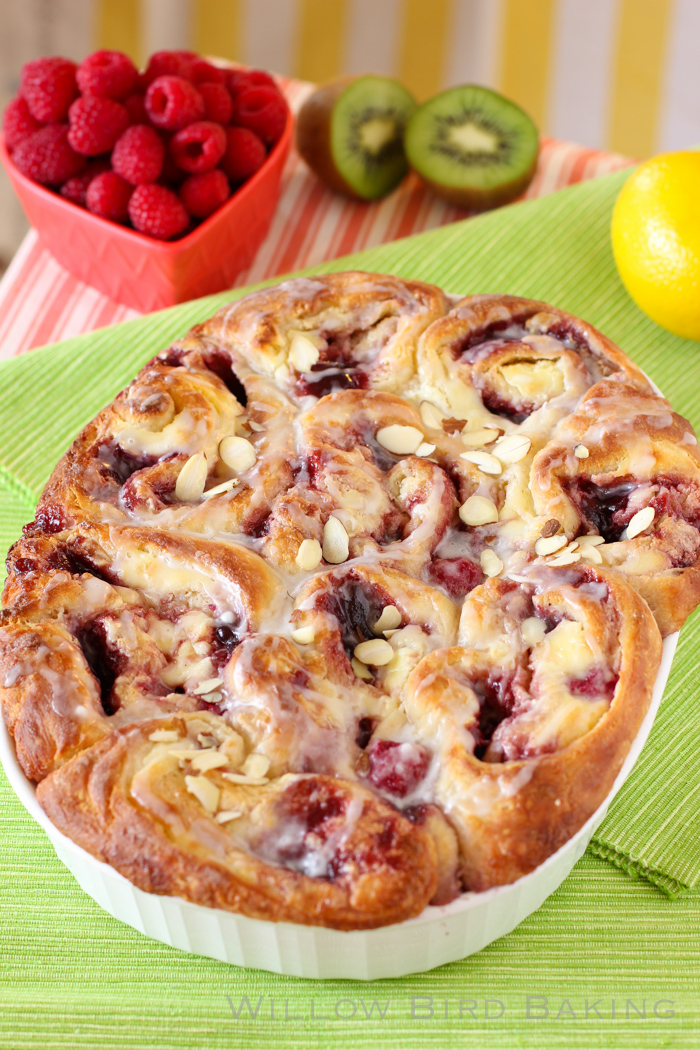
Worth it! I’m so glad I discovered the Simply Balanced line. Granted, I took my healthy new milk and used it to make these decadent, sinful morning buns, but I still love knowing that they’re a touch healthier than they would’ve been otherwise. These buns, by the way, were sort of an accident. I took my amazing Lemon Cheesecake Morning Buns and adapted them per some readers’ suggestions into Raspberry Cheesecake Morning Buns — only I accidentally doubled the cheesecake filling. Oops? And also yay?
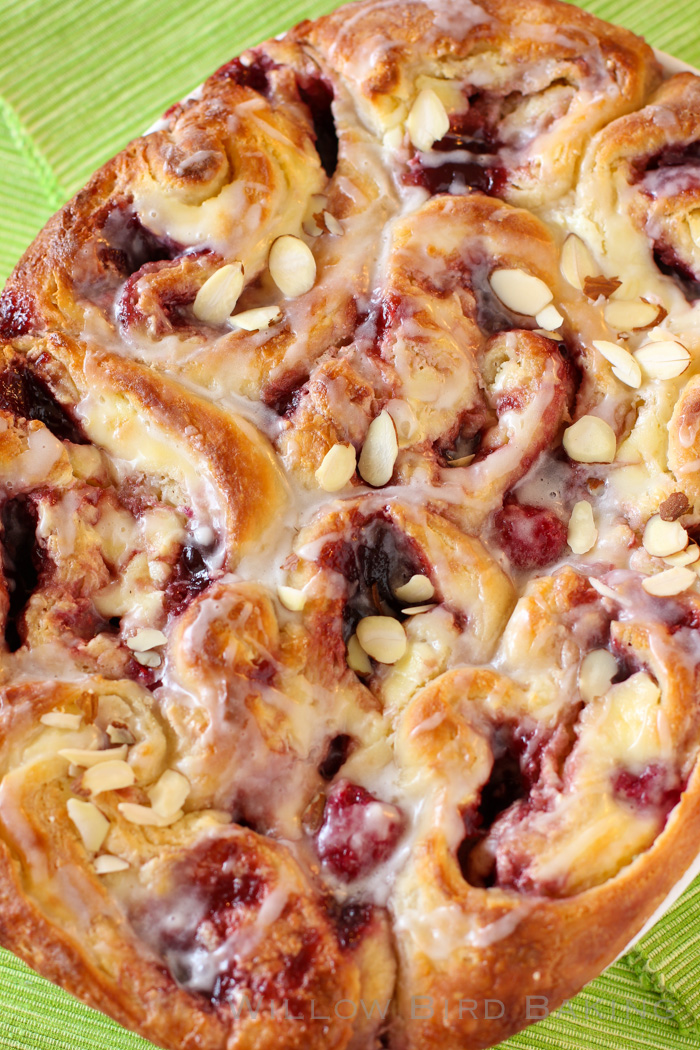
They’re springy, fantastic rolls that combine the joy of a delicious yeast roll with fresh raspberries and indulgent cheesecake. Enjoy!
Other amazing “cinnamon roll” recipes:
Lemon Cheesecake Morning Buns
Buttery Coconut & Almond Morning Buns
The Ultimate Sausage Breakfast Buns
Savory Sweet Potato & Chorizo “Cinnamon Rolls”
Buttery Almond Stuffed Morning Buns
One year ago: Spaghetti Squash Baked “Pasta” Boats
Two years ago: Caramelized Banana Upside-Down Coconut Cake & Coconut Whipped Cream
Three years ago: Two Exquisite Tea Sandwiches
Four years ago: Pecan Maple Bacon Pancakes
Raspberry Cheesecake Morning Buns
Recipe by: Willow Bird Baking
Yield: 24 rolls
These Raspberry Cheesecake Morning Buns combine the world’s best yeast dough with fresh raspberries and indulgent cheesecake. I’ve used a sweet almond glaze to round out the flavors, but if you’re not an almond fan, you can use vanilla extract in the glaze instead.
Roll Ingredients:
1 package (2 1/4 teaspoons) active dry yeast
1/4 cup warm water (100-110 degrees F)
2 tablespoons white vinegar
2 cups milk minus 2 tablespoons, room temperature
2/3 cup cold shortening
3 tablespoons sugar
1 teaspoon salt
1 teaspoon baking soda
1 teaspoon baking powder
5 cups flour
2 tablespoons butter, melted, for after baking
Filling Ingredients:
4 (8-ounce) packages cream cheese, softened
1 cup sugar
2 eggs, room temperature
2 sticks salted butter (or 2 stick unsalted butter and 1/2 teaspoon salt), melted
1 (12-ounce) jar raspberry jam
1 pint fresh raspberries (plus more for topping)
Glaze Ingredients:
1/2 cup powdered sugar
1 tablespoon milk
1/8 teaspoon almond extract (or vanilla if you prefer)
sliced almonds for garnish (optional)
Directions:
Note: I don’t recommend halving yeast recipes; instead, if you don’t want 24 rolls at once, consider freezing some for later. To freeze some of the unbaked rolls, just wrap them well before the second rise and freeze them. Once frozen, pop them out of the pan all together and store in the freezer, wrapped in plastic wrap and in a zip top bag or wrapped in foil. When you want to bake them, stick them back in a greased pan, thaw them in the fridge overnight, proof for the instructed amount of time, and bake like usual. These bun/roll recipes also provide the perfect opportunity to try two different flavor combos. I often make half sweet buns and half savory buns (like these or these) and half to make sweet buns for dessert. If you do this, just half the filling recipes and roll out the dough half at a time.
Mix the warm water and yeast in a medium bowl and let the yeast foam for about 10 minutes. Put 2 tablespoons white vinegar in a measuring cup and then add milk up to the 2 cup line. Set this aside. In a separate large bowl (or the bowl of a mixer fitted with a dough hook), whisk together flour, sugar, salt, baking soda, and baking powder and cut the shortening into the mixture with two knives or a pastry cutter until the shortening looks like small peas. Stir yeast mixture and milk mixture into the dry ingredients and mix well, kneading just a few turns. Transfer the dough to a bowl lightly sprayed with cooking spray, cover tightly with plastic wrap, and proof in a warm, draft-free place (such as a closed, turned-off oven), for around 70 minutes or until doubled in size.
After proofing the dough, cream the softened cream cheese in a medium bowl until fluffy before adding the sugar and eggs. Mix together until well combined.
Turn the dough out onto a floured surface and roll it into a large rectangle about 1/8-inch thick (I carefully cut the dough in half and worked with half at a time to make it more manageable; if you do this, just spread on half of the filling ingredients for each half you roll). Spread the melted butter over the surface of the rolled dough and then dollop the cream cheese mixture all across the surface, spreading gently to create an even layer. Dollop raspberry jam on top and spread it gently across the cream cheese. Sprinkle on raspberries. Gently roll the dough up into a spiral (I find using a bench scraper to encourage the dough to roll up during this process incredibly helpful) and cut it into 2-inch rolls, placing them close together in a 9 x 13-inch baking dish sprayed with cooking spray (at this point, you could wrap and freeze the rolls for later if you wanted).
Cover the rolls let them rise in the fridge overnight (they will have nearly doubled.) When you’re ready to bake, preheat the oven to 400 degrees F, letting the rolls rise on top of the preheating oven covered by a clean dish towel. Bake them for about 25-30 minutes or until lightly browned on top (don’t underbake or they’ll still be doughy in the center). Brush with 2 tablespoons melted butter and return to the oven for 1 more minute. Whisk together the glaze ingredients and drizzle the glaze over the warm rolls. Serve immediately.
Take the guesswork out of eating well. Introducing Simply Balanced, a new brand from Target that’s thoughtfully crafted for taste and goodness.
Disclosure: Compensation was provided by Target via Glam Media. The opinions in this post, however, are all mine.
25 Comments on Raspberry Cheesecake Morning Buns
3Pingbacks & Trackbacks on Raspberry Cheesecake Morning Buns
-
[…] would definitely make my morning! And by looking at the rest of Willow’s site – it is very inspirational for food […]
-
[…] Having some friends over for a brunch on Saturday morning. These rolls will grace the table. This sparkly beverage. And a delicious quiche. Keeping it simple. But, […]
-
[…] am making these on Saturday for a brunch with some single ladies at our church. They are perfect for brunch and […]

Sarah Toasty
January 13, 2014 at 12:12 am (11 years ago)whenever I go to target, I try not to use a basket so I can only pick up what I can carry… then I balance like 8 things. Oops.
These look amazing! I keep on seeing morning buns, I think I’m going to need to venture out of my non-yeast baked goods safe zone lol thanks for sharing!
Julie Ruble
January 13, 2014 at 12:32 am (11 years ago)Oh my gosh, we are TARGET STRATEGY TWINS. I do the exact same thing!
Thanks, Sarah. This is a GREAT yeast dough to start with because it’s so forgiving. Just put plenty o’ flour down to roll it, and go for it! 🙂 Hope you love it!
Katrina @ Warm Vanilla Sugar
January 13, 2014 at 8:07 am (11 years ago)These sound lovely!
Dalila G.
January 13, 2014 at 11:51 am (11 years ago)WoW!!
These rolls look so tasty and there’s fruit in them!
You just can’t go wrong with fruit in the mornings….or afternoon’s ……..evening snacks?! 😉
Plan on making these soon.
dina
January 13, 2014 at 10:19 pm (11 years ago)these would put a smile on my face in the morning!
Nicole ~ Cooking for Keeps
January 14, 2014 at 9:12 am (11 years ago)I don’t think anyone can go into to Target and only buy one thing!! It’s virtually impossible. Wishing I had these raspberry cheesecake buns as I sip my coffee right now. Gorgeous.
Amy | Club Narwhal
January 15, 2014 at 1:51 pm (11 years ago)BE STILL MY HEART!!!! Julie, you know how I feel about your other cheesecake morning buns and these look (is it even possible) even MORE delicious. I can’t wait for a lazy Saturday to test these babies out. And Target. It is like a black hole in there 🙂
Jenni
January 16, 2014 at 1:02 pm (11 years ago)Haha, I am the exact same way in Target! Only the closest Target to me is an hour and a half away, so when I finally get there I tend to go REALLY overboard. It’s not my fault their entire store is so darn cute! LOL
Miriam
February 1, 2014 at 10:29 am (11 years ago)These look AMAZING! Love your site! But, feel like an idiot, so forgive the question…I keep re-reading the directions to see what I am missing…you preheat oven to 400º after 1st proof, but then let rise again for another 24 hrs? Am I staring at the instructions too hard and missing something between the directions for making all the way through or freezing at the 1st rise? Sorry to be dense!
Julie Ruble
February 1, 2014 at 11:52 am (11 years ago)Oh my gosh, so glad you caught that! I have two different ways I let dough rise depending on the filling (whether it can sit out or not), and here I had pieces of both methods! I think it’s all fixed now 🙂 Thanks Miriam!
Miriam
February 1, 2014 at 5:36 pm (11 years ago)Awesome Julie! Thanks! I kept looking and looking thinking I had to be reading wrong! LOL
WooHoo! These will be on the plan for next weekend! 🙂
Julie Ruble
February 1, 2014 at 5:58 pm (11 years ago)Absolutely! Thank YOU! Hope you love them 🙂
Miriam
February 3, 2014 at 7:51 am (11 years ago)I know I will – have pinned quite a few things from your site, and now subscribed. I believe I need to take a “Mental Health Day” and pour through – what a gorgeous place to hang out!
Sarah
March 19, 2014 at 12:14 pm (11 years ago)These are INCREDIBLE!!! Oh my word! I did tweak it a little; the first time I made them they were a little too gooey for me….. Second time, I only did half the filling – liked them even better. I also refrigerated them overnight – simply amazing! Thanks for the awesome recipe!
Julie Ruble
March 19, 2014 at 2:04 pm (11 years ago)So happy to hear you enjoyed them, Sarah! These accidentally had double the filling of my Lemon Cheesecake Morning Buns, so I’m laughing about you enjoying them better with a halved filling recipe — since that was originally my intent! LOL. Glad you loved them!!
Serena
April 24, 2014 at 9:01 pm (11 years ago)Hi Julie,
I have been following your food boards on pinterest for a while now. You always post such wonderful recipes! Thanks for sharing all the good eats. *Cheers* 🙂
-Serena
Rosalee
June 2, 2014 at 12:08 am (11 years ago)These look wonderful. I was wondering about using coconut oil instead of shortening. Have you ever tried this?
Julie Ruble
June 2, 2014 at 12:15 am (11 years ago)Thanks, Rosalee! I’ve never tried coconut oil in place of shortening. It might alter the texture. Here’s a website I found: http://www.ehow.com/how_7588680_substitute-coconut-oil-shortening.html Let me know if you try it 🙂
Anabel Barbosa
August 2, 2014 at 4:52 am (11 years ago)These rolls look amazing!
I’m very intimidated by these type of rolls. Once before I tried to make them and failed. I wasted my time and money and decided that from then on I would only pop open a can and bake them.
I saw these pictures and told myself I should try. I read the recipe and convinced myself to do it. The question I have is, can I use buttermilk from the store instead of “making” buttermilk? (vinegar and milk together and set aside)
Thanks!
Julie Ruble
August 3, 2014 at 12:55 am (11 years ago)Don’t be intimidated! This dough is GREAT to work with 🙂 Just use lots of flour and have a bench scraper handy and you will be great! Remember that no matter what happens, just keep rollin’ and cuttin’ until you get rolls in the pan. You’ll be surprised how great they come out.
You can probably just use buttermilk but I’ve never tried it that way — I’ve always done it like this.
Good luck!
christena
September 10, 2014 at 2:53 pm (11 years ago)I am in the process of making these now, waiting to stick them in the oven and I’m hoping they turn out okay. they look like a bloody mess (literally). the cream cheese filling is super soft and poured out, no dolloping nessisary, which made rolling them up a difficult endeavor. should I have refrigerated the cream cheese filling to firm it up? it was just room temp, I swear! also I only made half of them (as instructed) and they still filled up a 9×13 baking dish. I’m a little nervous. what could I have done wrong?
Julie Ruble
September 10, 2014 at 3:31 pm (11 years ago)No worries! You probably didn’t do a thing wrong. This is a messy recipe and some will inevitably gloop out. It does sound like your cream cheese might have fared better a little colder (depending on what “room temp” is where you live right now, our outcomes could differ!) but it really will turn out fine. Better than fine — amazing! 🙂
When mine were going in the oven, they were oozing from all possible places and certainly didn’t look spirally — and they were wonderful.