Month: June 2012

Anthony’s Cinnamon & Walnut Zucchini Bread (gluten-free adaptation included)

“Miss Julie, did you bring us prizes?”

“Um, no — your prize is getting to spend time with me, duh! Did you bring me prizes?”

This was clearly not the response Sophia had been hoping for. She poked out her lip in a faux pout before running off with Caroline to play airplanes.

Thus began another fun night of Vacation Bible School with my sweet group of third graders. Vacation Bible School is a week of activities, Bible stories, and snacks (one of their favorite parts!) for elementary school kids. You might remember that I look forward to it each year because God always does something special. This year was no exception.

Three years ago, when I started helping with VBS, God taught me that I was there to listen to children. Before that lesson, I’m sure I thought I was there to use my awesome teaching skillz: managing the kids, making them walk in a straight line, dictating when bathroom breaks were and how much silliness was appropriate. It’s always easy for me to zoom straight into teacher mode, assuming that because that’s what I’m good at, that’s how God wants to use me.

Have you ever done that? Assumed you knew just what God wanted from you and in doing so, jumped the gun?

But thankfully at that VBS three years ago, God caught me before I jumped in. Since then, I go into VBS every year with an open heart and a humble spirit. When we pray before we begin the activities each night, I make a point to “turn off” my teacher brain — no looking around to catch kids whispering during prayers, no worrying about who’s poking whom — and surrender to God in prayer.

This year, my sweet group made it easy to relax, listen, and care. Every child had something unique and special about them. One went to boy scout camp each day and always had a fun hiking story. He loved the Percy Jackson novels and was immensely proud of his older brother, who by all accounts must have hung the moon. Another little boy was a dedicated dancer during our music class, watching and copying every move diligently. One little boy didn’t think he’d like VBS, but ended up enjoying every night and dancing even though he didn’t want to! He assured me that his friend had a girlfriend, a charge which the other little boy vehemently denied: “No, I don’t like her anymore!” Wonder if she knows that yet!

Two of my little girls were amazing helpers — and were also the winners of the airplane relay race one night! Another little girl wore a smile every single day. Two of the kids brought friends with them to VBS and were great hosts, explaining each activity. One little boy had a birthday during VBS, prompting us all to sing a boisterous version of “Happy Birthday to You” at the top of our lungs. Each child was a treat.

Including Anthony. Remember how I’d jokingly asked Sophia if she’d brought a prize for me? Well, Anthony really did bring prizes for me!

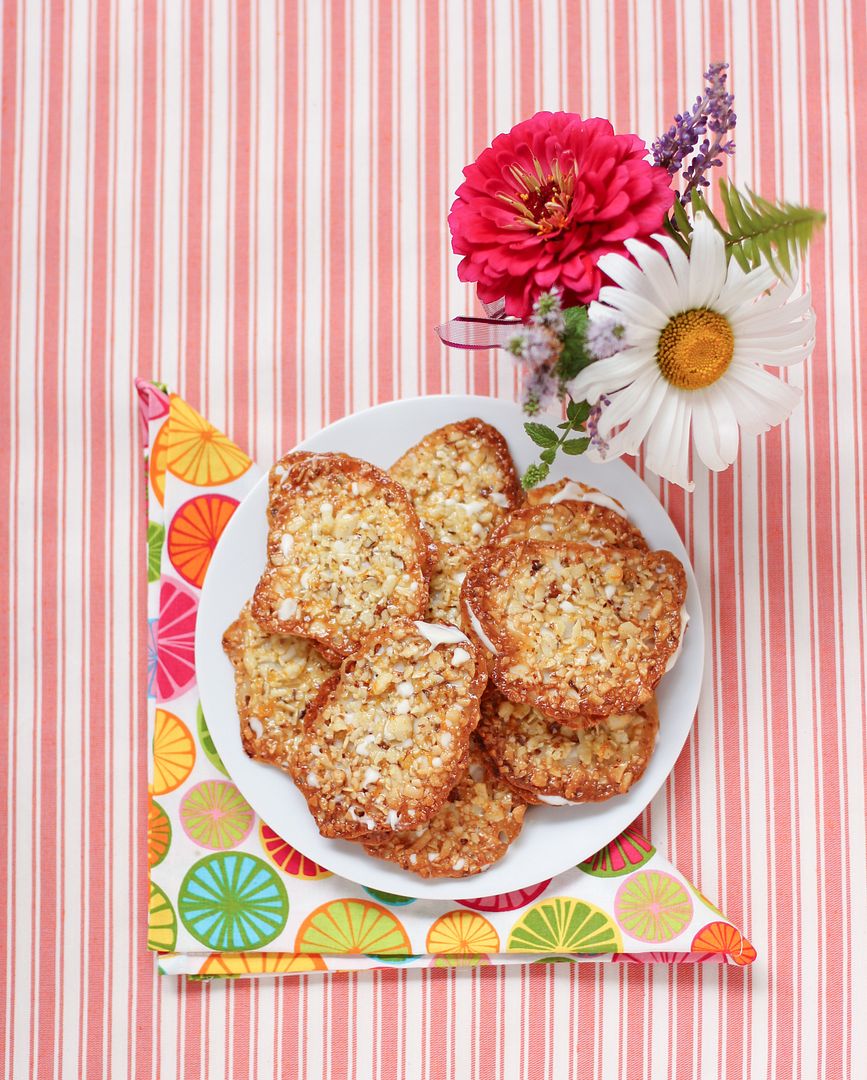
The second night he surprised me with a beautiful bouquet of flowers that his Grandma revealed he had arranged himself (that’s talent!) I was tickled to get them, but just imagine my surprise when he showed up on Night 3 with another treat. This time it was gluten-free zucchini bread that he had helped bake. My co-teachers and I scarfed down our delicious slice before the night was over, fussing over how moist and amazing it was. Night 5 found me in possession of a delectable iced sugar cookie and a photo of Anthony making it.

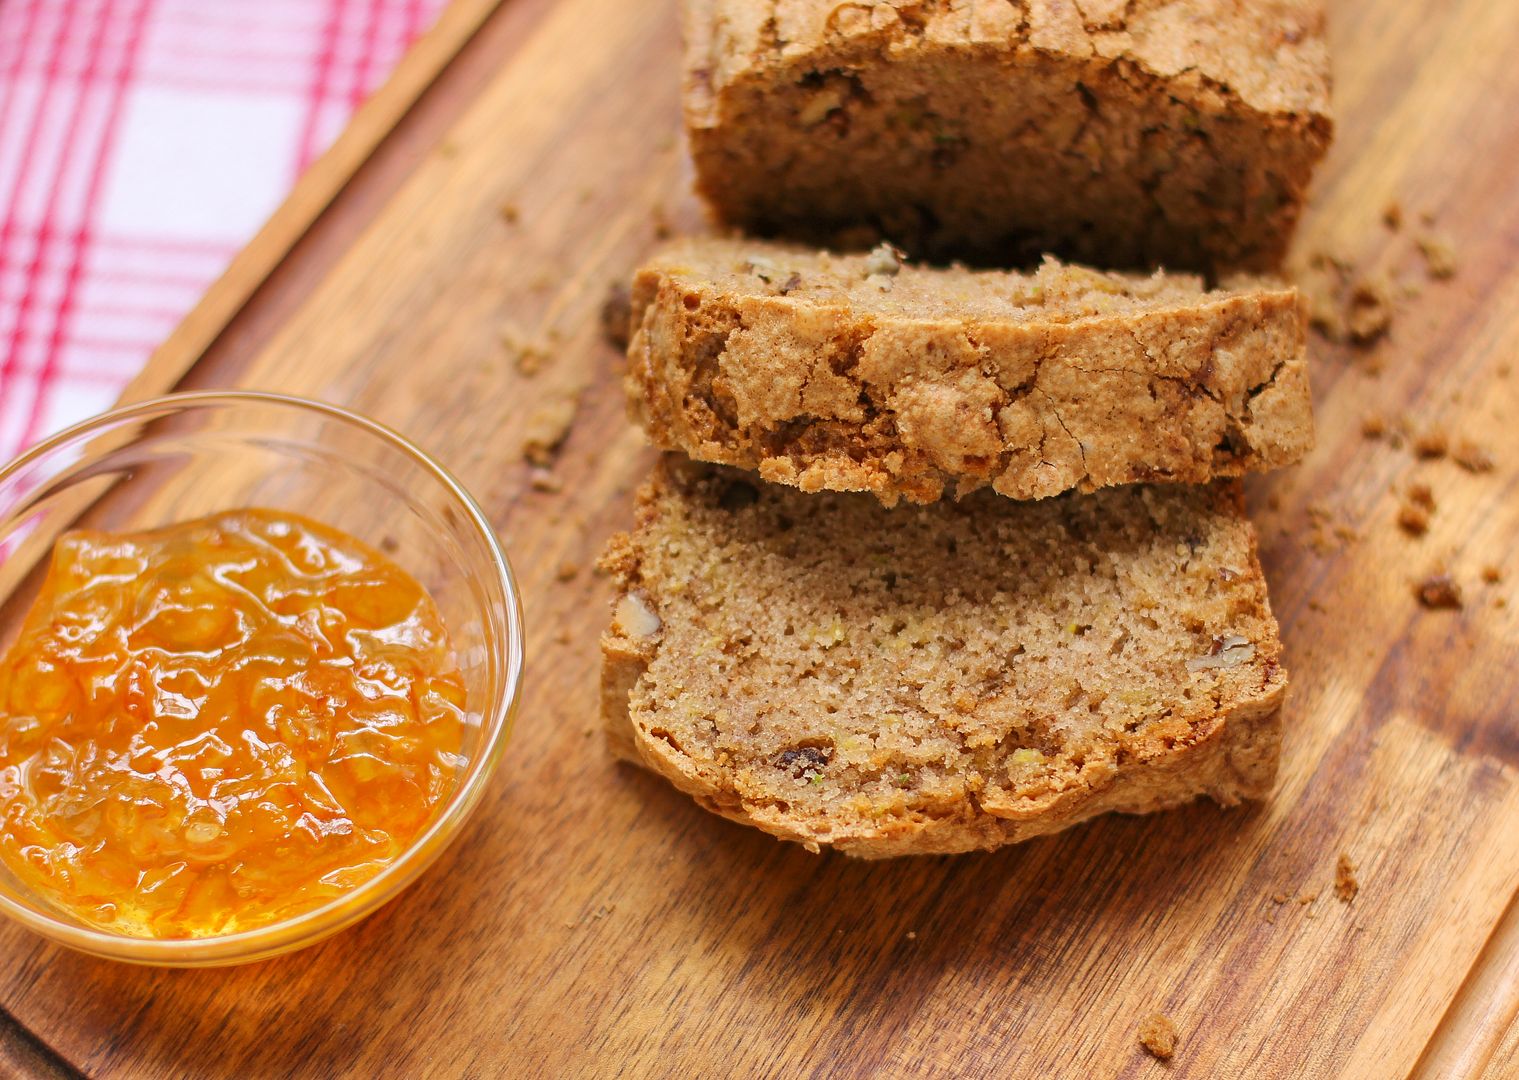
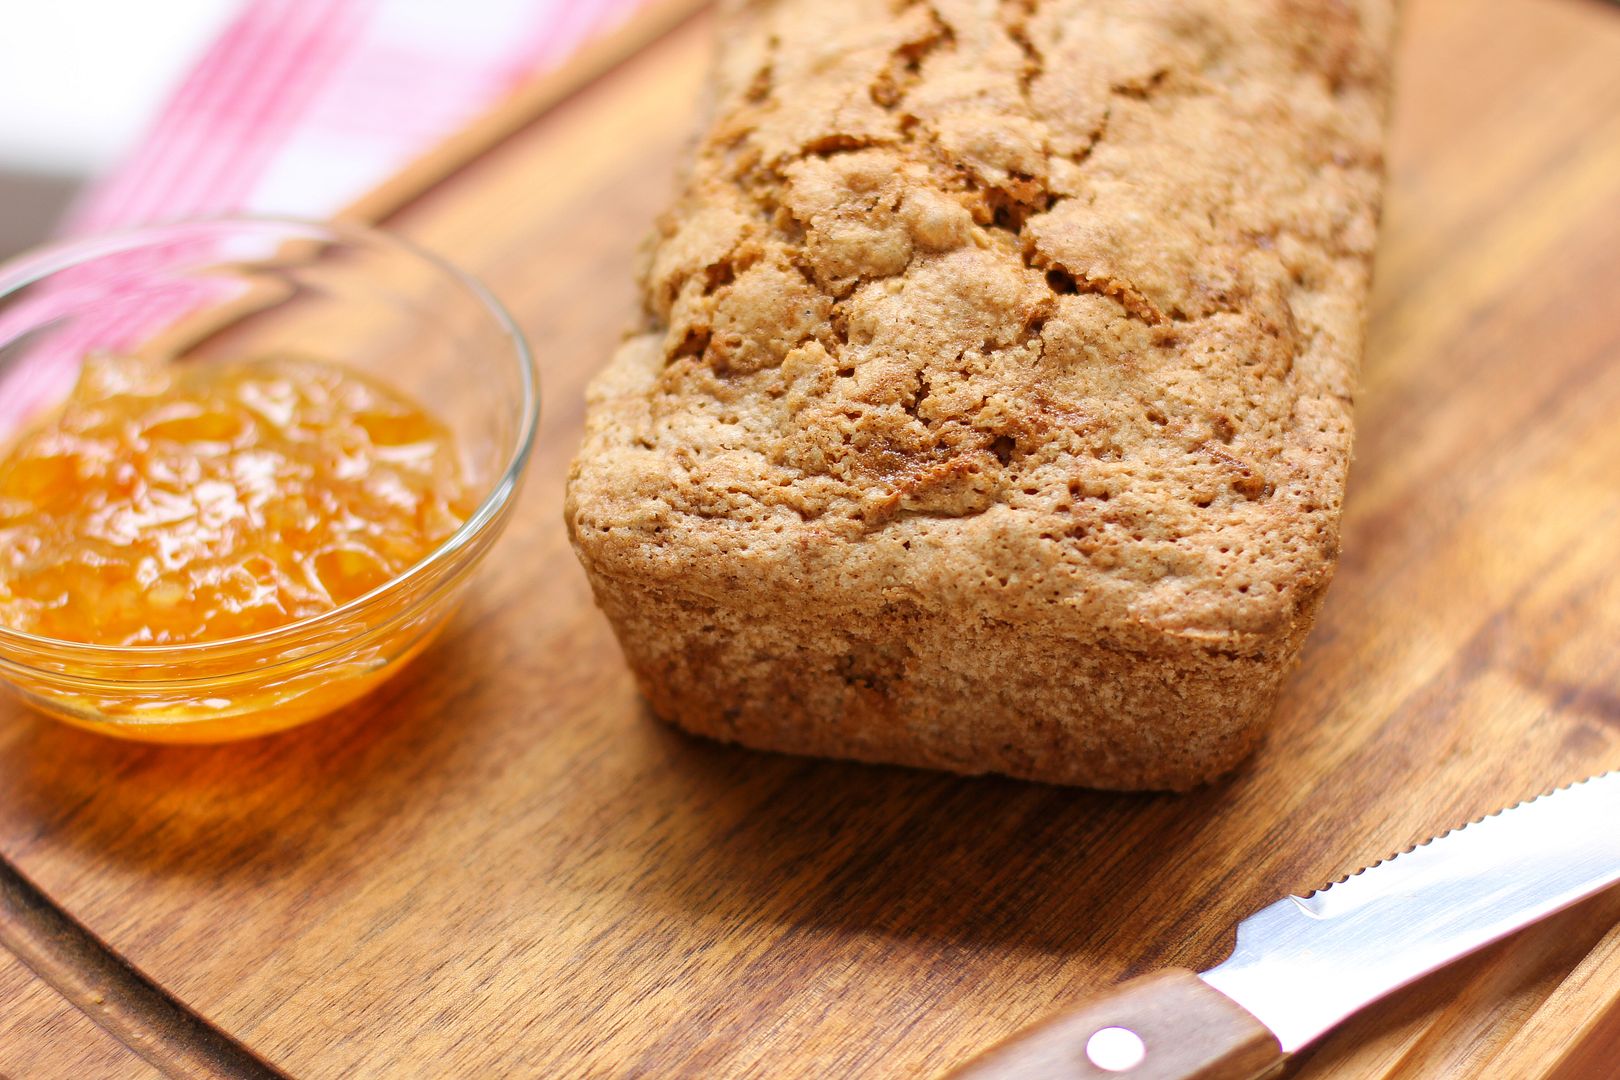
Don’t worry, I didn’t forget Night 4. On Night 4, Anthony gave me another gift, but he also gave you one: he gave us the recipe for the amazing zucchini bread! I gave him a Willow Bird Baking card and told him to watch this space to see his bread in lights. And here it is!

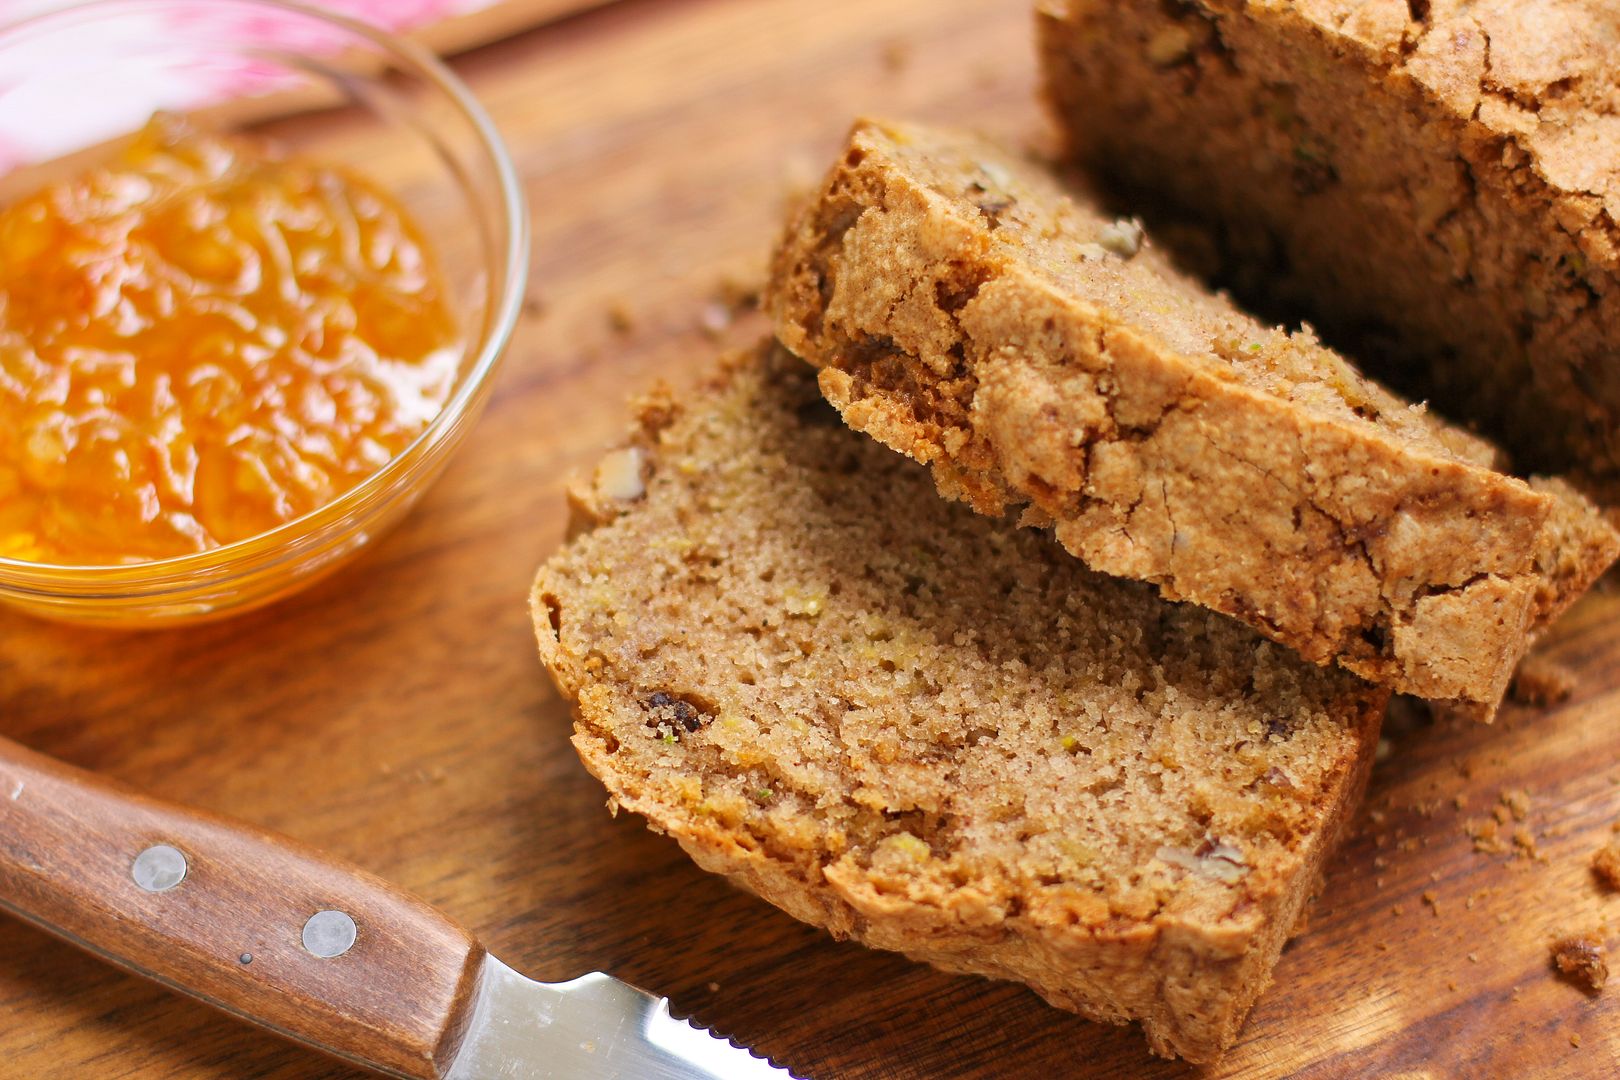
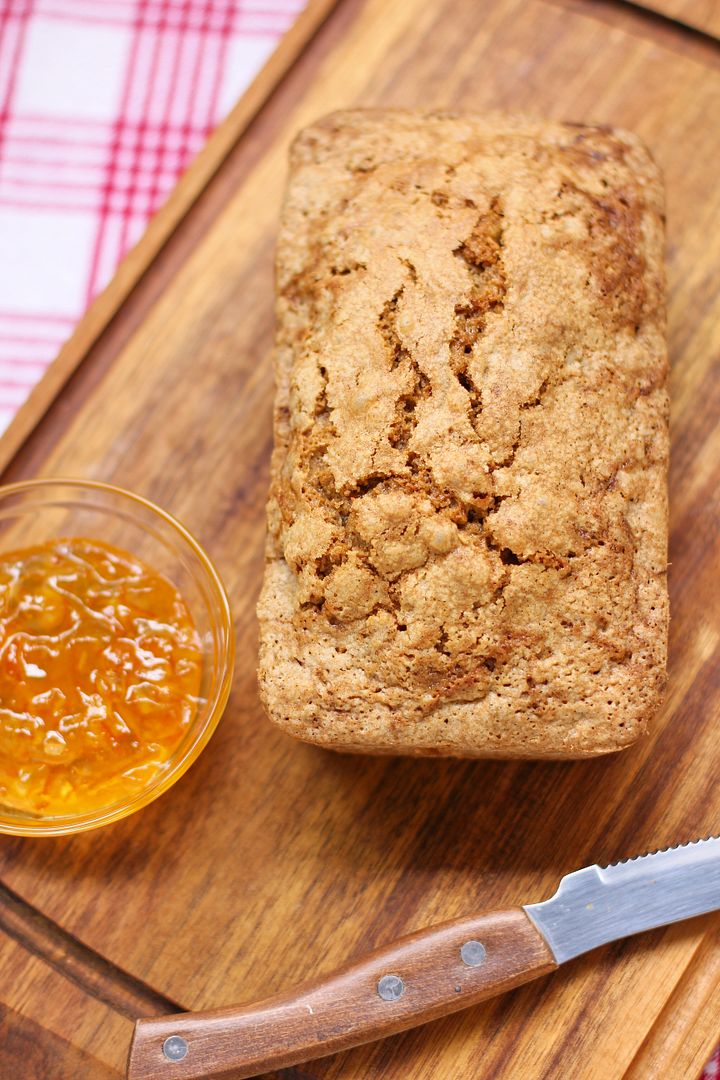
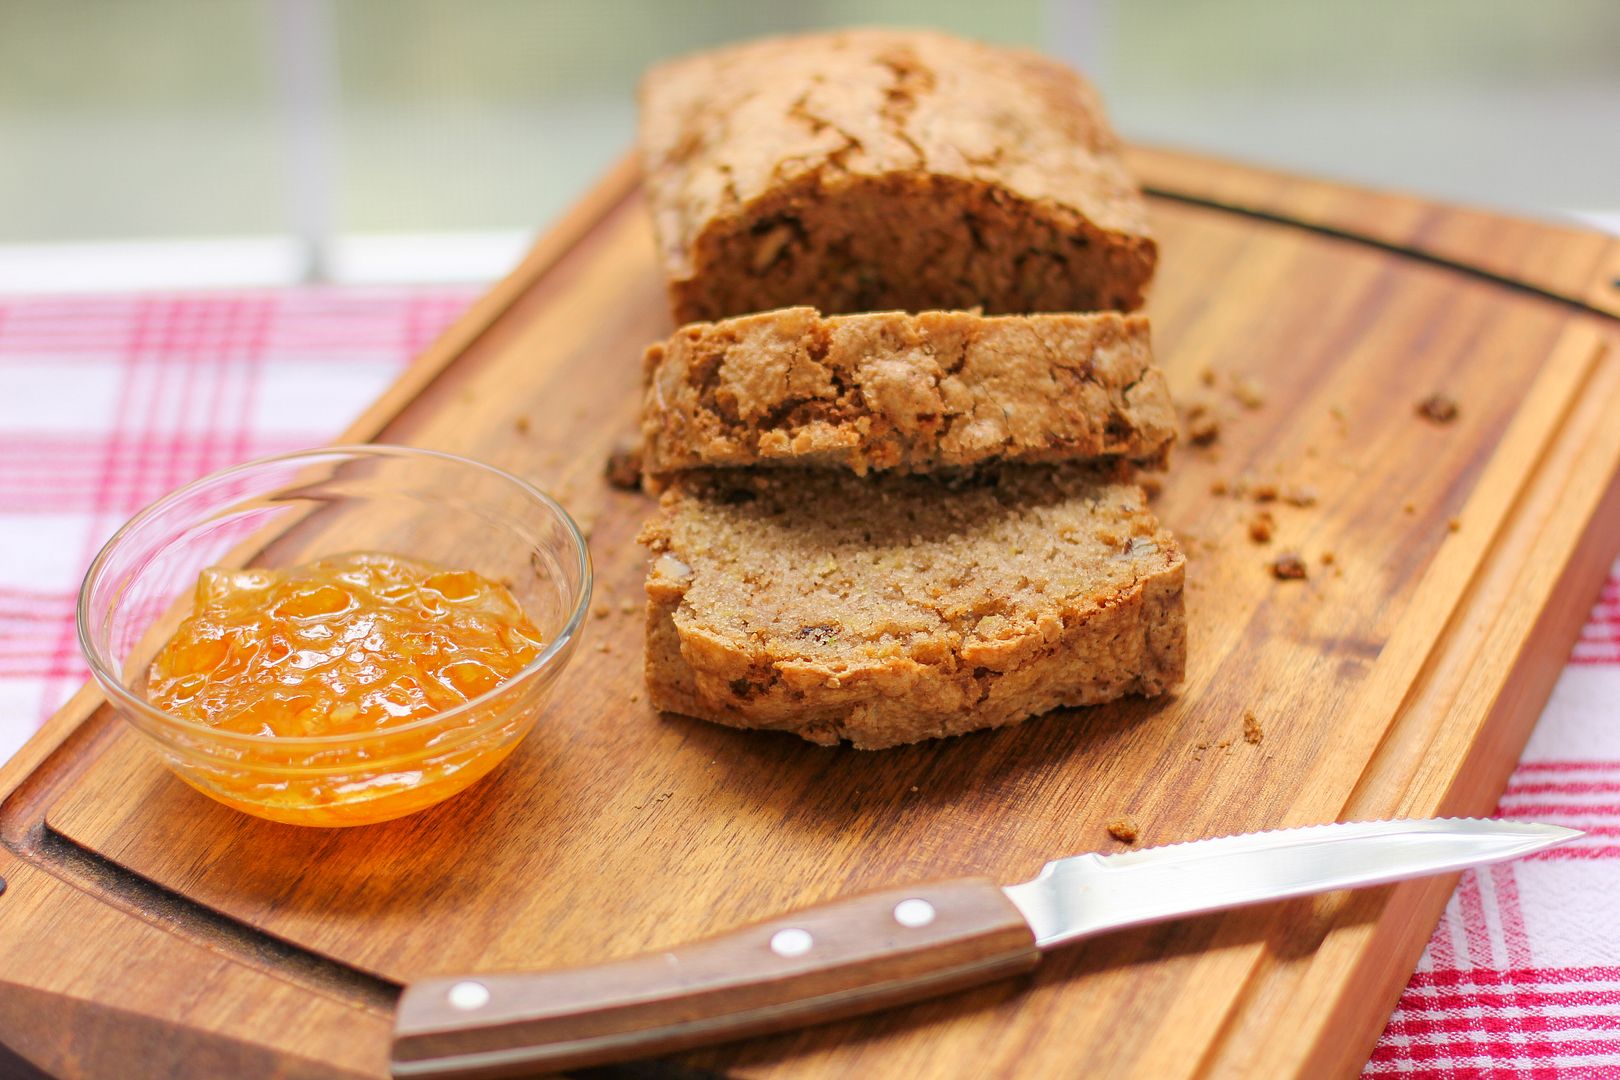
This bread is moist, cinnamony, and nutty. And don’t worry that putting veggies in your bread will harm its flavor: it’s 100% delicious. I baked up a couple of loaves on Saturday and served them at a party with softened butter and a bowl of orange marmalade. They were met with praise by all who tasted. Thanks, Anthony and Grandma, for such a treat.

Let’s give Anthony a gift — let’s give him some wisdom. Leave your best piece of advice for Anthony in the comments. He’s in third grade — what should he keep in mind for school, family, and life?

One year ago: School’s IN for Summer Picnic
Two years ago: Homemade Buttery Croissants and Pains-au-Chocolats

Anthony’s Cinnamon & Walnut Zucchini Bread


Recipe by: Adapted from Lisa and family
Yield: 2 loaves

This recipe produces two moist, hearty, cinnamon-kissed loaves of quick bread perfect for slathering with soft butter and sweet orange marmalade. There’s a gluten-free adaptation included — and since I’ve tasted both versions, I can testify that they’re both fantastic. They also happen to be quick and easy to make. Enjoy!

Ingredients:
3 cups all-purpose flour*
1 teaspoon salt
1 teaspoon baking soda
1 teaspoon baking powder
1 tablespoon cinnamon
3 eggs
1 cup vegetable oil
2 cups white sugar
1 tablespoon vanilla extract
2 cups grated zucchini (this was about 2 zucchini for me)
1 cup chopped walnuts (optional)

Directions:
*Gluten-free substitution: You can use gluten-free baking mix (not just gluten-free flour) in place of the all-purpose flour above. Alternatively, mix 2 cups brown rice flour (or 1 cup brown rice flour and 1 cup sorghum flour), 1/2 cup potato starch (not potato flour), 1/4 cup tapioca starch, and 2 teaspoons xantham gum. This will make about 3 cups of gluten free flour mixture to substitute for the all-purpose flour above.

Grease and flour two 8 x 4 inch loaf pans (I use Wilton’s Cake Release.) Preheat the oven to 325 degrees F. In a large bowl, whisk together flour, salt, baking powder, baking soda, and cinnamon.

In a separate bowl, beat together eggs, oil, vanilla, and sugar. Add the dry ingredients and mix until just combined. Using a spoon, stir in the zucchini and walnuts.

Divide the batter between the two prepared pans. Bake for 40-60 minutes, or until a tester inserted in the middle of the loaves comes out with just a few moist crumbs. Allow the bread to cool for 20 minutes in the pan before turning it out to finish cooling on a cooling rack. Serve with soft butter and orange marmalade.

If you liked this post, please:
Subscribe to Willow Bird Baking
Follow Willow Bird Baking on Twitter
Follow Willow Bird Baking on Facebook

Sweet Orange Florentines

“Don’t worry! It’s not scary. Here, I’ll go first.”

Her curly blonde ponytail bobbed as she picked her way through the freezing mountain river towards the sluice. She waved me over and I waded, fully clothed and reluctant, over to her side. The water was rushing past us, slamming into the rocks downstream in a mess of white spray. I must have looked nervous, because she reiterated: “It’s not scary. Watch me.”

She sat down in the freezing, frothing water of the sluice and was whisked away, laughing and splashing, to a pool downstream. Our 7th grade students, who had hiked to this stream with us as part of their overnight field trip and were now watching from the shore, cheered. It seemed easy enough.

You need to know a few things about me to guess how I was feeling at that moment:

1. I have older siblings, which made for some traumatic pool experiences as a child.

2. In college, my roommate frantically demonstrated (on the floor of our dorm room) how to swim minutes before our freshman year swim test, where I was positive I was going to be the first student in Davidson College history to drown.

3. It was a year later before I really learned to swim semi-confidently. I still opted out of taking a SCUBA class when I spent my semester doing marine biology because I was afraid I’d panic underwater and drown.

4. I did panic in about 15 feet of water at one point in the Gulf of Mexico, at which point I promptly requested that my friend drag me to the nearby boat. I think the undercurrent of hysteria in my voice got her attention. “Undercurrent” might be the worst word choice ever given the subject matter. Ugh.

Basically, I love water, but I am not fond of drowning.


sweet flowers for this post provided by one of my lovely vacation bible school students!

Ashley had just run the sluice right in front of me, though, and was safe and sound. If my mom were there, she would’ve begun, “If all your friends were jumping off a bridge…,” but thankfully she wasn’t there at that particular moment. I sat down in the froth of water, which was much colder than it had seemed when it was only up to my knees.

Gasping from the cold, I felt the water begin to propel me down the stream. I picked up speed and bounced through bubbles and foam before being deposited, laughing and flailing, into the pool of calmer water. Our students cheered. Ashley and I promptly posed for a soaked photo taken by one of them.

That wasn’t the first time Ashley had supported or encouraged me. As coworkers, we talked all the time about how to model certain behaviors for our 6th and 7th graders, but she probably didn’t realize how often she modeled fun, joy, and above all, bravery for me. I left every conversation with her feeling calmer, more joyful, and inspired — whether by her fantastic hand-crafted earrings, her creative outfits, her sweet relationship with her family, her bright outlook. How many people can you say that about?

Just recently, Ashley modeled bravery for me one more time. After teaching middle school Spanish for years, she made the decision to move her entire life to Spain, where she’ll be teaching middle school English! She told me that the decision — leaving family and friends and country indefinitely! — was one of the hardest she’s ever made, but after crying for a bit and taking a nap (we both agreed that naps are great for decision making), she knew it was the right choice.

Since she’s famous for packing light, I didn’t want to get her a physical going away present, but I did want to give her something she could “take with her” to know how special she is to me. She’s a cookie baking superstar, so I cobbled together this recipe for her. These florentines are based on some cookies her mom bought once that we all loved. They happen to be the best cookies I’ve ever had, so I hope she can bake them sometime in Spain and enjoy a “taste of home.”

Love you, Ashley!

One year ago: Itsy Bitsy Berry Cream Pies
Two years ago: Pulled Pork BBQ Sandwiches with Creamy Coleslaw and Summer Bean Salad

Sweet Orange Florentines


Recipe by: Willow Bird Baking
Yield: about 15 sandwich cookies

These are the best cookies I’ve ever tasted, seriously! Don’t be afraid of the anise extract — I hate licorice flavor, but the anise extract here is just enough to give an amazing depth to the orange flavor, not enough to make the cookies licoricey. These cookies are so different than drop cookies — make sure you only use a teaspoon of mixture for each cookie even if it looks tiny, because they spread out into the beautiful lace you see above. They’re easy and a lot of fun to bake!

Ingredients:
1/2 cup sliced almonds
3/8 cup macadamia nuts, chopped
1 1/2 tablespoon all-purpose flour
About 1 tablespoon finely grated orange zest (from about 1/2 orange)
1/8 teaspoon salt
3/8 cup sugar
1 tablespoon heavy cream
1 tablespoon honey
2 1/2 tablespoons unsalted butter
1/4 teaspoon pure vanilla extract
1/4 teaspoon anise extract
1/2 cup white chocolate chips

Directions:
Preheat the oven to 350 degrees F with a rack in the center. Line a baking sheet with parchment paper or a silicone baking mat. In the bowl of a food processor, pulse the almonds and macadamia nuts together until finely chopped without letting them form a paste. In a large bowl, whisk together the flour, orange zest, salt, and finely chopped nuts.

In a small saucepan, bring the sugar, cream, honey, and butter to a boil over medium heat, stirring occasionally. Once the sugar is dissolved, continue cooking the mixture for about a minute before removing it from the heat and adding the vanilla extract and anise extract. Stir this mixture into the flour mixture until it’s combined and let it sit for about 30 minutes.

Once the mixture is cool enough to touch, use a teaspoon measure to scoop up 1 teaspoon of batter at a time and roll them into balls. Place these balls on your prepared baking sheets at least 4 inches apart — don’t skimp on this distance, because the cookies will spread a lot as they form their “lace.” Flatten the balls into discs. Bake one pan of cookies at a time, rotating once halfway through the baking time, until they are thin, lacy, and golden brown, about 6-7 minutes (this is one of those cookies where you inevitably burn the first pan and then get the hang of it, so don’t fret. Just keep a close eye on them). Let them cool on the baking sheet for 5 minutes before removing them with a thin spatula to a cooling rack. Repeat until all cookies are baked.

In the meantime, melt the white chocolate chips in the microwave according to package instructions (usually half-power, in small increments, stirring often.) Carefully spread a very thin layer of white chocolate (just a whisp or they’ll be too sweet) on the bottom of one cooled cookie and top it with another to form a thin sandwich. Place these on wax or parchment paper to dry (you can stick them in the refrigerator to speed up the drying process). Serve immediately or store for up to 3 days in an air-tight container with layers separated by wax paper.

If you liked this post, please:
Subscribe to Willow Bird Baking
Follow Willow Bird Baking on Twitter
Follow Willow Bird Baking on Facebook

Crispy Baked Sweet Potato Fries with Basil Salt and Lemon Garlic Dipping Sauce

I really intended to have relaxed by now. Summer vacation officially began for me last Saturday, and I had all sorts of fun plans: relaxing at the pool, workin’ on my fitness, watching funny YouTube videos.

And then it happened: work creep.

I’ve talked a bit about lifestyle creep before — the phenomenon where, as you earn more money and invest in “luxuries” they begin to feel like “necessities.” Work creep is similar (I say this like I didn’t just make the term up; whatever), but without the fun new acquisitions. Work creep is where, as you gain a little time here and there, you find a way to fill it with work. Am I the only one who experiences this?

I think part of the problem is that I always have a backlog of work: things I should have been doing all school year but have been ignoring due to lack of time. I don’t want to think about the emails I’ve forgotten to respond to, the dog I’ve forgotten to walk (just kidding, just kidding, she reminds me!), the cleaning I’ve forgotten to do. Ugh.

I literally — are you guys going to judge me for this? I’m going to tell you anyway — I literally have not done an official overall cleaning of any room in my house in . . . months. Like, every now and then I cleaned the toilet, threw some dishes in the dishwasher, or cleaned off the stove, but other than that (and laundry when absolutely essential — but no folding!), we’ve been on autopilot over here. And again, it’s not because I’m lazy, but because my schedule was jam-packed full of educating young minds, baking young cobblers (okay, this parallelism makes no sense), and sometimes eating and sleeping.

So now that I’m confronted with a beautiful, wide-open couple of months, it’s understandable that I’ve immediately scheduled the entire thing with all of my backlogged work. I’ve worked all day every day this past week on blog work. And there are baking projects, cooking camps, cleaning (good grief, so much cleaning), and packing for my impending apartment and classroom moves still to be done. I need a vacation from my vacation — but I know I’d just work through it as well. Good thing I love every ounce of work I do, right?

If you’re fueling your work creep, sweet potato fries are a good snacking choice. This recipe by Giada DiLaurentis is my favorite because of the delicious basil salt and easy lemon garlic mayonnaise for dipping. Fun fact: I use the dipping sauce for dipping roasted asparagus spears in, too! So good.

I’ve included a few tips for making your fries extra crispy if you like them that way. Enjoy these at a summer picnic or, okay, while cleaning. Sigh.

Do you experience work creep? Are you a workaholic (by choice or necessity), or can you turn it off?

One year ago: Blueberry Cream Cheese Almond Braid
Two years ago: Santa Fe Breakfast Bake

Crisp Baked Sweet Potato Fries with Basil Salt and Lemon Garlic Dipping Sauce


Recipe by: Slightly adapted from Giada DiLaurentis
Yield: 2 servings

These sweet potato fries are delicious — especially with their tangy lemon garlic mayonnaise for dipping! To ensure you get crispy fries, cut them very thin and spread them out on the baking sheet — they shouldn’t be touching or crowding each other at all. This might mean using several baking sheets. Also, depending on the thickness of your fries, you might need to adjust the cooking time up or down to obtain crispy (but not burnt to a crisp!) fries. Just check early and often — and remember they’ll crisp up a bit as they cool as well.

Ingredients:
2 sweet potatoes, cut into thin “fries”
1 1/2 tablespoons olive oil
1 tablespoon chopped fresh basil leaves (or more to taste)
1 teaspoon kosher salt (or more to taste)
1/4 teaspoon freshly ground black pepper
3/4 cup mayonnaise
1 clove garlic, minced
1 tablespoon lemon juice

Directions:
Line two baking sheets (or more as needed) with foil and set aside. Preheat the oven to 400 degrees F. In a large bowl, toss the sweet potato fries in the olive oil and then spread them out on the baking sheets. Make sure they don’t touch and aren’t crowded. Bake until they’re golden and crisp, about 45 minutes (but check early and often in case your fries are thinner or smaller and cook faster.)

While the fries are baking, mix together the salt, pepper, and basil to make basil salt. Combine the mayonnaise, garlic, and lemon juice in another small bowl to make the Lemon Garlic Dipping Sauce. When the fries come out of the oven, sprinkle on the basil salt and toss them around with a spatula. Spread them out again to let them cool slightly (if you keep them in a heap, they’ll steam themselves and get soggy). Serve them with the Lemon Garlic Dipping Sauce.

If you liked this post, please:
Subscribe to Willow Bird Baking
Follow Willow Bird Baking on Twitter
Follow Willow Bird Baking on Facebook

Croque Madame French Toast Cups

My 7th grade students and I spent most of class today making fun of their writing.

Wait, that sounds bad, doesn’t it? Am I currently losing teacher points? I definitely would’ve lost a few if you’d walked in and seen me reading a student’s paper aloud, barely restraining laughter (while the class didn’t even bother trying.)

Reserve judgment, though! I promise it’s not as bad as it sounds.

See, the students were actually nominating themselves for this roasting. The papers we were snickering at were their earliest assignments from last year, and they were so amusing because the kids are so much better at writing now. Because they grow by leaps and bounds over the two years I teach them, I always plan a day at the end of 7th grade for them to complete a writing reflection. Today was that day.

I originally planned the reflection to be an individual, silent activity. Every year, however, it inevitably evolves into a class-wide discussion, mostly because they love to share the absurd things they find in their early work. About 5 minutes into the assignment, a student will raise his or her hand to announce, “My handwriting was terrible back then!” Another hand will shoot into the air: “I used periods in a list where I should have used commas!” Another hand: “This sentence didn’t even make sense!”

My favorite moment today was when E. and A. shared their “thesaurusy” papers. After I exhorted them at the beginning of the year to work on their word choice, both girls resorted to the thesaurus. It was an excellent impulse, but their execution was . . . ah, imperfect. They doubled over in laughter today as they shared sentences from that early paper: “I reckon human cloning is spurious,” and “I conjecture that human cloning is shoddy.”

I’m happy to report that both girls use more appropriate diction these days.

All of the good-natured ribbing and laughter today did make their writing analysis take longer, and I could have shushed them and redirected their focus. The truth is, though, I relish their incredulity. I’ve saved all of their writing for two years just to savor this moment with them. They giggle at themselves and at others, search for concrete ways their writing has improved, and realize that the 360 language arts classes they just completed actually taught them something.

Secretly, their reflection becomes my reflection: what did my course accomplish? How have these kids grown?

For my students, I provide reflection opportunities like this, complete with detailed prompts to guide their thoughts. For me, though, reflecting is like breathing. I’m naturally introspective (sometimes to a fault!) so that I can hardly plan the future without evaluating (and re-evaluating, and re-evaluating again) the past.

Recently, pondering the past led me to revisit these adorable stuffed French toast cups. They’re one of my favorite breakfast/brunch recipes and I’ve known for awhile that I wanted to create some variations on the French toast cup theme.

In these little Croque Madame Cups, sweet French toast cradles salty ham, mellow Gruyère cheese, and a gorgeous yolky baked egg. The cups self-sauce as the yolk breaks over the contents, and with a quick dip in some maple syrup, each bite is perfection. They’re a little more fiddly than just making French toast or just making a sandwich, but they’re cute enough for a fancy brunch and so worth the effort.

They were a delicious, luxurious way to reinvent my French toast cups, but I’m betting I’m not finished yet! Those cups are destined for even more fun fillings.

Since we’re being reflective today, reflect on your year so far: how have you grown in 2012?

One year ago: Blueberry Cream Cheese Almond Braid
Two years ago: Lemon Triumph Cake

Croque Madame French Toast Cups


Recipe by: Willow Bird Baking
Yield: 8 cups

These little Croque Madame French Toast Cups take two messy dishes — a traditional croque madame and French toast — and combine them in finger food format. Apart from being more convenient to serve and eat at a brunch or breakfast, they’re outright adorable. I love the gorgeous flavor of Gruyère in each cup, but if you’re on a budget you can use good Swiss. Make sure to buy good quality ham, though, because it really makes the dish.

Ingredients:
1/2 cup heavy cream, plus 8 teaspoons, divided
1/2 cup milk
3 large eggs plus 4-8 eggs, divided (see note below)
2 tablespoons honey, microwaved for 20 seconds (but not while still IN THE BEAR, y’all!)
1 teaspoon cinnamon
1/4 teaspoon salt
8 slices day-old or stale sandwich bread
4 tablespoons butter
a couple of slices good ham
a couple of slices Gruyère cheese (or Swiss) and some grated for topping
salt and pepper

Directions:
Note: Cracking the egg over each French toast cup before baking is the hardest part of this recipe, because a whole egg has too much liquid and overflows the cup. I’ll tell you what I did to get the right amount of egg in each cup, and then I’ll make a suggestion for how you might be able to do it even easier. What I did is crack the egg and pry it open just enough to let half the white and half the yolk slip into one French toast cup (using the shell to reserve the other half of the egg). I then released the other half of the egg over another cup. I think it’d be even easier, though, to just crack 8 eggs into a wide bowl and use a spoon to scoop a yolk and a little white out into each French toast cup. You’d end up using more eggs, but this way each cup will have a whole yolk, which is lovely!

In a medium bowl, whisk together the milk, cream, eggs, honey, cinnamon, and salt (this step can be done the night before and refrigerated). When you’re ready to cook your French toast, pour this mixture into a cake pan or pie dish.

Prepare your bread by removing the crusts (I stack the slices and use a long serrated knife to remove all the crusts at once) and roll each slice with a rolling pin to slightly flatten and elongate it. Dip each slice of bread into your custard mixture for about 8-10 seconds on each side before carefully removing it with a spatula to a cooling rack over a sheet pan or over the sink. Allow the excess moisture to drain off of the slices for 1-2 minutes.

To cook French toast, melt 1 tablespoon of butter over medium heat in a skillet. Put 2 slides of bread at a time into the pan and toast gently to golden brown (about 2-3 minutes per side). Remove the French toast to a cooling rack to cool completely. Repeat with all the slices of bread, replenishing butter in the pan as needed. Preheat oven to 400 degrees F. When the French toast is cool enough to handle, take each piece and gently tuck it into the well of a greased muffin tin, forming a bowl. Tuck some ham and Gruyère cheese in each cup. Place an egg over top (see above note). Lightly salt and pepper each cup and then top each egg with 1 teaspoon heavy cream.

Bake the cups at 400 degrees F for 10-12 minutes, watching carefully. Pull them out when the white is set but the yolk is not fully cooked through (has a little jiggle.) Top each cup with a little shredded Gruyère when they’re hot from the oven. Set them out to cool and continue cooking from their residual heat (at least 10 minutes). Use a knife to loosen the edges from the pan (and you might even need to use it as a lever to loosen the bottom of the cup, since some of the egg will have leaked out and sealed the cup to its well.) Remove the cups to a serving plate (if they seem to be wobbly, leave them in the pan a little longer). Serve them warm on a bed of maple syrup.

If you liked this post, please:
Subscribe to Willow Bird Baking
Follow Willow Bird Baking on Twitter
Follow Willow Bird Baking on Facebook

Krispy Kreme Doughnut Croque Madame

(Will it totally squander any shred of credibility gained from my New York Times mention and our fantastic discussion to post a doughnut sandwich right now? Yes? Oh.)

My 6th grade students and I take a field trip to High Point every year to watch a play produced by the North Carolina Shakespeare Festival. Shakespeare is the main event, but there’s another attraction in High Point that inevitably catches the students’ attention: the 60-year-old historic Krispy Kreme Doughnut shop on Main Street. It’s exciting to see the “Hot Doughnuts Now” sign pop into view each year, but the first year we went, the doughnuts became a major source of dissent.

See, I divide students into small car groups before a field trip so that parent volunteers can drive us. That particular year we had 4 different vehicles carting us to High Point and back. After the play, each vehicle arrived back at school and unloaded a group of tired, contented 6th graders — until the last car arrived.

When the door opened on that car, I watched all heck break loose. Each kid stepped out, much to the shock and dismay of their classmates, sporting a paper Krispy Kreme hat. That’s right: while every other kid had been driven straight back to school, this car had stopped for doughnuts.

My teacher sense kicked into gear. I recognized this moment! I knew it would come someday. This was the fateful moment when I had to whip out the line. You know the one (because you’ve either used it on your own kids or had it used on you). I looked around at all their outraged faces and said, feeling much older than I really was, “Guys, life’s not fair.”

They got over it. But since then, we’ve always made it a point to put “stop for a quick doughnut” on the field trip agenda. It’s lovely to see them all get out of their cars with paper Krispy Kreme hats and fun memories at the end of the day.

Personally, I have trouble “stopping for a quick doughnut.” It’s easier for me to stop for, say, a dozen doughnuts. In case you don’t already know this about me: I am wild for Krispy Kremes. Cake doughnuts are fine (only KK’s cake doughnuts, though; I’m not a fan of that other cake doughnut chain), but those yeasty rings of love are my kryptonite.

Last year I created the “Just Trust Me” Fried Bologna Doughnutwich (no really, trust me! It’s so good!) and recently I got a hankering for another version.

This sandwich is a take on a croque madame, which is a grilled ham and cheese sandwich topped with a fried egg and sometimes served on French toast. In this version, however, two original glazed Krispy Kreme doughnuts kick that French toast to the curb.

Listen, I know you’re skeptical (everyone gets skeptical when they see a doughnutwich, and perhaps that is the most appropriate initial reaction), but the melty Gruyère, salty ham, and creamy “sauce” from the egg yolk are absolutely insane with the sweet glazed doughnut. Maybe I should call this the “Just Trust Me (Again)” Krispy Kreme Doughnut Croque Madame? It’s probably a once-a-year sort of treat, but I hope you’ll give it a try.

What’s the “life’s not fair!” moment you remember from your childhood? (here’s another one of mine.)

One year ago: World’s Best Grilled Cheese (sharp cheddar cheese & caramelized onions on beer bread)
Two years ago: Caramel Fudge Brownie Cheesecake

Krispy Kreme Doughnut Croque Madame


Recipe by: Willow Bird Baking
Yield: 2 sandwiches

Proving once and for all that I’m not a food snob, I offer you a sandwich on . . . a doughnut. The first Krispy Kreme breakfast sandwich I made was so amazing that I was ready for more. This time around I combined salty ham, melty Gruyère, and an over-easy fried egg on an original glazed Krispy Kreme doughnut to create a croque madame. The flavors are amazing together — trust me!

Ingredients:
4 Krispy Kreme original glazed doughnuts (or you can cut 2 in half if you’re delicate)
2 thick slices of good smoked ham
2 slices Gruyère cheese
Hellmann’s mayonnaise
2 eggs
salt and pepper
2-3 tablespoons butter

Directions:
Lay 2 doughnuts out on a plate. Melt a tablespoon of butter in a skillet over medium-high heat and sear the slices of ham on both sides briefly. Remove them to a paper towel to drain for a bit before placing each slice onto a doughnut. Top with a thin slice or two of Gruyère and microwave for a a few seconds to get the cheese melty. Smear with some mayonnaise.

Melt the last tablespoon of butter in your skillet. Break one egg at a time into the pan, salt and pepper it, and fry it to your desired doneness (I’d like to make a pitch for over-easy or -medium, since the gooey yolk is delicious in this sandwich!) Place the fried egg briefly on the paper-towel lined plate to drain off the excess butter, and then place one on top of each stack of ham and Gruyère. Top both sandwiches with another doughnut as the “top bun.” Serve immediately.

P.S. In case you’re wondering, this is not a sponsored post. I just really love Krispy Kremes.

If you liked this post, please:
Subscribe to Willow Bird Baking
Follow Willow Bird Baking on Twitter
Follow Willow Bird Baking on Facebook