meat

Secret Garden Recipe: Two Exquisite Tea Sandwiches

When I was little, I didn’t lust after coins or stamps or postcards or anything particularly, ah, collectible. Instead, I coveted tiny things. When my mother would head to torturous craft stores to pick up sewing supplies, the dollhouse aisle was a haven. Package after package boasted teensy soda bottles, itty bitty magazines (with readable headlines!), miniature lamps, pint-sized armoires, and on and on. I always tried to pick a particularly adorable item to ask Mom for, but then I’d realize with a measure of disgust that I didn’t really know what I’d do with a set of tiny kitchen utensils. At any rate, miniatures have always had my heart.

Maybe I am secretly a gnome.

One sort of miniature that did frequently end up coming home with me was tea sets. I sought them out everywhere I went — toy stores, souvenir shops, craft stores, department stores, gas stations. You’d be surprised where you can find tea sets. I had medium sets, tiny sets, super-ultra-tiny sets. There were teapots with elegant designs, cutesy designs, holiday designs, and even one where every dish was shaped like a flower.

Despite my plethora of tea sets, I never once sat down and had tea. I displayed them, fiddled with them, and every now and then acted out a sad little version of a teddy bear tea party, but I don’t think a drop of tea or a crumb of a crumpet ever touched a single dish. What a shame, because there are very few food events more classy and sweet than a tea party.

For my sister’s Secret Garden Party, I remedied the situation. It was a tea party to the extreme, complete with a colorful tablecloth, Mom’s best china, some sweet decor, and the most important part: an elaborate spread of indulgent finger foods. These savory, delicate finger sandwiches were one of the biggest hits on the table.

Cucumber Tea Sandwiches


Recipe by: Great Party Recipes
Yields: about 40 finger sandwiches

Ingredients:
1 large cucumber, peeled and sliced very thinly
3/4 cup butter, room temperature so it’s soft and spreadable
2 teaspoons minced fresh garlic
20 pieces thin-sliced bread with crusts removed
1 tablespoon lemon juice
1 tablespoon olive oil
Salt
Pepper to taste

Directions:
Place the cucumber slices in a colander, lightly salt them, and let them drain for 1-2 hours to remove some of the moisture.

Combine the soft butter and garlic in a bowl and spread onto one side of each slice of bread. In a separate bowl, stir together lemon juice, olive oil, and pepper. Place the cucumber slices into this mixture and toss to coat them well. On each of 10 slices of bread, arrange overlapping cucumber slices. Top with remaining 10 slices and quarter. Serve immediately.

Classic Cucumber Tea Sandwiches were cool, buttery, and satisfyingly crisp. Providing the perfect complement was the salty, bold flavor of Smoked Salmon Tea Sandwiches with a kick of paprika. Both sandwiches were devoured (daintily, of course) in between scones, croissants, and lemonade.

Smoked Salmon Tea Sandwiches


Recipe by: Great Party Recipes
Yields: about 40 finger sandwiches

Ingredients:
1 cup cream cheese, room temperature so it’s soft and spreadable
20 slices bread, thin-sliced with crusts removed
1/2 cup capers
12 ounces thin-sliced smoked salmon
lemon juice
Pepper to taste
mayonnaise (optional)
paprika (optional)

Directions:
Spread cream cheese on each slice of bread (one side only) and dot with capers (I liked quite a few capers). Arrange the smoked salmon on 10 bread slices, with a squeeze of lemon juice on each. Pepper generously (to taste), top with remaining 10 bread slices, and quarter (using a serrated knife). Brush long side of each tea sandwich with mayonnaise very lightly and dip into paprika to coat. Tap to remove excess paprika. Serve immediately.

Don’t repeat my childhood mistake of overlooking the tea party. Whether it’s for a gardenful of guests, a roomful of family, or a handful of (conveniently disinterested) stuffed animals, whip up some of these simple tea sandwiches. With minimal kitchen time and a short ingredient list, they provide a ton of pinky-pointing deliciousness. How about you? What’s your favorite tea party friendly dish? Scones, croissants, muffins, pastries, petit fours? Or are you a savory tea sandwich person yourself?

If you liked this post, please:
Subscribe to Willow Bird Baking
Follow Willow Bird Baking on Twitter
Follow Willow Bird Baking on Facebook
Give this post a thumbs up on StumbleUpon


ShareOther ways to share this post with friends!

Deconstructing a Pizza and a Place

Deconstruction in the culinary world is about division: a familiar dish is broken down into its discrete flavor components, which are served in an unexpected way. It’s about assembly: the separated components meld in each bite, surprising in their newfound unity. It’s about departure: the eater is asked to readjust what they know and what they think they know. It’s about coming home. It’s about the moment when all the flavors suddenly make sense as a recognizable whole — maybe as a dish you’ve had a taste memory of since childhood, but didn’t expect to meet in this new form.

During my parents’ anniversary dinner, I took the classic dishes they’d grown up with and reinterpreted them. Diner pizza became these deconstructed pizza bites, cold and salty, bold and mellow — and surprising in their transformation from discrete bits of flavor to a unified, familiar experience.


View of the Bay Bridge from Alcatraz

San Francisco was also deconstructed for me this past weekend. I attended the Foodbuzz Food Blogger Festival and after a weekend of crowds, taxis, food, lights, friends, laughter, food, cameras, trolleys, hills, and food, I’m sitting alone in Charlotte trying to process the experience.

It’s quiet here — just the sound of airplanes in the sky above my apartment, the road noise beyond the woods, the determined hum of my recently reemployed heater. When I look to the west from this vantage point, pretending my vision reaches the 3,000 miles and 96 hours back in time to my trip, I see fragmented moments: a deconstructed city, a deconstructed experience.

Maybe if I offer these bits of memory to you together — no toothpick to assemble them on, so a blog post will have to do — you’ll taste the flavor of the weekend.


A gull looks toward San Francisco

FLAVOR

Bursting, juicy pork sandwiches with crispy pork skin. Cupcakes like coconut clouds. Adorable quail eggs. Agave-sweetened gazpacho. The burning rush of juice from a garlicky escargot pop. Sultry corn tortillas around shredded beef. A tongueful of flaming mushroom soup. Tart cranberries nestled in goat cheese. Lamb resting peacefully on a bed of butternut. Gruyère tucked inside a fat croissant.


Mini-doughnuts by the bay

ADRENALINE

I presented my Blueberry Stuffed French Toast Bowl recipe to a room filled with sweet, hungry people. Before the demonstration, my shaking hands were trying desperately to set each kitchen utensil and bowl in its rightful place, taking aimless photos, and failing to fasten my apron properly. During the demonstration, I might have been a little silly. Maybe. And after the demonstration — pure joy. What fun! What supportive friends!


Doing my Nature’s Pride demonstration at the Foodbuzz Tasting Pavilion

LAUGHTER

On Saturday night, Foodbuzz hosted a scavenger hunt around the city. I joined a group of relative strangers to romp around San Francisco being silly. I was so exhausted before we began that I wasn’t sure if I’d made the right decision — but being a part of Team Tony & the Gold Dust Gals (as we dubbed ourselves) was a highlight of my trip. Here are the tasks we had to complete (photos in this section are by the super-sweet Laura Flowers except the business card photo by my lovely roomie Diana):

[youtube=http://www.youtube.com/watch?v=ZByOPa-X-l0&fs=1&hl=en_US&color1=0x402061&color2=0x9461ca]1. Dance with a stranger (I totally stepped on his foot).


2. Late night exercise: 10 synchronized jumping jacks.


3. Exchange business cards with 10 people.


4. Photo with the hippest person you can find (the dude in the bowtie, OBVIOUSLY!)

5. Late night toast at the Gold Dust Lounge (I don’t drink, but water works!)


6. Late night snack (of brightly colored, flagrantly artificial drugstore sweets!)

It was beyond absurd scavenging around San Francisco with these wonderful, crazy people. I started out so tired I could barely move, but once we finished our tasks, I didn’t want the night to end.

CRISIS

Even as we were running around San Francisco through bouts of laughter and chatter, something was very wrong. In fact, something had been wrong throughout my trip. On my first night in the city, I walked out to the drugstore to purchase a few supplies. A homeless man stood outside and asked if I would buy him a tuna sandwich and some orange juice – something I happily did. As the weekend stretched on, though, I saw a different man or woman on every corner. Every few feet. In every other doorway.

During the scavenger hunt, we passed a man with no shoes and only a thin sweatshirt sitting in an alcove. He was unable to make eye contact, and seemingly unable to modulate his voice. In a quiet monotone, he was repeating, “Help me — somebody help me.”


San Francisco sunset through the dirty hotel window

I don’t know what to say except that I’m haunted. We have homeless in Charlotte, but I encounter them at a rate that I feel I can manage, and offer them a warm lunch or dinner. In San Francisco, I was overwhelmed. What can I do for this person? And this one? And this one? Each individual deserves a meal, deserves clothing, deserves love, deserves a kindness. But I don’t have the money to provide for them. I prayed as I passed, but was confronted with a scripture from James: “If one of you says to them, ‘Go in peace; keep warm and well fed,’ but does nothing about their physical needs, what good is it?”

I’m reading through the article series, Shame of the City from 2003 and still wondering, wondering, wondering: what can I do?


View of the Golden Gate Bridge from Alcatraz

COMFORT

Despite traumatic moments, Sunday was a balm on my nerves and heart. My beloved college roommate, Martha, drove an hour and a half to spend the day with me. We walked through the sometimes-rain and sometimes-mist in Chinatown, then took a trolley out to the water. We devoured croissants and muffins at Boudin Bakery, home of “mother sponge,” the starter of San Francisco’s famous sourdough.

The sea lions of Fisherman’s Wharf had us in stitches — especially the particularly bulbous ones. I made Martha pose like a tourist in front of random ferries and Ghirardelli square. We rounded off the night with In N Out fries and a crazy drive across the Golden Gate Bridge. Staring out at the lights of Sausalito and San Francisco with someone I truly love to pieces was one of my favorite parts of the trip.


Me and Martha

From random bites to random dances, from boisterous sea lions to giant bay bridges, San Francisco was full of magic. I’ll continue to process the experience and break it down into bright bite-size pieces. In the meantime, have a Deconstructed Pizza Bite.

Do you have suggestions for how to get involved in the plight of the homeless? Have you found a way of serving underprivileged citizens? Let me know.

Deconstructed Margherita Pizza Bites


Recipe by: Willow Bird Baking
Yield: about 12 pizza bites

Ingredients:
2 1-inch thick slices of crusty Italian bread, toasted
12 pieces of pepperoni
1 tomato, chopped into cubes
24 mozzarella pearls (or small hunks of mozzarella)
about 4-5 large basil leaves, torn into 3 pieces each

Directions:
On a toothpick, assemble the following: one hunk of bread as your base, a pearl of mozzarella, a hunk of tomato, another pearl of mozzarella, a piece of pepperoni folded into quarters, and finally, a piece of basil leaf. Refrigerate until ready to serve, and serve cold for a fresh, bright flavor.


Sea lions at Fisherman’s Wharf

If you liked this post, please:
Subscribe to Willow Bird Baking
Follow Willow Bird Baking on Twitter
Follow Willow Bird Baking on Facebook
Give this post a thumbs up on StumbleUpon


ShareOther ways to share this post with friends!

A Heartfelt Birthday Do-Over, Homemade Ravioli, and a Giveaway!

This weekend, I drove a total of 320 miles or 6 hours total for one magical road trip. It was inspired by a sweet gesture from Mike, and turned into a beautiful event for both of us. Let me tell you all about it.

I.  The Inspiration: A Childhood Dream Come True


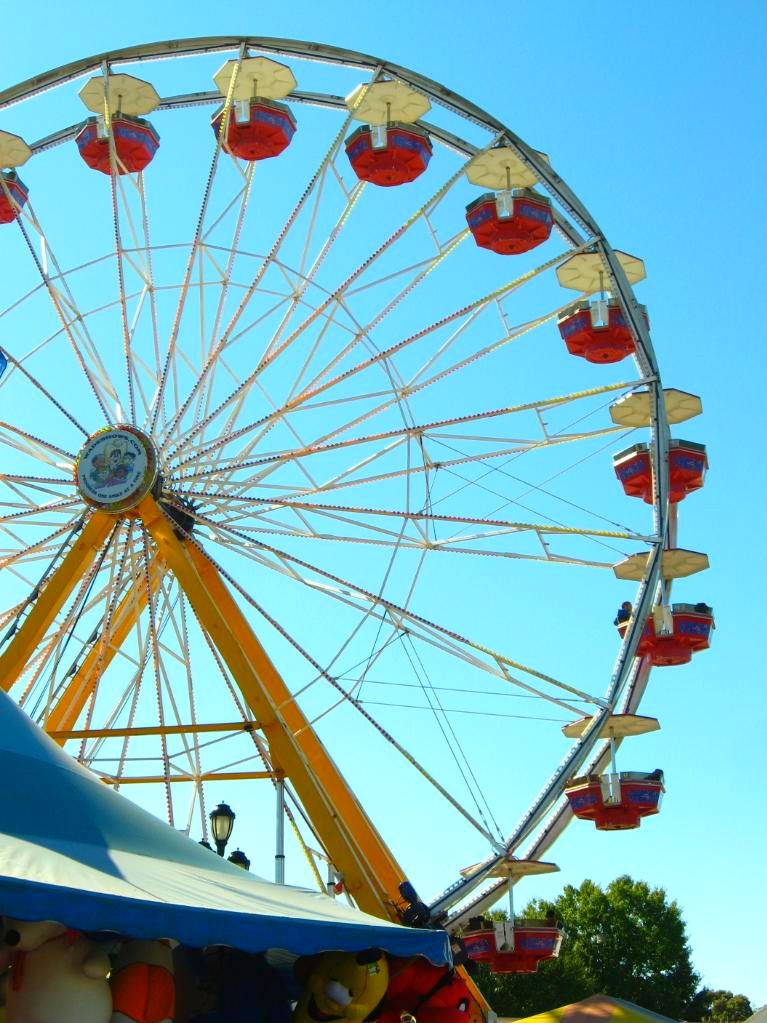
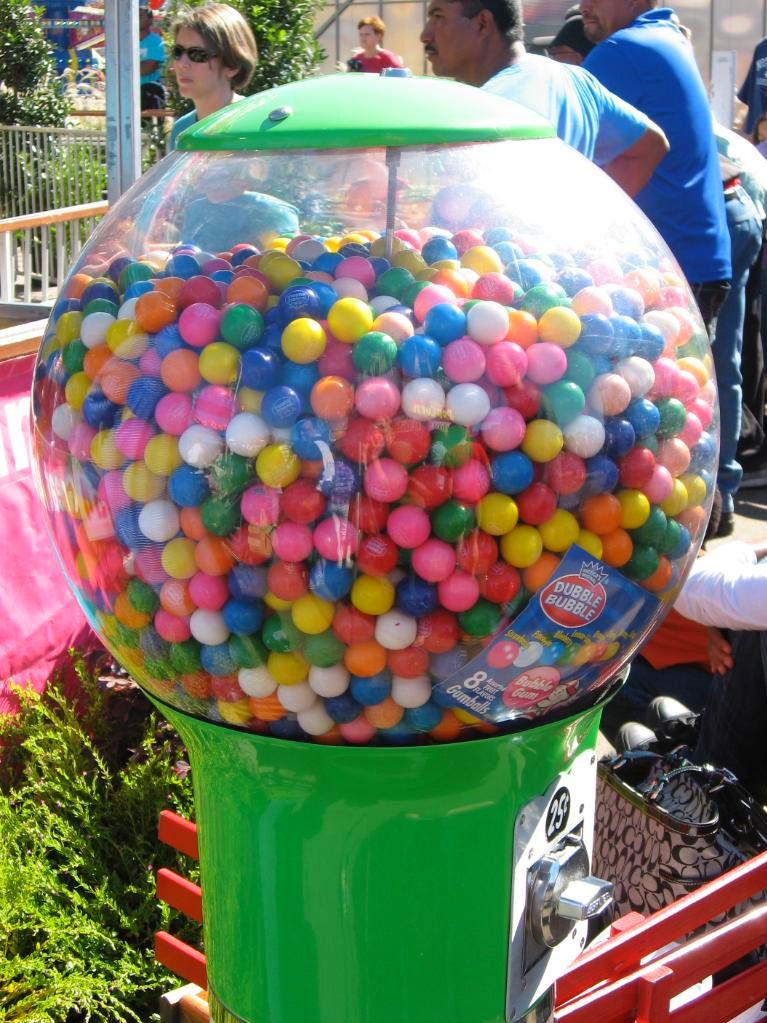
Mike’s gift to me that inspired my road trip: a visit to the NC State Fair.

This weekend, Mike gave me a sweet gift: a do-over. He gave me the opportunity to revise a childhood memory from fifth grade.

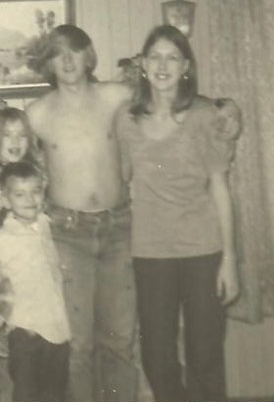
My parents are going to kill me when they read this, because I’ve never told them anything about it. In fifth grade, my teacher scheduled a field trip to the State Fair in Raleigh, about 3 hours away. I’d never been to a fair, so I was thrilled to hear about the trip — until I heard the cost: $90. To my fifth grade brain, that might as well have been a million dollars.

I thought of my daddy going off to work third shift every night at the newspaper. I thought of my mom working late into the night to get her nursing paperwork completed. I thought of how we had to be careful to make ends meet each month despite all of their hard work.

I decided not to tell them about the field trip. I knew they would sacrifice to let me go, and I knew I’d rather stay home than let that happen. I sat at school while the other kids climbed aboard the bus to Raleigh. I’m sorry Mom and Dad — I know I should’ve given you the opportunity to send me! But my fifth grade mind was made up.

Imagine my surprise and delight when, a few weeks ago, Mike asked if I wanted to drive up and go to the State Fair. All of my fifth grade excitement came rushing back. Yes, I wanted a do-over! A second chance! A funnel cake!

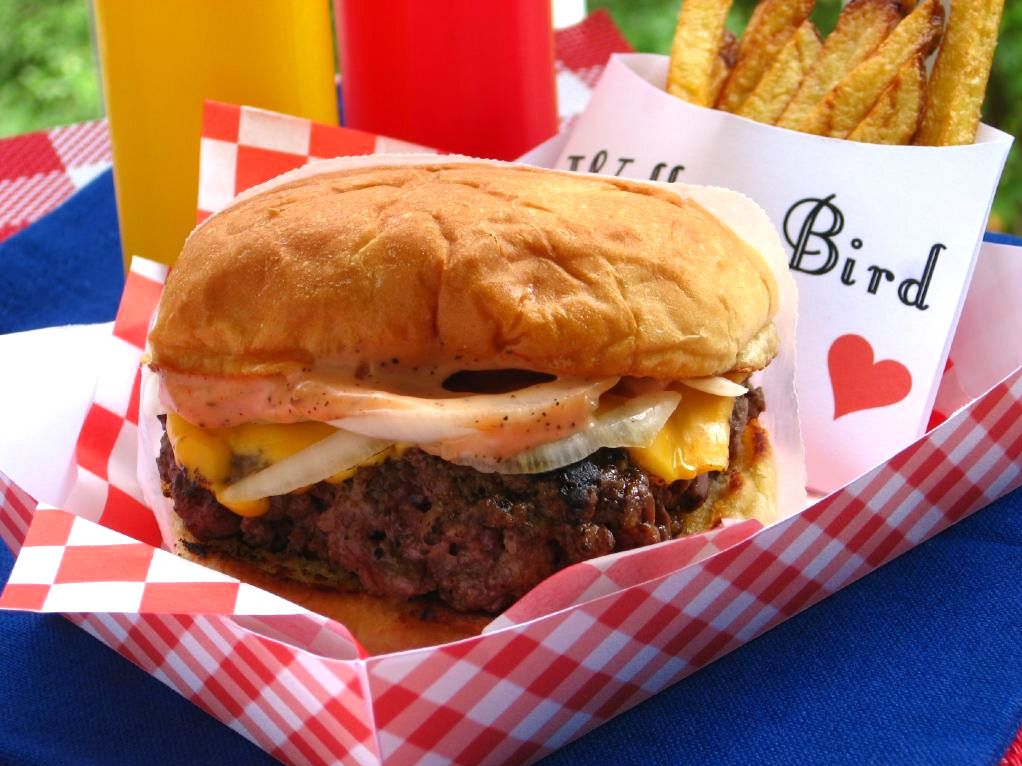
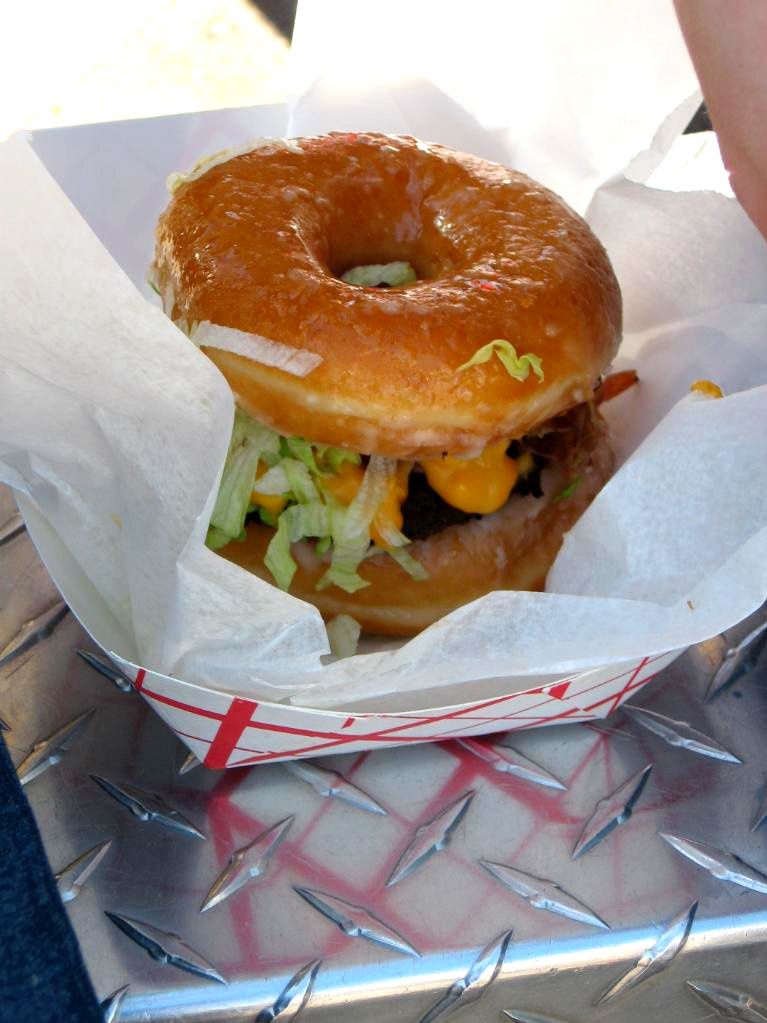
In that spirit, this past weekend, Mike took me to my first fair. We ate copious amounts of fried food, petted fat billy goats, and definitely made up for lost time. It was better than it ever could’ve been in fifth grade, because Mike was by my side.


II.  Returning the Favor with a Road Trip: Mike’s Birthday Do-Over

I knew I wanted to do something special for Mike in return for what he’d done for me. Thankfully, Project Food Blog’s challenge for Round 6 was to pack up a meal and take a road trip (thank you so much for voting me through to this point). My road trip was designed to surprise Mike with his very own special do-over!


Mike’s surprise do-over.

On Mike’s birthday this past year, I really goofed. I made him handmade pumpkin ravioli — which probably sounds wonderful, except for the fact that he doesn’t like pumpkin and it tasted awful. This isn’t one of those “Oh, this could use more salt” things, y’all. It was gross.

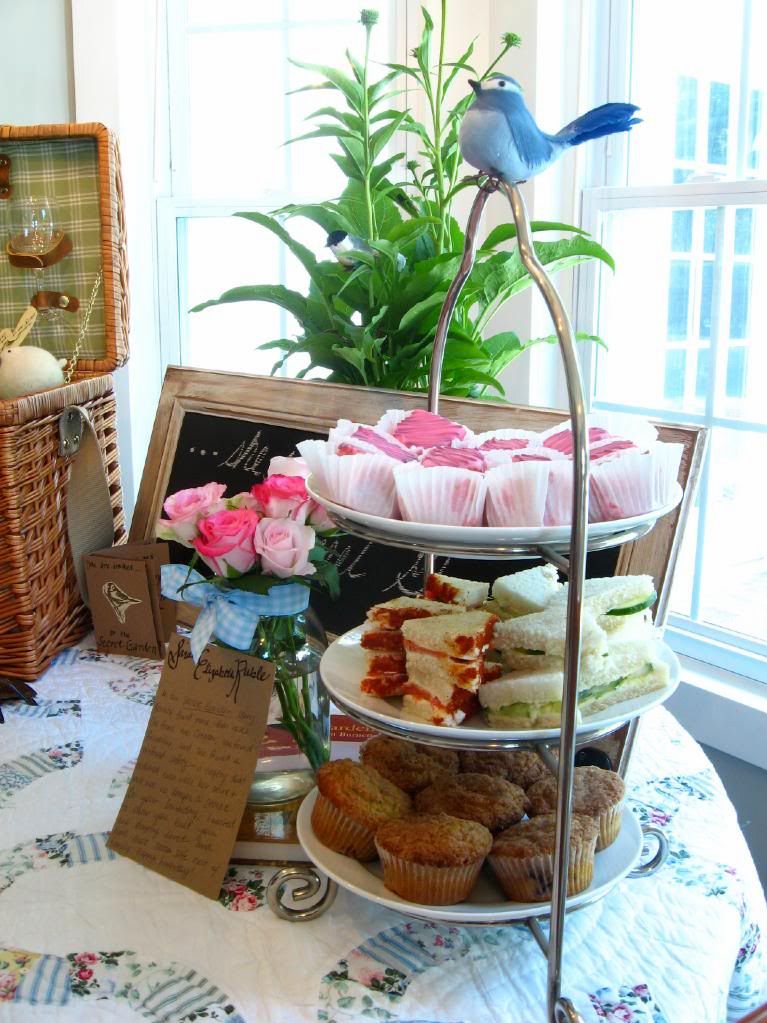
For my road trip challenge, I decided to drive to Raleigh and throw Mike a heartfelt birthday do-over. Everything would be decorated in hearts and kisses and, most importantly, I’d make him a fantastic meal this time — one to drive all thoughts of pumpkin ravioli straight out of his mind.


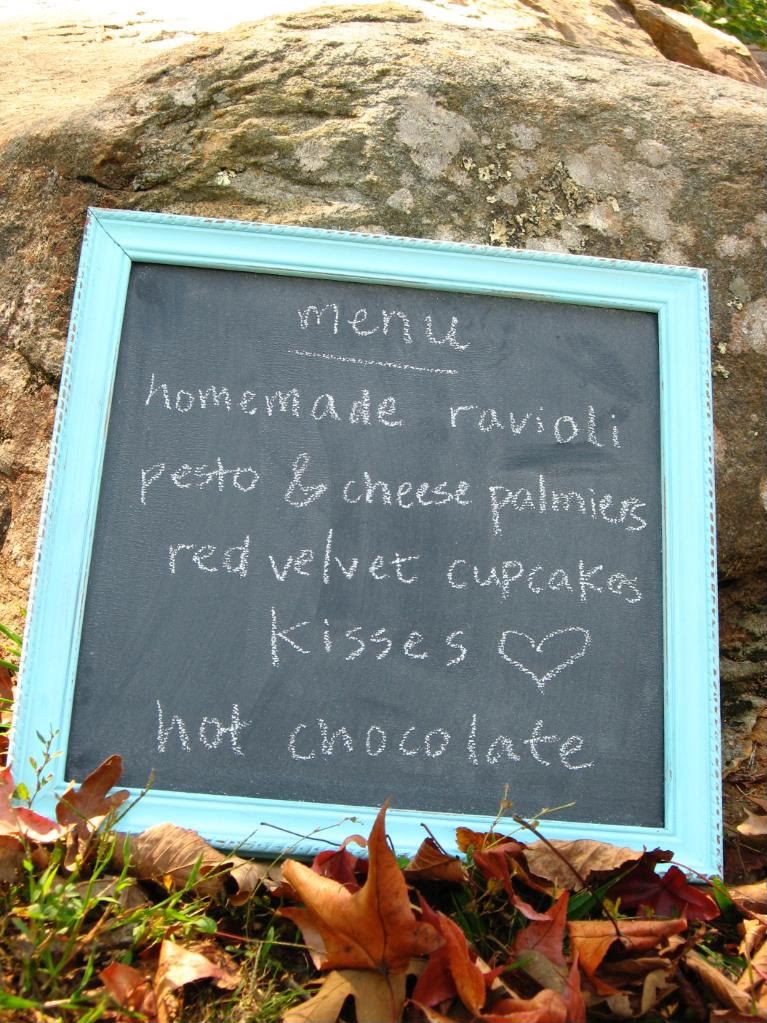
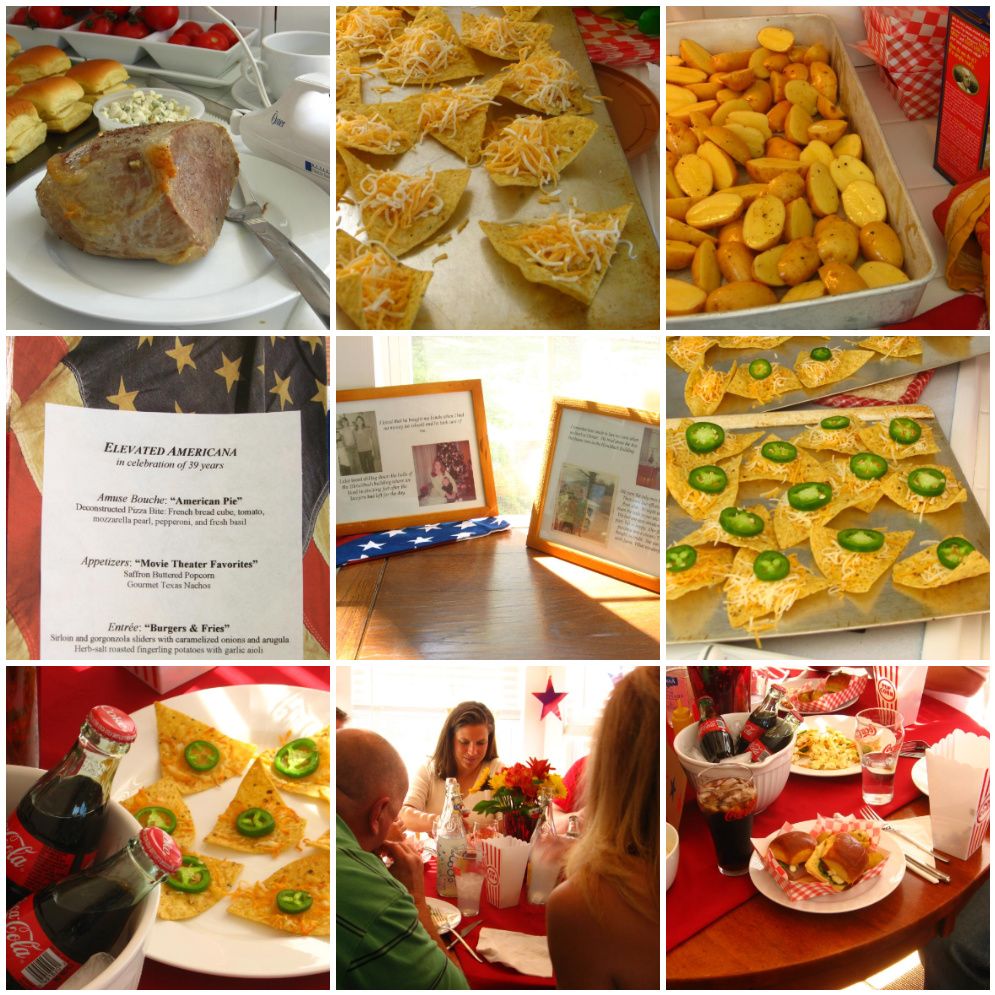
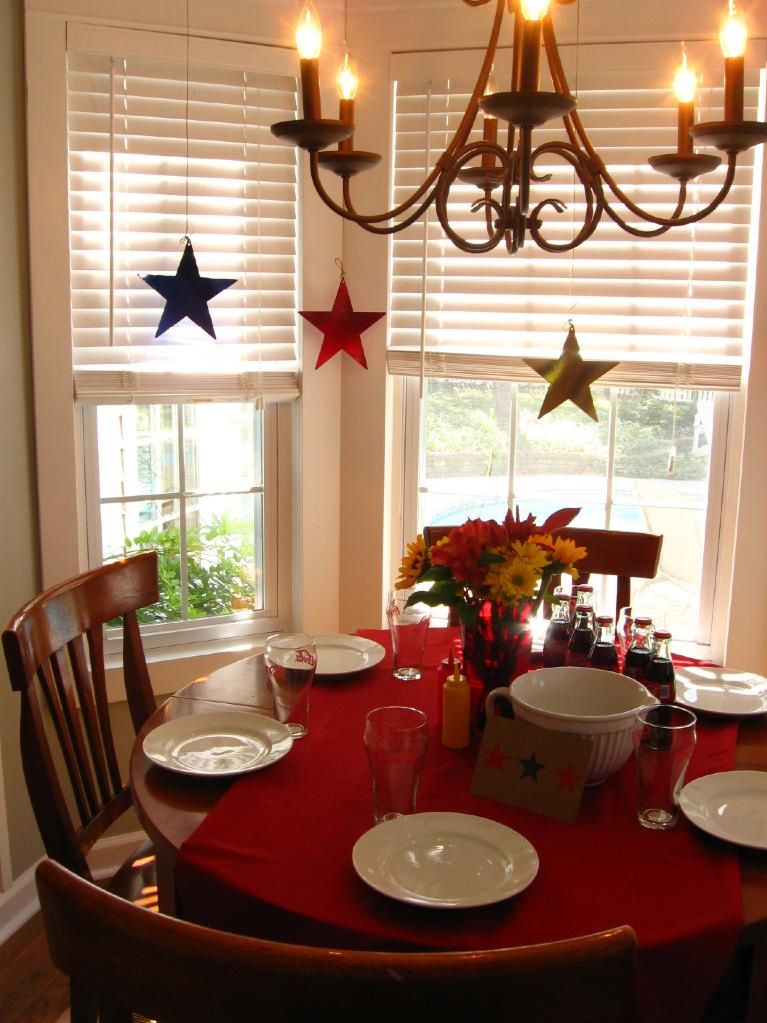
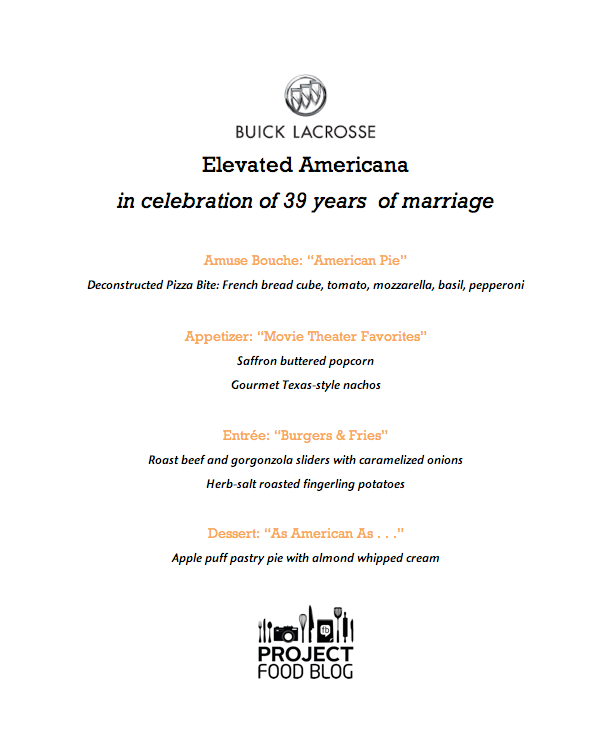
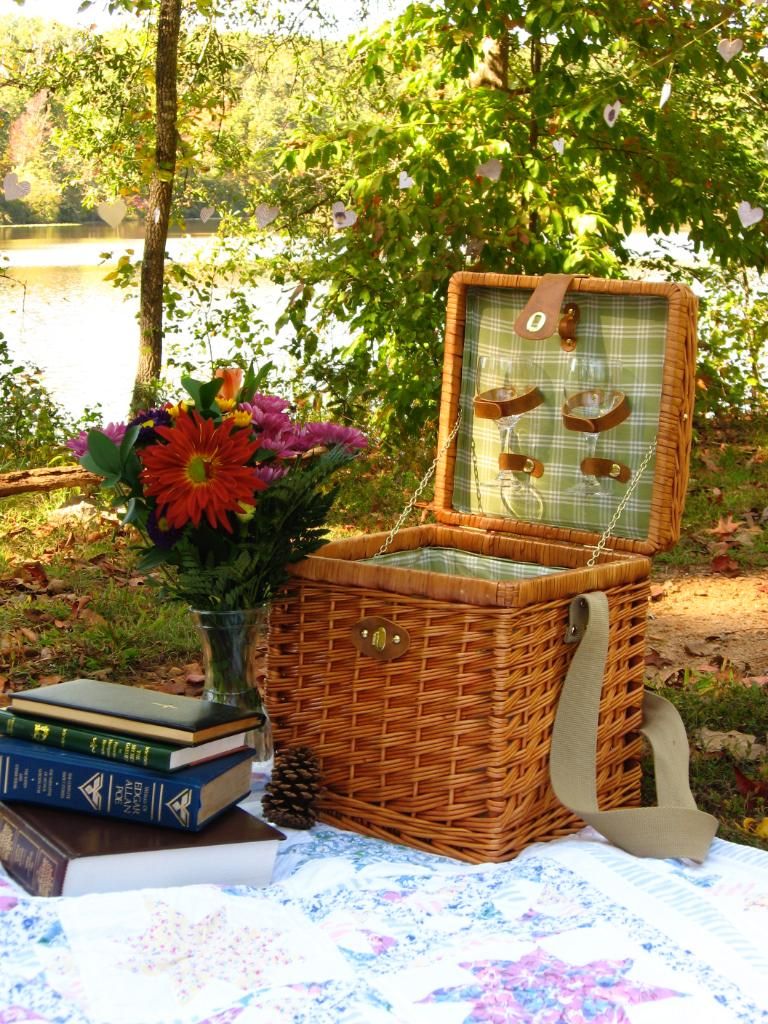
The menu and decor. Note to PFB voters: the picnic basket was just for charm; all food was transported in my PFB cooler per challenge guidelines! Oh, and psst – you can enter to win this chalkboard below!

I chose to make the following dishes for our party:

-handmade, heart-shaped cheese ravioli in a meaty red sauce

-heart-shaped palmiers with goat cheese and homemade pesto

-red velvet cupcakes with heart cutouts

-giant red velvet kisses with special messages

-hot chocolate with homemade heart-shaped marshmallows


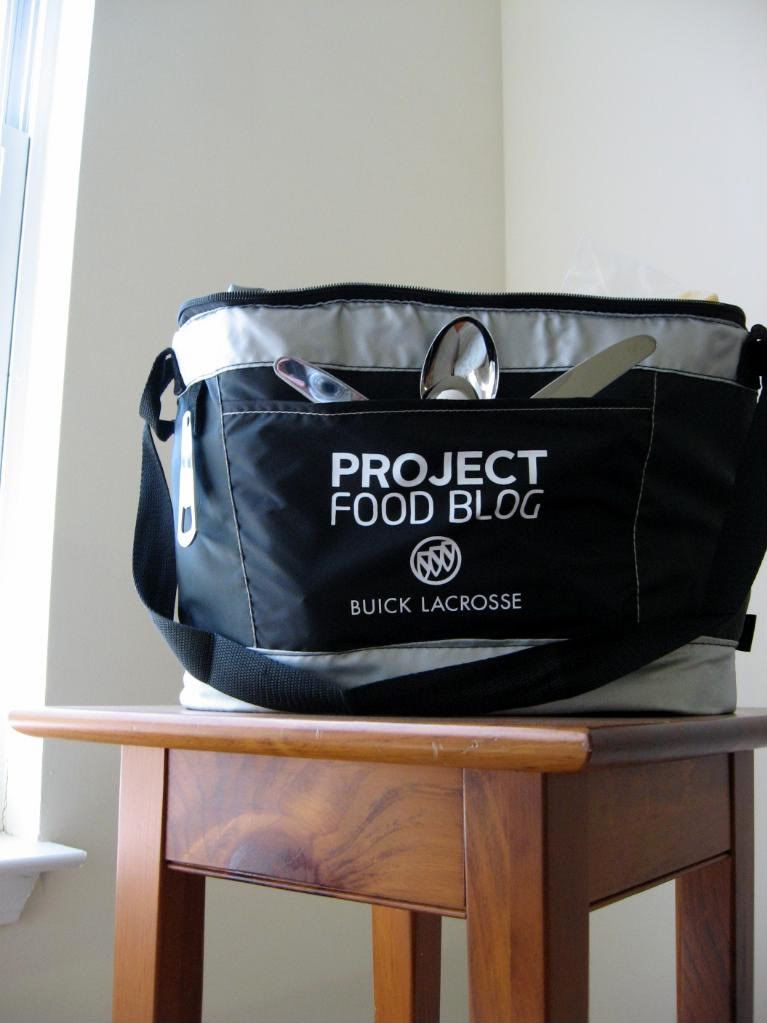
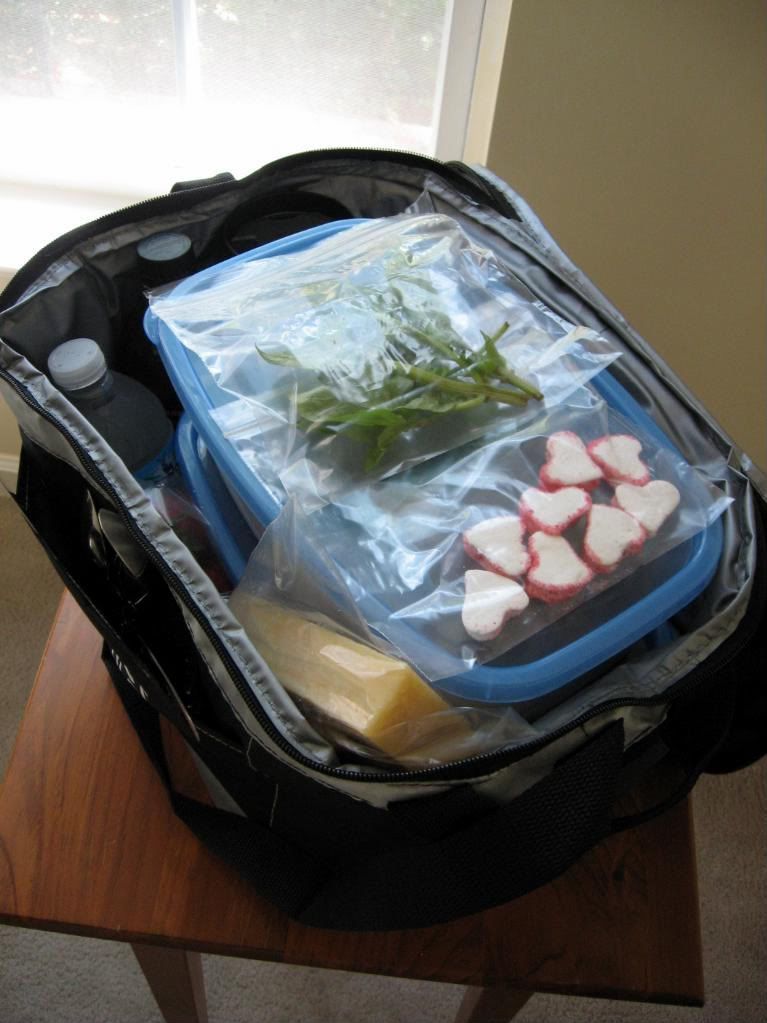
Cooler packed and ready to go!

Besides being delicious, some of the dishes had special significance. The red velvet cupcakes were planned to remind Mike of cupcakes I made for him one Valentine’s Day years ago, before I baked on a regular basis. He loved them so much that it inspired me to continue baking.

The hot chocolate represented sitting by the fire in Gatlinburg, Tennessee with him one December a couple of years ago. We hadn’t expected to have access to a fireplace on our trip, and for some reason, it made us so happy. We sat by it and sipped hot chocolate, loving every minute.


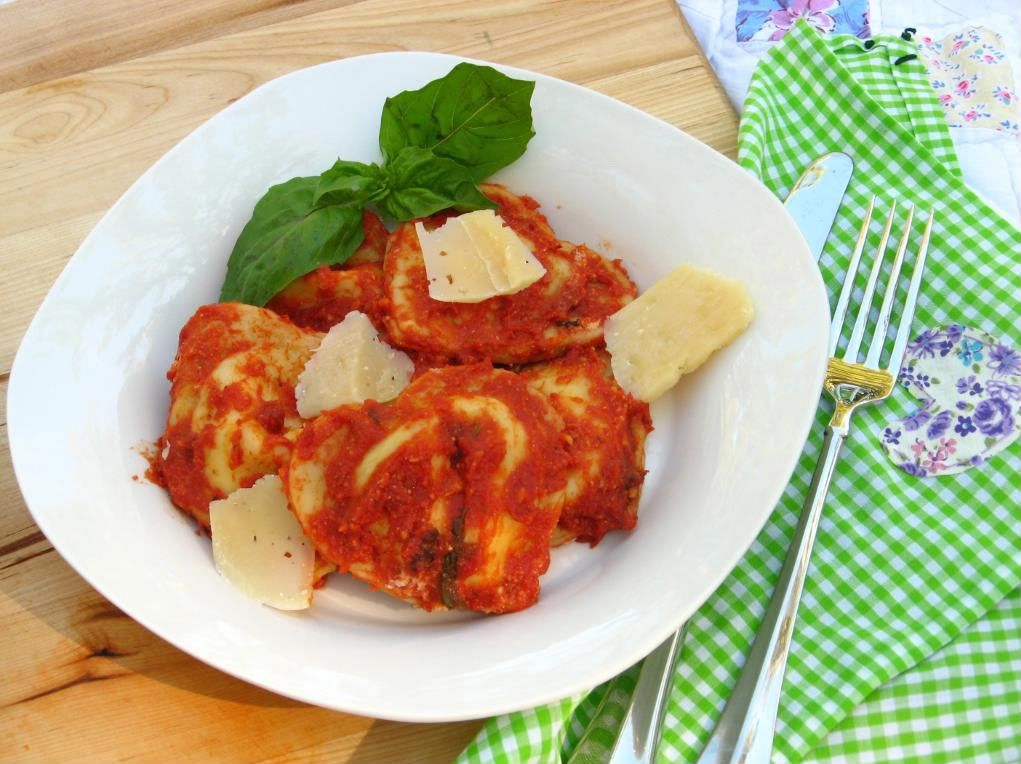
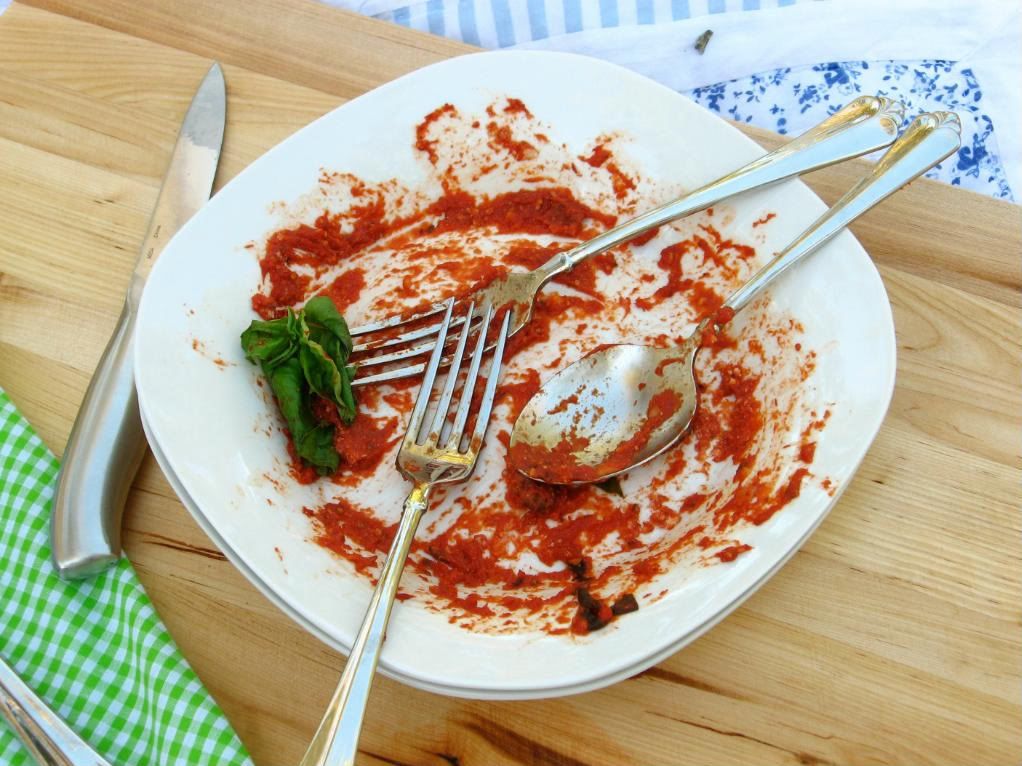
Handmade ravioli — now you see it, now you don’t.

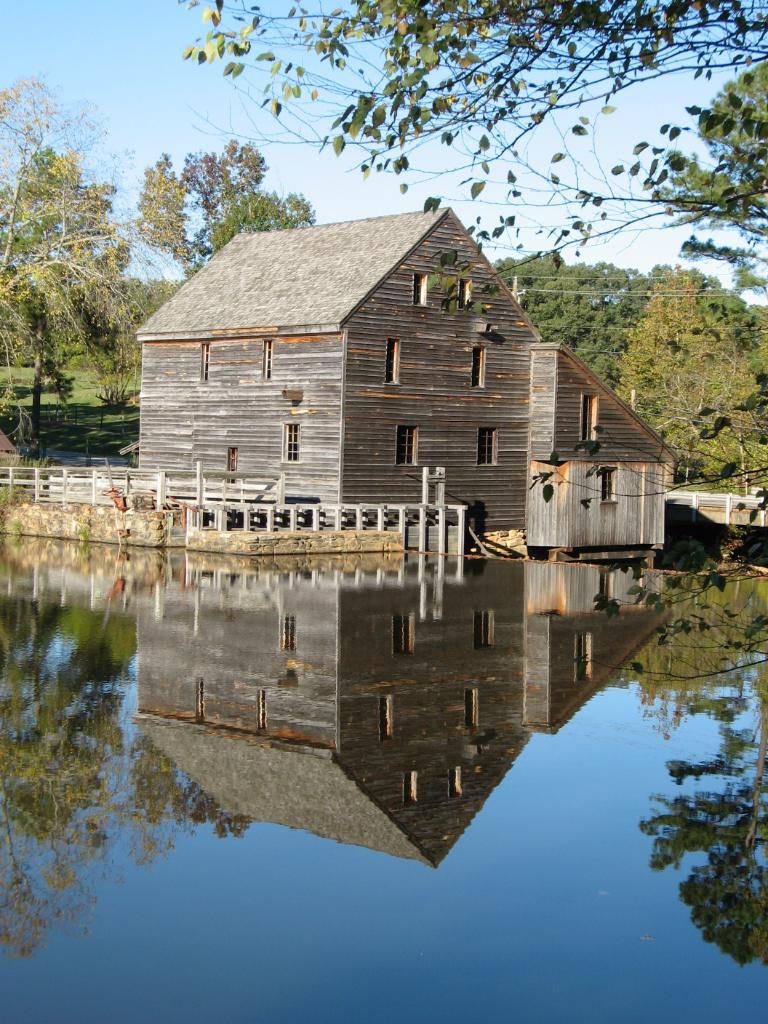
I prepped and cooked for 3 days before hopping in my car and driving up the interstate. The venue I’d chosen for our birthday party picnic was Historic Yates Mill Park, and it turned out to be breathtaking. We spread a quilt under the shade of some gorgeous trees and ate while looking out over the mirror-like pond. Heart streamers danced in the wind beyond our picnic blanket, and a few industrious ants tried to join us for our meal. We brought books to read, but ended up having too much fun playing, talking, lounging, and walking around the mill.


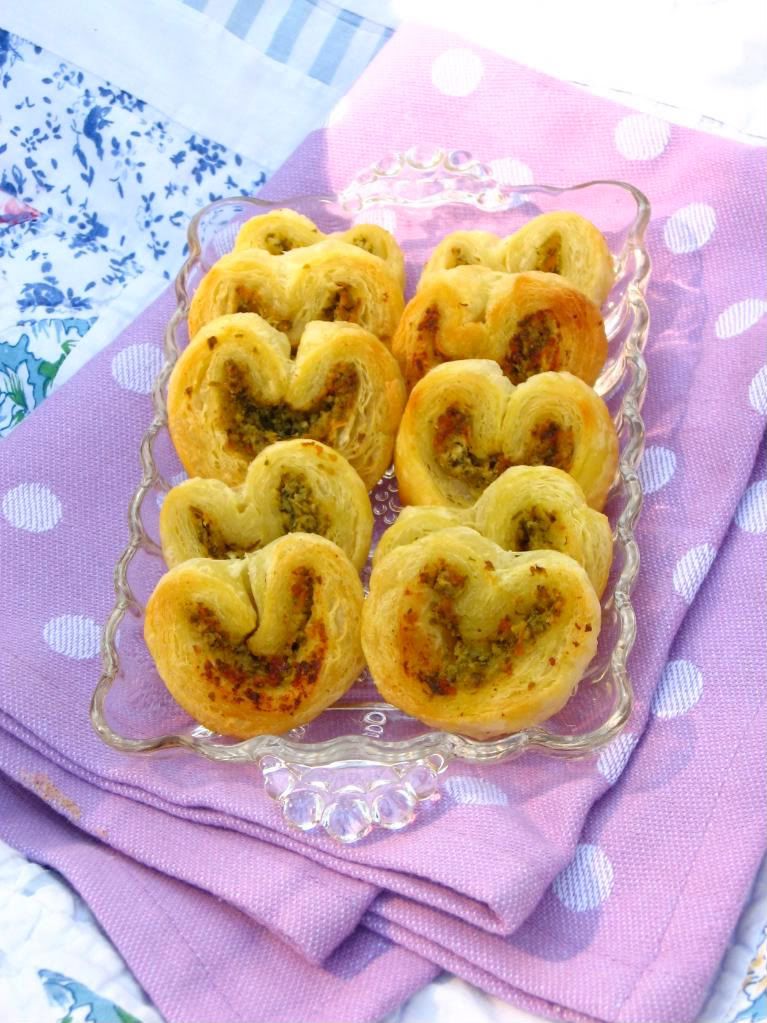
Heart-shaped Pesto and Goat Cheese Palmiers.


I <3 Dessert! A giant red velvet kiss, red velvet cupcakes with heart cut-outs, and hot chocolate with homemade marshmallows.

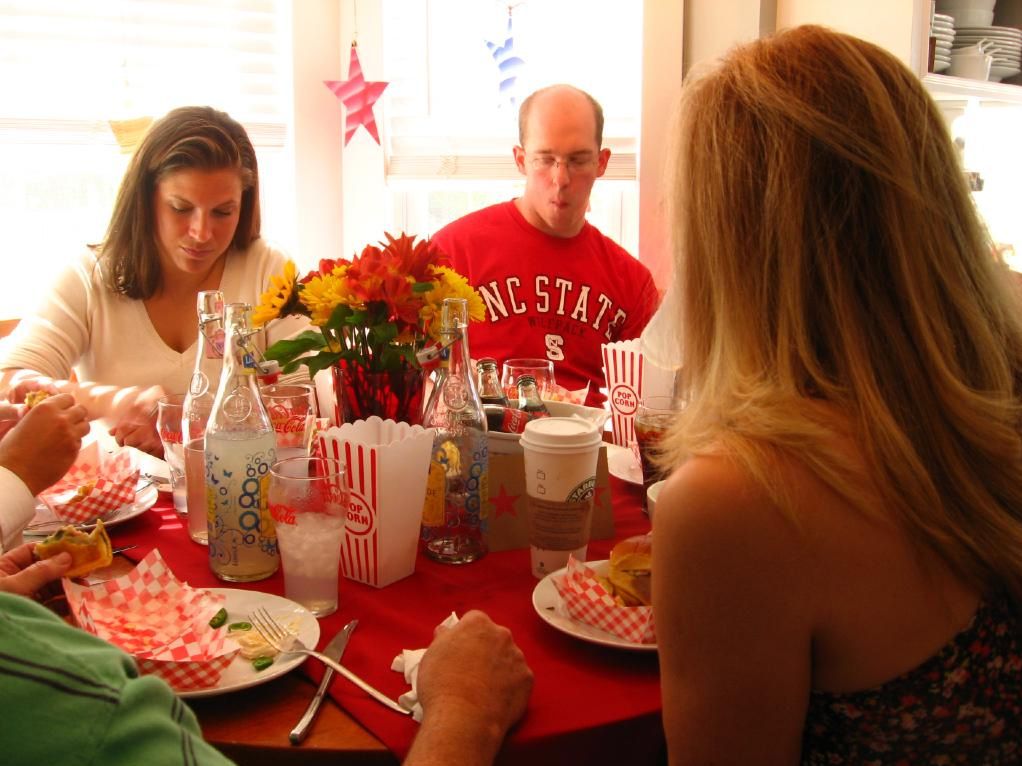
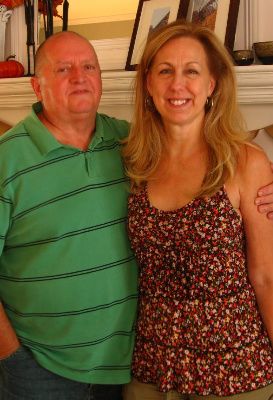
Mike was coaxed into putting on the gigantic birthday hat I bought him. We blew birthday horns, I sang happy birthday, and he blew out his candles — all just as it should have been on his real birthday. This time, there was no pumpkin disaster to overshadow the moment — just me, Mike, and our little feast.


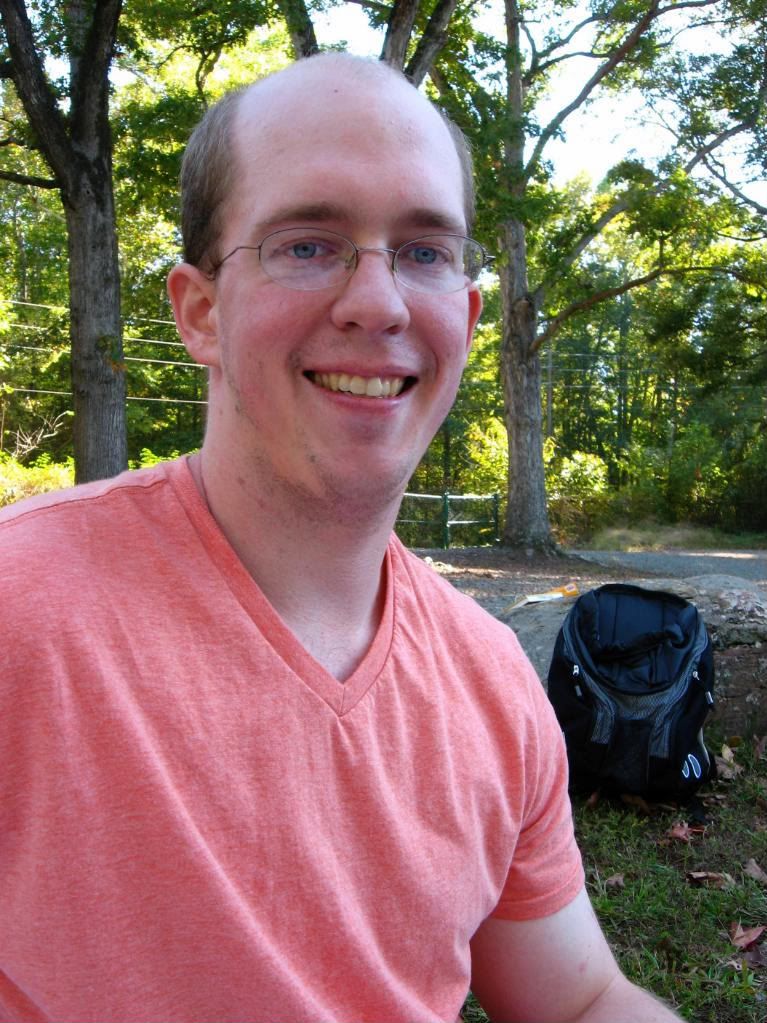
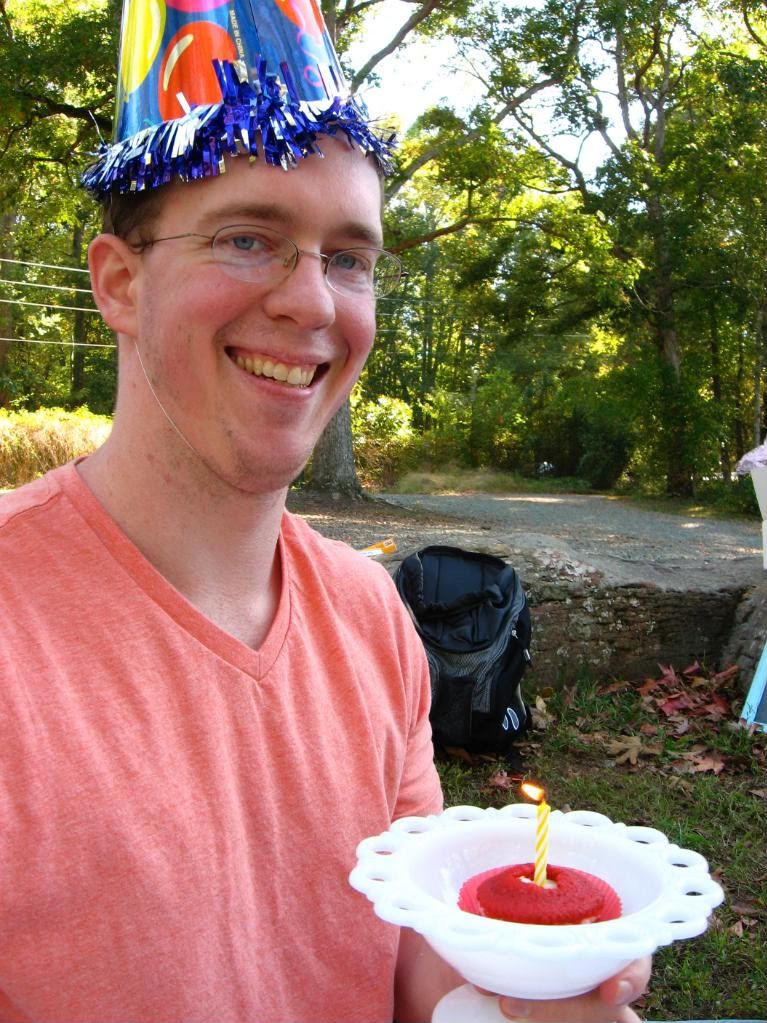
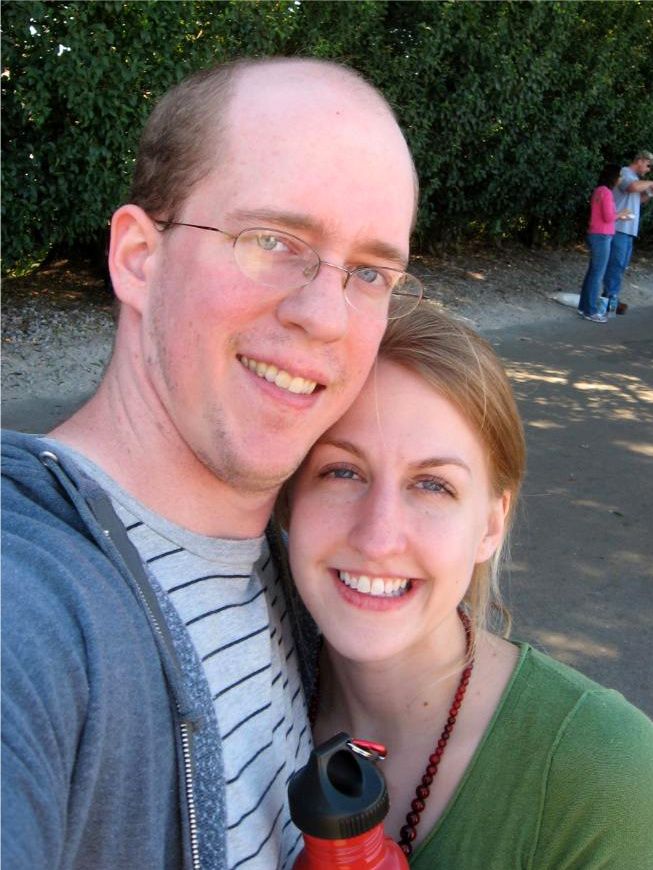
Normal Mike, and Julie-Made-Me-Wear-This-Stupid-Hat Mike

When all the food was packed away into the car again, we spent hours dwindling about the grounds. All told, four hours slipped past us like silt along the creek bed beside the mill. We decided picnics need to be a regular event for us.


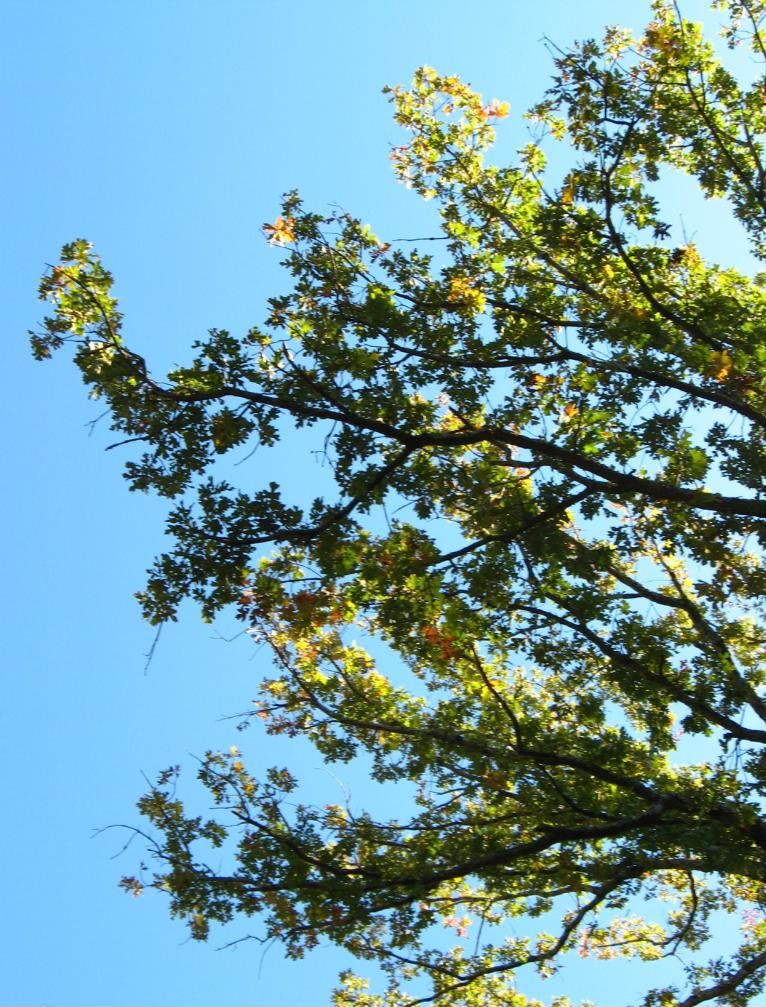
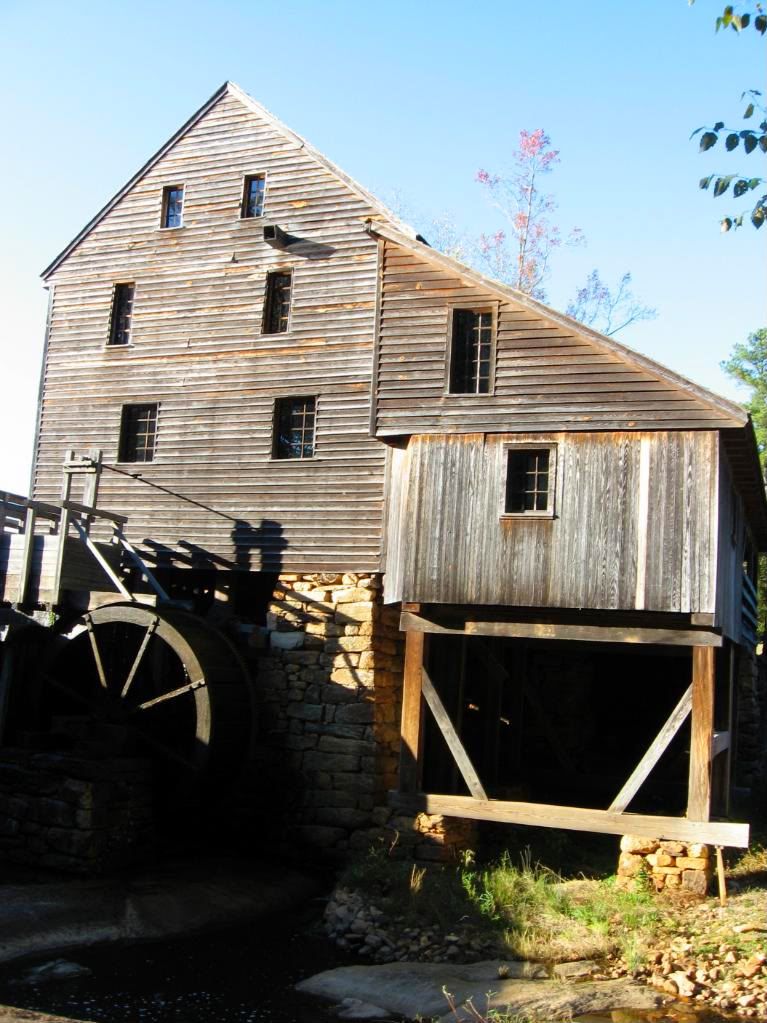
Around the Historic Yates Mill: heart streamers, beautiful trees, and the mill itself.

Between fried cheesecake, corndogs, historic mills, and heart-shaped meals, Mike and I have had an amazing weekend. Thank you to Project Food Blog for my awesome cooler, and for inspiring my birthday party do-over. Most of all, thank you, my amazing readers, for voting for me in the last 5 rounds. I’d so appreciate your votes again in round 6!

Would you like to win the aqua chalkboard showcased in this post? Posh Pilfer is giving it away to one lovely reader (deadline for entering: Thursday, 10/28 at 6pm EST; winner will be chosen via random.org). To enter, answer the following question in the comment section: What memory do you wish you could “do-over”? Think about what you could do right now to make your do-over happen — and go for it!

Want an extra entry? Follow Willow Bird Baking on Twitter, tweet this message, and leave an extra comment telling me that you’ve done so: I just entered to win a cute chalkboard from @julieruble of Willow Bird Baking: http://bit.ly/cz2iLB

Handmade Cheese Ravioli in Meaty Red Sauce


Recipe by: Adapted from Annie’s Eats (pasta and ravioli); Sauce adapted from Strawberry Hedgehog
Yield: enough pasta to serve about 2 people

Ravioli Pasta Ingredients:
2 large eggs
1/2 tablespoon water, plus more as needed (I ended up using several full tablespoons)
1/2 tablespoon olive oil
1 3/4 cups sifted all-purpose flour
1/4 teaspoon salt

Filling Ingredients:
1/2 cup whole ricotta
1/4 cup goat cheese crumbles
fresh basil, chopped, to taste
1/4 teaspoon dried thyme, chopped, to taste
1/4 teaspoon dried oregano
salt and pepper, to taste

Sauce Ingredients:
about 3 links of Italian sausage, crumbled and browned
2 16-oz. cans tomato sauce
4 6-oz. cans tomato paste
1 tablespoon dried oregano
chopped fresh basil to taste
3 cloves garlic
1 tablespoon olive oil (optional)
salt and pepper to taste
1/2 cup Parmesan cheese

Directions:
Make the pasta: In a food processor, combine the eggs, water, olive oil and flour. Mix on low speed until the ingredients are well mixed and a dough begins to form. If the mixture is not coming together, add more water, 1 tablespoon at a time just until the dough is formed. Transfer the dough from the food processor to a work surface. Knead 1-2 minutes by hand. Cover with a clean towel and let rest for 20 minutes. Knead again for 1-2 minutes, or until dough starts to feel more supple and elastic. Let rest for another 20 minutes.

Divide the dough into two equal pieces. If you have a pasta machine, see instructions here for how to prepare the sheets of dough. If not, roll one piece of the dough out on a lightly floured surface, pressing hard and rolling diligently until the dough is very thin. Use a large heart-shaped cookie cutter to cut out ravioli pieces. Let these rest while you mix your filling.

Mix filling: Place all ingredients into a bowl and mix well. Taste and season accordingly.

Assemble ravioli: Place about 1 teaspoon of filling in the middle of half of the heart shapes, leaving a clear edge around the perimeter. Dip a finger in water and lightly brush around the edges of a heart topped with the filling. Place one of the remaining pasta hearts on top and press the edges of the pasta shapes together to seal around the filling, being careful to press out any excess air. Repeat with the remaining dough shapes.

Make sauce: While browning Italian sausage, mix all other ingredients together in a bowl. Add to sausage and cook until heated through. In the meantime, cook pasta: bring a large pot of salted water to boil. Cook the ravioli until al dente, about 4-5 minutes. Drain well and add ravioli to the sauce, tossing to coat. Serve with a spring of basil and shaved Parmesan.


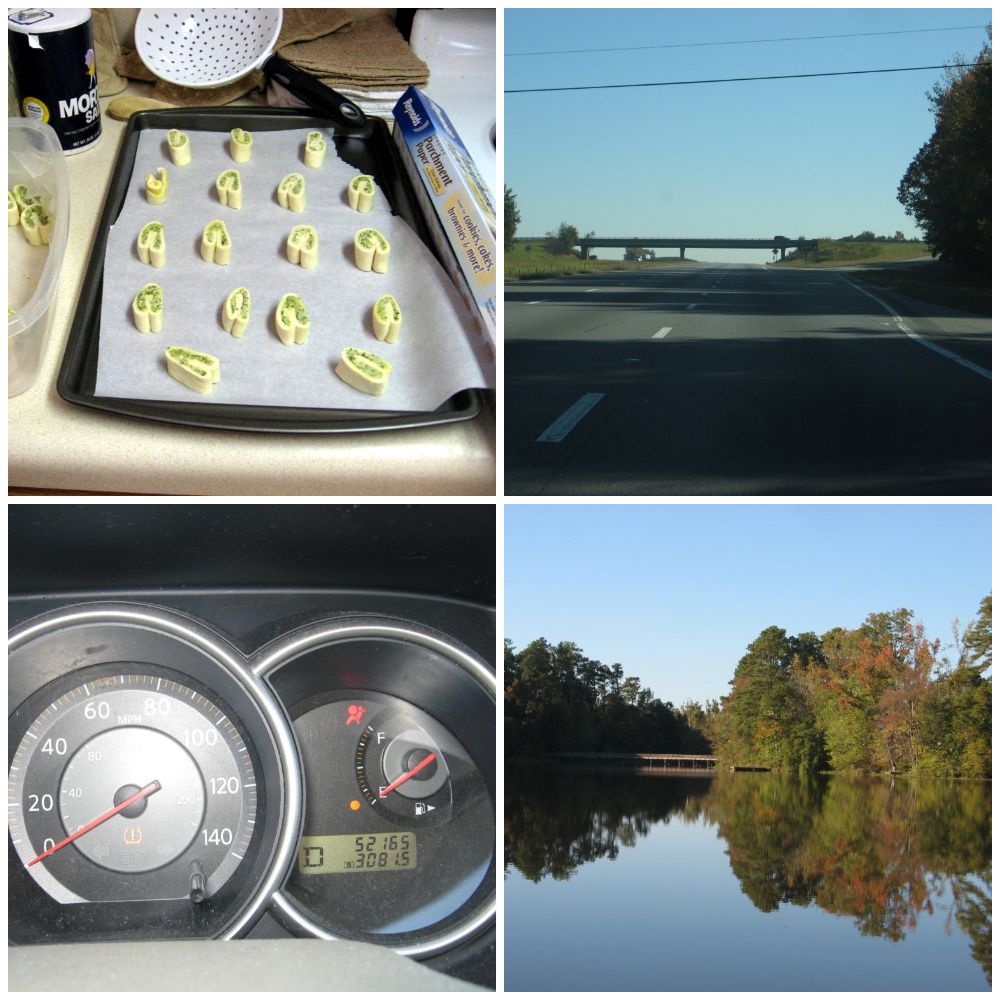
At one point, my “Check Airbags,” “Low Tire Pressure,” and gas light were all lit. Glad I was only 5 minutes from my destination at this point!

If you liked this post, please:
Subscribe to Willow Bird Baking
Follow Willow Bird Baking on Twitter
Follow Willow Bird Baking on Facebook
Give this post a thumbs up on StumbleUpon


ShareOther ways to share this post with friends!

Elevated Americana: A Celebration of 39 Years

Over a decade ago, my dad sat down to write out his memories. The resulting document sits in an pale green folder on my bookshelf now as one of my most treasured possessions. In it, he describes the cocoa paste sandwiches his mom packed for lunch each day, the novelty of the canned biscuits his Grandma made, and how his dad got laid off most winters from his construction job and resorted to hauling wood for meager pay.

Under a section called, simply, Vivi, he describes at the hot summer night at Gooch’s, a little soda shop in the tiny town of Piedmont, Missouri, where he drove up and saw my mother for the first time.

I saw a beautiful blond, tanned girl that I had not seen before. She was very pretty, and I caught her eye as soon as I drove in. After asking around, I found out she was Vivian Roberts and was in town visiting her cousins. I quickly asked her out . . . I knew I was in love, the moment I saw her.


Mom and Dad

It sounds like the beginning of a fairy tale, but my parents’ youth was harder than it should have been — especially for my mom. Daddy was poor, but mom was living a nightmare. Her dad was an abusive alcoholic. It wasn’t long after my parents’ first date that he took my mom and their family back to Kansas City. Dad describes the difficult time that followed:

We wrote letters to each other every day. I called her when it was possible. Kansas City was a good 6 hour drive from Piedmont. Viv was living in a rough situation and her dad treated her like dirt. It seemed like we would never be together. We both prayed for a solution.

The solution came in an unexpected way. My mom’s dad came home after drinking one night and beat her badly, tearing out fistfuls of hair. After getting a sobbing phone call from her, Daddy got in his Torino and made the 6 hour drive in 4 hours to pick her up and bring her back to Piedmont to live with her grandmother. Finally in the same city, Dad says, “I was in heaven. I could date Viv, and see her every night. I fell quickly and deeply in love with the girl I wanted to marry.” They were married shortly thereafter at the First Church of the Nazarene in Piedmont, my mother only 16 years old.

The third challenge in Project Food Blog, a competition to find the next food blog star, was to create a luxury dinner party. It just so happens that this challenge fell on my parents’ 39 year wedding anniversary. Thank you so much for voting in the first two challenges to get me to this point, where I had the privilege of creating a special meal to honor my parents’ marriage.

I wanted to take that night at Gooch’s soda shop and my parents’ memories from growing up in the 1960s and elevate them by creating luxury versions of several classic American dishes. My four course menu featured all-American favorites such as pizza, popcorn, nachos, burgers and fries, and of course, apple pie — fancied up, but still retaining their classic charm.

The amuse bouche truly amused my bouche — each component sung in the bite to produce a harmony that tasted exactly like a fresh Margherita pizza. The appetizers, though, were disappointing. Food blogs represent genuine, real people who are dancing through kitchen highs and lows along with their readers — so I’m not afraid to tell you when things don’t work out. My Saffron Buttered Popcorn only carried the lovely saffron flavor in certain bites and my nachos were dry. Nevertheless, we trekked on to the main course and were rewarded for our diligence!

Served in sweet diner trays (download the template here, print them on cardstock, cut, fold, and glue together. Adapted from Bakerella‘s smaller version), the “burgers and fries” were leagues above your standard diner fare.

The roast was perfectly cooked, juicy, and flavorful, and every accompaniment pulled its weight to make the sliders a true indulgence. I actually forgot the caramelized onions on my dinner party version (they were sitting in a container right behind me, too!), but remade the sliders that evening with them included just to taste. They were dynamite with and without the onions! The herb-salt roasted fingerling potatoes carried a hint of fresh lemon with every bite — delicious.

After a break for conversation, guests sat down to a fresh, light apple puff pastry tart. While everyone loved the tart, the consensus was that the star of dessert was the freshly whipped almond cream on top.

The food was good, the company was fabulous — but my favorite part of dinner was watching my parents read the quotes I had framed for them. A few days before the party, I’d asked each of them to tell me their favorite memory together, but to keep it a secret from each other. Imagine my surprise and delight (I’ll admit, there were a few happy tears) when they both emailed me the exact same memory.


Memories sent by mom and dad and framed for the party.

It was of a time when, according to Daddy, they were “so poor but so happy.” Mom was pregnant with my oldest sibling, Jason, and they lived above a hardware store next to some law offices. At night, after the lawyers had gone home, they would slide through the hallways in their stocking feet, laughing together. It’s a memory that, along with a love as strong as my Grandpa’s lumber-hauling hands and as sweet as my mom’s teenage smile, still unites them after 39 years.


Then and now.

Note: Voting for Round 3 is now open! Please log into your Foodbuzz.com account (or register if you don’t yet have one), go here, and click “Vote for this Entry.” Thank you!

Fancy Beef Sliders


Recipe by: Willow Bird Baking, with roast beef adapted from Simply Recipes and slider technique by Annie’s Eats
Yields: ~30 sliders

Roast Beef Ingredients:
3 to 3 1/2 lbs of Boneless Rump Roast (pick an end cut with a lot of fat marbling)
Olive oil
8 slivers of garlic
Salt and pepper


Slider Ingredients:
potato slider buns (or dinner rolls of your choice)
baby arugula
Swiss cheese, sliced
Gorgonzola cheese
2 sweet onions
2 tablespoons balsamic vinegar
3 tablespoons olive oil for caramelizing onions
melted butter

Directions:
Prepare the roast beef: Preheat oven to 375 degrees F. Let roast sit out for an hour before cooking so that it begins at room temperature. When ready to begin, rinse the roast and use a sharp knife to cut 8 small incisions over the surface, inserting a sliver of garlic into each. Rub the roast with olive oil and season both sides with salt and pepper. Place roast in baking dish with lid (or you can use Elise’s on-the-rack method) and bake for 30 minutes at 375 degrees.

After 30 minutes, turn heat down to 225 degrees F and continue cooking uncovered until a meat thermometer reads 140 degrees (Elise says this takes 2-3 hours, but for me, it was more like 1.5 hours. I was nervous that I might need to slow it down, but it came out perfect. So just keep an eye on it). Remove roast from the oven and tent with foil. Let rest at least 15 minutes before slicing into very thin slices. Increase oven temperature to 400 degrees F at this point, in preparation for the sliders.

While the roast cooks, caramelize your onions. Heat a large skillet over medium-high heat and add the oil. When it’s hot, add the onions and stir so that they all come into contact with the bottom of the pan. As they start to brown, stir them every 15-30 seconds. Add balsamic vinegar and stir. Continue to brown for 10-20 minutes until they’re well caramelized.

In the meantime, prepare slider assembly line. Set out baby arugula, Gorgonzola cheese, Swiss cheese, and mayonnaise. Set slider buns onto a baking sheet. On each bun, place roast beef and all the toppings, including caramelized onions. Brush tops of sliders with melted butter and bake at 400 degrees F for about 10 minutes, or until melty. Serve warm.


Sliders with caramelized onions added!

Tips for Creating a Special, Affordable Dinner Party:

  1. Pick a personal theme. Think of a special memory, book, or food — something that resonates with your guests of honor. Plan your party around that theme. In this case, Gooch’s soda shop was the foundation of my party plan.
  2. Get creative with your resources. I decorated my table with a curtain panel that was $3 cheaper than an actual tablecloth. A local dollar store provided fun popcorn containers and drinking glasses. I picked recipes with simple ingredients and used a few luxury items (saffron, Gorgonzola) to elevate them. I also created many party decorations out of paper.
  3. Plan ahead. A week before the party, I made a list of all groceries and planned out prep work for each day. I also wrote a detailed plan of party day, including what times to prep, bake, and photograph each dish.
  4. When possible, choose dishes that can be prepared ahead of time. I didn’t follow my own advice this time, but the beauty of many desserts and appetizers is that they can be prepared in advance and refrigerated until served. You’ll have more fun if there are only a few things to prepare at the last minute.

If you liked this post, please:
Subscribe to Willow Bird Baking
Follow Willow Bird Baking on Twitter
Follow Willow Bird Baking on Facebook
Give this post a thumbs up on StumbleUpon


ShareOther ways to share this post with friends!

Old-Fashioned Burger Stand Burgers & Easy French Fries

I wish I were gymnastically inclined. If I could do a cartwheel or two or three hundred, maybe I could express how excited I am about sharing this recipe with you. Instead, I am the girl who, in middle school, somehow body-slammed herself onto the hard gym floor mid-cartwheel-attempt. They make gymnastics mats for a reason, gym teachers.

I will not be trying that again. You’ll have to trust me when I say I’m flipping around the room in spirit. Because these. burgers. are. amazing.

They are not gourmet burgers. They’re not sporting Gruyere, truffle oil, shallots, or mushrooms — not that those ingredients wouldn’t be tasty on some burger, somewhere. Just not this one.

They are not Texas-sized steakburgers. You do not need to dislocate your jaw to take a bite, they do not include exotic spices or a pile of complementary toppings — though you know I love a burger like that on occasion. It’s just not this burger’s style.

These are the burgers your fast food burger could taste like (you guys know the Old Spice commercial, right?). The burgers they’re trying their hardest to replicate in every establishment that owns a drive-thru.

These are thin, fall-apart tender, juicy, salty burgers with a slight crisp crust, smothered in melty cheese, onions, and tangy burger sauce before being smooshed into a pillowy, sweet, toasted potato roll. Swoon.

Imagine the best 1950s burger stand — one that carefully wraps its burgers in wax paper and sends them out dripping in burger sauce with a side of crispy fries. Maybe via a roller skating waitress. These are those burgers. Christopher Kimball called them something like the “ultimate indulgence burgers” — exactly!

In case you’re nervous about the fact that you grind your own meat for this burger, I need to tell you that they’re also easy. I would stick these babies on the menu any weekend without a second thought. You can also make the patties and freeze them sandwiched between sheets of waxed paper, making this recipe perfect for weeknights as well (thaw for 30 minutes at room temperature before using).

The basic method is as follows: cut chunks of meat, freeze it for a bit, grind it in a food processor, gather your patties loosely, season, cook in hot skillet, melt cheesy goodness on top, and place on sauced, toasted bun. I made my sauce and sliced my onions the night before, and so the whole process was quick as a whip.

The burgers stay super tender because you don’t pack them into patties with your hands the way you might form other burgers. After grinding the meat, you try not to touch it much at all, gathering it into piles with your spatula and only then gently pressing it against a sheet pan or tray into a loose patty with plenty of crevices. You want it where it’s only just sticking together.

Heavy salting and a smoking hot pan make for a nice crisp crust on the patty. You don’t need to worry about cooking it to medium rare or medium or any of that — as Kenji from America’s Test Kitchen said, because of the way you form the patties, there’s no way to overcook this burger into toughness. No matter what, it’s tender and perfect.

Grab your glass bottles o’ coke and some roller skates, and let’s make some burger magic!

Old-Fashioned Burger Stand Burgers


Recipe by: Cooks Illustrated
Yields: 4 burgers

Ingredients:
10 ounces sirloin steak tips, cut into 1-inch chunks (look for meat that has a striated texture to be sure you have the right cut. Flank steak may be substituted)
6 ounces boneless beef short ribs, cut into 1-inch chunks
Kosher salt and ground black pepper
1 tablespoon unsalted butter
4 soft hamburger buns (potato rolls)
1/2 teaspoon vegetable oil
4 slices American cheese (don’t substitute! American cheese has the perfect texture for this recipe)
Thinly sliced onion

Classic Burger Sauce Ingredients:
2 tablespoons mayonnaise
1 tablespoon ketchup
1/2 teaspoon sweet pickle relish
1/2 teaspoons sugar
1/2 teaspoon white vinegar
1/4 teaspoon ground black pepper

Directions:
1. Mix ingredients for burger sauce and refrigerate it until you’re ready for it.
2. Place chunks of meat onto baking sheet about 1/2 inch apart. Freeze until very firm, hard around the edges, but still pliable (15-25 minutes).
3. Grind meat in a food processor in two batches, using 10 to 15 one-second pulses and redistributing meat in the processor as necessary. Transfer the meat to a tray or baking sheet without touching it — just overturn the processor bowl onto the tray. You want to touch the meat as little as possible from here on out. Discard gristle or hunks of fat.
4. Gently separate ground meat into 4 equal mounds using a spatula. Shape each mound gently (without picking it up) into a patty about 4 inches in diameter and thin (about 1/4 inch thick), leaving edges ragged and crevices in the burger. Season top of each patty liberally with salt and pepper. Use a spatula to flip patties and season the other side. Stick them in the refrigerator while you toast the buns.
5. Melt 1/2 tablespoon butter in a 12-inch skillet over medium heat until it foams. Toast 4 buns, tops and bottoms, in batches until golden brown. Set aside and wipe out the skillet.
6. Put skillet on high heat. Add oil and heat until just smoking. Using a spatula, put all 4 patties into the skillet and cook without moving for 3 minutes. Flip burgers over gently and cook for 1 minute. Top each with a slice of American cheese and cook for another minute.
7. Place patties onto bun bottoms and place sliced onions on top. Spread burger sauce on each bun top, cover burgers, and serve immediately.

Oh yeah, and those fries! They’re crisp and lovely, and just as easy as the burgers, if not easier. You’re talking to someone who inevitably burns the first batch of anything she’s trying to fry, and often doesn’t get a single usable piece of food out of the entire experience. Nevertheless, these were simple even for me. You don’t even need to measure the temperature of the oil!

To make fries super simple, Cooks Illustrated starts them in cold oil. Surprisingly, they don’t get soggy or absorb oil. You’re then supposed to bring them to a boil, leave them for 15 minutes without touching them, make sure none are stuck to the bottom, and cook for a few minutes more until golden brown. The times were a little off for me and I feared 15 minutes left alone would be too long, so I started scraping them off the bottom a tad earlier and they didn’t break apart. I’d just recommend keeping your eye on them. If you can watch a pot, you can make these fries.

You may have noticed that I went a little crazy with my food stylin’ for this photo shoot. I couldn’t help it! I love these little burgers so much, I wanted to give them the star treatment. It added so much fun to the meal.

I bought some coke in glass bottles, sweet little mustard and ketchup dispensers, and food-grade checked wax paper. A lot of these great materials were on sale after Independence Day. I then downloaded and adapted the template for the burger tray and little fry pouch from Bakerella, who used it for her adorable faux-burgers.

Want to present a meal to your family in these sweet little checkered trays and fry pouches? Download the template here, print it on cardstock, cut around the outside borders, fold the tabs over and glue them. If you’d like to change what the fry pouch says, just crop out my logo and paste in your own.

Easy French Fries


Recipe by: Cooks Illustrated
Yields: about 2-3 servings

Ingredients:
2 1/2 lbs Yukon Gold Potatoes (about 6 medium), scrubbed, dried, sides squared off, and cut length-wise in 1/4 inch by 1/4 inch batons (strips)
6 cups peanut oil
1/4 cup bacon fat, strained, optional
Kosher salt

Belgian-Style Dipping Sauce Ingredients:
5 tablespoons mayonnaise
3 tablespoons ketchup
1 medium garlic clove, minced
1/2 teaspoon hot sauce
1/4 teaspoon table salt

Directions:
1. Mix all ingredients for Belgian-Style Dipping Sauce together and refrigerate until needed.
2. Put potatoes, oil, and bacon fat (if using) into a large Dutch oven or stock pot. Cook over high heat about 5 minutes or until the oil reaches a good rolling boil. Cook without stirring until potatoes are limp but their exteriors are firm enough to scrape stuck ones off the bottom without breaking. The original recipe says 15 minutes, but keep an eye on them and try a little early (gently).
3. Using tongs, stir potatoes, gently loosening any that are sticking to the bottom, and continue to cook, stirring occasionally, until golden the fries are golden brown and crisp, about 5 to 10 minutes longer. Use a slotted spoon to transfer fries onto a bed of paper towels over a baking sheet. Salt and serve immediately, while hot, which Belgian-Style Dipping Sauce.

If you liked this post, please:
Subscribe to Willow Bird Baking
Follow Willow Bird Baking on Twitter
Follow Willow Bird Baking on Facebook
Give this post a thumbs up on StumbleUpon


ShareOther ways to share this post with friends!

1 7 8 9 10 11