cookies

Birthday Cake Cheesecake

At 26-going-on-27, I’ve grown to love birthdays that feel like deep crow-footed, cheek-hurting smiles, that sound like clanging dishes and brassy laughter.

On birthdays, I need my family. We need a table to sit around to hold our leaning elbows. We need food, we need each other, but that’s all.
For children, though, birthdays have to involve some sort of event. Kids want to scarf down plasticky pizza, be mildly terrorized by an oversized animatronic mouse playing a banjo, and wallow in a germy ball pit. Or they want to light tiki torches, drink pineapple punch, and marco polo around a swimming pool until their fingers are wrinkly.
When I was little, my mom convinced me that I wanted to throw a cross-stitching birthday party.

Naturally, the most direct avenue to popularity among your elementary school friends is to invite them to something called a “party” and proceed to introduce them to the pastime of 70-year-old ladies everywhere.

When my birthday rolled around, my unsuspecting friends gathered around the coffee table and listened intently to the plan. Our goal was to pick a pattern and each cross-stitch a bookmark before cake and gifts. We dutifully chose the our favorite design, fussed with threading our needles, and got to work.
Well, turns out cross-stitching requires quite a bit of time. And, like, patience and stuff. Things that are in short supply for kids at birthday parties.

My friends faded fast. Soon we were stuffing our faces with cake, our half-finished bookmarks languishing in the needle-and-thread strewn living room.

Oh well. As long as there’s cake, right?

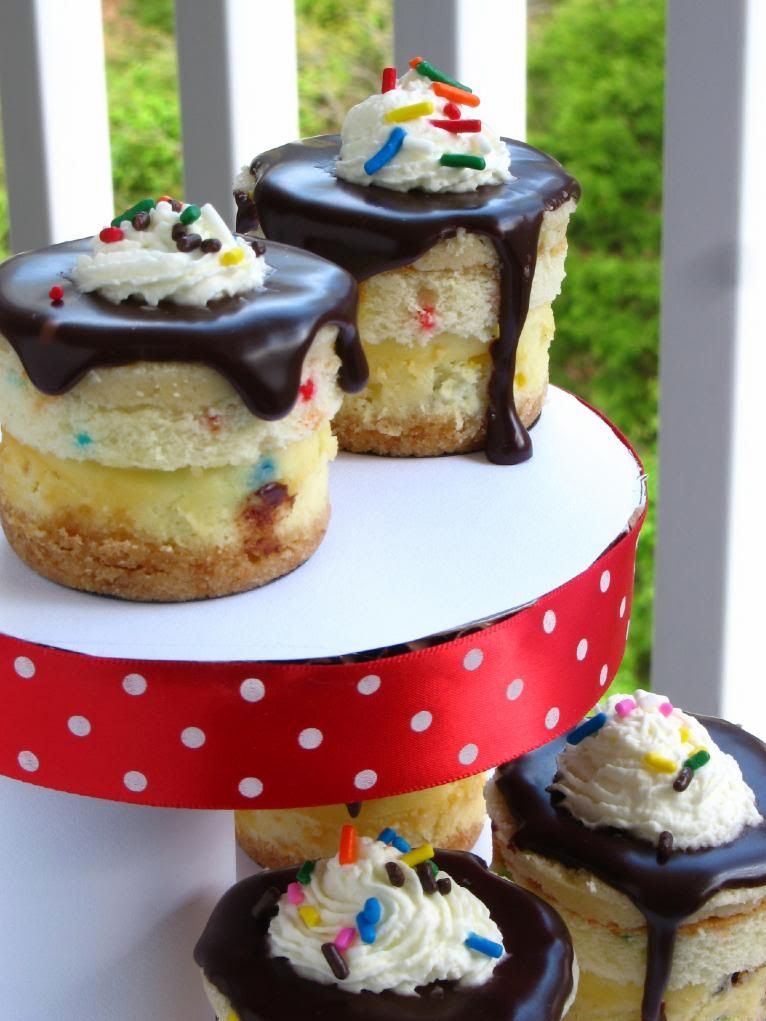
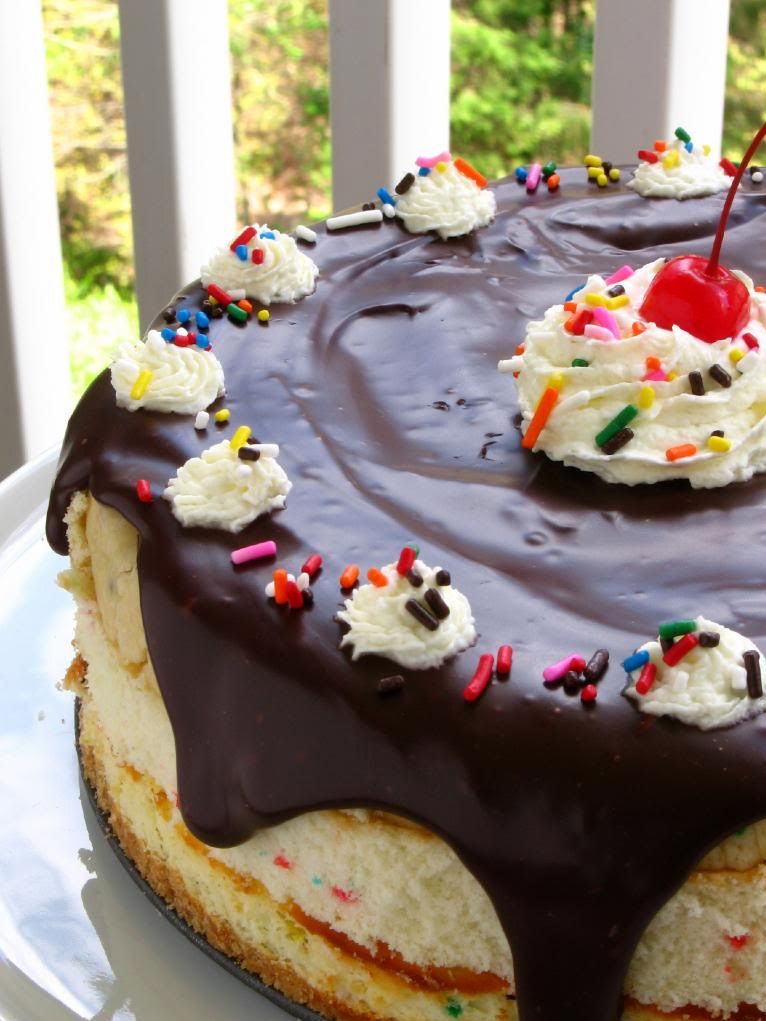
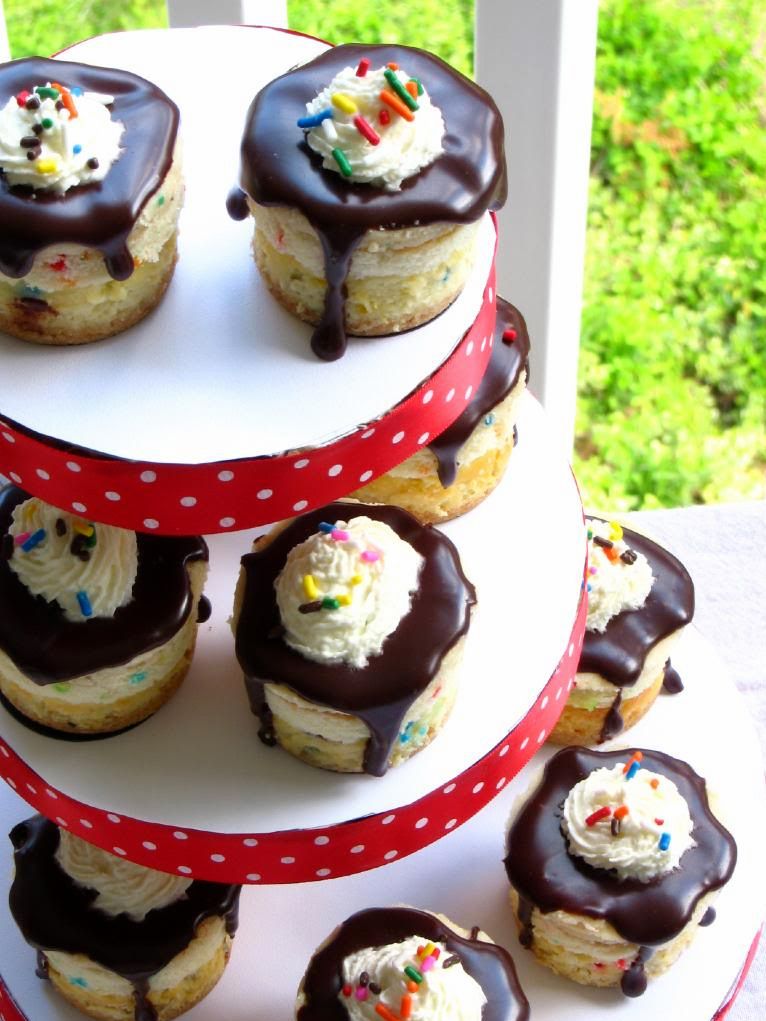
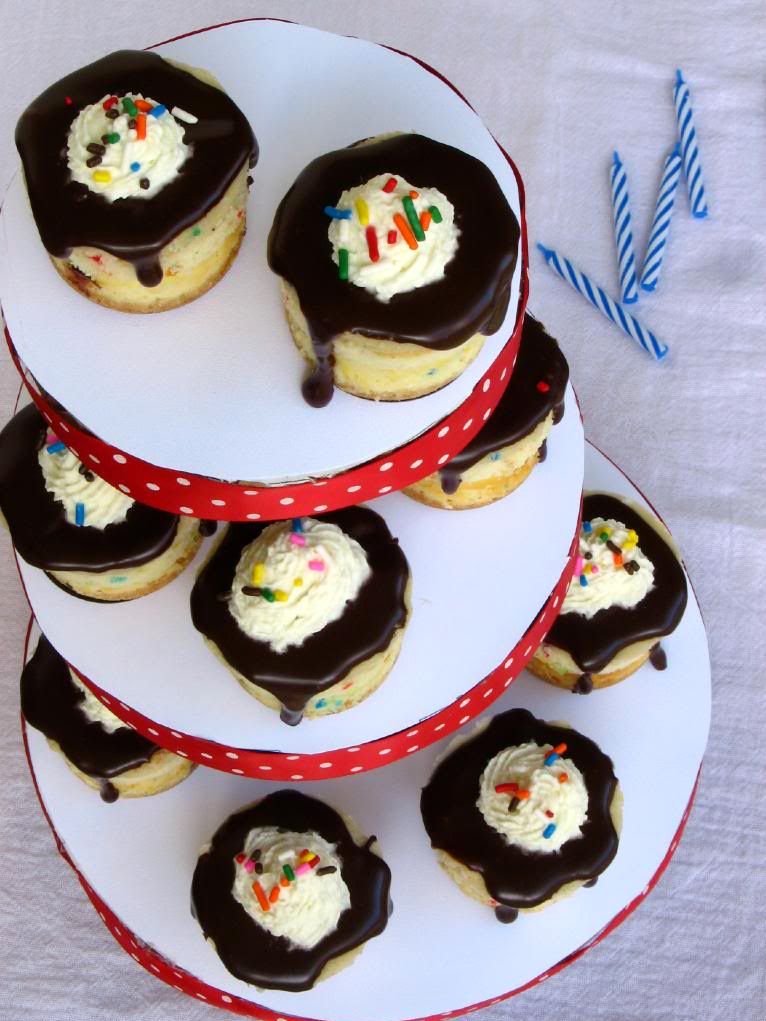
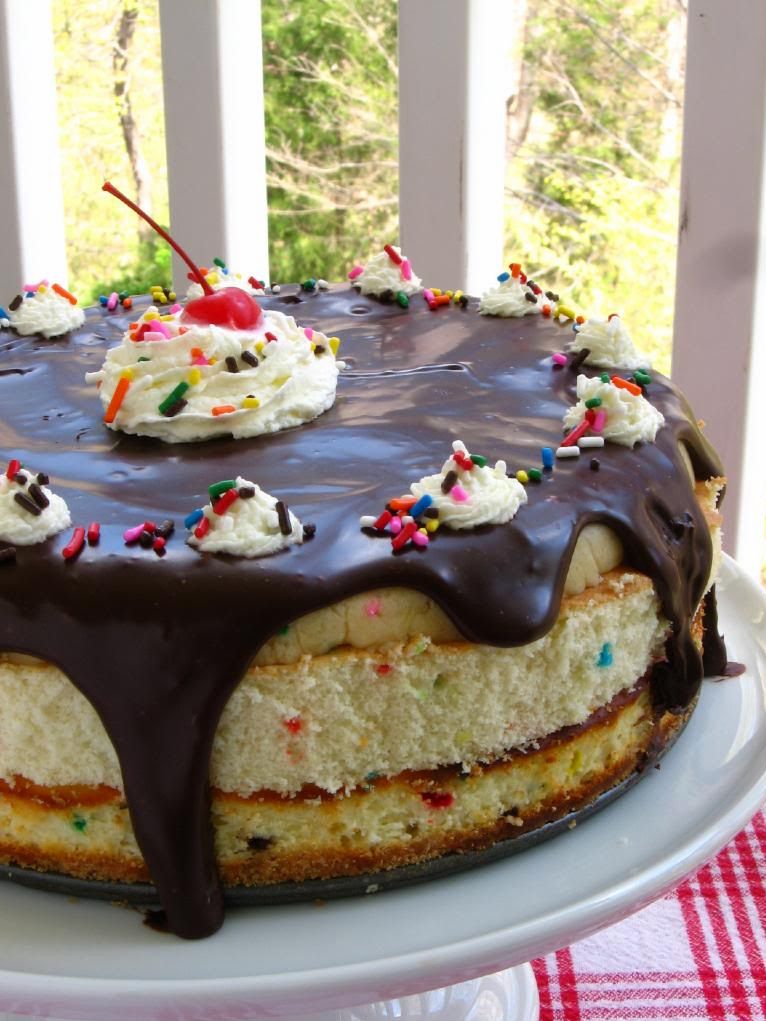
In that spirit, boy do I have a cake for you. This particular cake is an explosion of birthdayness. A “Funfetti” cheesecake on a vanilla wafer crust is topped with a layer of Funfetti cake, a layer of cake batter cookie dough, chocolate sauce, whipped cream, and a cherry. Every layer contributes a little bit of birthday joy. The final product is scrumptious and outrageously festive.
I have more ridiculous birthday stories from when I was a child, because apparently it was impossible for me to have a normal, uneventful birthday party. But I’ll spread the love and save those for later. In the meantime, have some cake.

Describe one of your favorite (or least favorite) childhood birthday memories.

Birthday Cake Cheesecake


Recipe by: Willow Bird Baking, with chocolate sauce adapted from Bakers Royale
Yield: 24 mini cheesecakes or 1 full-sized cheesecake

Crust Ingredients:
45 vanilla wafers, finely processed into crumbs
5 tablespoons unsalted butter, melted and cooled
Small pinch of salt

Cheesecake Ingredients:
2 (8 oz.) packages cream cheese, at room temperature
2/3 cup sugar
1 tablespoons all-purpose flour
1 tablespoon cake mix
1 1/2 teaspoons vanilla extract
2 large eggs
1 tablespoon sprinkles
1 Funfetti cake mix (or homemade yellow cake with sprinkles mixed in), prepared and baked in thin layers
melted chocolate (for topping)
whipped cream (for topping)
maraschino cherries (for topping)

Cake Batter Cookie Dough Ingredients:
1 1/2 cups all-purpose flour
2/3 cup yellow cake mix
1/4 teaspoon salt
1/2 cup unsalted butter, room temperature
1/2 cup granulated white sugar
1 teaspoon pure vanilla extract
2 tablespoons sprinkles
4-8 tablespoons water

Chocolate Pouring Sauce:
2/3 cups dark chocolate
2 tablespoons heavy cream
4 tablespoons powdered sugar, sifted
4-5 tablespoons water, warm

Directions:
Note on Scheduling: This is a great recipe to make over the course of a few days. You can make the Funfetti cake one day and freeze it, make the cookie dough disc another day and freeze it, make the cheesecake one day and refrigerate it, and then make your chocolate pouring sauce and assemble on the day you’ll serve the dessert.

Prepare your Funfetti cake: Mix and bake in 9-inch round cake pans according to box instructions and set aside to cool. Make one of these a pretty thin layer of cake — this will be the one you use on your cheesecake (be careful; a thinner layer will bake for less time). The other layer is extra; I tore mine up and froze it for future cake balls. After cooling, freeze your cake layer — it’s easier to work with when frozen.

Prepare your cheesecake: To make the cheesecake crust, preheat the oven to 350 degrees F. Butter two mini or one full-sized cheesecake pan. Combine the cookie crumbs, melted butter and salt in a small bowl. Toss with a fork to moisten all of the crumbs. Press into a thin layer covering the bottom of your cheesecake pan(s).

In the bowl of an electric mixer fitted with the paddle attachment, beat the cream cheese and sugar on medium-high speed until well blended. Beat in the flour and cake mix. Add in the vanilla and beat until well incorporated, scraping down the sides of the bowl as needed. Beat in the eggs one at a time, scraping down the bowl between each addition. Pour the filling into your cheesecake pan(s), leaving room for a cake and cookie dough layer on top of your cheesecake.

Bake until the top is lightly browned, puffed and cracked at the edges, and the center moves only very slightly when the pan is lightly shaken (about 40 minutes for a full-sized cheesecake or 12-15 minutes for mini cheesecakes). Transfer to a wire cooling rack. Cool at room temperature for at least 30 minutes. Transfer to the refrigerator and let cool at least 1 hour, until completely chilled and set.

Make the cookie dough: In a medium bowl, cream together butter and sugar for 2-3 minutes until light, fluffy, and pale yellow. Mix in salt, flour, cake mix, sprinkles, and vanilla. Add water one tablespoon at a time, mixing after each, until you reach cookie dough consistency. If making a full-sized cheesecake, line a 9-inch cake pan with plastic wrap and spread cookie dough in a disc in the pan. Freeze it until firm, about 15 minutes. If making mini cheesecakes, just chill the cookie dough until you’re ready to assemble your cakes.

Make the chocolate pouring sauce: Heat chocolate and cream together in a bowl set over simmering water. Let them sit for a few minutes before whisking them together to combine. Whisk in powdered sugar and then add 1 tablespoon of water at a time, mixing after each until you reach pouring consistency. Set the sauce aside and let it cool to warm.

Assemble the cheesecakes: If you’re making mini cheesecakes, use a round cookie cutter or a serrated knife to cut circles of Funfetti cake to fit on each mini cheesecake. Spread a little chocolate sauce on the top of each mini cheesecake before placing a cake round on each and gently pressing them down snugly. If you’re making a full-sized cheesecake, spread chocolate sauce over your cheesecake and just place full frozen cake layer on top and gently press down.

If making mini cheesecakes, spread cookie dough into the top of each well with the back of a spoon. If making a full-sized cheesecake, spread another thin layer of chocolate sauce on top of the cake layer to act as glue, and then take your frozen cookie dough disc and place it on top. Chill cheesecake(s) for about 30 minutes before gently unmolding them. Drizzle with melted chocolate and top with a dollop of whipped cream, sprinkles, and a maraschino cherry.

If you liked this post, please:
Subscribe to Willow Bird Baking
Follow Willow Bird Baking on Twitter
Follow Willow Bird Baking on Facebook
Give this post a thumbs up on StumbleUpon


ShareOther ways to share this post with friends!

Cake Batter Cookie Dough Truffles

What a mess of a weekend. While I was blowing my nose repeatedly and hacking unattractively on Saturday night, I noticed that Byrd was lethargic. After a little investigating (read: walking around the apartment), I found that she had eaten about a metric ton of kleenex from the trash can. Her tissue escapades must have been her attempt at staying occupied while I tried to sleep off my cold; alas, it was a bad life decision. She was one unhappy puppy.

She curled up next to me and tried to look as pitiful as possible while I massaged her sick little body. Every now and then she’d look up at me as if to say, “Why aren’t you fixing it, Mommy?” Then I’d cry a little and she’d lick my face a little and we’d continue spooning.

Finally the tissues worked their way out of her system, but not until the entire weekend had been spent fretting and giving her sips of olive oil. I’m ready for everyone in the apartment to be healthy now! At least my turtle hasn’t contracted any plagues as of yet.

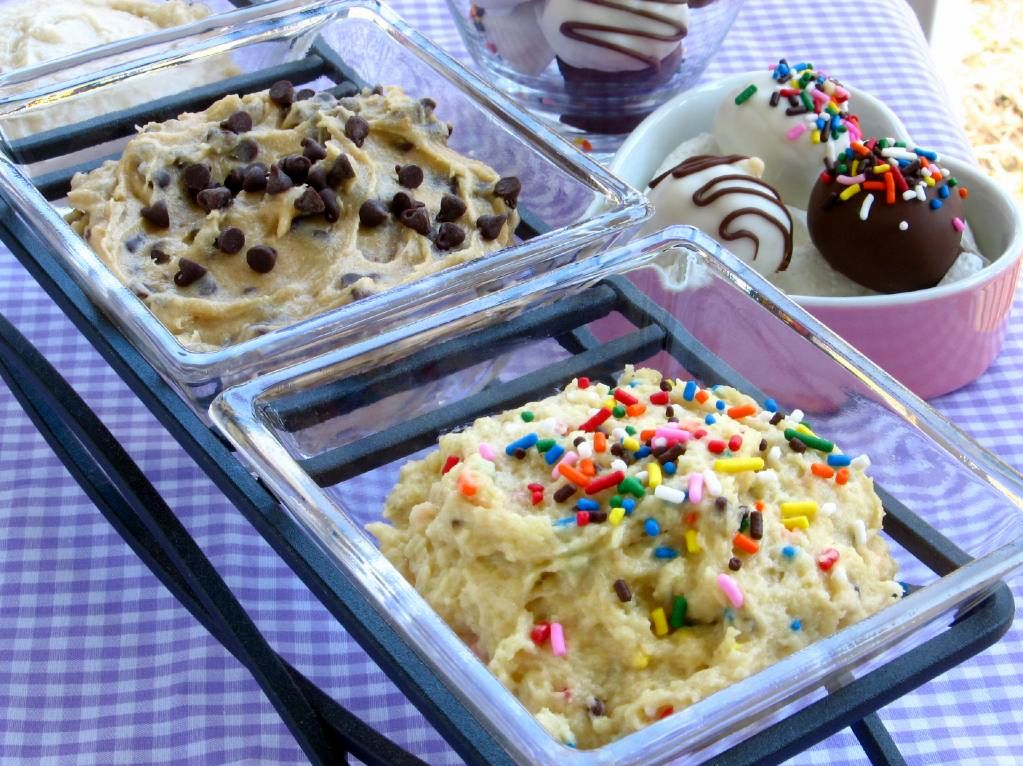
Needless to say, the safe-to-eat cookie dough I posted on Sunday has been a welcome ray of sunshine in an otherwise germy, sickly sort of week. In fact, I found two recipes in which to use said cookie dough that almost made everything feel downright cheery. And here’s one of them now: cookie dough truffles.

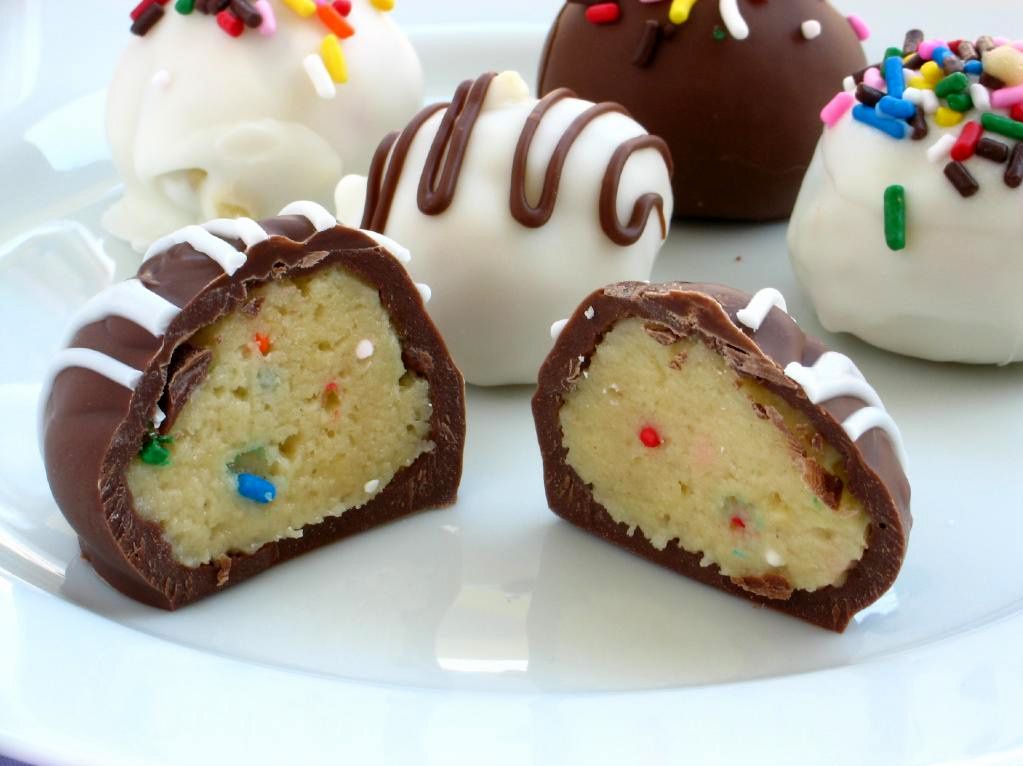
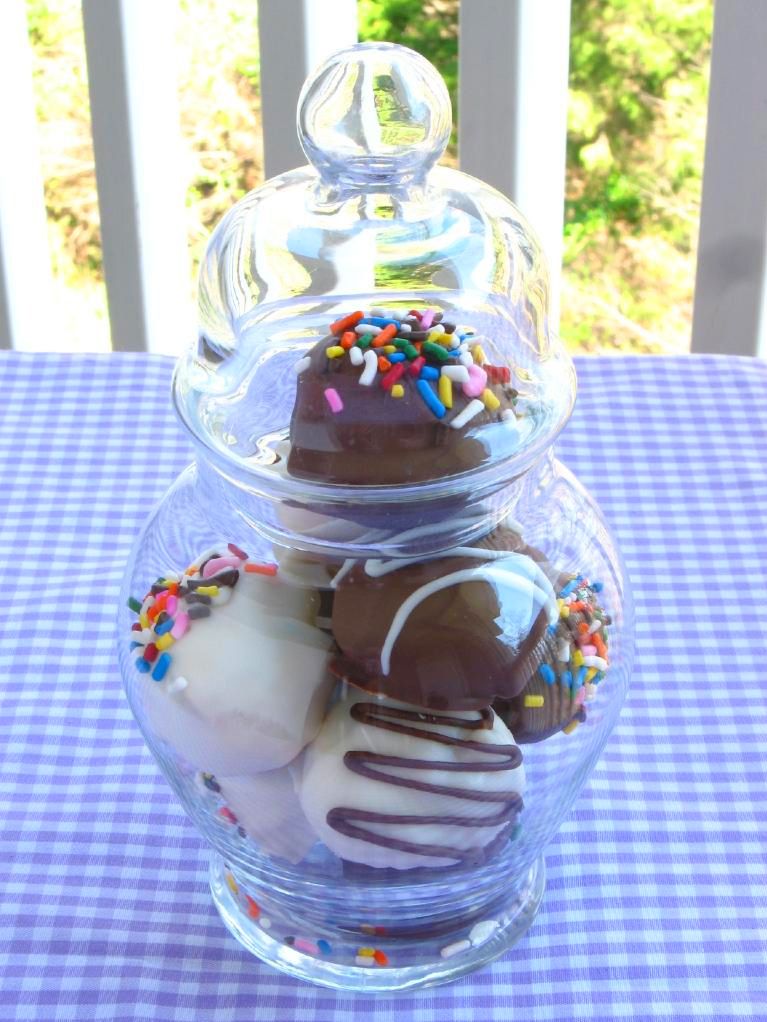
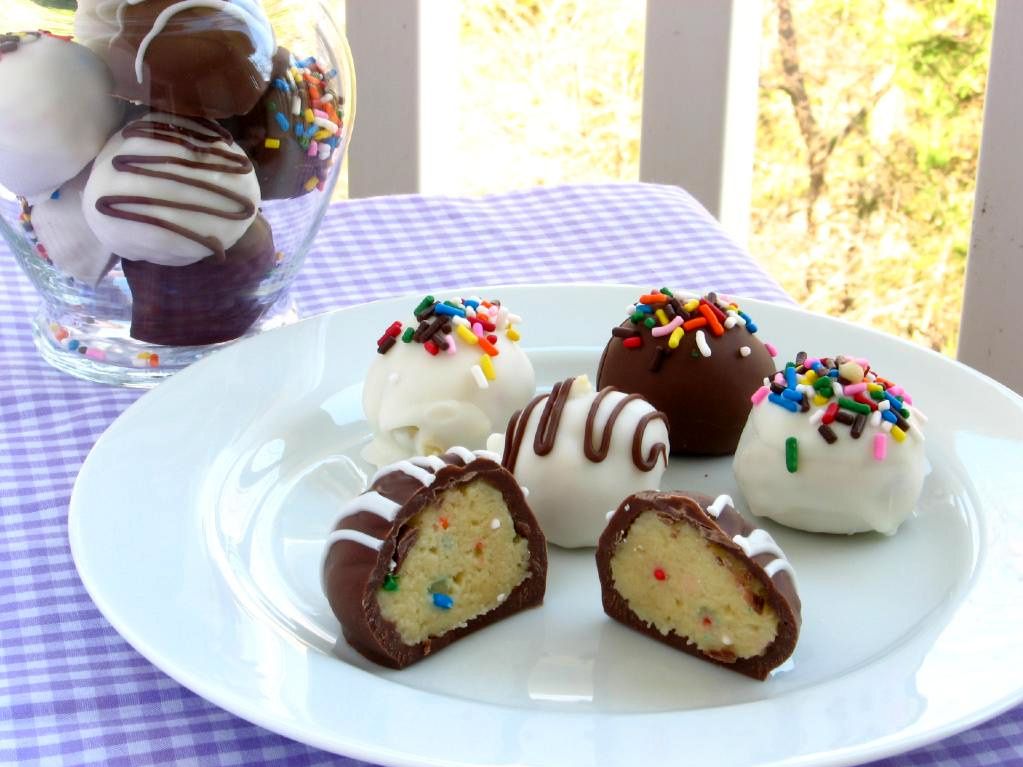
I usually use the eggless chocolate chip cookie dough in my Coffee Cookie Dough Fudge Cheesecake — a noble purpose, for sure. But if you’re not feeling making an entire cheesecake, you can whip up a batch of these simple truffles. I made them with each type of cookie dough and unsurprisingly, the cake batter cookie dough truffles were my absolute favorite. The cake batter cookie dough was the perfect buttery and festive filling inside of the rich chocolate shell. I’m just sorry poor Byrd couldn’t join in for a bite!

Cake Batter Cookie Dough Truffles


Recipe by: Willow Bird Baking
Yields:about 12 truffles, depending on size

Ingredients:
one recipe cake batter cookie dough (or other flavor)
chocolate candy melts (I use Candiquik)
sprinkles!

Directions: Roll your cookie dough into 1 inch balls and refrigerate for a few hours or overnight.

Melt candy melts according to package instructions. I place the bowl of melted candy melts into a bigger bowl with hot water in it. This keeps the candy melts warm and viscous as you work. Just be careful not to get any water in the chocolate, which will cause it to seize and be unusable. Prepare a sheet of wax paper to let your truffles dry on.

Take only a few dough balls out of the fridge at a time. Spear one with a toothpick and dip it, using a spoon to help you coat the outside and wiggling it a little over the bowl to let the excess drip off. Now wiggle it off onto your wax paper and top with sprinkles, chocolate chips, crushed oreos, or other cute toppings. Let them harden. Serve immediately or keep in an airtight container in the fridge.

If you liked this post, please:
Subscribe to Willow Bird Baking
Follow Willow Bird Baking on Twitter
Follow Willow Bird Baking on Facebook
Give this post a thumbs up on StumbleUpon


ShareOther ways to share this post with friends!

Three Safe-to-Eat Cookie Doughs: Chocolate Chip, Sugar, and Cake Batter!

I’m siiiiick. If you follow Willow Bird Baking on Facebook or Twitter (you do, right?), you’ve probably heard me whining about it lately (okay, maybe this isn’t the best way to encourage you to follow).

It started with a sore throat and has turned into a beastly, phlegmatic ogre of a cold that has taken up residence in my chest and commenced hanging draperies and such. I have protested this development with various hot teas, soups, and my favorite home remedy suggested by readers: complaining.

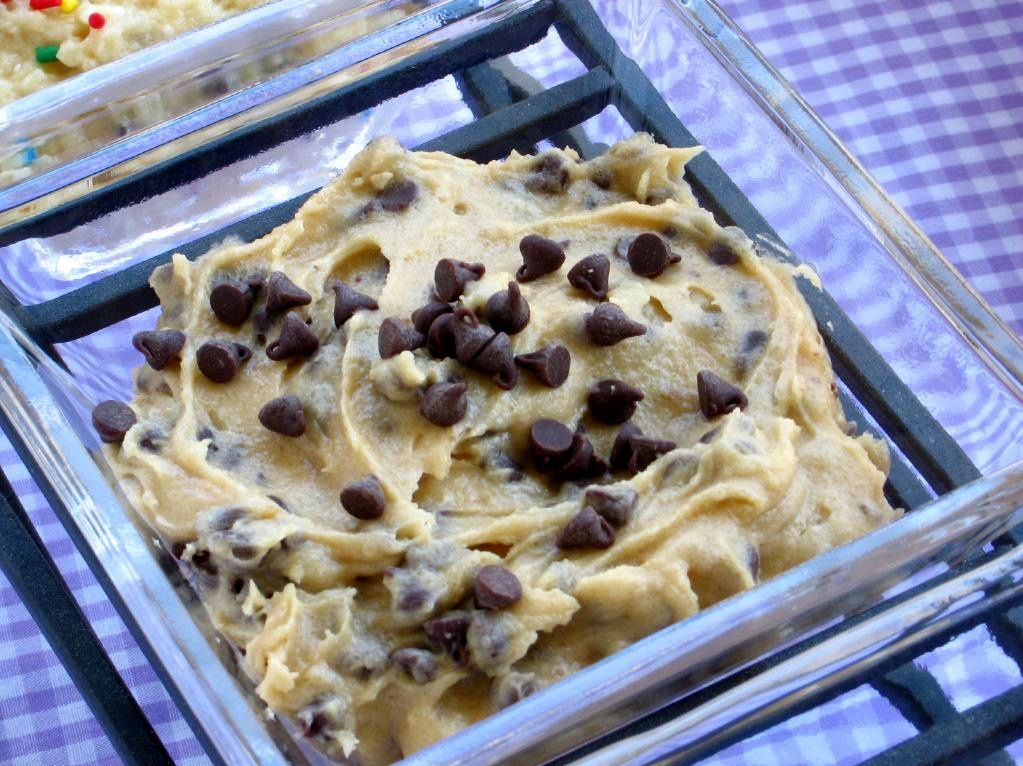
Three Safe-to-Eat Cookie Doughs: Chocolate Chip, Sugar, and Cake Batter!

Three Safe-to-Eat Cookie Doughs: Chocolate Chip, Sugar, and Cake Batter!

I know my students are to blame for this plague! They’ve been dropping like flies recently. A wave of 6th graders was sick early in the year, and then 7th grade took a nose dive. At one point almost half the class was home in bed, weeping at the thought of missing their fantastic language arts class and writing pickup essays in fond remembrance of healthier days. That’s what students do when they’re home sick, right?

Three Safe-to-Eat Cookie Doughs: Chocolate Chip, Sugar, and Cake Batter!

I can’t stay home until I’m better, but I do tend to baby myself when I’m sick. Take, for instance, the vat of spicy crab chowder and loaf of sourdough bread I allowed myself to eat yesterday under the guise of “feeding a cold” (not that I starve a fever or anything).

And I’m not even going to mention the amount of this cookie dough I consumed over the weekend. I’m sure cookie dough has, like, vitamins and stuff.

Three Safe-to-Eat Cookie Doughs: Chocolate Chip, Sugar, and Cake Batter!

If nothing else, cookie dough is good for the soul. As a child, my idea of adulthood was finally getting to sit down with a tube of technically-unsafe-to-eat-before-baking cookie dough, slice it open, and eat the whole thing — no parental scolding involved.

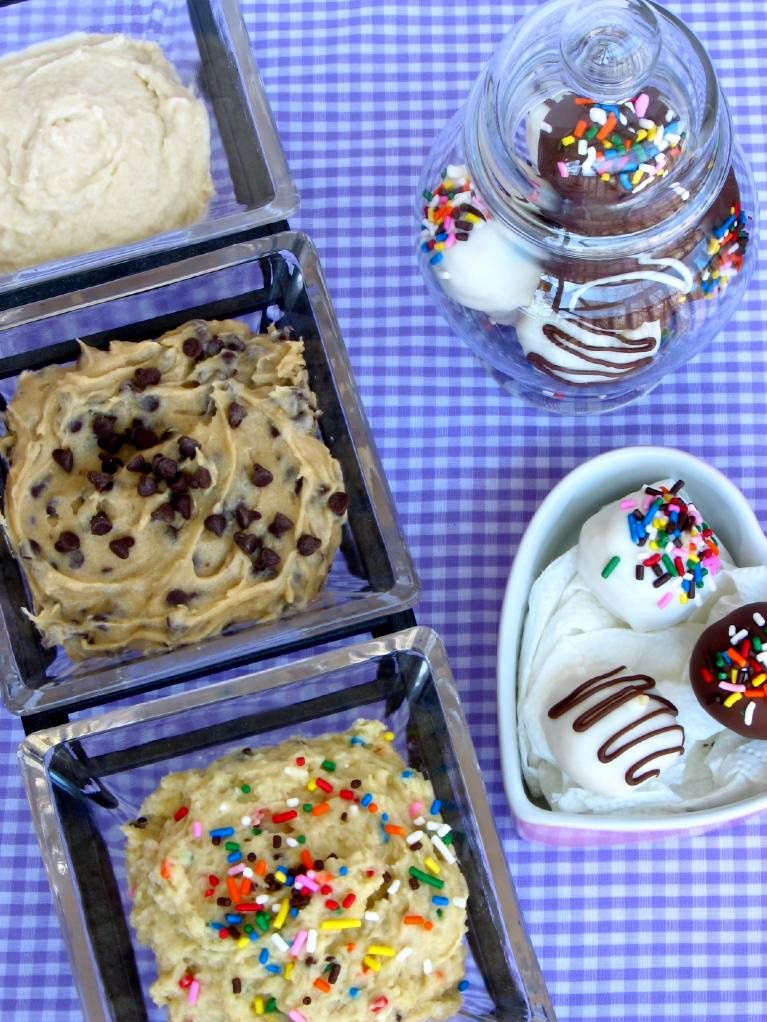
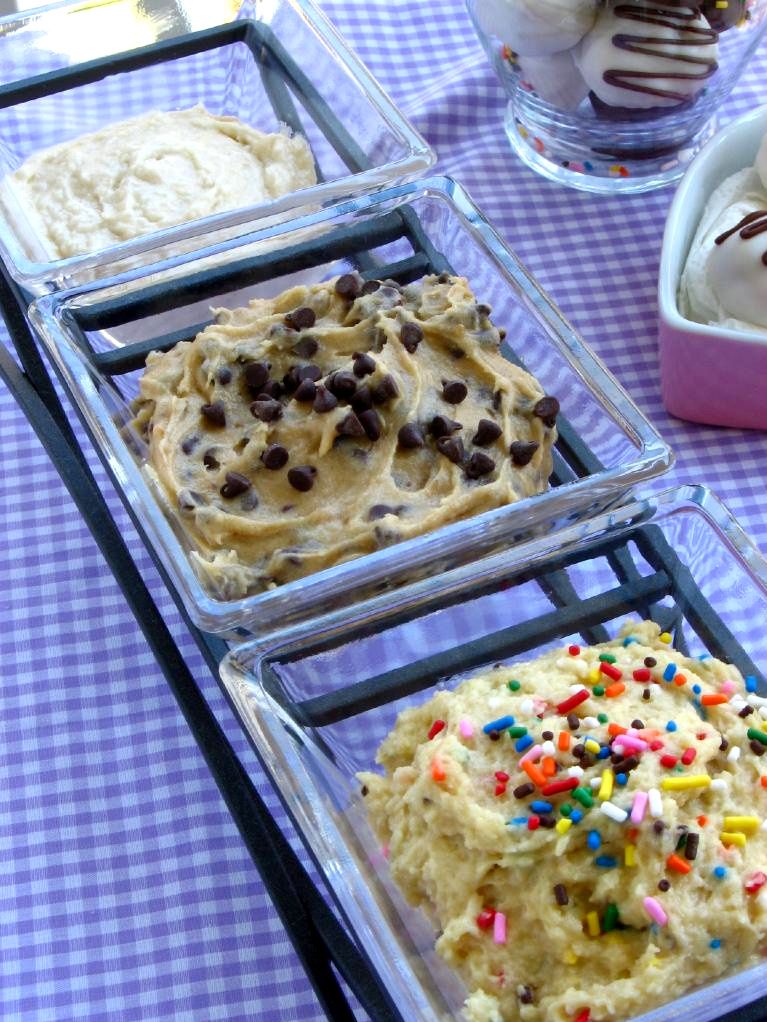
And now, look how far I’ve come: this weekend I made not one, but three kinds of cookie dough! Not only that, but they’re all eggless and therefore actually safe to eat*.

Three Safe-to-Eat Cookie Doughs: Chocolate Chip, Sugar, and Cake Batter!

Chocolate chip cookie dough recipes are popular and easy to find, but safe-to-eat sugar cookie dough is a bit more elusive. I developed the recipe below from a regular sugar cookie recipe. But the dough that really takes the cake (literally!) is the Cake Batter Cookie Dough.

Jessica at How Sweet It Is has been going cake batter crazy lately, and I’m loving it! Inspired, I decided to create a rich cookie dough that tastes like buttery yellow cake batter, complete with sprinkles. There’s just something wonderful about food that tastes like a birthday party.

Oh, and are you wondering about those truffles in the photos? Stay tuned — I’ll tell you all about those soon, along with yet another awesome use for cookie dough!

So, in summary: I’m sick. My students are sick. We’re all sick. Eat cookie dough.

5 from 1 reviews
Safe-to-Eat Chocolate Chip Cookie Dough
 
Prep time
Total time
 
Chocolate chip cookie dough you can eat on a spoon!
Author:
Ingredients
  • 1/2 cup butter, softened
  • 3/4 cup light brown sugar, packed
  • 1 cup all-purpose flour
  • 1/2 teaspoon salt (a few people have found this to be too much; if you want, just add a pinch and increase to taste. I add the full 1/2 teaspoon and enjoy it!)
  • 1 tablespoon vanilla extract (again, you might want to add this a teaspoon at a time to taste. I add the full tablespoon and enjoy it!)
  • 1 cup semisweet chocolate chips
  • water
Instructions
  1. In a medium bowl, cream together the butter and sugar. Stir in the flour, salt, vanilla and chocolate chips. Add water one tablespoon at a time (stirring between each) until the dough reaches cookie dough consistency.


5 from 1 reviews
Safe-to-Eat Sugar Cookie Dough
 
Prep time
Total time
 
Ingredients
  • 1 1/3 cups and 1 tablespoon all-purpose flour
  • 1/2 cup butter, softened
  • 3/4 cup white sugar
  • 1-2 tablespoons water
  • 1/2 teaspoon vanilla extract
Instructions
  1. In a medium bowl, cream together butter and sugar for 2-3 minutes until light, fluffy, and pale yellow. Mix in flour and vanilla. Add water one tablespoon at a time, mixing after each, until you reach cookie dough consistency.

5 from 1 reviews
Safe-to-Eat Cake Batter Cookie Dough
 
Prep time
Total time
 
Ingredients
  • 1 1/2 cups all-purpose flour
  • 2/3 cup yellow cake mix
  • 1/4 teaspoon salt
  • 1/2 cup unsalted butter, room temperature
  • 1/2 cup granulated white sugar
  • 1 teaspoon pure vanilla extract
  • 2 tablespoons sprinkles
  • 4-8 tablespoons water
Instructions
  1. In a medium bowl, cream together butter and sugar for 2-3 minutes until light, fluffy, and pale yellow. Mix in salt, flour, cake mix, sprinkles, and vanilla. Add water one tablespoon at a time, mixing after each, until you reach cookie dough consistency.

*Note: Since posting this recipe, scientisty types have also found that raw flour — just like produce — can carry E.coli if it’s been contaminated with it. This article suggests that the risk is even smaller than the tiny risk of getting Salmonella from eating cookie dough with raw eggs, but it’s still there and I wanted you to know about it. At least eggless cookie dough is safer — and no reason to waste the eggs when you just want to eat it with a spoon, right?!

Magic Bars and a Tate’s Bake Shop Giveaway!

I can be kind of a trainwreck sometimes. I don’t mean a lose-my-pencil or knock-over-my-milk trainwreck (although I can be those too). I mean a National Lampoon trainwreck.

Christmastime always reminds me of this fact, mostly because of something that happened a few years ago. My parents had decided to travel to South Korea for the holiday to visit my sister, who was living there at the time. I was sullen about having to spend Christmas alone, and on top of that, I had been appointed petsitter.


Magical, magical Magic Bars

Everything would have been okay if this position merely entailed taking care of my parents’ toy poodle, Abbey, who — while getting crotchety in her old age — is still a little scoop o’ sweetness. But no. Petsitting meant taking care of the dog, the finch, the very animated Roomba, and THE RABBIT.

THE RABBIT, y’all, who — I KID YOU NOT — eats two freshly made salads per day. I don’t even eat two freshly made salads per day! Or, uh, even one freshly made salad per day.

THE RABBIT, who snuggles and kisses everyone EXCEPT ME, because he hates my guts.

THE RABBIT, who attacks me whenever I’m within range.

THE RABBIT, who was THIS CLOSE to being turned into a stew and not making it out of the experience alive.


Don’t worry — no rabbit in the Magic Bars.

It was clear from the very beginning that this was going to be an interesting week, but I had no idea what kind of shenanigans were in store for me. I thought the worst of my troubles was THE RABBIT. Not even close. Because:

1. In the middle of one of my first nights at my parents’ house, I woke up to a waterfall raining down from the living room ceiling. There was apparently a leak in an upstairs bathroom. Over the next few days, what started as a tiny crack in the downstairs ceiling became a gaping hole.

2. The Roomba stopped working after a few days. It already required daily maintenance to manually clean out the gobs of bunny hair it had to consume, but halfway through the week, it gave up the ghost. I barely fiddled with it before giving up, which meant being buried in bunny fluff the rest of the week. It was EVERYWHERE. Covering every article of clothing, stuck in my eyelashes, garnishing every bite of food.

3. Abbey decided to start spontaneously bleeding from her head midweek, staining the couch and sheets. Still no idea what happened there.

4. Speaking of Abbey, she and Byrd (my toy poodle) were mortal enemies all week long. Byrd likes to pester Abbey. Abbey wishes Byrd would fall into a hole and get swallowed by the earth. This makes for interesting interactions, including what I like to call “the great potty war,” during which each dog was determined to out-pee the other.

5. That $#@*% RABBIT attacked me and almost broke my hand as I was cleaning up his gross cage. Apparently he’s territorial about his hay. Noted.

6. The bird died. IT JUST UP AND DIED. I promise I fed it, watered it, milleted it, cooed at it, kept the temperature steady. Mom later assured me that it was an old bird. At this point I kind of felt like telling her that she was an old bird. Just kidding, Mom. Love you!

7. The day had finally arrived when I was supposed to pick my parents up from the airport after school. Everything was going to be okay! I was on my way to work, gleeful at the prospect of leaving the demolished ceiling, bleeding dog, dead bird, and vicious Monty Pythonesque bunny behind — when I totaled my car. TOTALED. Some dude pulled out in front of me leaving me no room to stop, and bang! Cue the airbags, the traffic jam, the police report, etc.

All of this occurred without a reliable way of contacting my parents since they were, you know, across the globe and all. I picked them up from the airport that night in Mike’s car, and I’ll bet you can imagine how well that went: “Hi guys. Your ceiling’s destroyed, your bird is dead, your house is one giant furball, your dog may or may not still be bleeding, and I just totaled my car. How was your trip?”

Anyway, I can be a trainwreck of epic proportions. That’s why when I received a copy of Tate’s Bake Shop Cookbook to review a few weeks ago and promptly failed at the first recipe I made from it, I knew I needed to give it another go.

My first try was the Lemon Wafers. They’re described as “cake like,” but mine were thin, crisp, and burnt around the edges. They still tasted amazing (I may or may not have eaten half a batch by myself), but they were quite the ugly ducklings. With no photographs of some of the recipes, it was hard to decide how they were supposed to look; nevertheless, I’m pretty sure they weren’t supposed to look like that.

I’m so glad I tried again, because the next recipe was a winner. Magic Bars consist of pecans, bittersweet chocolate, and coconut bound by sweetened condensed milk on a graham cracker crust. They were so simple and quick to make, but were definitely magical! I took them to a crafting party (I feel so hip to have gone to a crafting party – did you see how deftly I slid that tidbit into this post? Am I ruining it now? Oh.) and they were a huge hit.

Pocket Review


Book Stats: 156 pages, $25.99 list price (~$18 on Amazon), indexed.
Accessibility: Perfect for a beginning baker!
Examples of Recipes: Mocha Pecan Muffins, Ginger Scones, Zvi’s Cinnamon Swirl Bread, Double Chocolate Almond Cookies, Peanut Butter Squares, Apple Cream Cheese Tart, Hummingbird Cake, Raspberry Charlotte, etc.
Overall Impression: I love the simplicity and accessibility of the recipes, but I would’ve preferred more photos — particularly to see how things were supposed to turn out.
Overall Rating: 3.5 out of 5 stars

Kathleen King, the author of the cookbook and owner of Tate’s Bake Shop in the Hamptons, has received recognition from Ina Garten, Everyday with Rachael Ray, The Gourmet Retailer, and The Boston Globe for her simple handmade treats. The cookbook is filled with easy, accessible recipes perfect for whipping up at a moment’s notice. In addition, the lovely folks at Tate’s sent me some buttery, thin and crisp cookies to sample. I loved them, and can’t wait to make some of the famous chocolate chip cookies to share with family.

Would you like to try some Tate’s Bake Shop goodies? One Willow Bird Baking reader will win a gift-pack of cookies including oatmeal raisin, white chocolate macadamia nut, and chocolate chip, as well as a copy of the Tate’s Bake Shop Cookbook. To enter, leave a comment on this post answering the question, “What’s your favorite cookie?” To receive up to three extra entries:

1. Become a fan of Tate’s Bake Shop on Facebook and leave a separate comment telling me you did so (or if you’re already a fan, just say so in your comment!)
2. Become a fan of Willow Bird Baking on Facebook and leave a separate comment telling me you did so (or if you’re already a fan, just say so in your comment!)
3. Tweet about the giveaway using this message: “Just entered to win a Tate’s Bake Shop gift pack and cookbook at Willow Bird Baking! Enter here: http://bit.ly/eFtQi6 @julieruble” and leave a separate comment telling me you did so.

This contest will run through December 28, 2010 at noon EST, but even if you don’t win, you can still enjoy some cookies! Tate’s Bake Shop is offering a 15% discount for Willow Bird Baking readers on tatesbakeshop.com from now until December 31. Just use the code “cookie” at checkout. Enjoy!

Magic Bars


Recipe by: Kathleen King of Tate’s Bake Shop
Yield: 24 bars

Ingredients:
1/2 cup salted butter
1 1/2 cups graham cracker crumbs
1 1/3 cups dessicated shaved coconut (unsweetened)
1 1/2 cups bittersweet chocolate chunks (I use Ghirardelli)
1 1/4 cups pecans, chopped
1 can (14 ounces) sweetened condensed milk

Directions:
Preheat the oven to 350 degrees F. In a 9 x 13 inch pan, mix the melted butter and graham cracker crumbs. Press the mixture evenly to cover the bottom of the pan. Sprinkle the coconut over the crumb base. Sprinkle the chocolate chunks over the coconut. Sprinkle the pecans over the chocolate chunks. Drizzle sweetened condensed milk evenly over the top. Bake it for 25 minutes. Cool it completely and cut it into bars. I like these magic bars served cold.

If you liked this post, please:
Subscribe to Willow Bird Baking
Follow Willow Bird Baking on Twitter
Follow Willow Bird Baking on Facebook
Give this post a thumbs up on StumbleUpon

ShareOther ways to share this post with friends!

How to Make 27+ Cheesecakes and Look Awesome While Doing It

…or at least, feel like you look awesome while doing it?

Thank you so much for voting me into Project Food Blog Round 7 — I’m so grateful for your support! Challenge #7 was to create a video tutorial. I think you guys know by now that I’m a little obsessed with soupedup cheesecakes, so without further ado (okay, with a little more further ado), I’m about to show you how to create flippin’ awesome cheesecakes.

LIGHTS

What went into creating this video? Lots and lots of planning — dozens of pages worth! Lots and lots of time — 35+ hours worth! And lots and lots of fun — probably more than I should’ve had. Ahem. You’ll see.

CAMERA

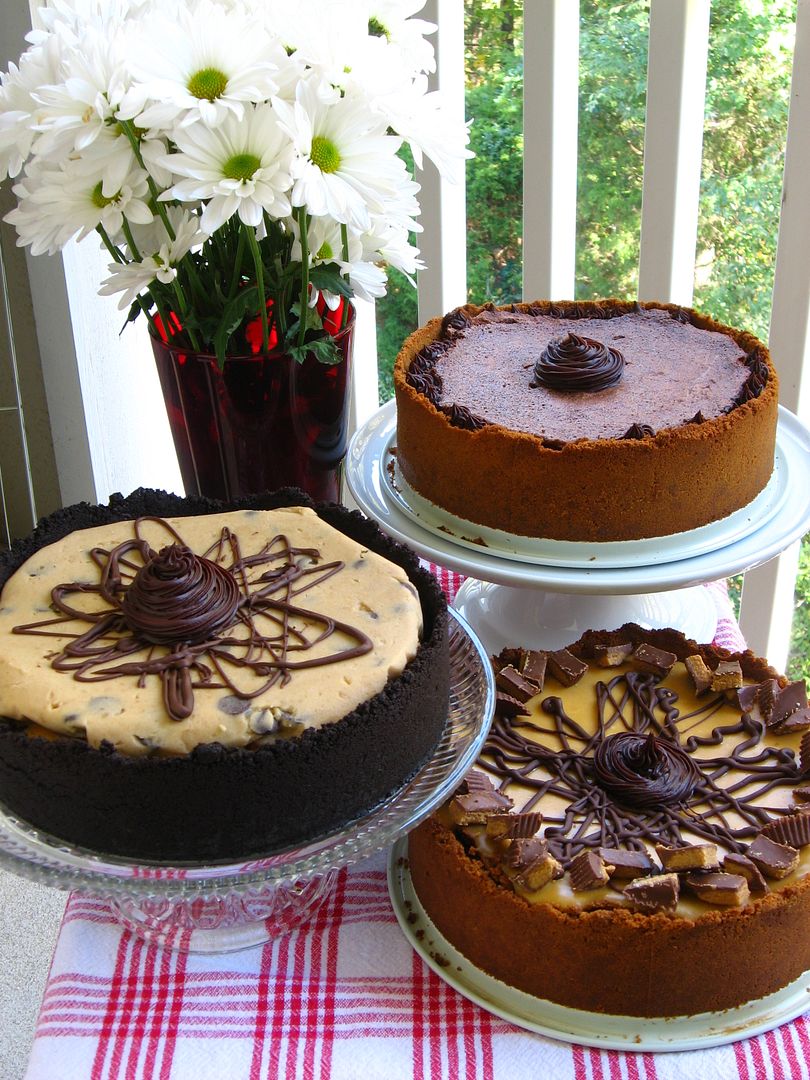
Cheesecakes are incredibly customizable. In the video below, I’ll show you 3 different crusts, 3 different fillings, and 3 different toppings. By mixing and matching these components, you can feasibly create over 27 different cheesecakes! So, um, if you ever need 27 different cheesecakes . . . I got ya covered.

ACTION

Enough of the suspense! What do you get when you combine stop-motion animation, a music video, some ridiculousness, and a whole lotta cheesecake? Watch and see.

http://www.youtube.com/watch?v=7Dj3msQYjOQ&fs=1&hl=en_US&color1=0x402061&color2=0x9461ca

(please click here to see bigger version)

You can print the recipes for these cheesecakes here: Coffee Cookie Dough Fudge Cheesecake, Caramel Fudge Brownie Cheesecake, Chocolate Peanut Butter Bliss Cheesecake.

(Note: Voting is now open! I would so appreciate if you’d take a moment to pop over and vote for me by clicking the heart on this page once you’re signed into your Foodbuzz account. Registering for a Foodbuzz account is quick, easy, and free if you don’t have one already! Thanks, y’all!)

THE BLOOPER REEL

…wherein I prove that I’m basically tone deaf, drop my brownie layer in the floor, yell a lot at my piece-of-crap hand mixer, and eat bacon.

http://www.youtube.com/watch?v=a4D3hOu0DOM&fs=1&hl=en_US&color1=0x402061&color2=0x9461ca

(please click here to see bigger version)

STRIKE THE SET

After the video camera was tucked away, the tripods were folded up, and my smudgy lipstick had faded, there was still one itty bitty order of business to attend to. What the heck does one do with three cheesecakes?! Turns out there was something awesome to do with them!

My friend Carol has a heart the size of Jupiter. She’s worked with children with special needs for several years now, and recently, while browsing Reece’s Rainbow, a website that connects orphans with special needs to adoptive homes, she laid eyes on Quinton. Quinton is a tiny, precious baby boy in Eastern Europe with Downs Syndrome. At first, Carol half-jokingly asked her husband if they could adopt him. As time went on, though, it became clear that neither she nor her husband could stop thinking about Quinton.

They posted his picture on her refrigerator and decided they were going for it. They’re currently beginning the process to bring him home! This miracle is not without a cost — it will take thousands of dollars. I decided my huge, decadent cheesecakes were perfect for a little fundraising. I gave two of them away in return for donations to Quinton’s fund. I can’t tell you what an honor it is to be a tiny part of Carol’s journey — and how humbling it is to see other friends donating their time, goods, services, energy, and love to them! Little Quinton is already changing our lives. Would you like to help as well? You can see Quinton and donate to his adoption fund here.

ROLL THE CREDITS

A big thank you to: ALL Willow Bird Baking readers who have been so supportive, Sarah for the use of her camera, Kim for loaning me a second tripod, Byrd for being willing to hang out with me while I edited video for about a decade, Royalty-Free Music, Carol for already being an amazing mommy even though her little one is still across the world, my 7th grade students for inspiring my stop-motion animation, and everyone who helped me eat cheesecake!

P.S. – Did you have a chance to see my Teaser Video?
P.S. 2 – Dear Coworkers, if you make fun of me about this, no more cheesecake for you!

If you liked this post, please:
Subscribe to Willow Bird Baking
Follow Willow Bird Baking on Twitter
Follow Willow Bird Baking on Facebook
Give this post a thumbs up on StumbleUpon

ShareOther ways to share this post with friends!

1 7 8 9 10 11