Listen, this entire post is about turn signals. Like, the whole post (with the exception of some cheesecakey bits). I’m just warning you in case you’re not in a turn signal sort of mood.
(You are in a Sticky Toffee Pudding Cheesecake sort of mood though, right? Good.)
sticky toffee love.
I am not a violent person in general, but there is nothing that makes me wish I had a rocket launcher stashed in my glove compartment more than people who don’t use turn signals. Turn signals are included on your vehicle to let other people know where you’re headed so they don’t plow into you and die. They’re, like, important*.
(Am I ruining the serene vibe we had going on here with all the pretty pastels and birdies and such? I’m probably totally harshing the mellow with my latent road rage. Sorry.)
Just think of cheesecake.
Actually, I don’t care if you ignore your turn signal sometimes. I’m not unreasonable. For instance:
Are you driving down a deserted road in the middle of the frigid Nebraska night, with no one but a few chilly cows to watch you with disdain as you turn left with no prior warning? It’s cool. No need to signal. The bovine haters will learn to accept your rebellious agrarian road rules.
Are you one of those bodacious** ice road truckers whose existence I honestly still kind of question? You crazy mythological creature, you! Forget those turn signals. No one needs to be notified that you’re about to veer in a different direction across the frozen tundra.
cheesecakes are also exempt from signaling.
Are you Abraham Lincoln? Abe, you were one honest, tall, admirable dude. I don’t think anyone would hold it against you if you didn’t signal before you turned your horse and buggy. Plus, you’re (sadly) deceased. Dead people do not need to use turn signals.
If you’re not a Nebraskan farmer, an ice road trucker, Abraham Lincoln, or dead, however, you’re going to have to suck it up and signal***.
And if you’re one of the billions of Charlotteans who seem to think it’s not important to use your turn signal when switching into the middle lane of a busy multilane highway in the middle of the night, well. The Charlotte police department has granted me the right to revoke your license (okay, no they haven’t.) But I think it’s just kind of implied that I’m allowed to do so.
the one with the cheesecake makes the rules.
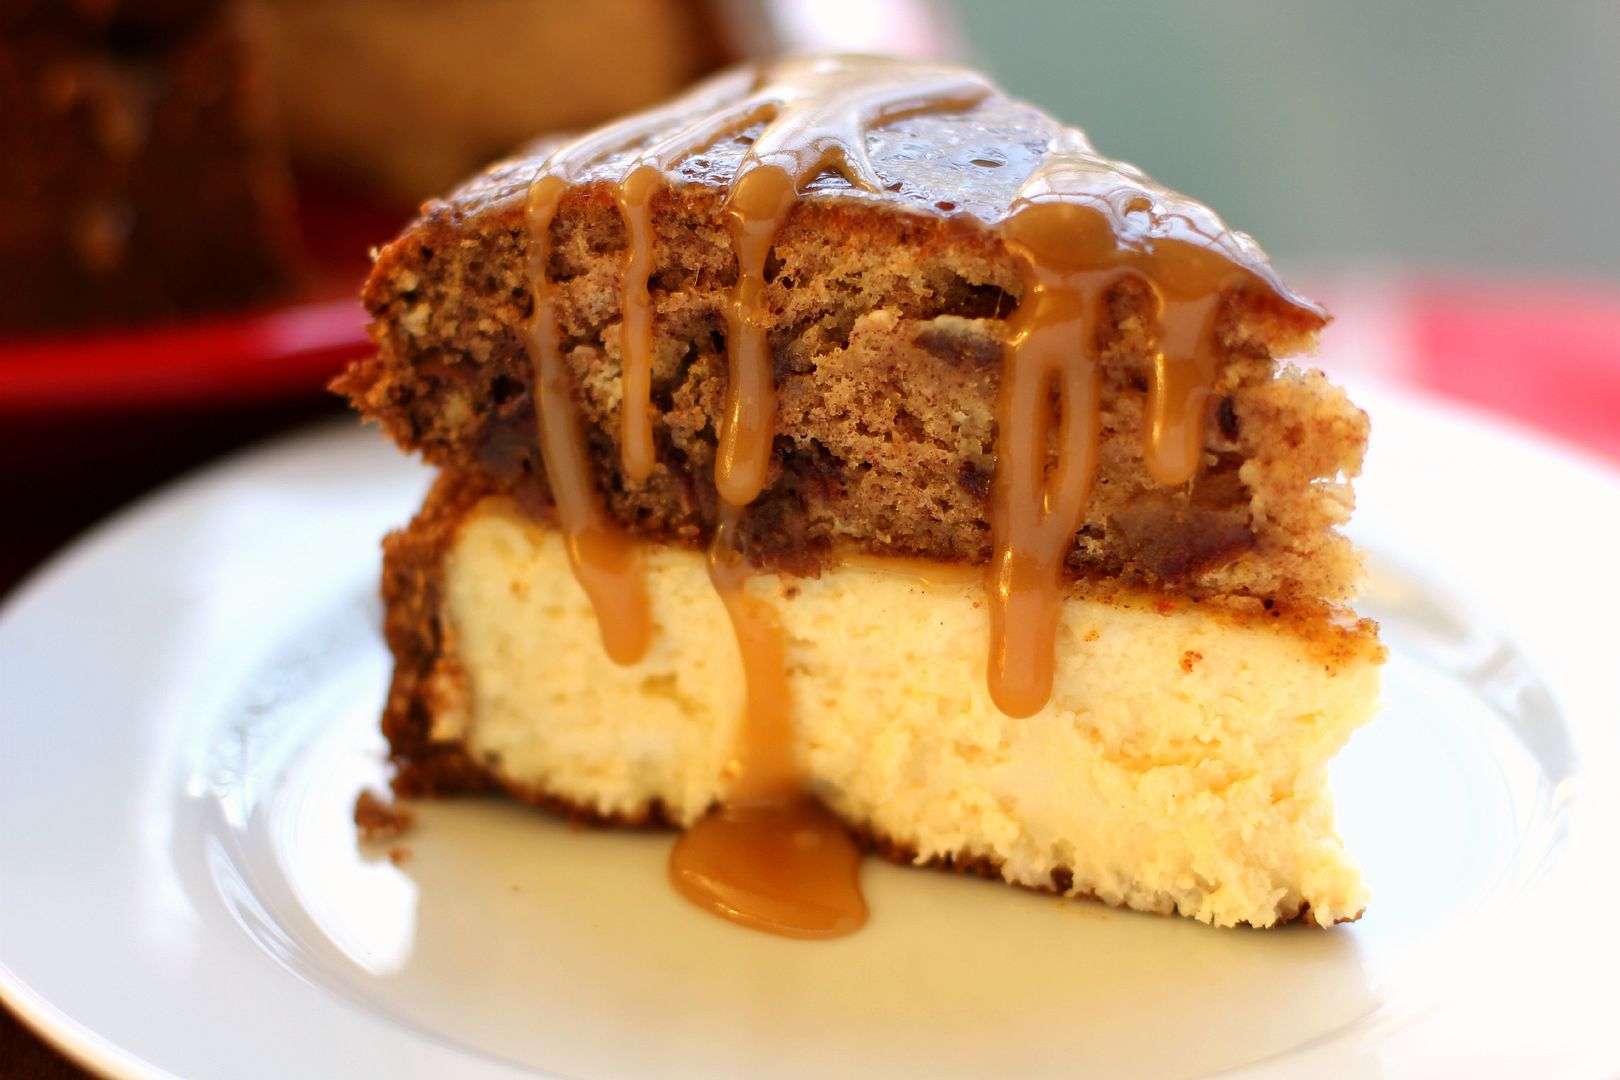
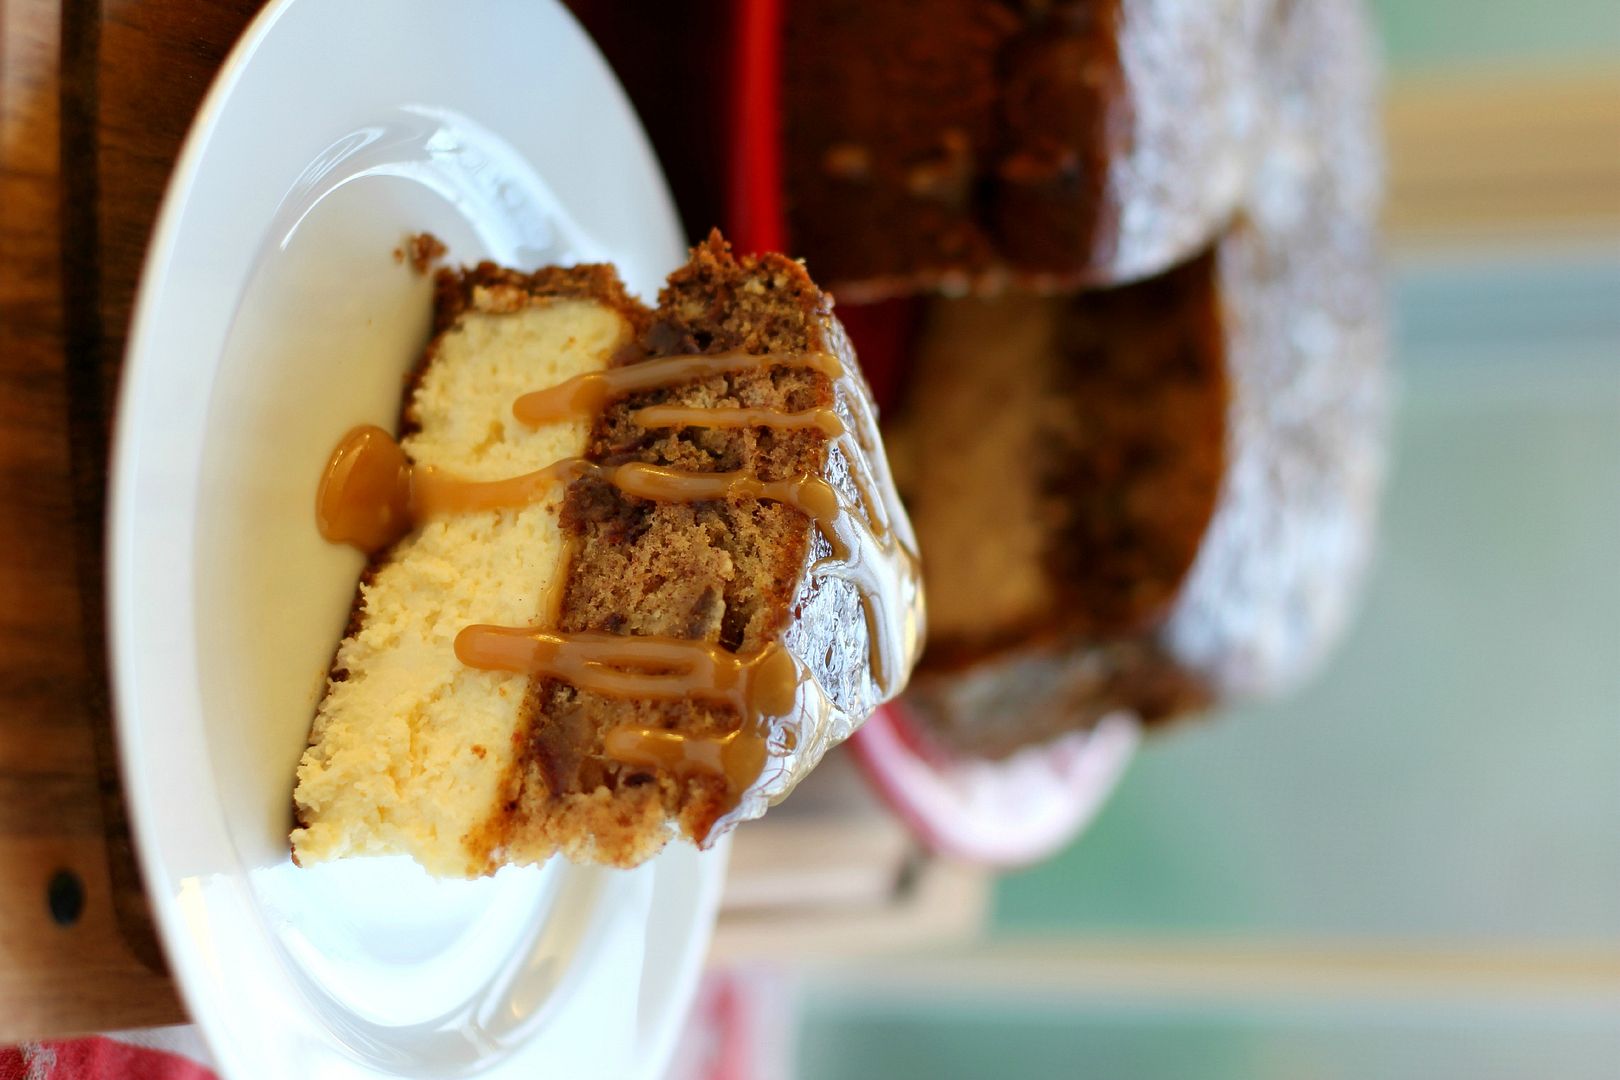
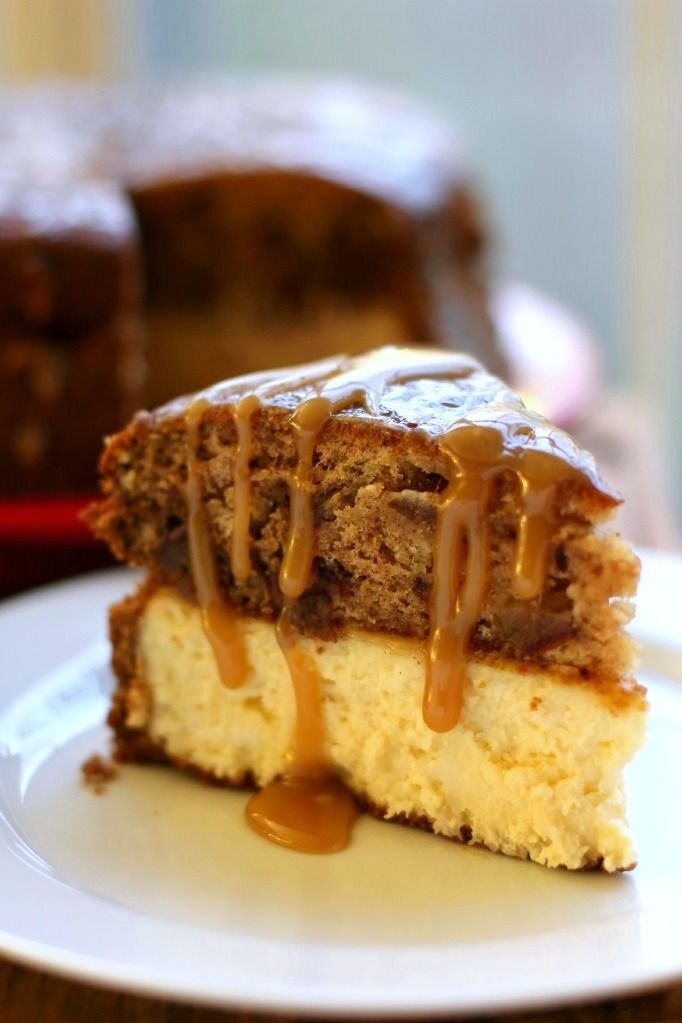
Well. After all that road rage, I think we need something comforting. How about something so comforting you want to bathe in it? Something so comforting you want to wear it around like a sticky toffee snuggie? How about a thick, sloppy slice of Sticky Toffee Pudding Cheesecake?
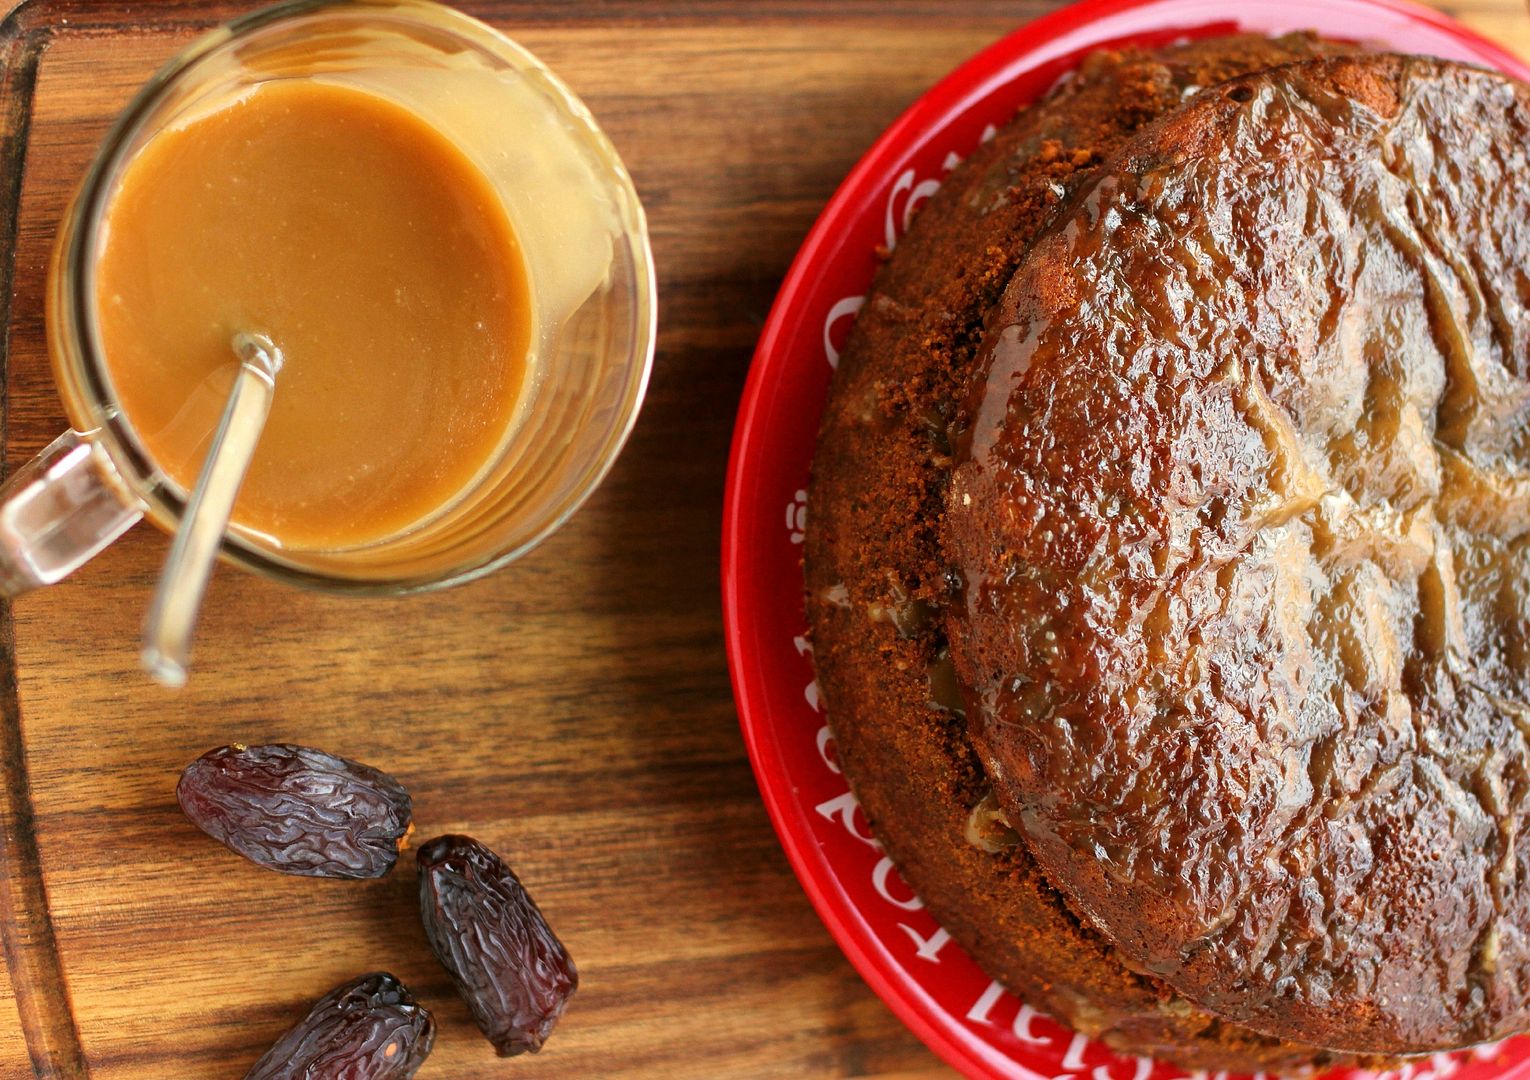
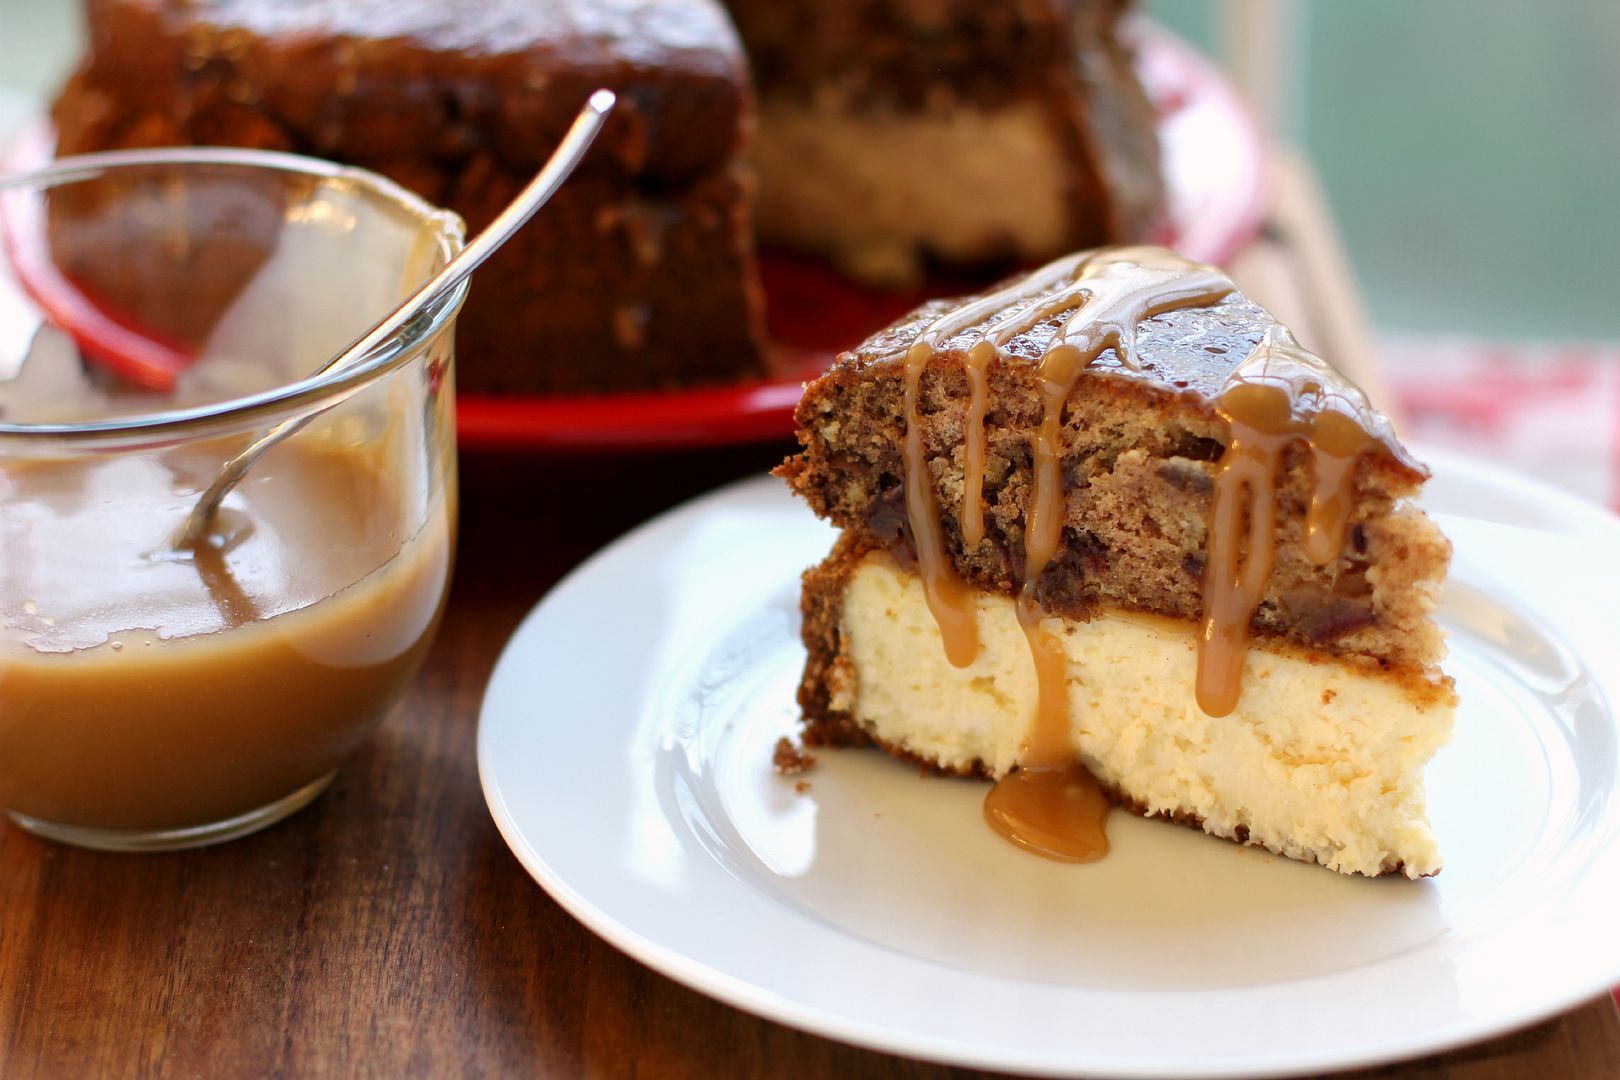
Just to address the elephant in the room: yes, the cake is about as ugly as sin (or as ugly as not using one’s turn signal? Sorry, I’ll stop.) The crust crumbled down to just the cheesecake height. The toffee pudding is puckery on top. The whole thing is decidedly brown. Please don’t be deterred, though. Firstly, you can dress it up with a drizzle of toffee sauce and some pretty flatware. Secondly, it’s one of the best things I’ve ever tasted.
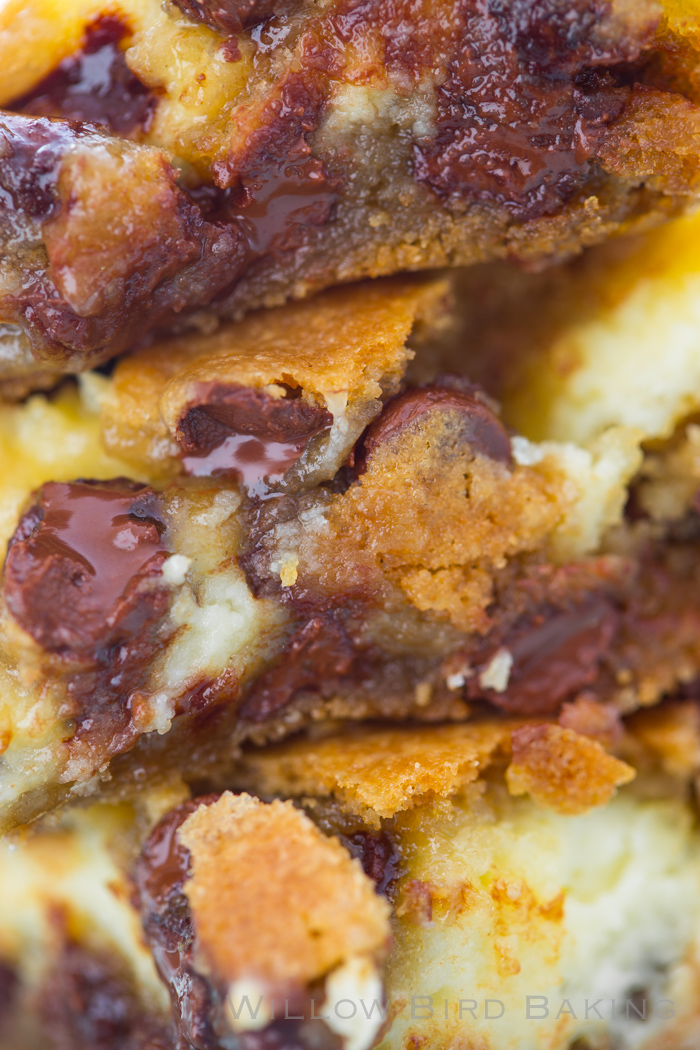
It’s not surprising that it’s good: it’s buttery toffee sauce on top of smooshy, date-filled pudding (in the British sense, y’all, not the Jell-O sense) on top of a creamy cheesecake on top of a gingersnap and graham cracker crust. It did surprise me, though, how good it was. And really, how freeing. Knowing that your goal is a homey, warm, comforting dessert instead of a beautiful one can make the whole process feel more forgiving.
Much more forgiving than I am with regards to your driving practices, for sure.
u-g-l-y, this cake ain’t got no alibi — but it’s nothing a little toffee sauce can’t fix.
*Full disclosure: I’m sure that at some point, I have neglected to use a turn signal. You guys are free to call me the crap out if you ever see it happening. This is probably safe to say since very few of you know what sort of car I drive. Heh.
**In writing this post, I came across this Yahoo! Answers post about how to talk about Andrew Jackson without using the word “badass,” and I admit I laughed for at least a full minute. I guess I can’t talk, because I was searching for a way to describe ice road truckers without using that word.
***I still love you even if you don’t use your turn signal. Please still love me even though I just wrote an entire post admonishing you.
Time for cake!
Sticky Toffee Pudding Cheesecake
Recipe by: Willow Bird Baking, using Food Network’s pudding recipe
Yield: 10-12 servings
There are no words for how delicious this dessert is. Buttery toffee sauce cascades over smooshy, date-filled sticky toffee pudding on top of a creamy cheesecake. The recipe can be made over several days and made in advance, making it convenient in addition to delectable. I served slices warmed for 30-40 seconds in the microwave and with a drizzle of extra toffee sauce. A scoop of ice cream or a dollop of whipped cream would be a lovely addition.
Cheesecake Ingredients:
3 (8 ounce) packages cream cheese, at room temperature
1 cup granulated sugar
1½ tablespoons all-purpose flour
2 teaspoons vanilla extract
3 large eggs
2 heaping cups cookie crumbs (I used a 50/50 mixture of graham cracker and gingersnap crumbs)
6 tablespoons butter
Sticky Toffee Pudding Ingredients:
1 cup plus 1 tablespoon all-purpose flour
1 teaspoon baking powder
3/4 cup pitted dates, finely chopped (Oh Nuts! provided me with these)
1 1/4 cups boiling water
1 teaspoon baking soda
1/4 cup butter, room temperature
3/4 cup granulated sugar
1 large egg, lightly beaten
1 teaspoon vanilla extract
Toffee Sauce Ingredients:
1/2 cup butter
1/2 cup heavy cream
1 cup packed light brown sugar
Directions:
Notes: Cheesecakes are simple and super customizable. New to cheesecake making? Watch my 6 minute Cheesecake Video Tutorial for visual assistance! This recipe can be divided up over several days — you can make and refrigerate both the cheesecake and pudding in advance. Simply make the toffee sauce and assemble the day you’re serving the cake.
Make the cheesecake: Preheat the oven to 350 degrees F. Lightly grease a springform cheesecake pan. Combine the cookie crumbs and melted butter in a small bowl. Toss with a fork to moisten all of the crumbs. Using a flat-sided glass, press into a thin layer covering the bottom and sides (you want it to be tall — try to get to about 2.5-3 inches high and not too thick in any one spot) of your cheesecake pan. Bake the crust for about 6 minutes and let it cool as you make your cheesecake filling.
In a large bowl, beat the cream cheese and sugar on medium-high speed until well blended. Beat in the flour. Add in the vanilla and beat until well incorporated, scraping down the sides of the bowl as needed. Beat in the eggs one at a time, scraping down the bowl between each addition. Pour the filling into your crust.
Bake until the top is lightly browned, puffed and cracked at the edges, and the center moves only very slightly when the pan is lightly shaken (about 40 minutes). Check while baking periodically and put a pie shield (or strips of foil) around the top of your pan to protect the crust edges if they’re getting too dark. Just don’t let the shield/foil touch the crust — it’s delicate and might crumble. Let cheesecake cool before chilling it in the fridge for at least 3 hours. (My crust kind of crumbled on top as the cheesecake cooled and pulled it inward, but don’t fret if this happens — everything will still be delicious! I just swept away the crumblies with a pastry brush.)
Make Sticky Toffee Pudding: In the meantime, grease a 9-inch round cake pan. Place a parchment paper round in it to line the bottom, and grease the paper as well. You don’t want your pudding stuck in your pan!
Sift the flour and baking powder onto a sheet of waxed paper (I love doing this with dry ingredients, because then the paper becomes a funnel for easy transport of your dry ingredients and you aren’t using an extra bowl). In a separate small bowl, gently mix the dates, boiling water, baking soda. Set this aside.
In a large bowl, cream the butter and sugar together until light and fluffy (2-3 minutes). Add the egg and vanilla and beat to combine. Gradually mix in the flour mixture, scraping down the sides of the bowl as needed. Fold in (I did a little folding and a little stirring, since it was quite soupy, but just be gentle with it) the date mixture with a spatula. Pour your batter into your prepared pan and bake until the pudding is set up and firm, about 35 minutes (jiggle the pan and watch the middle). Let the pudding cool completely on a wire rack before inverting it onto a wax paper lined plate and popping it in the freezer to firm up for easy handling (or leave it in the fridge overnight).
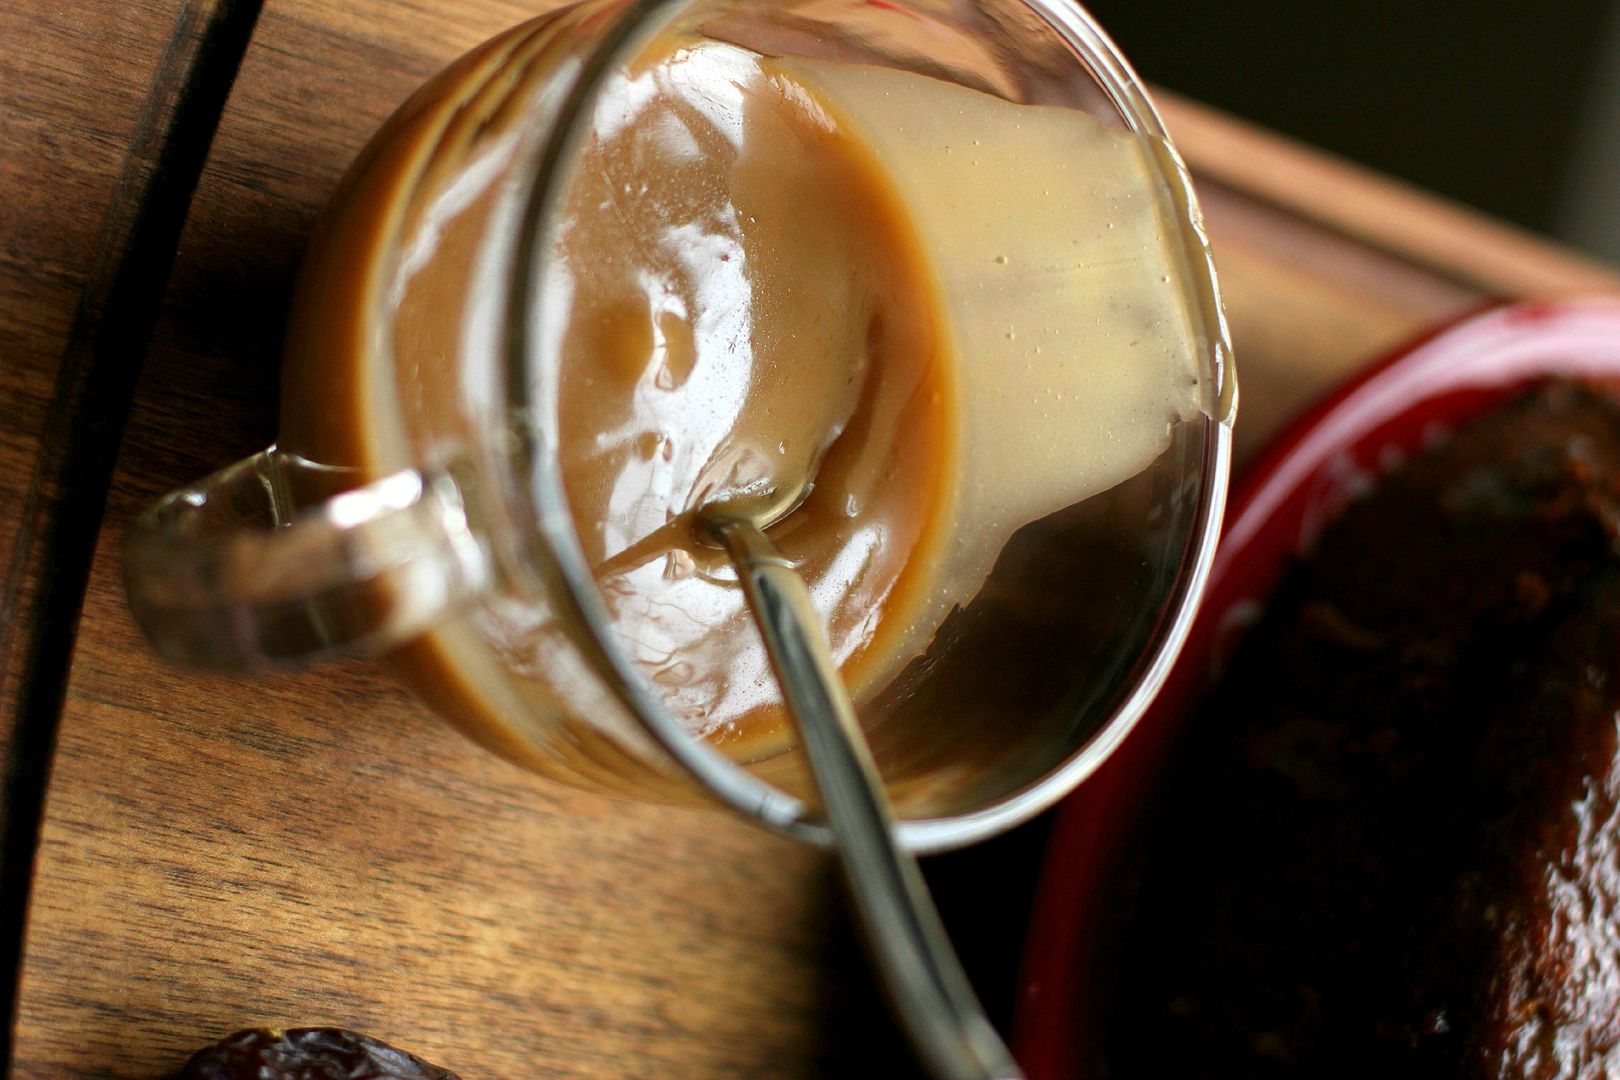
Make the Toffee Sauce: In a small saucepan, combine the butter, heavy cream and brown sugar. Bring this to a boil, whisking constantly. Boil gently for about 8 minutes over medium low heat, or until the mixture is thickened.
Assemble the cake: Preheat the broiler. Spoon about 1/3 cup of toffee sauce onto the surface of your cheesecake to serve as a “glue” and gently place your sticky toffee pudding layer on top, pressing to adhere. Top this layer with about 1/3 cup of the toffee sauce and spread this around evenly on top. Place the cake under the broiler until the topping is bubbly, about 1 minute (keep a close watch! I rotated mine carefully every few seconds for even bubbling). Carefully remove the springform pan and using a sturdy spatula or two, place cheesecake on serving platter (if you’re nervous, just remove the sides of the springform pan and serve it straight from the base — no worries). Serve slices with extra toffee sauce and whipped cream or ice cream.
P.S. Oh Nuts! sent me California Medjool Dates to try free of charge. My opinions are always my own and always thoughtfully prepared with consideration for my readers — and I loved the dates! It was my first date experience and now I’m hooked.
If you liked this post, please:
–Subscribe to Willow Bird Baking
–Follow Willow Bird Baking on Twitter
–Follow Willow Bird Baking on Facebook
–Give this post a thumbs up on StumbleUpon
–Pin It
 Other ways to share this post with friends!


