cupcakes

Croissant Masters Round 2

Most of the dishes I post on Willow Bird Baking are things I’ve just made for the first time. The first attempt at a recipe can be scary, but you can reap huge rewards in terms of your kitchen confidence.

More Willow Bird Baking readers have taken my Croissant Challenge to heart, and without fail, they’ve been proud of the results they’ve achieved! If you’ve never made croissants in your own kitchen, will you commit to croissant? When you pull them out of the oven, the excitement you feel will be well worth the effort. Go get the recipe for yourself! You can also see the first round of Croissant Masters.

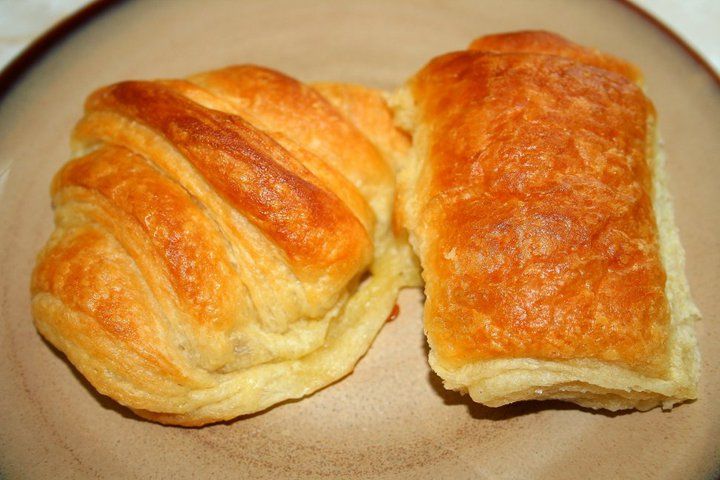
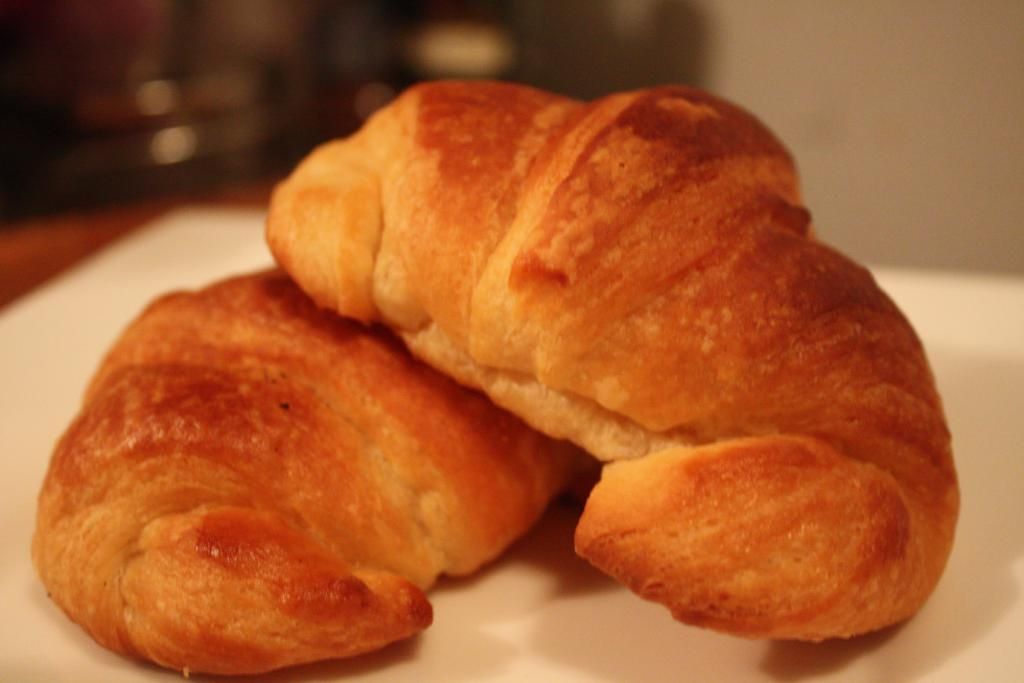
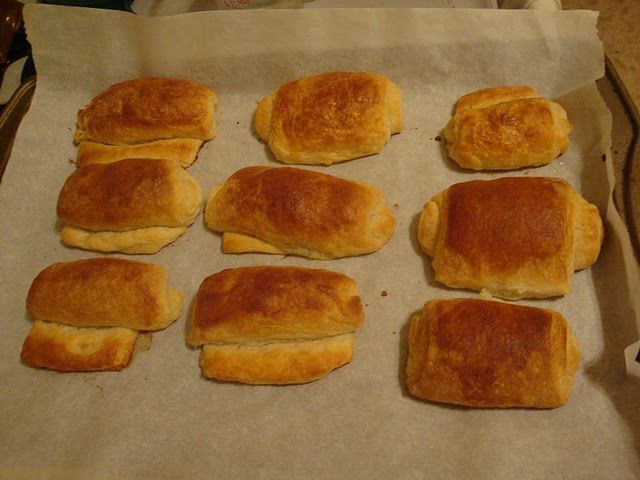
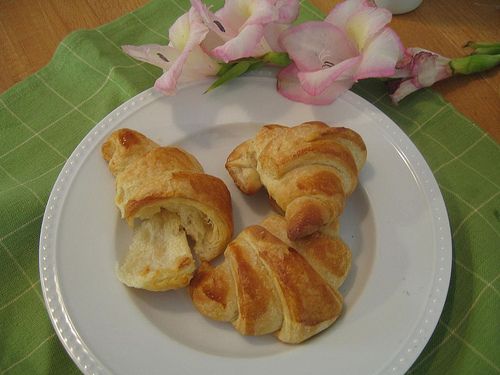
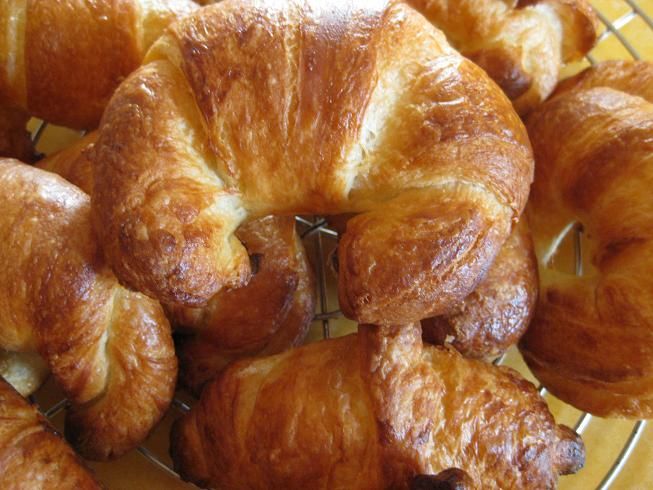
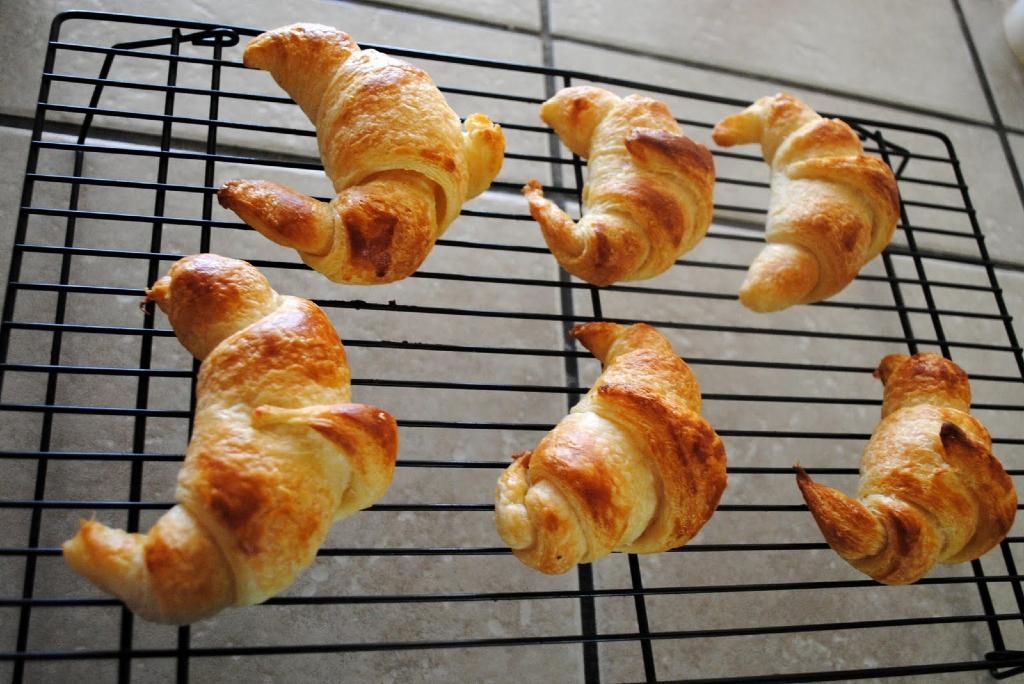
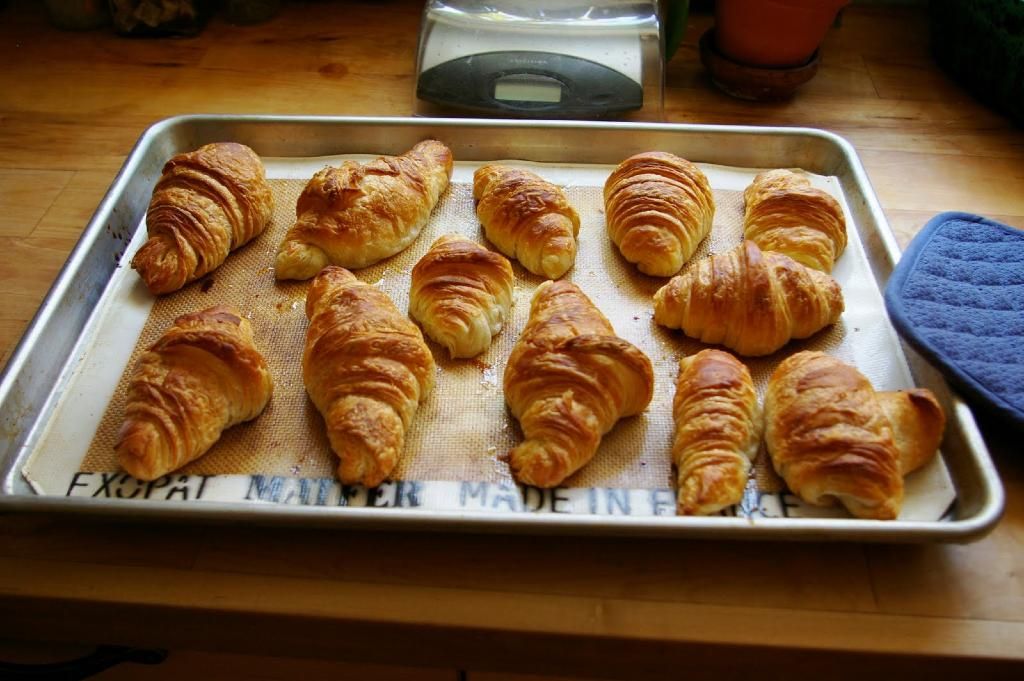
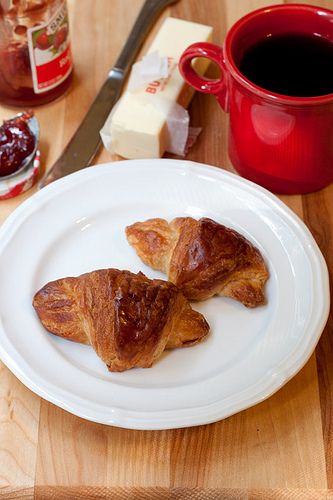
Here are the lovely pastries of the latest Croissant Masters!


Maranda: “I’m not sure Julie over at Willow Bird Baking understands the impact she has made on my life through her baking…So naturally, when she threw the gauntlet and challenged other bakers to commit to croissant, I was literally first in line. ”

(Can we just have a round of applause for Maranda, whose printer is on the fritz? She had to write out the entire recipe by hand. Not to mention the fact that her croissant post made me get all teary eyed! You have to see!)


[see more of Maranda’s croissants here.]


Amanda: “They were amazing (and didn’t last very long around my house)! We ate them with local wildflower honey from our farmer’s market.”


Black Rose: “Would you believe it? I showed someone I know the slideshow of croissant-making and they’re actually paying me to make them some for Saturday, so now I get to make croissants again for the second time in a week! “


Cortney: “I don’t mean I made crescent rolls. I didn’t pop a can of anything. I mean, I made, from scratch, over two days, real live actual butter-and-pastry croissants. It’s tempting to end that statement with the phrase ‘so, suck it…'”


[see more of Cortney’s croissants here.]


If you liked this post, please:
Subscribe to Willow Bird Baking
Follow Willow Bird Baking on Twitter
Follow Willow Bird Baking on Facebook
Give this post a thumbs up on StumbleUpon


ShareOther ways to share this post with friends!

Croissant Masters!

You may remember my goal to encourage folks to make croissants at home for the first time. What an amazing experience it’s been! As I mentioned before, making croissants was one of my proudest kitchen moments. Well, hearing about others making croissants for the first time because of my post is without a doubt one of my proudest blogging moments.

Seventeen crazy croissanters came, they saw, they baked. And now it’s time to show the first batch of them off. Introducing . . . the first 5 croissant masters!


Hannah: “People demanded that I should try other challenges and I promised to do so if you do another one, since all the tricks etc. you posted helped a lot. I guess otherwise I wouldn’t have thought that I could manage baking them.”


Amy: “I did enough folding to qualify for a management position at the Gap.”


[see more of Amy’s croissants here.]


Kat: “The trick is to use the fridge as a lifeboat. Every time something seems to be heading south, throw it all in the fridge.”


[see more of Kat’s croissants here.]


Emily: “I mean, I made these croissants. From scratch. All by myself. That is an accomplishment…”


[see more of Emily’s croissants here.]


Kirsten: “I’ll definitely be making croissants of some sort again…”


[see more of Kirsten’s croissants here.]


If all of these beautiful croissants produced by bakers just like you — some with experience, some without — make you want to join in the fun, please let me know so I can add you to my list of folks committed to croissant! Stay tuned for the rest of the croissant masters.


If you liked this post, please:
Subscribe to Willow Bird Baking
Follow Willow Bird Baking on Twitter
Follow Willow Bird Baking on Facebook
Give this post a thumbs up on StumbleUpon


ShareOther ways to share this post with friends!

Pasta Carbonara

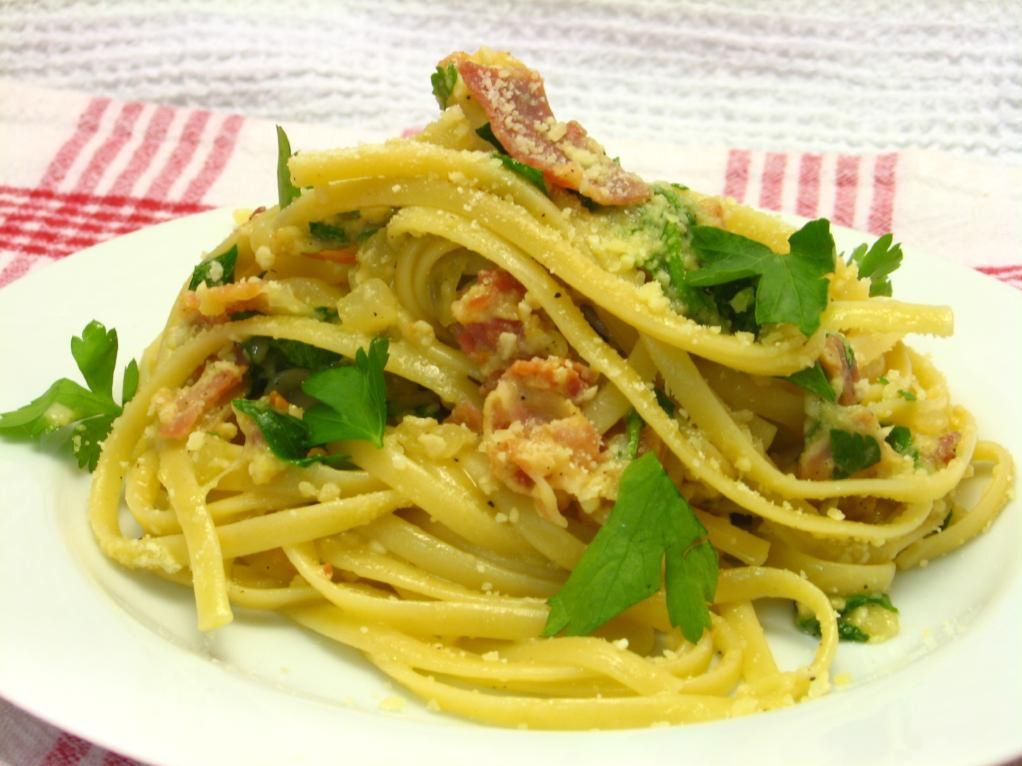
I’ve been so antsy to share this recipe with you! It’s one of those I-put-a-bite-in-my-mouth-and-suddenly-my-eyes-widened-to-the-size-of-Pluto dishes. One of those I-stared-at-Mike-impatiently-waiting-for-him-to-take-a-bite-and-have-Pluto-sized-eyes dishes! One of those I-could-eat-a-Pluto-sized-bowl-of-this-stuff dishes!

I’ve been trying to redeem myself for Mike’s terrible birthday dinner disaster for awhile now. Sure, I’ve made some delectable things since then, but I knew my penance wouldn’t be truly complete until I made him some really good pasta.

I went hunting on my favorite places to hunt for recipes: Tastespotting and Foodgawker. I’m so visual when it comes to food — seeing a dish gives me a better idea of how it’ll taste than looking at ingredients lists — and I find the mini-descriptions on these sites force bloggers to succinctly convey how amazing a dish is. You’ll find some captions that say things like, “pretty good,” or emphasize the ease of a dish, and others that convey the kind of emotion I wanted to elicit from Mike with my pasta dish: “WOW, this is good!”

This recipe was one of the WOW ones I came across. The photo of the dish was submitted by Kate of Framed, who called it “extra special.” That — combined with her charge to throw out all your other carbonara recipes — gave me confidence. I’m not going to lie, something about her blog’s exuberant header photo probably also made be feel exuberant about linguine! Regardless of the reasons, I decided that this was the recipe I’d been searching for!

As if you needed any more encouragement to make this pasta, the original recipe is straight from Pioneer Woman’s site (a Pastor Ryan recipe, for those of you who follow her posts). P-Dub has never steered me wrong, and on top of that, she’s coming to Charlotte this Friday for a book signing! What a perfect time to make a meal from her blog.

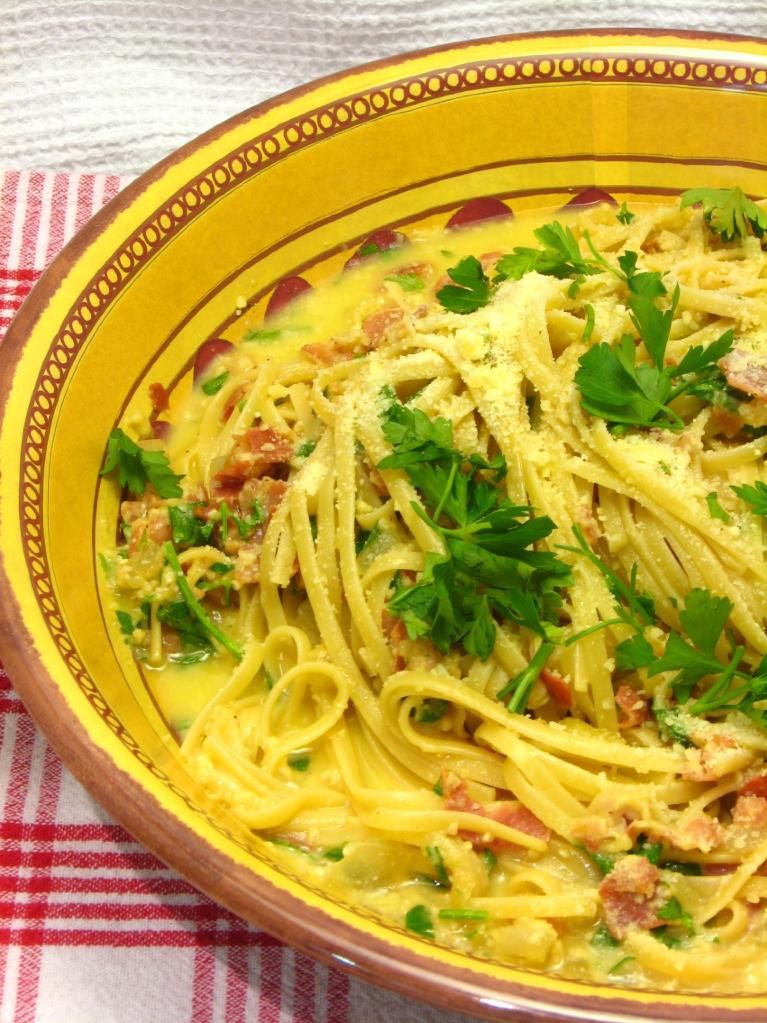
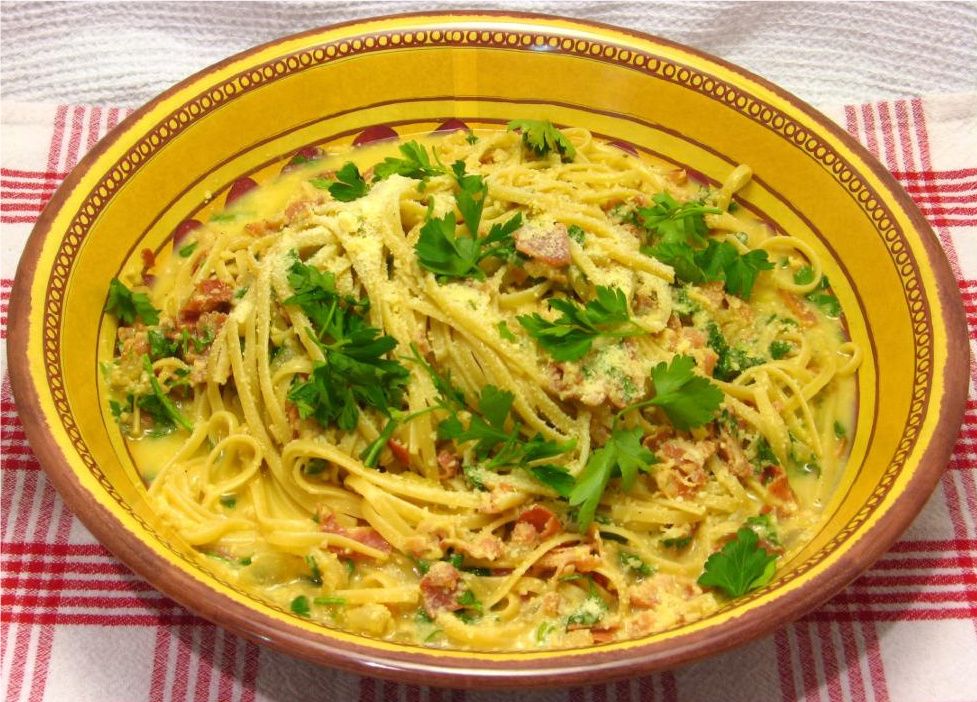
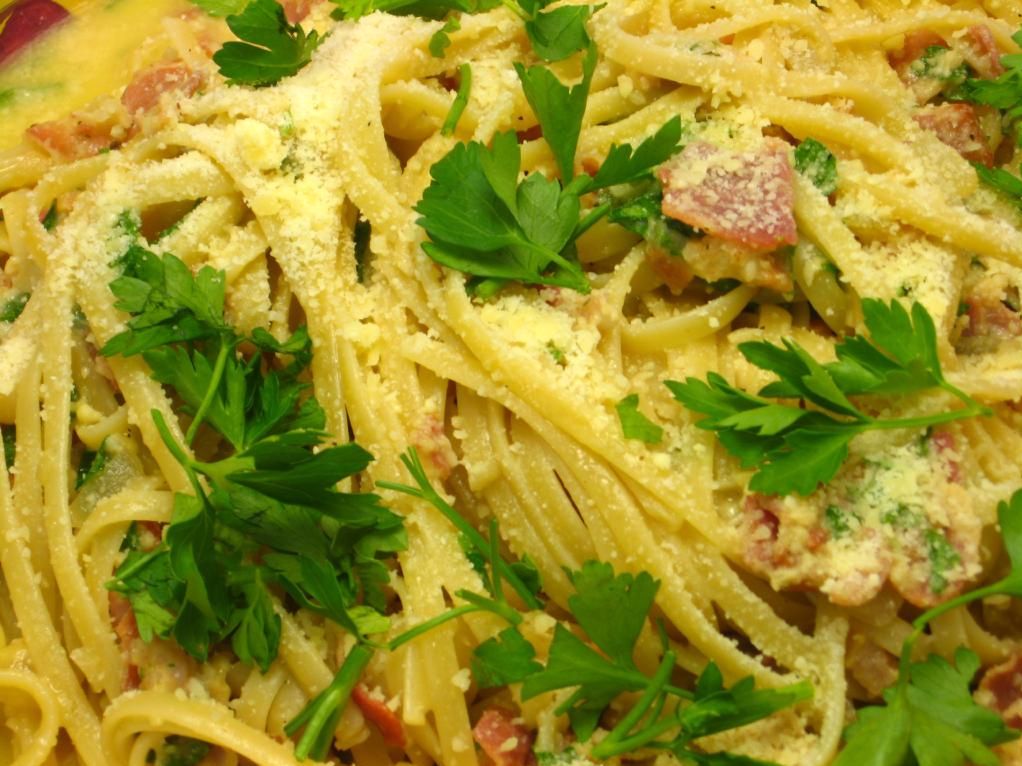
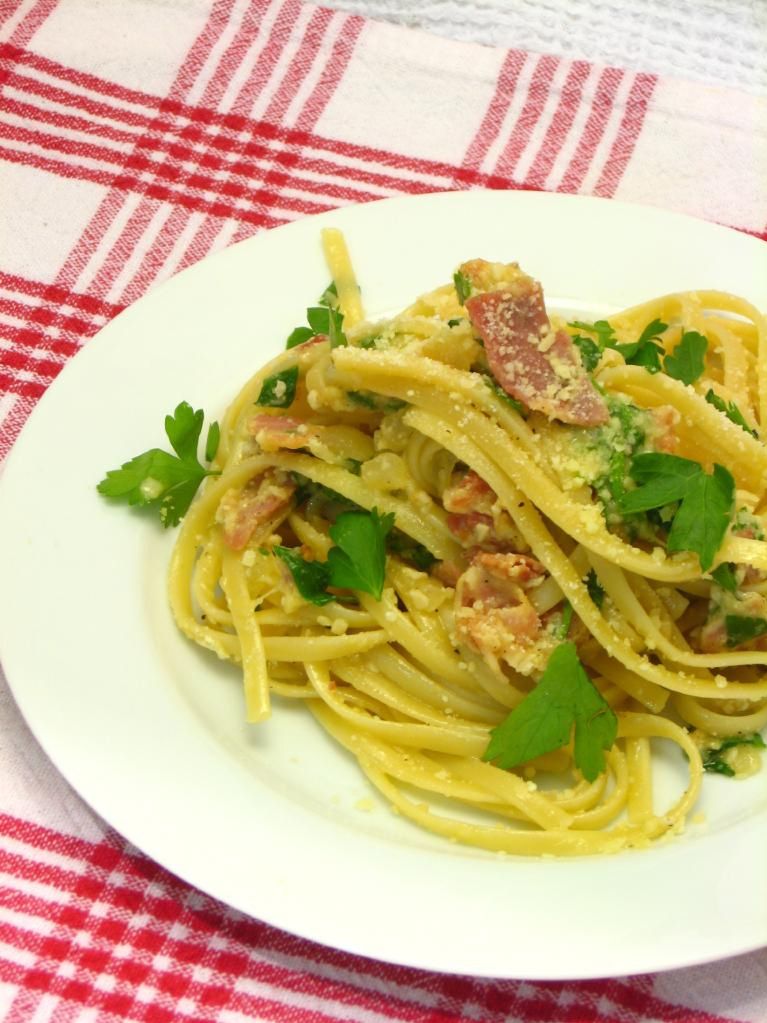
I guess the only thing left to tell you about is the most important part: the taste. The last time I ate pasta carbonara was in Little Italy in San Diego, so the creamy, rich, buttery sauce and the salty punch of the pancetta was a wonderful memory. I have to say, though, this rendition was even better than the one I remember. Bunches of torn parsley add a fresh note to the otherwise deep and indulgent pasta.

One flavor I noticed that stood out was the wine, so pick a good one — but don’t ask me how to do that! I picked my wine because it was white and had a penguin on the bottle. I got lucky, though, because it tasted perfect in the sauce. It was a Pinot Grigio, in case you want to replicate my random choice.

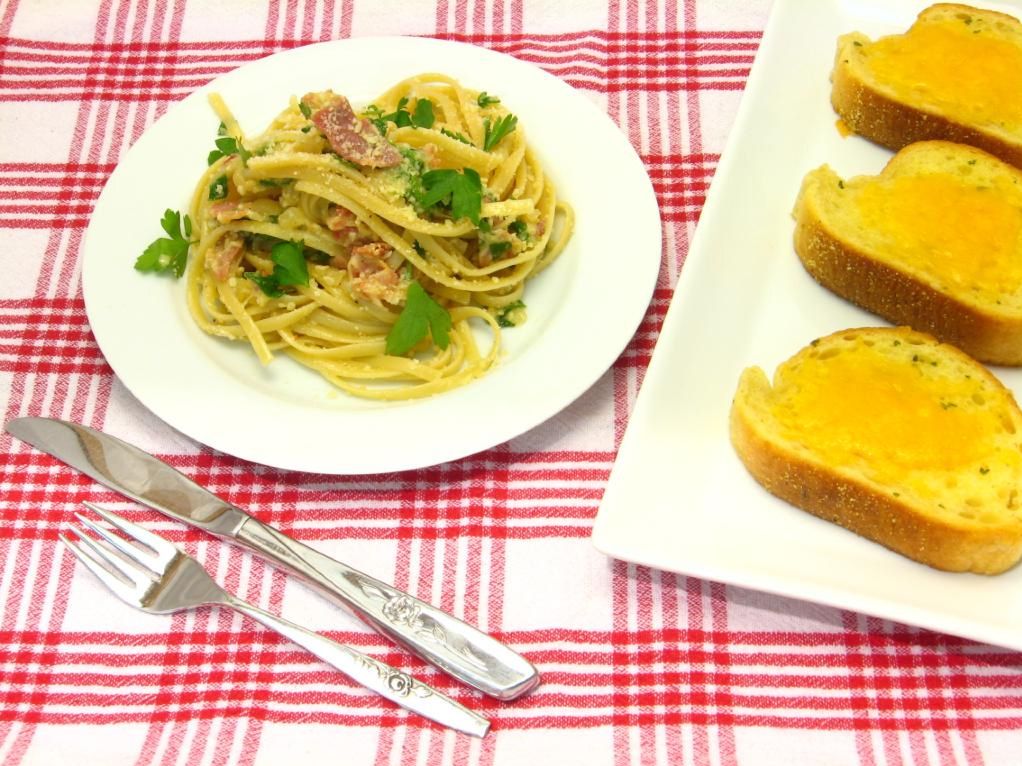
We paired our pasta with some cheesy garlic bread, and it was such a great combination. Actually, I considered making some big homemade garlic croutons to top the pasta itself, which would have been delectable if you want to give it a go. Make this as soon as you can manage to throw some linguine into your shopping cart. Bon Appétit!

Pasta Carbonara


Recipe by: Slightly adapted from Pioneer Woman’s blog by Framed
Yields: about 4 servings, if you’re us — perhaps 6 servings for normal folk.

Ingredients:
1 pound linguine pasta
4 eggs
1 pound bacon or pancetta (I used pancetta)
1 1/2 cups Parmesan cheese
8-12 cloves of garlic, sliced thin
1 large onion, chopped
1 cup chicken stock
1 cup white wine (or substitute another cup of stock)
1/2 stick of butter
1 handful of parsley
1-2 tablespoons black pepper

Directions:
1. Cut bacon into pieces about one inch wide. Cook until browned and crisp and set aside, saving bacon grease in the skillet.

2. Cook linguine in salted water until al dente.

3. Add chopped onions to bacon grease and let them cook down over a medium-high heat for a couple of minutes.

4. After the onions have cooked for a couple of minutes, throw in the garlic. Adding it after the onions have cooked a little will prevent the garlic from burning. After the onion and garlic have cooked for another couple of minutes, remove from the pan with a slotted spoon. Discard the grease.

5. Place the pan back on high heat until it starts to smoke a little. As soon as the pan begins to smoke, pour in the white wine (or chicken stock). Whisk until pan is thoroughly deglazed and all of the brown bits have come off of the bottom of the pan. Add 1 cup of chicken stock. Return onion and garlic to the pan. Let simmer over medium heat.

6. Crack four eggs into a large bowl. Add most of the Parmesan cheese, and roughly chop the parsley, adding it into the eggs as well. Leave a little Parmesan and parsley out for a garnish. Mix well with a fork.

5. Add the cooked hot pasta to the egg mixture and then add the onion mixture. Stir in ½ stick (1/4 cup) of butter and the cooked bacon. Mix it all together well. Pepper to taste. Garnish with parmesan and parsley. Throw out all previous carbonara recipes.


Enjoy!


Share Share this post with friends!

Banana Coconut Cream Cakes

We went off on a brief romantic tangent to celebrate my anniversary with Mike (thanks for all your congratulations!), but now we need to get back to some serious business. SERIOUS business. I told you after making my Coconut Cream Tart that I had some of that heavenly coconut pastry cream leftover. The dessert I came up with to use that leftover pastry cream is now (drumroll, please . . . are you drumrolling?) MY FAVORITE DESSERT OF ALL TIME.

Wow. I eat a lot of desserts, so you know this must be big.

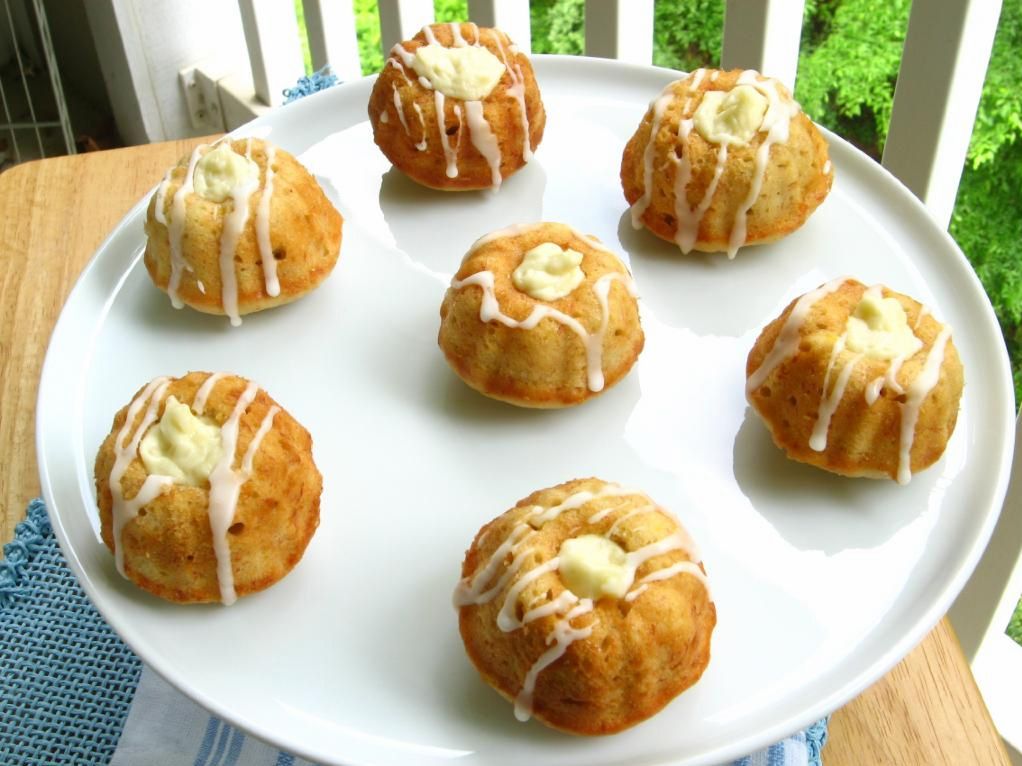
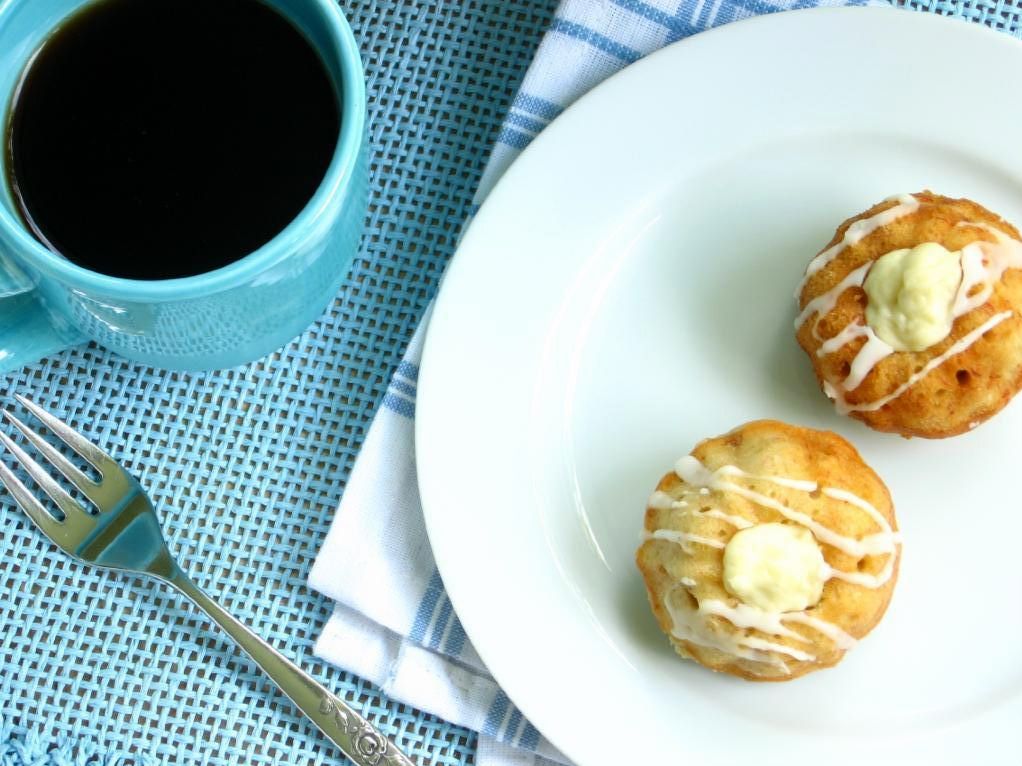
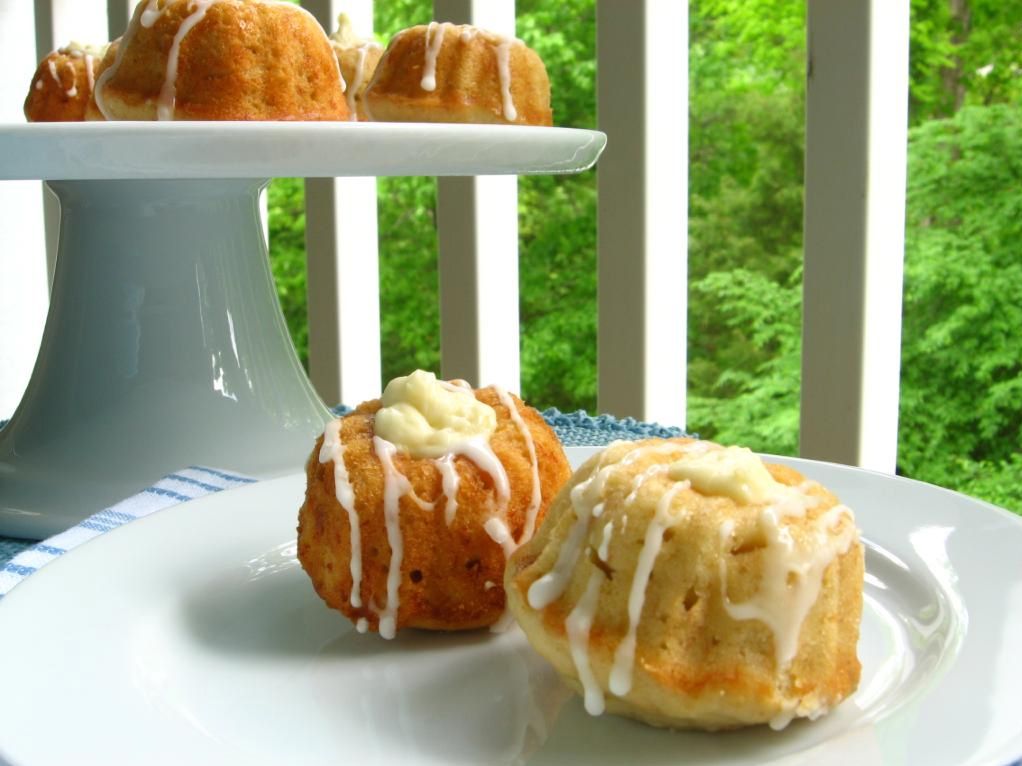
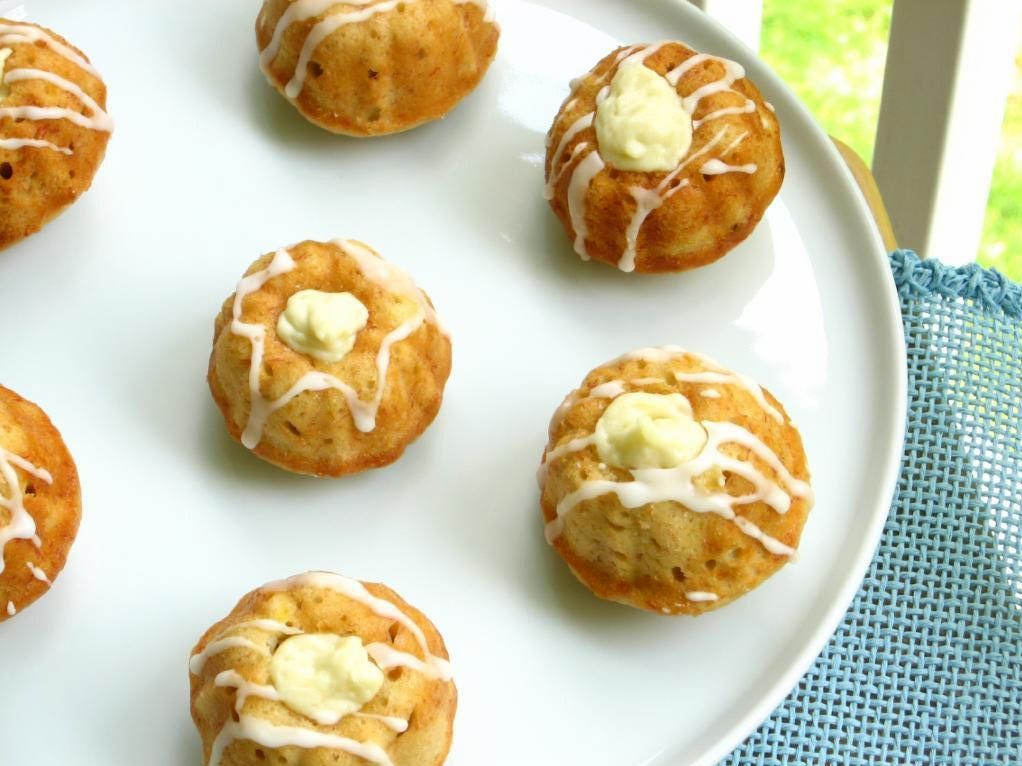
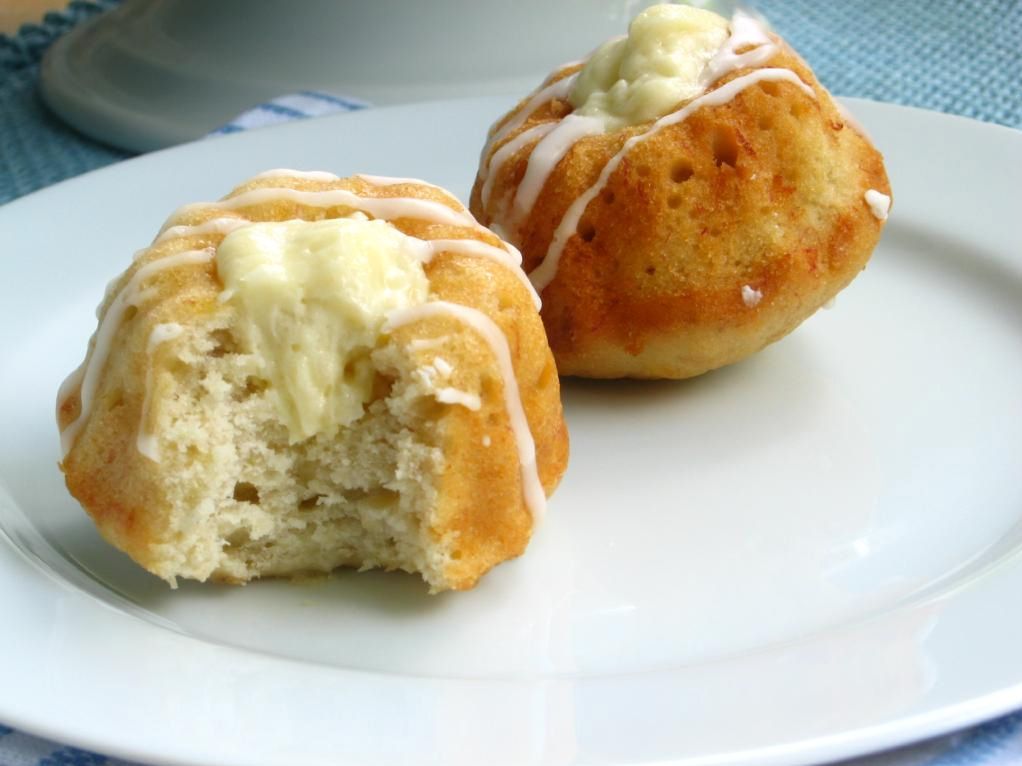
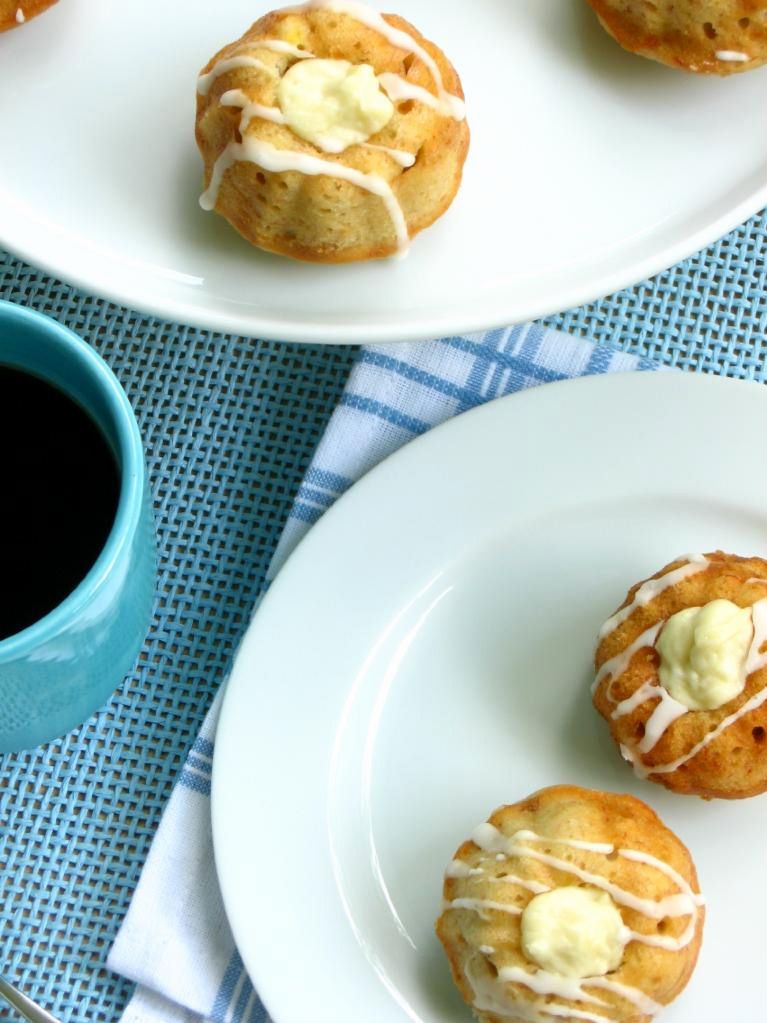
Well, actually it’s small and cute. But BIG in taste!

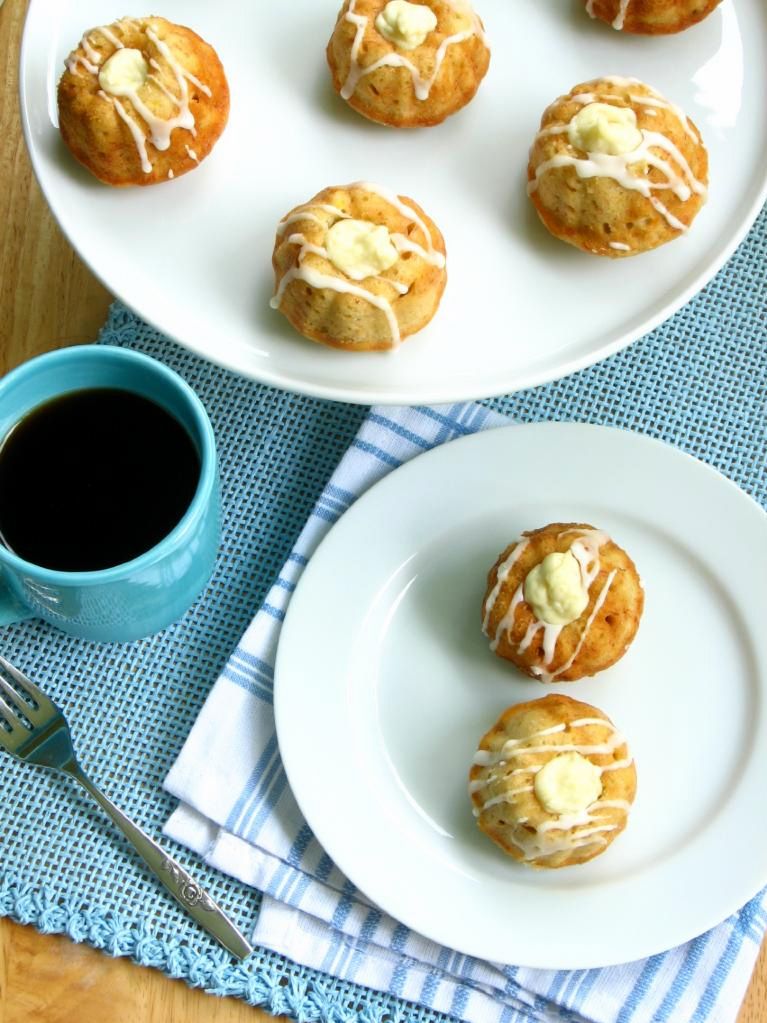
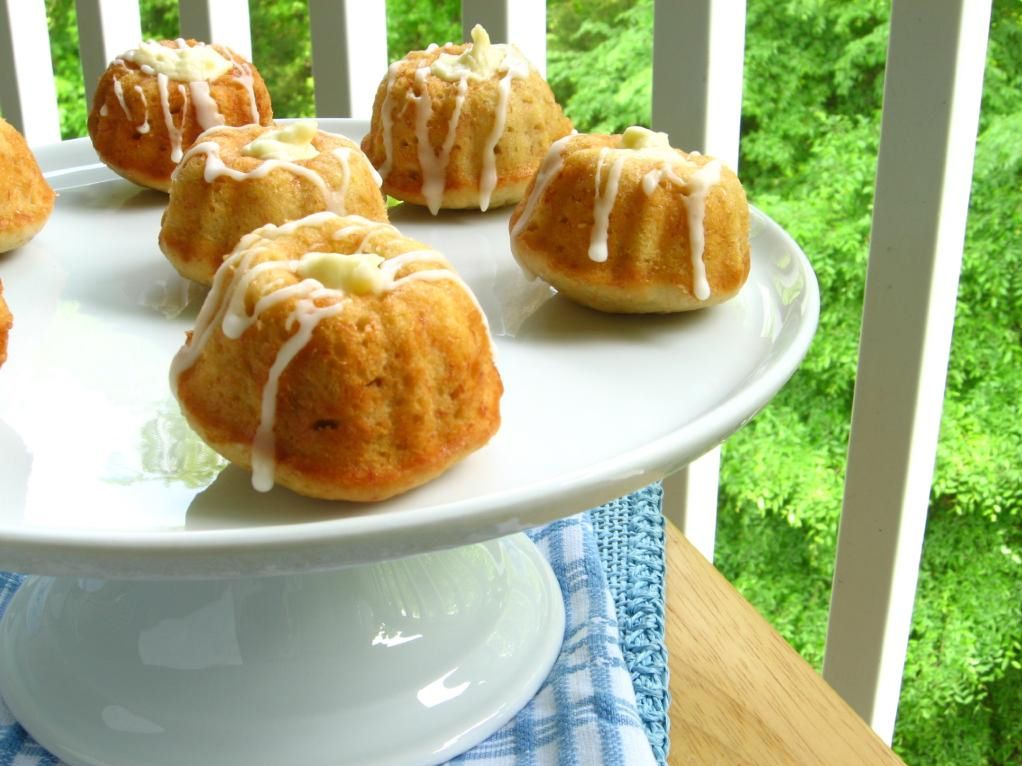
These sweet little cakes are Banana Mini-Bundt Cakes filled with Coconut Cream and topped with a sweet pineapple glaze. My sister describes the coconut pastry cream as “tylenol PM that tastes good” because it’s so soporifically sweet and creamy. Imagine that deliciousness stuffed into the center of a bright, dense, moist banana cake. Now add the slight tang of pineapple. NOW MAKE THAT AMAZING DESSERT SO SMALL AS TO ALMOST BE BITE-SIZED. That, my friends, is a winner.

Some of you are getting all whiny right about now. Hey, there’s no shame in that; I get whiny sometimes, too. You’re thinking, “Oh well, I don’t like bananas,” or “Ew, coconut,” and it’s even POSSIBLE that there’s someone out there thinking, “Gross, pineapple.” Weirdo.

Kidding, kidding — I don’t think any less of you pineapple haters! BUT before you write off this dessert for any of the reasons above, let me give you a run-down of why you should try it anyway.

1. I dislike bananas. They’re odd. Nevertheless, I still love these cakes more than I can really explain.

2. My roommate hates coconut with a passion. She would barely consent to try one of these. Nevertheless, she loves these cakes more than almost anything I’ve ever made.

3. Mike loves both banana and coconut, and also adored every bite of these cakes. (Just so you know there’s not some strange phenomenon goin’ on with the flavors!)

4. You will love these cakes. YOU WILL.

Some of you, instead of whining, are mourning right now: “I don’t have a mini-bundt cake pan!” I didn’t either until my roommate bought me one (thanks, Barb!), so one option is to be really sweet to the folks you live with and keep your fingers crossed. The other (more realistic) option is to simply make these as cupcakes. I think they’d work out just fine — maybe not quite as adorable, but still just as tasty.

To reiterate how amazing these cakes are, let me tell you about my little mixup while making them. I was hoping to get 12 mini-bundt cakes out of this recipe but, because I failed to check the size of the pan in the original recipe, I ended up with 32. At first I was annoyed — who on earth was going to eat the extra 20 CAKES?!

Yeah, that did not turn out to be a problem. They were DEVOURED. In fact, as Mike and I polished off the last few cakes, we wept a little. Okay, maybe we didn’t actually cry, but we were crying on the inside. I can’t wait to make these again. Please, if you make one thing from this willowy, birdbrain blog of mine, make these! I’m anxious to hear what you think.

Banana Coconut Cream Cakes


Recipe by: Compiled by Willow Bird Baking from Piggly-Wiggly (banana cake), Zoë Bakes (coconut pastry cream), and The Neely’s (pineapple glaze)
Yields: About 32 mini-bundt cakes using the pan size pictured below

Mini-Bundt Cake Ingredients:
3 cups all-purpose flour
2 tsp baking soda
1/2 tsp salt
2 sticks (8 ounces) unsalted butter at room temp
2 cups sugar
2 tsp pure vanilla extract
2 large eggs, preferably at room temp
~4 very ripe bananas, mashed (about 1.5-1.75 cups)
1 cup sour cream or plain yogurt

Coconut Pastry Cream Ingredients: *
1 can (14 fluid ounces) unsweetened coconut milk
3/4 cup sugar
1 vanilla bean
pinch kosher salt
3 large egg yolks
2 tablespoons corn starch
2 tablespoons unsalted butter
1 cup sweetened coconut flakes
1/2 cup whipping cream

Pineapple Glaze Ingredients:
2 cups powdered sugar
4 tablespoons pineapple juice

Directions:
Preheat the oven to 350. Generously butter a mini-bundt cake pan or cupcake pan.

In a medium bowl, whisk the flour, baking soda and salt together. In a separate, large bowl, beat the butter until creamy. Add the sugar and beat at medium speed until pale and fluffy. Beat in the vanilla, then add the eggs, one at a time, beating for about 1 minute after each egg goes in. Reduce the mixer speed to low and mix in the bananas.

Mix in half the dry ingredients (the mixture may look curdled — just keep mixing), followed by all the sour cream and finally, the rest of the flour mixture. Fill each well of your prepared pan about 1/2 to 2/3 of the way full and rap the pan on the counter to remove bubbles from the batter and smooth the top.

Bake for 25 to 30 minutes, or until a toothpick inserted deep into the center of the cakes comes out clean. Transfer the pan to a rack and cool for 10 minutes before unmolding on the rack. Let cool to room temperature before adding cream filling and glaze.

While cakes are baking and cooling, make coconut pastry cream. Heat the coconut milk, sugar, salt and vanilla bean or extract in a medium saucepan over medium heat. In a bowl, whisk together the egg yolks and corn starch. Once the cream is hot, remove the vanilla bean (if used), scraping out any remaining seeds and returning them to the cream. Add 1/2 cup of the hot cream slowly to the yolks, whisking as you add, to temper the eggs so they won’t cook into an omelette in the middle of your pastry cream. That would be a bummer. Then pour the yolk mixture into the pot of hot cream and whisk. Continue to whisk with heat on medium-high for 3 more minutes. The mixture will turn thick and bubble. You need to continue to whisk for the full 3 minutes or the pastry cream will separate once it is cool. After the 3 minutes, whisk in the butter. Add the coconut flakes. Pour into a shallow dish to cool.

Cover with plastic wrap pressed right against the pastry cream. This will prevent a thick skin from forming on the surface. Refrigerate for at least an hour or freeze for 30 minutes. Once it is cold, stir the pastry cream to loosen. Whip the 1/2 cup cream to medium peaks. Stir in 1/3 to the pastry cream to lighten. Fold in the remaining cream until the pastry cream is nice and light.

When cakes are cool, hollow out the center of each mini-bundt cake (or, for cupcakes, you can use the cone method). Pipe in as much of the coconut pastry cream as will fit.

Whisk confectioners’ sugar and pineapple juice together to form glaze. Drizzle over filled mini-bundt or cupcakes. Store in an airtight container in the refrigerator for 5-7 days.

NOTE: These things are aaaaamazing served cold straight from the refrigerator! They’re dense, creamy, cool hunks o’ bright flavor.

*NOTE 2: This recipe actually makes twice as much coconut pastry cream as you need to fill the cakes. I split my pastry cream and made these with half, and a Coconut Cream Tart with the other half. If you’re not keen on a tart, you can also just double the number of banana cakes you make to fill, or find some other creative use for the excess cream. I suppose you could also try halving the coconut pastry cream recipe, but I didn’t want to fiddle with halving three yolks and a can o’ coconut milk.


Enjoy!


Share Share this post with friends!

Ice Cream Cupcakes

My sister Sarah is a Tetris addict. Something about spinning those awkwardly shaped blocks around and packing them together must release happy chemicals in her brain. It’s serious: she played Tetris in her wedding gown right before walking down the aisle, and she thinks this guy is totally hot.
I really can’t talk. I play real-life Tetris. All my errands have to be planned to ensure maximum efficiency: no driving out of my way or backtracking. My groceries are arranged on the checkout belt so that they fit together nicely. Periodically I’ll rearrange my fridge so that all the food is organized by shape (flat items on bottom, tall items shoved together in the back, and materials to make a quick dinner wrap all stacked together neatly for easy grabbing). But the fridge is nothing compared to the freezer.

Pistachio Ice Cream Cupcakes

My roommate and I are world champions at Freezer Tetris. We both overshop, and every now and then one of us will come home with a month’s worth of foodstuffs to shove into our already-full freezer (cue the excuses: “It was on sale! It’s cheaper when you buy in bulk!”). Let the games begin! We set to work emptying, rearranging, tossing, organizing, repackaging, and creatively stuffing until every last green pea has its own chilly little space in the freezer. There ought to be an international competition we can enter or something — why let all this talent go to waste?
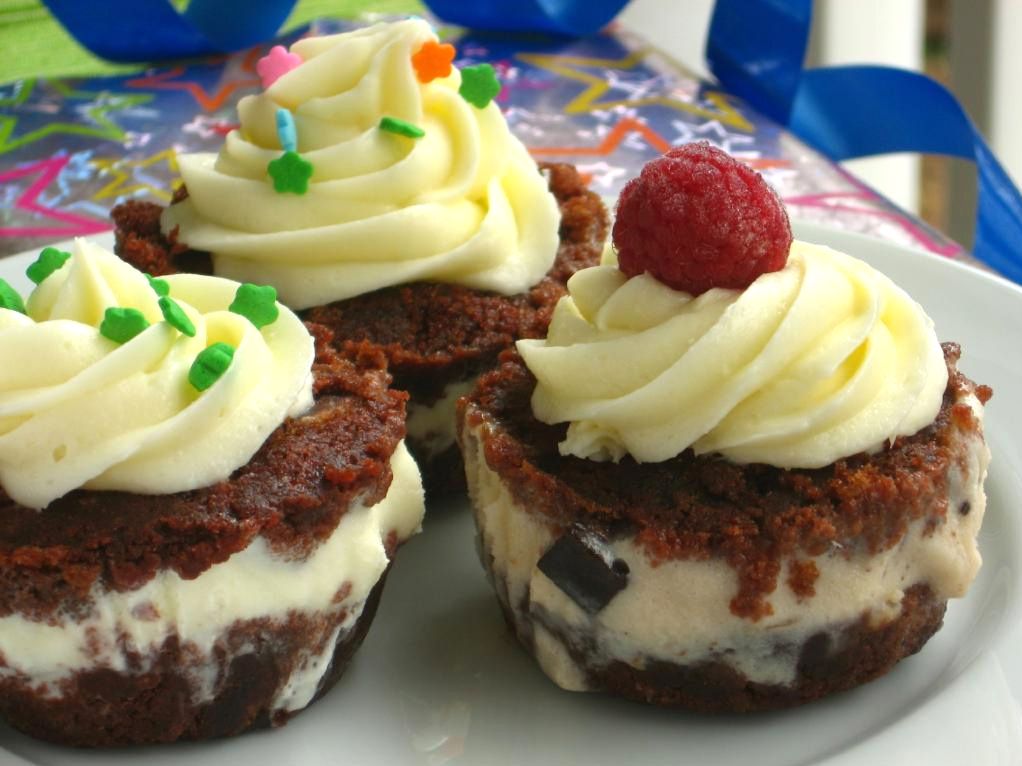
I don’t know about other bakers, but the bulk of my freezer space is consumed by dessert scraps: leftover cake, extra frosting, the last piece of blueberry pie, curds, berries, ice creams, doughs. For someone who only eats dessert on the weekend, I have a lot of fixins! Well, my Freezer Tetris has served me well. This week I went out and bought some of my favorite ice cream flavors, grabbed out some of my scraps, and created Ice Cream Cupcakes. If you have sweet bits and pieces lying around your freezer, this is just the leftover makeover you need!
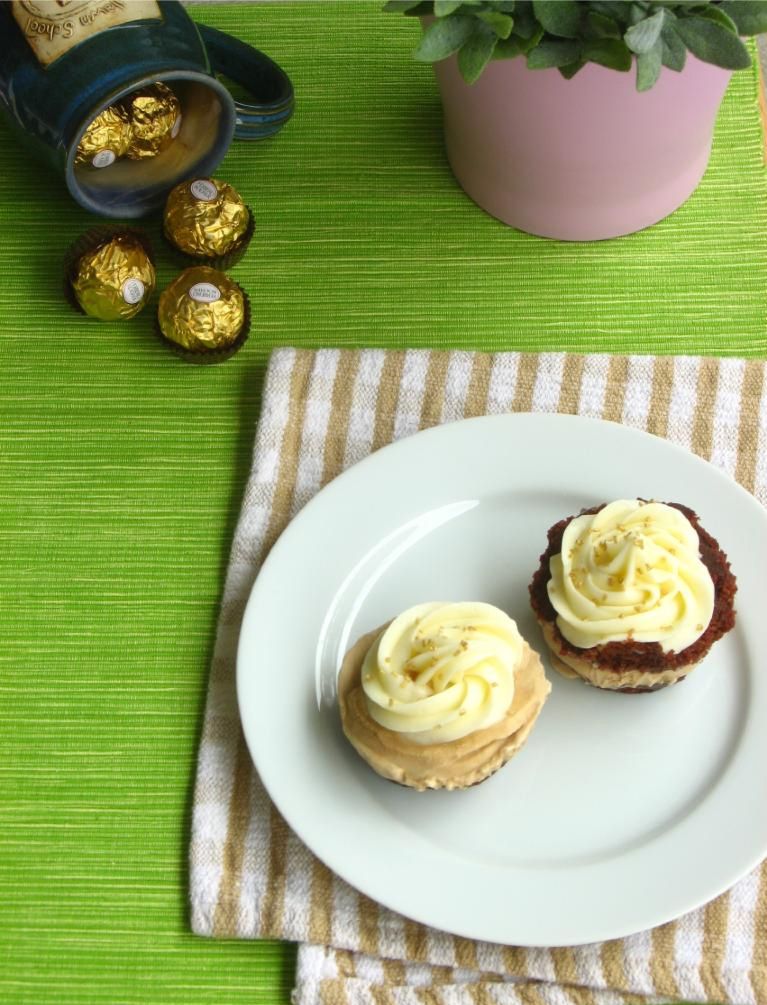

The Coffee Cupcake decided it was too sophisticated to be photographed with the others. Love that beautiful stamped mug as much as I do? It’s made by local artist Julie Payne. She also makes lovely clay pendants.

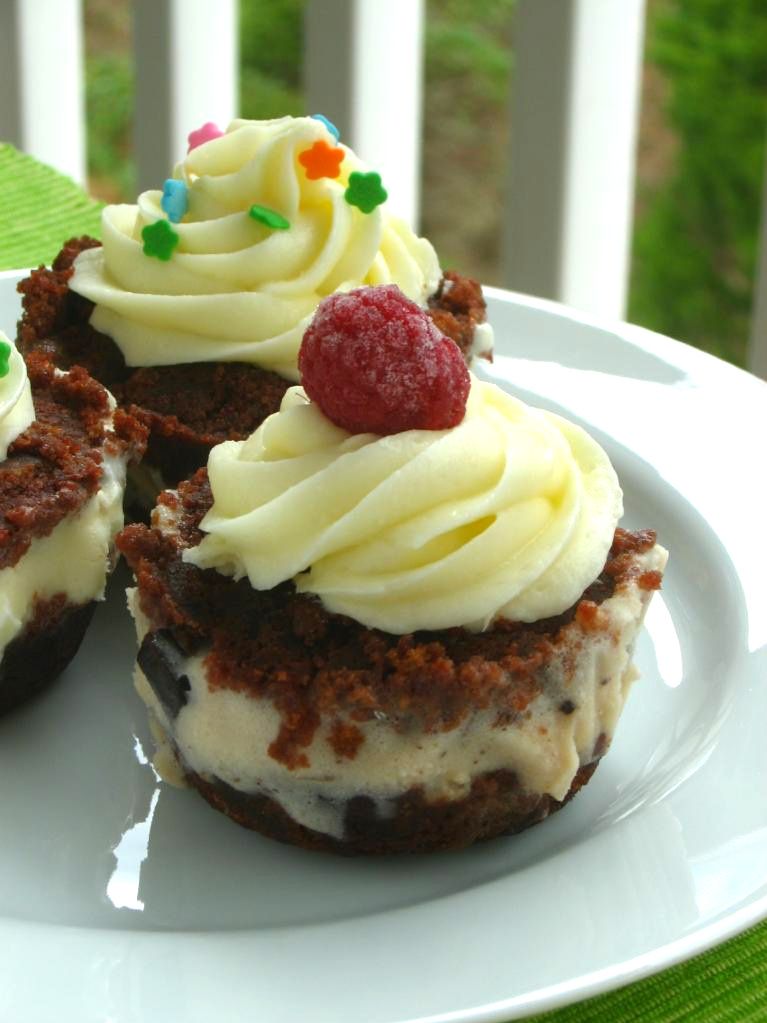
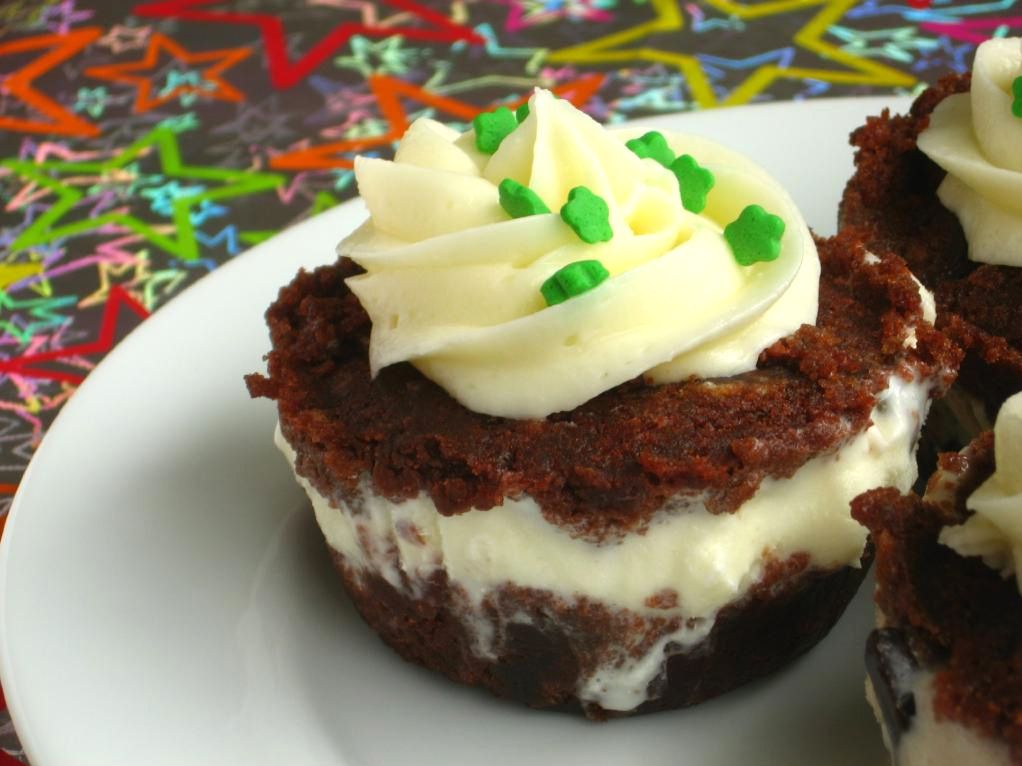
This post is actually more of a method than a recipe (as such, you’ll find detailed process photos below). You can use any ice creams, cakes, brownies, cookies, or creative add-ins that suit your fancy. The overall idea is to create a personal ice cream cupcake with three layers (two cake layers sandwiching a thick slab of ice cream), freezing the layers as you build. The whole thing is topped with icing and decorated before being stuck back in the freezer.
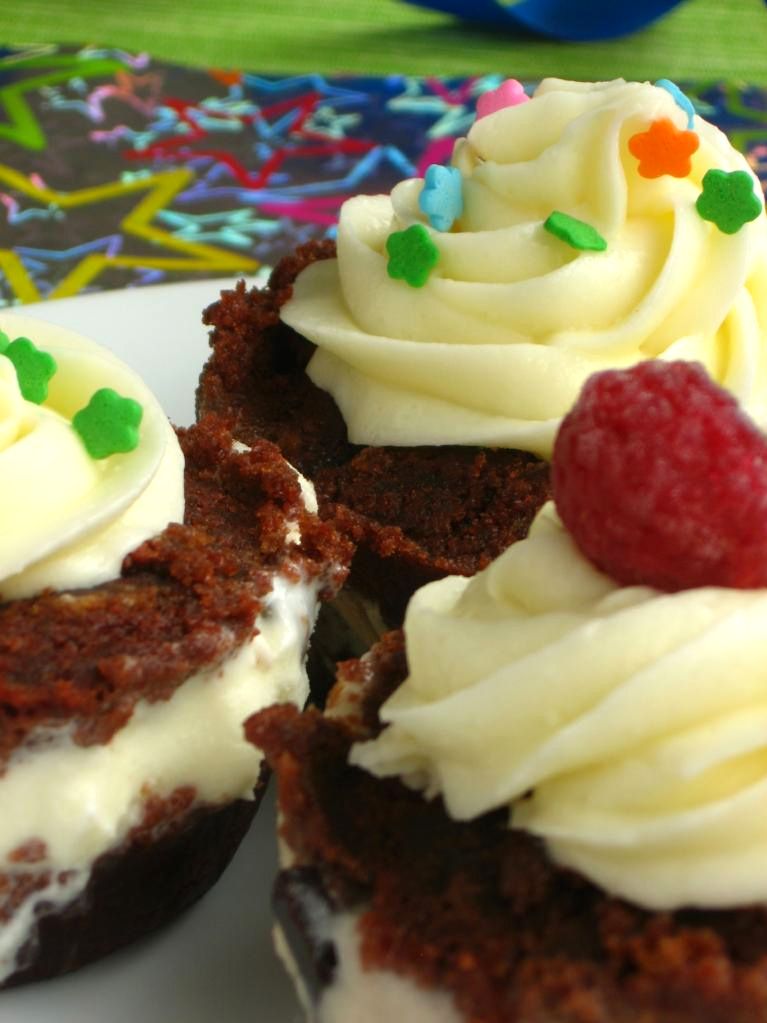

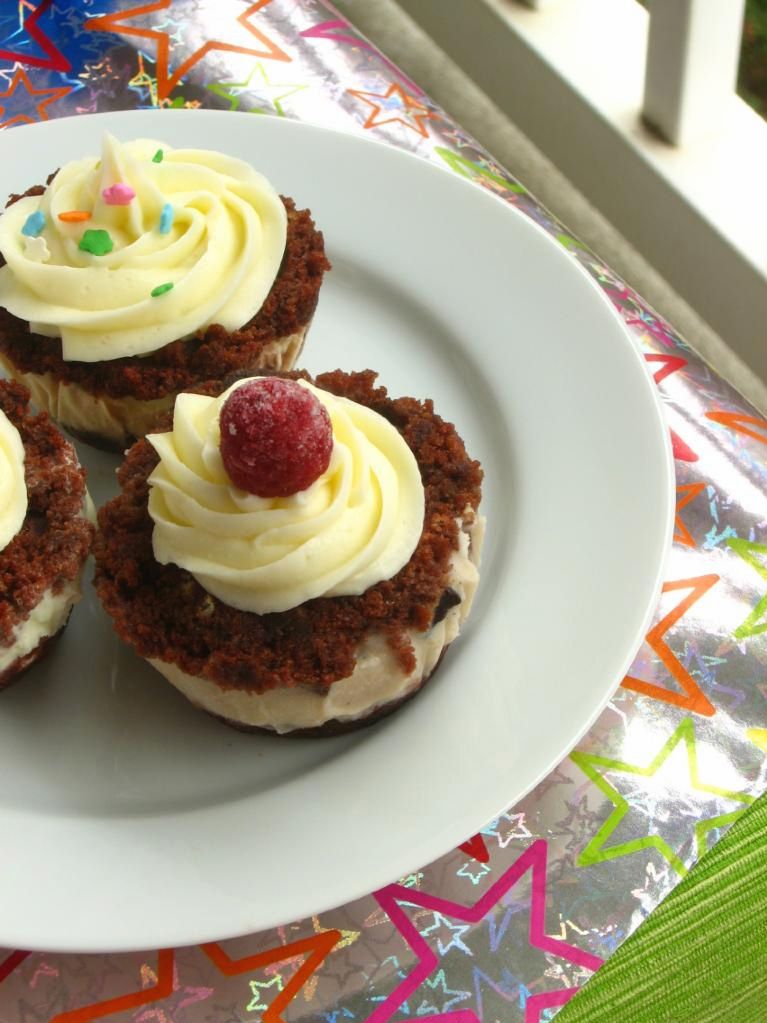
Clockwise from top: Cake Batter Ice Cream Cupcake, Cherry Garcia FroYo Cupcake, and Pistachio Ice Cream Cupcake.

Personally, I had some leftover chocolate sheet cake (the best cake in the world, and so easy!) and cream cheese frosting. I made four variations: Cake Batter Ice Cream Cupcakes (with and without toffee pieces added), Pistachio Ice Cream Cupcakes, Cherry Garcia FroYo Cupcakes, and Coffee Ice Cream Cupcakes (with and without Ferrero Rocher or toffee pieces added).
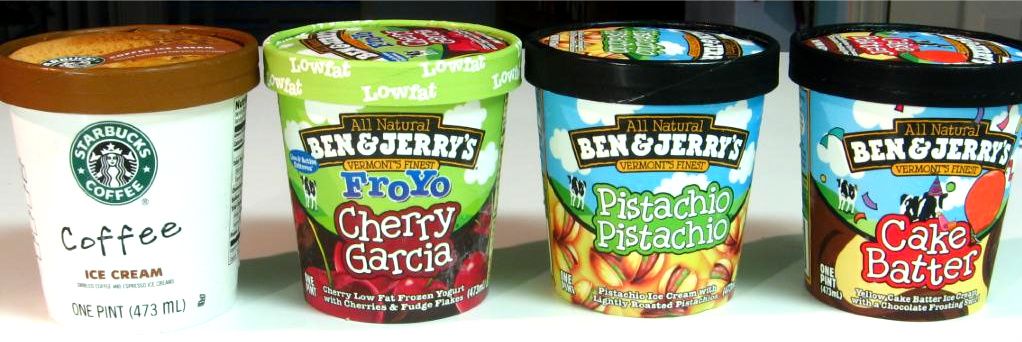

The ice cream line-up.

I can’t decide which was my favorite! The deep coffee flavor complemented the chocolate cake and Ferrero Rocher perfectly, creating a rich, indulgent cupcake. The cake batter cupcake tasted just like a big ice cream birthday cake. I think if forced to choose, though . . . I might have to go with the pistachio! Something about the sweet, otherworldly flavor of pistachio ice cream with toasted pistachios and chocolate cake just bowled me over. Speaking of bowls, that’s how we ate these: in a bowl with a spoon. No sticky fingers!
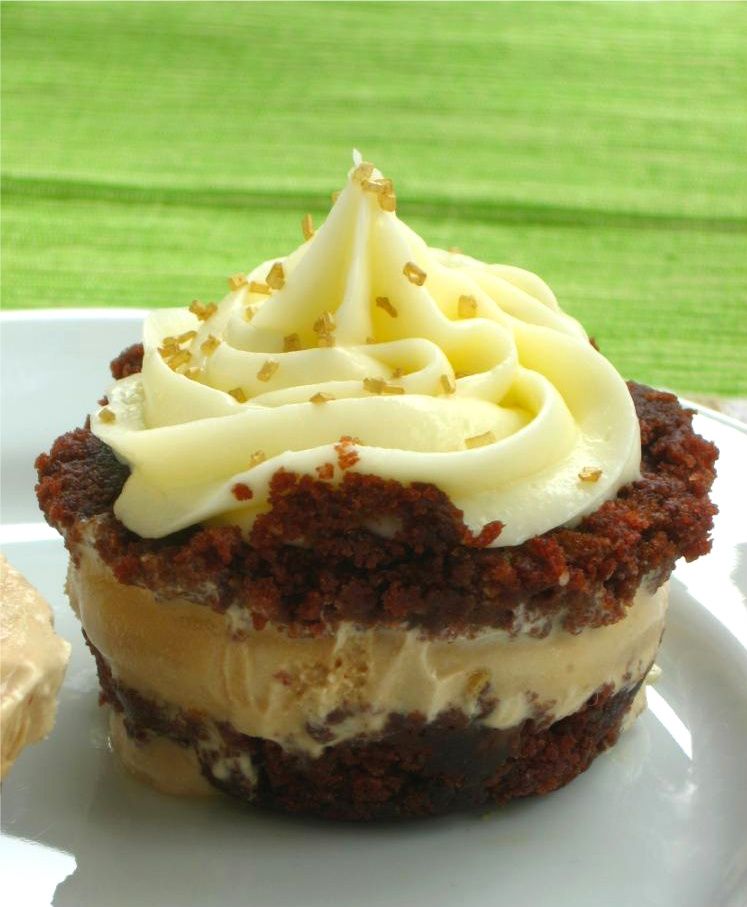

Shall we call this a Café au Lait Cupcake?

Grab a couple of pints of ice cream, some leftovers, and go wild! You could even whip up a small cake or some brownies just for the purpose of tearing it up and making some ice cream cupcakes! I won’t tell. What ice cream flavor would you pick for your cupcakes?

Ice Cream Cupcakes


Recipe by: Willow Bird Baking
Yields: Varies depending on amounts of ingredients

Ingredients:
Cake or brownie scraps, crumbled (I used Chocolate Sheet Cake)
Ice cream of your choice, softened slightly
Frosting of your choice (I used this delicious cream cheese frosting)
Add-ins (chocolate, peanut butter, cinnamon, or butterscotch chips; toffee; candy; nuts; frozen berries etc.)

Equipment:
muffin tin
plastic wrap
a glass with a bottom that fits into muffin wells
wax paper

Directions (also see process photos below):
1. Clean out some space in your freezer. You’ll need room for the muffin tins in addition to the container you’ll eventually store your cupcakes in. You don’t want to have to clear out space in the middle of the process while your cupcakes melt on the counter! Don’t ask me how I know this.

2. Line your muffin tins with plastic wrap, leaving an overhang. I did this by cutting a long sheet of plastic wrap in half lengthwise. I then used each long, thin strip to line one column of wells on my muffin tin — using 3 strips total.

3. Form the base cake layer: Place a heaping scoop of cake or brownie into each well. Lay a small square of wax paper over the wells one at a time, pressing on the cake with the bottom of the glass to flatten and pack it. Carefully peel wax paper away and continue until all wells have a base cake layer. You also might be able to put wax paper over all of the wells, press down with the bottom of another muffin pan, and pack cake into all the wells at once — but I didn’t try this.

4. Form the ice cream layer: Scoop a heaping spoonful of ice cream over the packed cake and level it with the back of a spoon. Sprinkle any add-ins over the ice cream layer. Try to leave some room at the top of the well for another cake layer!

5. Cover muffin tin with plastic wrap and freeze for a few hours.

6. Form final cake layer: Working quickly, scoop a final spoonful of cake over each well. Lay a small square of wax paper over the wells one at a time, pressing on the cake with the bottom of the glass to flatten and pack it. Carefully peel wax paper away and use a table knife to scrape away any uneven edges. Continue until all cupcakes have a top cake layer.

7. Cover muffin tin with plastic wrap and freeze for about an hour.

8. Frosting and decorating: Do this step in batches if possible! Things can get melty and messy if your cupcakes sit out too long waiting to be decorated. Don’t ask me how I know this. Pull 4 cupcakes out of your tin at a time using the plastic wrap overhang, keeping the rest of the cupcakes in the freezer. Place cupcakes carefully into cupcake papers if desired, or directly into storage container. Frost with a big star tip and decorate with sprinkles, nuts, or frozen berries as desired. Place finished cupcakes into your storage container and then into then freezer while you move on to the next batch. Keep cupcakes frozen until you’re ready to enjoy them (no need to soften before eating)!
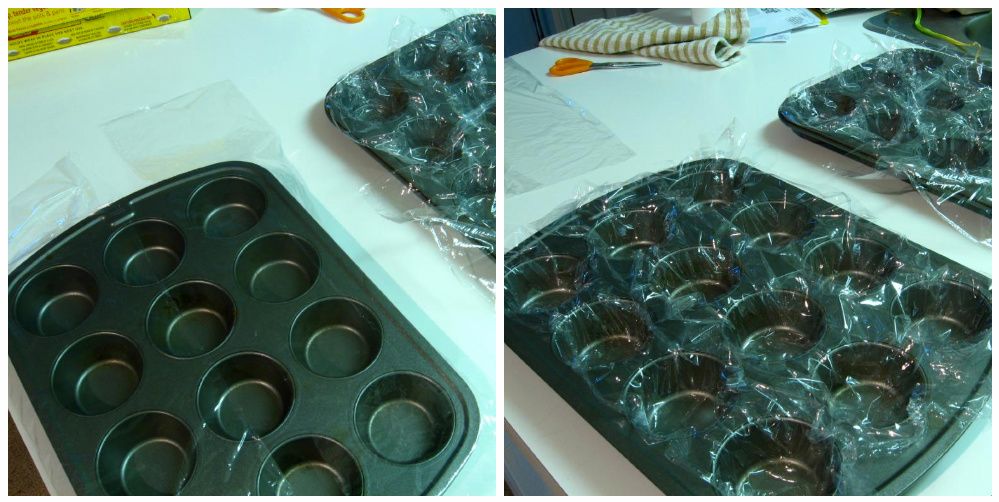

Step 2: Cut long strips of plastic wrap to line columns of wells in your muffin tin.
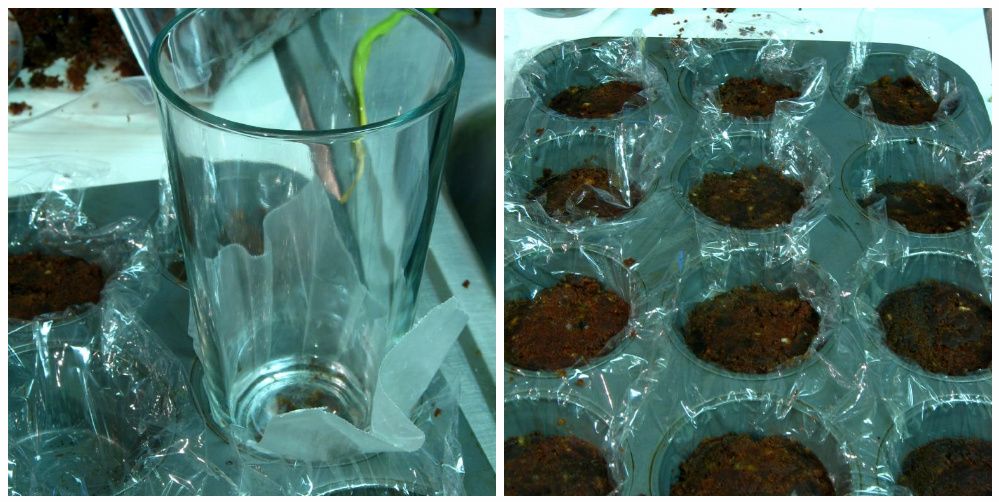

Step 3: Spoon cake into the well, cover with a square of wax paper, and use the base of a glass to pack and flatten.
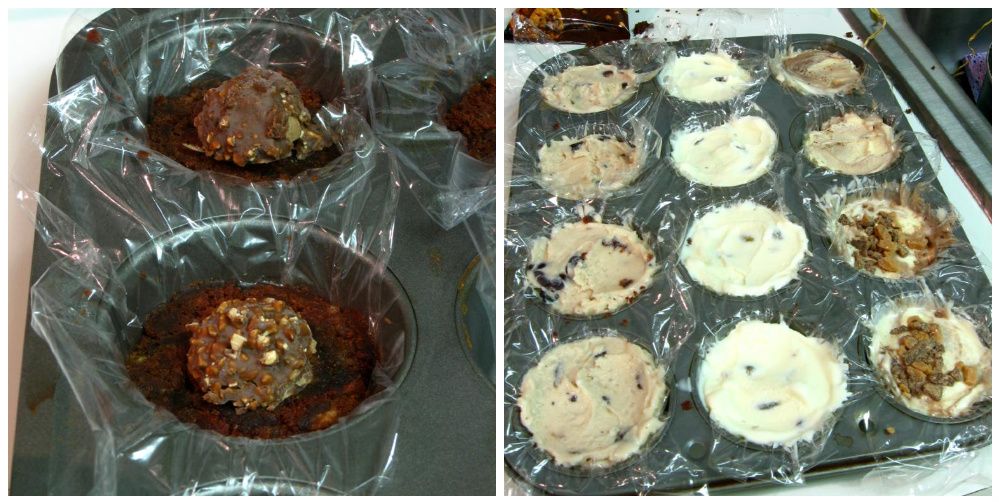

Step 4: This is a good time to add Ferrero Rocher halves! Add ice cream layer and freeze for a few hours.
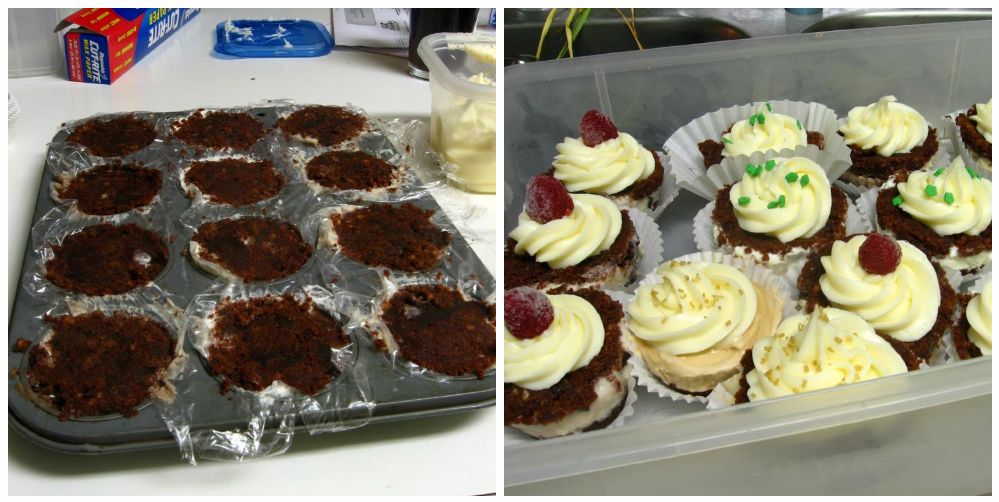

Step 6 and final cupcakes! Pack another layer of cake on, cover and freeze, and then decorate!

Share Share this post with friends!
1 3 4 5 6 7 8