cookies

Jack-o’-Lantern Whoopie Pies

I love how the vibrant online community of food blogs has erupted into autumnal flavors. A flickering fireplace on a chilly day has nothing on the cinnamon-and-spice glow of recipes flickering across my computer screen. The latter keeps not my toes but my tastebuds warm and cozy. Okay, okay, I’ll admit we haven’t had much need of it lately in Charlotte. The South still can’t make up its mind about the season, so temperatures have been in the 80s the past few days! Sorry to those in New England who are grumbling a bit right now. Soon enough, the chill will settle into North Carolina. In the meantime, I’ll enjoy fall flavors without the appropriate meteorological accoutrement.

My friend Katie and I had a date to bake together last weekend, and I was thrilled to hear that she was craving pumpkin just like I was. You may have heard about the pumpkin shortage, but thankfully I’d stocked up on a few cans of pumpkin before even hearing about it! So Katie and I brainstormed via email and decided to use our scarce squash to bake these gorgeous pumpkin whoopie pies. The recipe is from Matt Lewis of Baked bakery in New York City.

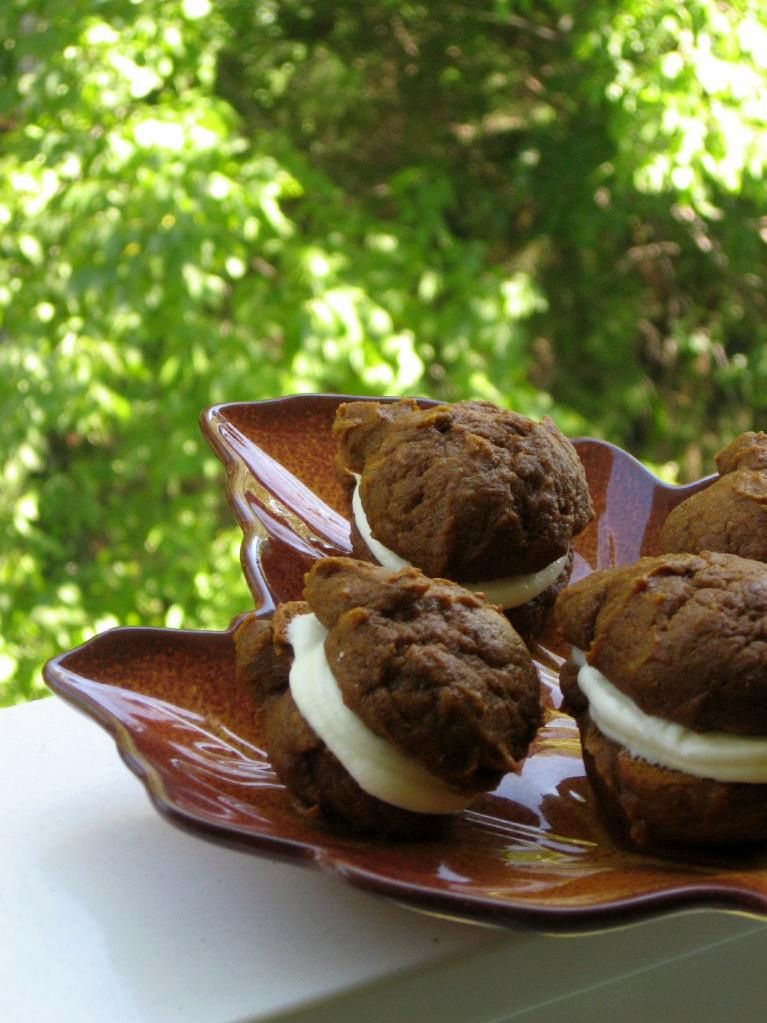
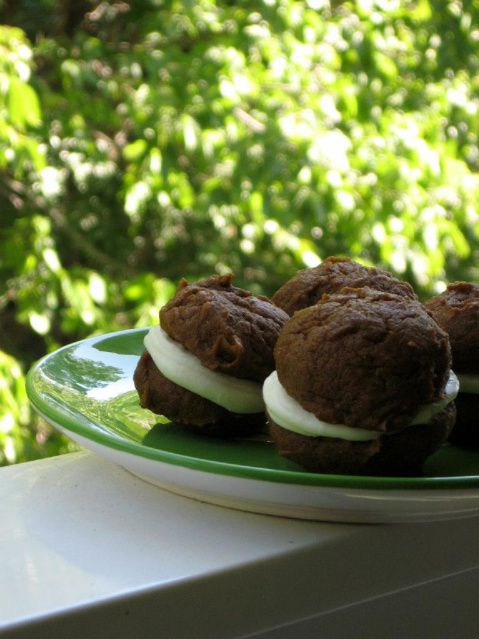
I’m a huge whoopie pie fan. My mom makes traditional whoopie pies each Thanksgiving and the rich, cakey chocolate and cream combination is something I look forward to all year. Imagine that same extremely moist, cakey texture with a beautiful pumpkin spice flavor instead: rich, dark brown sugar; ginger; ground cloves; and cinnamon. The result is a darker than average, plump pie that when slathered with sweet cream cheese spread, is the perfect fall bite.

This is also the perfect recipe for cooking in partners. Katie measured out dry ingredients while I whisked pumpkin and sugars together. We found that she (with previous ice cream shop experience) was an expert cookie scooper — wonderful, especially since I quickly realized I was lousy at it!


Katie showing off her scooping skills.

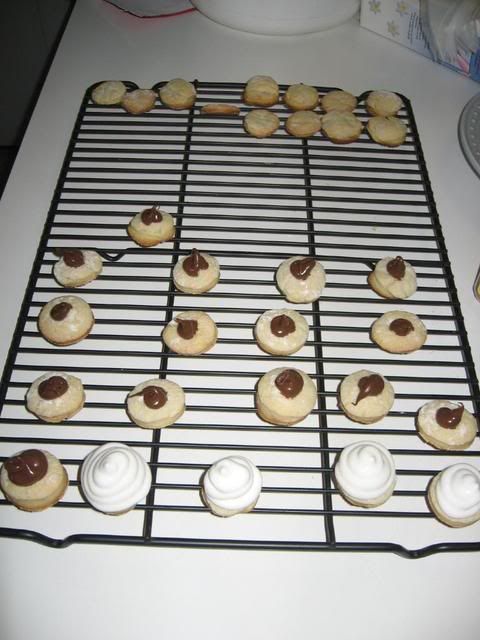
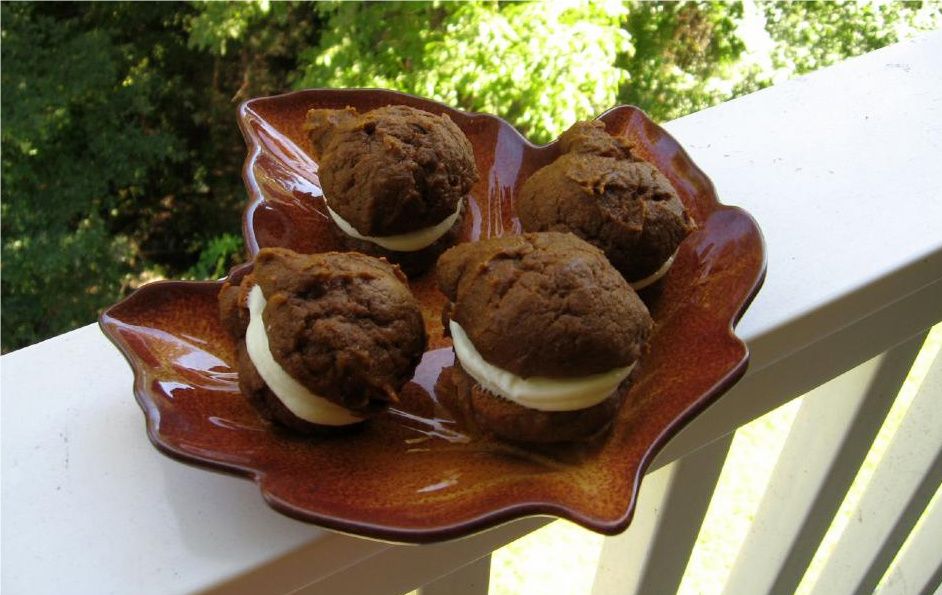
I went behind her and sculpted batter in the shape of pumpkin stems on each pie in hopes that they’d look like little pumpkins after baking. Sometimes this worked beautifully. Sometimes we ended up with whoopie pies shaped like triangles, snowmen, or the state of Idaho. It was a cute little Idahoan whoopie pie, don’t get me wrong, but the pumpkins were cuter:

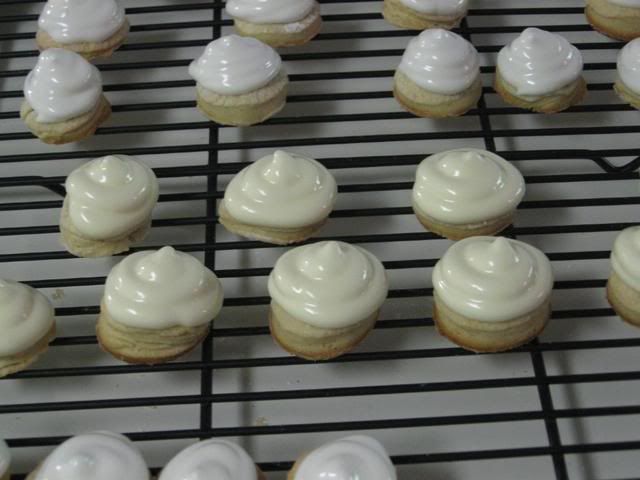
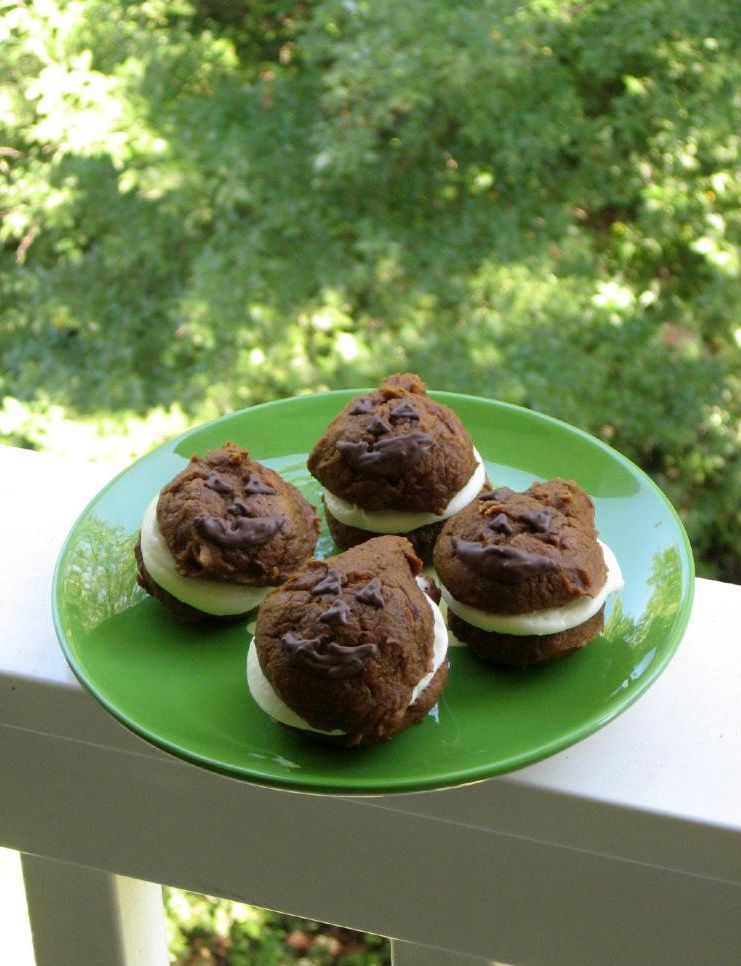
After seeing Bakerella’s cute twist on her pumpkin pie bites (Jack-o’-lantern faces drawn on in chocolate), I knew I wanted to try faces on our whoopie pies. Katie piped cream cheese filling into each sandwich while I melted up some Candiquik (any chocolate candy melt will do) and set to work. When finished, the faces were adorable — but a little hard to see against the dark whoopie pies! Perhaps using light brown sugar in the pies would make the faces stand out more, but then you’d lose a bit of that great molasses flavor. Use your personal tastebuds and aesthetic to decide!


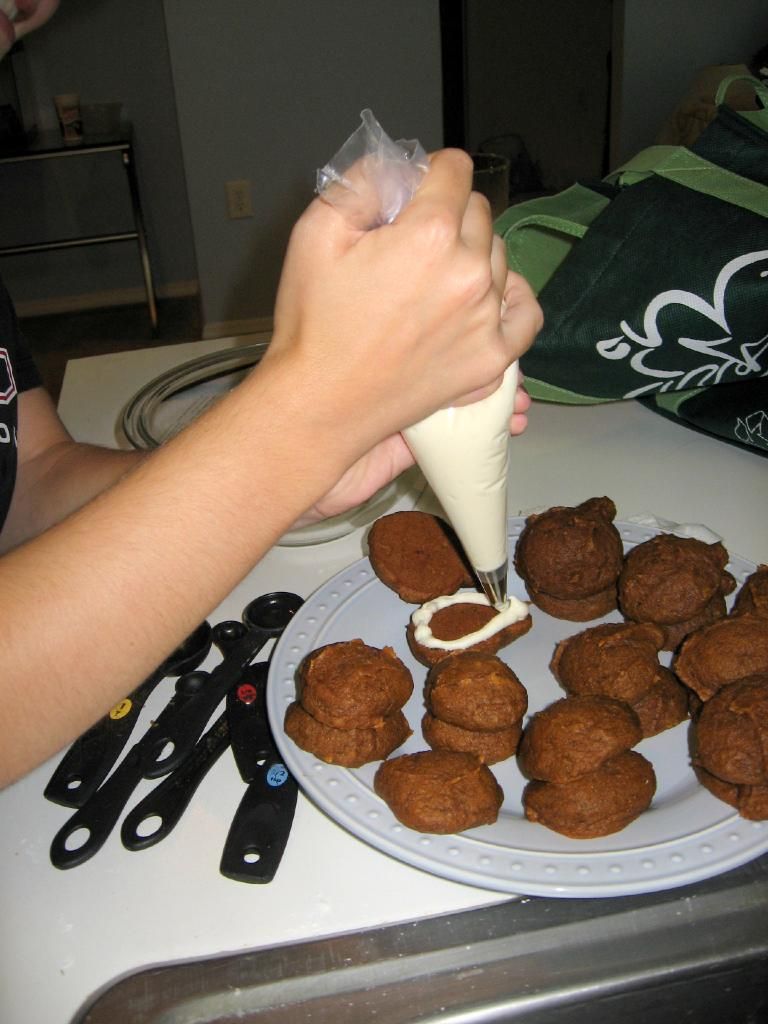
Katie doing some fantastic filling.


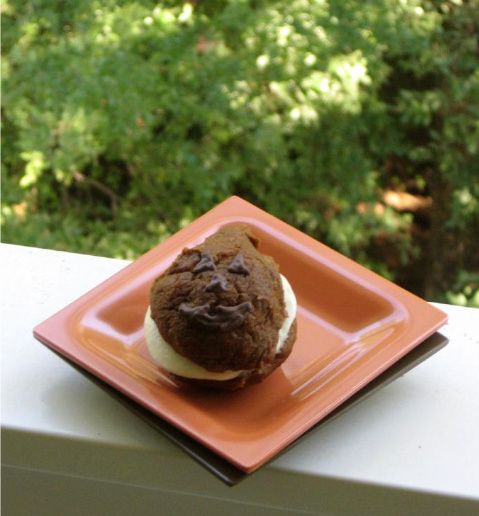
Jack-o’-lantern face!

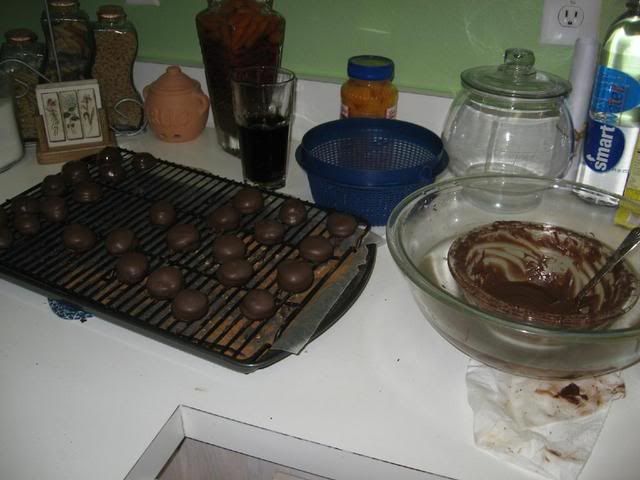
One thing I didn’t anticipate was how good chocolate and pumpkin taste together! Y’all already knew this, didn’t you?! Why didn’t anyone tell me?! The richness of the milk chocolate was a perfect partner to the spicy pumpkin flavor, and I’ve even been inspired to search for more recipes that use this combination. Give it a try if you haven’t already!

There are so many satisfying facets of these whoopie pies: the simple recipe, the deep and indulgent fall taste, the cute Jack-o’-lantern grins. The most satisfying part, though, was definitely the time spent baking with a friend. I hope you’ll invite a friend over (or maybe just invite a husband, wife, son, or daughter into the kitchen) to help you make some of these sweet pun’kins!

Jack-o’-Lantern Whoopie Pies
Recipe by: Matt Lewis of Baked Bakery (adapted slightly by me)
Yields: 24 medium whoopie pies or about 34 small-scoop whoopie pies


Pumpkin Whoopie Pie Ingredients:
3 cups all-purpose flour
1 teaspoon salt
1 teaspoon baking powder
1 teaspoon baking soda
2 tablespoons ground cinnamon
1 tablespoon ground ginger
1 tablespoon ground cloves
2 cups firmly packed dark-brown sugar
1 cup vegetable oil
3 cups pumpkin puree, chilled (chilling ensures pies won’t spread too much)
2 large eggs
1 teaspoon pure vanilla extract


Cream Cheese Filling Ingredients:
3 cups confectioners’ sugar
1/2 cup (1 stick) unsalted butter, softened
8 ounces cream cheese, softened
1 teaspoon pure vanilla extract
melted chocolate for piping on Jack-o’-Lantern faces


Directions:
1. Make the cookies: Preheat oven to 350 degrees. Line two baking sheets with parchment paper or a nonstick baking mat; set aside.
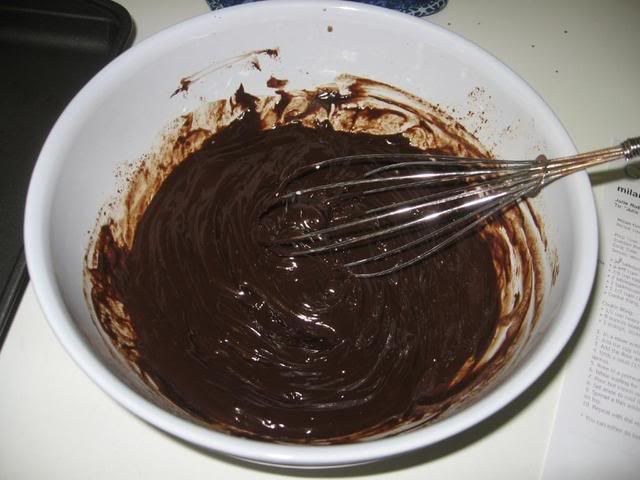
2. In a large bowl, whisk together flour, salt, baking powder, baking soda, cinnamon, ginger, and cloves; set aside. In another large bowl, whisk together brown sugar and oil until well combined. Add pumpkin puree and whisk until combined. Add eggs and vanilla and whisk until well combined. Sprinkle flour mixture over pumpkin mixture and whisk until fully incorporated.
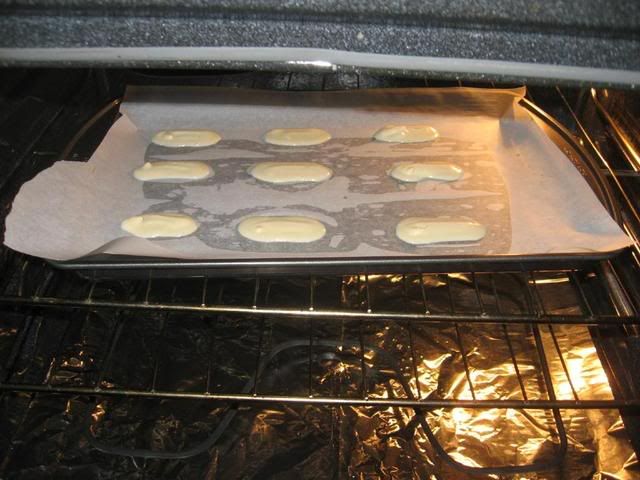
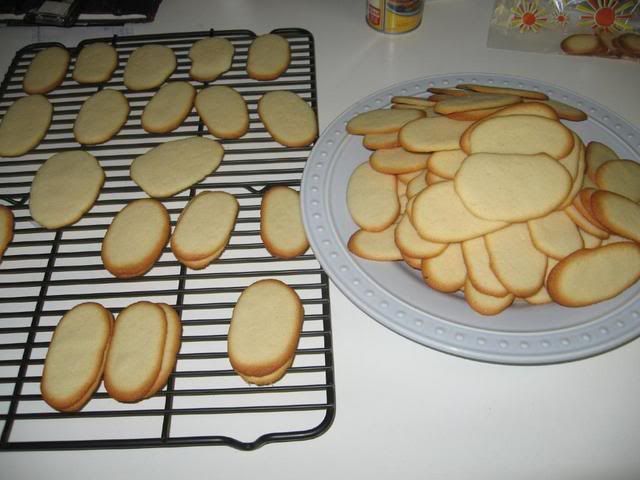
3. Using a small ice cream scoop with a release mechanism, drop heaping tablespoons of dough onto prepared baking sheets, about 1 inch apart. Transfer to oven and bake until cookies are just starting to crack on top and a toothpick inserted into the center of each cookie comes out clean, about 15 minutes. Let cool completely on pan.
4. Make the filling: Sift confectioner’ sugar into a medium bowl; set aside. In the bowl of an electric mixer fitted with the paddle attachment, beat butter until smooth. Add cream cheese and beat until well combined. Add confectioners’ sugar and vanilla, beat just until smooth. (Filling can be made up to a day in advance. Cover and refrigerate; let stand at room temperature to soften before using.)
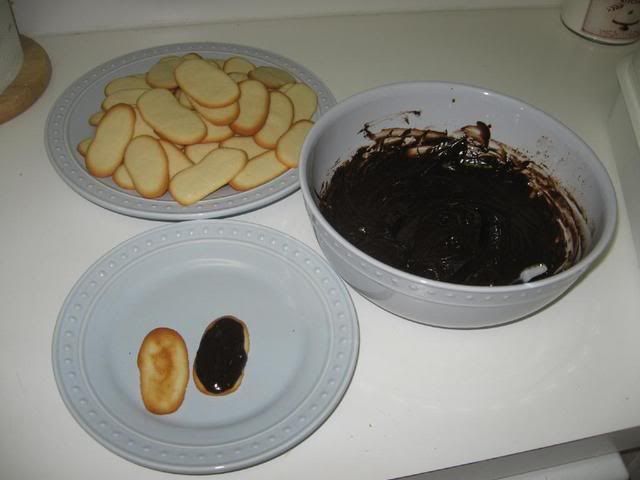
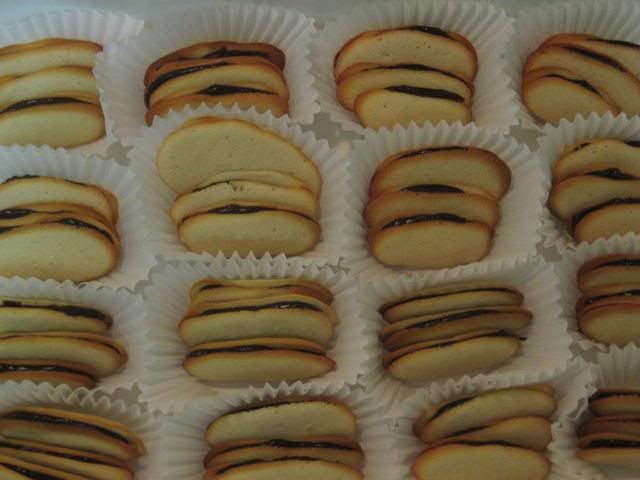
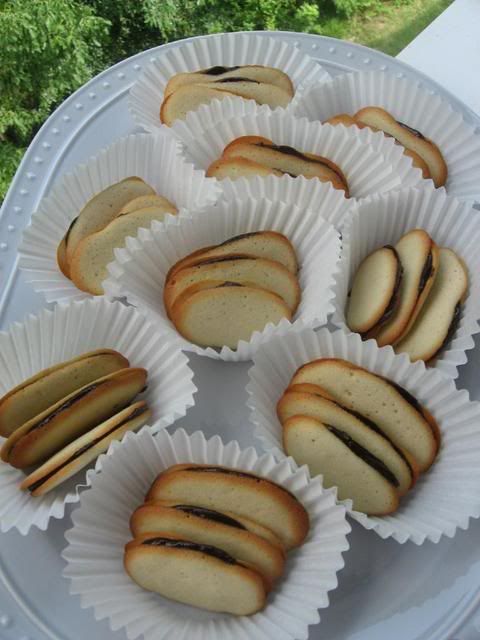
5. Assemble the whoopie pies: Line a baking sheet with parchment paper and set aside. Transfer filling to a disposable pastry bag and snip the end. When cookies have cooled completely, pipe a large dollop of filling on the flat side of half of the cookies. Sandwich with remaining cookies, pressing down slightly so that the filling spreads to the edge of the cookies. Use a ziplock bag with a tiny corner cut off to pipe on melted chocolate in the shape of Jack-o’-Lantern faces. Allow these to harden (stick them in the fridge for a bit to speed it up). Transfer sandwiched and decorated cookies to a prepared baking sheet and cover with plastic wrap. Refrigerate cookies at least 30 minutes before serving and up to 3 days.

NOTE: There’s a lovely video of Matt Lewis making these whoopie pies located here (click on “Watch Video.”) Though the recipe above seems to have a lot of spice, it’s really the perfect balance — don’t skimp.

Milan Cookies

Saying that I love to try new recipes and techniques is an understatement. Even when I’m making a tried and true dessert that I’ve made repeatedly, I always have a crazy urge to try a new decorating technique or another twist. It was a wonderful decision, therefore, to join The Daring Bakers.

Each month, one of the Daring Bakers is responsible for hosting a challenge that they issue to all of the others. Bakers complete the challenge and everyone posts their results on the 27th of the month. This is my first month in the group, and I can already tell I’m going to love it.

The July Daring Bakers’ challenge was hosted by Nicole at Sweet Tooth. She chose Chocolate Covered Marshmallow Cookies and Milan Cookies from pastry chef Gale Gand of the Food Network (to see my Mallows, go to this post).

First and foremost, I think the Daring Bakers will encourage me to try recipes I might not otherwise consider. These Milan Cookies, for example, aren’t something I would have decided to try on my own, but they are delicious and sophisticated. I can picture them being served at tea; they’re so prim in their little paper bowls! The cookie filling is a thick ganache with a hint of orange zest that complements the slightly citrus flavor of the cookie itself. Everyone who tried these loved them!

Just a hint: I had some lemon curd frozen from my Lemon Burst Fairycakes, so I spread it on a cookie and gave it a taste. It was heavenly! You could even sandwich some lemon curd between two cookies and dip them in ganache! Clearly, these cookies have inspired me.


Milan Cookie with lemon curd filling in the place of ganache.

This recipe is from Gale Gand and Food Network, but of course, I tweaked some things. Changes to the recipe are marked in italics below. I hope you enjoy these cookies, and be sure to send me a photo and/or leave me a comment if you make them! I’d love to see your results!

Milan Cookies


Recipe By: Gale Gand (slightly tweaked — changes in italics)
Yields: about 50 sandwich cookies

Ingredients:
12 tablespoons butter, softened
2 1/2 cups powdered sugar
7/8 cup egg whites (from about 6 eggs)
2 tablespoons vanilla extract
2 tablespoons lemon extract
1 1/2 cups flour
Cookie filling, recipe follows

Cookie filling ingredients:
1/2 cup heavy cream
8 ounces semisweet chocolate, chopped
1 orange, zested

Directions:

Cream the butter with a paddle attachment then mix in the sugar. Add the egg whites gradually and then mix in the vanilla and lemon extracts. Add the flour and mix until just incorporated. With a small (1/4-inch) plain tip, pipe thick 2-inch sections of batter onto a parchment-lined sheet pan (note: it’s easier to pipe onto parchment if you “glue” it to the pan using some nonstick cooking spray), spacing them 2 inches apart as they spread. Bake in a preheated 350 degree oven for 7-8 minutes or until light golden brown around the edges. Let cool on the pan.

Cookie Filling: In a small saucepan over medium flame, scald cream. Pour hot cream over chocolate in a bowl. Whisk to melt chocolate, add zest and blend well. Set aside to cool (the mixture will thicken as it cools). Spread a thin amount of the filling onto the flat side of a cookie while the filling is still soft and press the flat side of a second cookie on top. Repeat with the remainder of the cookies.

NOTES on storage from Audax Artifex: Let cookies cool completely before storing them, or the residual heat will produce steam that will soften the cookies and accelerate spoilage. Separate layers of cookie with wax paper or foil.

In a dry climate, keep unfilled cookies crisp by storing them in a loosely covered container, such as a cookie jar without a snug lid. In a damp, humid climate, store in a tightly covered container.

Also keeping the unfilled cookies in an air tight container with a muslin bag of salt or bicarbonate of soda – this will absorb the dampness keeping your cookies crisp.

All of that said, I will tell you, my cookies got soft. We actually enjoyed them that way, so don’t fret if yours aren’t as crisp on day 2. Many of the Daring Bakers also tried fun combinations — chocolate Milan cookies with chocolate mint ganache, plain Milan cookies with no citrus, etc. So do some experimenting!

Process Photos:


Baking in the oven.


Cooling off (here you can see that a few were quite
wonky! To reduce the number of crooked cookies,
quickly and confidently pipe a thick, straight line.)


Mixing cookie filling.


The sandwich construction station!


LOTS of cookies!


Enjoy!

Visit the Daring Bakers (temporary) Blogroll to see more of these treats from amazing bakers!

Since I mentioned challenges, what’s the most challenging recipe you’ve tried?

Mallows

As I mentioned in my previous post, the July Daring Bakers’ challenge was hosted by Nicole at Sweet Tooth. She chose Chocolate Covered Marshmallow Cookies and Milan Cookies from pastry chef Gale Gand of the Food Network. While the Milan cookies were delicious and dainty, the Mallows were scrumptious and indulgent. They were two very different types of cookies, but I learned from each recipe and enjoyed the variety! If I had to choose a favorite, though — and you know I do — it would be these Mallows.


Four types of Mallows (from back): Almond Mallows, Hazelnut Mallows, Cinnamon Mallows, and Plain Mallows

Mallows are chocolate-covered, marshmallow-topped cookies. The wonderful thing about these Mallows (besides the amazing flavor) is how versatile they are. Homemade marshmallows are very easily flavored and customized, so I was able to make four Mallow “flavors” with hardly any more trouble than just making one. I chose Almond, Hazelnut, and Cinnamon Mallows in addition to the plain.


Almond Mallows

Almond Mallows have an almond sliver between the cookie and marshmallow, and another atop the cookie. In addition, their marshmallows are flavored with vanilla, almond, and butter flavorings. The marshmallow is as rich as a buttercream frosting, and so tasty! I bet this version would also be delicious with some creamy almond butter piped on under the marshmallow.


Hazelnut Mallows

Hazelnut Mallows (my favorite!) have Nutella piped on under plain marshmallow, and are topped with toasted hazelnuts.


Cinnamon Mallows

Cinnamon Mallows have cinnamon and nutmeg flavored marshmallow, and a light dusting of cinnamon and cocoa powder on top.

Enjoy experimenting with flavors! Different sorts of nuts, spices, and extracts are all tools for tweaking your mallows. Some Daring Bakers piped a bit of jam or nut butter below their marshmallows for an added surprise. Use food coloring to denote different flavors of marshmallow. There’s a lot of room for creativity here.


All four types of Mallows again (from left): Cinnamon Mallows, Almond Mallows, Plain Mallows, and Hazelnut Mallows

Gale Gand’s original recipe seemed to need some tweaking, since Daring Bakers typically ended up with — I kid you not — hundreds of cookies, and only enough marshmallows to cover around 50. I’ve adjusted the recipe below to hopefully yield the correct amounts! Also, Gand’s original recipe called for melting semisweet chocolate and vegetable oil to make your coating. After reading that about half of the Daring Bakers’ were having trouble with their chocolate not setting — especially those who live in warm or humid climates — I decided not to take a chance with it. Instead, I used my beloved CandiQuik dipping chocolate, which dries in literally minutes! You can probably find this at Lowes Food or SuperTarget. A friend of mine over at Barbara Bakes uses Ghiradelli dipping chocolate, which is another option.

Enjoy playing with your Mallows! My family and friends loved these cookies, and I hope yours will too.

Mallow Cookies


Recipe By: Gale Gand (tweaked quite a bit!)
Yields: about 80 small (bite-sized) Mallows

Cookie Ingredients:
1.5 cups all purpose flour
1/2 cup white sugar
1/2 teaspoon salt
3/8 teaspoon baking powder
1.5/8 teaspoon baking soda (this is an odd measurement — eyeball it as best you can!)
1/4 teaspoon ground cinnamon
6 tablespoons unsalted butter
1.5 eggs, whisked together (to get half an egg, crack it into a separate cup and lightly beat it; then discard 1.5 tablespoons and add the rest to the recipe)
Dipping chocolate (I used 2 bags of chocolate CandiQuik)

Homemade Marshmallow Ingredients:
1/4 cup water
1/4 cup light corn syrup
3/4 cup (168.76 grams/5.95oz) sugar
1 tablespoon powdered gelatin
2 tablespoons cold water
2 egg whites , room temperature
Flavoring (either Plain, Almond, or Cinnamon)

-Plain = 1/4 teaspoon vanilla extract
-Almond = 1/8 teaspoon vanilla extract, 1/8 teaspoon almond extract, 1/8 teaspoon imitation butter flavoring, and 4 drops of yellow food coloring (optional).
-Cinnamon = 1/4 teaspoon vanilla extract, 1/4 teaspoon cinnamon, and a pinch nutmeg

Directions:

Begin by making cookies:
1. In a mixer with the paddle attachment, blend the dry ingredients.
2. On low speed, add the butter and mix until sandy.
3. Add the eggs and mix until combine.
4. Form the dough into a disk, wrap with clingfilm or parchment and refrigerate at least 1 hour and up to 3 days.
5. When ready to bake, grease a cookie sheet or line it with parchment paper or a silicon mat.
6. Preheat the oven to 375 degrees F.
7. Roll out the dough to 1/8-inch thickness, on a lightly floured surface. Use a 1 1/2 inches cookie cutter to cut out small rounds of dough (see my tips for rolling out dough, below).
8. Transfer to the prepared pan and bake for 8 minutes or until light golden brown. Let cool to room temperature.

While cookies are cooling, make your marshmallows:
1. In a saucepan, combine the water, corn syrup, and sugar, bring to a boil until “soft-ball” stage, or 235 degrees on a candy thermometer (though soft ball stage can be eyeballed with a simple cold water test, I love having a candy thermometer around. Mine even has a line marked “soft-ball stage”).
2. Sprinkle the gelatin over the cold water and let dissolve.
3. Remove the syrup from the heat, add the gelatin, and mix.
4. Whip the whites until soft peaks form and pour the syrup into the whites.
5. Add the flavoring of your choice and continue whipping until stiff (it will take around 15 minutes, so I hope you took your vitamins this morning!). Note: You can also separate the marshmallow into multiple bowls and make multiple flavors, but if you do, reduce the amounts of the ingredients so they don’t overpower the smaller volume they’re flavoring.
6. Transfer to a pastry bag.

Now to finish the cooled cookies:
1. Pipe a “kiss” of marshmallow onto each cookie. Let set at room temperature for 2 hours.
2. Line a cookie sheet with parchment or silicon mat and cover with a cooling rack — this will be your drying rack!
3. Melt dipping chocolate according to package instructions. I like to set my bowl of chocolate in a larger bowl of hot water to keep it melted while I work. Just be careful not to let the water touch the chocolate, or it will seize and you won’t be able to work with it.
3. One at a time, gently drop the marshmallow-topped cookies into the hot dipping chocolate (see my video demonstration below!).
4. Lift out with a fork and let excess chocolate drip back into the bowl. Now’s the time to add toppings if you wish, while the coating is wet. For a chocolate squiggle, let coating dry and use a ziplock of CandiQuik with the corner cut off to drizzle over cookies.
13. Place on the prepared pan and let set at room temperature until the coating is firm, about 10 minutes. Store in an airtight container at room temperature (unless you’re in a very hot environment and notice melting, in which case, store in fridge).

Note: if you don’t want to make your own marshmallows, you can cut a large marshmallow in half and place on the cookie base. Heat in a preheated 350-degree oven to slump the marshmallow slightly, it will expand and brown a little. Let cool, then proceed with the chocolate dipping.

Julie’s tips for rolling, gathered from various internet sources, my mother, and some lovely friends during a moment of panic:

  • Work with small batches (about 1/3 of the dough) at a time, while keeping the rest chilling in the refrigerator.
  • You can coat your workspace in equal parts confectioners’ sugar and flour if you’re worried about using too much flour (which can cause dough to get dry/tough).
  • Roll dough immediately from the refrigerator, turning it often and redusting lightly with flour mixture to prevent sticking.
  • If you don’t have a cool metal counter or marble slab (which I don’t), set some frozen vegetables out on your counter for a bit before you roll to cool it off. Then dry your workspace and roll. You can also refrigerate or freeze your rolling pin for a few minutes.
  • Have a sheet pan in the freezer. If you sense your dough is getting sticky/warm, put a sheet of wax paper on the dough and press the frozen sheet pan on top to cool it down quickly.

The One Minute Dipping Demonstration!
[youtube=http://www.youtube.com/watch?v=dvyI3i4nYLY&hl=en&fs=1&rel=0&color1=0x2b405b&color2=0x6b8ab6&border=1]

Process Photos!


Ready to roll!


Fresh from the oven and not so pretty.


Getting organized to make my four types of Mallows (and not confuse them!)


Is it soft-ball stage yet? (notice my faithful Coke Zero in the background!)


Piping Nutella filling onto my Hazelnut Mallows. The more you can fit, the better!


For Almond Mallows, I used a bit of the almond marshmallow mixture to “glue” an almond sliver on the cookie before piping my marshmallow.


Marshmallows of all flavors piped on.


Dipping — see video above for a demonstration!


Finished!


Mmm! Have one of each!

Visit the Daring Bakers (temporary) Blogroll to see more of these treats from amazing bakers!

Baking to Freeze: Chunky Peanut Chocolate and Cinnamon Cookies

Chunky Peanut, Chocolate, and Cinnamon Cookies are the third and final recipe in my “baking to freeze” series (see the introduction post here, if you missed it!). These cookies taste festive: cinnamon and spice, along with crunchy peanuts and rich chocolate chips.


Ziplock of Chunky Peanut, Chocolate, and Cinnamon Cookie dough partitioned into 4-cookie logs, with thawing/baking instructions.


Cookies after baking.


Baking to Freeze Recipe #3: Chunky Peanut, Chocolate, and Cinnamon Cookies


Recipe by: Martha Stewart
Yields: About 40-50 cookies

2 cups all-purpose flour
1 teaspoon baking soda
1 teaspoon salt
1/2 teaspoon ground cinnamon
3/4 cup (1 1/2 sticks) unsalted butter, softened
1/2 cup smooth peanut butter
1 cup packed light-brown sugar
1/2 cup granulated sugar
2 large eggs
1 1/2 cups semisweet chocolate chips
2/3 cup roasted, salted peanuts, coarsely chopped
2 teaspoons pure vanilla extract

Directions:
Preheat oven to 350 degrees. Whisk together flour, baking soda, salt, and cinnamon in a medium bowl. Put butter and peanut butter in the bowl of an electric mixer fitted with the paddle attachment; mix on medium speed until combined, about 2 minutes. Add sugars; mix 2 minutes. Mix in eggs. Gradually add flour mixture; mix until just combined. Fold in chocolate chips, peanuts, and vanilla with a mixing spoon until well distributed. Refrigerate dough until it is slightly firm, 15 minutes. If freezing, roll into logs using wax paper. Double wrap logs of cookie dough (in desired portions) in plastic wrap and seal in a ziplock bag. Freeze for up to 6 weeks.

Roll dough into 1-inch balls. Space balls 2 to 3 inches apart on baking sheets lined with parchment paper. Flatten slightly. Bake until just golden, about 13 minutes. Transfer cookies to wire racks to cool. Can serve with ice cream.

Thawing Instructions: Thaw desired amount of cookie dough in refrigerator for several hours. Preheat oven to 350 degrees. Roll dough into 1 inch balls. Space 2-3 inches apart on greased cookie sheet and flatten slightly. Bake until golden, about 13 minutes.

Click here to download thawing/baking instruction labels and recipe card to include with this dish.

Preview:

Quick and Easy Peanut Butter Cookies

Last night around midnight, I was poking about online and found this super-easy, flourless peanut butter cookie recipe. I immediately ran out and measured my peanut butter . . . juuuust shy of a cup! Of course! Not to be deterred, I threw Byrd in the car (actually, I let her jump into the car herself) and drove to the grocery store to pick up some extra peanut butter, along with things I’ll need for my savory cupcakes this weekend (stay tuned for these! I’m hoping they’re going to be amazing!)

I was excited about this recipe because of the possibility of making a weekday snack. I eat lower carb during the week, and since they have no flour, these cookies (when made with sugar-free peanut butter and Splenda) are low carb. About 125 calories and 5 grams of carbohydrates per cookie, to be exact.

The only issue I was concerned about is the effect these substitutions would have. Natural peanut butter can be oilier or drier (depending on how well-mixed your jar is) than regular processed peanut butter, and Splenda works in most things, but not all. The cookies came out dry because of the peanut butter difference, and a little crumbly as well, but you know . . . for a low carb sweet, they hit the spot. After refrigerating overnight in an air-tight container, they were quite yummy. Nevertheless, if you’re not worried about the carbs, I would use regular ol’ JIF and sugar for a moister cookie.

Flourless Quick and Easy Peanut Butter Cookies


Recipe By:

Nadia

Yields: 14-18 cookies

Cookie Ingredients:

1 cup peanut butter
1 egg
1/2 cup sugar

Directions:

Mix ingredients together for about 2 minutes. Cover and chill in refrigerator for half an hour. Preheat oven to 325 degrees and grease a cookie sheet. Shape dough into small balls (and roll balls in sugar, if you’d like). Use the back of a fork to press balls flat vertically and horizontally (forming that lovely crisscross pattern). Bake for 18 minutes. Allow to cool on wire rack and store in airtight container.

Note: As mentioned above, the low carb version of this won’t be quite as moist, but is yummy as a quick treat. If substituting low carb ingredients (and maybe even if not), I think refrigerating overnight in an airtight container makes the flavor better. If you’re making the regular recipe, I could see these being fantastic with some mini hershey kisses or dipped in jam, as several folks on the original post suggested. Mmm peanut butter cookies! Enjoy!

1 8 9 10