cookies

Carrot Cake Sandwich Cookies with Honey Cardamom Cream Cheese

I’m so proud, and instead of quietly congratulating myself on a minor success, I’m going to tell the interwebs all about it like it’s a big deal. Because that’s what blogs are for, right? Okay, then. Drumroll, please . . .

I exercised four days in a row last week.

You may remember that I’ve had exercise successes like this before — over the summer I went to Jazzercise consistently for months! But once August rolled around and it was time to go back to teaching, any physical activity (besides the vigorous use of my grading pen) was put on the back burner.

Recently, though, I finally scrounged around under the furniture and in the closets of my heart until I found enough motivation to get on my elliptical machine. Four. Days. In. A. Row.

Turns out a little Coke Zero and some Teen Mom make exercise almost bearable. Don’t judge me.

Some of you out there are crazy exercisers and are trying your best not to giggle at my “success.” Marathoners, triathaloners, rock climbers, extreme ironers — I know you’re out there, reading this and scoffing. Or guffawing. Or perhaps chortling.

Regardless of what sort of condescending laugh you’ve chosen, I recognize that four days is decidedly unimpressive to some of you hardcore athletes. Nevertheless, it was such an achievement for me that I felt I deserved some sort of reward. A trophy, maybe? A medal? A subscription to Ellipticizing For Life Magazine (which does not exist)?

You see where I’m going with this. I deserved a reward after a week of hard work, so I SPENT ALL WEEKEND EATING THE MAXIMUM AMOUNT OF CARROT CAKE COOKIES ONE PERSON COULD POSSIBLY INGEST OVER A TWO DAY PERIOD. That is only a slight exaggeration.

I made these for a Saved by the Bell potluck I went to on Friday night (I know, right? I have cool friends). The sultry honey cardamom cream cheese was an oasis of smoooooth between two spicy carrot cake cookies. Those hunky cookies, by the way, boasted toasted pecan, candied ginger, carrot, and a kick of cinnamon. The final product was perfect for rewarding oneself after four arduous days of exercise: a sweet-but-not-too-sweet, sophisticated, portable bit of carrot cake bliss.

Now to spend the next five days working off the weekend! What about you? How do you reward yourself for a job well done? A special food favorite? Some time to relax?

Carrot Cake Sandwich Cookies with Honey Cardamom Cream Cheese


Recipe by: Adapted from In Praise of Leftovers
Yield: 12 sandwich cookies

Cookie Ingredients:
1 1/8 cups all-purpose flour
1 teaspoon cinnamon
1/2 teaspoon baking soda
1/2 teaspoon salt
1 stick (1/2 cup) unsalted butter, softened
1/3 cup plus 2 tablespoons packed light brown sugar
1/3 cup plus 2 tablespoons granulated sugar
1 large egg
1/2 teaspoon vanilla
1 cup coarsely grated carrots (2 medium)
1 scant cup pecans (3 ounces), toasted and chopped
4 tablespoon candied ginger chopped

Filling Ingredients:
8 ounces cream cheese
1/4 cup honey
1.5 teaspoons ground cardamom
Grating of fresh nutmeg

Directions: Preheat oven to 375 degrees F. Line two baking sheets with parchment paper. In a medium bowl, whisk together flour, cinnamon, baking soda, and salt.

In a separate bowl, beat together butter, brown and granulated sugars, egg, and vanilla until pale and fluffy, about 2 minutes. Stir in carrots, nuts, and ginger at low speed. Add the flour mixture and mix until just combined.

Drop about 1.5 tablespoons of batter 2 inches apart on baking sheets and bake until cookies are lightly browned and springy, about 12 to 16 minutes total. Cool cookies on their baking sheets for a few minutes before transferring them to a cooling rack to cool completely.

While cookies are cooling, blend cream cheese, honey, cardamom, and nutmeg together until smooth. Spoon cream onto half the cookies and top with the other half.

If you liked this post, please:
Subscribe to Willow Bird Baking
Follow Willow Bird Baking on Twitter
Follow Willow Bird Baking on Facebook
Give this post a thumbs up on StumbleUpon


ShareOther ways to share this post with friends!

Magic Bars and a Tate’s Bake Shop Giveaway!

I can be kind of a trainwreck sometimes. I don’t mean a lose-my-pencil or knock-over-my-milk trainwreck (although I can be those too). I mean a National Lampoon trainwreck.

Christmastime always reminds me of this fact, mostly because of something that happened a few years ago. My parents had decided to travel to South Korea for the holiday to visit my sister, who was living there at the time. I was sullen about having to spend Christmas alone, and on top of that, I had been appointed petsitter.


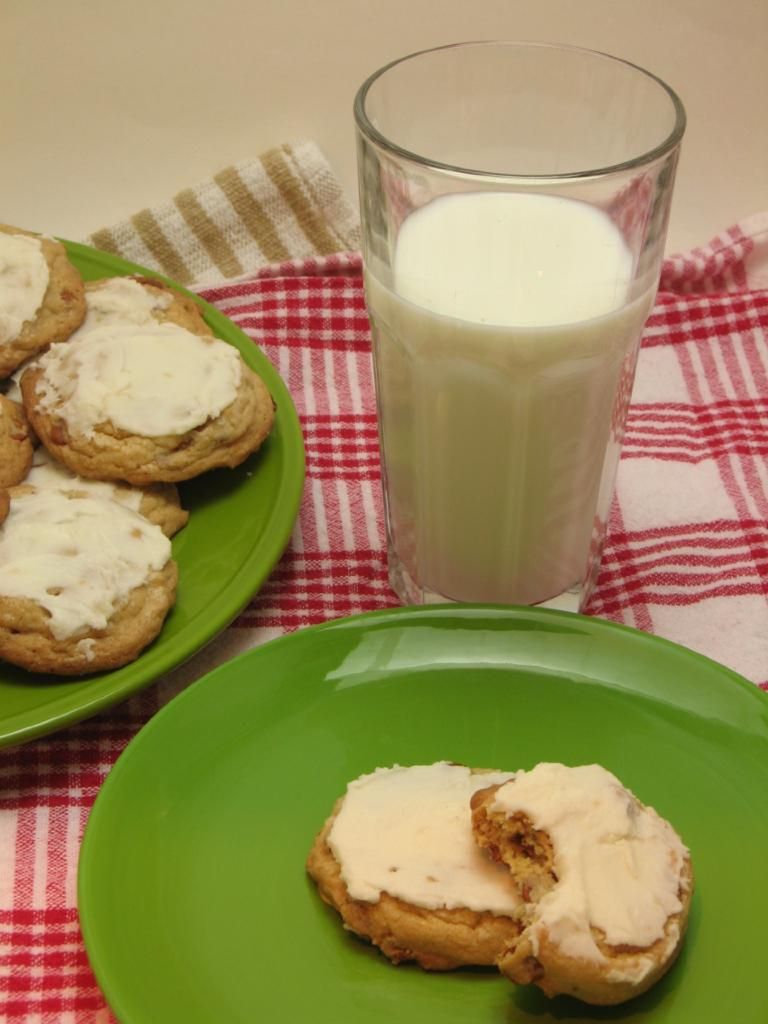
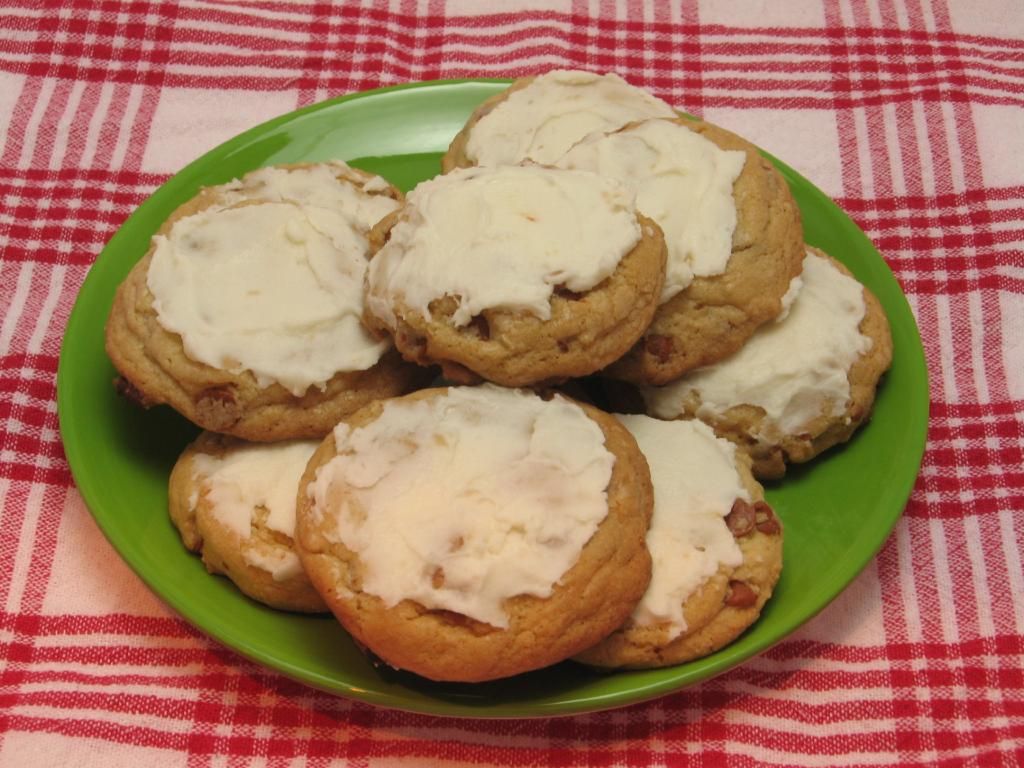
Magical, magical Magic Bars

Everything would have been okay if this position merely entailed taking care of my parents’ toy poodle, Abbey, who — while getting crotchety in her old age — is still a little scoop o’ sweetness. But no. Petsitting meant taking care of the dog, the finch, the very animated Roomba, and THE RABBIT.

THE RABBIT, y’all, who — I KID YOU NOT — eats two freshly made salads per day. I don’t even eat two freshly made salads per day! Or, uh, even one freshly made salad per day.

THE RABBIT, who snuggles and kisses everyone EXCEPT ME, because he hates my guts.

THE RABBIT, who attacks me whenever I’m within range.

THE RABBIT, who was THIS CLOSE to being turned into a stew and not making it out of the experience alive.


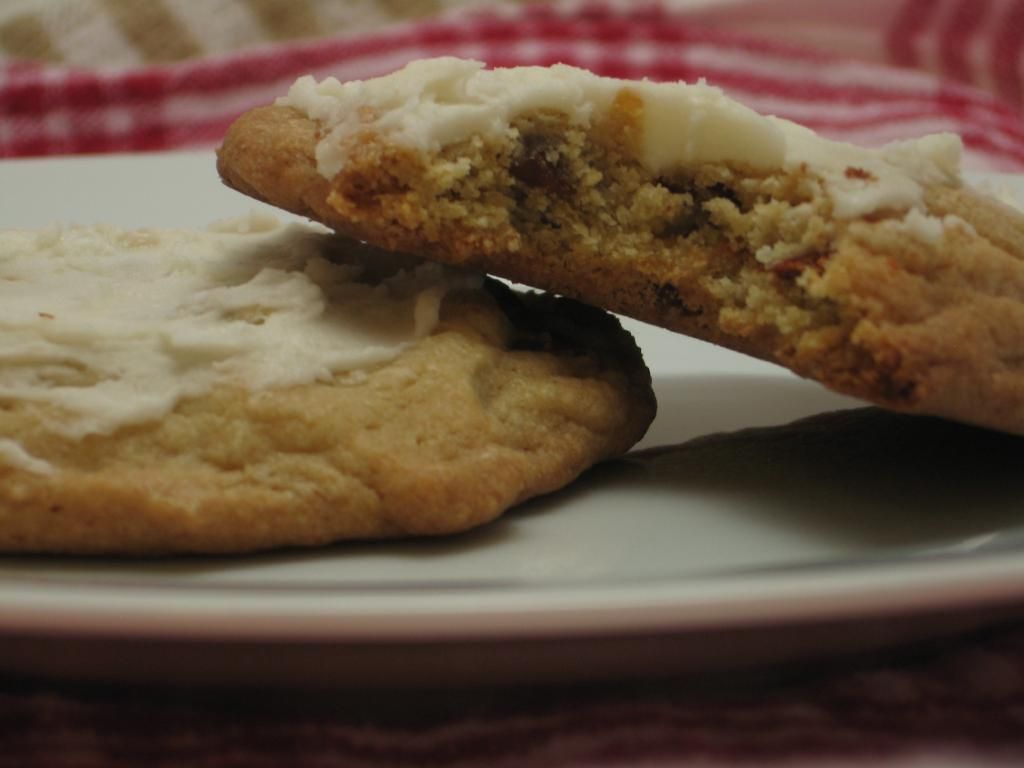
Don’t worry — no rabbit in the Magic Bars.

It was clear from the very beginning that this was going to be an interesting week, but I had no idea what kind of shenanigans were in store for me. I thought the worst of my troubles was THE RABBIT. Not even close. Because:

1. In the middle of one of my first nights at my parents’ house, I woke up to a waterfall raining down from the living room ceiling. There was apparently a leak in an upstairs bathroom. Over the next few days, what started as a tiny crack in the downstairs ceiling became a gaping hole.

2. The Roomba stopped working after a few days. It already required daily maintenance to manually clean out the gobs of bunny hair it had to consume, but halfway through the week, it gave up the ghost. I barely fiddled with it before giving up, which meant being buried in bunny fluff the rest of the week. It was EVERYWHERE. Covering every article of clothing, stuck in my eyelashes, garnishing every bite of food.

3. Abbey decided to start spontaneously bleeding from her head midweek, staining the couch and sheets. Still no idea what happened there.

4. Speaking of Abbey, she and Byrd (my toy poodle) were mortal enemies all week long. Byrd likes to pester Abbey. Abbey wishes Byrd would fall into a hole and get swallowed by the earth. This makes for interesting interactions, including what I like to call “the great potty war,” during which each dog was determined to out-pee the other.

5. That $#@*% RABBIT attacked me and almost broke my hand as I was cleaning up his gross cage. Apparently he’s territorial about his hay. Noted.

6. The bird died. IT JUST UP AND DIED. I promise I fed it, watered it, milleted it, cooed at it, kept the temperature steady. Mom later assured me that it was an old bird. At this point I kind of felt like telling her that she was an old bird. Just kidding, Mom. Love you!

7. The day had finally arrived when I was supposed to pick my parents up from the airport after school. Everything was going to be okay! I was on my way to work, gleeful at the prospect of leaving the demolished ceiling, bleeding dog, dead bird, and vicious Monty Pythonesque bunny behind — when I totaled my car. TOTALED. Some dude pulled out in front of me leaving me no room to stop, and bang! Cue the airbags, the traffic jam, the police report, etc.

All of this occurred without a reliable way of contacting my parents since they were, you know, across the globe and all. I picked them up from the airport that night in Mike’s car, and I’ll bet you can imagine how well that went: “Hi guys. Your ceiling’s destroyed, your bird is dead, your house is one giant furball, your dog may or may not still be bleeding, and I just totaled my car. How was your trip?”

Anyway, I can be a trainwreck of epic proportions. That’s why when I received a copy of Tate’s Bake Shop Cookbook to review a few weeks ago and promptly failed at the first recipe I made from it, I knew I needed to give it another go.

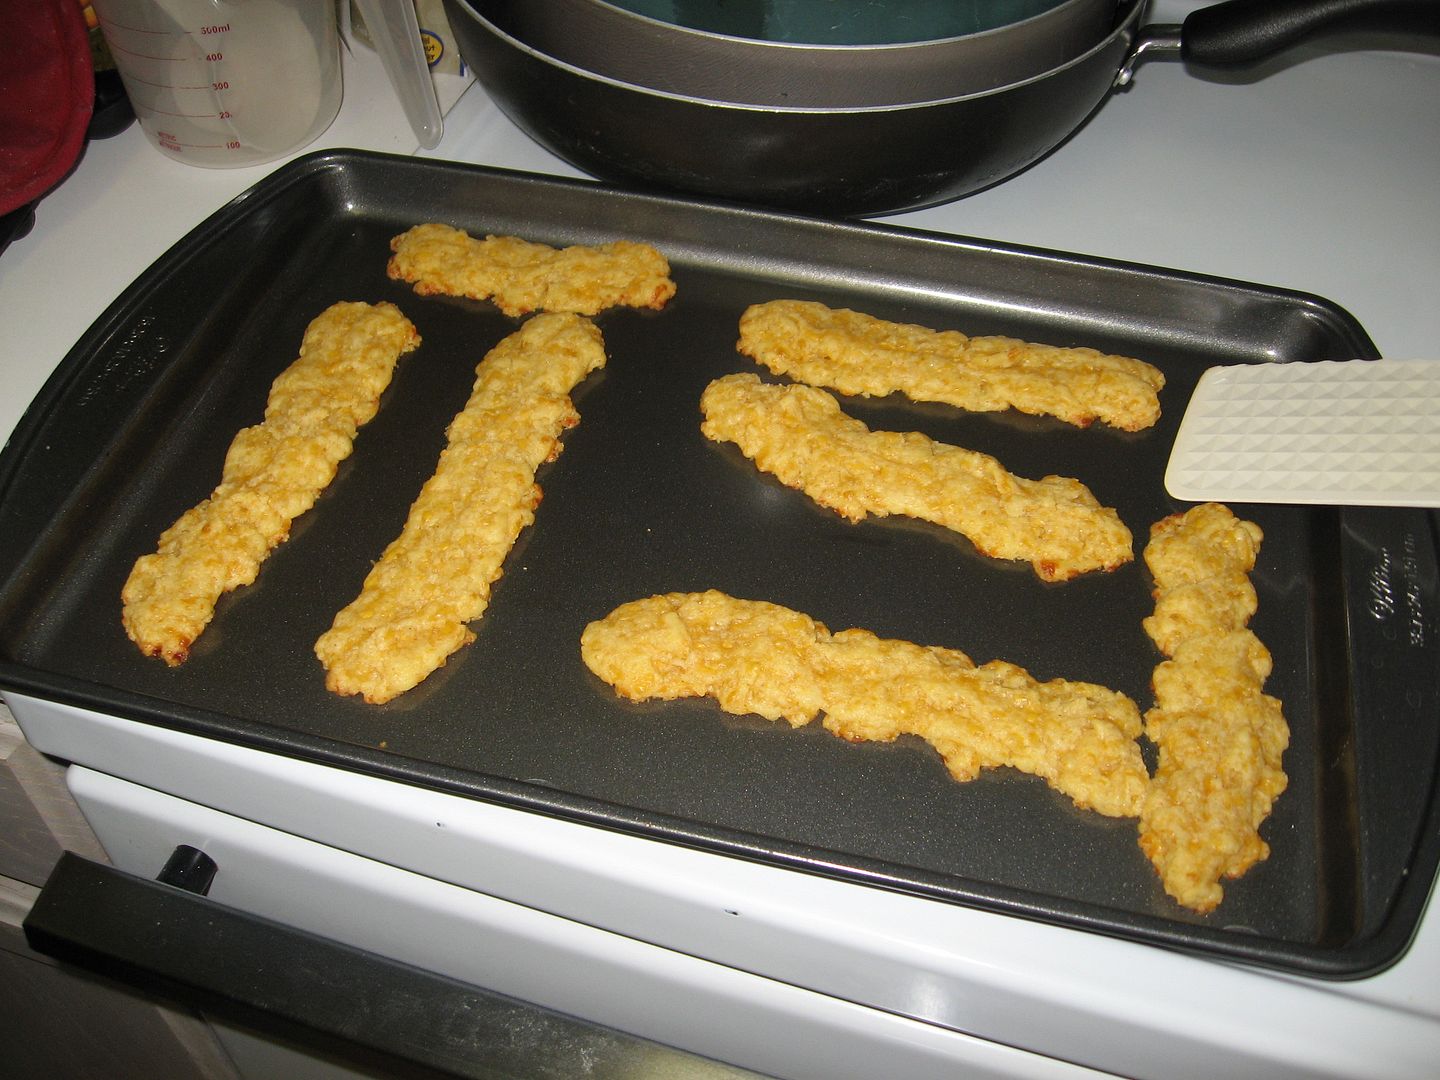
My first try was the Lemon Wafers. They’re described as “cake like,” but mine were thin, crisp, and burnt around the edges. They still tasted amazing (I may or may not have eaten half a batch by myself), but they were quite the ugly ducklings. With no photographs of some of the recipes, it was hard to decide how they were supposed to look; nevertheless, I’m pretty sure they weren’t supposed to look like that.

I’m so glad I tried again, because the next recipe was a winner. Magic Bars consist of pecans, bittersweet chocolate, and coconut bound by sweetened condensed milk on a graham cracker crust. They were so simple and quick to make, but were definitely magical! I took them to a crafting party (I feel so hip to have gone to a crafting party – did you see how deftly I slid that tidbit into this post? Am I ruining it now? Oh.) and they were a huge hit.

Pocket Review


Book Stats: 156 pages, $25.99 list price (~$18 on Amazon), indexed.
Accessibility: Perfect for a beginning baker!
Examples of Recipes: Mocha Pecan Muffins, Ginger Scones, Zvi’s Cinnamon Swirl Bread, Double Chocolate Almond Cookies, Peanut Butter Squares, Apple Cream Cheese Tart, Hummingbird Cake, Raspberry Charlotte, etc.
Overall Impression: I love the simplicity and accessibility of the recipes, but I would’ve preferred more photos — particularly to see how things were supposed to turn out.
Overall Rating: 3.5 out of 5 stars

Kathleen King, the author of the cookbook and owner of Tate’s Bake Shop in the Hamptons, has received recognition from Ina Garten, Everyday with Rachael Ray, The Gourmet Retailer, and The Boston Globe for her simple handmade treats. The cookbook is filled with easy, accessible recipes perfect for whipping up at a moment’s notice. In addition, the lovely folks at Tate’s sent me some buttery, thin and crisp cookies to sample. I loved them, and can’t wait to make some of the famous chocolate chip cookies to share with family.

Would you like to try some Tate’s Bake Shop goodies? One Willow Bird Baking reader will win a gift-pack of cookies including oatmeal raisin, white chocolate macadamia nut, and chocolate chip, as well as a copy of the Tate’s Bake Shop Cookbook. To enter, leave a comment on this post answering the question, “What’s your favorite cookie?” To receive up to three extra entries:

1. Become a fan of Tate’s Bake Shop on Facebook and leave a separate comment telling me you did so (or if you’re already a fan, just say so in your comment!)
2. Become a fan of Willow Bird Baking on Facebook and leave a separate comment telling me you did so (or if you’re already a fan, just say so in your comment!)
3. Tweet about the giveaway using this message: “Just entered to win a Tate’s Bake Shop gift pack and cookbook at Willow Bird Baking! Enter here: http://bit.ly/eFtQi6 @julieruble” and leave a separate comment telling me you did so.

This contest will run through December 28, 2010 at noon EST, but even if you don’t win, you can still enjoy some cookies! Tate’s Bake Shop is offering a 15% discount for Willow Bird Baking readers on tatesbakeshop.com from now until December 31. Just use the code “cookie” at checkout. Enjoy!

Magic Bars


Recipe by: Kathleen King of Tate’s Bake Shop
Yield: 24 bars

Ingredients:
1/2 cup salted butter
1 1/2 cups graham cracker crumbs
1 1/3 cups dessicated shaved coconut (unsweetened)
1 1/2 cups bittersweet chocolate chunks (I use Ghirardelli)
1 1/4 cups pecans, chopped
1 can (14 ounces) sweetened condensed milk

Directions:
Preheat the oven to 350 degrees F. In a 9 x 13 inch pan, mix the melted butter and graham cracker crumbs. Press the mixture evenly to cover the bottom of the pan. Sprinkle the coconut over the crumb base. Sprinkle the chocolate chunks over the coconut. Sprinkle the pecans over the chocolate chunks. Drizzle sweetened condensed milk evenly over the top. Bake it for 25 minutes. Cool it completely and cut it into bars. I like these magic bars served cold.

If you liked this post, please:
Subscribe to Willow Bird Baking
Follow Willow Bird Baking on Twitter
Follow Willow Bird Baking on Facebook
Give this post a thumbs up on StumbleUpon


ShareOther ways to share this post with friends!

Lemon Madeleines with Mango and Raspberry Curd — and a chance to win a mixer!

What does summer taste like?

I know what summer looks like. It looks like trees weighed down with heavy cascades of leaves, thunderheads gathering solemnly in evening heat, steam rising off pavement. Summer sounds like the persistent hum of cicadas, wind rushing through the woods behind my apartment. Summer smells like jasmine, gardenias, and bushels and bushels of honeysuckle. Summer feels like bearing the burden of the sun, carrying its winter secrets on new summer skin . . .

But what does summer taste like? I think it must taste like mango curd, tropical and cool and sweet on your tongue. And of course, it tastes like lemon: fresh and bright. Don’t forget ripe, lush berries, and oh, maybe some freshly whipped cream piled high on top.

The folks at beso.com want to know what you think summer tastes like, and it’s worth a KitchenAid mixer to them! They’re currently holding a Baking Up Summer Sweets contest in which you can tell them about your favorite summer recipe for a chance to win.

Given my own summer tastes, I’m entering beso.com’s contest with a recipe that’s mangoy, lemony, berry-y, creamy . . . full of summer goodness. And since I recently won a mini-madeleine pan from Shortbread NYC, of course it had to involve madeleines! Hence, lemon madeleines with mango and raspberry curd were born.

These lemony bites are the perfect summer treat. I served them with fresh, sliced strawberries. They were light, bright, and so tiny — perfect for sitting on a warm patio in the evening and nibbling one-by-one. Also, I don’t know about you, but I’m a dipper. I love dipping sauces and creams. Dipping each of these golden hunks into various curds and cream was not only delicious, but a fun experience too! Just a note about the texture of the madeleines, though: these were a bit cakey and only had a slight outer shell just after baking, which may displease die-hard madeleine lovers. I’m not sure if it was my silicone pan or the recipe. Nevertheless, I enjoyed the texture.

Speaking of KitchenAid mixers, you will never believe what I got for my birthday. My family all chipped in and bought me the most gorgeous silver professional KitchenAid stand mixer in the world! Bowl-lift, 5 quart bowl, and it came complete with a complimentary KitchenAid timer, four prep bowls, and a free attachment. To say I was shocked would be an understatement. Summer in this house is gonna sound like a whole lotta mixin’ this year! So what would I do with that pretty mixer beso.com is giving away, were I to win? My mama’s mixer is looking a little beat up, so I’m thinking it would be a good belated Mothers’ Day gift. Here’s hoping!

Mix up your own summer treat and enter to win, but don’t forget to mix up some of these madeleines as well! Make mango curd, raspberry curd, or both! You’ll love every summery bite.

Lemon Madeleines with Mango and Raspberry Curd


Recipe by: adapted from Joy of Baking (madeleines), Smitten Kitchen (mango curd), and notes from my food diary(raspberry curd)
Yields: about 80-90 bite-sized mini madeleines, maybe 25 regular size

Madeleine Ingredients:
1/2 cup (113 grams) unsalted butter, melted
1 cup (130 grams) all-purpose flour
1/2 teaspoon baking powder
1/8 teaspoon salt
3 large eggs, at room temperature
2/3 cup (133 grams) granulated white sugar
1/2 teaspoon pure vanilla extract
1/2 teaspoon lemon extract

Mango Curd Ingredients:
1 15-ounce ripe mango, peeled, pitted, cut into 1/2-inch pieces
1/3 – 1/2 cup sugar (depending on your preference for tart vs. sweet)
3 tablespoons fresh lime or lemon juice (lime comes out tangier)
Pinch of salt
4 large egg yolks
1/4 cup (1/2 stick) unsalted butter, cut into small pieces

Raspberry Curd Ingredients:
1/2 cup (1 stick) unsalted butter
Two 1/2-pints ripe raspberries or one 12-ounce package frozen raspberries, thawed
5 large egg yolks, lightly beaten
3/4 cup sugar
Pinch of salt
2 to 3 teaspoons fresh lemon juice

Whipped Cream Ingredients:
2 cups heavy whipping cream
3 tablespoons confectioners’ sugar

Directions:
Make madeleine batter: First, melt the butter and allow it to cool while you make the batter. In a small bowl place the flour, baking powder and salt and whisk until well blended.

In the bowl of your electric mixer, beat the eggs and sugar at medium-high speed until the mixture has tripled in volume and forms a thick ribbon when the beaters are lifted (about 5 minutes).  Add the vanilla and lemon extracts and beat to combine.

Sift a small amount of flour over the egg mixture and, using a large rubber spatula, fold the flour mixture into the beaten eggs to lighten it.  Sift the rest of the flour over the egg mixture and fold in being sure not to overmix or the batter will deflate. 

Whisk a small amount of the egg mixture into the melted butter to lighten it.  Then fold in the cooled melted butter in three additions.  Cover and refrigerate for at least 30 minutes, or several hours, until slightly firm.

While batter is refrigerating, make mango curd: Puree mango, sugar, lime/lemon juice and salt in processor, scraping down sides of work bowl occasionally. Add yolks; puree 15 seconds longer. Strain through sieve set over large metal bowl, pressing on solids with back of spatula to release as much puree as possible. Discard solids in sieve.

Set metal bowl over saucepan of simmering water (do not allow bottom of bowl to touch water); whisk puree until thickened and thermometer registers 170°F., about 10 minutes. Remove from over water. Whisk in butter 1 piece at a time. Cover with plastic wrap (directly on the curd to prevent a skin from forming) and refrigerate for several hours. Note: Freeze excess for up to two months.

Make raspberry curd: Melt the butter in a large saucepan over medium heat. Add the raspberries, egg yolks, sugar, and salt and cook, mashing the berries and stirring frequently at first and them constantly at the end, until thickened, about 10 minutes (this took longer for me — about 15+).

Pour the mixture through a coarse strainer set over a bowl, pressing hard on the solids to extract as much liquid as possible. Cool to room temperature; the curd will continue to thicken as it cools. Stir in lemon juice to taste. Refrigerate. Note: freeze excess for up to 1 month.

To bake madeleines, position a rack in the center of the oven and preheat to 375 degrees F (190 degrees C).  Generously butter two 12-mold madeleine pans.  Dust the molds with flour and tap out the excess.  Alternatively, use Bakers Joy to coat pans. (Make sure the pans are well greased or the madeleines will stick and be hard to remove.)

Drop a generous tablespoonful of the batter into the center of each prepared mold, leaving the batter mounded in the center.  (This will result in the classic “humped” appearance of the madeleines.)

Bake the madeleines for 11 to 13 minutes, until the edges are golden brown and the centers spring back when lightly touched.  Note: If you make miniature madeleines, reduce the baking time to about 7-9 minutes. Do not overbake these cookies or they will be dry.

Remove the pans from the oven and rap each pan sharply against a countertop to release the madeleines.  Transfer the madeleines, smooth sides down, to wire racks to cool.  While they cool, make whipped cream by mixing cream and sugar together until they reach loose whipped cream consistency. Serve madeleines with curds and cream the same day for best taste, or store them in an airtight container at room temperature for 2 to 3 days or frozen, well wrapped, for up to 1 month.


Enjoy!

P.S. – Wondering about that refreshing-looking pitcher of sparkling strawberry lemonade? That summer recipe is coming up soon!

P.S. 2 – My roommate texted me today from her visit to her home state of New York. It snowed there today. Yikes! Buffalo, summer is coming soon, just hang on!


Share Share this post with friends!

Cinnamon Roll Cookies

My lovely friend Jennifer and I had a date this past Saturday to do some holiday baking. It was a much-needed fun adventure in the midst of the whirlwind holiday season. Do you all feel a bit like a hamster in a wheel, or is it just me? This is the time of year replete with Christmas parties, family gatherings, and various other occasions that call for packing freshly baked goodies into a satchel and carting them all over town. Festive, but exhausting!

I was therefore glad to do some “relaxing baking” with Jennifer. We set out to make cheese straws first, followed by a batch of Cinnamon Roll Cookies. We were sure we’d knock the cheese straws out quicker than a cat knockin’ ornaments outta the Christmas tree. But . . . well, it turns out that, “This recipe looks easy!” are famous last words.


A moment we weren’t sure would ever happen:
pulling the cheese straws out of the oven!

One smoking, dead mixer motor; one spontaneous shopping trip; and one battery-acid-filled cookie press later, we were bemoaning our smug pronouncement. Okay, okay, cheese straws can get a little complicated! They were at least delicious for all the trouble — they were cheesy, dense, and came out of the oven smelling just like macaroni and cheese. I devoured my portion in two days flat. So much for sharing! (Well, Mike did get a few. And somehow escaped with his fingers.)

You can understand why, after being bested by a recipe that only had 5 ingredients, I approached the Cinnamon Roll Cookies with some trepidation. Thankfully, the sweet little cookies we made next are as simple can be. Originally called Iced Cinnamon Chip Cookies, these chewy treats have such a buttery cinnamon flavor and such a lovely white swish of glaze that I couldn’t help changing their name a bit. They remind me of the warm pan of cinnamon rolls my mom makes on Christmas morning, so I’ve dubbed them Cinnamon Roll Cookies.

The warmth of the cinnamon with the sweet edge of icing was the perfect Christmassy treat, particularly since whipping up a batch was so easy. If you’re about to run your little hamster wheel right off its fulcrum, I hope you’ll give this relaxing and rewarding recipe a try.

Cinnamon Roll Cookies


Recipe by: Taste of Home
Yields: about 39 cookies

Cookie Ingredients:
1 cup butter, softened
3/4 cup sugar
3/4 cup packed brown sugar
2 eggs
1 teaspoon vanilla extract
3 cups all-purpose flour
1 teaspoon baking soda
1 teaspoon salt
1 package (10 ounces) cinnamon baking chips

Icing Ingredients:
1/4 cup butter, melted
1/4 cup shortening
1 1/4 cups confectioners’ sugar
1 tablespoon milk
3/4 teaspoon vanilla extract

Directions:
In a large bowl, cream butter and sugars until light and fluffy. Beat in eggs and vanilla. Combine the flour, baking soda and salt; gradually add to creamed mixture and mix well. Fold in cinnamon chips.

Drop by rounded tablespoonfuls 2 in. apart onto ungreased baking sheets. Bake at 350° for 10-12 minutes or until golden brown. Remove to wire racks to cool.

In a small bowl, combine icing ingredients; beat on high speed for 1-2 minutes or until fluffy. Spread over cooled cookies.


The impossibly thick cheese straw batter (with the now departed mixer in the background!), followed by Jennifer piping the finished mixture out to bake.


Cookies just getting started, and then in the oven.


Cookies cooling and then all frosted.


Enjoy!


Share Share this post with friends!

Un Petit Trésor: Les Macarons

The time has come. What a lovely night: I’m sitting in my little white desk chair, burning my raspberry scented candle, and weaving together a story I’ve been itching to tell you for ages. Why haven’t I told it sooner? It’s about an endeavor that until this month, I simply haven’t had the nerve to attempt. In keeping with their character and mission, however, the Daring Bakers have once again pushed me out of my comfortable nest. For weeks now I’ve been flapping my wings in a frenzy, uncertain as to whether I’d fly through this challenge like a graceful (albeit nonexistent) Willow Bird, or fall to my (melodramatic) doom. Well, here I am telling you the story I’ve longed to tell you, so it must be good news, right? Let me tell you a tale of magnificence, of magic, of madness, of . . . feet?

Of feet.

Don’t be grossed out, podophobics — these aren’t the sort of feet with heels, arches, and toes. These are the sort of feet that bakers across the world have been dreaming of long before this month’s challenge rolled around. You’ve probably guessed by now that I’m referring to the sweet little feet on a lovely French macaron.

The 2009 October Daring Bakers’ challenge was brought to us by Ami S. She chose macarons from Claudia Fleming’s The Last Course: The Desserts of Gramercy Tavern as the challenge recipe.

Macarons are unique, delicate sandwich cookies with a crisp shell, soft innards, and a variety of different fillings. They’ve been called “the new cupcakes” because of their petite portion sizes, their diverse flavorings, and their meteoric increase in popularity in recent years. While I don’t think they’ll be replacing cupcakes anytime soon, macarons are infinitely versatile. The shells can be flavored with cocoa, powdered fruits, and teas; colored with bright powdered food coloring; and filled with any one of myriad ganaches, frostings, creams, nut butters, or jams.

The recipe for macarons is deceptively short and (forgive my beloved puns) sweet. The plethora of nit-picky addendums to said recipe, however, expose the truth: macarons are difficult to perfect. They’re finicky about ingredient ratios, oven temperatures, folding intensity and duration, your kitchen decor . . . you get the idea. I was nervous but determined as I set my first batch of egg whites out on the counter to age. To be honest, the aforementioned nit-picky how-tos probably added to my anxiety more than they aided my technique. My obsessive compulsive nature was on overdrive trying to compile the 847,948 macaron tips I had read, some of which conflicted and some of which were insanely detailed. I wouldn’t have been at all surprised to find someone prescribing optimal wrist angles for folding batter or proper macaron-making hairstyles.

At some point, you have to stop reading the mountain of macaron manuals and just jump on in. In that spirit, I picked up some cardamom in the bulk spice section of my local grocer and set to work on Cardamom Pumpkin Macarons.

Macaron recipes all typically follow a basic pattern: beat egg whites and sugar to a stiff meringue, process almonds and powdered sugar together until fine, sift to remove lumps, fold dry ingredients into wet ingredients to form the macaronage, pipe out into circles, and bake. I added the cardamom into my macaron shells and whipped up Tartelette’s Pumpkin Cream Cheese Filling to sandwich between them. I sprinkled some roasted, salted pumpkin seeds in the center of some of these macarons for good measure.

When I knelt to peer into my oven window and saw feet on my macarons, I grabbed my phone and my camera. The former was to call Mike and share my elation, while the latter provided a video memento of my victorious achievement. I love knowing that so many fellow bakers (daring or otherwise) have felt the joy of this very moment while sitting in front of their own ovens.

Despite my elation, my first batch of macarons certainly wasn’t perfect. They were delicious, but the shells were a bit flat. After reflecting and reading, I decided the flatness of the shells was probably due to overfolding my macaronage, and that the Daring Bakers recipe was a risk, seeing as it used a different ratio of ingredients than the accomplished Tartelette. Thus I made the following changes: I would count my strokes as I folded in my dry ingredients, ensuring that they were under 50, and I would use Tartelette’s recipe.

Batch #2 was comprised of plain macaron shells with two fillings: Cream Cheese Buttercream with Strawberry Jam, or David Lebovitz’s Chocolate Filling. And finally, using only 45 folding strokes, egg whites aged for 48 hours, and Tartelette’s careful ratio, I achieved a magnificent macaron!

While both fillings were good, we strongly preferred the chocolate filling to the somewhat overly tangy cream cheese buttercream. Y’all know I love cream cheese, but the taste of this recipe struck me as a bit odd (maybe I did something wrong). I do love the idea of cold, fruity jam on top of cream, but next time I’ll use a regular vanilla buttercream.

These gorgeous bites would be perfect with tea or coffee (I have to admit, though, I’m not a coffee drinker. In fact, that’s Coke Zero in the mug up there — go ahead and laugh). Because of their flexible flavoring, macarons are also ideal for any time of day. Eat a light jam macaron on the patio for breakfast, a buttercream macaron for a late morning brunch, or a ganache-filled macaron for a decadent dessert. Don’t be discouraged if your first try doesn’t yield perfection; the eventual success and satisfaction is worth the wait!

Cardamom Pumpkin Macarons


Recipe By:

-Claudia Fleming’s The Last Course: The Desserts of Gramercy Tavern (adapted by me)
Tartelette (pumpkin cream cheese filling)

Yields: around 2 dozen macarons (48 shells)


Macaron Ingredients:
2 ¼ cups (225 g, 8 oz.) icing sugar
2 cups (190 g, 6.7 oz.) almond flour
2 tablespoons (25 g , .88 oz.) granulated sugar
1/2 heaping teaspoon ground cardamom
5 (Have at room temperature) egg whites, at room temperature (I followed the popular recommendation and aged my egg whites for 24-48 hours on a counter top, covered with a paper towel)


Pumpkin Cream Cheese Ingredients:
2 oz (60gr) cream cheese, at room temperature
2 oz (60gr) freshly cooked or canned pumpkin
1/8 tsp ground cloves


Directions:
1. Preheat the oven to 200°F (93°C). Combine the icing sugar and almond flour in a medium bowl. If grinding your own nuts, combine nuts and a cup of confectioners’ sugar in the bowl of a food processor and grind until nuts are very fine and powdery.
2. Beat the egg whites in the clean dry bowl of a stand mixer until they hold soft peaks. Slowly add the granulated sugar and beat until the mixture holds stiff peaks.
3. Sift half of the almond flour mixture into the meringue and fold to combine. Fold quickly at first and then gently. Add cardamom to your batter. Sift in the remaining almond flour and continue to fold, but be gentle! Don’t overfold, but fully incorporate your ingredients. Note: Count your strokes and try to stay under 50. The macaronnage should “flow like magma,” whatever that means, when it’s ready.)
4. Spoon the mixture into a pastry bag fitted with a plain half-inch tip (Ateco #806). You can also use a Ziploc bag with a corner cut off. It’s easiest to fill your bag if you stand it up in a tall glass and fold the top down before spooning in the batter.
5. Pipe one-inch-sized (2.5 cm) mounds of batter onto baking sheets (double up on baking sheets if they aren’t professional grade) lined with nonstick liners (or parchment paper). Note: I piped mine too close together. Be careful.
6. Bake the macaroon for 5 minutes. Remove the pan from the oven and raise the temperature to 375°F (190°C). Once the oven is up to temperature, put the pans back in the oven and bake for an additional 7 to 8 minutes, or lightly colored. Note: Don’t get so excited about their feet that you yank them out too soon; if you do, the feet will collapse into a sad ruffle. Don’t ask me how I know this.
7. Cool on a rack before filling.

For filling: In a medium bowl, mix the cream cheese, pumpkin and cloves until completely incorporated. Fill a pastry bag with this mixture and pipe onto half the shells and top with another shell.

Note: If I had this to do over again, I’d use Tartelette’s recipe (below) with cardamom added for the macarons.

Plain Macarons with Two Fillings: Cream Cheese Buttercream with Strawberry Jam and Chocolate Ganache


Recipe By:

Tartelette (macarons, cream cheese buttercream, adapted by me)
David Lebovitz (chocolate filling)

Yields: around 15-17 macarons (30-34 shells)


Macaron Ingredients:
3 egg whites (about 90 gr)
30 gr granulated sugar
200 gr powdered sugar
110 gr almonds


Cream Cheese Buttercream Filling Ingredients: Note: I would have preferred regular buttercream. This filling had an odd flavor.
1 1/2 sticks (170 gr) butter at room temperature
4 oz (120gr) cream cheese, softened
3 egg whites
1/2 cup (100gr) sugar
2 Tb water
1 tsp vanilla extract or 1/2 vanilla bean split open and seeded.
Strawberry jam (or flavor of your choice)


Chocolate Filling Ingredients:
½ cup (125 ml) heavy cream
2 teaspoons light corn syrup
4 ounces (120 gr) bittersweet or semisweet chocolate, finely chopped
1 tablespoon (15 gr) butter, cut into small pieces


Directions:
For the whites: the day before (24hrs), separate your eggs and store the whites at room temperature in a covered container. If you want to use 48hrs (or more) egg whites, you can store them in the fridge. In a stand mixer fitted with the whisk attachment, whip the egg whites to a foam, gradually add the sugar until you obtain a glossy meringue. Do not overbeat your meringue or it will be too dry and your macarons won’t work. Combine the almonds and powdered sugar in a food processor and give them a good pulse until the nuts are finely ground. Pass through a sieve. Add them to the meringue,with the coloring and give it a quick fold to break some of the air and then fold the mass carefully until you obtain a batter that flows like magma or a thick ribbon. Give quick strokes at first to break the mass and slow down. The whole process should not take more than 50 strokes. Test a small amount on a plate: if the tops flattens on its own you are good to go. If there is a small beak, give the batter a couple of turns. Fill a pastry bag fitted with a plain tip (Ateco #807 or #809) with the batter and pipe small rounds (1.5 inches in diameter) onto parchment paper lined baking sheets (double up on baking sheets if they aren’t professional grade). Preheat the oven to 300F. Let the macarons sit out for 30 minutes to an hour to harden their shells a bit and bake for 8-10 minutes, depending on their size. Note: Don’t get so excited about their feet that you yank them out too soon; if you do, the feet will collapse into a sad ruffle. Don’t ask me how I know this. Let cool. If you have trouble removing the shells, pour a couple of drops of water under the parchment paper while the sheet is still a bit warm and the macarons will lift up more easily do to the moisture. Don’t let them sit there in it too long or they will become soggy. Once baked and if you are not using them right away, store them in an airtight container out of the fridge for a couple of days or in the freezer.

For strawberry cream cheese filling: In the bowl of stand mixer, whip the egg whites until they have soft peaks. In the meantime, combine 2 Tb water with the sugar to a boil in a heavy saucepan and bring the syrup to 250F. Slowly add the sugar syrup to the egg whites. If you use hand beaters, this is even easier and there is less hot syrup splatter on the side of your bowl and in the whisk attachment of the stand mixer. Continue to whip until the meringue is completely cooled. Slowly add the butter, one tablespoon at a time. The mass might curdle but no panic, continue to whip until it all comes together. Add the cream cheese, the same way, a little at a time until everything is smooth. Whisk in the vanilla extract, or paste or bean. Keep it to spreadable consistency for the macarons and refrigerate the leftover for cupcakes or mini toast in the fridge up to 3 days or in the freezer.

To assemble macarons, pipe cream cheese buttercream onto one side topped with a dollop of jam. Sandwich the other shell on top. Refrigerate to set.

For chocolate filling: Heat the cream in a small saucepan with the corn syrup. When the cream just begins to boil at the edges, remove from heat and add the chopped chocolate. Let sit one minute, then stir until smooth. Stir in the pieces of butter. Let cool completely before using. When cool, I whipped the chocolate with a handmixer to achieve a good spreading consistency. I then piped a large dollop in the middle of shells and sandwiched other shells on top. Refrigerate.


Piping batter onto a macaron template and then the cookies fresh out of the oven (and a little wonky).


Blurry proof of feet for batches 1 and 2!


I hope you enjoyed this post! Don’t forget to cruise the Daring Bakers blogroll to see all of the creative French macarons.


Share Share this post with friends!

1 7 8 9 10