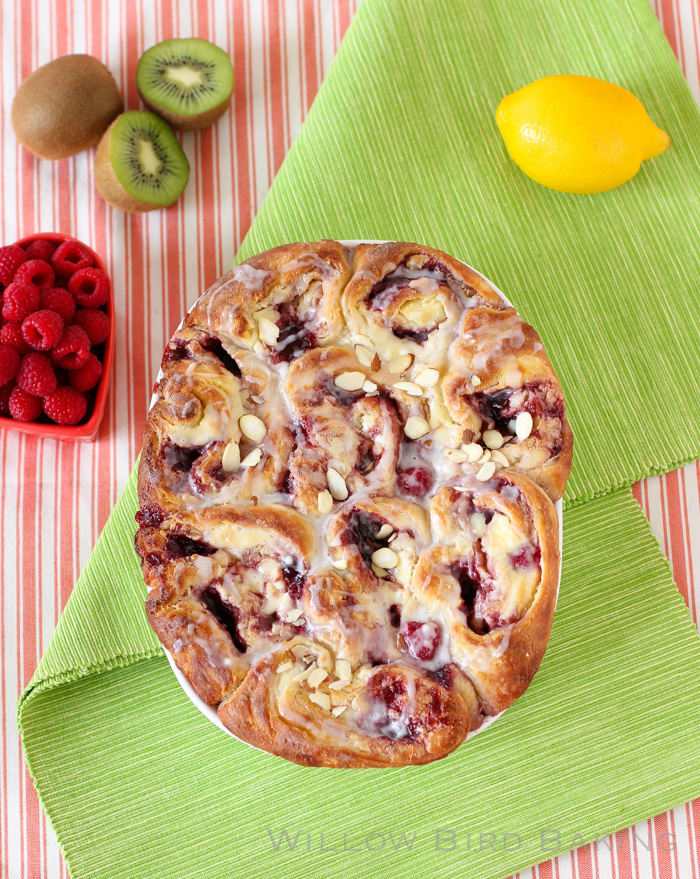
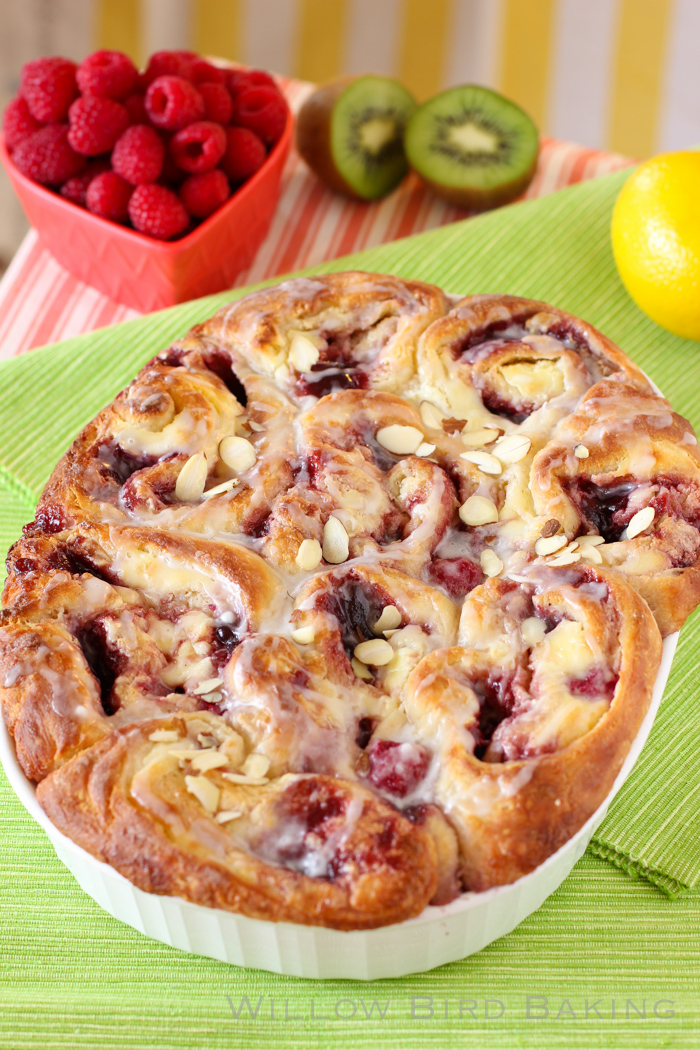
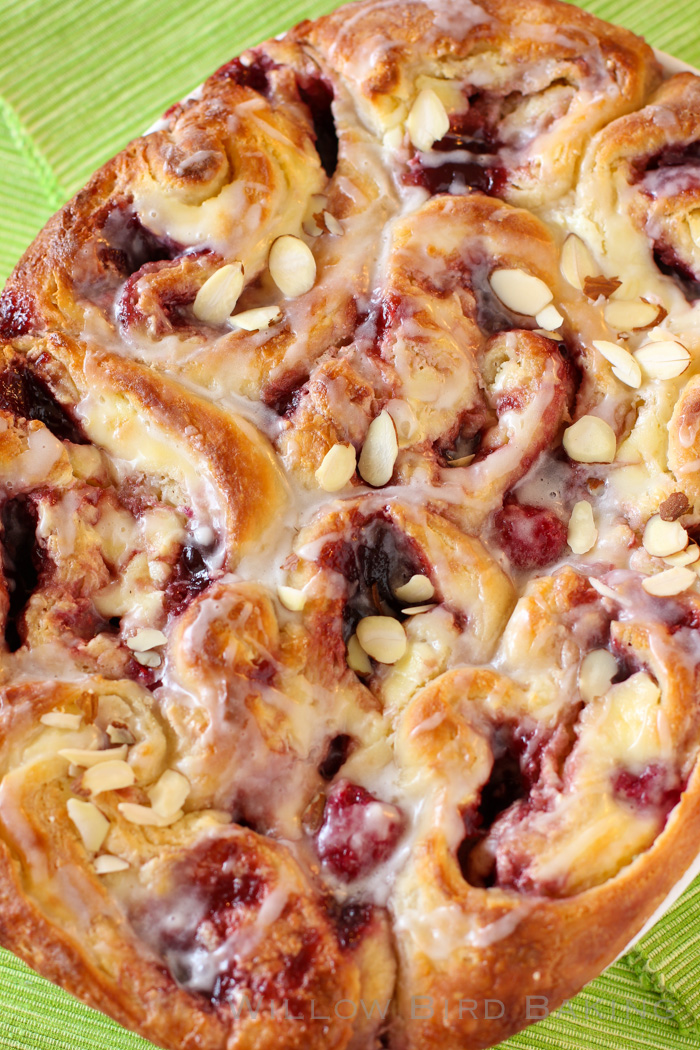
Raspberry Cheesecake Morning Buns
I WENT INTO TARGET FOR ONE THING.
See, Target has a new line of products, Simply Balanced, and I was excited to pick one or two items from it to try. The line is designed to “take the guesswork out of eating well” by including only foods that meet these basic nutritional requirements: low sodium and fat, zero trans fat, no hydrogenated oils or high fructose corn syrup, and no synthetic colors, artificial preservatives, flavors or sweeteners.
 It’s way too much trouble for me to manage all of these criteria on my own during my busy workweek, so I usually just end up chuggin’ down the aspartame and red dye 15 or whatever all week long. I pick a few nutritional criteria to manage (calories, carbs, and dairy intake for me) and tune out everything else. So Simply Balanced is a healthier way for me to pick up a quick grocery item: they managed all the considerations that I don’t have time to.
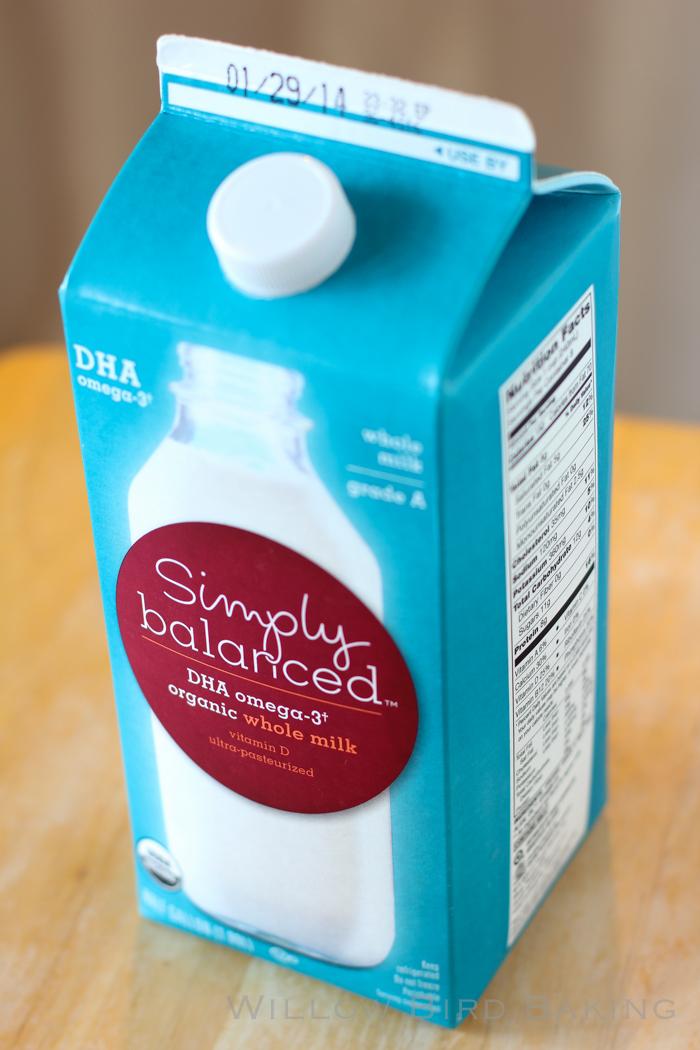
When I first looked at the line a few months ago, they only had a few items, but they’ve since expanded it to dozens of simple, healthy staples. I chose to use their Simply Balanced DHA Omega 3 Organic Whole Milk for this recipe.
Which brings me back to how I went to Target for ONE THING.
You know what happened, right? I saw (insert my husband’s huge eye roll here) A RAMEKIN. You may not understand the significance of this if you aren’t hanging out with us over on Willow Bird Baking’s Facebook page, but let’s just say I have, um, a strong affinity for ramekins. This particular ramekin was a gorgeous red heart. And then I saw a heart plate. And a pink bird mug. And a white mug. And.
Put it this way: I have a lot of new dishes. And from now on, I’m not allowed in Target alone.
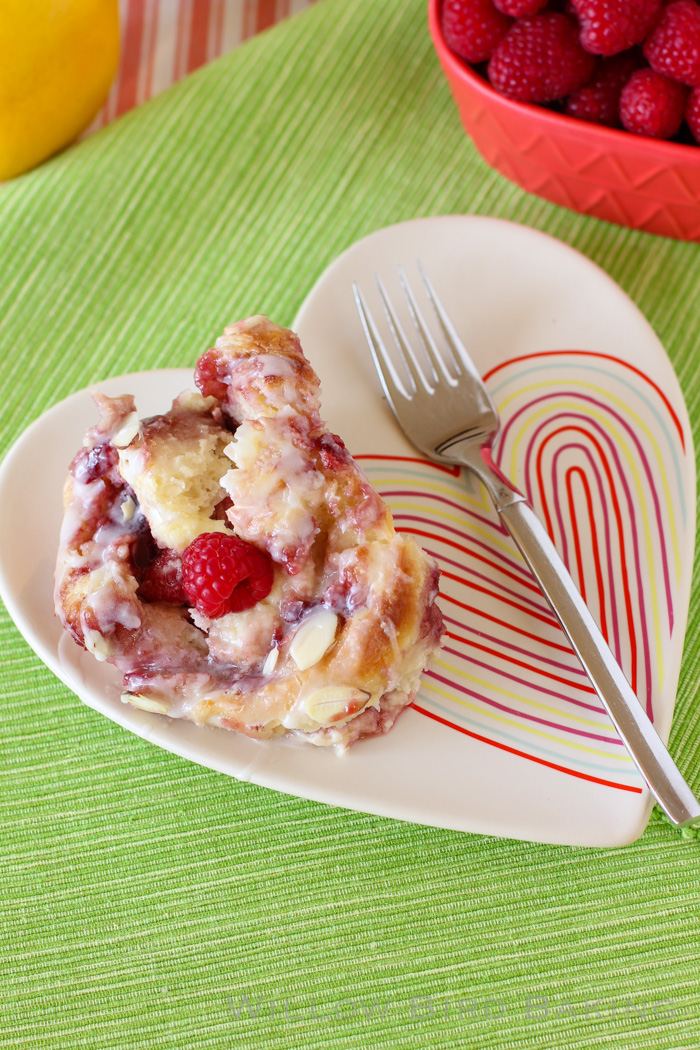
Worth it! I’m so glad I discovered the Simply Balanced line. Granted, I took my healthy new milk and used it to make these decadent, sinful morning buns, but I still love knowing that they’re a touch healthier than they would’ve been otherwise. These buns, by the way, were sort of an accident. I took my amazing Lemon Cheesecake Morning Buns and adapted them per some readers’ suggestions into Raspberry Cheesecake Morning Buns — only I accidentally doubled the cheesecake filling. Oops? And also yay?
They’re springy, fantastic rolls that combine the joy of a delicious yeast roll with fresh raspberries and indulgent cheesecake. Enjoy!
Other amazing “cinnamon roll” recipes:
Lemon Cheesecake Morning Buns
Buttery Coconut & Almond Morning Buns
The Ultimate Sausage Breakfast Buns
Savory Sweet Potato & Chorizo “Cinnamon Rolls”
Buttery Almond Stuffed Morning Buns
One year ago: Spaghetti Squash Baked “Pasta” Boats
Two years ago: Caramelized Banana Upside-Down Coconut Cake & Coconut Whipped Cream
Three years ago: Two Exquisite Tea Sandwiches
Four years ago: Pecan Maple Bacon Pancakes
Raspberry Cheesecake Morning Buns
Recipe by: Willow Bird Baking
Yield: 24 rolls
These Raspberry Cheesecake Morning Buns combine the world’s best yeast dough with fresh raspberries and indulgent cheesecake. I’ve used a sweet almond glaze to round out the flavors, but if you’re not an almond fan, you can use vanilla extract in the glaze instead.
Roll Ingredients:
1 package (2 1/4 teaspoons) active dry yeast
1/4 cup warm water (100-110 degrees F)
2 tablespoons white vinegar
2 cups milk minus 2 tablespoons, room temperature
2/3 cup cold shortening
3 tablespoons sugar
1 teaspoon salt
1 teaspoon baking soda
1 teaspoon baking powder
5 cups flour
2 tablespoons butter, melted, for after baking
Filling Ingredients:
4 (8-ounce) packages cream cheese, softened
1 cup sugar
2 eggs, room temperature
2 sticks salted butter (or 2 stick unsalted butter and 1/2 teaspoon salt), melted
1 (12-ounce) jar raspberry jam
1 pint fresh raspberries (plus more for topping)
Glaze Ingredients:
1/2 cup powdered sugar
1 tablespoon milk
1/8 teaspoon almond extract (or vanilla if you prefer)
sliced almonds for garnish (optional)
Directions:
Note: I don’t recommend halving yeast recipes; instead, if you don’t want 24 rolls at once, consider freezing some for later. To freeze some of the unbaked rolls, just wrap them well before the second rise and freeze them. Once frozen, pop them out of the pan all together and store in the freezer, wrapped in plastic wrap and in a zip top bag or wrapped in foil. When you want to bake them, stick them back in a greased pan, thaw them in the fridge overnight, proof for the instructed amount of time, and bake like usual. These bun/roll recipes also provide the perfect opportunity to try two different flavor combos. I often make half sweet buns and half savory buns (like these or these) and half to make sweet buns for dessert. If you do this, just half the filling recipes and roll out the dough half at a time.
Mix the warm water and yeast in a medium bowl and let the yeast foam for about 10 minutes. Put 2 tablespoons white vinegar in a measuring cup and then add milk up to the 2 cup line. Set this aside. In a separate large bowl (or the bowl of a mixer fitted with a dough hook), whisk together flour, sugar, salt, baking soda, and baking powder and cut the shortening into the mixture with two knives or a pastry cutter until the shortening looks like small peas. Stir yeast mixture and milk mixture into the dry ingredients and mix well, kneading just a few turns. Transfer the dough to a bowl lightly sprayed with cooking spray, cover tightly with plastic wrap, and proof in a warm, draft-free place (such as a closed, turned-off oven), for around 70 minutes or until doubled in size.
After proofing the dough, cream the softened cream cheese in a medium bowl until fluffy before adding the sugar and eggs. Mix together until well combined.
Turn the dough out onto a floured surface and roll it into a large rectangle about 1/8-inch thick (I carefully cut the dough in half and worked with half at a time to make it more manageable; if you do this, just spread on half of the filling ingredients for each half you roll). Spread the melted butter over the surface of the rolled dough and then dollop the cream cheese mixture all across the surface, spreading gently to create an even layer. Dollop raspberry jam on top and spread it gently across the cream cheese. Sprinkle on raspberries. Gently roll the dough up into a spiral (I find using a bench scraper to encourage the dough to roll up during this process incredibly helpful) and cut it into 2-inch rolls, placing them close together in a 9 x 13-inch baking dish sprayed with cooking spray (at this point, you could wrap and freeze the rolls for later if you wanted).
Cover the rolls let them rise in the fridge overnight (they will have nearly doubled.) When you’re ready to bake, preheat the oven to 400 degrees F, letting the rolls rise on top of the preheating oven covered by a clean dish towel. Bake them for about 25-30 minutes or until lightly browned on top (don’t underbake or they’ll still be doughy in the center). Brush with 2 tablespoons melted butter and return to the oven for 1 more minute. Whisk together the glaze ingredients and drizzle the glaze over the warm rolls. Serve immediately.
Take the guesswork out of eating well. Introducing Simply Balanced, a new brand from Target that’s thoughtfully crafted for taste and goodness.
Disclosure: Compensation was provided by Target via Glam Media. The opinions in this post, however, are all mine.