Insane Chili Cheese Dip
I think I’ve finally figured out how marriage works.

I asked Mike in November to please get a cable to hook up the TV my parents gave us. Don’t be like my mom here:

As you can see, she lost chili cheese dip privileges.
Yes, I have legs, but this was Mike’s Job. In November (please remember that this all started in November. That’s 2 months ago), I told him I’d go to some store and pick something up (I’ve forgotten the details since it was 2 months ago) if he’d to go Walmart and pick up a cable. I fulfilled my end of the bargain (2 months ago) while he apparently forgot cables, TVs, and wives even existed.
I reminded him a couple of times over the course of the 2 months (did I mention it’s been 2 months?) but no cable arrived. Then it was time for the Super Bowl, the one time all year when my favorite sport and favorite foods meet in one magical celebration. So things had to get real. In addition to verbal and Facebookian threats, I also left him ample reminders. Exhibit 1: This note was left on his desk.
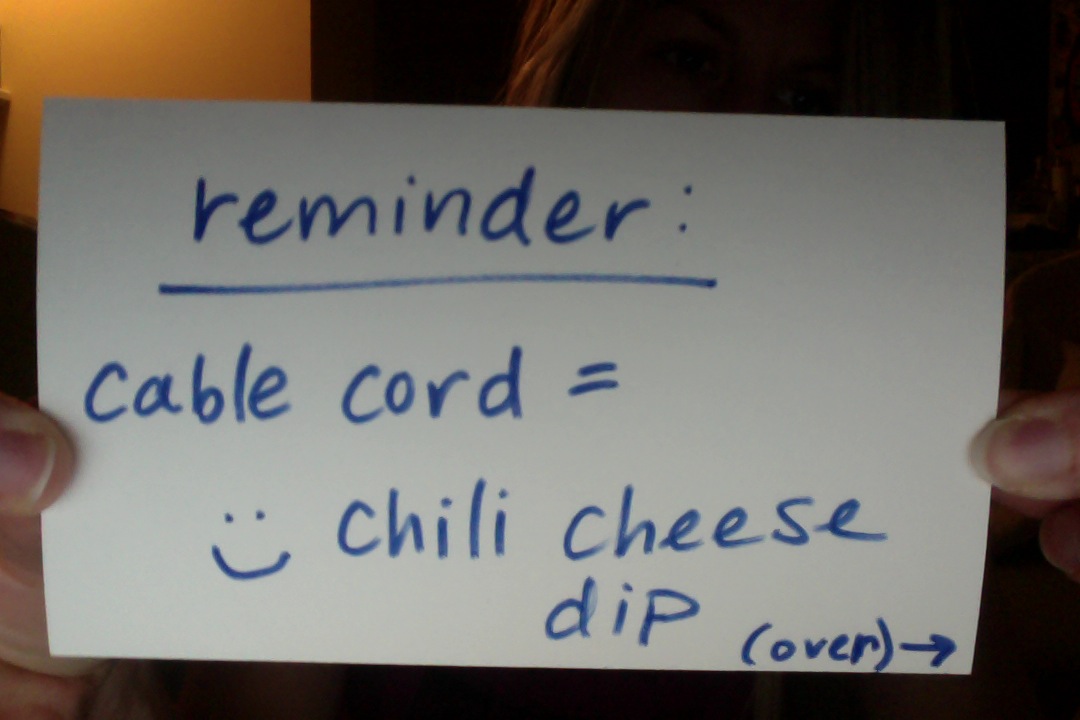
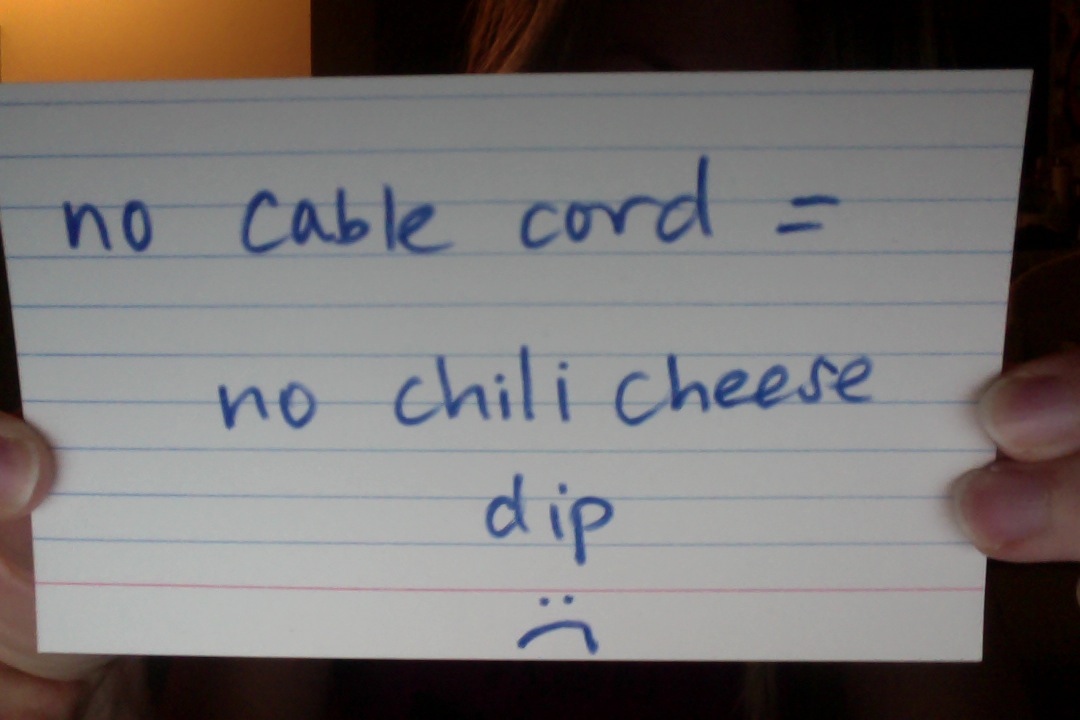
Exhibit 2: The back of the note also contained a very important message.
It is now Sunday and I’m happy to report that my TV is hooked up and tuned in to the Super Bowl channel. Is this all I had to do to get my way? Make chili cheese dip? ‘Cause I can totally handle that.
Moral of the story, as captured by my friend Rebecca:

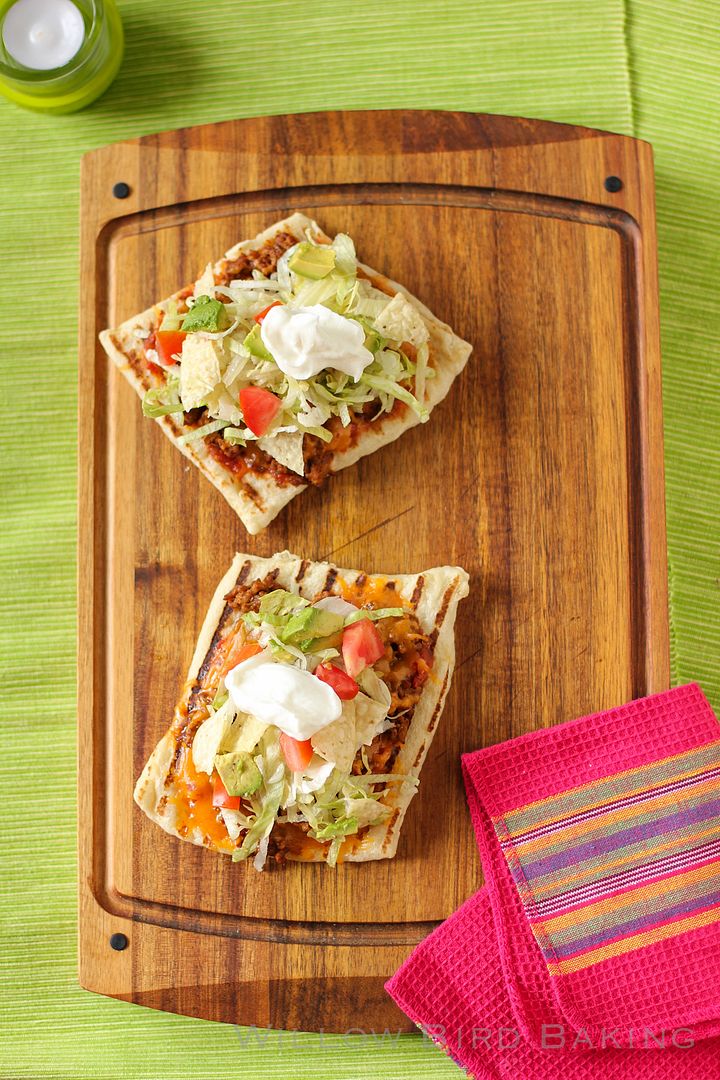
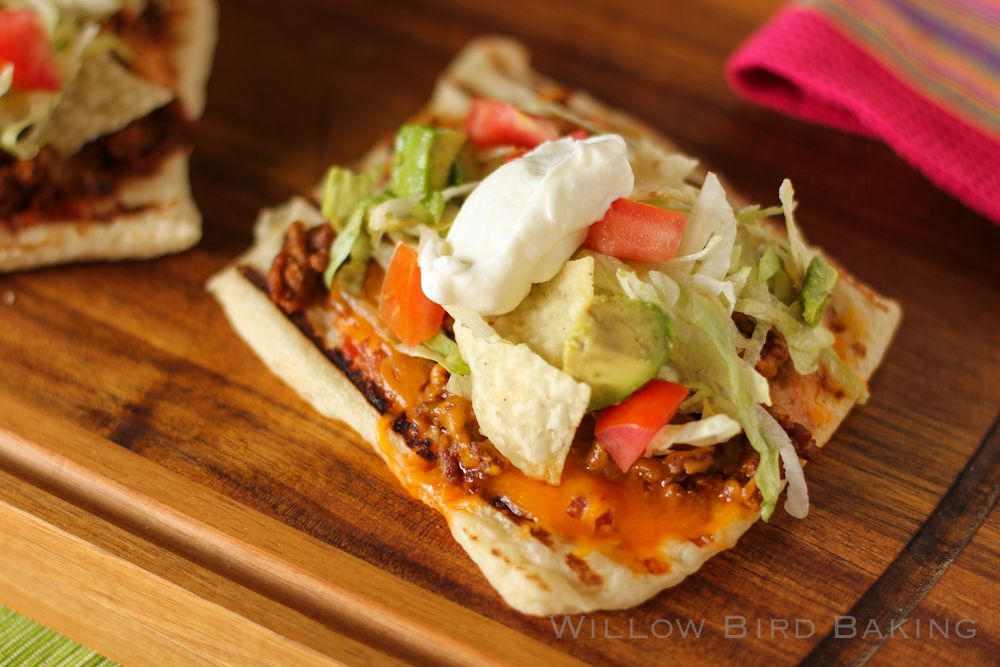
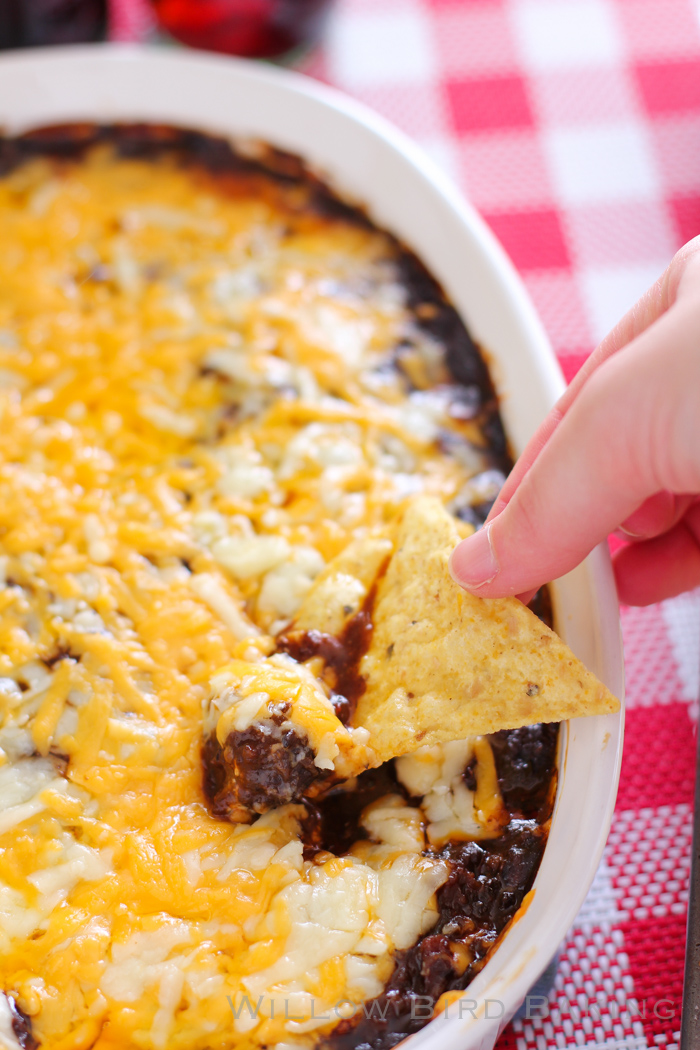
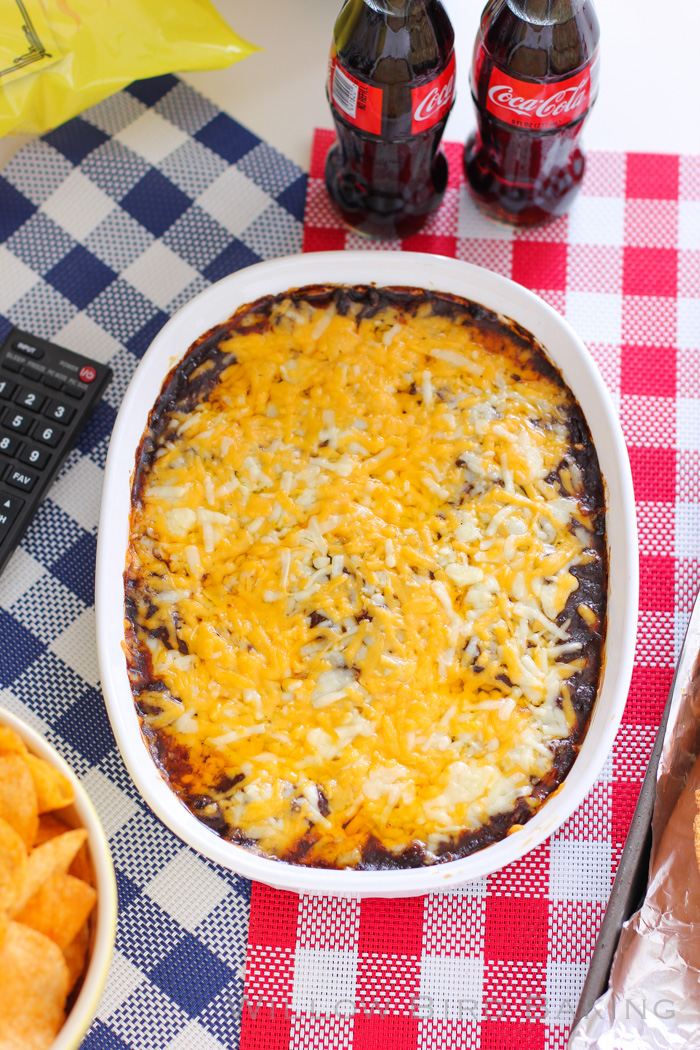
Want some chili cheese dip to “encourage” your husband or wife to run errands? I got ya covered. This dip was a family favorite when I was little. We used a can of Hormel chili without beans and it took around 15 minutes to whip up — perfect for an emergency last minute dip on game day!
If you have more time, though, make the grown up version below. It starts by layering flavors from árbol and ancho chiles, dark beer, and chorizo to make the best homemade chili I’ve ever tasted. Either route you take — easy and quick or carefully crafted — this dip is gonna drive you crazy.
One year ago: White Sheet Cake with Fluffy Whipped Icing
Two years ago: Cheeseburger Bāozi (Steamed Cheeseburger Stuffed Buns)
Three years ago: Carrot Cake Sandwich Cookies with Honey Cardamom Cream Cheese
Four years ago: Ugly as Sin Coconut Cake
Insane Chili Cheese Dip
Recipe by: Willow Bird Baking, with chili recipe adapted from Cooks’ Illustrated, as found on Brown Eyed Baker
Yield: serves 4-6 people
If you want a quick (and still delicious) version of this dip, use a can or two of Hormel Chili without beans in place of homemade chili. But if you have the time, it’s so worth it to make this incredible homemade chili. It’s the best I’ve ever had, hands down. It looks complicated, but it’s actually a cinch to prepare and can be made a few days ahead and refrigerated until you’re ready to assemble and bake your dip. The recipe below makes about twice the amount of chili you need, but I make the whole batch because I know I’ll want to freeze some for other uses.
Chili Paste Ingredients:
6 dried ancho chiles (about 7/8 ounces), stems and seeds removed, and flesh torn into 1-inch pieces
2-4 dried árbol chiles, stems removed, pods split, seeds removed*
3 tablespoons cornmeal
2 teaspoons dried oregano
2 teaspoons ground cumin
2 teaspoons cocoa powder
2 1/2 cups chicken broth, divided
Chili Ingredients:
Table salt
2 medium onions, cut into ¾-inch pieces (about 1 cup)
3 jalapeño peppers, stems and seeds removed, cut into ½-inch pieces
2 tablespoons plus 1 tablespoon vegetable oil, divided
4 garlic cloves, minced
1 (14.5-ounce) can diced tomatoes, drained
2 teaspoons light molasses
1 pound chorizo, with casings removed
3 strips of bacon
1 (12-ounce) bottle beer (I’ve used Red Stripe and Guinness before and both have come out perfectly)**
1 tablespoon flour
Other Dip Ingredients:
2 (8-ounce) packages cream cheese
2 cups sharp cheddar cheese
green onions for garnish (optional)
tortilla chips for serving
Directions:
NOTES: *Make sure to wear gloves when working with chiles and avoid touching your eyeballs (or other people’s eyeballs. But why would you be doing that? Weirdo.) You can substitute 1/2 cup chili powder and 1/4 to 1/2 teaspoon cayenne pepper if you don’t want to use the dried chiles, but I highly, highly recommend you give it a try. It’s so easy, and very gratifying.
**If you don’t cook drink alcohol, you should know that according to this chart, only about 5-10% of alcohol will remain in the entire dish by the time you’re done. The beer is very important to the flavor and I don’t recommend skipping it.
Make the chili: Preheat the oven to 300 degrees F. Begin to prepare the chili paste by toasting ancho chiles in a skillet over medium-high heat, stirring frequently, until they’re fragrant (4 to 6 minutes). Reduce the heat if they start to smoke. Place the chiles into the bowl of a food processor and let them cool. Leave the skillet unwashed for future use.
Add the árbol chiles, cornmeal, oregano, cumin, cocoa, and 1/2 teaspoon salt to the food processor with the ancho chiles and pulverize for about 2 minutes, or until finely ground. Then, with the food processor still running, slowly add 1/2 cup of chicken broth until a smooth paste forms (about 45 seconds). Use a spatula to scrape the sides of the bowl as needed. Transfer the paste to a bowl and set aside.
Put the onions in the food processor and pulse them until they’re chopped (about 4 pulses). Add the jalapeños and pulse until the mixture reaches the consistency of a chunky salsa, about 4 more pulses, scraping the bowl if needed.
In your stock pot or Dutch oven, heat 1 tablespoon of vegetable oil over medium-high heat. Add the onion mixture and cook, stirring occasionally, until the veggies are softened and the moisture has cooked off, about 7 to 9 minutes. Then add the garlic and saute until it’s fragrant, just about 1 minute. Add the chili paste, tomatoes, and molasses and stir to combine thoroughly. Add the remaining 2 cups of chicken broth and bring the whole mixture to a boil before reducing the heat to simmer.
Meanwhile, cook the bacon over medium-high heat in your skillet to your desired crispiness. Remove it to drain on a paper towel lined plate. In the same skillet, cook the chorizo until browned through (add 1 1/2 teaspoons of vegetable oil if needed to supplement the bacon grease). Use a slotted spoon to transfer the chorizo and bacon to the Dutch oven. Discard any liquid in the skillet (but don’t rub off the stuck-on bits!) and return to the heat. Add the bottle of beer to the skillet, scraping the bottom of the pan with a wooden spoon to loosen any browned bits, and bring it to a simmer. Pour the lager into the Dutch oven. Stir to combine and return the mixture to a simmer.
Cover the pot and transfer it to the oven. Cook until the meat is fully tender and the flavors have melded, 1 1/2 to 2 hours. About an hour into cooking, ladle some of the hot chili liquid into a small bowl and whisk the flour into it until smooth. Add this to back to the chili pot and stir together. Continue cooking.
When the chili is finished, let it stand, uncovered, for about 10 minutes. Stir the chili well and season to taste with salt. (Afterwards, you can store it in a tupperware in the refrigerator if you’re not using it right away.)
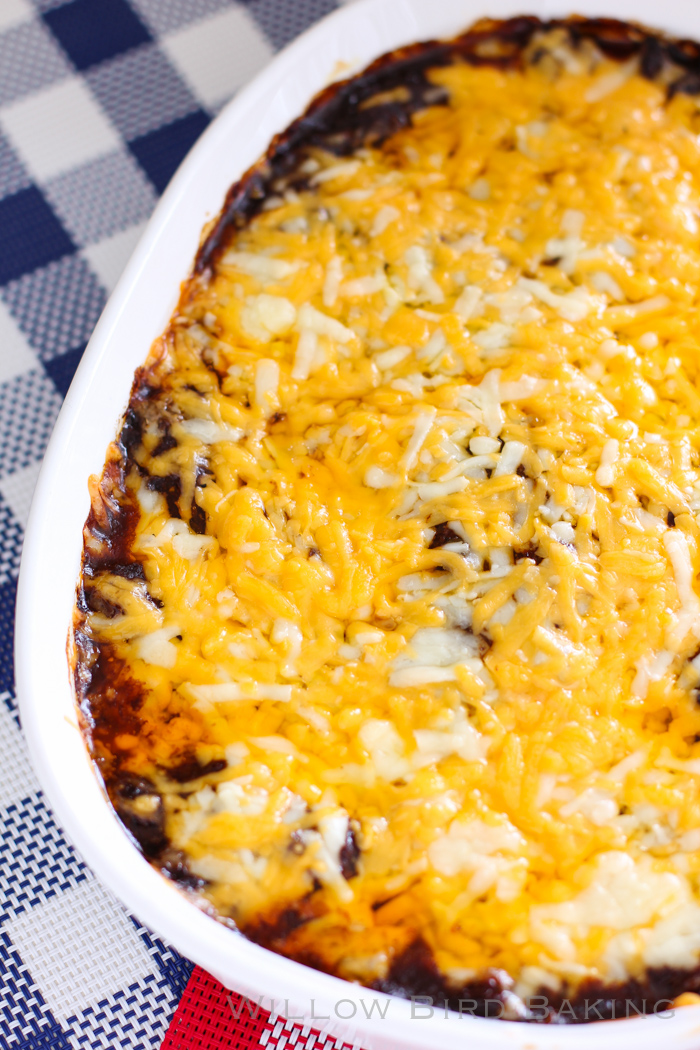
Assemble and bake the dip: Preheat oven to 350 degrees F. Spread the cream cheese evenly over the bottom of a baking dish (I use a 2-quart oval one). Pour 2 heaping cups of the chili over the cream cheese and top with grated sharp cheddar. Bake the dip until the cheese is melted and the dip is bubbly, around 20 minutes. Top with chopped green onions and serve immediately with tortilla chips.