breakfast

Clementine Curd

I noticed early on in my teaching career that 6th graders do this thing. A discussion with them about a novel might go something like this:

Me: “What was the main character’s opinion on the government?”
Student: (unsure of the answer) “Hm. Uh.” (stares off into space for a few moments) “Ummm.” (gives up) “Well, I don’t know.”

All the while, the novel itself sits like an ironic little nugget in front of them, untouched. I look at it pointedly. The student looks at me blankly.

At this point, I usually get a little heavy-handed. I give my head an exaggerated scratch and give a shrug of cartoon proportions. “Is there any way we could possibly find out? Is there anywhere in the universe we might be able to get a hint about the answer?” Typically after this bit of melodrama on my part, the students catch my drift, grin, and grab their books.

It’s not a personal failing that they don’t immediately use available resources to form their ideas. Instead, it’s part of natural child development — every 6th grader who enters my class needs to build this skill. I’m here to construct a staircase toward resourcefulness and independence.

In keeping with that, I tell my 6th graders all year long that we’re going to work on finding evidence.

We hunted through the novel Crispin to find for evidence to support our opinions about feudalism. We hunted through a biography about St. Giles to find evidence for why the author included him in the story. We read Greek myths to find evidence to build a definition of what a hero quest is. We found evidence in The Giver that Lois Lowry’s “utopia” wasn’t really all that perfect.

Evidence isn’t just for language arts, either. In the after school Cookie Camp I’m leading right now, the following exchange is a common one:

Me: “What’s the next thing we have to do?”
Camper 1: “Maybe add the egg?”
Camper 2: “Oh, or maybe add the flour!”
Camper 3: “Do we have to add the vanilla next?”
Me: (requisite melodrama) “How in the world are we going to decide?! We don’t want to mess up our cookies, but how do we know what to do?!”
Campers: “Oh, the recipe!”

Oh. The recipe, y’all.

Maybe as you accumulate practice and skill, you can begin to deviate from the recipe, combine recipes, or even create recipes. But in those beginning stages when you’re just learning to bake (or form opinions, or understand new subject matter), you have to learn to go back to the source.

6th grade was a long time ago for me, but I still need this reminder sometimes. I’ll find myself fretting about a decision or wondering why events are unfolding like they are. My cloud of anxiety can narrow my perspective. I need to return to the source during those times. I need to increase my time reading the Bible, return to the basics, and remind myself through the words inspired by God Himself who He is and what He’s done. I need to let go of the other ways I try to find my answers — worrying, busying myself with my to-do list, trying on different reactions to the situations I encounter.

That being said, this post isn’t so much a polished prescription (“just go back to the source, duh — problem solved!”) as it is a revelation of where I am in my thought process right now. I’m reading through Job, the most difficult book of scripture for me (and I don’t mean in terms of comprehension), for the second time in a year. I’m finding some answers, but also more questions. And always, always, I’m asking God to take me back to the recipe, to give me evidence — building blocks of information about what I can do (or what I can release) to glorify Him.

There’s a song I love that says, “[A Father’s] whisper’s like a bridge; it’s a river spanned.” It’s true — every whisper of truth He gives me spans a river of need. So I’ll keep collecting His whispers and weaving them into a path, an answer that won’t be complete in this lifetime.

. . .

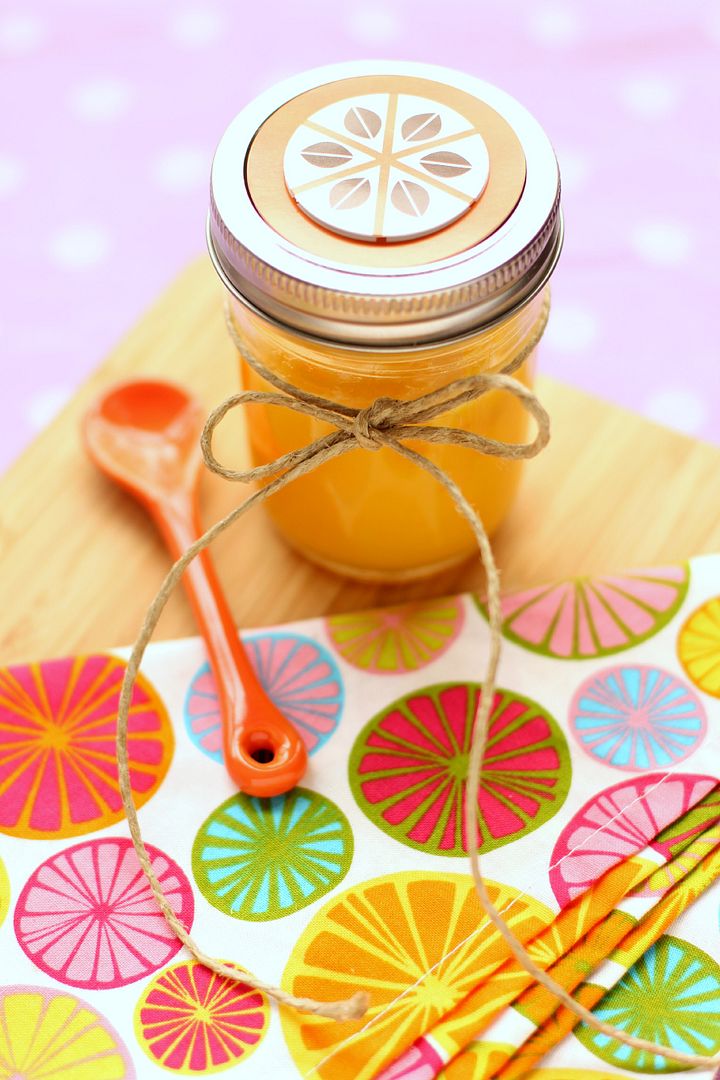
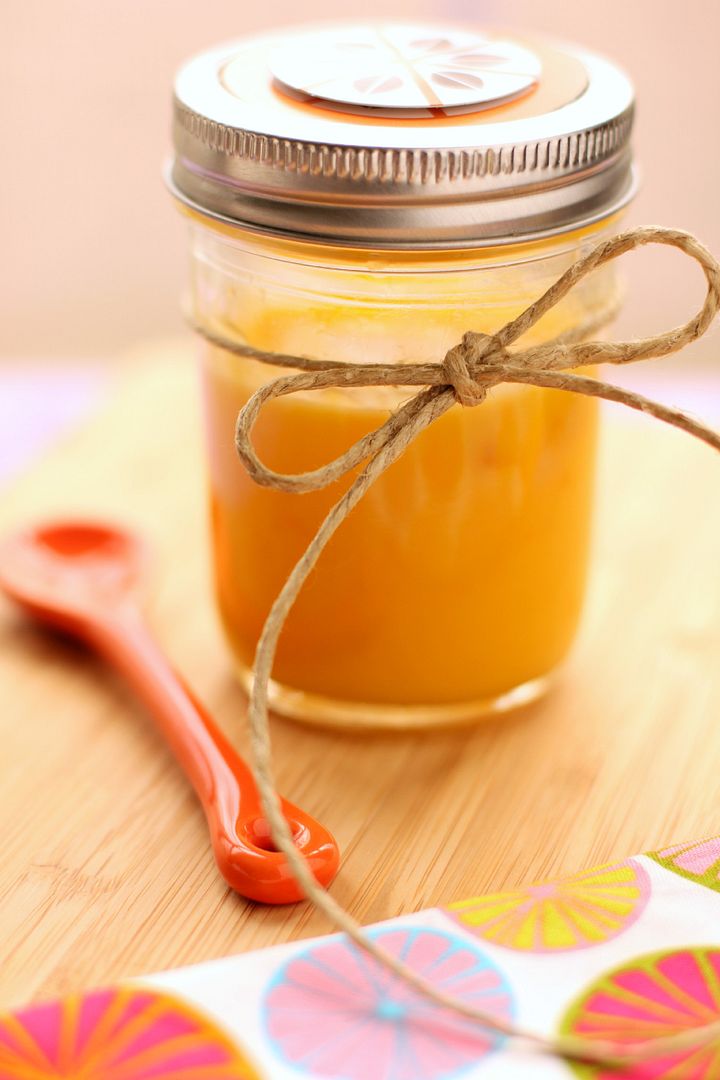
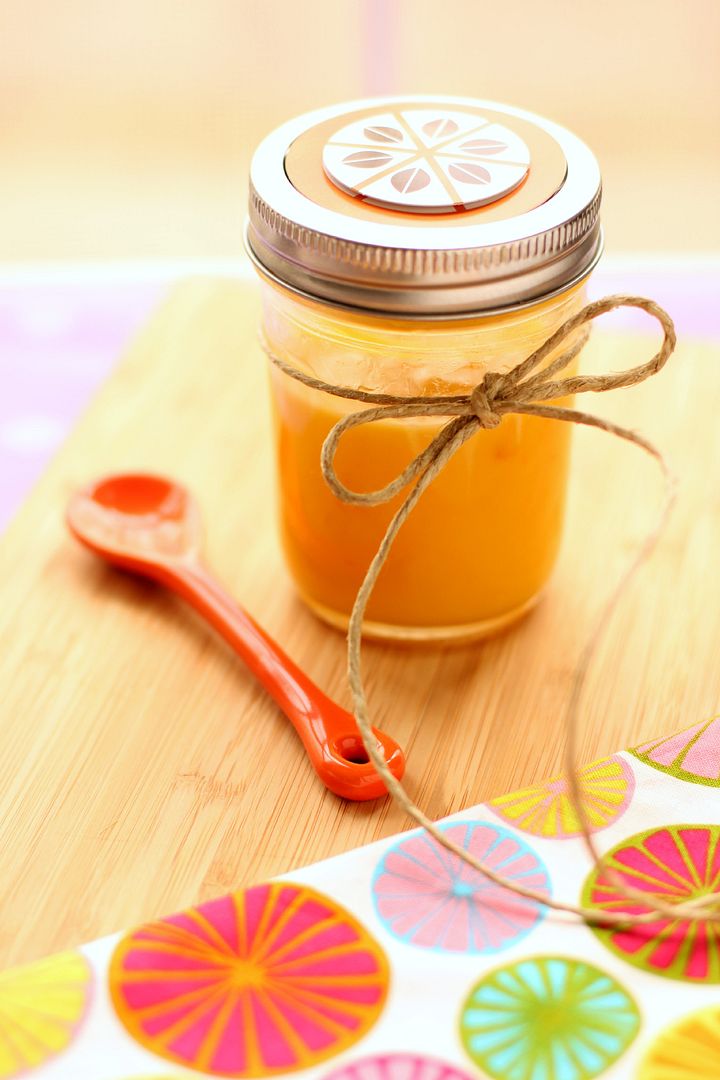
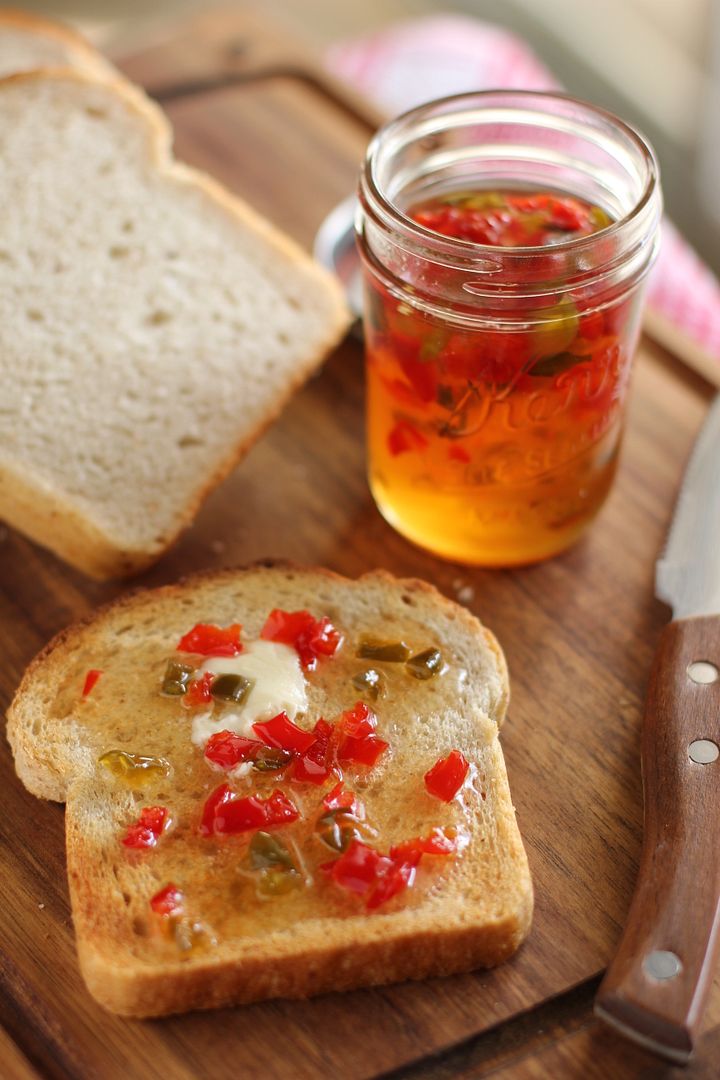
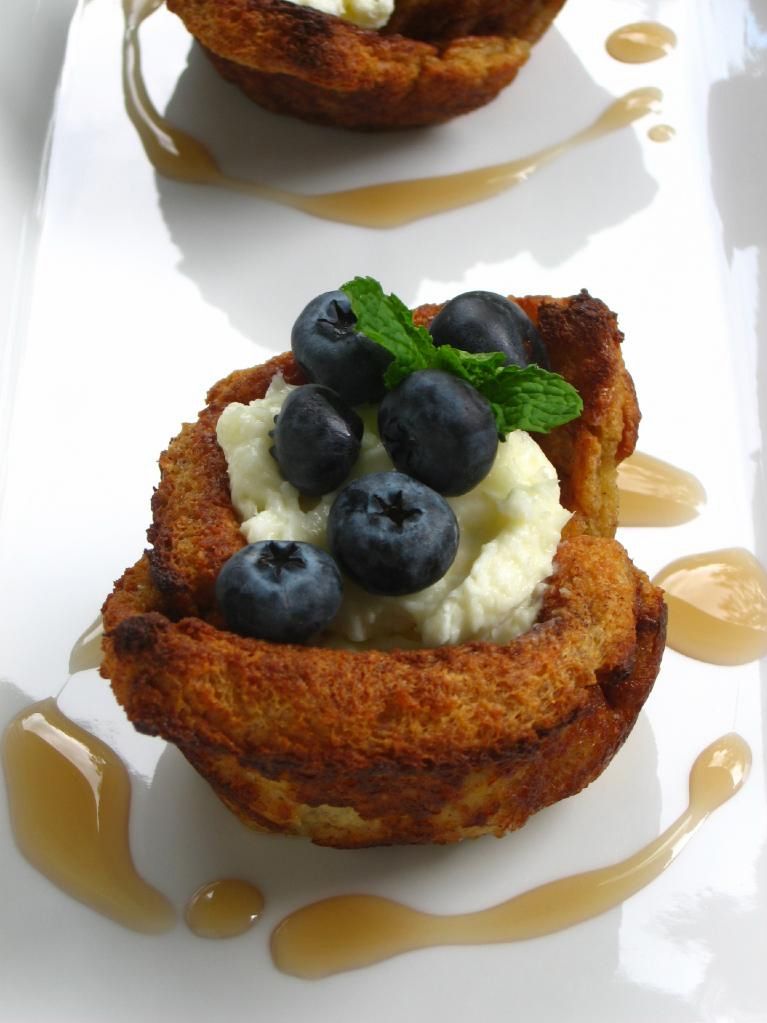
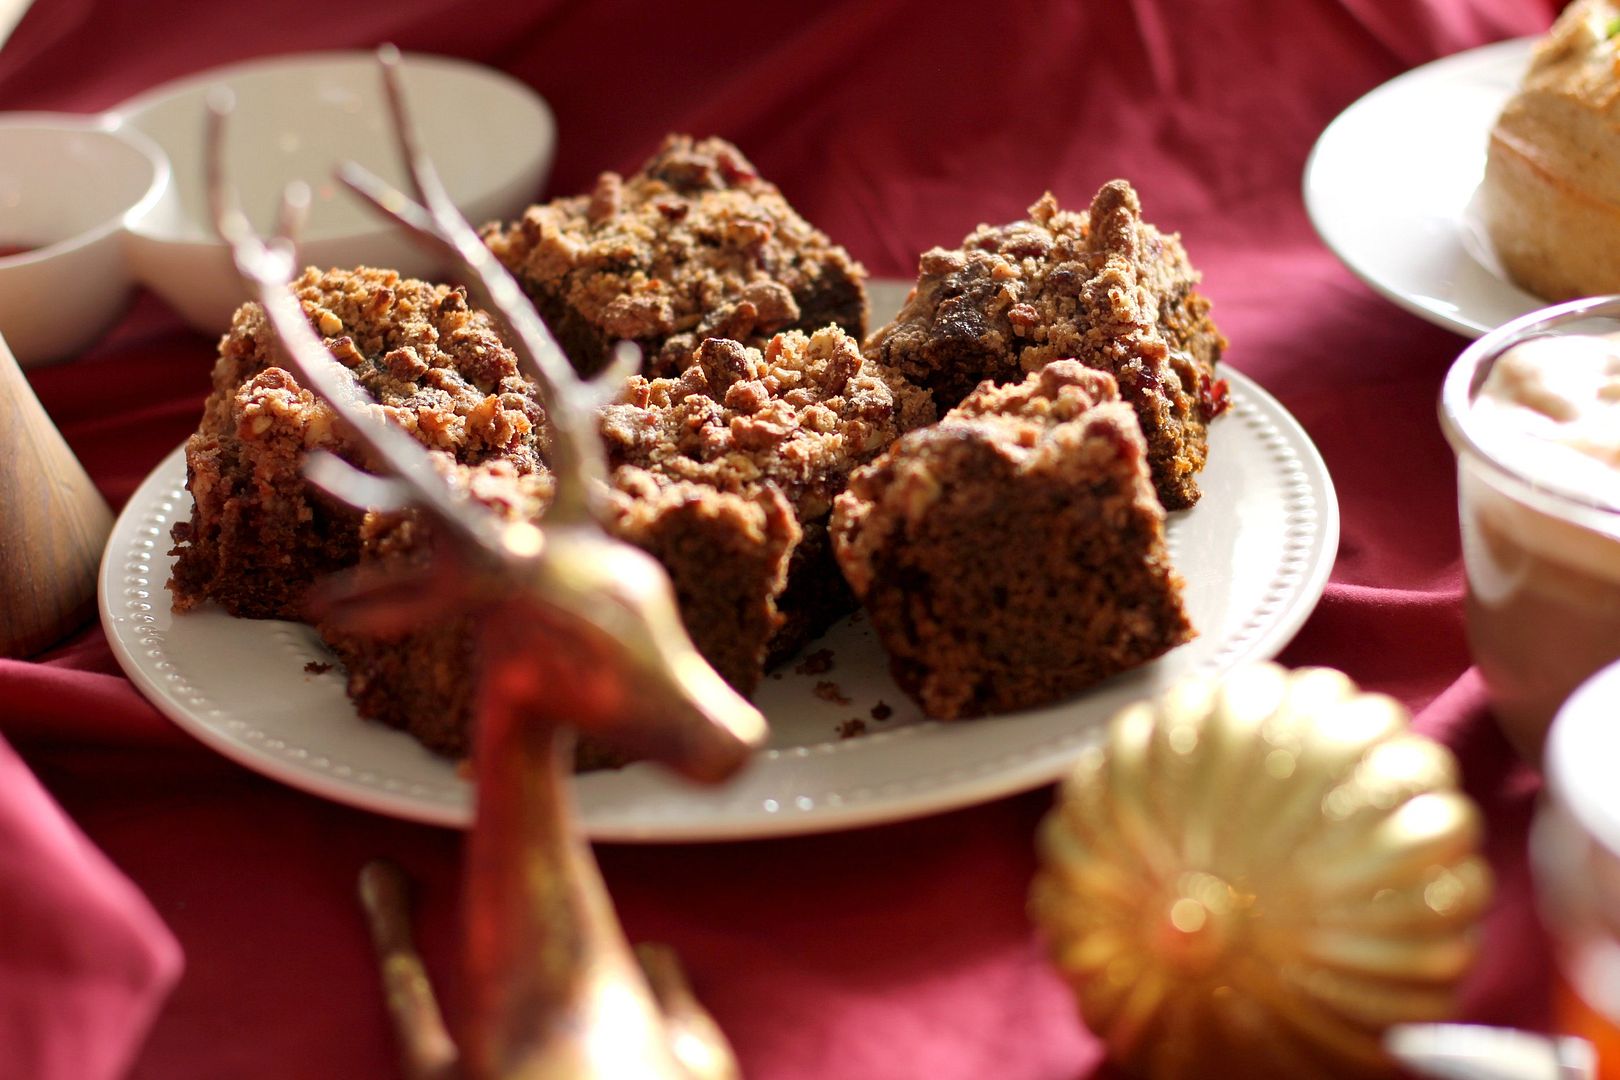
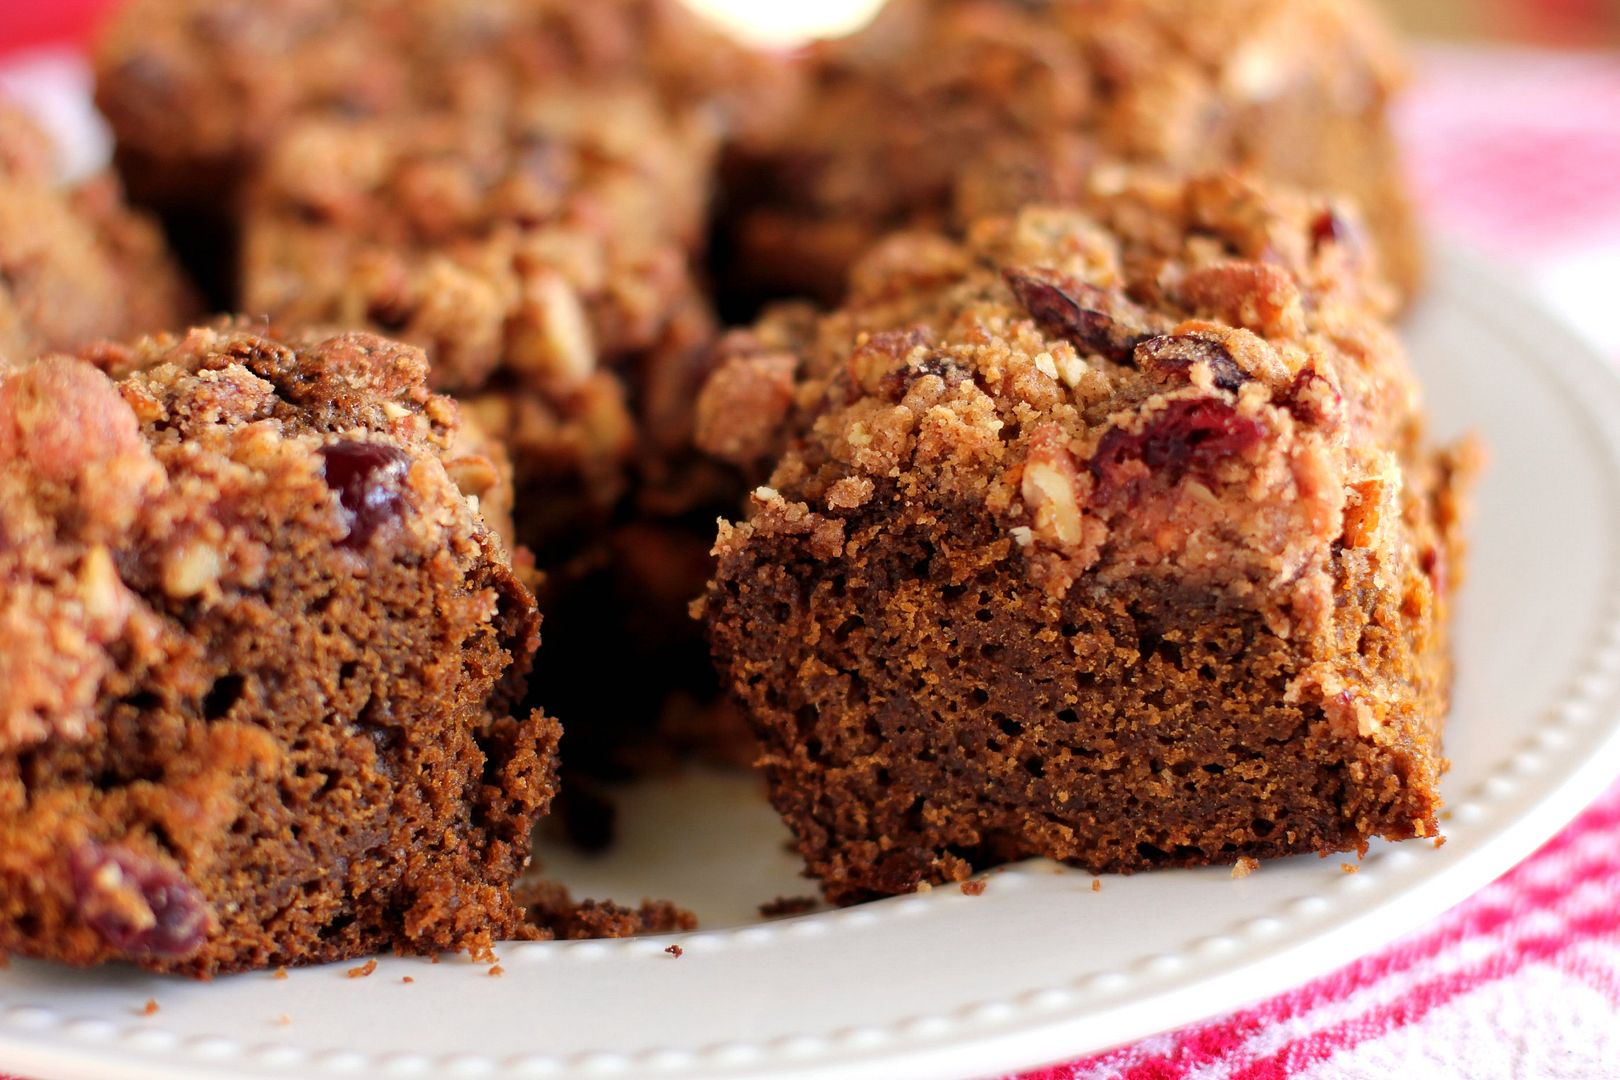
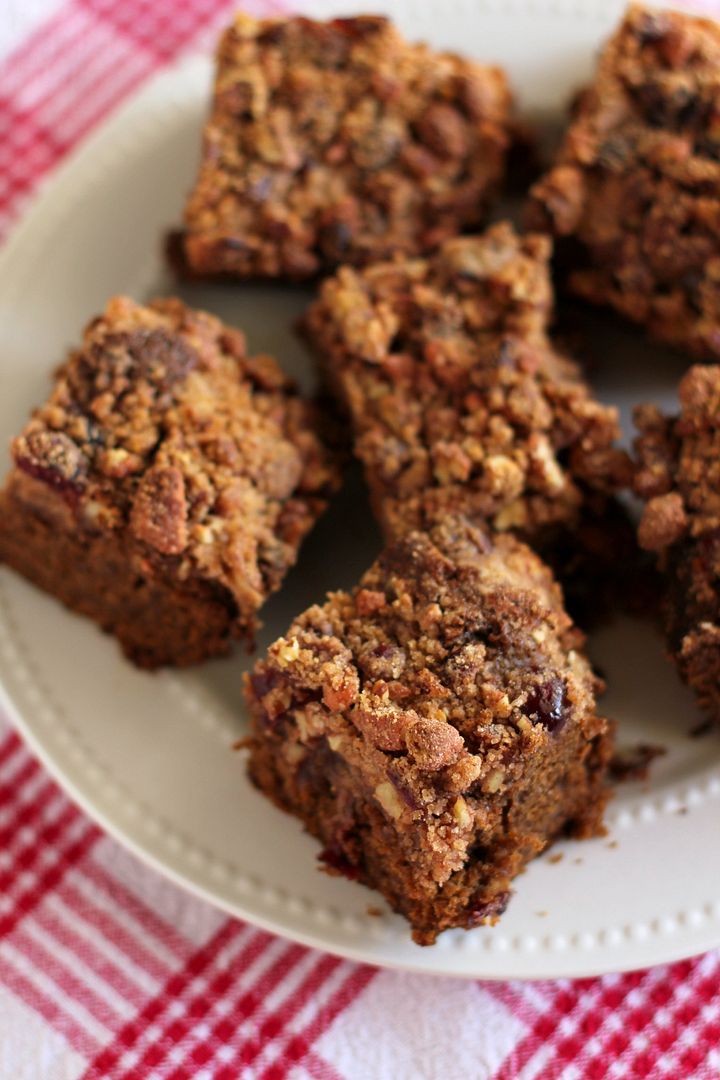
In the meantime, in the spirit of going back to the basics, here’s a simple, foundational recipe. A lovely fruit curd can play so many versatile roles in the kitchen: a spread for buttered toast, a dip for shortbread cookies, a base for mousse, a filling for cakes and cupcakes, a quick snack on a spoon. I’ve been in love with Fine Cooking’s foolproof lemon curd recipe since I first found it, and I use it as a base for all other curds I create, such as this clementine curd.

While it takes quite a bit of stirring and only lasts a week in the fridge, curd can be frozen for up to about two months. It’s worth the investment of time and your arm muscles.

How do you go “back to basics” in your life?

Clementine Curd


Recipe by: Adapted from Fine Cooking’s foolproof lemon curd recipe
Yield: about 1 1/2 cups of curd

Bright, sweet, tangy clementine curd is lovely spread on toast, stuffed into cupcakes or cakes, or used as a base for mousse. I make a big batch and freeze it, using it in many different recipes over the course of a few weeks. This curd recipe is adapted from one dubbed “foolproof” by Fine Cooking, and it’s perfect for those who have never made curd before and worry about accidentally cooking their eggs or curdling their mixture.

Ingredients:
6 tablespoons unsalted butter, at room temperature
1 cup sugar
2 large eggs
2 large egg yolks
2/3 cup fresh clementine juice
1 teaspoon grated clementine zest

Directions:
Cream butter and sugar together in a large bowl for about 2 minutes or until light, pale, and fluffy. While mixing, slowly add eggs and yolks. Beat the mixture for 1 minute before mixing in the clementine juice. Don’t worry if the mixture looks curdled, because it’ll get smooth as it cooks and the butter melts.

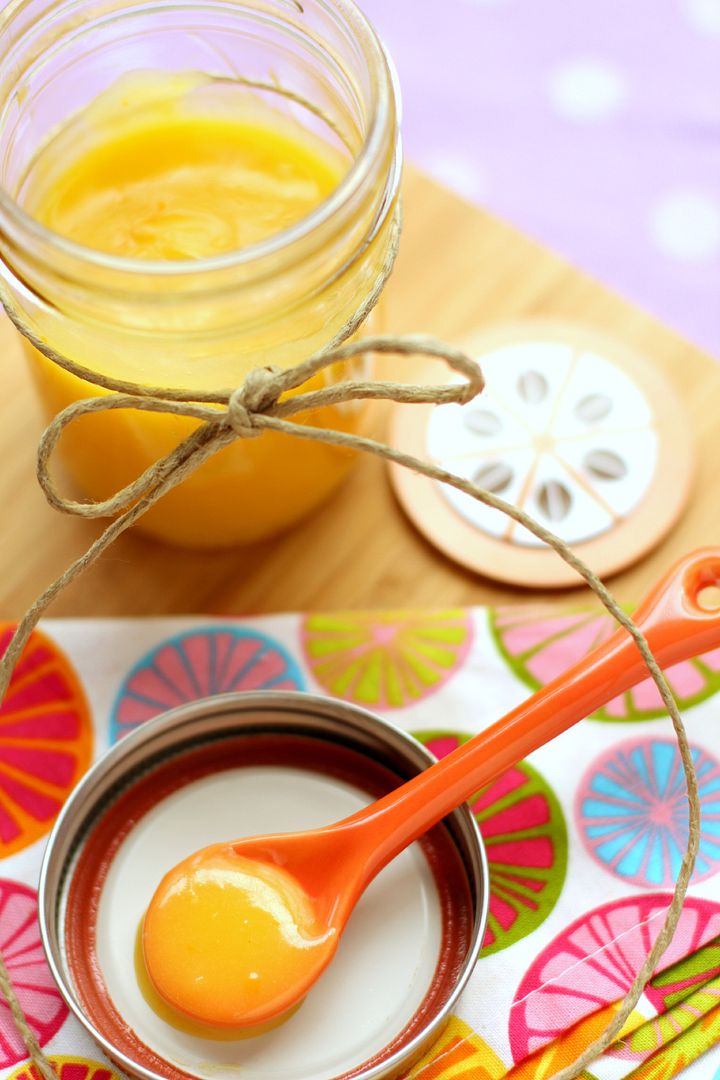
Cook the mixture in a heavy saucepan over medium heat, stirring constantly, for about 20-25 minutes (lemon curd only takes 15, but I’ve found the clementine curd takes me longer), or until it’s thickening and it registers at least 170 degrees on a candy thermometer (I usually end up around 175 before I get it to the thickness I want). Just don’t let the mixture boil. Also, remember it’ll continue thickening as it cools and then chills, so don’t feel like you have to get it to its final thickness on the stove. When it’s done, it should leave a clean path on the back of a wooden spoon when you run your finger down it.

Remove the clementine curd from the heat and stir in the clementine zest. Transfer the mixture to a wide bowl and place a layer of plastic wrap directly on the surface of the curd to prevent a film from developing. Place the curd in the refrigerate to chill it. Cover it tightly and keep if you about a week in the fridge or for about 2 months in the freezer.

If you liked this post, please:
Subscribe to Willow Bird Baking
Follow Willow Bird Baking on Twitter
Follow Willow Bird Baking on Facebook
Give this post a thumbs up on StumbleUpon
Pin It


Shareother ways to share this post with friends

Make-Ahead Christmas Morning Breakfast Recipes from Willow Bird Baking

You probably would’ve guessed dessert, but breakfast is my favorite meal of the day. I’ve been scheming for a month to bring you this collection of recipes. They’re festive, delicious dishes that are perfect for the most special breakfast of the year: Christmas morning!

Most of these dishes have make-ahead instructions tucked right into the recipe so that you can spend time with your family Christmas morning. There’s also a section of recipes at the end that aren’t make-ahead, but are worth considering anyway because they’re so tasty. I hope you choose one or more of these treats for your holiday table.

1. Sassy Sausage & Hash Brown Breakfast Bake
2. Gingerbread Coffee Cake with Cranberry Pecan Streusel
3. Salted Caramel Mocha Hot Chocolate
4. Bright Pepper Jelly on Buttered Toast


5. Blueberry Cream Cheese Almond Braid

6. Raspberry Almond Braid
7. Cinnamon Sparkled Pastry Stix with Egg Nog Glaze
8. Buttermilk Cranberry Scones
9. Pumpkin Pecan Streusel Breakfast Braid


10. Winter Breakfast Chili Over Eggs in Sourdough Bowls


The following recipes aren’t make-ahead, but they are fantastic:

11. Blueberry Stuffed French Toast Bowls (you could prepare the filling in advance)
12. Banana Nut Bread Waffles
13. Carrot Cake Waffles
14. Eggs in a French Toast Basket


15. Pecan Maple Bacon Pancakes

Merry Christmas!

If you liked this post, please:
Subscribe to Willow Bird Baking
Follow Willow Bird Baking on Twitter
Follow Willow Bird Baking on Facebook
Give this post a thumbs up on StumbleUpon
Pin It


ShareOther ways to share this post with friends!

Winter Breakfast Chili Over Eggs in Sourdough Bowls


winter breakfast chili: spicy chili served over fluffy scrambled eggs in sourdough bowls

My 6th graders’ faces lit up deviously. It was a cold, gray morning hardly worthy of delight, but they seemed delighted nonetheless.

I was standing at the front of the room sipping the day’s second diet Sunkist while I issued instructions for the assignment they were about to begin. They double-checked: “So we don’t put our name on it anywhere? Can we disguise our handwriting? Can we give you a letter grade?”

The assignment was something I affectionately call Ms. Ruble’s Progress Report.

It was only fair, I had explained to them, for students to give me a grade since I got to give them one. And since I wanted them to feel comfortable honestly evaluating my performance, they could complete the entire progress report anonymously.

The ardor with which they began furiously scribbling comments — some writing in careful cursive or big block caps to hide their identity — made me a tad bit nervous. One after another finished with a flourish and shuffled their paper into the growing stack at the front of the room.

You may think I’m a little nuts. And every trimester when I give a gaggle of 12- and 13-year-olds the power to anonymously evaluate me, I kind of wonder if I’m a little nuts as well. But even though I may get one or two angsty comments, I learn something about how my students are feeling from every insight they offer. And beyond that, every single time I’ve completed this exercise with them, I’ve been overwhelmed not by how snarky they are, but by how kind.

For instance, from my most recent evaluations:

“I like your singing and your happiness.”

“I like having individual chats about my essays or projects.”

“I know you care about me because you always take the time to make class fun and equal for every student.”

“I really liked making haiku and working outside.”

“Ms. Ruble only gets mad when necessary.” (Ha!)

“I like how organized everything is and how we read a lot.” (Lots of them asked for even more reading time!)

“I love the creative projects we do because they really entertain me.”

“Ms. Ruble is always helping me with things I don’t understand.”

“You can tell she has put thought into each lesson and really wants you to enjoy it.”

“I really enjoyed making the paper cranes and doing the anime project. I have learned a lot so far this year about China and Japan.”

“I like that language arts challenges you, makes you want to put forth all of your potential and effort. Awesome teacher.”

“Ms. Ruble is fair because she gives proper instruction for everything we do and constantly includes our opinions about activities.”

“I like that Ms. Ruble is funny and that makes the class fun. I also like that she adds her own touch to the lesson.”

“Class is strict to keep it running smoothly and that’s what I like the most.”

“There is never a day that is boring from just note taking off the board.”

“I know that Ms. Ruble cares about me because she gives us lots of tips and is always trying to make us better at everything.”

“I think Ms. Ruble sees so much potential in every one of us. She thinks we all can succeed.”

. . . Wow, right? I’m getting a little teary compiling these just like I did while reading them.

Honestly, these comments say a lot more about my students than they say about me. I’m no different from any other teacher who works hard and tries to give her class a valuable experience. But my students, given complete freedom, anonymity, and voice — a soapbox to gripe about homework! to call me a witch! to rip apart my policies! to complain about having to write essays! — are the ones who chose words full of kindness.

If you’re surprised that when given the opportunity to say anything, these tweens chose to be sweet, I understand. We hear about the cyberbullying and the “mean girls,” very real issues, but we don’t often hear about kids’ kind hearts. The day after I read these evaluations, I stood in front of class and tried not to get choked up as I thanked them for their suggestions, critiques, and most of all, for their thoughtfulness.

Sometimes folks are skeptical about this claim, but I’ll say it again: middle schoolers are great little people.

. . .


Speaking of things that have warmed my soul lately, this Winter Breakfast Chili was another pleasant surprise. I’d never toasted and ground chiles to make my own chile paste before, but believe me, I’ll never go back. First, it was easy — I found cheap, big bags of the dried chiles I needed right in my local grocery store (in the small Hispanic foods section). Second, this chili is flippin’ awesome — it’s the best I’ve ever tasted hands down.

You may be curious about the concept of a breakfast chili. The idea was borne from my desire to create a winter breakfast that was warm and filling, full of protein and just a bit of heat. This chili includes bacon and chorizo and is served over fluffy scrambled eggs in sourdough bread bowls from my local bakery. It turned out to be a phenomenal breakfast reminiscent of spicy, comforting huevos rancheros. And since the chili can be prepared in advance and refrigerated, it’s also the perfect special breakfast for a busy holiday morning.

What’s warmed your soul lately?

Winter Breakfast Chili Over Eggs in Sourdough Bowls


Recipe by: Recipe adapted from Cooks’ Illustrated, as found on Brown Eyed Baker
Yield: 4 servings

The layers of flavor in this chili come from the toasted dried chiles used to make the chile paste, the savory chorizo and bacon, and the addition of some yeasty beer. It’s a rich, deep, slightly spicy dish that shines on a breakfast or dinner table. For breakfast, serve it over fluffy scrambled eggs in a sourdough bowl with broiled cheese on top. Since the chili can be prepared in advance, it makes the perfect dish for a busy holiday morning.

Chili Paste Ingredients:
3 dried ancho chiles (about 7/8 ounces), stems and seeds removed, and flesh torn into 1-inch pieces
1-2 dried árbol chiles, stems removed, pods split, seeds removed
1 tablespoon plus 1 1/2 teaspoons cornmeal
1 teaspoon dried oregano
1 teaspoon ground cumin
1 teaspoos cocoa powder
1 1/4 cups chicken broth, divided

Chili Ingredients:
1/4 pound dried pinto beans (about 1/2 cup), rinsed and picked over
Table salt
1 medium onions, cut into ¾-inch pieces (about 1 cup)
1 1/2 jalapeño peppers, stems and seeds removed, cut into ½-inch pieces
1 tablespoon plus 1 1/2 teaspoons vegetable oil, divided
2 garlic cloves, minced
1/2 (14.5-ounce) can diced tomatoes
1 teaspoon light molasses
3 ounces chorizo, with casings removed
a few strips of bacon
1/2 (12-ounce) bottle milk lager (I don’t know anything about beer, so I just used Red Stripe and it came out perfectly)*
4 eggs for scrambling
1 tablespoon butter
4 sourdough boules (about 4 inches in diameter)
1 cup sharp cheddar cheese, shredded
sour cream and cilantro for serving
*If you don’t cook drink alcohol (I don’t, either), you should know that according to this chart, only about 5-10% of alcohol will remain in the entire dish by the time you’re done. The beer is very important to the flavor and I don’t recommend skipping it.

Directions:
Note on scheduling: This chili can be fully prepared in advance and stored in the fridge for a few days. You can hollow out fresh bread boules the day before serving and wrap them tightly to keep them soft. When ready to eat, reheat the chili in the microwave for a few minutes, stirring periodically. Scramble your eggs, assemble the dish, broil the cheese on top, and serve.

Other notes: Make sure to wear gloves when working with chiles and avoid touching your eyeballs (or other people’s eyeballs. But why would you be doing that? Weirdo.) You can substitute 1/4 cup chili powder and 1/8 to 1/4 teaspoon cayenne pepper if you don’t want to use the dried chiles, but I highly, highly recommend you give it a try. It’s so easy, and very gratifying.


Soak the beans: In a large stock pot or Dutch oven, bring 8 cups of water, beans, and 1 1/2 teaspoons salt to a boil over high heat. Once boiling, remove the pot from the heat and cover it. Let it stand for 1 hour before draining and rinsing the beans and rinsing out the pot.

Prepare chile paste: Preheat the oven to 300 degrees F. Toast ancho chiles in a skillet over medium-high heat, stirring frequently, until they’re fragrant (4 to 6 minutes). Reduce the heat if they start to smoke. Place the chiles into the bowl of a food processor and let them cool. Leave the skillet unwashed for future use.

Add the árbol chiles, cornmeal, oregano, cumin, cocoa, and 1/4 teaspoon salt to the food processor with the ancho chiles and pulverize for about 2 minutes, or until finely ground. Then, with the food processor still running, slowly add 1/4 cup of chicken broth until a smooth paste forms (about 45 seconds). Use a spatula to scrape the sides of the bowl as needed. Transfer the paste to a bowl and set aside.

Make the chili: Put the onions in the food processor and pulse them until they’re chopped (about 4 pulses). Add the jalapeños and pulse until the mixture reaches the consistency of a chunky salsa, about 4 more pulses, scraping the bowl if needed.

In your stock pot or Dutch oven, heat 1 1/2 teaspoons of vegetable oil over medium-high heat. Add the onion mixture and cook, stirring occasionally, until the veggies are softened and the moisture has cooked off, about 7 to 9 minutes. Then add the garlic and saute until it’s fragrant, just about 1 minute. Add the chili paste, tomatoes, and molasses and stir to combine thoroughly. Add the remaining 1 cup of chicken broth and the drained beans and bring the whole mixture to a boil before reducing the heat to simmer.

Meanwhile, cook the bacon over medium-high heat in your skillet to your desired crispiness. Remove it to drain on a paper towel lined plate. In the same skillet, cook the chorizo until browned through (add 1 1/2 teaspoons of vegetable oil if needed to supplement the bacon grease). Use a slotted spoon to transfer the chorizo to the Dutch oven. Discard any liquid in the skillet (but don’t rub off the stuck-on bits!) and return to the heat. Add 1/2 of the bottle of lager to the skillet, scraping the bottom of the pan with a wooden spoon to loosen any browned bits, and bring it to a simmer. Pour the lager into the Dutch oven. Stir to combine and return the mixture to a simmer.

Cover the pot and transfer it to the oven. Cook until the meat and beans are fully tender, 1½ to 2 hours (I kept test-tasting the beans, since they took the longest — mine actually took longer than 2 hours). While the chili cooks, hollow out 4 sourdough bread boules for serving. If you’re not serving the chili today, wrap these tightly to preserve their freshness for the next day. Otherwise, set them aside.

When the chili is finished, let it stand, uncovered, for about 10 minutes. Stir the chili well and season to taste with salt. (Afterwards, you can store it in a tupperware in the refrigerator if you’re not eating it right away.)

Assemble the dish: When you’re ready to serve your chili, heat 1 tablespoon butter in a skillet over medium heat. Scramble 4 eggs and distribute them evenly between the bread boules. Ladle chili over the eggs in each boule. Top with shredded cheddar and place on a baking sheet covered in foil. Broil on high for a couple of minutes, watching closely, until cheese is melted and bubbly. Serve immediately with cilantro, avocado, chopped onions, and sour cream.

If you liked this post, please:
Subscribe to Willow Bird Baking
Follow Willow Bird Baking on Twitter
Follow Willow Bird Baking on Facebook
Give this post a thumbs up on StumbleUpon
Pin It


Shareother ways to share this post with friends

Make-Ahead Gingerbread Coffee Cake with Cranberry Pecan Streusel

“Hey Barb,” I chirped into the phone, hoping I sounded nonchalant. “You know our security deposit? Well. We’re, uh . . . we’re not getting that back.”

It was my first call to my roommate since we’d gotten the keys to our new apartment. I was standing in the living room surveying the debris field. Chaotic stacks of moving boxes littered the floor, as you might expect, but in front of me, the front doorframe lay in splinters on the floor. The door itself hung agape, swaying in the wind: a boat without a moor.

The tone of her voice took on a preparing-for-the-worst quality as she replied. “Uh-oh. What happened?” Do you want to know what happened, dear reader? I’ll tell you what happened.

It all started about an hour earlier, when I’d arrived in the parking lot of my new apartment complex with my dad and my brother, Alex, to begin moving in. We walked up the stairs and I began digging through my gigantic purse in search of my apartment key. I dug past lip gloss, receipts, gift cards, candy, my flashlight, my checkbook, my hippopotamus change purse, tampons, medicine, tissues, letters, my phone, several key rings . . .

I dug through that purse like an paleontologist for what seemed like an hour, uncovering months’ worth of fossilized garbage instead of cool dinosaur bones. And instead of, um, my apartment key.

Suddenly the awful realization dawned on me: I’d left the key at my parents’ house. I admitted this to my dad and we stared unhappily at the moving boxes we’d just hauled across town. We walked downstairs to consider our options.

We needn’t have worried, though, because Alex came down a few minutes later and relayed some “good” news: “The door’s open.”

“Wait, what?” I asked, thinking perhaps the apartment folks had left it unlocked for us. But you know where this is going. Alex didn’t mean that the door was unlocked. No. You know what Alex meant?

Alex meant that on my first day moving into my brand new apartment, he had just broken down my front door.

(Even better is that I don’t think he saw anything strange about this. He had kind of a, “Well, we had to get in, right?” attitude about the whole thing.)

As I stood in the living room relaying to Barbara that our new apartment had just been broken into (by, uh, my kid brother), I felt more than just my bank account plummet. The apartment didn’t feel so new and exciting anymore. My spirits fell. I’d been anxious about moving across town, moving in with a new roommate, and starting a new job; now it seemed my new living situation was already going poorly.

My dad returned the next day and fixed the door frame. A few nails, some spackle, and some paint and it was good as new. As for my morale, it took a little longer to improve. Barb is a magnets-on-the-refrigerator and tchotchkes-on-the-mantle person and I am not. The huge windows, while gorgeous, let in lots of cold air. The faucet in the kitchen was too low to fit a stock pot under.

Really, though, none of this was the issue. The issue was that I was in a new place and it just wasn’t home yet.

It’s been 3 years since I stood in front of my busted up doorway and broke the news to Barbara. I still don’t know if we’ll get our security deposit back. And as I mentioned to Kaitlin recently, I still don’t know that this is truly “home.”

But there have been plenty of moments that felt like “home” in this apartment. There was the time Mike walked in and saw the Valentine’s feast I’d prepared as a surprise for him. There was the time Barbara, Mike and I all decorated her Christmas tree together. There was the time I sat out on the balcony in the middle of a summer night all alone, writing poetry in the company of fireflies.

And there was the Make-Ahead Holiday Breakfast Party — Mike and I eating in our PJs by the fire, with little Byrd eating her breakfast between us.

This Gingerbread Coffee Cake was probably the easiest dish to prepare and also Mike’s favorite of the morning. The recipe began life as a regular gingerbread cake, but I revised it to include sour cream, cake flour, and a healthy dose of streusel on top to turn it into a coffee cake. It’s certainly Christmas-worthy! I hope you can find a little bit of “home” in it just like I did.

Gingerbread Coffee Cake with Cranberry Pecan Streusel


Recipe by: Willow Bird Baking, heavily adapted from Joy of Baking
Yields: 9-12 servings

This moist, gorgeous Gingerbread Coffee Cake is the perfect combination of sweet, spiced, crunchy, and comforting. The best part (besides the taste!) is that it can be made in advance and refreshed in the oven for just a few minutes before serving. You can even divide the preparation over a few days to ensure it fits into your holiday schedule. This was Mike’s favorite dish on our holiday breakfast table.

Coffee Cake Ingredients:
1 1/2 cups cake flour
1/2 cup all-purpose flour
1 1/2 teaspoons baking soda
1 1/2 teaspoon ground ginger
1 1/2 teaspoon cinnamon
1/2 teaspoon salt
1/4 teaspoon ground cloves
1/8 teaspoon nutmeg
1/4 cup unsalted butter, room temperature
1/2 cup light brown sugar
2 large eggs, room temperature
1/2 cup unsulphured molasses*
1/2 cup milk
1/2 cup sour cream
*Tip from Joy of Baking: To prevent the molasses from sticking to the measuring cup, first spray the cup with a non-stick vegetable spray.

Cranberry Pecan Streusel Ingredients:
3/4 cup firmly packed light brown sugar
3/4 cup all-purpose flour
1 tablespoon cinnamon
6 tablespoons cold butter
1 cup chopped pecans (Oh Nuts! sent me Cranberry Pecans and they were so awesome for this!)
1/2 cup dried cranberries
1/4 cup apple cider

Directions:
NOTE: If you wanted to make this cake way in advance, you could complete this recipe up to the point of wrapping and refrigerating the cake. Instead, you’d double wrap it and freeze it. Then you could just thaw it overnight in the fridge before warming it through in the oven and serving it.

2 days in advance: Place the cranberries and apple cider for the streusel into a small bowl and cover. Refrigerate to rehydrate the berries.

1 day in advance: Make the streusel. First, drain the cranberries. Combine the flour and brown sugar in a medium bowl and using two knives or a pastry cutter, cut in the cold butter until you have crumbly streusel. Mix in the pecans and drained cranberries. Cover and refrigerate until ready to use.

Make the cake: Preheat the oven to 350 degrees F and make a foil sling for a 9-inch square baking pan: tear off 4, 16-inch long pieces of aluminum foil and fold them in half. Situate two side-by-side in the pan, covering the bottom of the pan to the edge (they will overlap). Situate the other two strips in the same manner, but perpendicular to the first. The overhanging foil of the sling will make it easy to remove the cake from the pan after baking and cooling. Butter and flour the sling.

In a medium bowl, whisk together the flours, baking soda, salt, cinnamon, ginger, cloves, and nutmeg. Set aside. In a separate large bowl, beat the butter and sugar with an electric mixer until pale and fluffy (at least 2-3 minutes). Add the eggs one at a time, beating after each addition. Beat in the molasses, pausing to scrape down the sides of the bowl when you need to. Gently mix the sour cream and milk in a measuring cup. Add the dry ingredients and milk mixture alternately, starting and ending with the dry ingredients. Beat until just combined.

Pour the batter into the buttered and floured baking pan and smooth the top with a spatula. Bake for about 25 minutes before sprinkling the streusel evenly over the top of the cake (and kind of pressing it on). Continue baking for 20-25 minutes, or until a toothpick inserted into the middle of the cake comes out with just a few moist crumbs. Remove the cake from the oven and let it cool completely. Remove it from its pan using the foil sling and wrap it tightly with plastic wrap (I wrap the foil sling and all so I can just pop it back in the pan to refresh later on) and stick it in the fridge.

The morning of: Let the cake sit out and come to room temperature while you preheat the oven to 350 degrees F. Pop it back in its pan and into the oven for a few minutes until warmed through. Let it cool for about 10 minutes.

P.S. Oh Nuts! sent me Cranberry Pecans to try free of charge. My opinions are always my own and always thoughtfully prepared with consideration for my readers — and I loved ’em!

If you liked this post, please:
Subscribe to Willow Bird Baking
Follow Willow Bird Baking on Twitter
Follow Willow Bird Baking on Facebook
Give this post a thumbs up on StumbleUpon
Pin It


ShareOther ways to share this post with friends!

Foodbuzz 24×24: The Make-Ahead Holiday Breakfast Party (Recipe: Salted Caramel Mocha Hot Chocolate)

I remember that Christmas morning with all the clarity of the glass icicles adorning our Christmas tree — at least one of which was shattered each year, an inadvertent Christmas tradition. Mom was sitting on the couch in her dramatic floral robe. The scent of coffee — which I loved, despite being averse to the bitter taste — filled the house. The rest of the family was milling about the living room, preparing to distribute the presents.

Suddenly, with a pine needley, jingle-jangly harrrrrumph!, the Christmas tree outright fell on my mother.

I mean, one minute that thing was standing tall, looking regal and festive, and the next it was on her head. She let out a startled cry and flailed from between its branches, sending ornaments and pine needles flying around the room.

Mom will disagree — and okay, my little brother’s First Christmas ornament broke, and that was sad — but this was quite possibly the most hilarious and lively Ruble Christmas morning to date.

Other Christmas mornings were notable too. There was the one where I found, after opening all my gifts, that I hadn’t received the one thing I wanted most: a pedal go-kart. I pasted on a happy face, but I was disappointed. I did have one present left, but it was a card and didn’t look promising.

The card turned out to be from Santa. I scanned it halfheartedly, and realized that it was a set of instructions. I was supposed to head upstairs to my sister’s room. Suddenly, my heart filled with hope. I charged up the stairs eagerly and shot through the door. There, in all its bright yellow glory, was my go-kart!

Other years brought a dose of holiday reality. When I was around 6, I opened my parents’ closet a few days before Christmas to put some clothes away. To my great surprise, I found myself staring at a gigantic dollhouse. I was so stunned that it took me a few moments to realize that this must be a poorly hidden Christmas present.

My tiny heart filled with glee as I briefly surveyed the three-story mansion, complete with furniture, a balcony, and landscaping. I’d always been enamored with miniatures, and now my parents had apparently decided to indulge my dollhouse obsession. I closed the door, thrilled at my discovery and determined to act surprised when I received my gift.

On Christmas morning, I ran downstairs and sure enough, the dollhouse was standing in the living room like a beacon of childhood happiness, boasting a big bow. I squealed joyfully and ran over to it, only to hear my parents call out, “That’s for your sister!

Those four words — so tiny! so brief! — cut me down faster than a fir tree on a Christmas farm.


family photo!

Then there was the Christmas morning I woke up and accidentally stabbed myself in the nose while trying to brush my hair out of my face. My entire family, probably confused but not surprised by the fact that I’d managed to injure myself immediately upon waking, waited patiently while I tried to stop the bleeding.

I couldn’t make this stuff up.


salted caramel.

It’s true; Christmas morning has varied wildly over the years — exciting, disappointing, joyous, dangerous, absurd. One constant that we’ve all come to cherish, though, is Christmas morning breakfast. Every single year, without fail, my mother wakes up early, bakes an egg casserole, and rolls out dough to make fresh cinnamon rolls. While we’re all still counting sugar plums in our jammies, she’s hard at work in the kitchen.

This year, in her honor, I decided to design some recipes specifically for a holiday breakfast — dishes that in addition to being fancy and indulgent, could be prepared almost entirely in advance. To test my menu — that’s my excuse, and I’m stickin’ to it — I threw a Make-Ahead Holiday Breakfast Party, where I decked my halls and created a make-believe Christmas morning.

The party turned out to be special even beyond the menu. See, Mike and I have never spent a Christmas morning together, despite being in a relationship for most of the past 12 years.

I’m not complaining. So many families are separated on Christmas morning because of deployment, distance, and even death. Our situation is downright joyful by comparison. We’re separated each year because both of our families have Christmas morning traditions. We spend time with our own parents in the morning before meeting later to enjoy Christmas afternoon together. This year, though, my Make-Ahead Holiday Breakfast Party was the perfect way to create a “Christmas morning” for just us.

So yesterday morning, we donned our PJs and slippers in true Christmas morning fashion. I lit my first ever fire, put the finishing touches on all of the make-ahead dishes I’d prepared earlier in the week, and we sat down together to eat. Little Byrd sat between us eating her Christmas kibble. Our plates, however, were loaded down with Gingerbread Coffee Cake, Cinnamon Stix with Eggnog Glaze, Savory Bread Pudding with Cranberries and Fennel, Winter Breakfast Chili in Sourdough Bowls, and Buttered Toast with Bright Pepper Jam.

Between bites, we sipped this Salted Caramel Mocha Hot Chocolate. I’m not one for hot breakfast drinks, usually, but I’d make an exception for this thing any day. You coat the mug with hot, buttery salted caramel before pouring in the steaming mocha hot chocolate (where coffee plays a supporting role than the lead). The whole thing is topped with a mess of caramel whipped cream and a caramel drizzle.

I’ll be sharing the other make-ahead breakfast recipes with you throughout the coming weeks as you prepare for the holidays. In the meantime, share your favorite Christmas morning memories. Anyone have any harrowing experience with falling Christmas trees?

Salted Caramel Mocha Hot Chocolate


Recipe by: Willow Bird Baking, inspired by Savory Sweet Life, adapted from Martha Stewart (caramel and cream) and TLC
Yield: 2 big mugs of hot chocolate

I can’t really quantify how buttery, caramelly, chocolatey, and delicious this Salted Caramel Mocha Hot Chocolate is, so let me just say: mmmmmm. I don’t like coffee, but in this recipe it’s there to add richness and balance, and isn’t the dominant flavor. The recipe is designed to be completed mostly in advance, making it lovely for a holiday morning breakfast — or anytime you’re in a festive mood. Also, don’t be afraid of caramel. This recipe includes temperatures, and as long as you use a candy thermometer, you’ll be great!

Mocha Hot Chocolate Ingredients:
1 1/2 cups milk
1/2 cup brewed coffee
2 tablespoons semi-sweet chocolate chips
2 tablespoons bittersweet chocolate chips (I love Ghirardelli 60% cacao)
2 tablespoons sugar

Caramel Sauce and Cream Ingredients:
3/4 cup sugar
1/8 cup water
3/4 cup heavy cream
1/8 cup creme fraiche or sour cream
1/4 teaspoon pure vanilla extract
Pinch of coarse salt

Directions:
1 to 3 days in advance: Make the hot chocolate and the caramel. First, heat the milk, coffee, chocolate, and sugar in a saucepan over medium heat, whisking constantly until it comes to a boil. Remove it from the heat and whisk it to ensure it’s fully combined. Pour it into a bowl and let it cool, stirring periodically, before covering it and refrigerating it.

Make caramel sauce: Prepare an ice-water bath and set a heavy bowl in it. Heat the sugar and water in a medium saucepan over medium-high heat until mixture boils and sugar dissolves (don’t stir at all, or crystals will form and make your caramel grainy). Use a pastry brush to wash down sides of pan often to prevent crystals from forming. When the sugar starts to turn amber, you can swirl a couple of times to ensure it’s caramelizing evenly.

Cook until the sugar turns a dark amber (definitely use a candy thermometer here! You’re looking for it to read about 345 degrees), 5 to 7 minutes more. Immediately remove from heat, and slowly whisk in 1/2 cup cream (reserve the rest of the cream in the fridge). It will bubble up when you do this, so be careful. Return the caramel to medium heat, whisking and heating until the sugar melts completely and the mixture boils.

Remove the pan from the heat and pour the caramel into a bowl set in an ice-water bath. Let the caramel cool, stirring often, for 10 minutes. Whisk in creme fraiche or sour cream, vanilla, and salt. Cover and refrigerate this.

The morning of: Reheat the chocolate mixture in a saucepan over medium heat on the stove (or for a couple of minutes in the microwave), stirring often. In the meantime, whip your remaining 1/4 cup cream in a cold bowl to stiff peaks.

Coat the sides of two mugs with caramel sauce, reserving a little over half of it. Gently fold most of the rest of the caramel sauce into your whipped cream (reserving a little to drizzle on top). Fill caramel coated mugs with mocha hot chocolate. Top with caramel cream and drizzled caramel. Serve immediately.

Note: I received a stipend from Foodbuzz for creating this meal.

If you liked this post, please:
Subscribe to Willow Bird Baking
Follow Willow Bird Baking on Twitter
Follow Willow Bird Baking on Facebook
Give this post a thumbs up on StumbleUpon
Pin It


ShareOther ways to share this post with friends!

1 5 6 7 8 9 11