banana

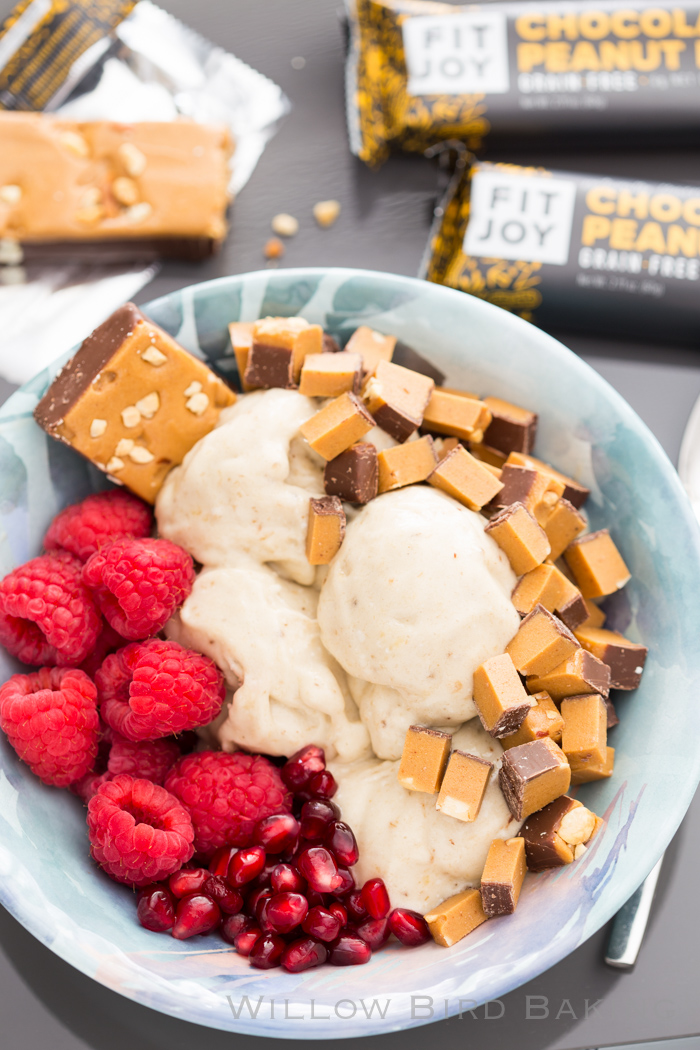
Healthy Three-Ingredient Banana Ice Cream

Thank you for sponsoring this Healthy Three-Ingredient Banana Ice Cream recipe, FitJoy!

Healthy Three-Ingredient Banana Ice Cream

August is going to be a little stressful, so if you’re available to come sedate me for roughly a month or like throw me into the ocean or something, I’m down for that! Good news, though: it’s stressful for GREAT reasons, because there are big changes coming up that I’m excited about!
(more…)

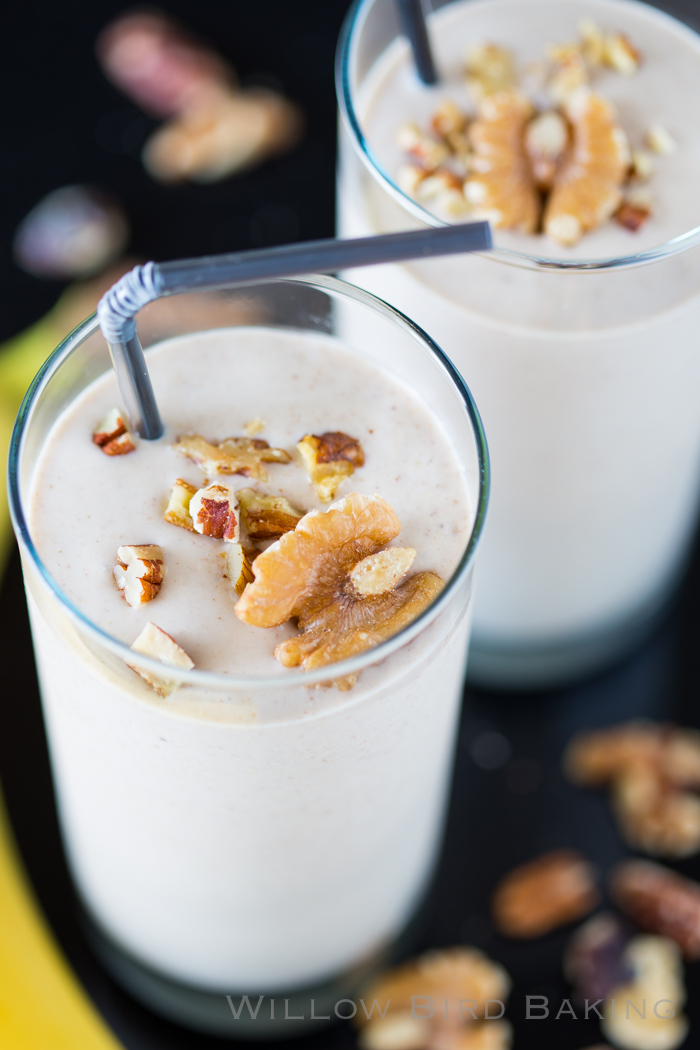
Banana Nut Crunch Protein Smoothie + Win a Blendtec Designer 725 Blender and Twister Jar!

A recipe for a healthy vegan Banana Nut Crunch Smoothie with lots of protein, plus a chance to win a BlendTec Designer 725 Blender and Twister Jar!
Banana Nut Crunch Smoothie Recipe

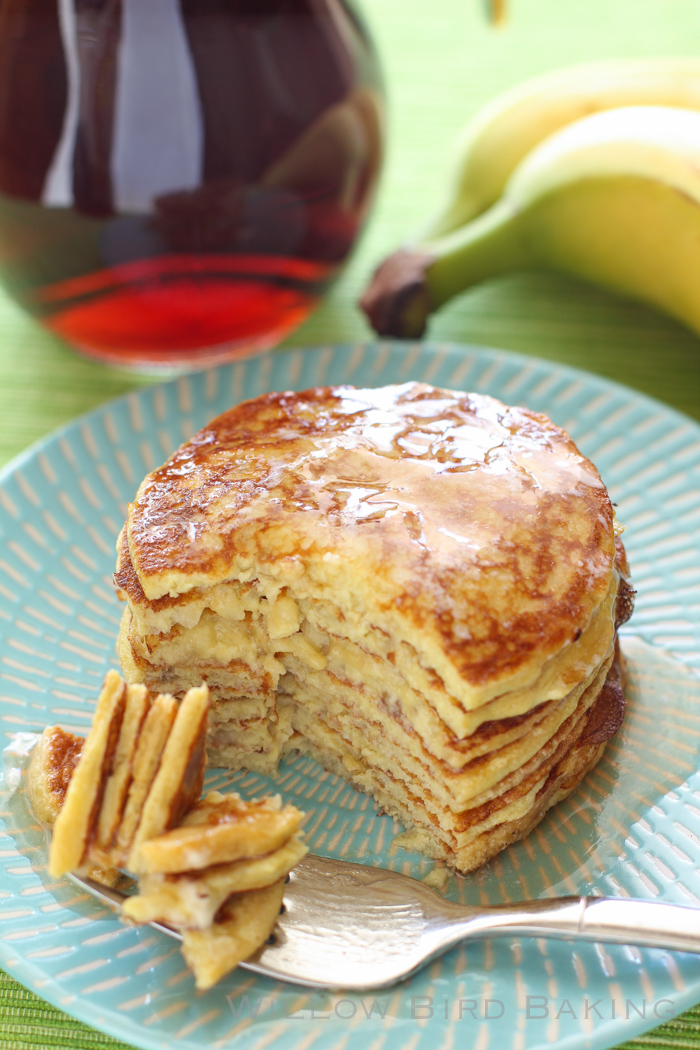
Four-Ingredient Protein Pancakes (and 16 other simple, healthy meals)

Recipe for Four-Ingredient Protein Pancakes from Willow Bird Baking
Four-Ingredient Protein Pancakes

Okay, I did it. I went to a hot yoga class.

Some context: I’m trying to be healthier. I’m trying to get more fruits and veggies in my diet, trying to exercise more often and in different ways. So when this coupon popped into my inbox for hot yoga classes, I bought it.

And then I realized just buying it doesn’t actually do anything. You actually have to go to the class or whatever. Oh.

(more…)

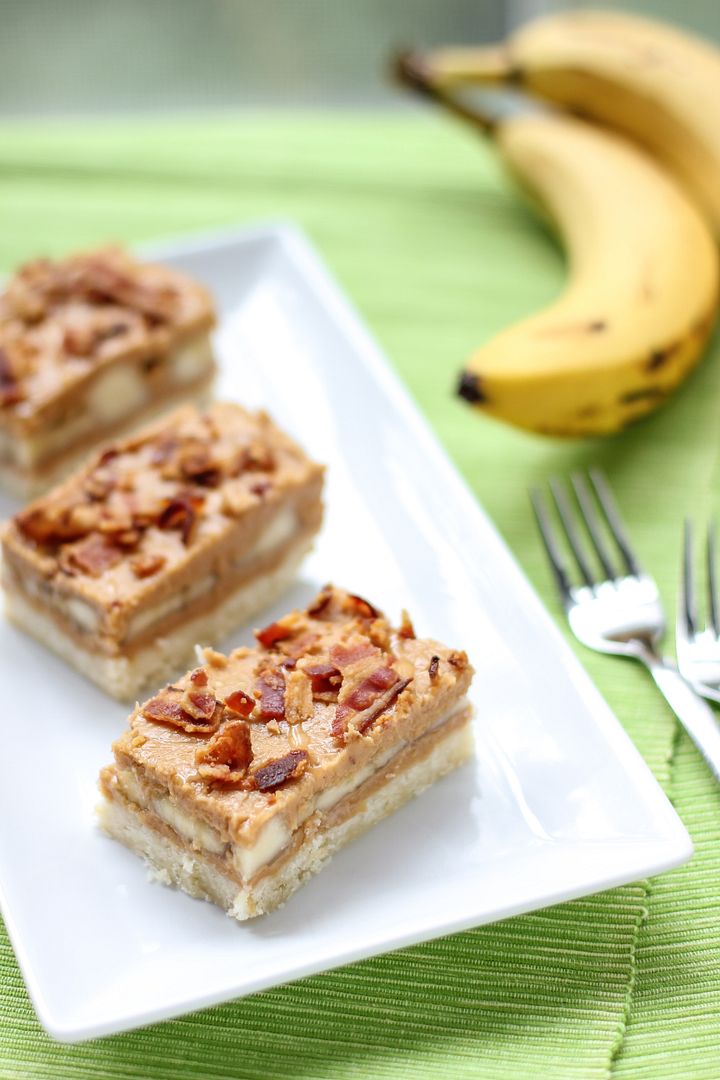
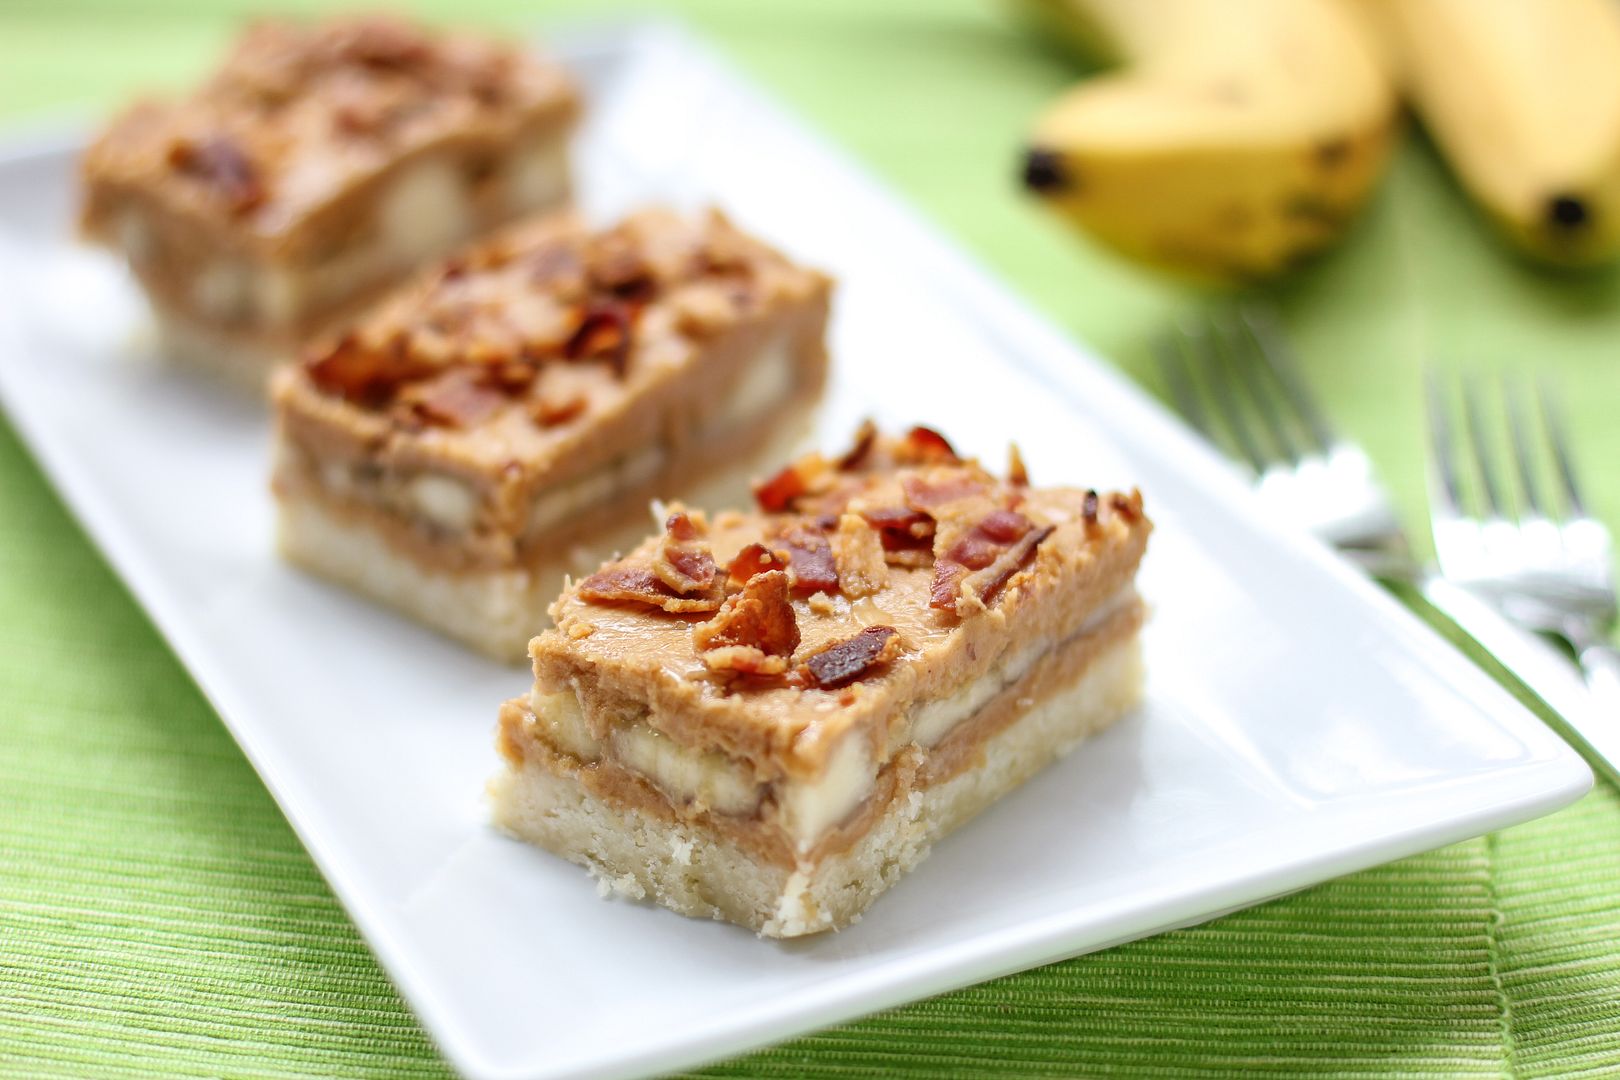
Elvis Presley Bars (Peanut Butter Banana Bacon Bars – with a vegetarian variation!)

When I posted the invitation on my Facebook wall, I was pretty sure no one was going to respond (except to heckle me.) Imagine my surprise when a couple of my friends — one from Sunday school and one from high school — responded that they’d come. That meant it was really happening.

When Saturday evening came, I drove across town, listening to the radio to distract myself from what I was about to do. It was only when I stepped out of my car and surveyed the busy roller skating rink in front of me that visions of ambulances flashed through my head. Was I really about to go roller skating for the first time in 20 years?

My doubts resurfaced a few moments later when I carefully stood up in my skates for the first time. I thought that the four-wheeled skates would provide more, uh, balance than that. They didn’t come with, like, knee pads or anything? Maybe some bubble wrap?

I looked at my friends and attempted a confident smile. It must’ve been about as wobbly as I was, though, because they both looked worried. To lighten the mood, I mentioned that I was actually considering trying to join the roller derby someday. They laughed a little too much at that. Hm. Bad sign.

Nevertheless, we made slow, shaky progress over to the opening in the rink — which, I noted bitterly, only had a wall around about a quarter of it. At this point I was pretty certain the night was going to end in one or more broken limbs. My left arm ached as if to remind me the Roller Skating Incident in third grade, which left me with a sling for a few months and residual pain well into my adulthood. I stepped gingerly onto the slick floor and pushed clear of the doorway, wondering what I’d gotten myself into.

Turns out my friend Meredith is a total roller skating rockstar. My friend Steven was slower but still relatively surefooted. Next to them, I felt like a roller skating walrus with a coordination problem. They were ruthlessly encouraging, though, assuring me I was doing well despite my tendency to flail-and-scream every 30 seconds or so.

I did huff and puff. And I did hug the wall more than my friends. And I did take several breaks. And my quads did start burning because I’m in roughly the same physical shape as an old lady with a video gaming addiction.

But I want you to know that I did not fall even once! I want you to know that I upgraded to fancy inline skates! I want you to know that Meredith assured me (sincerely!) that I was doing tons better by the end of the night! And most importantly, I want you to know that the only thing louder than the rockin’ roller rink soundtrack and the gaggles of middle school girls was the sound of our laughter — because we had so much fun.

Roller skating was a blast from the past. Meredith, Steven, and I have already decided to make a monthly date out of it. Who knows, maybe after a few months practice, the roller derby will recruit me. No? Okay, maybe not.

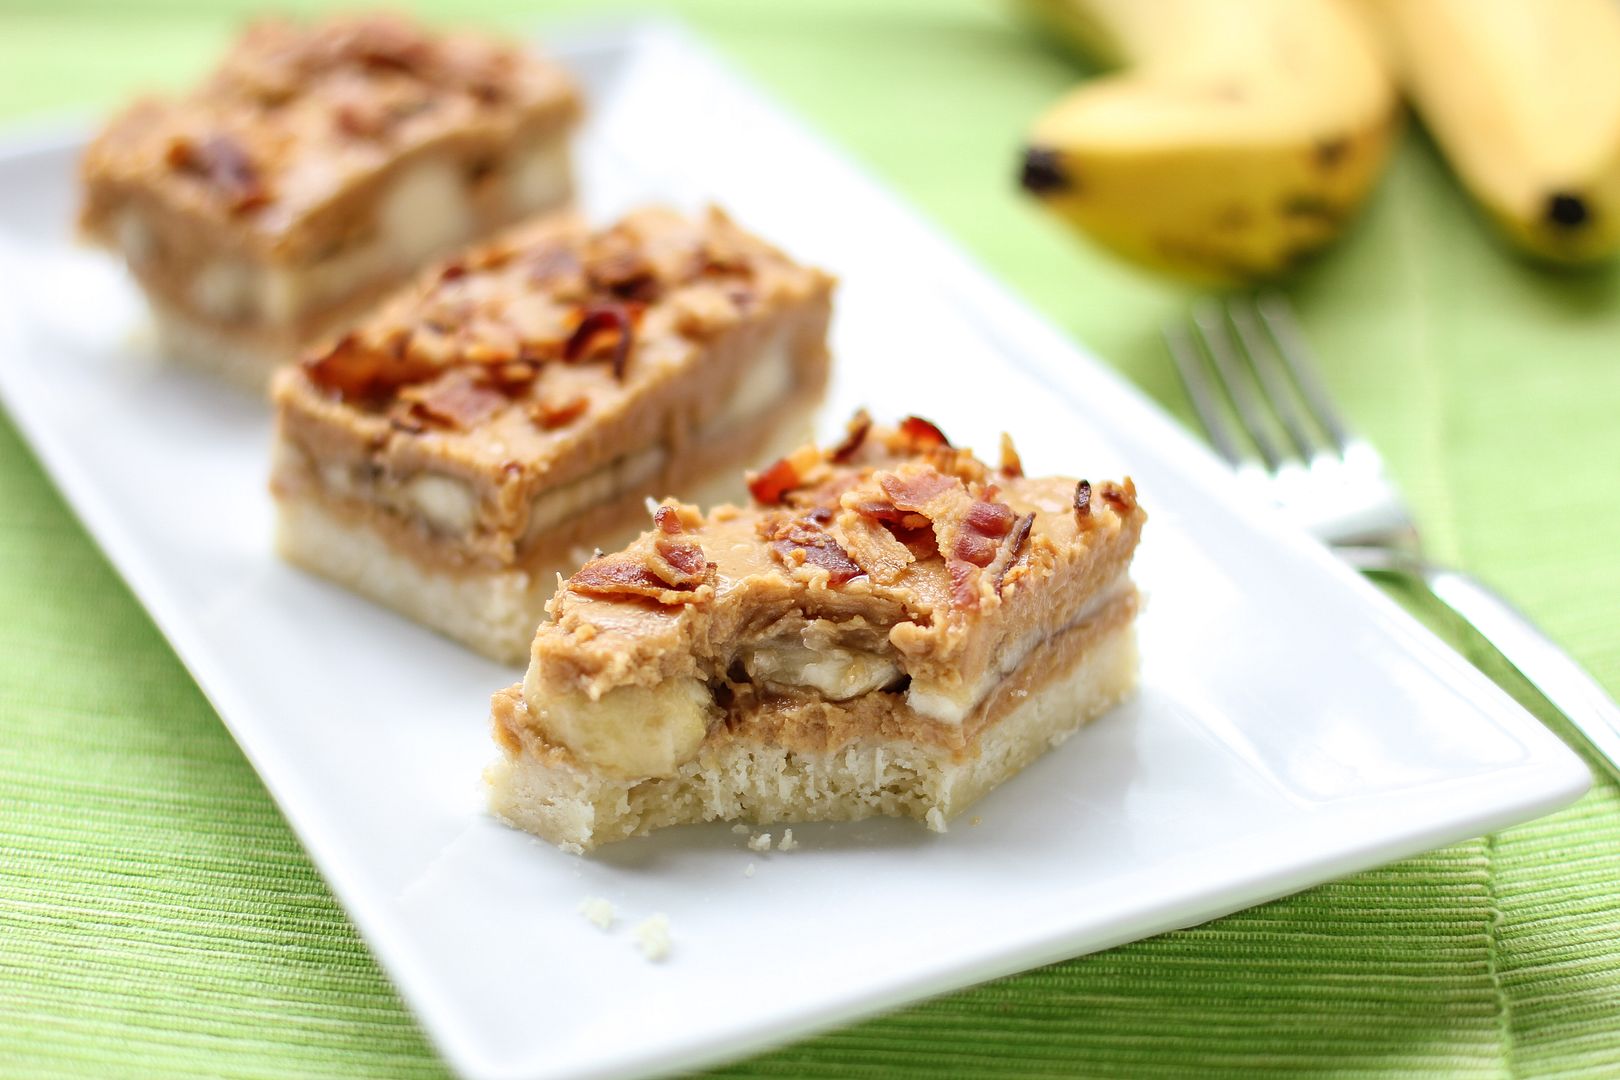
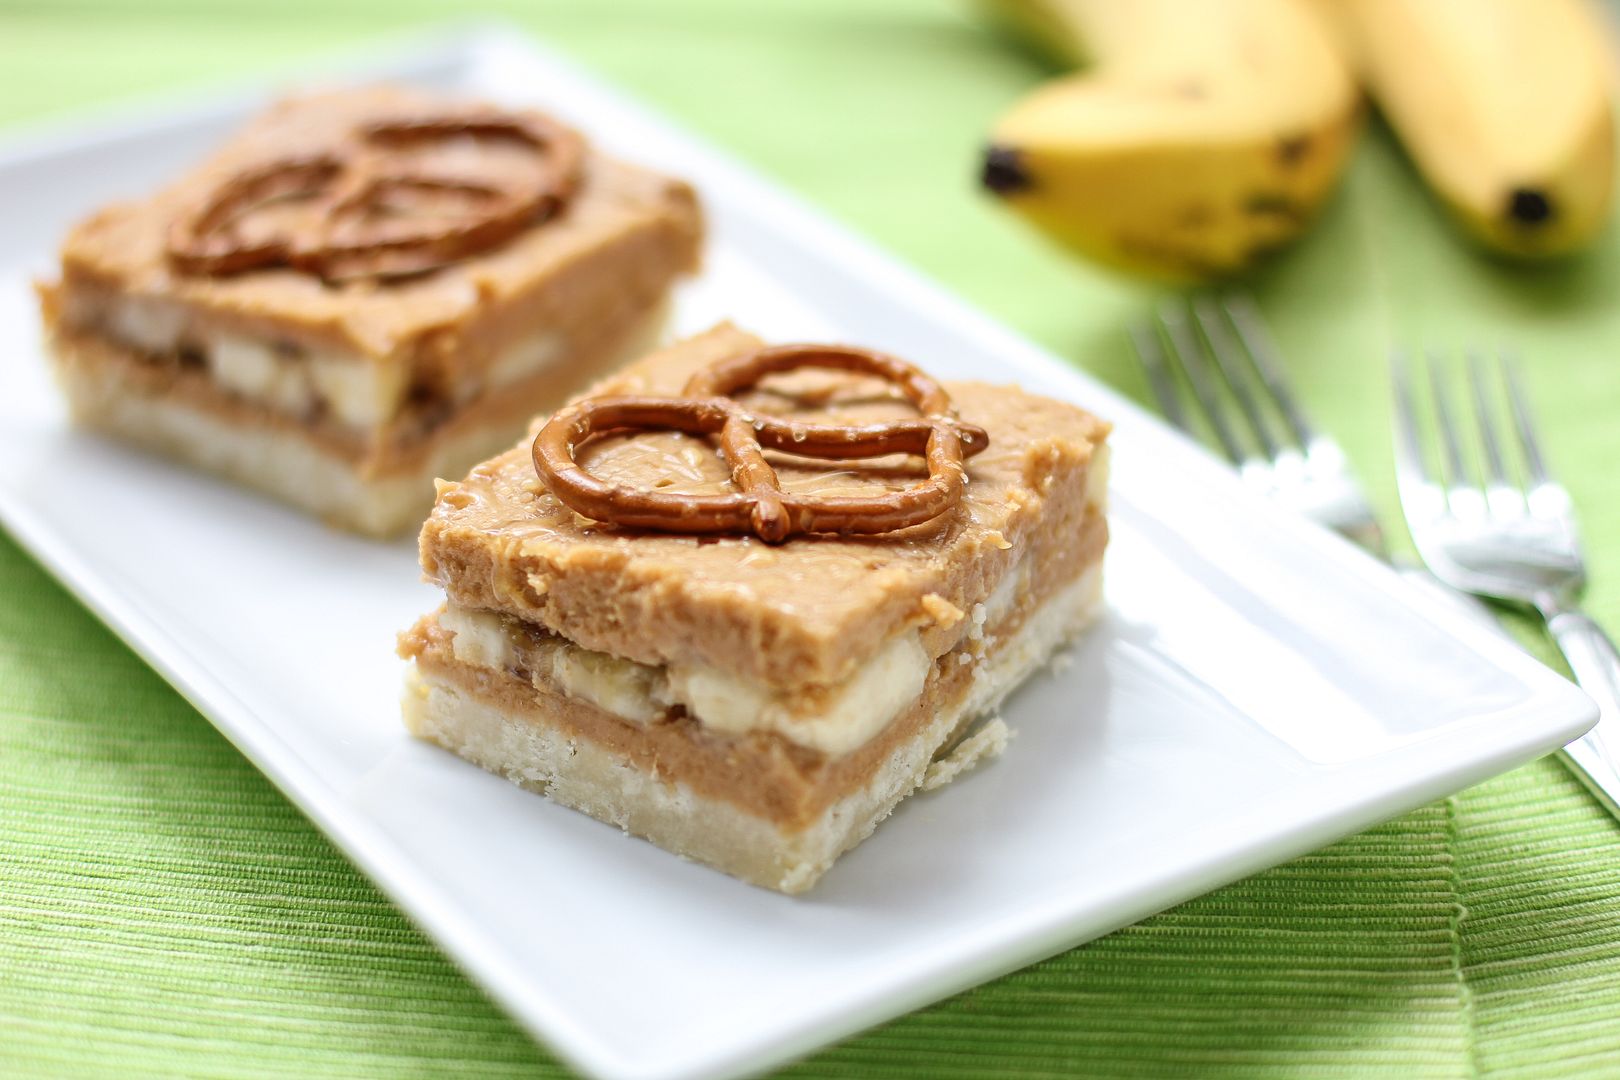
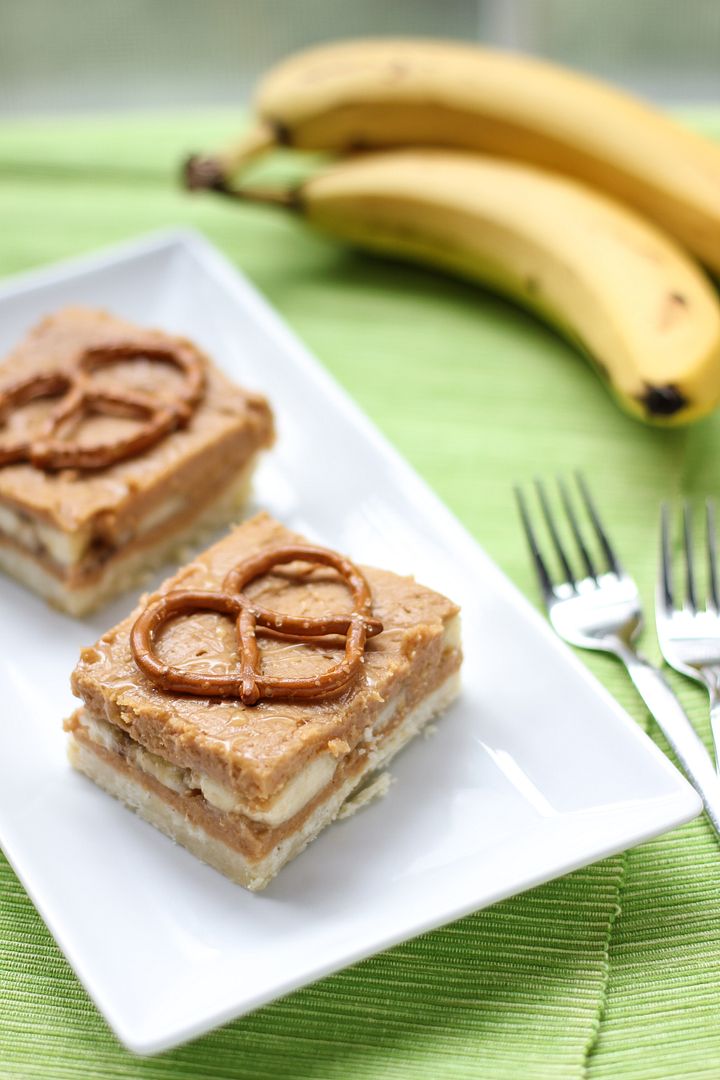
Another blast from the past that I enjoyed recently (one that you might actually want to join me for!) are these Elvis Presley Bars. They’re based on Elvis’s favorite sandwich: Peanut Butter, Banana, and Bacon. Anything with bananas and peanut butter has that elementary-school-lunch nostalgia that I love, but adding bacon for a salty twist makes these bars extra delicious. Don’t worry if you’re a vegetarian; big crunchy pretzels can be used as your salty component. Either way, I think Mr. Presley would be proud.

One year ago: Fig, Prosciutto, and Arugula Pizza
Two years ago: Chocolate Mousse Pie
Three years ago: Mallow Cookies

Elvis Presley Bars (Peanut Butter Banana Bacon Bars)


Recipe by: Willow Bird Baking, with peanut butter filling adapted from Fine Cooking
Yield: about 15 bars

These Peanut Butter, Banana, and Bacon Bars are a delicious combination of salty and sweet. Pretzels can be used to replace the bacon for a vegetarian substitute. Since the recipe makes a big pan of bars, they’re perfect for taking to a potluck or for pleasing a crowd.

Shortbread Crust Ingredients:
2 cups all-purpose flour
1/2 cup powdered sugar
1 cup cold butter, cut into small pieces
1/2 teaspoon salt

Peanut Butter Filling Ingredients:
2 cups creamy peanut butter (use an emulsified kind like JIF, not natural peanut butter)
12 tablespoons unsalted butter, at room temperature
2 1/2 cups powdered sugar
2 teaspoons pure vanilla extract
4 tablespoons hot water
3-4 bananas
honey for drizzling
5-6 strips bacon OR large pretzels for topping

Directions:
Preheat the oven to 350 degrees F and line a 9 x 13-inch baking dish with a foil sling with the ends overhanging the pan to facilitate the removal of the bars later on.

Pulse the flour, powdered sugar, and salt together in a food processor to combine. Add the cold butter chunks and pulse about 10-12 times until you have the texture of coarse sand (you can also use a pastry cutter or two knives to accomplish this if you don’t have a food processor). Pour this mixture into the prepared dish and use a spatula or the bottom of a glass to press it down into an even layer. Bake it for about 15 minutes or until it’s lightly browned. Let it cool completely.

In a medium bowl or in the bowl of a stand mixer, beat together the peanut butter and butter until smooth and fluffy, about 1 minute. Add the vanilla extract, 2 tablespoons of hot water, and half the powdered sugar to the mixture and beat until combined and fluffy. Add the rest of the powdered sugar and another 2 tablespoons of hot water. Once combined, beat for an extra minute until the mixture is smooth and thick like frosting.

Use a spoon to glob half the peanut butter mixture onto the cooled shortbread crust, and then use an offset spatula to gently spread it into a roughly even layer (don’t worry if it’s not perfect.) Lay banana slices across the entire surface. Glob the rest of the peanut butter mixture all across the top. Again, use your offset spatula to gently spread the peanut butter mixture over all the banana slices (you want the banana slices to be covered because bananas oxidize and turn brownish, so the bars are prettier if you can’t see them. It’s hard to get them all covered, but just be patient and keep working the peanut butter around, cleaning off your spatula now and then.) Chill the bars for at least 3 hours.

While the bars are chilling, preheat the to 400 degrees F and cover a baking sheet with aluminum foil. Lay out the strips of bacon on the baking sheet and bake for 17-20 minutes or until crisp. Let bacon drain and completely cool on a paper towel covered plate.

When the bars are chilled, lightly drizzle the surface with honey (they’re already very sweet, so don’t be heavy-handed), and crumble bacon pieces over the surface (or top with pretzels as desired). Gently use the sling to pull the bars out and cut them on a cutting board. Serve them within a day or two (before the bananas get too brown), storing them in an airtight container in the fridge if needed.

If you liked this post, please:
Subscribe to Willow Bird Baking
Follow Willow Bird Baking on Twitter
Follow Willow Bird Baking on Facebook

Caramelized Banana Upside-Down Coconut Cake & Coconut Whipped Cream

I don’t remember the first spice I ever purchased with my own money, but I’m betting it was a packet of McCormick® chili seasoning. And I’m betting it was during my senior year of college. I lived in a cozy apartment above my professor’s garage. It was furnished with a blue couch from Goodwill that was missing its back legs, a twin bed, a sturdy desk, a dresser, and a couple of plants I was doing my best to keep alive.

There wasn’t a kitchen, but there was a fridge downstairs in the garage and a microwave in my room. Mike assembled an electric skillet for me (he likes to say, “remember that skillet I built you?”) as well. My makeshift “kitchen” wasn’t much, but since I’d left the comfort (and cost) of a meal plan behind the previous year, it would have to do.

Many of my meals were hot dogs and quesadillas, usually devoured with lots of salsa while watching The Cosby Show, or People’s Court. But I did call my mom and ask her to send over her chili recipe — the one we ate with peanut butter maple syrup sandwiches when I was little.

Heading to the grocery store to buy the chili ingredients was the beginning of a new adventure for me. In those days, the aisles and ingredients were unfamiliar, and I ambled to and fro searching for each item. Each line of the recipe flooded my head with new questions: Where are the canned tomatoes? Do I buy dry beans or canned? Where is the spice aisle? How lean do I want my ground beef? Wait, do I own a spoon?
I do remember my mom specifying that she used McCormick’s chili seasoning though. And I remember sprinkling the packet on my ground beef just as she’d instructed. And finally, I remember the utter satisfaction of sitting down with a bowl full of cheesy, sour creamy, spicy chili (and watching A Different World, no doubt) that I’d made myself.

McCormick is definitely a part of my earliest cooking memories, and it claims a huge chunk of my spice rack (or really, spice shoe organizer) today. Far from being stuck in the past, though, the company released the McCormick Flavor Forecast 2012 on Tuesday.
This report, compiled by chefs, sensory scientists, trend trackers, marketing experts, and food technologists, highlights up-and-coming flavor trends around the world. It’s used both to guide the company’s product development as well as to inspire home cooks with new flavor combinations.

While McCormick has been producing a Flavor Forecast since 2000, this year’s report is the first to be global in scope. It’s organized into six trends: Honoring Roots, Quest for the Ultimate, Veggies in Vogue, Simplicity Shines, Flavorful Swaps, and No Boundaries. Each trend includes two innovative spice and ingredient combinations to spark your culinary creativity.
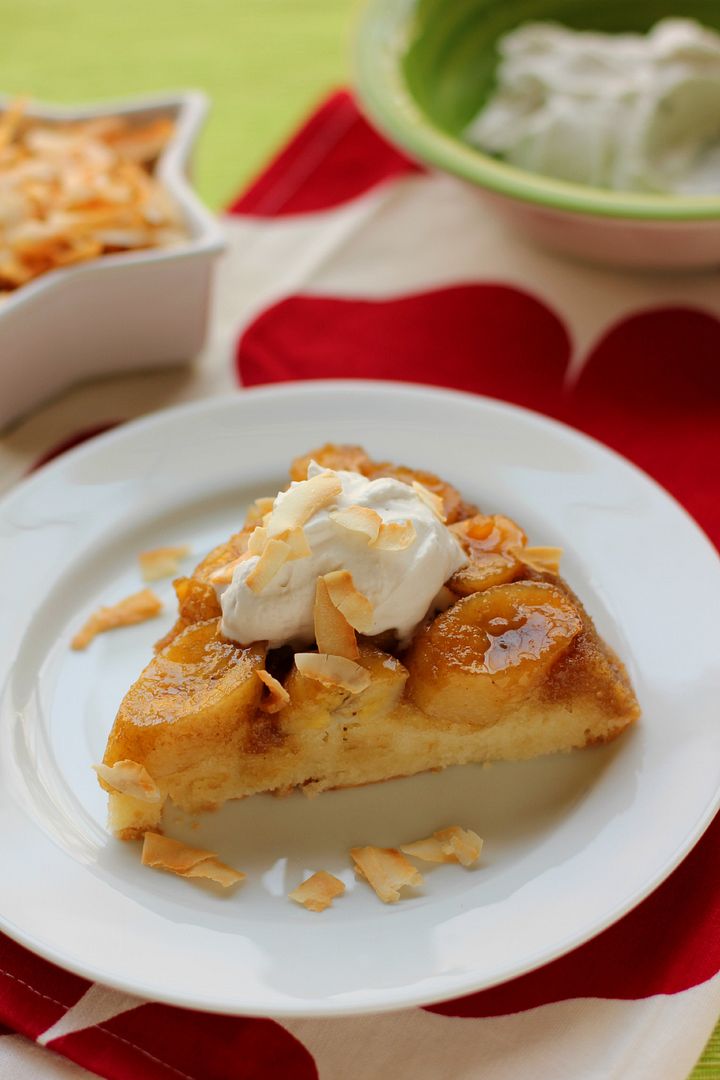
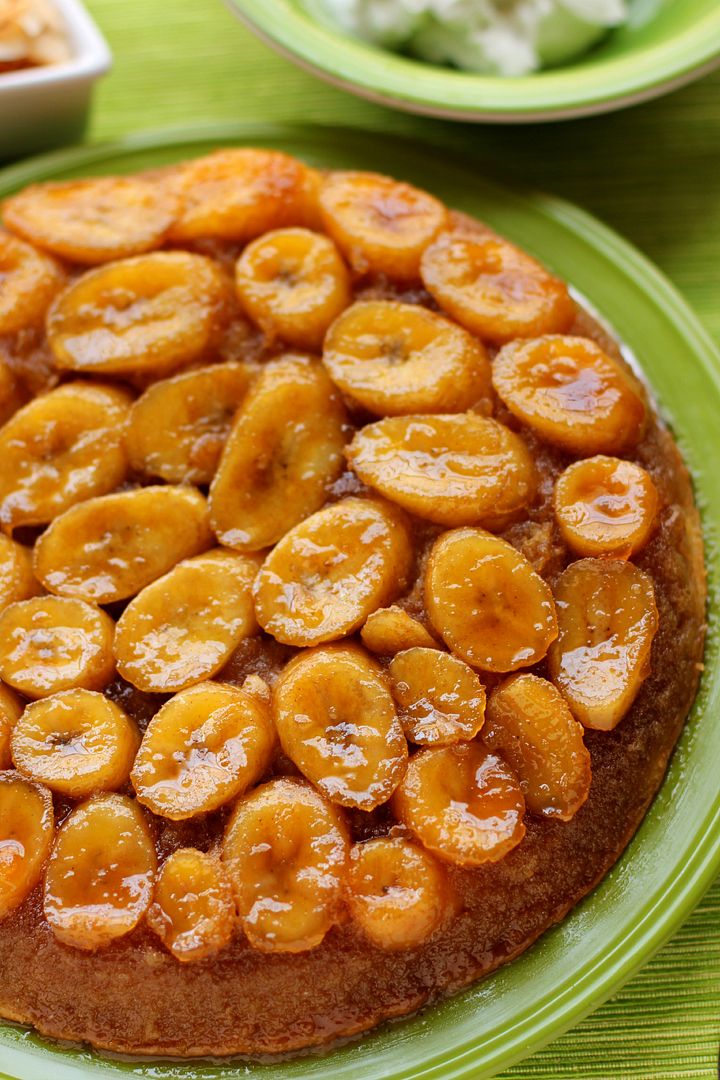
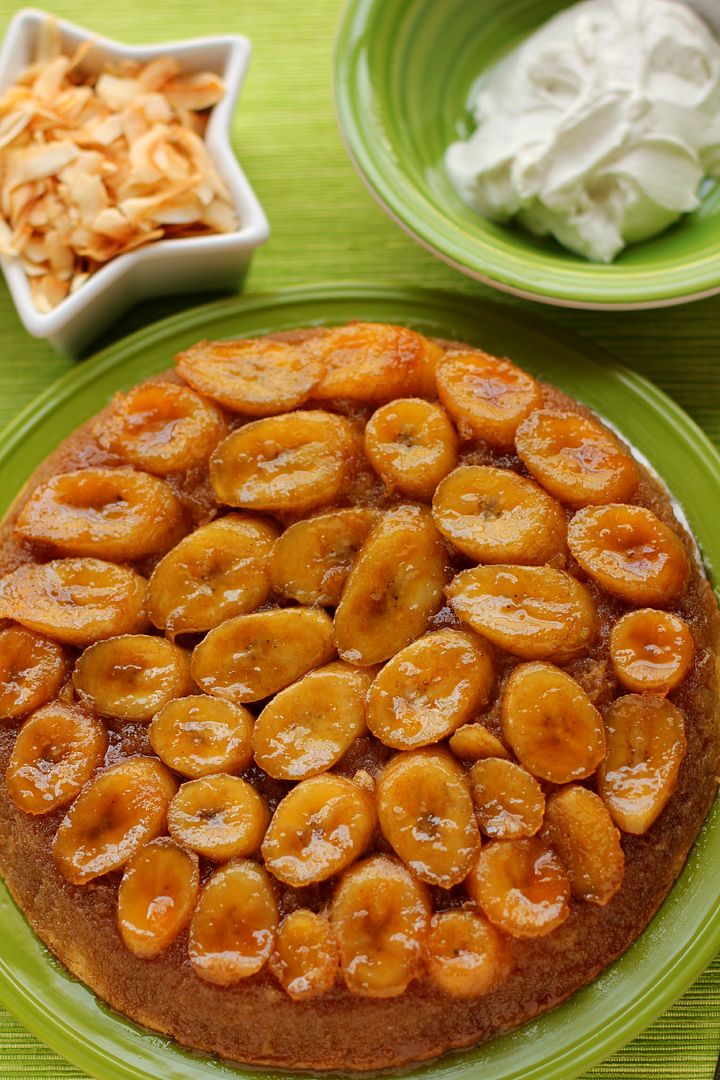
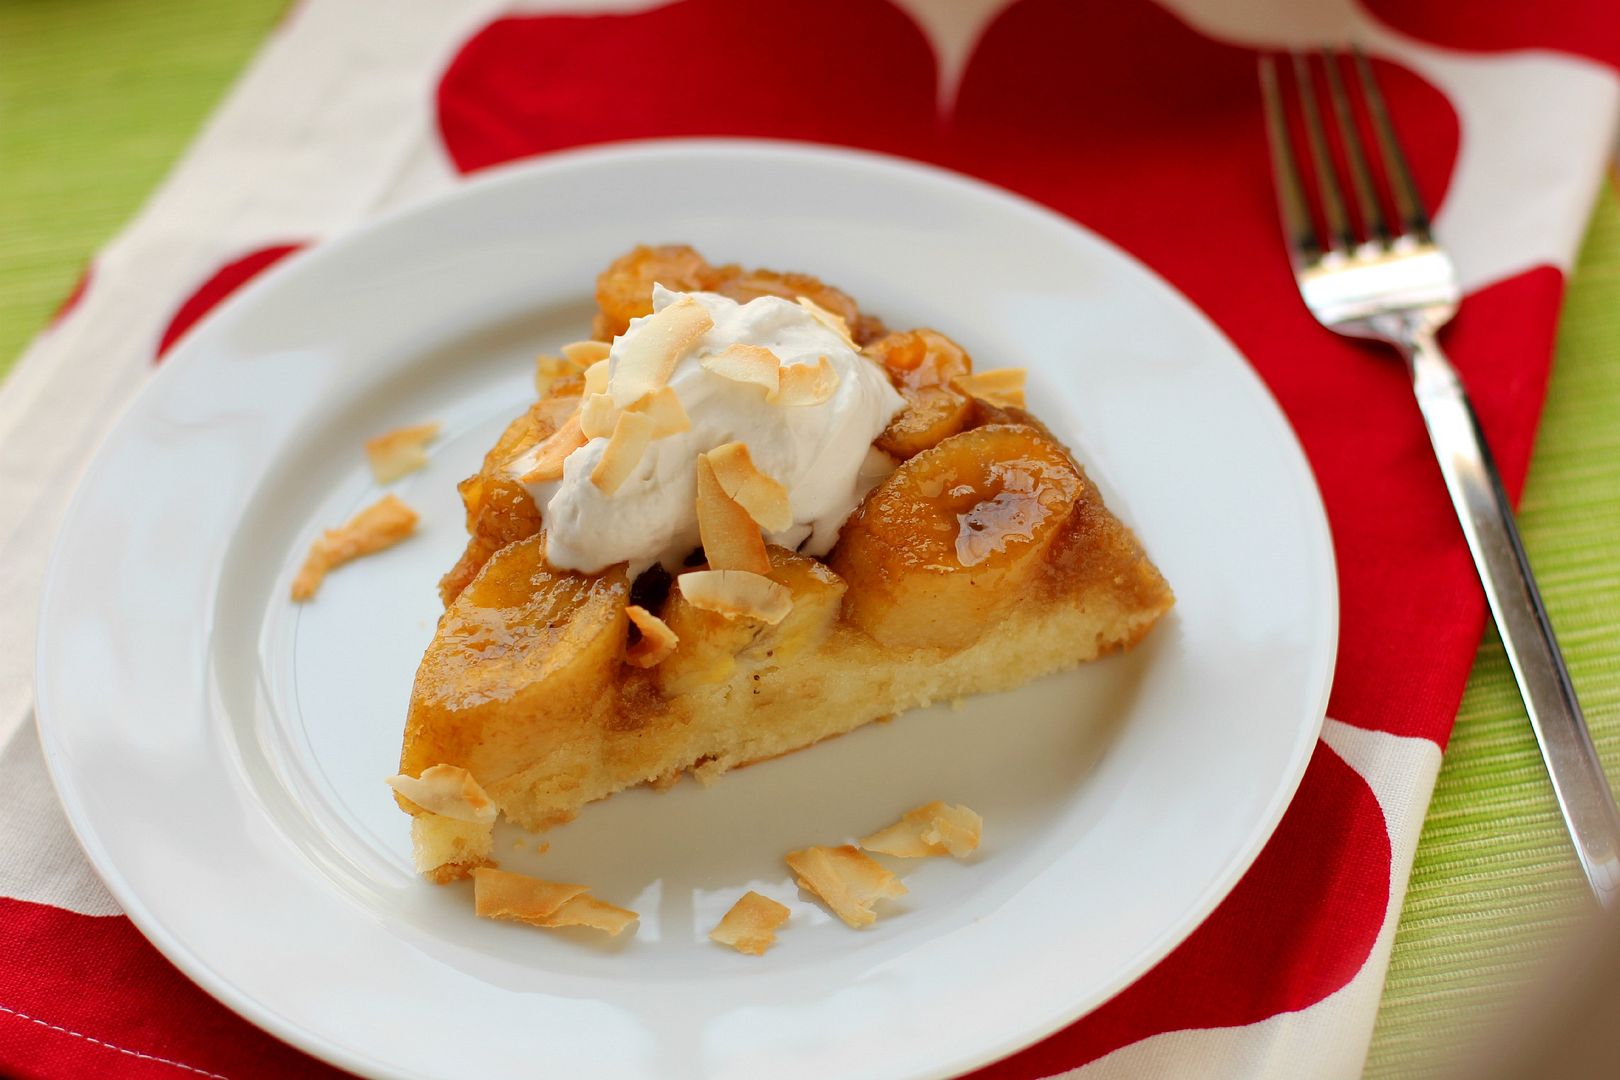
One of the flavor combinations that sounded particularly tempting to me was ginger and coconut. I decided to use this simple pair to create an indulgent Caramelized Banana Upside-Down Coconut Cake. Upside-down cakes are both simple to create and delicious. You’ll love this comforting, nostalgic dessert even more with a few modern twists: the bold zing of ginger in the caramelized banana topping, a moist coconut cake in the place of a regular yellow cake, and a big dollop of coconut whipped cream on top. I added a generous sprinkle of toasted coconut for extra texture and flavor. In short, it was insane. I can’t wait for you to taste this thing!

In the meantime, I’d love for you to join in the conversation: which of McCormick’s flavor combinations could you see yourself using? What are some ideas for recipes you want to create? Get inspired!

Caramelized Banana Upside-Down Coconut Cake With Coconut Whipped Cream


Recipe by: Willow Bird Baking, with coconut whipped cream adapted from Nutty Kitchen
Yield: 10 pieces

This thing is downright celestial. Upside-down cakes are easy to create, but come out so beautiful and delicious. This one uses a sweet, tender coconut cake in the place of a yellow cake, and adds the bold zing of ginger to the caramelized banana topping. Enjoy it with a cloud of cool coconut whipped cream (one of my new favorite things!) and some crunchy toasted coconut.

Topping Ingredients:
3/4 stick unsalted butter
3/4 cup packed light brown sugar
4 large just-ripe bananas, cut on a diagonal into 1/2-inch slices (you might want to have an extra banana or two on hand just in case your bananas are skinnier or something weird)
1 teaspoon McCormick ginger
1 teaspoon finely chopped McCormick crystallized ginger
pinch salt

Cake Ingredients:
1 cup all-purpose flour
3/4 cup sugar
1 1/2 teaspoons baking powder
1/2 teaspoon salt
1/4 cup vegetable oil
1/2 cup Thai Kitchen coconut milk
1 teaspoon McCormick vanilla
1 egg

Coconut Whipped Cream Ingredients:
2 cans Thai Kitchen coconut milk (refrigerated overnight)
3 tablespoons powdered sugar
1/2 teaspoon McCormick vanilla
flaked coconut for toasting and topping

Directions:
NOTE: This recipe is designed for a 10-inch cast iron skillet, but it can also be made in a 10-inch cake pan or a 12-inch cast iron skillet. To make it in a cake pan, prepare the topping in a separate saucepan first, add it to your cake pan, and then continue with the recipe as usual. If you make it in a 12-inch skillet, it’ll produce a thinner cake, may require an extra banana or two, and may take about 5 minutes less to bake. Because cast iron can vary, no matter what size you use, be sure to check the cake’s doneness early and often, starting around 20 minutes, with a toothpick inserted into various spots.

Toast coconut flakes: Preheat oven to 350 degrees F. Spread flakes out on baking sheet. Bake for a few minutes, stirring every minute or so, until the coconut is lightly browned (watch it like a hawk). Transfer to a plate to let cool.

Make cake: In a 10-inch skillet (see note above about using different pan sizes), melt the butter over medium-high heat. Stir in the brown sugar, ground ginger, crystallized ginger, and salt and simmer for 4 minutes (or until the mixture is bubbly and caramelized), whisking constantly. Be careful — hot sugar is no joke! After 4 minutes, remove the mixture from heat and add the bananas as close together as possible, fitting as many in as you can.

In a separate bowl, whisk together the flour, sugar, baking powder, and salt. Add the oil and coconut milk and whisk like a crazy person for 1 minute. Add the egg and vanilla and whisk it in well. Pour the batter over the banana mixture, evening it out with a spatula.

Bake 25-30 minutes or until it’s lightly brown on top and a toothpick inserted in various parts of the cake comes out with just a few moist crumbs. Let cool in the pan for exactly 5 minutes (any more and it will harden in the pan, and less and it might fall apart) before running a knife around the edge of it and carefully (use oven mitts! hold both sides of the skillet, holding the plate on with the heels of your hands! enlist a spotter! did I mention that hot sugar is no joke?) invert it onto a large serving platter.

Make coconut whipped cream: Using a spoon, remove the cold coconut solids from each can of coconut milk (save the coconut water for other uses). Place it in a chilled bowl with vanilla and powdered sugar. Whisk like the dickens with a chilled beater until it has a whipped cream-like consistency (this probably took over 10 minutes with my electric mixer, but it’s worth it). Serve cake warm with a big dollop of cold coconut whipped cream and a sprinkle of toasted coconut.

You don’t see many product reviews on Willow Bird Baking, because I’m choosy with how I share this space. My choosiness reflects my own ideals for Willow Bird in addition to my respect for the community we have here. When I get the opportunity to work with a company I genuinely love and use in my own kitchen, though, I’m always thrilled to share. McCormick is just such a company, and I’m excited to share their forecast of upcoming flavor trends.

Disclosure: McCormick sent me a Flavor Forecast Immersion Kit of ingredients, and compensated me for other ingredients and for my time and creative energy. I value my readers such that all opinions expressed on Willow Bird are always my own.

If you liked this post, please:
Subscribe to Willow Bird Baking
Follow Willow Bird Baking on Twitter
Follow Willow Bird Baking on Facebook
Give this post a thumbs up on StumbleUpon
Pin It


Shareother ways to share this post with friends
1 2