
As I mentioned in my previous post, the July Daring Bakers’ challenge was hosted by Nicole at Sweet Tooth. She chose Chocolate Covered Marshmallow Cookies and Milan Cookies from pastry chef Gale Gand of the Food Network. While the Milan cookies were delicious and dainty, the Mallows were scrumptious and indulgent. They were two very different types of cookies, but I learned from each recipe and enjoyed the variety! If I had to choose a favorite, though — and you know I do — it would be these Mallows.
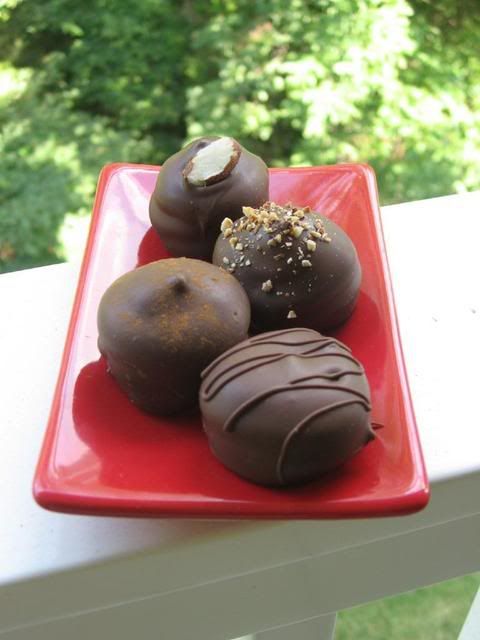
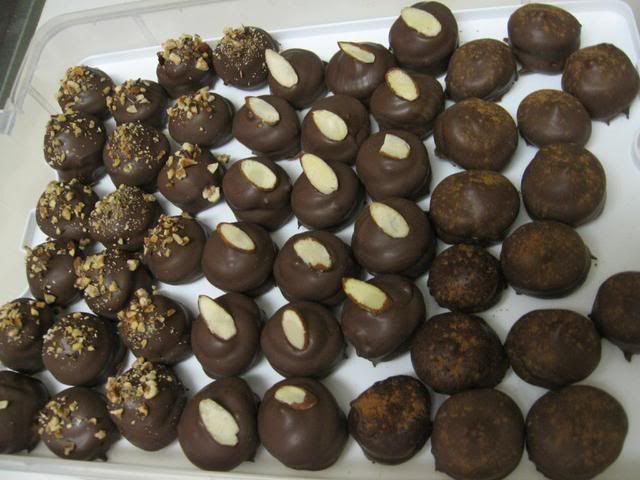
Four types of Mallows (from back): Almond Mallows, Hazelnut Mallows, Cinnamon Mallows, and Plain Mallows
Mallows are chocolate-covered, marshmallow-topped cookies. The wonderful thing about these Mallows (besides the amazing flavor) is how versatile they are. Homemade marshmallows are very easily flavored and customized, so I was able to make four Mallow “flavors” with hardly any more trouble than just making one. I chose Almond, Hazelnut, and Cinnamon Mallows in addition to the plain.
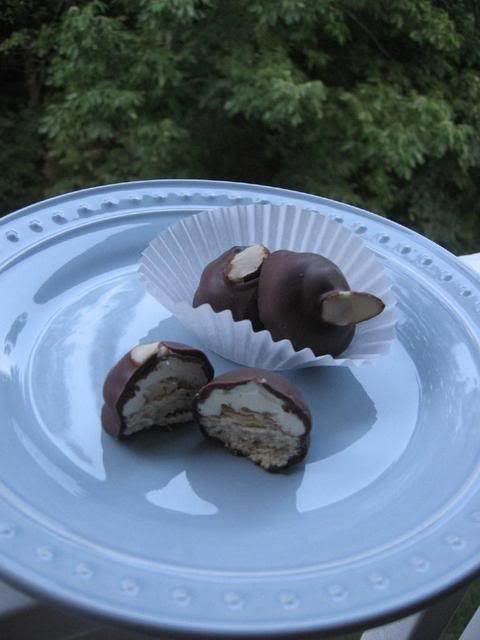
Almond Mallows
Almond Mallows have an almond sliver between the cookie and marshmallow, and another atop the cookie. In addition, their marshmallows are flavored with vanilla, almond, and butter flavorings. The marshmallow is as rich as a buttercream frosting, and so tasty! I bet this version would also be delicious with some creamy almond butter piped on under the marshmallow.
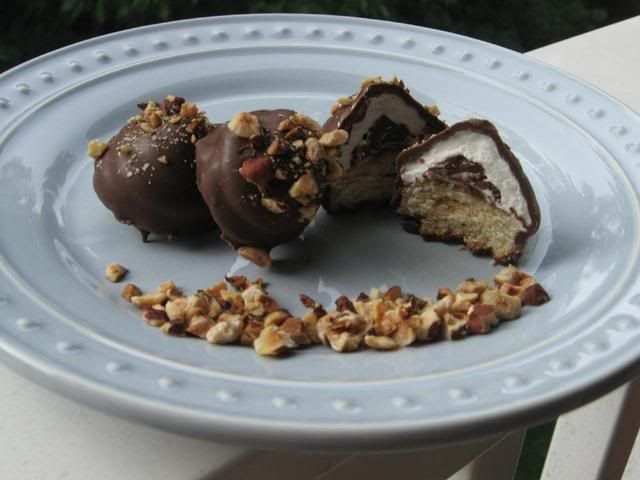
Hazelnut Mallows
Hazelnut Mallows (my favorite!) have Nutella piped on under plain marshmallow, and are topped with toasted hazelnuts.
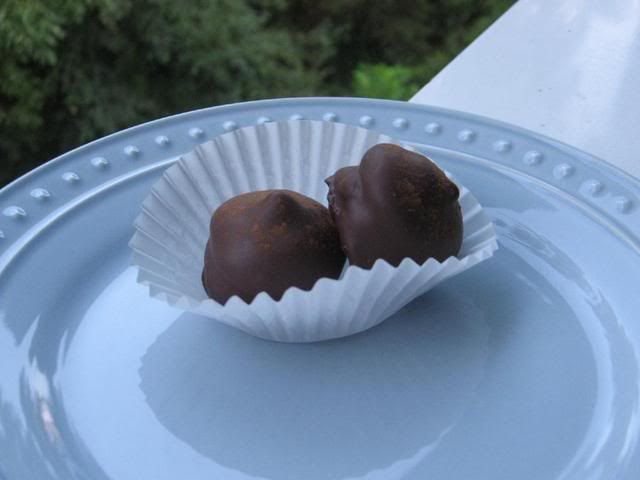
Cinnamon Mallows
Cinnamon Mallows have cinnamon and nutmeg flavored marshmallow, and a light dusting of cinnamon and cocoa powder on top.
Enjoy experimenting with flavors! Different sorts of nuts, spices, and extracts are all tools for tweaking your mallows. Some Daring Bakers piped a bit of jam or nut butter below their marshmallows for an added surprise. Use food coloring to denote different flavors of marshmallow. There’s a lot of room for creativity here.
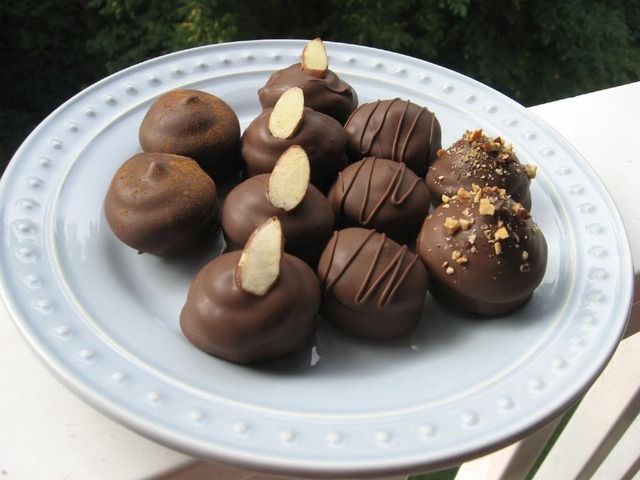
All four types of Mallows again (from left): Cinnamon Mallows, Almond Mallows, Plain Mallows, and Hazelnut Mallows
Gale Gand’s original recipe seemed to need some tweaking, since Daring Bakers typically ended up with — I kid you not — hundreds of cookies, and only enough marshmallows to cover around 50. I’ve adjusted the recipe below to hopefully yield the correct amounts! Also, Gand’s original recipe called for melting semisweet chocolate and vegetable oil to make your coating. After reading that about half of the Daring Bakers’ were having trouble with their chocolate not setting — especially those who live in warm or humid climates — I decided not to take a chance with it. Instead, I used my beloved CandiQuik dipping chocolate, which dries in literally minutes! You can probably find this at Lowes Food or SuperTarget. A friend of mine over at Barbara Bakes uses Ghiradelli dipping chocolate, which is another option.
Enjoy playing with your Mallows! My family and friends loved these cookies, and I hope yours will too.
Mallow Cookies
Recipe By: Gale Gand (tweaked quite a bit!)
Yields: about 80 small (bite-sized) Mallows
Cookie Ingredients:
1.5 cups all purpose flour
1/2 cup white sugar
1/2 teaspoon salt
3/8 teaspoon baking powder
1.5/8 teaspoon baking soda (this is an odd measurement — eyeball it as best you can!)
1/4 teaspoon ground cinnamon
6 tablespoons unsalted butter
1.5 eggs, whisked together (to get half an egg, crack it into a separate cup and lightly beat it; then discard 1.5 tablespoons and add the rest to the recipe)
Dipping chocolate (I used 2 bags of chocolate CandiQuik)
Homemade Marshmallow Ingredients:
1/4 cup water
1/4 cup light corn syrup
3/4 cup (168.76 grams/5.95oz) sugar
1 tablespoon powdered gelatin
2 tablespoons cold water
2 egg whites , room temperature
Flavoring (either Plain, Almond, or Cinnamon)
-Plain = 1/4 teaspoon vanilla extract
-Almond = 1/8 teaspoon vanilla extract, 1/8 teaspoon almond extract, 1/8 teaspoon imitation butter flavoring, and 4 drops of yellow food coloring (optional).
-Cinnamon = 1/4 teaspoon vanilla extract, 1/4 teaspoon cinnamon, and a pinch nutmeg
Directions:
Begin by making cookies:
1. In a mixer with the paddle attachment, blend the dry ingredients.
2. On low speed, add the butter and mix until sandy.
3. Add the eggs and mix until combine.
4. Form the dough into a disk, wrap with clingfilm or parchment and refrigerate at least 1 hour and up to 3 days.
5. When ready to bake, grease a cookie sheet or line it with parchment paper or a silicon mat.
6. Preheat the oven to 375 degrees F.
7. Roll out the dough to 1/8-inch thickness, on a lightly floured surface. Use a 1 1/2 inches cookie cutter to cut out small rounds of dough (see my tips for rolling out dough, below).
8. Transfer to the prepared pan and bake for 8 minutes or until light golden brown. Let cool to room temperature.
While cookies are cooling, make your marshmallows:
1. In a saucepan, combine the water, corn syrup, and sugar, bring to a boil until “soft-ball” stage, or 235 degrees on a candy thermometer (though soft ball stage can be eyeballed with a simple cold water test, I love having a candy thermometer around. Mine even has a line marked “soft-ball stage”).
2. Sprinkle the gelatin over the cold water and let dissolve.
3. Remove the syrup from the heat, add the gelatin, and mix.
4. Whip the whites until soft peaks form and pour the syrup into the whites.
5. Add the flavoring of your choice and continue whipping until stiff (it will take around 15 minutes, so I hope you took your vitamins this morning!). Note: You can also separate the marshmallow into multiple bowls and make multiple flavors, but if you do, reduce the amounts of the ingredients so they don’t overpower the smaller volume they’re flavoring.
6. Transfer to a pastry bag.
Now to finish the cooled cookies:
1. Pipe a “kiss” of marshmallow onto each cookie. Let set at room temperature for 2 hours.
2. Line a cookie sheet with parchment or silicon mat and cover with a cooling rack — this will be your drying rack!
3. Melt dipping chocolate according to package instructions. I like to set my bowl of chocolate in a larger bowl of hot water to keep it melted while I work. Just be careful not to let the water touch the chocolate, or it will seize and you won’t be able to work with it.
3. One at a time, gently drop the marshmallow-topped cookies into the hot dipping chocolate (see my video demonstration below!).
4. Lift out with a fork and let excess chocolate drip back into the bowl. Now’s the time to add toppings if you wish, while the coating is wet. For a chocolate squiggle, let coating dry and use a ziplock of CandiQuik with the corner cut off to drizzle over cookies.
13. Place on the prepared pan and let set at room temperature until the coating is firm, about 10 minutes. Store in an airtight container at room temperature (unless you’re in a very hot environment and notice melting, in which case, store in fridge).
Note: if you don’t want to make your own marshmallows, you can cut a large marshmallow in half and place on the cookie base. Heat in a preheated 350-degree oven to slump the marshmallow slightly, it will expand and brown a little. Let cool, then proceed with the chocolate dipping.
Julie’s tips for rolling, gathered from various internet sources, my mother, and some lovely friends during a moment of panic:
- Work with small batches (about 1/3 of the dough) at a time, while keeping the rest chilling in the refrigerator.
- You can coat your workspace in equal parts confectioners’ sugar and flour if you’re worried about using too much flour (which can cause dough to get dry/tough).
- Roll dough immediately from the refrigerator, turning it often and redusting lightly with flour mixture to prevent sticking.
- If you don’t have a cool metal counter or marble slab (which I don’t), set some frozen vegetables out on your counter for a bit before you roll to cool it off. Then dry your workspace and roll. You can also refrigerate or freeze your rolling pin for a few minutes.
- Have a sheet pan in the freezer. If you sense your dough is getting sticky/warm, put a sheet of wax paper on the dough and press the frozen sheet pan on top to cool it down quickly.
The One Minute Dipping Demonstration!
[youtube=http://www.youtube.com/watch?v=dvyI3i4nYLY&hl=en&fs=1&rel=0&color1=0x2b405b&color2=0x6b8ab6&border=1]
Process Photos!
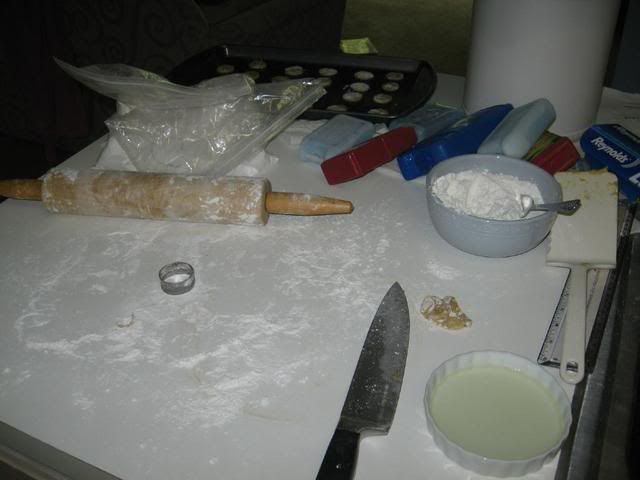
Ready to roll!
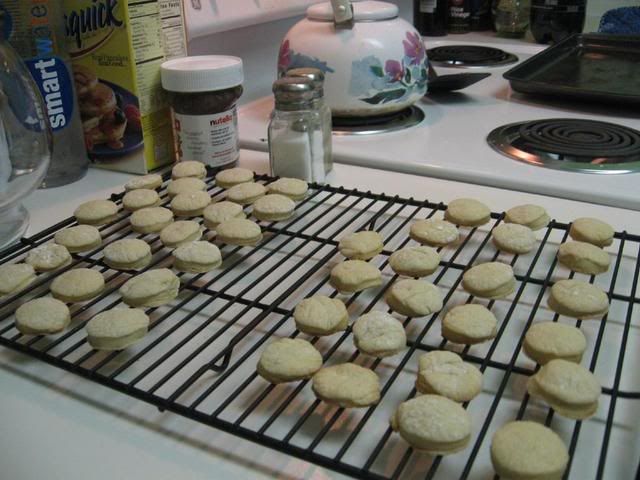
Fresh from the oven and not so pretty.
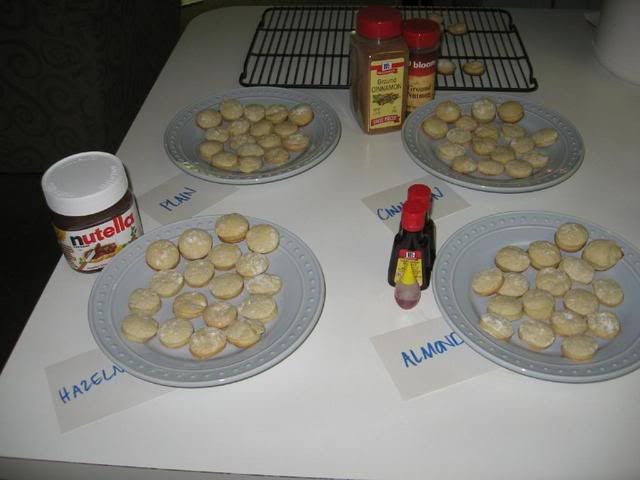
Getting organized to make my four types of Mallows (and not confuse them!)
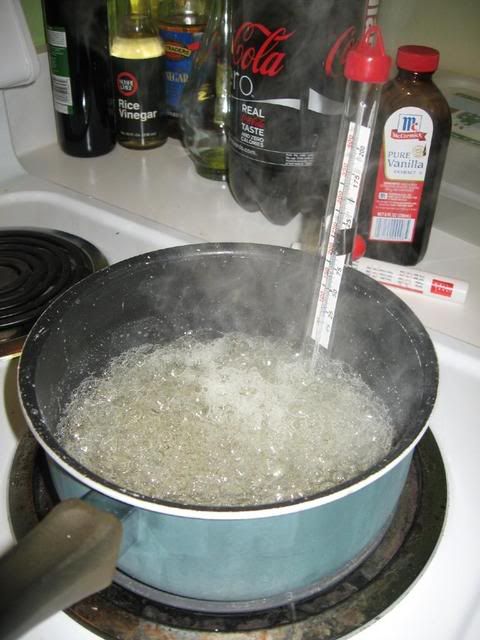
Is it soft-ball stage yet? (notice my faithful Coke Zero in the background!)
Piping Nutella filling onto my Hazelnut Mallows. The more you can fit, the better!
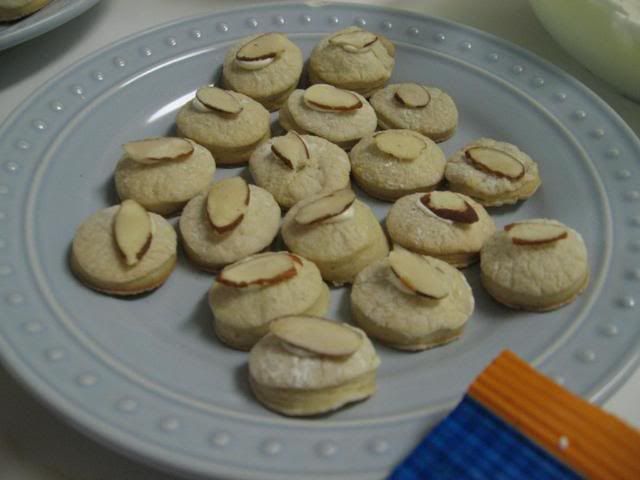
For Almond Mallows, I used a bit of the almond marshmallow mixture to “glue” an almond sliver on the cookie before piping my marshmallow.
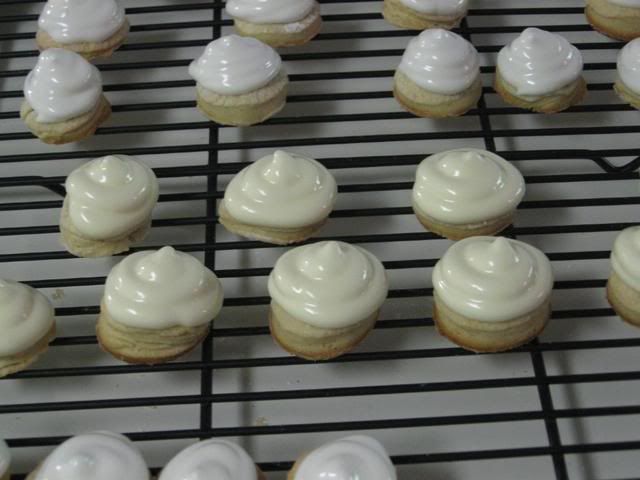
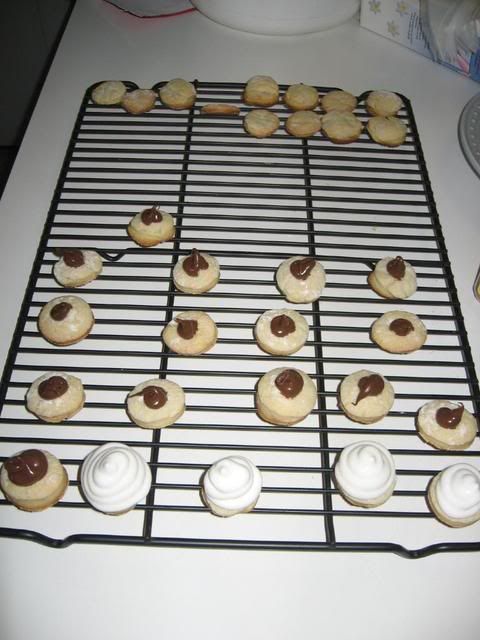
Marshmallows of all flavors piped on.
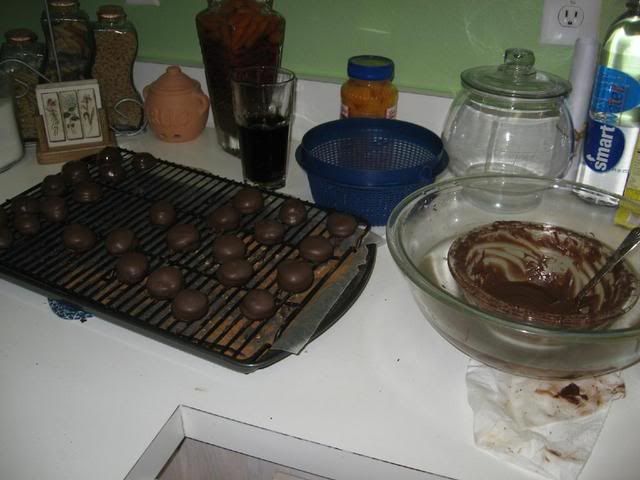
Dipping — see video above for a demonstration!
Finished!
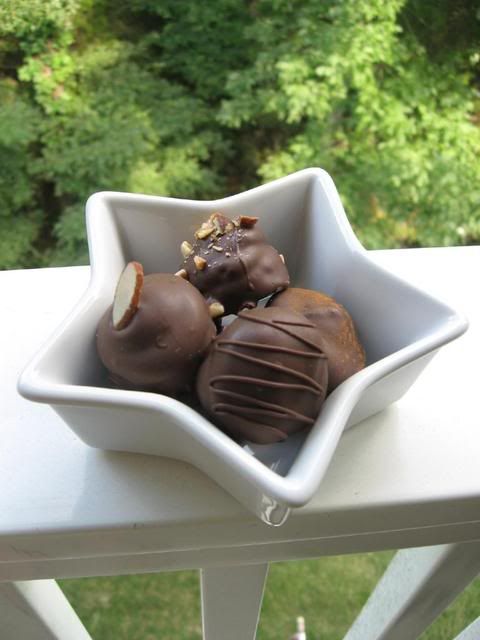
Mmm! Have one of each!
Visit the Daring Bakers (temporary) Blogroll to see more of these treats from amazing bakers!
Vivian
July 27, 2009 at 5:27 am (17 years ago)Makes me tired to watch! lol They are great and I think I will go eat one now…
Maybe you will be the”Next Food Network Star!”
Julie
July 27, 2009 at 5:29 am (17 years ago)I was just talking to Mike about that today (Next Food Network Star) — would be fun but tiring! I hope the stay-at-home mom wins this season!
Glad you like the Mallows! And glad you took them so I didn’t eat them all . . . as it is, I’ve eaten a ton!
pontch
July 27, 2009 at 12:02 pm (17 years ago)Perfect !!!
what a great job
I love the Milan and the Mallow your pictures are amazing.
Thank you !!
Julie
July 27, 2009 at 1:20 pm (17 years ago)Thank YOU, Pontch!!
Barbara
July 27, 2009 at 2:39 pm (17 years ago)Loved the video. But I especially loved the shout out from my newest blogging friend! Beautiful job!
Julie
July 27, 2009 at 2:42 pm (17 years ago)Thanks, Barbara! Your cookies were fantastic! Had to send folks your way to see my cookie twin 🙂
Amelia
July 27, 2009 at 4:08 pm (17 years ago)Those cookies look divine!
Julie
July 27, 2009 at 4:15 pm (17 years ago)Thanks, Amelia! They took all day but they were really tasty!!
Sabiilaa
July 27, 2009 at 5:15 pm (17 years ago)Your cookies look great and gorgeous mallows! Nice photos! True having a mashALLAH big family has its advantages!…thank you for dropping by and for the sweet comments! =)
Julie
July 27, 2009 at 5:17 pm (17 years ago)Thank you, Sabiilaa! 🙂
Anula
July 27, 2009 at 6:53 pm (17 years ago)Love your mallows. You did a great job! I like your photos – very helpful 🙂 Cheers!
Julie
July 27, 2009 at 7:26 pm (17 years ago)Thanks, Anula!
s-j
July 27, 2009 at 9:21 pm (17 years ago)Wow! Your mallows look spectacular. I’m going to come back and watch the video when I make these again.
Julie
July 27, 2009 at 10:31 pm (17 years ago)Thanks S-J! Hope it’s helpful!
angiegazdziak
July 27, 2009 at 9:35 pm (17 years ago)WOW! These look amazing! I love all your variations–they look so delicious!!
Julie
July 27, 2009 at 10:32 pm (17 years ago)Thanks Angie!!
Jenni
July 27, 2009 at 10:11 pm (17 years ago)Great job! Your cookies look marvelous. I really like the flavor combinations you chose for the mallows!
Julie
July 27, 2009 at 10:32 pm (17 years ago)Thanks Jenni!!
Jen @ My Kitchen Addiction
July 27, 2009 at 11:22 pm (17 years ago)Wow – your cookies look wonderful! I love the different flavors and twists you added – it’s always fun to personalize a recipe. Looking forward to more of your Daring Bakers posts!
Julie
July 28, 2009 at 12:07 am (17 years ago)Thanks, Jen! It was a lot of fun!
sarah
July 28, 2009 at 1:03 am (17 years ago)“Indulgent” is right…these look sooo good!
Julie
July 28, 2009 at 1:04 am (17 years ago)Thanks, Sarah! I’m a little ashamed at how many I indulged in… 🙂
Gab*
July 28, 2009 at 9:23 am (17 years ago)Love the different varieties! Well done.
Julie
July 28, 2009 at 4:01 pm (17 years ago)Thanks, Gab!
Bake in Paris
July 28, 2009 at 9:39 am (17 years ago)The most delicious mallows I have ever seen! Great job on this challenge!!
Regards
Kris
Julie
July 28, 2009 at 4:01 pm (17 years ago)Hurray! Thank you, Kris! They were quite tasty 🙂
Anna
July 28, 2009 at 1:14 pm (17 years ago)Julie, your Mallows look perfect! I am so imjpressed that you could do 4 flavors at once, I cannot imagine keeping all of the ingredients in order! 🙂 Thank you for the 1 minute dipping demo, it was quite helpful.
Julie
July 28, 2009 at 3:59 pm (17 years ago)Thanks, Anna! You know, I’ve made multiple flavors of cupcakes before and then accidentally mixed them all up, so I was DETERMINED to keep my mallows straight!! I organized everything and enlisted my boyfriend to help me remember which was which after I piped on the marshmallow. ha!
Renato
July 28, 2009 at 1:53 pm (17 years ago)I loved your mallows! I didn’t have enough time to make them, but I’m still planning on doing it later! And I loved your demonstration on chocolate dipping!
Julie
July 28, 2009 at 3:57 pm (17 years ago)HA thanks, Renato! I’m not exactly a Food Network Star 🙂 I hope you do get a chance to make the mallows. They were so good!
butterandsugar
July 28, 2009 at 3:07 pm (17 years ago)I love using the lemon curd! I just ate all my wonky ones 🙂
Julie
July 28, 2009 at 3:54 pm (17 years ago)It’s sort of a good thing to get SOME wonky ones, isn’t it?? Those are the ones you can eat immediately 😀
Ruth
July 28, 2009 at 6:59 pm (17 years ago)Wow I love the mallows and milanos they both look delicious
Julie
July 28, 2009 at 7:00 pm (17 years ago)Thank you, Ruth!
evanescencia
July 28, 2009 at 8:23 pm (17 years ago)WOW!! Your Mallows are marvelous and look delicious!! The step by step FANTASTIC.
Now I’ve my Mallows let rest the 2 hours before the chocolate cover. Tomorrow I’ll try to plubish it. I never try Mallows and I’m impatient to bite them!!
GREAT JOB!!
Hugs from Spain
Eva
Julie
July 28, 2009 at 8:27 pm (17 years ago)Thank you, Eva!! The mallows are my favorite! Hope you love yours! I’m sure they’ll be awesome! Can’t wait to come see.
Sandie
July 28, 2009 at 10:06 pm (17 years ago)Your hazelnut mallows look great! I will have to try that next time.
Julie
July 28, 2009 at 10:32 pm (17 years ago)Thanks, Sandie! I LOVE nutella, so I had to try it!
Linda
July 28, 2009 at 10:47 pm (17 years ago)Really nice work on both of your cookies! I loved your little video of the Mallow-dipping. They turned out cute as a button!
Julie
July 28, 2009 at 11:14 pm (17 years ago)Thank you, Linda! 🙂
Lacey
July 29, 2009 at 8:43 pm (17 years ago)All of your cookies look so good! I would totally try the hazelnut ones, they look awesome. Great job!
and thanks for visiting my blog 🙂
Julie
July 29, 2009 at 8:50 pm (17 years ago)Thanks, Lacey!
Singing Horse
July 29, 2009 at 8:49 pm (17 years ago)Your mallows are really beautifully decorated. Well done!
Julie
July 29, 2009 at 8:51 pm (17 years ago)Thanks, Singing Horse!
msmeanie
July 31, 2009 at 3:28 am (17 years ago)Your mallows look fantastic! Absolutely perfect! That is such a great idea to flavor the marshmallows. I didn’t even think about that. I will definitely have to try it. The nutella ones would probably be my favorite too.
Julie
July 31, 2009 at 3:44 am (17 years ago)Thanks! I’m in LOVE with Nutella… what a great flavor. Mmm.
Lorraine @NotQuiteNigella
August 4, 2009 at 12:31 am (17 years ago)Gorgeous flavours! I love the nut variations and good on you for getting all the process photos! 🙂
Julie
August 4, 2009 at 12:33 am (17 years ago)Thank you, Lorraine!!
Eman
November 16, 2013 at 4:04 pm (13 years ago)Love the idea but, I don’t use gelatin. Any ideas for a gelatin substitute to make these with?