Dobos Torte

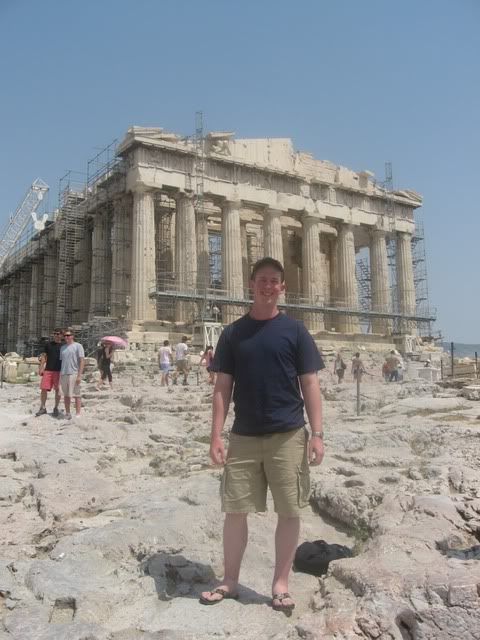
Mike’s a history buff in addition to being a math superhero. Every now and then he’ll be looking at photos of something like a spoon from Pompeii or a statue from Greece and geeking out over how neat it is. It’s thrilling to think of people centuries and millennia ago actually using the objects and living in the homes we now have as artifacts of their existence. Last summer he finally went on a trip to some of the places he’s always loved to read about: Rome, Greece, and Turkey. Looking through his pictures when he returned, it was so sweet to see him living one of his dreams.


I understand Mike’s excitement about the cultures of the past, and sometimes I feel it too, but it doesn’t come naturally to me. I usually have to sort of ponder artifacts and give my imagination a shove to really appreciate how neat they are. With this past Daring Bakers challenge, however, I finally got a taste of how Mike must feel. After reading through the recipe and researching the challenge, I realized that I was about to bake a piece of history: the Dobos Torte.

The August 2009 Daring Bakers’ challenge was hosted by Angela of A Spoonful of Sugar and Lorraine of Not Quite Nigella. They chose the spectacular Dobos Torte based on a recipe from Rick Rodgers’ cookbook Kaffeehaus: Exquisite Desserts from the Classic Caffés of Vienna, Budapest, and Prague.

Reading about the Dobos Torte gave me goosebumps. The torte is the namesake of József C. Dobos, its Hungarian creator. It was created with the intent of making a cake with a longer shelf life, and was debuted in 1885 at the National General Exhibition of Budapest. What really excited me was learning that Franz Joseph I and his wife, the Empress Elisabeth (also called Sisi), were among the first to taste the dessert! For those of you who don’t teach your 6th graders about the Russian Revolution like I do, I’ll fill you in. Franz Joseph I was the uncle of Archduke Franz Ferdinand, who was assassinated by Serbian terrorists in 1914. This act effectively started World War I and contributed to the Russian Revolution. I won’t give you a full history lesson, but isn’t that amazing? This torte has such a rich history, and here I am baking it in my own kitchen!

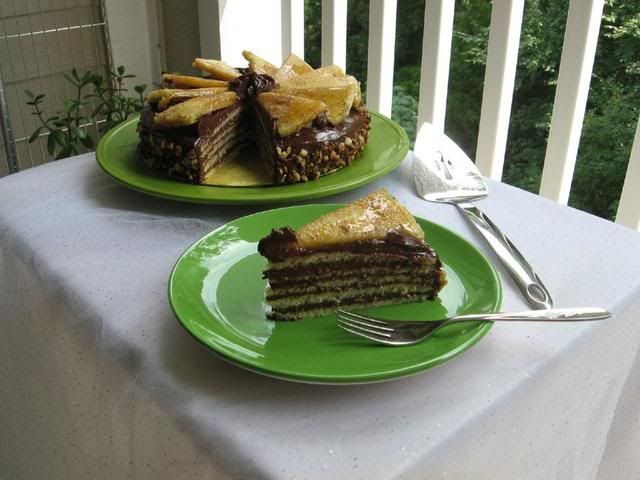
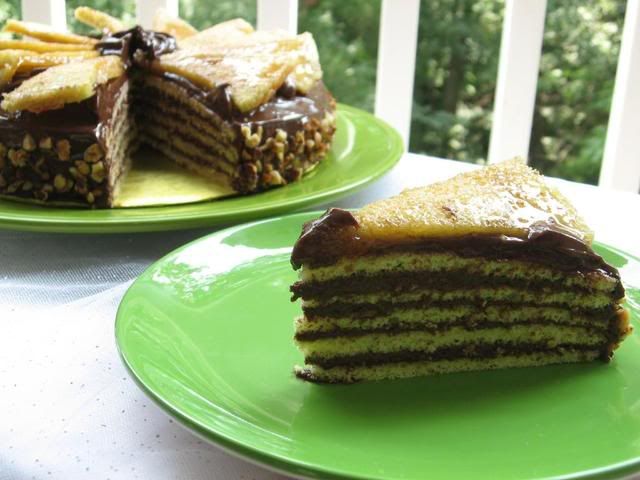
Dobos kept the recipe for his torte a secret until his retirement in 1906, and since then, the popular dessert has been made around the world. The torte is comprised of multiple layers (anywhere from 6-12 is typical) of thin sponge cake, a thick American buttercream, and a slightly lemony caramel coating on the top layer. The recipe was quite intimidating at first, but I enjoyed the process and felt nudged out of my cupcake comfort zone, as all Daring Bakers should!

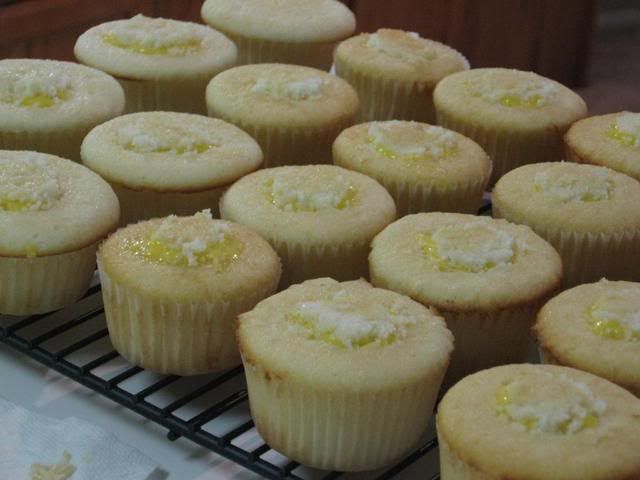
I chose to make my torte the classic size and shape, but did change a few things. I brushed each sponge layer with a simple syrup when assembling the torte to ensure that they’d stay moist. I also used macadamia nuts to prop up my caramel wedges instead of hazelnuts, but that wasn’t an artistic decision — I couldn’t find any whole hazelnuts at my grocery store.

If I could change a few things about the recipe, I’d add flavoring to my simple syrup and apply more of it to the sponge layers. I found my layers a bit dry (good thing they were smooshed between so much buttercream). I’d also nix the lemon from the caramel — it tasted a little odd — and use cream instead. Finally, I can attest that creating the perfect caramel texture is the hardest part of this cake. I took my sugar mixture off of the stove too soon and ended up with a sticky caramel that made my sponge cake layer a bit soggy. Using a candy thermometer might be a better idea than relying on your instincts (especially if you tend to be jumpy/hasty/caffeinated about your baking). For caramel, you’ll want the temperature of your sugar mixture between 320 to 350 degrees based on this handy chart.

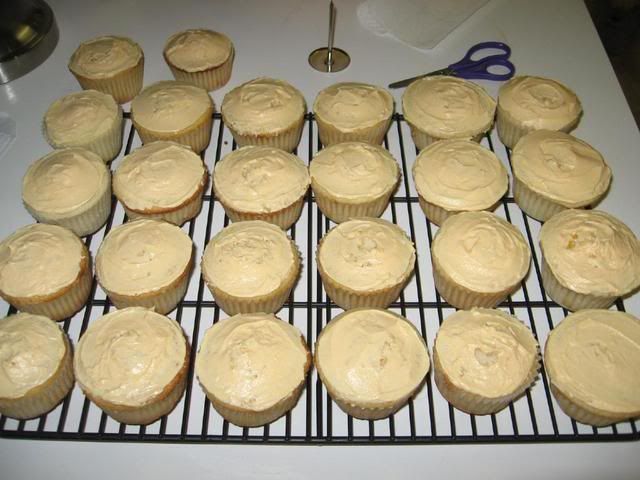
One thing I’m glad I didn’t change was the frosting. I used unsweetened Belgian chocolate, and the result spread like a dream and tasted rich and indulgent. I can’t wait to make this chocolate buttercream again and slather it on — you guessed it — some cupcakes!

There are lots of opportunities for creative alterations with this torte. You can bake all the batter in sheet pans and cut it into as many rectangular layers as you’d like, or even use a cookie cutter to create some adventurously shaped layers. You could also use different nuts to decorate the cake (almonds, hazelnuts, cashews), different flavors of syrup on the sponge cake, and different flavors of buttercream to frost. One particularly daring baker brushed each sponge layer with a hazelnut liqueur and used Ferrero Rocher to prop up her caramel wedges! You know I love Ferrero Rocher, so I’m a fan of that idea!

I hope you’ll take the plunge and try making a Dobos Torte on your own. The recipe is a mile long, yes, but that’s partially because of the clear, thorough instructions. Angela has thoughtfully created a printable version of this recipe to make the process a bit easier! It was such a lovely achievement when all the work was finished, and I relished each bite thinking of the legacy I was eating!


Dobos Torte


Recipe by: Kaffeehaus: Exquisite Desserts from the Classic Cafés of Vienna, Budapest, and Prague, by Rick Rodgers
Yield: about 11-12 pieces of torte

Equipment
2 baking sheets
9” (23cm) springform tin and 8” cake tin, for templates
mixing bowls (1 medium, 1 large)
a sieve
a double boiler (a large saucepan plus a large heat-proof mixing bowl which fits snugly over the top of the pan)
a small saucepan
a whisk (you could use a balloon whisk for the entire cake, but an electric hand whisk or stand mixer will make life much easier)
metal offset spatula
sharp knife
a 7 1/2” cardboard cake round (or just build cake on the base of a sprinfrom tin)
12 whole hazelnuts, peeled and toasted (I used macadamia nuts)
½ cup (50g) peeled and finely chopped hazelnuts
piping bag and tip, optional

Prep times
Sponge layers 20 mins prep, 40 mins cooking total if baking each layer individually.
Buttercream: 20 mins cooking. Cooling time for buttercream: about 1 hour plus 10 minutes after this to beat and divide.
Caramel layer: 10-15 minutes.
Assembly of whole cake: 20 minutes

Sponge Cake Ingredients
6 large eggs, separated, at room temperature
1 1/3 cups (162g) confectioner’s (icing) sugar, divided
1 teaspoon (5ml) vanilla extract
1 cup plus 2 tablespoons (112g) sifted cake flour
pinch of salt

Chocolate Buttercream Ingredients
4 large eggs, at room temperature
1 cup (200g) caster (ultrafine or superfine white) sugar
4oz (110g) bakers chocolate or your favourite dark chocolate, finely chopped (I used Belgian chocolate)
2 sticks plus 2 tablespoons (250g) unsalted butter, at room temperature.

Caramel Topping Ingredients
1 cup (200g) caster (superfine or ultrafine white) sugar
12 tablespoons (180 ml) water
8 teaspoons (40 ml) lemon juice
1 tablespoon neutral oil (e.g. grapeseed, rice bran, sunflower)

Directions for the sponge layers:
NB. The sponge layers can be prepared in advance and stored interleaved with parchment and well-wrapped in the fridge overnight.

1. Position the racks in the top and centre thirds of the oven and heat to 400F (200C).
2. Cut six pieces of parchment paper to fit the baking sheets. Using the bottom of a 9″ (23cm) springform tin as a template and a dark pencil or a pen, trace a circle on each of the papers, and turn them over (the circle should be visible from the other side, so that the graphite or ink doesn’t touch the cake batter.)
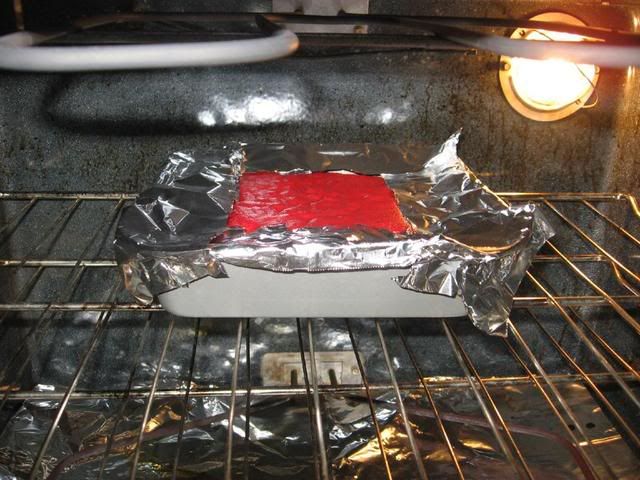
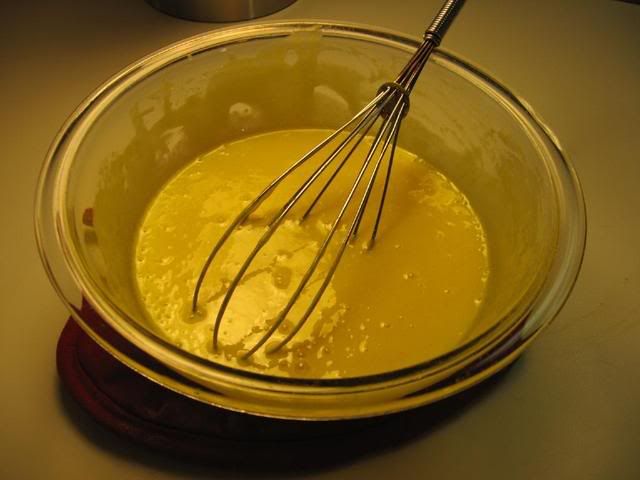
3. Beat the egg yolks, 2/3 cup (81g) of the confectioner’s (icing) sugar, and the vanilla in a medium bowl with a mixer on high speed until the mixture is thick, pale yellow and forms a thick ribbon when the beaters are lifted a few inches above the batter, about 3 minutes. (You can do this step with a balloon whisk if you don’t have a mixer.) Note: I leveled each sponge layer after baking per a great suggestion from other Daring Bakers. I did this by covering the layer with an oiled, cocoa powder dusted sheet of parchment paper and then pressing another sheet pan down on the layer to even it out.
4. In another bowl, using clean beaters, beat the egg whites until soft peaks form. Gradually beat in the remaining 2/3 cup (81g) of confectioner’s (icing)sugar until the whites form stiff, shiny peaks. Using a large rubber spatula, stir about 1/4 of the beaten whites into the egg yolk mixture, then fold in the remainder, leaving a few wisps of white visible. Combine the flour and salt. Sift half the flour over the eggs, and fold in; repeat with the remaining flour.
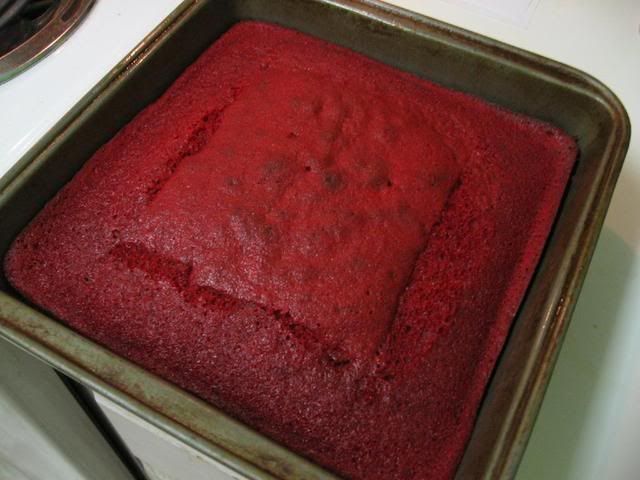
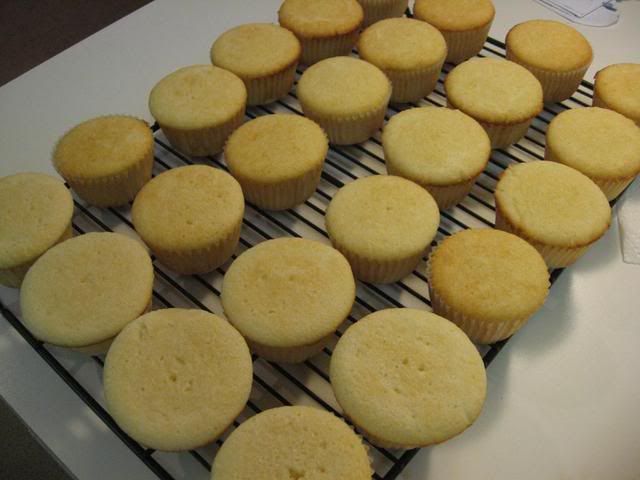
5. Line one of the baking sheets with a circle-marked paper. Using a small offset spatula, spread about 3/4cup of the batter in an even layer, filling in the traced circle on one baking sheet. Bake on the top rack for 5 minutes, until the cake springs back when pressed gently in the centre and the edges are lightly browned. While this cake bakes, repeat the process on the other baking sheet, placing it on the centre rack. When the first cake is done, move the second cake to the top rack. Invert the first cake onto a flat surface and carefully peel off the paper. Slide the cake layer back onto the paper and let stand until cool. Rinse the baking sheet under cold running water to cool, and dry it before lining with another parchment. Continue with the remaining papers and batter to make a total of six layers. Completely cool the layers. Using an 8″ springform pan bottom or plate as a template, trim each cake layer into a neat round. (A small serrated knife is best for this task.)


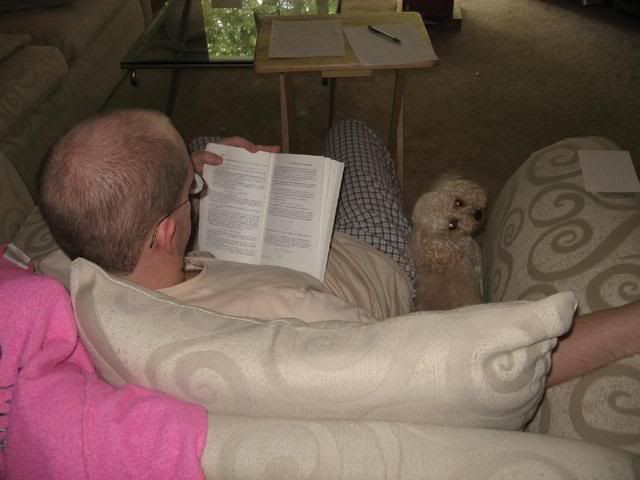
I love when I have two cookin’ buddies! Mike and Byrd cheer me on from the couch.

  
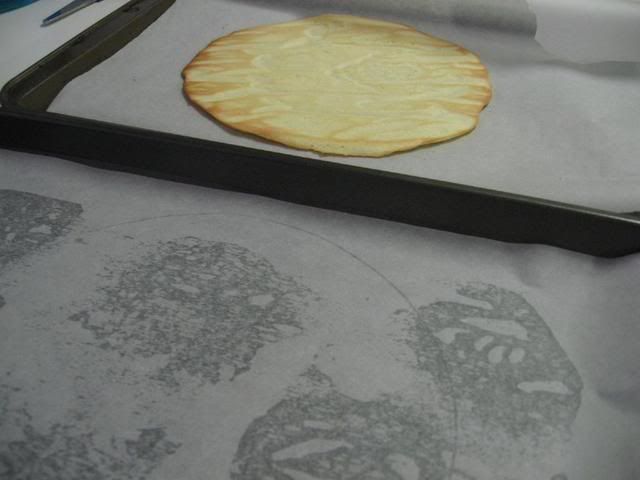
Drawing my circles, spreading my batter, and baking my layers. What sort of recipe requires artwork?

Directions for the chocolate buttercream:
NB. This can be prepared in advance and kept chilled until required.

1. Prepare a double-boiler: quarter-fill a large saucepan with water and bring it to a boil.
2. Meanwhile, whisk the eggs with the sugar until pale and thickened, about five minutes. You can use a balloon whisk or electric hand mixer for this.
3. Fit bowl over the boiling water in the saucepan (water should not touch bowl) and lower the heat to a brisk simmer. Cook the egg mixture, whisking constantly, for 2-3 minutes until you see it starting to thicken a bit. Whisk in the finely chopped chocolate and cook, stirring, for a further 2-3 minutes.
4. Scrape the chocolate mixture into a medium bowl and leave to cool to room temperature. It should be quite thick and sticky in consistency.
5. When cool, beat in the soft butter, a small piece (about 2 tablespoons/30g) at a time. An electric hand mixer is great here, but it is possible to beat the butter in with a spatula if it is soft enough. You should end up with a thick, velvety chocolate buttercream. Chill while you make the caramel topping.

Lorraine’s note: If you’re in Winter just now your butter might not soften enough at room temperature, which leads to lumps forming in the buttercream. Male sure the butter is of a very soft texture I.e. running a knife through it will provide little resistance, before you try to beat it into the chocolate mixture. Also, if you beat the butter in while the chocolate mixture is hot you’ll end up with more of a ganache than a buttercream!


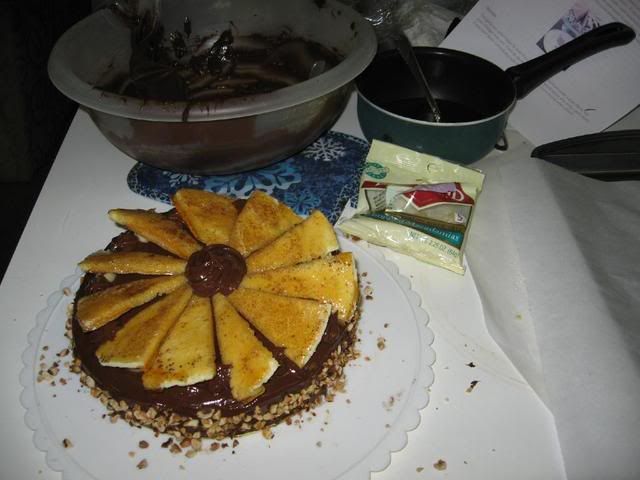
Frosting and decorating the torte.

Directions for the caramel topping:
1. Choose the best-looking cake layer for the caramel top. To make the caramel topping: Line a jellyroll pan with parchment paper and butter the paper. Place the reserved cake layer on the paper. Score the cake into 12 equal wedges. Lightly oil a thin, sharp knife and an offset metal spatula.
2. Stir the sugar, water and lemon juice in a small saucepan. Bring to a boil over a medium heat, stirring often to dissolve the sugar. Once dissolved into a smooth syrup, turn the heat up to high and boil without stirring, swirling the pan by the handle occasionally and washing down any sugar crystals on the sides of the pan with a wet brush until the syrup has turned into an amber-coloured caramel.
3. The top layer is perhaps the hardest part of the whole cake so make sure you have a oiled, hot offset spatula ready. I also find it helps if the cake layer hasn’t just been taken out of the refrigerator. I made mine ahead of time and the cake layer was cold and the toffee set very, very quickly—too quickly for me to spread it. Immediately pour all of the hot caramel over the cake layer. You will have some leftover most probably but more is better than less and you can always make nice toffee pattern using the extra to decorate. Using the offset spatula, quickly spread the caramel evenly to the edge of the cake layer. Let cool until beginning to set, about 30 seconds. Using the tip of the hot oiled knife (keep re-oiling this with a pastry brush between cutting), cut through the scored marks to divide the caramel layer into 12 equal wedges. Cool another minute or so, then use the edge of the knife to completely cut and separate the wedges using one firm slice movement (rather than rocking back and forth which may produce toffee strands). Cool completely.

Angela’s note: I recommend cutting, rather than scoring, the cake layer into wedges before covering in caramel (reform them into a round). If you have an 8” silicon round form, then I highly recommend placing the wedges in that for easy removal later and it also ensures that the caramel stays on the cake layer. Once set, use a very sharp knife to separate the wedges.

Assembling the Dobos:
1. Divide the buttercream into six equal parts.
2. Place a dab of chocolate buttercream on the middle of a 7 1/2” cardboard round and top with one cake layer. Spread the layer with one part of the chocolate icing. Repeat with 4 more cake layers. Spread the remaining icing on the sides of the cake.
3. Optional: press the finely chopped hazelnuts onto the sides of the cake.
4. Propping a hazelnut under each wedge so that it sits at an angle, arrange the wedges on top of the cake in a spoke pattern. If you have any leftover buttercream, you can pipe rosettes under each hazelnut or a large rosette in the centre of the cake. Refrigerate the cake under a cake dome until the icing is set, about 2 hours. Let slices come to room temperature for the best possible flavour.


Don’t forget to visit other Daring Bakers and see the imaginative combinations and configurations of the Dobos Torte they created!

Lemon Blueberry Cake

I’m clinging tenaciously to summer’s hem right now, about to topple off into fall. I do have a quiet excitement growing about the upcoming season — crisp air, pumpkins, spice cakes, pies, stews and chilis — but I’m just not ready yet. I need a few more months of summer dresses, fruity cupcakes, and flip flops (although, let’s be honest, I will continue wearing those well into winter).

Along with the end of summer, I’m facing the beginning of another school year teaching middle school English. Our teacher workdays start this coming week. Don’t get me wrong: my school is an absolute Utopia, and I’m excited to spend time with my students in our little classroom together. They’re experts at creating special moments: sometimes insightful, sweet, hilarious, and even absurd. I’ll listen them complain about (and sometimes start to care about) Shakespeare and Hemingway. We’ll laugh over Sei Shonagon’s scandalous Pillow Book. We’ll fold over a thousand paper cranes after reading Sadako’s story. I know it’ll be fun (I just have to convince them of that).

But right now, though the first day of school is still a week away, I’m overwhelmed. Mike and I have been squabbling while trying to make my chaotic mess of a classroom into a decent learning space. I have to make a thousand copies. I have to create a seating chart. I have to plan the first week of school. It’s no wonder that this week, rather than any particular food, I craved simplicity. When I saw the recipe for this Lemon Blueberry Cake, I knew it fit the bill. It’s an ode to summer with plump blueberries and tart lemon, and a simple recipe at that: mix, bake, glaze, eat!

The cake is buttery and moist, and the flavors are a great combination — I adore blueberries and lemons together, as you may already know. While it wasn’t the absolute best cake I’ve ever had, it was a nice dessert for the end to a crazy week. How satisfying, to crack the tart glaze with my fork and shovel a bite of dense, sweet cake into my mouth — and after only having baked for an hour or so! So while I’m not utterly astounded, I am pleased.

This cake would be perfect at a brunch, tea, or garden party, what with its fresh flavors. I’m not going to pretend I have brunches, teas, or garden parties, though; Mike and I will almost certainly devour it while watching Star Trek or something similar. I give you permission to do something more sophisticated with your lemon blueberry cake.

Lemon Blueberry Cake


Recipe by: Joy of Baking and Silent Auror (adapted by me)
Yields: about 8-10 pieces of cake

Ingredients:
1 cup (226 grams) butter, room temperature
1 cup (200 grams) granulated white sugar
4 large eggs
1 teaspoon pure vanilla extract
Zest of 1 large lemon
2 cups (280 grams) all purpose flour
2 teaspoons baking powder
1/4 teaspoon salt
1/4 cup (60 ml) fresh lemon juice
1-1.5 cup blueberries

Icing:
1 cup (115 grams) confectioners’ (powdered or icing) sugar, sifted
2 tablespoons fresh lemon juice

Directions:

Preheat oven to 350 degrees F (180 degrees C). Grease a 9″ springform pan or a 8″ round cake pan. Note: I used a 9″ round cake pan, because I’m a rebel.

Cream the butter and sugar until light and fluffy. Add the eggs, one at a time, mixing well after each addition. Beat in the vanilla extract and lemon zest.

Sift together the flour, baking powder and salt and then add to the batter along with the lemon juice. Mix only until incorporated, adding the blueberries at the very end.

Pour the batter into the prepared pan and bake about 45 minutes, or until a toothpick inserted in the center comes out clean. Note: If you notice the cake is done on top but not in the middle, shield it with aluminum foil for the rest of the baking time. This happened around 35 minutes for me. Place on a wire rack to cool, then gently remove the cake from the pan. Wait until the cake is completely cool before icing.

For the icing, combine the sifted confectioners’ sugar with the 2 tablespoons lemon juice. (You want the icing to be thicker than a glaze but still thin enough that it will just run over the sides of the cake. If not the right consistency add more lemon juice or powdered sugar, accordingly.) Frost the top of the cake, allowing the icing to drip down the sides. Place blueberries over the top as you like.

Note: This cake is another of the many baked goods that tastes better after being refrigerated in an airtight container (such as a cake dome) overnight. The lemon and blueberry get a chance to mingle and chill.


In the oven, and then fresh out of the oven. My cake got a little darker than I wanted on top; keep an eye on it!


Enjoy!

As a side note, I’m “on the spot” this week at The Daring Kitchen — go and take a look!

Red Velvet and Oreo Kisses

Need a kiss? Everyone does sometimes, and these past few weeks, it was Mike. He’s been studying intensely for the math GRE this summer. He’s interested in stellar grad schools, so he needs to hit the ball (or the sphere, perhaps? or the open ball? or the unit circle? okay, enough with the bad math jokes) out of the park on this exam. I have complete faith in his ability to do so, but he needs some encouragement now and then. What’s better for encouragement than a little kiss? Well, maybe a BIG kiss!

I think I’ve mentioned before that Bakerella is one of my heroes. I love cuteness, and she’s the Queen of Cute. When I saw her Oreo Kisses, I knew they couldn’t wait until Valentine’s Day. They were the perfect surprise to lift Mike’s spirits.

In addition to Oreo, I decided to make some red velvet kisses. While the Oreo version is a no-bake combo of crushed cookies and cream cheese, the red velvet version is essentially a cake ball (or a cake cone in this case). You bake a cake, rip it up (heartbreaking, I know), add frosting, and form the mixture into balls (or cones, or hearts, or zebras) and dip into your candy coating (incidentally, if you try out the zebra shape, please do send a photo). Any flavor combination of cake and frosting will do. And don’t let the idea of baking a cake deter you; while I bake mine from scratch, cake mixes and canned frosting work just fine!


Oreo Kisses


Red Velvet Kisses

Dipping these kisses (or any cake ball) is always the most (ahem) interesting part of the process. I use Candiquik as my chocolate coating of choice, but you can use any chocolate bark or dipping chocolate. I don’t recommend baker’s chocolate or chocolate chips, however, as they don’t form the same hard shell. You should be able to find Candiquik at Lowes Food, SuperTarget, or (I recently discovered) Bloom.

Regarding the act of dipping itself, you’re going to have to get a little creative. Bakerella’s instructions (below) say to use a spoon to dip your kisses and then drain the excess chocolate against the side of the bowl. This hasn’t ever worked for me, though; I’ve used everything from forks to toothpicks to bamboo skewers to dip cake balls. I’ll go ahead and admit that I’ve had visions of standing on the counter lowering a cake ball into chocolate with dental floss (thankfully, I haven’t resorted to this just yet). For dipping these kisses, I used a two-tined grill fork to support the kiss while I spooned chocolate over it. I then let the excess drain off for a long while before sliding the kiss onto wax paper. When it was dry, I went back and re-dipped the bottom. You can try this technique, but the most important message to take home is this: experiment with your kitchen supplies. Necessity is the mother of invention and all that, so try any utensil that looks promising and keep your sense of humor!

One thing I love about these sweet kisses (apart from, oh, everything about them) is the messages you can attach. I used a word processing program (font: light blue, 14 point, Helvetica Neue Bold) to create the little strips of paper that sail out of each kiss. Get creative: you can label various kiss flavors; send encouragement, congratulations, and thank yous; or even say happy birthday. My wonderful Dad’s birthday is this coming Monday — the perfect occasion for a special message! Whether with Oreo kisses, cake kisses, or plain old hugs and kisses, tell someone you love them today!

Oreo Kisses


Recipe By: Bakerella (kisses decoration/assembly)
Yields: About 11 2-inch high kisses

Oreo Kisses Ingredients:
1 package oreo cookies (divided; use cookie including the cream center)
1 8-ounce package cream cheese (softened)
chocolate bark (chocolate candy coating)

Directions

1. Finely crush all but seven cookies in a food processor or place them in a ziploc bag and crush into a fine consistency. Note: As for the extra 7 cookies, just eat them. Or, if you have extra dipping chocolate, make some chocolate covered oreos.
2. Stir in softened cream cheese. Use the back of a large spoon to help mash the two together.
3. Roll the mixture into 1-2″ balls and place on wax paper covered cookie sheet.
4. Then, begin to form the shape of a kiss. Flattening the bottom and forming a point at the top. Note: mine ended up about 2 inches tall and 1.5 inches wide.
5. It helps to put the uncoated balls in the freezer for a few minutes to keep the mixture from starting to fall apart when you drop into the melted chocolate. Note: I refrigerated mine overnight and then froze for a couple of minutes before dipping.
6. Melt chocolate as directed on package and then dip “kisses” one at a time into chocolate, tap off extra and slide them off spoon onto wax paper covered cookie sheet to dry. Note: Dipping is often the most difficult part. These are Bakerella’s instructions, but find what works for you. Let your kitchen be your playground. Look through your utensils for useful tools, and be creative. I used a grill fork to hold my kisses while spooning chocolate over them, and then redipped the bottoms separately.

To decorate:
1. Handwrite your messages or create them on the computer. Cut out the strips (about 1/4″ tall and however wide you need).
2. Cut up some square sheets of aluminum foil (about 6″ square)
3. Place dry kiss in center and start wrapping the foil around the base. Insert message near top and secure it by pressing the foil together at top. Note: It really helps to use cheap foil here! The thinner and more malleable the better. Crush it a little first to make it more flexible.
4. Refrigerate in an airtight container.

Red Velvet Kisses


Recipe By:

Bakerella (kisses decoration/assembly)
-Mom (red velvet cake)
Paula Deen (cream cheese frosting)

Yields: About 28 2-inch high kisses

Red Velvet Cake Ingredients:
1/2 cup Crisco shortening
2 eggs
2 tablespoons cocoa
1/2 teaspoon salt
1 1/2 cups sugar
1 teaspoon vanilla
1 cup buttermilk
2 1/2 cups flour
1 teaspoon baking soda
1 tablespoon white vinegar
2 ounces red food coloring
chocolate bark (chocolate candy coating; for kisses)

Cream Cheese Frosting Ingredients:
8 ounces cream cheese, softened
1 stick butter, softened
1/2 teaspoon vanilla extract
2 cups sifted confectioners’ sugar

Directions

Make the cake: Preheat oven to 350 degrees. Cream Crisco, sugar, and eggs. Make a paste of the cocoa and coloring and add to the Crisco mixture. Add salt and vanilla. Add buttermilk alternately with the flour, beginning and ending with flour. Mix vinegar and soda right before using and add to mixture by folding in. Pour batter into a 9 x 13 in. pan and bake at 350 degrees for 25-30 minutes (check periodically, and if the edges are getting too done, you might want to shield them with foil while the middle continues to bake). Cool completely.

Make the frosting: In a large mixing bowl, beat the cream cheese, butter and vanilla together until smooth. Add the sugar and on low speed, beat until incorporated. Increase the speed to high and mix until very light and fluffy.

Make the kisses:
1. After cake is cooked and cooled completely, crumble into large bowl.
2. Mix thoroughly with about 2 cups cream cheese frosting. (It may be easier to use fingers to mix together, but be warned it will get messy.)
3. Roll mixture into 1-2″ size balls and lay on cookie sheet.
4. Then, begin to form the shape of a kiss. Flattening the bottom and forming a point at the top. Note: mine ended up about 2 inches tall and 1.5 inches wide.
5. It helps to put the uncoated balls in the freezer for a few minutes to keep the mixture from starting to fall apart when you drop into the melted chocolate. Note: I refrigerated mine overnight and then froze for a couple of minutes before dipping.
6. Melt chocolate as directed on package and then dip “kisses” one at a time into chocolate, tap off extra and slide them off spoon onto wax paper covered cookie sheet to dry. Note: Dipping is often the most difficult part. These are Bakerella’s instructions, but find what works for you. Let your kitchen be your playground. Look through your utensils for useful tools, and be creative. I used a grill fork to hold my kisses while spooning chocolate over them, and then redipped the bottoms separately.

To decorate:
1. Handwrite your messages or create them on the computer. Cut out the strips (about 1/4″ tall and however wide you need).
2. Cut up some square sheets of aluminum foil (about 6″ square)
3. Place dry kiss in center and start wrapping the foil around the base. Insert message near top and secure it by pressing the foil together at top. Note: It really helps to use cheap foil here! The thinner and more malleable the better. Crush it a little first to make it more flexible.
4. Refrigerate in an airtight container.

Process Photos:


You may need to shield the sides of the red velvet cake if they’re done before the middle. I halved my cake recipe since I was making two kinds of kisses; if you do this, half the frosting too.


Shaped into cones and then dipping.


Cutting messages into strips.


Did I mention that they were giant?


XOXO


Share Share this post with friends!

Chocolate Cheesecake Stuffed Cupcakes with Ganache

I did some super secret daring baking this weekend, but I can’t do the big reveal until later in the month. I’m not too disappointed, though, because I have a stack of past baking endeavors just waiting for their internet debut. Like Chocolate Cheesecake Stuffed Cupcakes, for example.

These cupcakes — which are also floating around the internet as Black Bottom Cupcakes — remind me of the chocolate cake cookies Mike and I used to buy from the local grocery store and scarf down shamelessly. They had a cream cheese filling and when you heated them for a few seconds in the microwave, they were exquisite. In fact, I was secretly excited when Mike started eating less sugar, because that meant more cheesecake cookies for me! Oh sure, I would offer him some — but what a relief when he refused! Mike’s sugar abstinence aside, I knew I had to make these Chocolate Cheesecake Stuffed Cupcakes when I saw them. They were pure genius: moist chocolate cake AND creamy cheesecake combined in one cute cupcake! I was sure that even Mike with all his willpower wouldn’t be able to resist. I eagerly awaited the perfect occasion to make a batch.

I have a confession we may as well get out of the way: I’m a bit hokey. I like Scrabble. Mike and I are watching our way through Star Trek: Deep Space Nine. I collect Nancy Drew books even though I’m over 10 years old. I own and love those turtle plates above. And I adore theme dinners! You know, you pick a theme ingredient or idea and create dishes to match. I finally got my chance to make the cupcakes as part of one of these very dinners. The theme was “stuffed,” so we dined on my semi-homemade Taco Stuffed Crescent Rolls (one of Mike’s favorites), a pan of hearty stuffed portobello mushrooms, and last but not least, the Chocolate Cheesecake Stuffed Cupcakes.


“Stuffed” Dinner — after which we were stuffed!

Never content to leave delicious enough alone, I decided to make a smooth ganache to drizzle over each cupcake, adding some goo factor. What’s chocolate without some gooeyness? It turned out to be an exceptional addition to an already exceptional cupcake.


Some ganache for good measure.

In addition to being delightful, these cupcakes are also extremely simple to whip up. It’s one of those great recipes where the taste far outweighs the effort. I hope you’ll give it a try and let me know what you think.

Chocolate Cheesecake Stuffed Cupcakes with Ganache


Recipe By:

JoyofBaking.com (cupcakes)
JoyofBaking.com (ganache)

Yields: 12 cupcakes

Cream Cheese Filling Ingredients:
8 ounces (227 grams) cream cheese, room temperature
1/3 cup (65 grams) granulated white sugar
1 large egg
1/2 teaspoon pure vanilla extract

Chocolate Cupcake Ingredients:
1 1/2 cups (195 grams) all purpose flour
1 cup (210 grams) light brown sugar
1/3 cup (30 grams) natural unsweetened cocoa powder (not Dutch processed)
1 teaspoon baking soda
1/4 teaspoon salt
1 cup (240 ml) water
1/3 cup (80 ml) unflavored vegetable oil
1 tablespoon white vinegar
1 teaspoon pure vanilla extract

Ganache Ingredients (optional):
8 ounces (227 grams) semisweet or bittersweet chocolate, cut into small pieces
3/4 cup (180 ml) heavy whipping cream
2 tablespoons (28 grams) unsalted butter
1 tablespoons cognac or brandy (optional)

Directions:

Preheat oven to 350 degrees F (177 degrees C) and line 12 muffin cups with paper liners, or generously butter or spray each cup with a non stick vegetable spray.

Cream Cheese Filling: In your electric mixer, or with a hand mixer, beat the cream cheese until smooth. Add the sugar, egg, and vanilla extract and beat until creamy and smooth. Set aside while you make the Chocolate Cupcake batter.

Chocolate Cupcakes: In a large bowl sift together the flour, sugar, cocoa powder, baking soda, and salt. In a separate bowl mix the water, oil, vinegar, and vanilla extract. Make a well in the center of the dry ingredients and stir in the wet ingredients until nice and smooth. Evenly divide the batter among the 12 muffin cups (resist the urge to overfill — remember that the cream cheese filling needs some space too). Spoon a few tablespoons of the cream cheese filling into the center of each cupcake.

Bake in the preheated oven for about 25 minutes, or until the cream cheese filling is a little brown and the cupcakes feel springy to the touch (a toothpick inserted into the chocolate part of the cupcake will come out clean). Remove from oven and place on a wire rack to cool.

Ganache: Place the chopped chocolate in a medium sized stainless steel bowl. Set aside. Heat the cream and butter in a medium sized saucepan over medium heat. Bring just to a boil. Immediately pour the boiling cream over the chocolate and allow to stand for 5 minutes. Stir with a whisk until smooth. If desired, add the liqueur. Makes enough ganache to cover a 9 inch (23 cm) cake or torte.

These cupcakes can be stored in an airtight container in the refrigerator for about 3-4 days.


Ready to bake!


Enjoy!

Mango Raspberry Rosecakes

I’ve had a very important objective for awhile now. I think there comes a time in every baker’s life when they realize that they need perfect basics. I love to make new things, sweet things, and even the occasional odd thing, but you really need delicious bases on which to build. That’s why I’ve been determinedly scouring the internet for recipes, reviews, wives’ tales, photos, comparisons — you get the idea — for (drum roll, please) the PERFECT WHITE CAKE. Not a dry styrofoam white cake. Not a brick of white cakeness. I wanted a moist, tightly crumbed, perfectly dense white cake. It was my great fortune to find this very thorough white cake comparison on The Way the Cookie Crumbles during my search. I baked the author’s adaptation of Cooks Illustrated’s Classic White Cake, and I feel like I’ve hit the jackpot. I have a new perfect white cake base!

White cake does not a cupcake make, however, if you’ve got a hankering for experimenting and a reputation to uphold. For that reason, I decided to try a few new things along with my white cake: first, a sultry mango curd filling (the beautiful thing about filling a white cake with a curd is that white cakes typically use only egg whites, while curds use egg yolks — what a perfect pair). Second, buttercream roses.

My first brush with a mango occurred at an intimate table with friends in the curried, rosy air of Jaipur. I wish I meant the Indian city, but actually, I mean the small restaurant situated in an unassuming, bustling Charlotte strip mall. A group of college friends and I drove 45 minutes one night to South Boulevard for the delicious buffet. Mike and I were regulars, so the waiter already knew to bring me a diet coke. On this visit, though, at my friend’s suggestion, I also asked for a mango lassi — a cool, sweet mango yogurt drink. Perhaps they should rename it ambrosia and nectar, the fabled food of Greek gods, because it was definitely divine. Since that fateful meeting, I’ve had delicious mango pudding at another Indian restaurant and a refreshing frozen mango sorbet from the Indian grocery down the street. Mangoes make me think of sitar music, bright orange marigolds, and a beautiful love scene in the rain under an umbrella of flowers (if you haven’t seen Monsoon Wedding, you should!)


Monsoon Wedding: Dubey and his love in the rain under a marigold umbrella.

In short, I love mangoes. When I saw Smitten Kitchen’s version of mango curd, I immediately knew that I had to stuff it in a cupcake. Why is my reaction to beautiful things sticking them into baked goods? That’s probably a question for another day.

As for the buttercream roses, they answered my need for something pretty and simple on top of my cupcakes. I came across the beauties on Smitten Kitchen again, if it’s any indication of how much time I spent perusing her blog this week. I’d never tried to make an icing rose, but after watching millions (no, really, ask Mike how many I forced him to watch with me) of videos on the topic, I thought I’d give it a try. I whipped up a raspberry buttercream, bought a flower nail and some rose tips, and went to work. While my frosting was an imperfect consistency and it proved harder than it looked, I think the technique was a success. I can’t wait to try again with different frostings! I hope you’ll try it (and keep trying . . . and keep trying) if you haven’t already. If you want a great tutorial, I like this one and this one.

All of these delicious components — the perfect white cake, the tangy mango curd, and the raspberry buttercream — came together to form these Mango Raspberry Rosecakes.


Peekaboo! My mango curd is smiling.

The moist white cake envelopes the exotic and bright flavor of the mango and, topped with tart raspberry, forms a sweet, summery treat. The only thing I wonder, both because of my frosting rose difficulties and because the buttercream almost overpowered the mango, is if a raspberry cream cheese frosting might be a better choice. I’ll leave that up to you to decide. Either way, I know you’re going to enjoy these amazing flavors. Feel free to deconstruct these treats and use the perfect white cake base with other fillings and frostings, and the mango curd in other cakes (or even as a delicious spread for shortcake, shortbread cookies, or toast).

Mango Raspberry Rosecakes


Recipe By:

The Way the Cookie Crumbles (white cake, adapted to cupcakes)
Smitten Kitchen (mango curd)
-Me (buttercream frosting)

Yields: 25-26 cupcakes, 1-1.5 cups of mango curd filling

Perfect White Cupcake Ingredients:
2¼ cups cake flour (9 ounces)
1 cup + 2 tablespoons whole milk, at room temperature
6 large egg whites (¾ cup), at room temperature
2 teaspoons almond extract
1 teaspoon vanilla extract (or 1 inch vanilla bean seeds)
1½ cups + 2 tablespoons granulated sugar (11.35 ounces)
4 teaspoons baking powder
1 teaspoon table salt
12 tablespoons unsalted butter (1½ sticks), softened but still cool

Mango Curd Ingredients:
1 15-ounce ripe mango, peeled, pitted, cut into 1/2-inch pieces
1/3 – 1/2 cup sugar (depending on your preference for tart vs. sweet)
3 tablespoons fresh lime juice
Pinch of salt
4 large egg yolks
1/4 cup (1/2 stick) unsalted butter, cut into small pieces

Raspberry Buttercream Ingredients:
(double this if you’re planning on attempting roses)
1/2 cup butter, softened
1/2 cup vegetable shortening (white)
4 cups powdered sugar
1/2 teaspoon vanilla flavoring
1/2 teaspoon almond flavoring
1/2 teaspoon imitation butter flavoring
1/2 teaspoon raspberry extract
2-6 tablespoons sweet milk, depending on consistency
Food coloring as desired

Extra supplies needed to create buttercream roses:
Flower nail
Rose tips #104 (I used two, to create two-toned roses)
Offset spatula
Patience

Make mango curd: This can be made a day in advance and refrigerated. Puree mango, sugar, lime juice and salt in processor, scraping down sides of work bowl occasionally. Add yolks; puree 15 seconds longer. Strain through sieve set over large metal bowl, pressing on solids with back of spatula to release as much puree as possible. Discard solids in sieve.

Set metal bowl over saucepan of simmering water (do not allow bottom of bowl to touch water); whisk puree until thickened and thermometer registers 170°F., about 10 minutes. Remove from over water. Whisk in butter 1 piece at a time. Cover with plastic wrap (directly on the curd to prevent a skin from forming) and refrigerate for several hours (or overnight). Note: I’m freezing my excess according to Fine Cooking’s instructions for lemon curd, that is, up to two months.

Make the perfect white cupcakes: Set oven rack in middle position. Heat oven to 350 degrees. Spray cupcake pans with nonstick cooking spray or line with cupcake papers.

Pour milk, egg whites, and extracts into 2-cup glass measure, and mix with fork until blended.

Mix cake flour, sugar, baking powder, and salt in bowl of electric mixer at slow speed. Add butter; continue beating at slow speed until mixture resembles moist crumbs, with no powdery streaks remaining.

Add all but ½ cup of milk mixture to crumbs and beat at medium speed (or high speed if using handheld mixer) for 1½ minutes. Add remaining ½ cup of milk mixture and beat 30 seconds more. Stop mixer and scrape sides of bowl. Return mixer to medium (or high) speed and beat 20 seconds longer.

Divide batter evenly in cupcake pans and smooth tops of cupcakes. Arrange pans at least 3 inches from the oven walls and 3 inches apart. (If oven is small, place pans on separate racks in staggered fashion to allow for air circulation.) Bake until thin skewer or toothpick inserted in the center comes out clean, about 15-16 minutes.

Let cakes rest in pans for 3 minutes. Transfer to wire rack for cooling completely, about 1½ hours. To fill with mango curd, core the middle of the cupcake using something like the cone method (not easy with such a moist cake, but no worries — your frosting will cover any mess you make). Pipe or spoon in as much mango curd as you can fit. Replace your cupcake “cone” and frost.

Make raspberry buttercream: Cream all ingredients (except milk) together. Add milk slowly as needed to produce desired consistency. If you’re planning on making roses, you want a thick, stiff frosting (but still smooth). For the roses, frost cupcakes lightly with the back of a spoon or an offset spatula. Then create the roses on the flower nail and transfer to the top of the cupcake (use this tutorial or this one). Otherwise, frost as desired.

Process Photos:


Mango curd finished.


Perfect white cakes fresh from the oven.


Stuffed with mango curd and ready for frosting.


First frosting layer finished.


Roses added.


Enjoy!


Share Share this post with friends!

1 120 121 122 123 124 127