Sparkling Strawberry Lemonade

Historically, I’ve been biased against beverage-making. First off, Coke Zero exists in the world — why would anyone feel the need to make a different beverage?! Would you be completely ashamed of me if I told you that I drink Coke Zero with breakfast, lunch, and dinner? Would it help if I promised that I drink a lot of water, too?

Second off, why make a beverage when you could be making cupcakes?! Or cakes, or pies, or tarts, or enchiladas, or . . . anything!

It took a great professor to show me the error of my beverage discriminating ways. First, a little background info. I was blessed to go to an amazing college — Davidson College, that is — where I learned so many important life lessons: how to pull an all-nighter studying for multivariable calculus, how to write more simultaneous essays than humans are actually capable of, how to illegally park to turn in an exam before the deadline, and, perhaps most importantly, all the lyrics to Vanilla Ice’s “Ice, Ice Baby.” I jest, but really, I did learn an incredible amount, hone my work ethic, and generally enjoy every moment at that fantastic school.

One facet of Davidson I particularly valued was the faculty and the close bonds formed between professors and students. Classes were invited to dinners at professors’ houses, faculty doors were open wide to chat with students about academics or life in general. I had many wonderful professors (in fact, only one not-so-wonderful professor, which has to be a miracle in 4 years!), including Dr. Peroni. Dr. Peroni is a biology professor with an infectious laugh who is passionate about the outdoors and a great biostatistician. My turtle, Squirt, and I lived above her garage my senior year of college, when he was just a wee shellbaby. It was Dr. P who introduced me to experiencing a beverage, and I’m sure she doesn’t even know it!

One summer I was doing research at Davidson and Dr. P invited a bunch of us lab rats (ha ha) over to her house to make DNA earrings (like these). Shut up! What, you don’t have random biological jewelry?! I’ll have you know that I also proudly own neuron and microscope pendants. So there.

Anyhow, at her house she poured us some freshly brewed ice tea and offered us each a big sprig of mint from her garden to stir it with. The taste itself wasn’t even the point for me — but adding the home-grown mint, the act of sprucing up a beverage and enjoying it slowly instead of just glugluglugging it out of a Coke bottle . . . that was galvanizing. Oh, just like food, drinks can be an experience.

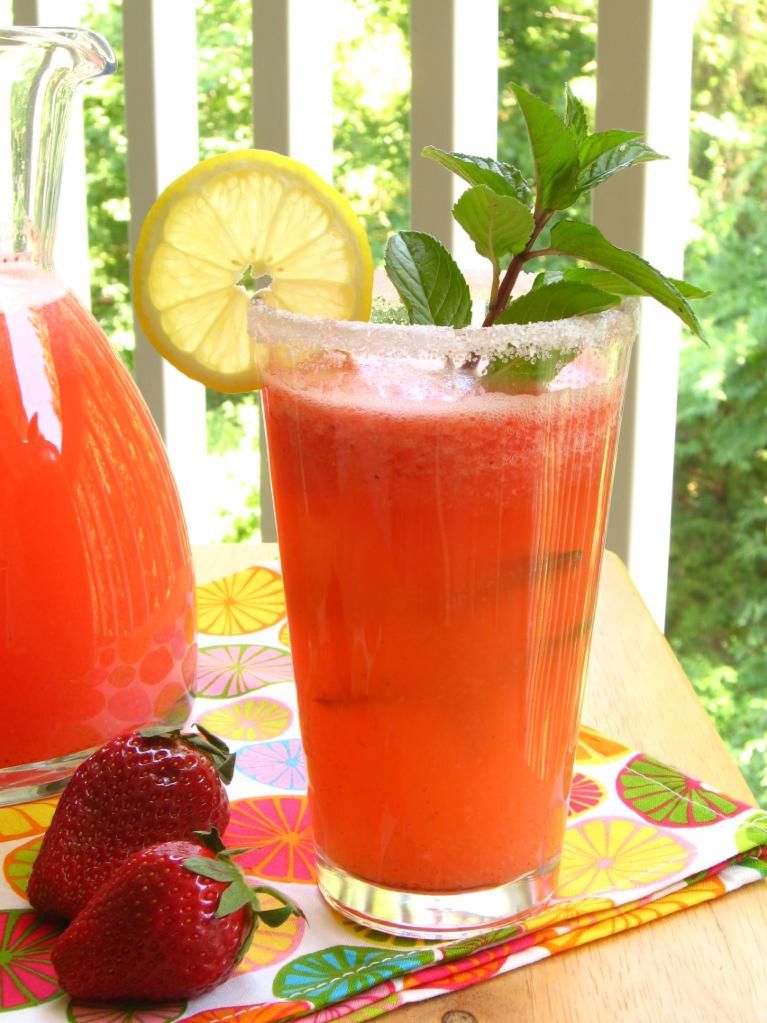
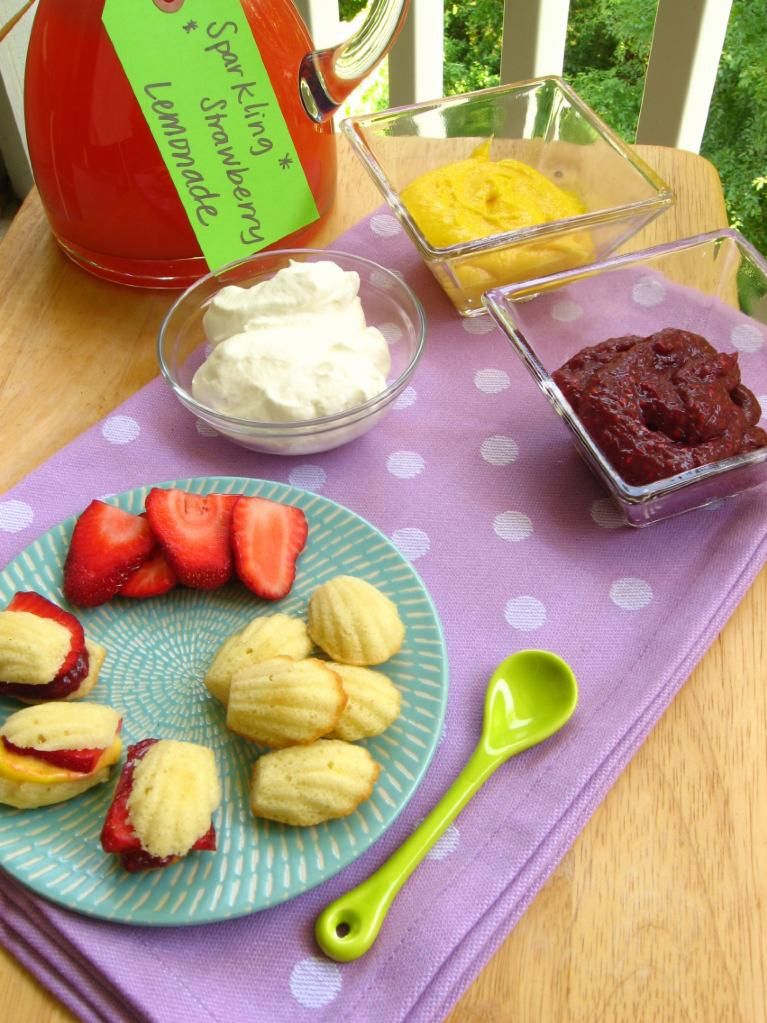
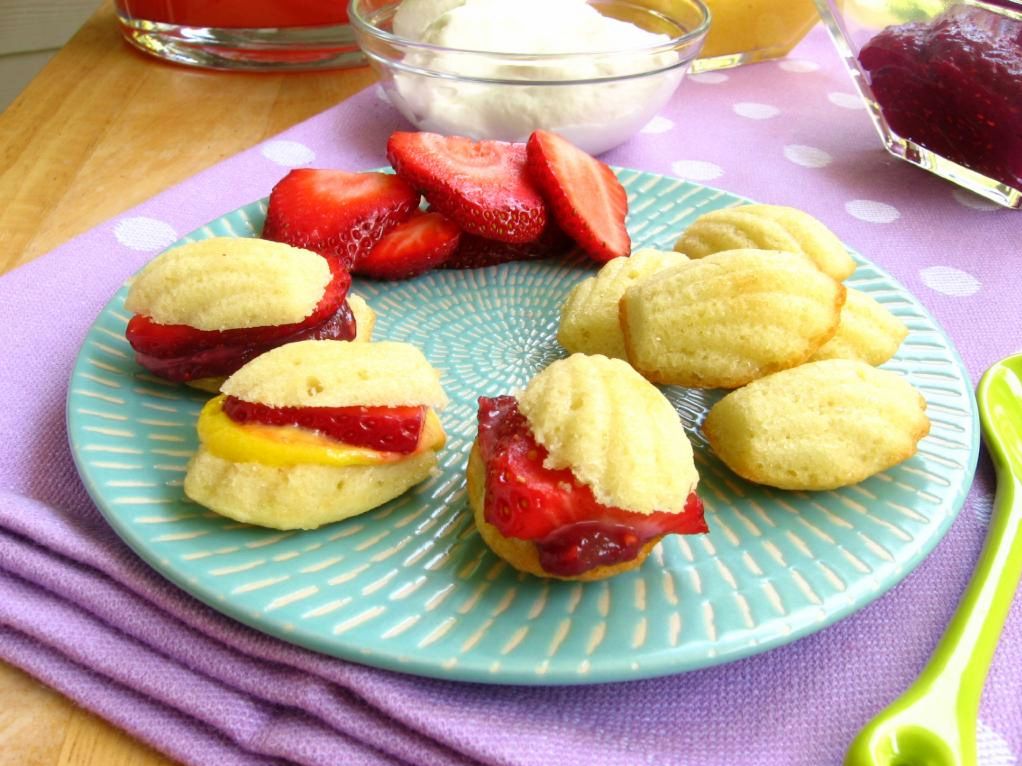
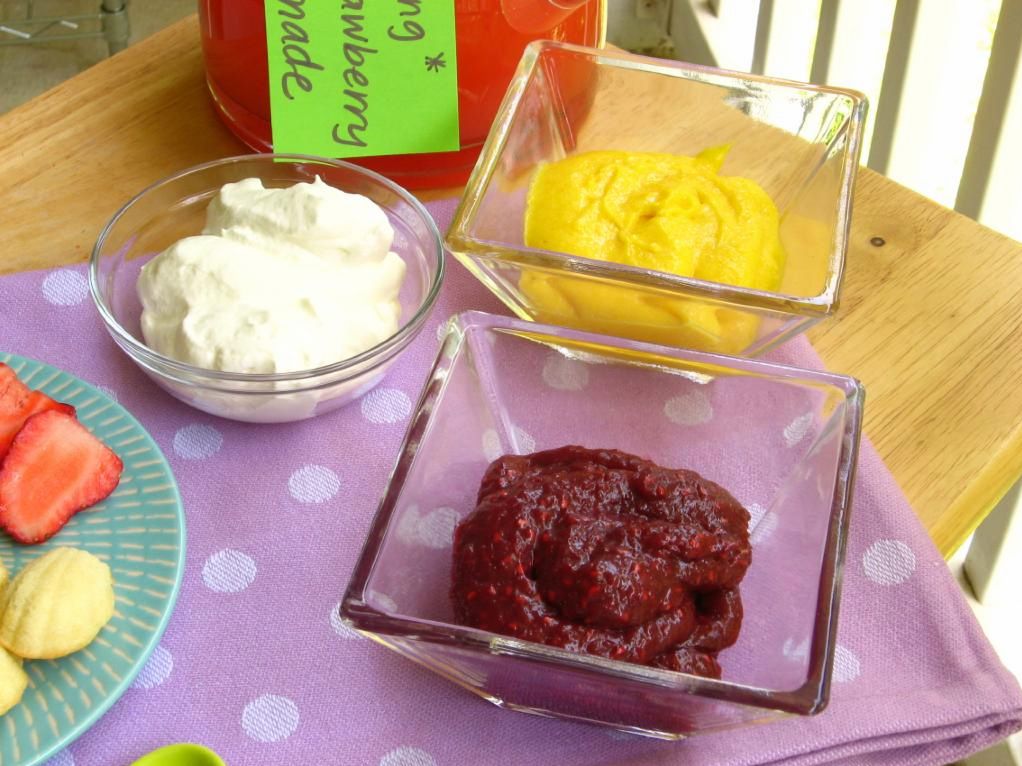
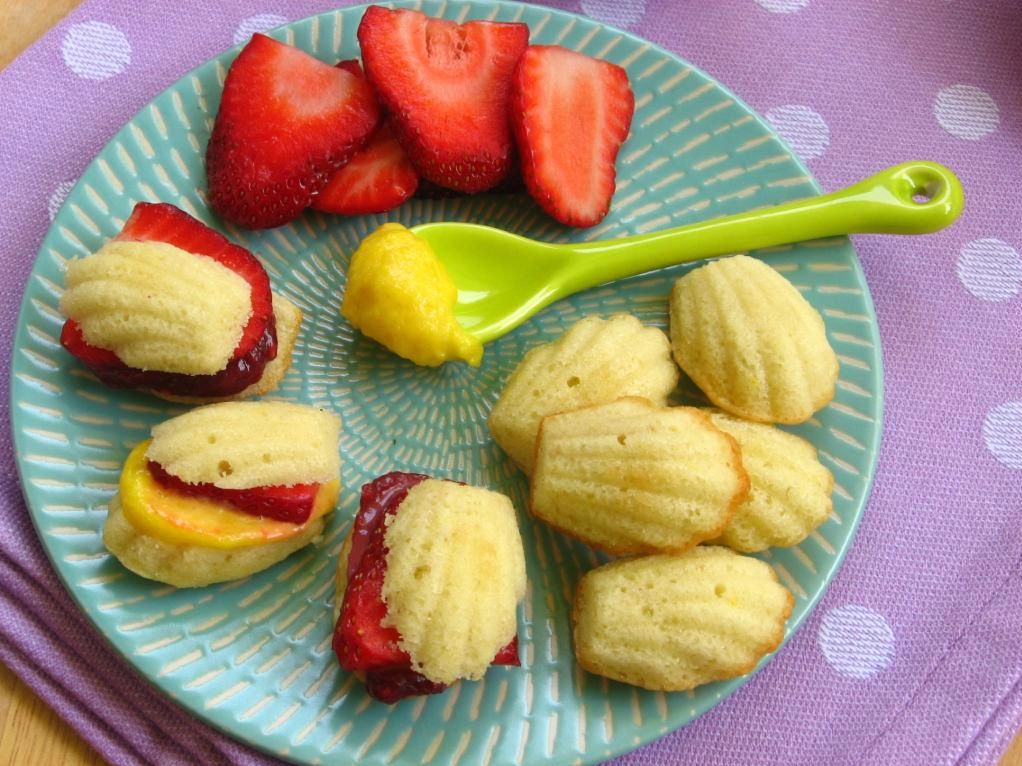
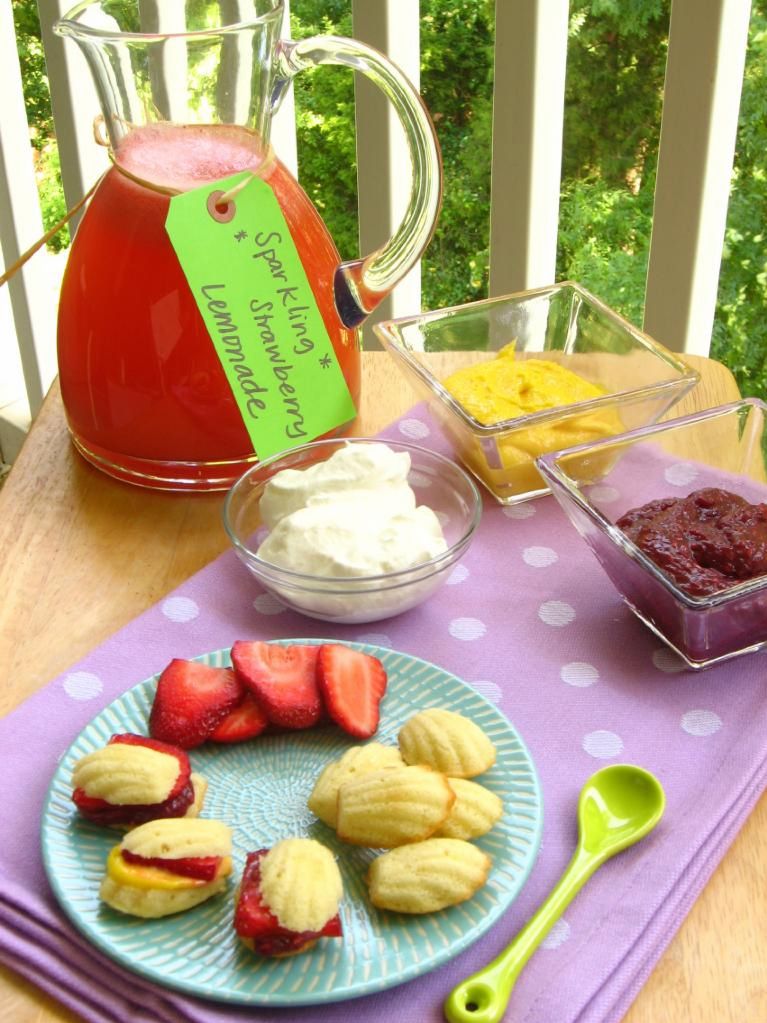
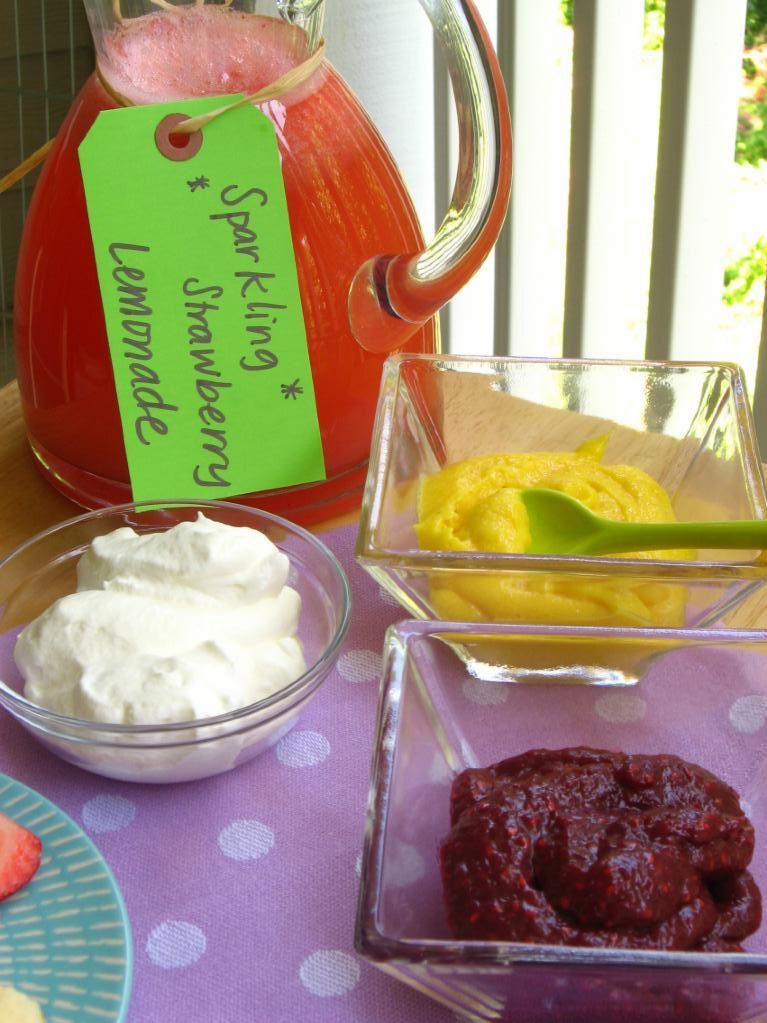
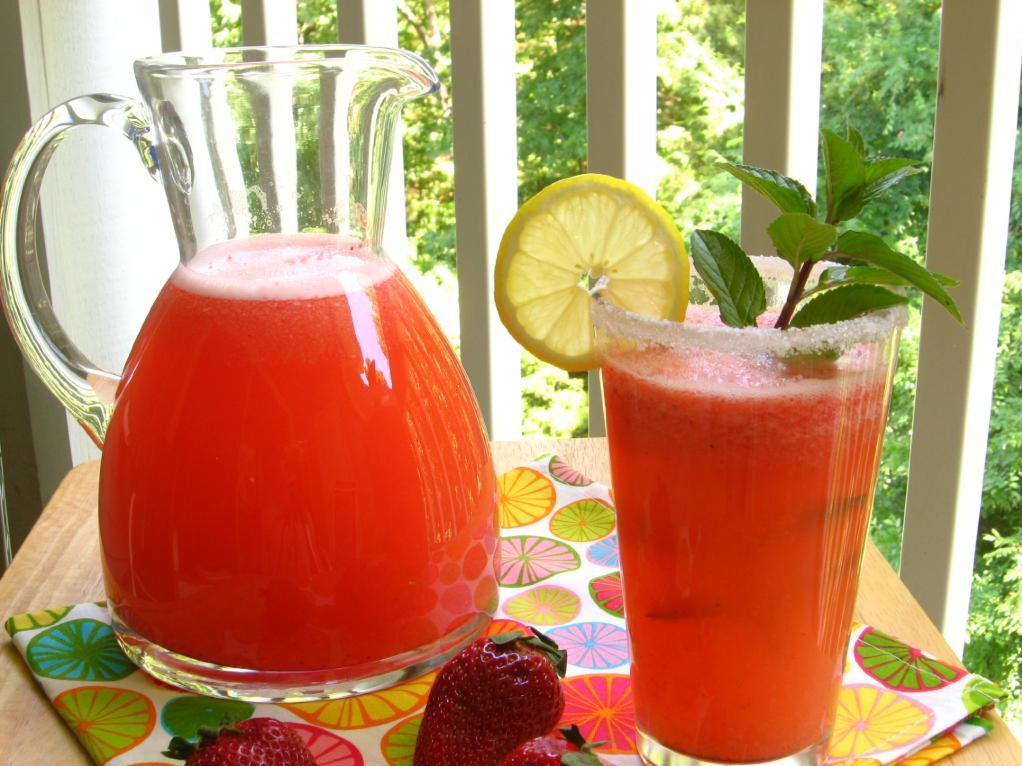
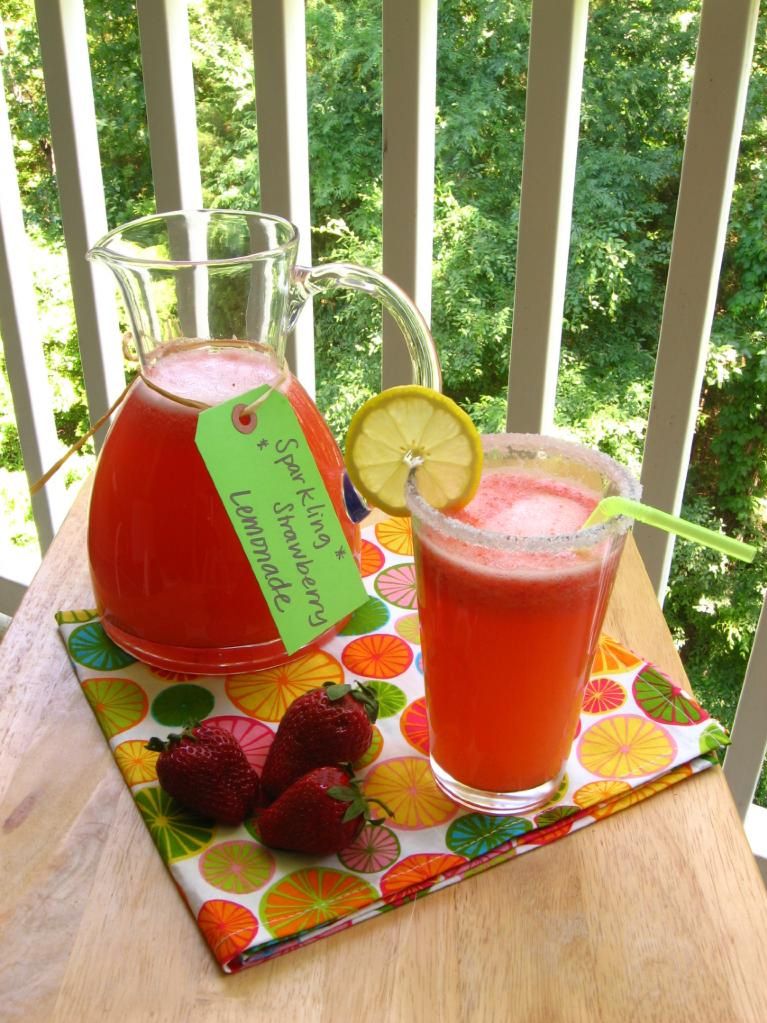
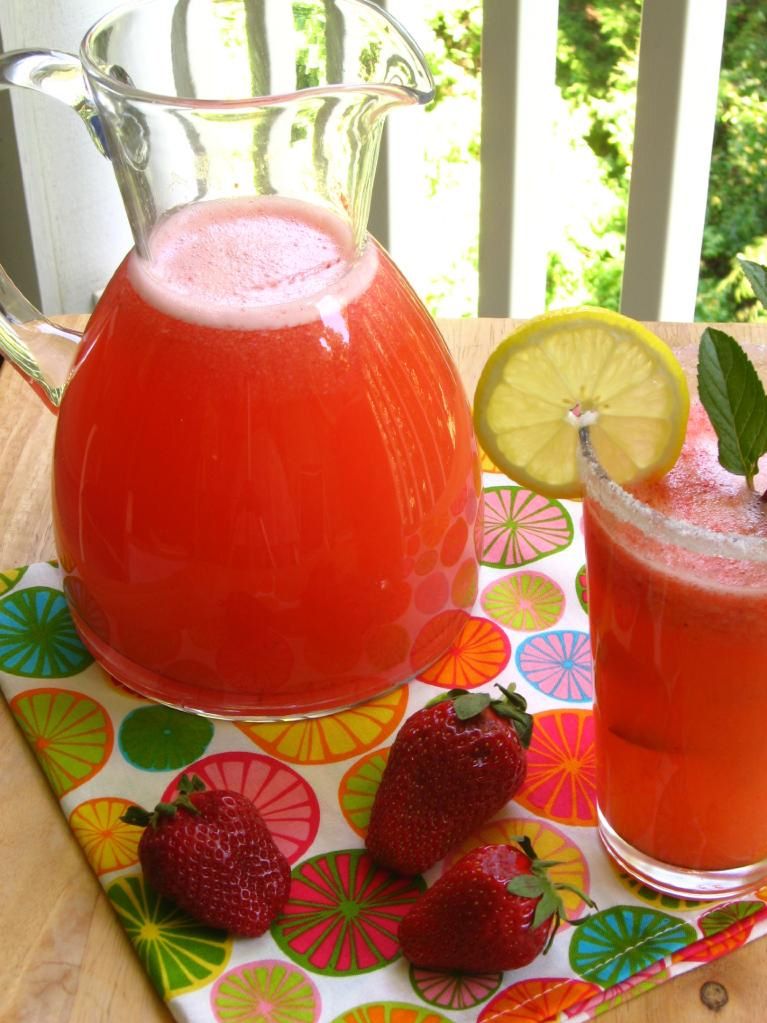
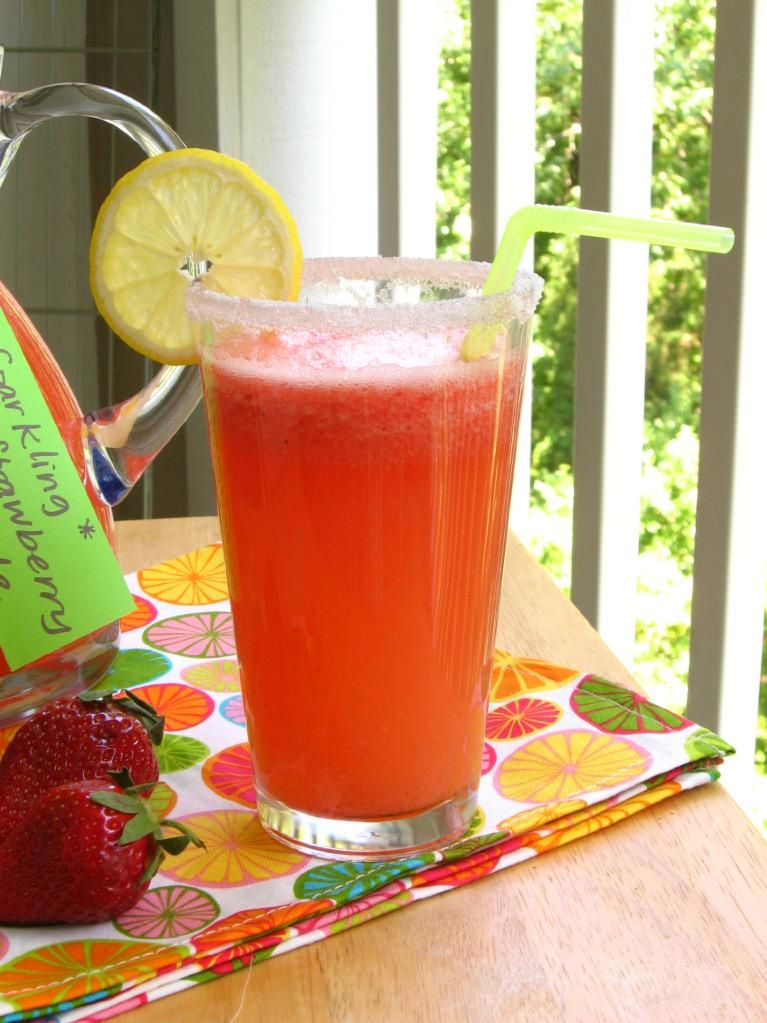
Since then, I’ve been on the lookout for possible drink recipes. All sorts of fantastic lemonades have been catching my eye on the interwebs lately — berry lemonades, herb and lavender lemonades, plain ol’ lemon lemonades. Also catching my eye have been mocktails — snazzy juice and seltzer concoctions that fellow teetotalers enjoy instead of their alcoholic counterparts. When working on my summer dessert, I decided it was also the perfect time to roll out a summer drink. Combining my mocktail and lemonade inspiration, I decided to make some gorgeous Sparkling Strawberry Lemonade — with lots of accoutrements, of course: slices of juicy lemon, plump strawberries, ice cubes, a sugar-crusted rim, green bendy straws, and of course, big sprigs of fresh mint! After all, it’s all about the experience.

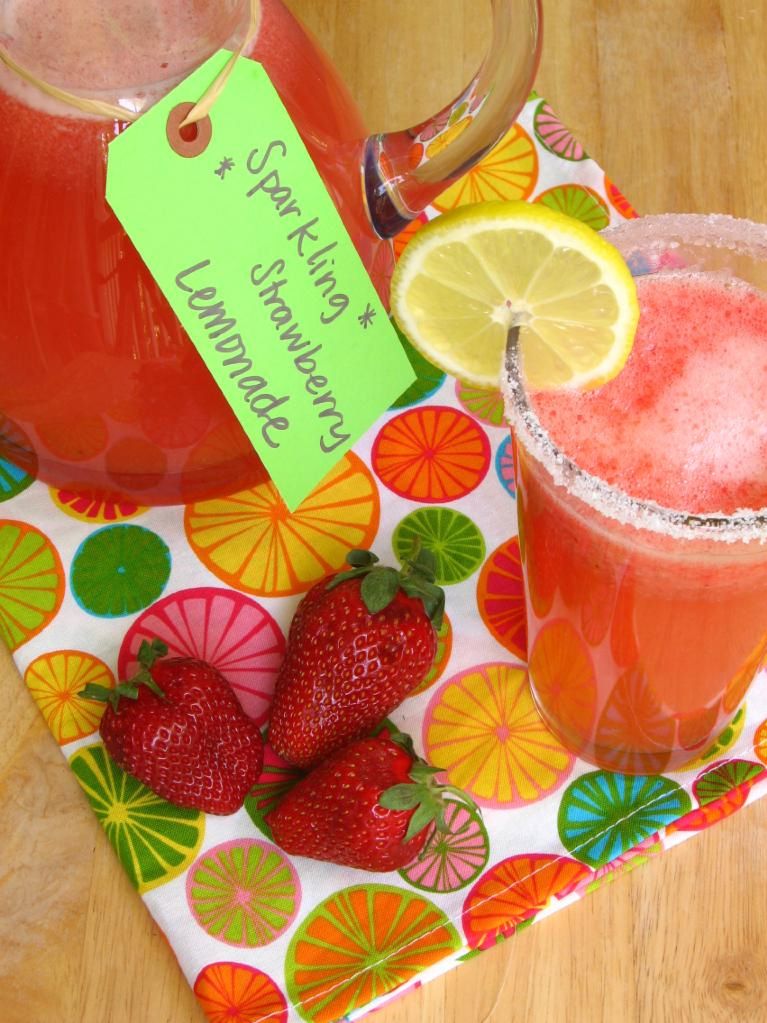
Next time I might add more strawberries, because I want an even bolder strawberry-lemon ratio, but the lemonade was perfectly tart and sweet. After embellishing my glass with the above additions, I thoroughly enjoyed sip-sip-sipping my time away. Make a big pitcher of this fresh summer treat and enjoy it on your porch or balcony tonight!

Sparkling Strawberry Lemonade


Recipe by: Adapted from The Sweet Melissa Baking Book by Melissa Murphy
Yields: about 6.5 cups of lemonade

Fresh Strawberry Sauce Ingredients:
1 dry pint fresh strawberries, rinsed and hulled (or maybe a little more)
2 tablespoons sugar
1 teaspoon fresh lemon juice
2 tablespoons cold water

Lemonade Ingredients:
3/4 cup sugar
1 cup very hot water
1 cup fresh lemon juice
4-1/2 cups cold seltzer or sparkling water

Optional Accoutrements:
lemon juice and sugar for glass rims
sprigs of fresh mint
fresh strawberries
slices of lemon
crushed ice
bendy straws!

Directions:
Make strawberry sauce: In a food processor or blender, puree the berries, sugar, lemon juice and water until smooth. Strain the berry mixture into a clean bowl and discard the seeds. Stir in additional sugar, if needed. Cover and refrigerate until used.

Make lemonade: In a pitcher, combine the sugar and hot water and stir until the sugar has dissolved into a syrup. Stir in the lemon juice and cold seltzer water. Add the strawberry sauce and stir to combine. Pour over ice into tall glasses rimmed with sugar (dip rims into lemon juice and then sugar). Garnish with fresh strawberries and other accoutrements, if using. Strawberry lemonade keeps at least 3 days in the refrigerator.


Enjoy!


Share Share this post with friends!

Toasted Almond Cake with Mascarpone Cream and Amarena Cherries

Don’t worry — I did go see my wonderful mom on Mother’s Day and take her a special gift. But (despite the fact that Mother’s Day is now over), I also thought it would be nice to brag on her here a bit and show you the decadent birthday cake she made me. I’ve loved reading blog posts all over the internet about why others’ mothers were so great. Now it’s my turn!

Why do I love my mom?

1. She made me this cake. Enough said (but you know I’ll say more)! This three-layer dessert was a masterpiece of toasted almond, slightly tart cherry, and light-as-a-feather buttercream. Many joyous exclamations were uttered while we plowed through our three-story pieces.

2. She went back to college with four kids (insert appropriate gasp!) in the 80’s to earn her nursing degree. Even with four kids, she managed to graduate magna cum laude from UNCC’s nursing program.

3. She sews: she has created special quilts for me and my siblings, as well as other family members. She also makes clothes for my niece and nephews. Look for a picture of my quilt at the end of this post!

4. She taught me how to cook. It was under her auspices that I made my first Chocolate Sheet Cake, my first pan of Oven Baked Macaroni, and she is always on-call for cooking emergencies. As I mention on my About page, she is my main culinary influence, and I learn new things from her every meal.

5. She (and my little brother — Hi, Alex!) hung out with me for 3-4 hours while waiting for Pioneer Woman to sign our books last week. More on the Pioneer Woman booksigning later!

6. She’s beautiful.

7. She crafts: lately, her creative craft has been homemade chalkboards from antique or recycled frames. See her handiwork at her Etsy store, Posh Pilfer.

8. She decorates. She and my dad have single-handedly (well, double-handedly, I guess) renovated and redecorated their home to be a gorgeous oasis. Once again, photo evidence at the bottom of this post!

9. She cares about her children. A few years ago, she wrote each one of us poems. Every April Fools’ Day, she makes my little brother a wacky meal to celebrate. She has bandaged wounds, baked cakes, worked hard, and sacrificed to make us happy.

10. She rose above a difficult childhood to become an amazing mother of 5 children.

…And did I mention that she made me this cake? This heavenly confection is truly a “special occasion” cake: it’s expensive, it’s time consuming and involved, and it’s positively dreamy. If you want to feel like you’ve been transported to an almond-cherry cloud of joy, you should invest in some fancy Italian cherries and make this baby. It was the grand finale to a fantastic birthday meal, which I’ll share with you soon!

Toasted Almond Cake with Mascarpone Cream and Amarena Cherries


Recipe by: Gina DePalma
Yields: 12-16 servings

Cake Ingredients:
2 cups almond flour
3 cups unbleached all-purpose flour (not self-rising)
1 1/2 teaspoons kosher salt
3/4 teaspoon baking powder
3/4 teaspoon baking soda
1 1/2 cups sugar
1 can or tube (7 to 8 ounces) almond paste, cut into small chunks
24 tablespoons (3 sticks) unsalted butter, at room temperature
6 large eggs, at room temperature
1 cup whole milk, at room temperature
1 tablespoon Amaretto liqueur
Finely grated lemon zest (from 1 lemon, about 2 teaspoons)
2 teaspoons vanilla extract

Mascarpone and Amarena Cherry Filling Ingredients:
1 1/2 cups mascarpone
1 cup heavy cream
1/4 cup sugar
1/2 vanilla bean, split and seeds scraped
2 tablespoons kirsch or grappa
1 cup amarena cherries in syrup, well drained and coarsely chopped
3/4 cup cherry jam

Buttercream Ingredients:
1 cup sugar
4 large egg whites, at room temperature
24 tablespoons (3 sticks) unsalted butter, at room temperature
4 teaspoons vanilla extract

Directions:

Note: Amarena cherries are a sweet-sour varietal from Northern Italy. DePalma uses Agrimontana’s and also recommends those from Fabbri, available at Amazon.com. Almond flour is available on Amazon.com and at specialty grocers. This recipe is for a classic, one-tiered layer cake.

To make cake: Adjust 2 oven racks to divide oven into thirds. Preheat oven to 350°. Grease 3 (9″ x 2″) round cake pans. Line bottoms with parchment paper; grease paper and dust pans with flour, tapping out excess. Spread almond flour on a rimmed baking sheet and bake until toasted, stirring once, 8 to 10 minutes. Let cool.

In a large bowl, whisk together almond flour, all-purpose flour, salt, baking powder, and baking soda; set aside. Combine sugar and almond paste in a food processor and blend until almond paste is finely ground, with the texture of fine sand.

In a stand mixer with paddle attachment, combine almond paste mixture and butter. Beat on medium speed until light and fluffy, about 2 minutes, scraping bowl occasionally. Beat in eggs one at a time until well blended. With mixer on low speed, beat in milk, Amaretto, lemon zest, and vanilla until well blended. Beat in flour mixture, scraping bowl. Beat on medium speed until well blended, about 30 seconds. Divide batter among prepared pans and spread evenly. Stagger pans on 2 racks in oven so pans are not directly above one another. Bake 30 to 40 minutes, rotating pans halfway through, or until a toothpick inserted in center of cakes comes out clean. Let cool in pans 10 minutes. Run a knife around sides of pans and turn cakes out onto wire racks. Remove parchment paper and flip again; cool completely.

To make filling: In a stand mixer with whisk attachment, combine mascarpone, heavy cream, sugar, vanilla bean seeds, and 1 tablespoon kirsch or grappa. With mixer on low speed at first and increasing to medium, beat just until firm peaks form; do not over beat. Fold in cherries. Refrigerate 30 minutes. In a bowl, stir together cherry jam and remaining 1 tablespoon kirsch or grappa.

To make buttercream icing: Combine sugar and 1/2 cup water in a small saucepan and bring to a boil over medium-high heat, stirring to dissolve sugar. Boil without stirring until syrup reaches 240° on a digital thermometer, about 5 minutes.

Meanwhile, in a stand mixer with whisk attachment, beat egg whites on medium-high speed until soft peaks form. With mixer on medium speed, gradually pour in hot syrup in a thin stream; avoid pouring syrup on whisk. Increase speed to medium-high and beat until stiff peaks form and mixture is cool, about 8 minutes. Reduce speed to medium and add butter 1 tablespoon at a time, beating after each addition. (If at any time buttercream appears curdled, beat on high until smooth, then reduce speed to medium and continue beating in butter.) Once all butter is added, beat on high speed until buttercream is smooth and fluffy, about 1 minute. Beat in vanilla.

To assemble cake: Spread 1 side of 2 of the cake layers with jam and let stand 10 minutes, so cakes absorb some of jam. Place 1 cake layer, jam-side up on cake stand or plate. Spread with half of mascarpone filling. Top with second cake layer, jam-side up. Spread with remaining filling. Top with third cake layer, top-side up. Frost cake with about 1 cup buttercream to crumb coat cake; refrigerate 1 hour. Frost cake with remaining buttercream. Serve immediately or refrigerate; if refrigerated, let stand at room temperature 1 hour before serving.

Note: My mother’s cake is decorated with marshmallow fondant flowers in various shades of pink.


Clockwise from upper left:My mom, my dad, and the family toy poodle, Abbey; the quilt mom made for me; mom’s redecorated bedroom; Mom on Christmas morning, 2007.


Happy (late) Mother’s Day!


Share Share this post with friends!

Lemon Madeleines with Mango and Raspberry Curd — and a chance to win a mixer!

What does summer taste like?

I know what summer looks like. It looks like trees weighed down with heavy cascades of leaves, thunderheads gathering solemnly in evening heat, steam rising off pavement. Summer sounds like the persistent hum of cicadas, wind rushing through the woods behind my apartment. Summer smells like jasmine, gardenias, and bushels and bushels of honeysuckle. Summer feels like bearing the burden of the sun, carrying its winter secrets on new summer skin . . .

But what does summer taste like? I think it must taste like mango curd, tropical and cool and sweet on your tongue. And of course, it tastes like lemon: fresh and bright. Don’t forget ripe, lush berries, and oh, maybe some freshly whipped cream piled high on top.

The folks at beso.com want to know what you think summer tastes like, and it’s worth a KitchenAid mixer to them! They’re currently holding a Baking Up Summer Sweets contest in which you can tell them about your favorite summer recipe for a chance to win.

Given my own summer tastes, I’m entering beso.com’s contest with a recipe that’s mangoy, lemony, berry-y, creamy . . . full of summer goodness. And since I recently won a mini-madeleine pan from Shortbread NYC, of course it had to involve madeleines! Hence, lemon madeleines with mango and raspberry curd were born.

These lemony bites are the perfect summer treat. I served them with fresh, sliced strawberries. They were light, bright, and so tiny — perfect for sitting on a warm patio in the evening and nibbling one-by-one. Also, I don’t know about you, but I’m a dipper. I love dipping sauces and creams. Dipping each of these golden hunks into various curds and cream was not only delicious, but a fun experience too! Just a note about the texture of the madeleines, though: these were a bit cakey and only had a slight outer shell just after baking, which may displease die-hard madeleine lovers. I’m not sure if it was my silicone pan or the recipe. Nevertheless, I enjoyed the texture.

Speaking of KitchenAid mixers, you will never believe what I got for my birthday. My family all chipped in and bought me the most gorgeous silver professional KitchenAid stand mixer in the world! Bowl-lift, 5 quart bowl, and it came complete with a complimentary KitchenAid timer, four prep bowls, and a free attachment. To say I was shocked would be an understatement. Summer in this house is gonna sound like a whole lotta mixin’ this year! So what would I do with that pretty mixer beso.com is giving away, were I to win? My mama’s mixer is looking a little beat up, so I’m thinking it would be a good belated Mothers’ Day gift. Here’s hoping!

Mix up your own summer treat and enter to win, but don’t forget to mix up some of these madeleines as well! Make mango curd, raspberry curd, or both! You’ll love every summery bite.

Lemon Madeleines with Mango and Raspberry Curd


Recipe by: adapted from Joy of Baking (madeleines), Smitten Kitchen (mango curd), and notes from my food diary(raspberry curd)
Yields: about 80-90 bite-sized mini madeleines, maybe 25 regular size

Madeleine Ingredients:
1/2 cup (113 grams) unsalted butter, melted
1 cup (130 grams) all-purpose flour
1/2 teaspoon baking powder
1/8 teaspoon salt
3 large eggs, at room temperature
2/3 cup (133 grams) granulated white sugar
1/2 teaspoon pure vanilla extract
1/2 teaspoon lemon extract

Mango Curd Ingredients:
1 15-ounce ripe mango, peeled, pitted, cut into 1/2-inch pieces
1/3 – 1/2 cup sugar (depending on your preference for tart vs. sweet)
3 tablespoons fresh lime or lemon juice (lime comes out tangier)
Pinch of salt
4 large egg yolks
1/4 cup (1/2 stick) unsalted butter, cut into small pieces

Raspberry Curd Ingredients:
1/2 cup (1 stick) unsalted butter
Two 1/2-pints ripe raspberries or one 12-ounce package frozen raspberries, thawed
5 large egg yolks, lightly beaten
3/4 cup sugar
Pinch of salt
2 to 3 teaspoons fresh lemon juice

Whipped Cream Ingredients:
2 cups heavy whipping cream
3 tablespoons confectioners’ sugar

Directions:
Make madeleine batter: First, melt the butter and allow it to cool while you make the batter. In a small bowl place the flour, baking powder and salt and whisk until well blended.

In the bowl of your electric mixer, beat the eggs and sugar at medium-high speed until the mixture has tripled in volume and forms a thick ribbon when the beaters are lifted (about 5 minutes).  Add the vanilla and lemon extracts and beat to combine.

Sift a small amount of flour over the egg mixture and, using a large rubber spatula, fold the flour mixture into the beaten eggs to lighten it.  Sift the rest of the flour over the egg mixture and fold in being sure not to overmix or the batter will deflate. 

Whisk a small amount of the egg mixture into the melted butter to lighten it.  Then fold in the cooled melted butter in three additions.  Cover and refrigerate for at least 30 minutes, or several hours, until slightly firm.

While batter is refrigerating, make mango curd: Puree mango, sugar, lime/lemon juice and salt in processor, scraping down sides of work bowl occasionally. Add yolks; puree 15 seconds longer. Strain through sieve set over large metal bowl, pressing on solids with back of spatula to release as much puree as possible. Discard solids in sieve.

Set metal bowl over saucepan of simmering water (do not allow bottom of bowl to touch water); whisk puree until thickened and thermometer registers 170°F., about 10 minutes. Remove from over water. Whisk in butter 1 piece at a time. Cover with plastic wrap (directly on the curd to prevent a skin from forming) and refrigerate for several hours. Note: Freeze excess for up to two months.

Make raspberry curd: Melt the butter in a large saucepan over medium heat. Add the raspberries, egg yolks, sugar, and salt and cook, mashing the berries and stirring frequently at first and them constantly at the end, until thickened, about 10 minutes (this took longer for me — about 15+).

Pour the mixture through a coarse strainer set over a bowl, pressing hard on the solids to extract as much liquid as possible. Cool to room temperature; the curd will continue to thicken as it cools. Stir in lemon juice to taste. Refrigerate. Note: freeze excess for up to 1 month.

To bake madeleines, position a rack in the center of the oven and preheat to 375 degrees F (190 degrees C).  Generously butter two 12-mold madeleine pans.  Dust the molds with flour and tap out the excess.  Alternatively, use Bakers Joy to coat pans. (Make sure the pans are well greased or the madeleines will stick and be hard to remove.)

Drop a generous tablespoonful of the batter into the center of each prepared mold, leaving the batter mounded in the center.  (This will result in the classic “humped” appearance of the madeleines.)

Bake the madeleines for 11 to 13 minutes, until the edges are golden brown and the centers spring back when lightly touched.  Note: If you make miniature madeleines, reduce the baking time to about 7-9 minutes. Do not overbake these cookies or they will be dry.

Remove the pans from the oven and rap each pan sharply against a countertop to release the madeleines.  Transfer the madeleines, smooth sides down, to wire racks to cool.  While they cool, make whipped cream by mixing cream and sugar together until they reach loose whipped cream consistency. Serve madeleines with curds and cream the same day for best taste, or store them in an airtight container at room temperature for 2 to 3 days or frozen, well wrapped, for up to 1 month.


Enjoy!

P.S. – Wondering about that refreshing-looking pitcher of sparkling strawberry lemonade? That summer recipe is coming up soon!

P.S. 2 – My roommate texted me today from her visit to her home state of New York. It snowed there today. Yikes! Buffalo, summer is coming soon, just hang on!


Share Share this post with friends!

Pasta Carbonara

I’ve been so antsy to share this recipe with you! It’s one of those I-put-a-bite-in-my-mouth-and-suddenly-my-eyes-widened-to-the-size-of-Pluto dishes. One of those I-stared-at-Mike-impatiently-waiting-for-him-to-take-a-bite-and-have-Pluto-sized-eyes dishes! One of those I-could-eat-a-Pluto-sized-bowl-of-this-stuff dishes!

I’ve been trying to redeem myself for Mike’s terrible birthday dinner disaster for awhile now. Sure, I’ve made some delectable things since then, but I knew my penance wouldn’t be truly complete until I made him some really good pasta.

I went hunting on my favorite places to hunt for recipes: Tastespotting and Foodgawker. I’m so visual when it comes to food — seeing a dish gives me a better idea of how it’ll taste than looking at ingredients lists — and I find the mini-descriptions on these sites force bloggers to succinctly convey how amazing a dish is. You’ll find some captions that say things like, “pretty good,” or emphasize the ease of a dish, and others that convey the kind of emotion I wanted to elicit from Mike with my pasta dish: “WOW, this is good!”

This recipe was one of the WOW ones I came across. The photo of the dish was submitted by Kate of Framed, who called it “extra special.” That — combined with her charge to throw out all your other carbonara recipes — gave me confidence. I’m not going to lie, something about her blog’s exuberant header photo probably also made be feel exuberant about linguine! Regardless of the reasons, I decided that this was the recipe I’d been searching for!

As if you needed any more encouragement to make this pasta, the original recipe is straight from Pioneer Woman’s site (a Pastor Ryan recipe, for those of you who follow her posts). P-Dub has never steered me wrong, and on top of that, she’s coming to Charlotte this Friday for a book signing! What a perfect time to make a meal from her blog.

I guess the only thing left to tell you about is the most important part: the taste. The last time I ate pasta carbonara was in Little Italy in San Diego, so the creamy, rich, buttery sauce and the salty punch of the pancetta was a wonderful memory. I have to say, though, this rendition was even better than the one I remember. Bunches of torn parsley add a fresh note to the otherwise deep and indulgent pasta.

One flavor I noticed that stood out was the wine, so pick a good one — but don’t ask me how to do that! I picked my wine because it was white and had a penguin on the bottle. I got lucky, though, because it tasted perfect in the sauce. It was a Pinot Grigio, in case you want to replicate my random choice.

We paired our pasta with some cheesy garlic bread, and it was such a great combination. Actually, I considered making some big homemade garlic croutons to top the pasta itself, which would have been delectable if you want to give it a go. Make this as soon as you can manage to throw some linguine into your shopping cart. Bon Appétit!

Pasta Carbonara


Recipe by: Slightly adapted from Pioneer Woman’s blog by Framed
Yields: about 4 servings, if you’re us — perhaps 6 servings for normal folk.

Ingredients:
1 pound linguine pasta
4 eggs
1 pound bacon or pancetta (I used pancetta)
1 1/2 cups Parmesan cheese
8-12 cloves of garlic, sliced thin
1 large onion, chopped
1 cup chicken stock
1 cup white wine (or substitute another cup of stock)
1/2 stick of butter
1 handful of parsley
1-2 tablespoons black pepper

Directions:
1. Cut bacon into pieces about one inch wide. Cook until browned and crisp and set aside, saving bacon grease in the skillet.

2. Cook linguine in salted water until al dente.

3. Add chopped onions to bacon grease and let them cook down over a medium-high heat for a couple of minutes.

4. After the onions have cooked for a couple of minutes, throw in the garlic. Adding it after the onions have cooked a little will prevent the garlic from burning. After the onion and garlic have cooked for another couple of minutes, remove from the pan with a slotted spoon. Discard the grease.

5. Place the pan back on high heat until it starts to smoke a little. As soon as the pan begins to smoke, pour in the white wine (or chicken stock). Whisk until pan is thoroughly deglazed and all of the brown bits have come off of the bottom of the pan. Add 1 cup of chicken stock. Return onion and garlic to the pan. Let simmer over medium heat.

6. Crack four eggs into a large bowl. Add most of the Parmesan cheese, and roughly chop the parsley, adding it into the eggs as well. Leave a little Parmesan and parsley out for a garnish. Mix well with a fork.

5. Add the cooked hot pasta to the egg mixture and then add the onion mixture. Stir in ½ stick (1/4 cup) of butter and the cooked bacon. Mix it all together well. Pepper to taste. Garnish with parmesan and parsley. Throw out all previous carbonara recipes.


Enjoy!


Share Share this post with friends!

Assorted Truffles in a Chocolate Bowl

What sort of recipe starts off with a grocery list that includes plastic gloves, balloons, and turtle food? Okay, the turtle food is actually just something I picked up for my precious chelonian friend, so I guess we can ignore that. But I promise plastic gloves and balloons are both important tools when making this adorably fancy dessert.

I had leftover ganache from this indulgent dessert / monstrosity and considered tossing it. I’m so glad I didn’t! I stumbled across a discussion of using leftover ganache to make truffles and suddenly had a plan: I’d make a batch of simple truffles myself! As usual, my plan grew . . . and grew. Before long, my elaborate menu included four varieties of truffle, and, oh yes, wouldn’t it be sweet to serve them in a bowl made of chocolate? Marbled chocolate, even? Oh, yes.

Call me harebrained. I don’t mind; I like bunnies (well, except that louse of a pet rabbit my little brother owns . . . his name is Pilfer, and he frequently reminds me what a pity it is that I haven’t yet tried rabbit stew. But I digress.)

My ideas do get a little “hare-y,” but this time it worked out into a sweet little plan — and one that would be perfect for a simple but sophisticated Mothers’ Day gift!

My four truffle varieties all begin with the same base: a ball of rich, thick ganache. Mine had been stored in the fridge since I made it and was lovely to work with. After rolling the ganache into a ball, it got one of four treatments:

  1. Plain truffles: ganache coated in melted chocolate and rolled in cocoa.
  2. Oreo coated truffles: ganache coated in melted chocolate and rolled in pulverized oreos.
  3. Hazelnut truffles: ganache with a toasted hazelnut in the center, coated in nutella and rolled in chopped hazelnuts and melted chocolate.
  4. Tuxedo truffles: ganache coated in melted chocolate and then dipped in vanilla and chocolate candy coating.

Deb of Smitten Kitchen explained a truffle-making technique that I employed. In fact, the instructions below are really more of a method than a recipe. One of the most important things to note is that you should do some mise-en-place before starting! It’s no fun retrieving something you forgot with sticky, chocolatey hands.

My setup was relatively simple: bowl of ganache, bowl of melted chocolate, bowls of my multiple coatings (chopped nuts, cocoa, crushed oreos, vanilla candy coating), a sieve for shaking off excess coating, and finally, a big strip of waxed paper for drying. The truffle-making process is where those rubber gloves come in, by the way! To coat each ball of ganache in melted chocolate, you smear the chocolate on your glove and roll the chilled ganache therein.

And what about the balloons? Ah, yes. Those were for the chocolate bowls which looked so easy when I read about them, and turned out to involve a lot of trial and error! Out of 5 or 6 tries, I managed to obtain 3 reasonable-looking bowls. Not too shabby. Lessons I learned include blowing your balloon up small, using candy coating instead of regular melted chocolate that takes longer to dry, and double coating where possible. And just expect to shatter a few bowls — it seems almost inevitable. Take heart that with each bowl that collapsed, I had a better idea of what to do differently on my next try.

Chocolate Bowls


Recipe by: Technique found here
Yields: Depends on how much chocolate you melt!

Ingredients/equipment:
one package chocolate and/or vanilla candy coating (I use CandiQuik)
toothpicks if you plan on trying to marble your bowl
balloons

Directions:
Melt candy coating according to package directions and then pour into shallow container to let it cool slightly and get slightly less viscous. You want it to be a consistency where you can sort of “paint” it onto the balloon with a spoon and it won’t immediately pour right off — though it will slowly drain. When it’s cooled for a minute, carefully paint it onto the bottom of your balloon with a spoon, placing each balloon on wax paper to dry*. After they’ve dried for a few minutes, the candy coating should be starting to harden. If your first coating seems thin, paint another coat on and let it dry as well.

After letting the candy coating cool thoroughly, snip the top of the balloon with a pair of scissors, letting the air out slowly. The balloon will pull away from the bowl. When it stops, very gently continue pulling it away until your chocolate bowl stands alone!

*Note: If you’d like to try marbling your bowls, pipe thin lines of chocolate in a contrasting color on the still-wet chocolate after coating the bottom of the balloon. Use toothpicks to very carefully drag through the piped lines, creating a marbling effect. Let balloon dry.

Speaking of how fragile these bowls are (or at least, how fragile mine were), the above photo shows what happened in the midst of my photoshoot. It was almost dessert disaster, but when life hands you shards of chocolate bowls (life is strange), why not make an ice cream sundae? Yep, even broken bowls make for pretty desserts.

If you’re not that into edible bowls (weirdo), the truffles would also look adorable in a cellophane bag with a ribbon, or any sweet little container you have lying around — maybe even a heart-shaped box? If you love the bowls but aren’t that into truffles (weirdo), you could use these chocolate bowls for serving ice cream or even individual French silk pies (I want to give Dr. GG a hug for that brilliant idea)! Or follow in my bunny-brained footsteps and make both bowls and truffles for a fancy schmancy dessert.

Assorted Truffles


Recipe by: Bon Appétit (ganache) and Robert Linxe (method)
Yields: Perhaps around 30-40 truffles?*

Ganache Ingredients:
3/4 cups whipping cream
10 ounces bittersweet or semisweet chocolate, chopped (I use a combination)

Optional ingredients for Hazelnut Truffles:
whole hazelnuts
melted semisweet chocolate
Nutella

Optional Indredients for Oreo Coated Truffles:
7 pulverized oreo cookies
melted semisweet chocolate

Optional Ingredients for Plain Truffles:
cocoa powder
melted semisweet chocolate

Optional Ingredients for Tuxedo Truffles:
vanilla candy coating (I use CandiQuik)
chocolate candy coating (I use CandiQuik)
melted semisweet chocolate

Directions:
First, set up your work area to minimize the amount of chocolate you have on random kitchen surfaces when you finish. Then, for all truffle types, make ganache. Bring whipping cream to simmer in large saucepan. Remove from heat; add chocolate. Whisk until chocolate is melted and ganache is smooth. Let sit at room temperature for about 30 minutes before transferring it to the refrigerator.

Plain truffles: Roll chilled ganache into a ball of desired size. Don cute plastic gloves. Smear melted (and slightly cooled) chocolate on one glove and gently roll the ganache ball in the smear until coated. Toss into a bowl of cocoa powder and toss to coat with a fork. Transfer the truffle to a sieve and shake off excess cocoa powder. Store truffles in sealed container in the refrigerator.

Oreo truffles: Repeat plain truffle procedure, but instead of coating in cocoa powder, coat in oreo crumbs. Store truffles in sealed container in the refrigerator.

Tuxedo Truffles: Repeat plain truffle procedure, but instead of coating in cocoa powder, place chocolate-coated ganache ball on a plate and freeze for at least 10 minutes. When hard, use a toothpick to dip each ball into melted vanilla candy coating, wiggling the ball off onto wax paper to dry. You may have to double-dip if the white doesn’t fully cover. When dry, dip the sides of each white truffle into chocolate candy coating to form “lapels.” Use a toothpick to dab on chocolate candy coating “buttons,” forming a tuxedo design. Store truffles in sealed container in the refrigerator.

Hazelnut Truffles: Toast hazelnuts on a cookie sheet at 350 degrees F for about 5-7 minutes, checking and shaking the pan periodically. Save some of the hazelnuts whole to form the center of truffles. Chop the rest of the toasted hazelnuts up very finely and let cool. Place cooled, chopped hazelnuts in a bowl. Prepare another bowl of melted chocolate.

Roll chilled ganache into ball of desired size and poke a whole, toasted hazelnut into its center. Don cute plastic gloves. Smear nutella on one glove and gently roll ganache ball in the nutella until coated. Drop coated ball into bowl of chopped hazelnuts and toss with a fork to coat. Drop coated ball into the melted chocolate to coat. Finally, coat the ball in chopped hazelnuts one last time. Set on wax paper to dry. Store truffles in sealed container in the refrigerator.

*Note: Since I made this with leftover ganache, I used a different amount, and can’t say exactly how many this recipe will make; however 30-40 is my best estimate.


The messy process. By the way, do as I say and not as I do: those balloons are blown up too big!


Enjoy!


Share Share this post with friends!

1 109 110 111 112 113 127