Banana Coconut Cream Cakes

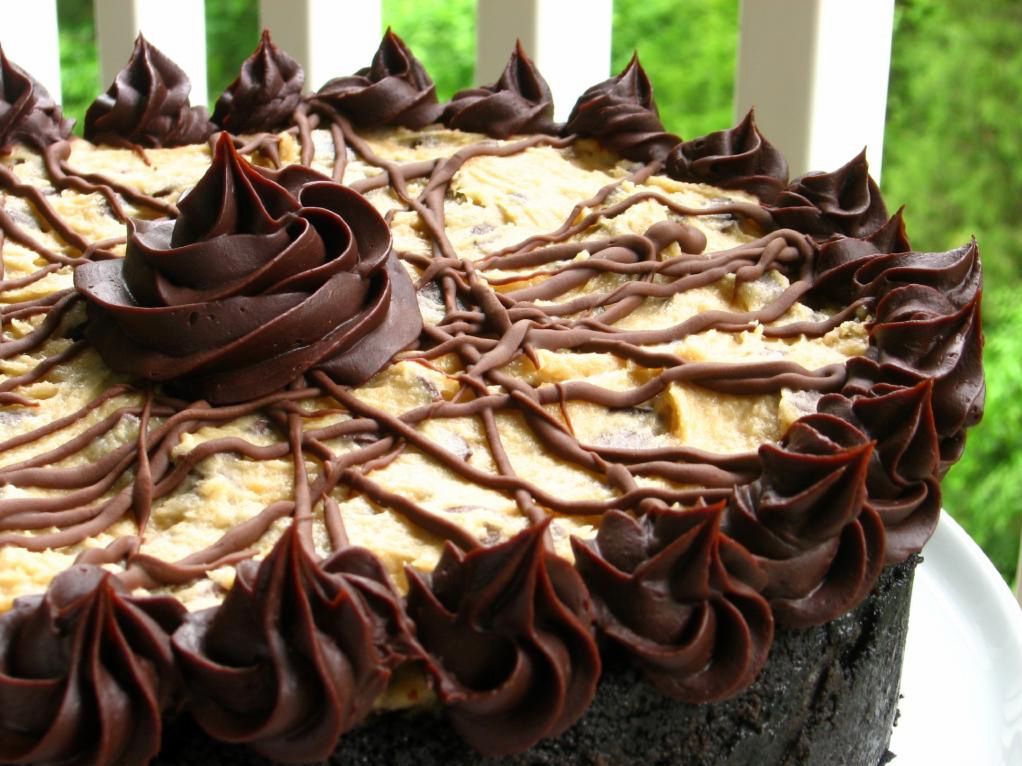
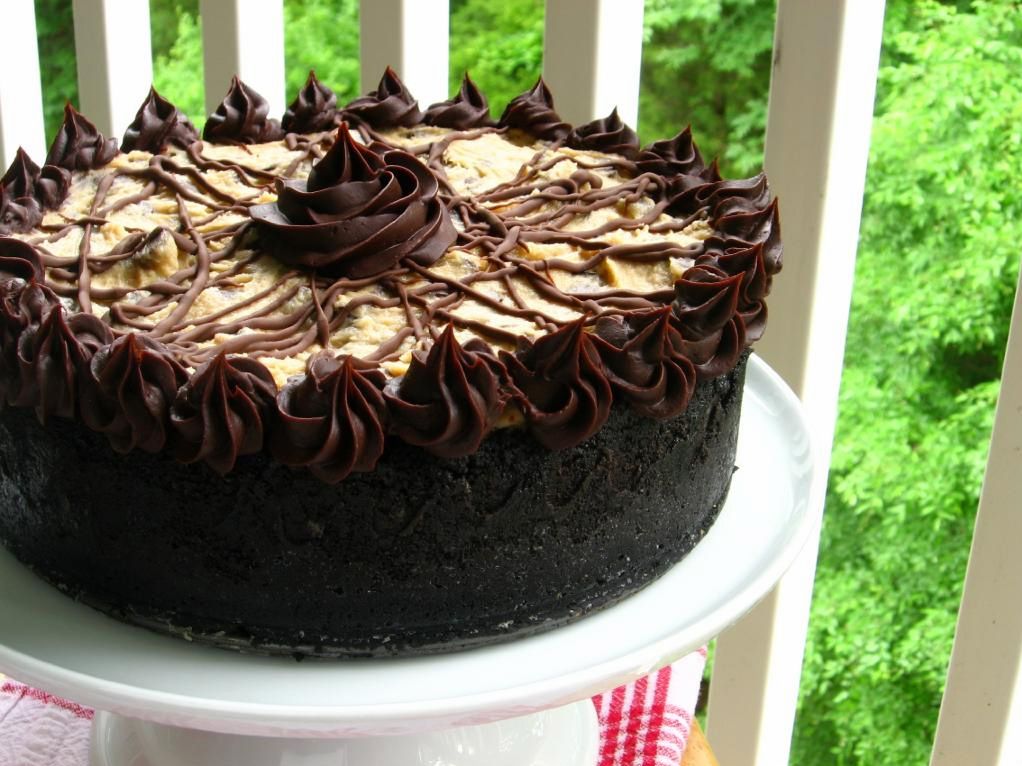
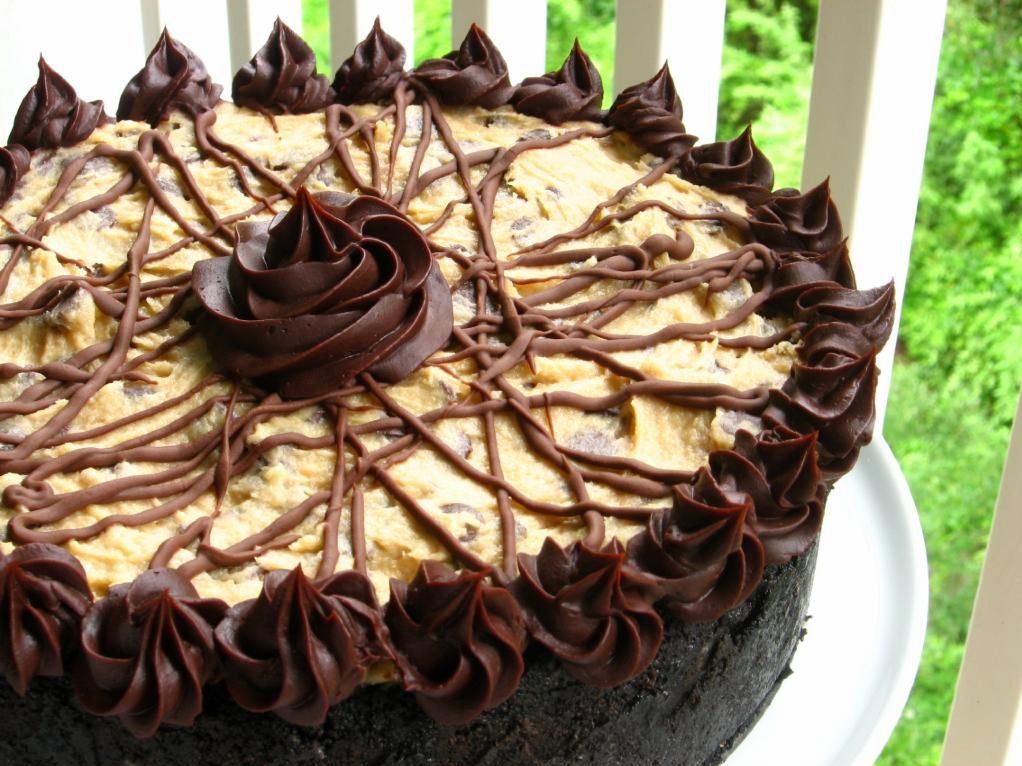
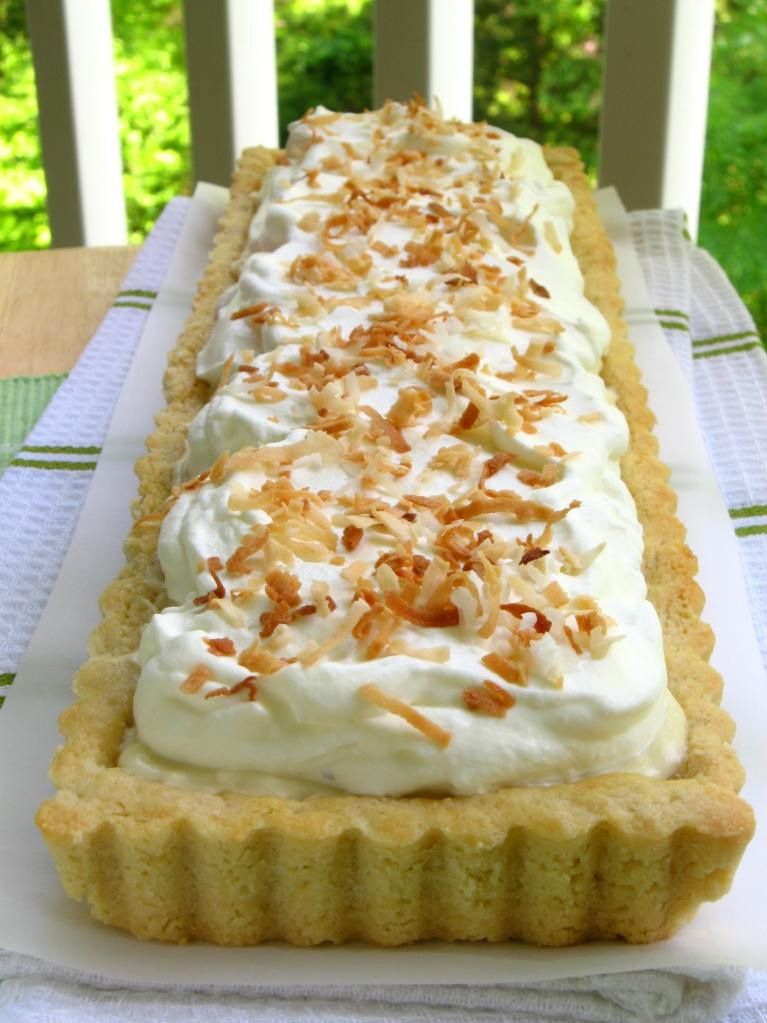
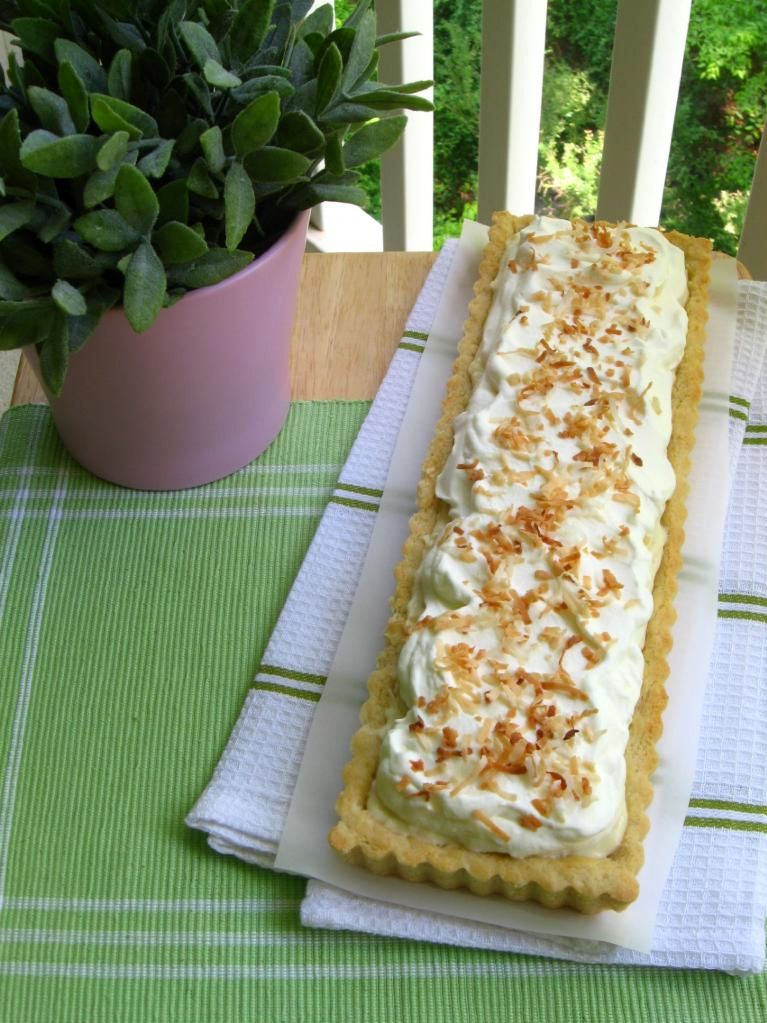
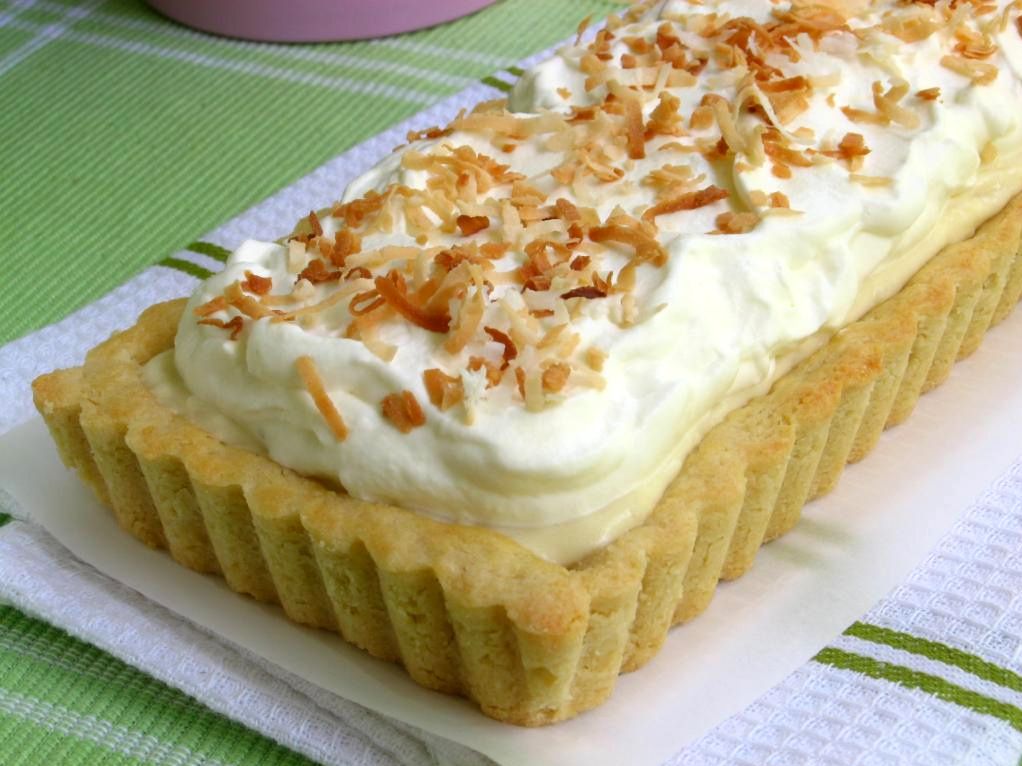
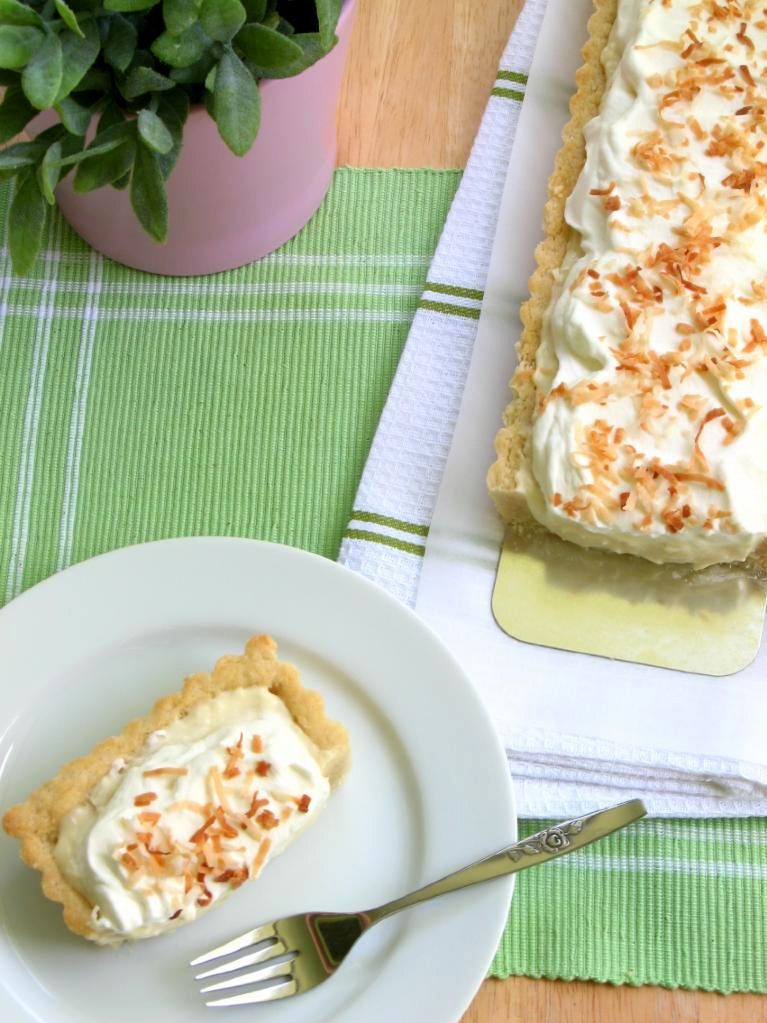
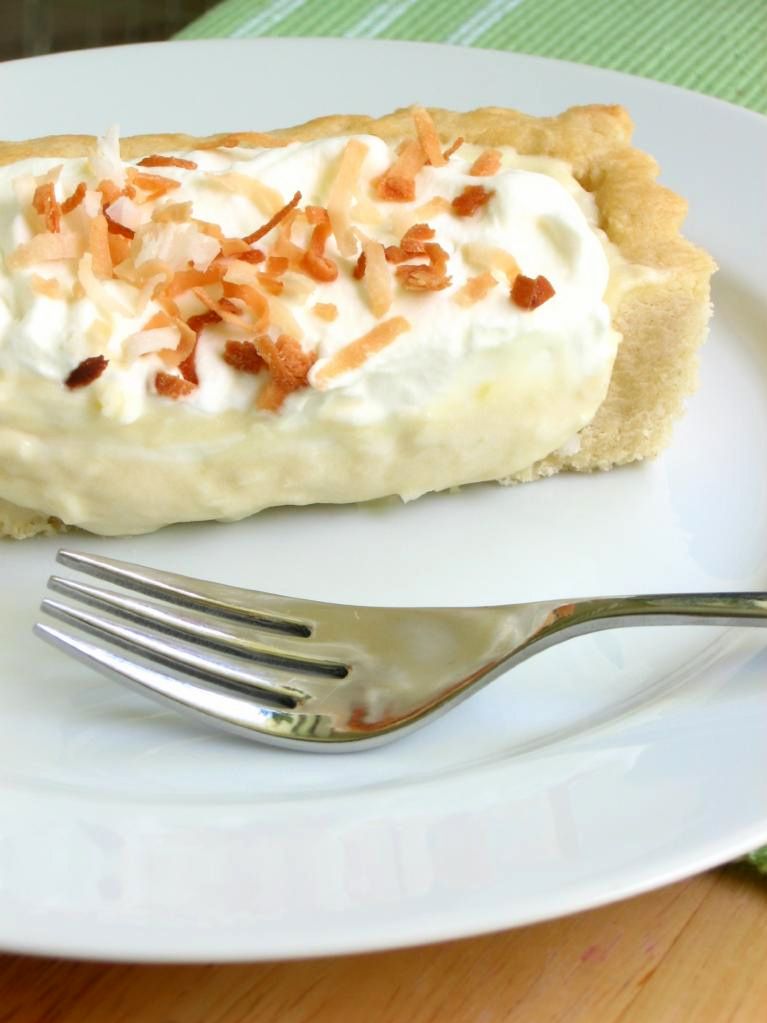
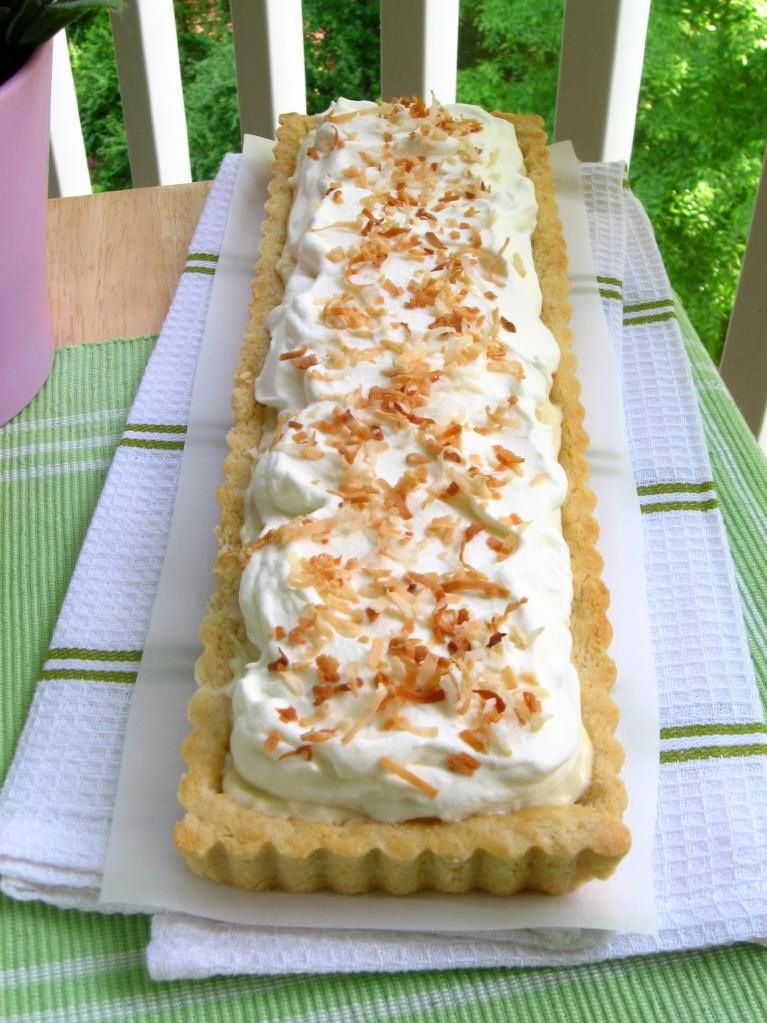
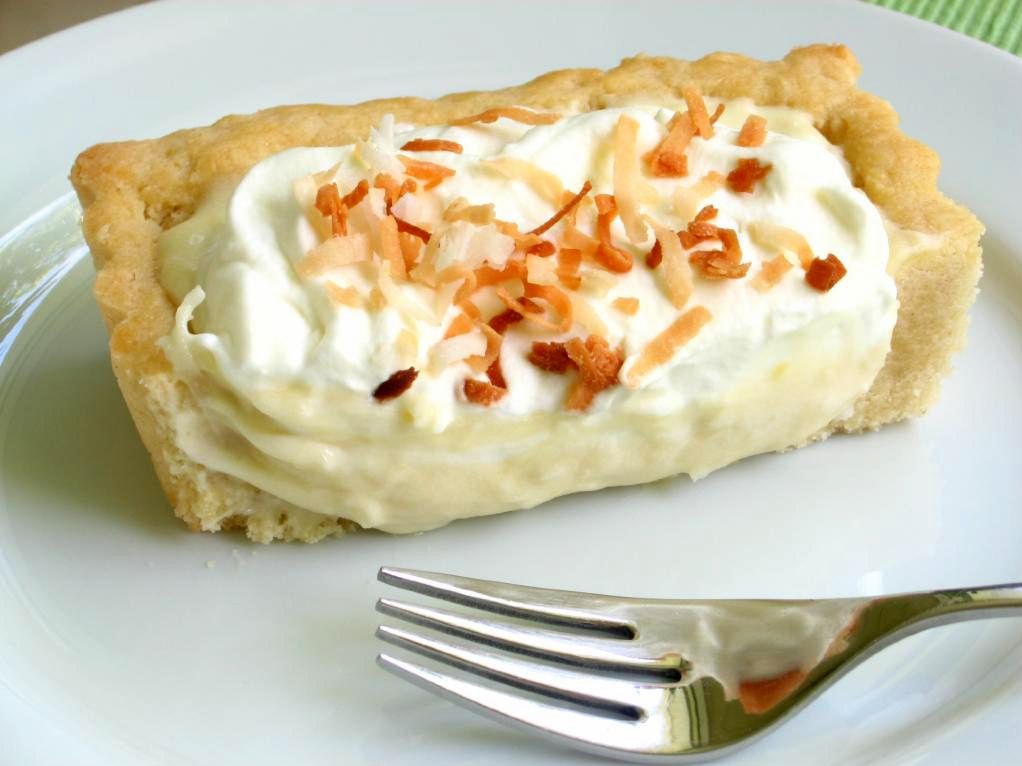
We went off on a brief romantic tangent to celebrate my anniversary with Mike (thanks for all your congratulations!), but now we need to get back to some serious business. SERIOUS business. I told you after making my Coconut Cream Tart that I had some of that heavenly coconut pastry cream leftover. The dessert I came up with to use that leftover pastry cream is now (drumroll, please . . . are you drumrolling?) MY FAVORITE DESSERT OF ALL TIME.

Wow. I eat a lot of desserts, so you know this must be big.

Well, actually it’s small and cute. But BIG in taste!

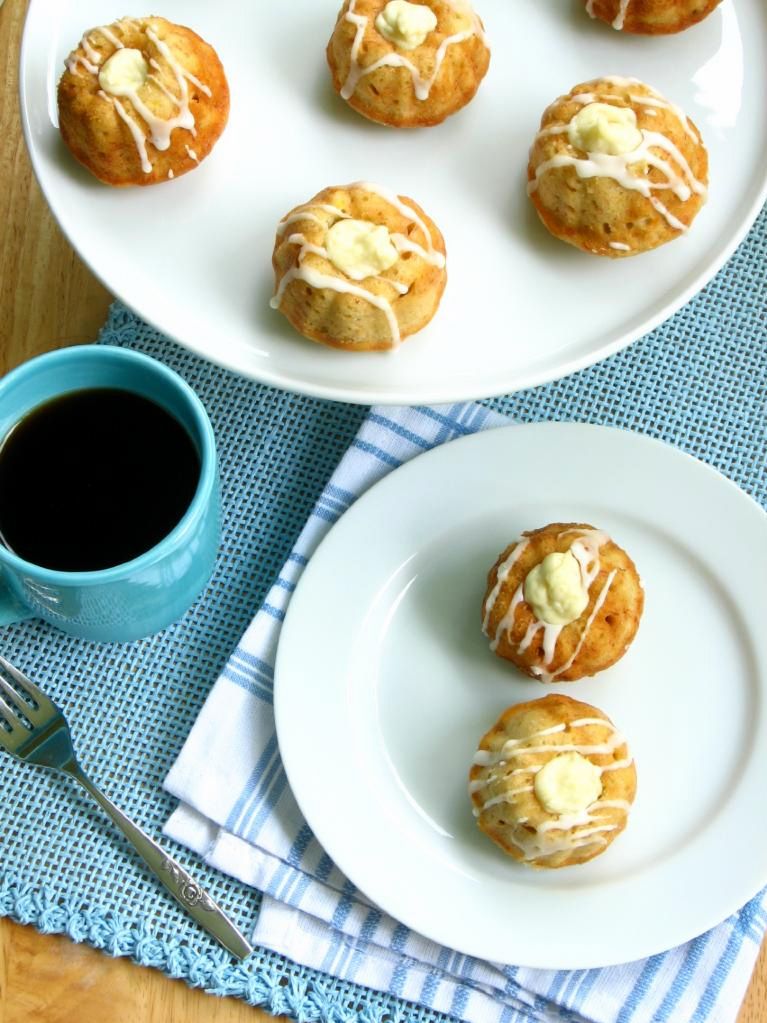
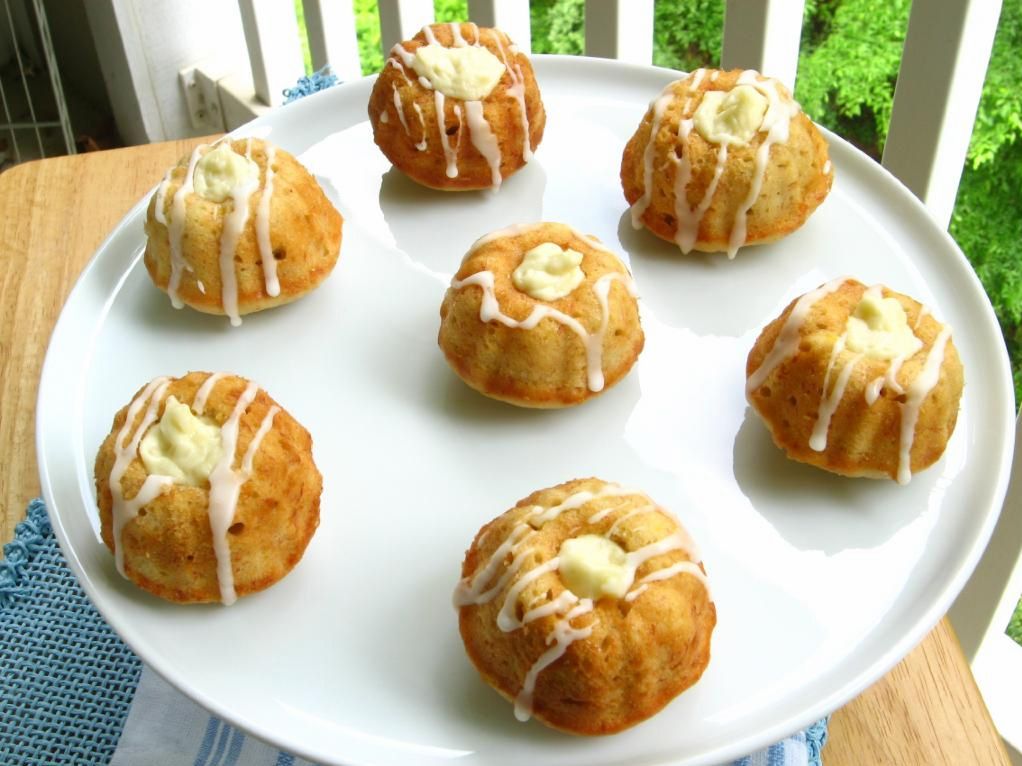
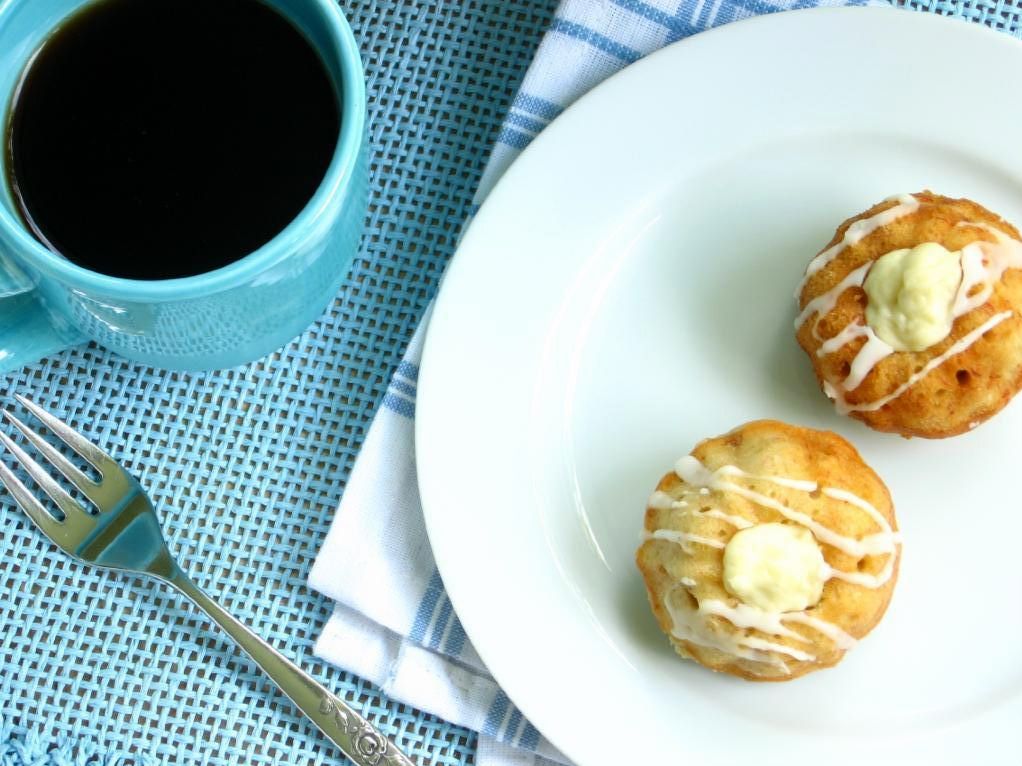
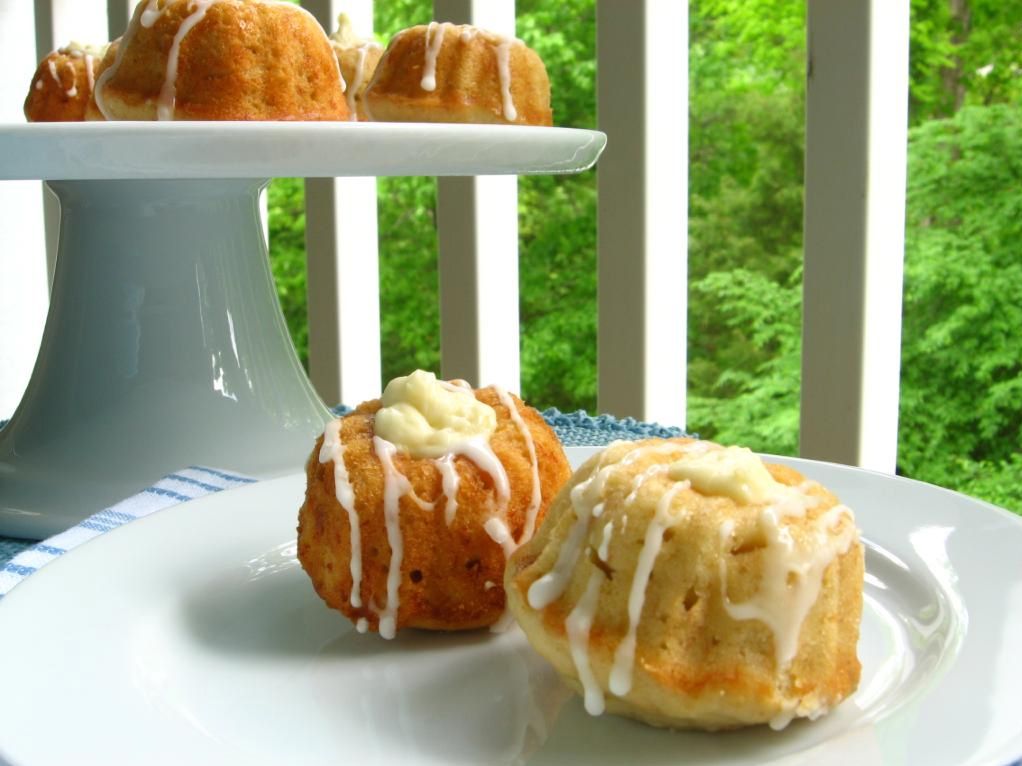
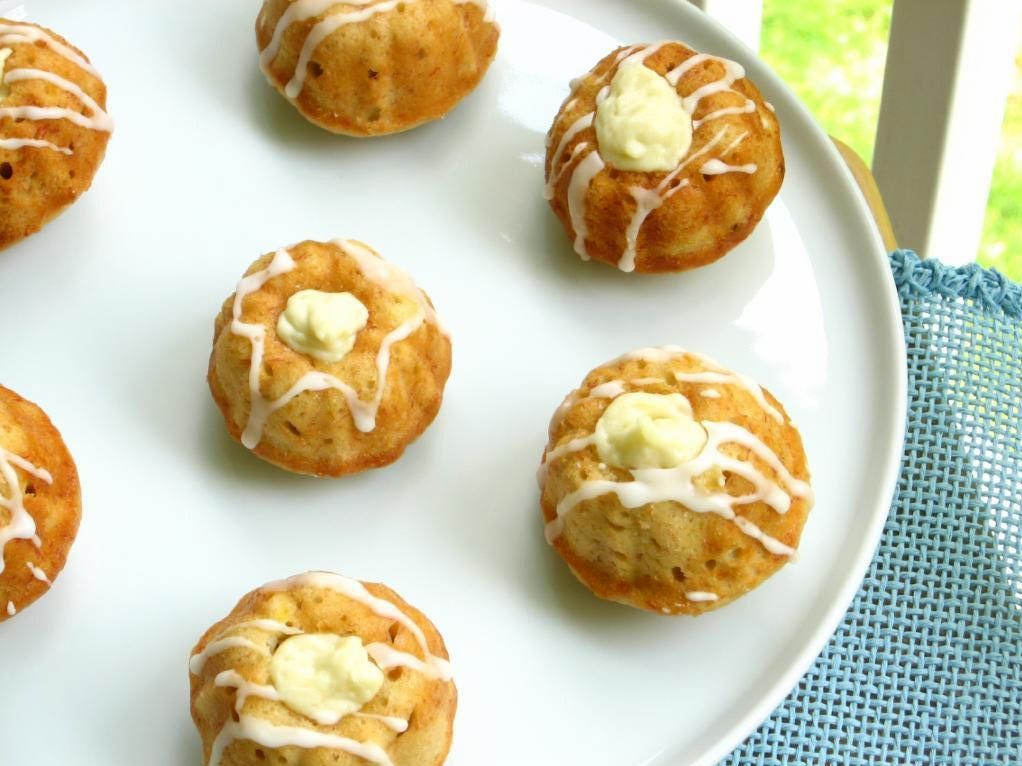
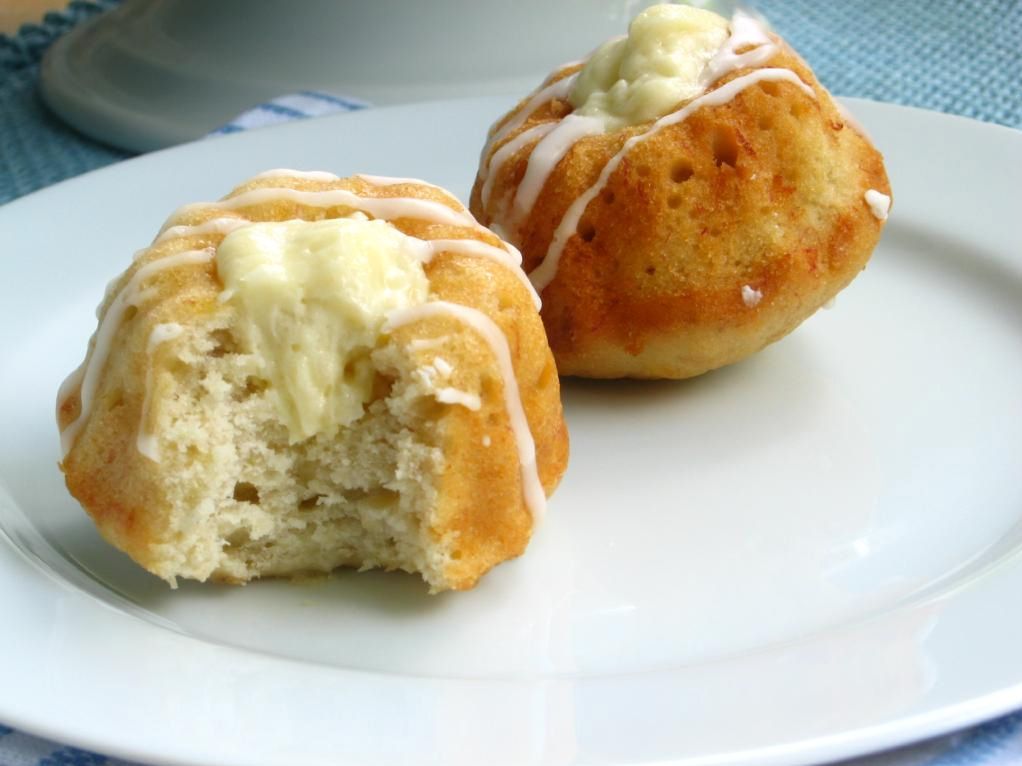
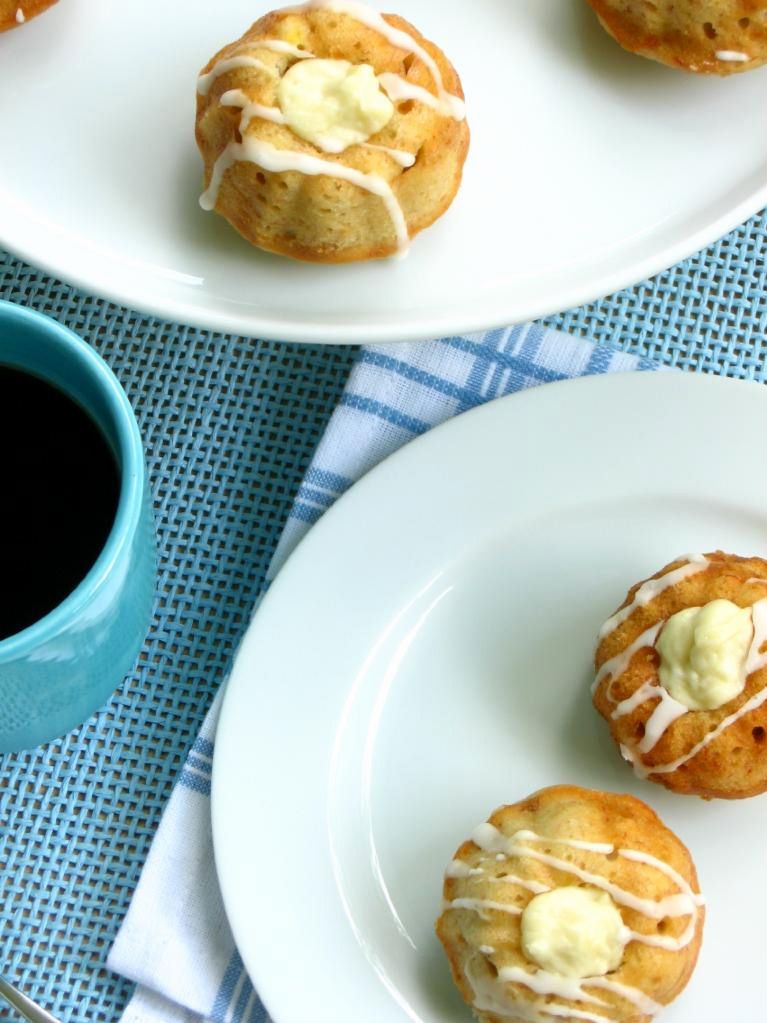
These sweet little cakes are Banana Mini-Bundt Cakes filled with Coconut Cream and topped with a sweet pineapple glaze. My sister describes the coconut pastry cream as “tylenol PM that tastes good” because it’s so soporifically sweet and creamy. Imagine that deliciousness stuffed into the center of a bright, dense, moist banana cake. Now add the slight tang of pineapple. NOW MAKE THAT AMAZING DESSERT SO SMALL AS TO ALMOST BE BITE-SIZED. That, my friends, is a winner.

Some of you are getting all whiny right about now. Hey, there’s no shame in that; I get whiny sometimes, too. You’re thinking, “Oh well, I don’t like bananas,” or “Ew, coconut,” and it’s even POSSIBLE that there’s someone out there thinking, “Gross, pineapple.” Weirdo.

Kidding, kidding — I don’t think any less of you pineapple haters! BUT before you write off this dessert for any of the reasons above, let me give you a run-down of why you should try it anyway.

1. I dislike bananas. They’re odd. Nevertheless, I still love these cakes more than I can really explain.

2. My roommate hates coconut with a passion. She would barely consent to try one of these. Nevertheless, she loves these cakes more than almost anything I’ve ever made.

3. Mike loves both banana and coconut, and also adored every bite of these cakes. (Just so you know there’s not some strange phenomenon goin’ on with the flavors!)

4. You will love these cakes. YOU WILL.

Some of you, instead of whining, are mourning right now: “I don’t have a mini-bundt cake pan!” I didn’t either until my roommate bought me one (thanks, Barb!), so one option is to be really sweet to the folks you live with and keep your fingers crossed. The other (more realistic) option is to simply make these as cupcakes. I think they’d work out just fine — maybe not quite as adorable, but still just as tasty.

To reiterate how amazing these cakes are, let me tell you about my little mixup while making them. I was hoping to get 12 mini-bundt cakes out of this recipe but, because I failed to check the size of the pan in the original recipe, I ended up with 32. At first I was annoyed — who on earth was going to eat the extra 20 CAKES?!

Yeah, that did not turn out to be a problem. They were DEVOURED. In fact, as Mike and I polished off the last few cakes, we wept a little. Okay, maybe we didn’t actually cry, but we were crying on the inside. I can’t wait to make these again. Please, if you make one thing from this willowy, birdbrain blog of mine, make these! I’m anxious to hear what you think.

Banana Coconut Cream Cakes


Recipe by: Compiled by Willow Bird Baking from Piggly-Wiggly (banana cake), Zoë Bakes (coconut pastry cream), and The Neely’s (pineapple glaze)
Yields: About 32 mini-bundt cakes using the pan size pictured below

Mini-Bundt Cake Ingredients:
3 cups all-purpose flour
2 tsp baking soda
1/2 tsp salt
2 sticks (8 ounces) unsalted butter at room temp
2 cups sugar
2 tsp pure vanilla extract
2 large eggs, preferably at room temp
~4 very ripe bananas, mashed (about 1.5-1.75 cups)
1 cup sour cream or plain yogurt

Coconut Pastry Cream Ingredients: *
1 can (14 fluid ounces) unsweetened coconut milk
3/4 cup sugar
1 vanilla bean
pinch kosher salt
3 large egg yolks
2 tablespoons corn starch
2 tablespoons unsalted butter
1 cup sweetened coconut flakes
1/2 cup whipping cream

Pineapple Glaze Ingredients:
2 cups powdered sugar
4 tablespoons pineapple juice

Directions:
Preheat the oven to 350. Generously butter a mini-bundt cake pan or cupcake pan.

In a medium bowl, whisk the flour, baking soda and salt together. In a separate, large bowl, beat the butter until creamy. Add the sugar and beat at medium speed until pale and fluffy. Beat in the vanilla, then add the eggs, one at a time, beating for about 1 minute after each egg goes in. Reduce the mixer speed to low and mix in the bananas.

Mix in half the dry ingredients (the mixture may look curdled — just keep mixing), followed by all the sour cream and finally, the rest of the flour mixture. Fill each well of your prepared pan about 1/2 to 2/3 of the way full and rap the pan on the counter to remove bubbles from the batter and smooth the top.

Bake for 25 to 30 minutes, or until a toothpick inserted deep into the center of the cakes comes out clean. Transfer the pan to a rack and cool for 10 minutes before unmolding on the rack. Let cool to room temperature before adding cream filling and glaze.

While cakes are baking and cooling, make coconut pastry cream. Heat the coconut milk, sugar, salt and vanilla bean or extract in a medium saucepan over medium heat. In a bowl, whisk together the egg yolks and corn starch. Once the cream is hot, remove the vanilla bean (if used), scraping out any remaining seeds and returning them to the cream. Add 1/2 cup of the hot cream slowly to the yolks, whisking as you add, to temper the eggs so they won’t cook into an omelette in the middle of your pastry cream. That would be a bummer. Then pour the yolk mixture into the pot of hot cream and whisk. Continue to whisk with heat on medium-high for 3 more minutes. The mixture will turn thick and bubble. You need to continue to whisk for the full 3 minutes or the pastry cream will separate once it is cool. After the 3 minutes, whisk in the butter. Add the coconut flakes. Pour into a shallow dish to cool.

Cover with plastic wrap pressed right against the pastry cream. This will prevent a thick skin from forming on the surface. Refrigerate for at least an hour or freeze for 30 minutes. Once it is cold, stir the pastry cream to loosen. Whip the 1/2 cup cream to medium peaks. Stir in 1/3 to the pastry cream to lighten. Fold in the remaining cream until the pastry cream is nice and light.

When cakes are cool, hollow out the center of each mini-bundt cake (or, for cupcakes, you can use the cone method). Pipe in as much of the coconut pastry cream as will fit.

Whisk confectioners’ sugar and pineapple juice together to form glaze. Drizzle over filled mini-bundt or cupcakes. Store in an airtight container in the refrigerator for 5-7 days.

NOTE: These things are aaaaamazing served cold straight from the refrigerator! They’re dense, creamy, cool hunks o’ bright flavor.

*NOTE 2: This recipe actually makes twice as much coconut pastry cream as you need to fill the cakes. I split my pastry cream and made these with half, and a Coconut Cream Tart with the other half. If you’re not keen on a tart, you can also just double the number of banana cakes you make to fill, or find some other creative use for the excess cream. I suppose you could also try halving the coconut pastry cream recipe, but I didn’t want to fiddle with halving three yolks and a can o’ coconut milk.


Enjoy!


Share Share this post with friends!

Coffee Cookie Dough Fudge Cheesecake

Coffee Cookie Dough Fudge Cheesecake


Recipe by: Willow Bird Baking, adapted from Annies’ Eats’ Cappucino Fudge Cheesecake with eggless cookie dough by Family Fun

Yields: one 9-inch cheesecake
Crust Ingredients:
32 chocolate sandwich cookies, finely processed into crumbs (use whole cookies, filling and all)
5 1/3 tablespoons unsalted butter, melted and cooled
Small pinch of salt

Ganache Ingredients:
1½ cups heavy cream
20 oz. bittersweet or semisweet chocolate, finely chopped (I combined both)

Filling Ingredients:
3 (8 oz.) packages cream cheese, at room temperature
1 cup sugar
1½ tablespoons all-purpose flour
1 tablespoons instant coffee granules
2 teaspoons vanilla extract
1½ teaspoons mild-flavored (light) molasses
3 large eggs

Topping Ingredients:
1½ cups sour cream
1/3 cup sugar
2 teaspoons vanilla extract

Cookie Dough Layer Ingredients:
1/2 cup butter, softened
3/4 cup light brown sugar, packed
1 cup all-purpose flour
1/2 teaspoon salt
1 tablespoon vanilla extract
1 cup semisweet chocolate chips
4 to 6 tablespoons water (I used 4)

Directions:
To make the crust, butter a 9-inch springform pan. Combine the chocolate cookie crumbs, melted butter and salt in a small bowl. Toss with a fork to moisten all of the crumbs. Press into a thin layer covering the bottom and sides of the springform pan (at least 3 inches up the sides). I did this using a smooth glass to press crumbs into place.

Bring the cream to a simmer in a medium saucepan. Place the chocolate in a medium bowl. Once the cream reaches a simmer, pour the cream over the chocolate and let stand 1-2 minutes. Whisk in small circles until a smooth ganache has formed. Pour 1.5-2 cups of the ganache over the bottom of the crust. Freeze until the ganache layer is firm, about 30 minutes. Reserve the remaining ganache; cover and let stand at room temperature for later decorating.

Preheat the oven to 350˚ F and position a rack in the middle of the oven. In the bowl of an electric mixer fitted with the paddle attachment, beat the cream cheese and sugar on medium-high speed until well blended. Beat in the flour. In a small bowl, combine the coffee granules, vanilla and molasses, stirring until the coffee dissolves. Add to the cream cheese mixture and beat until well incorporated, scraping down the sides of the bowl as needed. Beat in the eggs one at a time, scraping down the bowl between each addition.

Pour the filling over the cold ganache in the crust. Enclose the bottom of the springform pan in tightly wrapped foil and place it in a baking dish. Fill the baking dish with hot water about halfway up the cheesecake pan, careful not to let the moisture touch the cheesecake. Bake until the top is lightly browned, puffed and cracked at the edges, and the center moves only very slightly when the pan is lightly shaken, about 1 hour. Transfer to a wire cooling rack. Cool 15 minutes while preparing the topping (maintaining the oven temperature.)

To make the topping, whisk together the sour cream, sugar and vanilla in a small bowl. Pour the topping over the hot cheesecake, spreading to cover the filling completely. Bake until the topping is set, about 10-15 minutes. Return to the cooling rack and let cool at room temperature for at least 30 minutes. Transfer to the refrigerator and let cool at least 3 hours, until completely chilled and set.

To make cookie dough layer, cream together the butter and sugar in a large bowl. Stir in the flour, salt, vanilla and chips. Add the water, one tablespoon at a time, until you have reached a cookie dough consistency. Line a 9-inch cake pan with parchment paper. Spoon the cookie dough into the pan and flatten to an even layer. Freeze the cookie dough layer until ready to use (at least 30 minutes).

To finish, wrap a warm towel around the outside of the springform pan to help loosen the crust from the sides. Carefully remove the springform. Transfer the cake to a serving platter. Turn cookie dough out of cake pan and place layer on top of cheesecake, pressing it gently into place. Place the reserved ganache in a pastry bag fitted with a decorative tip and use to garnish the top of the cake as desired. Chill until the ganache is completely firm, at least 6 hours.


Happy Anniversary, Mike!

Coconut Cream Tart

I could have easily become a picky eater. I am compulsive in so many ways . . . the way my glass has to be completely clean or I won’t drink from it, the way I hate to get my hands dirty, the way I have to brush my teeth before my shower, not after. I can’t tell you how glad I am that I like all foods. There’s not much I won’t try, and once I’ve tried it, not much I don’t like! Except beets . . . ew, beets.

I wasn’t always so open to food. I was never picky, per se, but I had my list — like many kids — of things I didn’t like. Tomatoes, onions, lima beans, olives, bananas, and coconut. I hated coconut! What was wrong with me? Looking back, I think my aversions were almost always related to texture. Lima beans and bananas are oddly smushy. Shredded coconut just feels weird . . . too many paper-like pieces in your mouth, I guess!

Anyway, I’ve heard people say that their tastes “gradually” changed as they got older . . . well, mine usually change instantaneously. It’s an odd and wonderful phenomenon. For instance, last year I was driving home from school and realized I wanted sushi, something that until that moment, I was relatively sure I hated. I picked some up, enjoyed every bite, and have enjoyed it ever since. The same thing recently happened with olives and lima beans . . . and coconut! All of a sudden it hit me that light, sweet, wonderful COCONUT, when combined with milky or creamy flavors, was one of the best tastes in the world. I’m hooked.

Mike loves coconut too, thank God! After making him two birthday dishes that included ingredients he wasn’t too keen on (smart choice), I needed to hedge my bets.

This gorgeous tart was a sure thing. It has all the appeal of a coconut cream pie with an even better texture. The coconut pastry cream is thick, rich, buttery, and altogether one of the best tasting things I’ve ever put in my mouth. I filled my favorite buttery, flaky tart shell with it and topped it with lightly sweetened whipped cream and toasted coconut. Mike actually liked the Chocolate Tart better, but I’m voting for this one all the way!

Coconut fans (and even those who don’t think they’re coconut fans) have to whip up one of these tarts. It’ll work just the same in a round tart pan, but this rectangular tart pan was only $18 at my Williams-Sonoma if you’re into corners. Even though the recipe below makes enough pastry cream to fill two tarts, feel free to just make one tart shell — I have another amazing recipe coming up shortly to use the extra pastry cream!

Coconut Cream Tart


Recipe by: Compiled by Willow Bird Baking from Zoe Bakes (coconut pastry cream) and Tyler Florence (tart shell)
Yields: makes one tart (but enough pastry cream for two, if you want to double the tart shell recipe — otherwise use leftover pastry cream for something fun!)

Tart Shell Ingredients:
2 cups all-purpose flour, plus more for dusting
3 tablespoons sugar
1/4 teaspoon salt
3/4 cup (1 1/2 sticks) unsalted butter, cold and chopped
1 large egg, separated
2 tablespoons ice water, plus more if needed

Coconut Pastry Cream Ingredients*: (makes enough to fill two of the tart shells above)
1 can (14 fluid ounces) unsweetened coconut milk
3/4 cup sugar
1 vanilla bean
pinch kosher salt
3 large egg yolks
2 tablespoons corn starch
2 tablespoons unsalted butter
1 cup sweetened coconut flakes
1/2 cup whipping cream

Whipped Cream Ingredients:
1 cup heavy whipping cream
3 tablespoons powdered sugar (or more to taste)

Directions:
To make the pastry: combine the flour, sugar, and salt in a large mixing bowl (or food processor). Add the butter and mix with a processor or hands until the mixture resembles coarse crumbs. Make a well in the middle of the pastry. Combine the egg yolk with the ice water in a small bowl, whisking to blend; pour it into the well and work it in to bind the dough until it holds together without being too wet or sticky. Squeeze a small amount together, if it is crumbly, add more ice water, 1 tablespoon at a time. When the dough is coming together but still in crumbs, pour the crumbs into your tart pan and press them out to fill the pan. Press them up the sides evenly and trim off any excess. Dock the dough (prick it slightly) with a fork all over. Put the tart shell in the refrigerator for at least 15 minutes to relax.

Preheat the oven to 350 degrees F. Place the tart pan on a sturdy cookie sheet so it will be easy to move in and out of the oven. Line the tart with aluminum foil and add pie weights or dried beans to keep the sides of the tart from buckling. Bake for 30 minutes, then remove the foil and weights. Using a pastry brush, lightly coat the crust with a beaten egg white. Return to the oven and continue to bake for another 8 minutes until the tart is golden brown. Let cool completely before filling.

To make filling: Heat the coconut milk, sugar, salt and vanilla bean in a medium saucepan over medium heat. In a bowl, whisk together the egg yolks and corn starch. Once the cream is hot, remove the vanilla bean, scraping out any remaining seeds and returning them to the cream. Add 1/2 cup of the hot cream slowly to the yolks, whisking as you add. Then pour the yolk mixture into the pot of hot cream and whisk. Continue to whisk with heat on medium-high for 3 more minutes. The mixture will turn thick and bubble. You need to continue to whisk for the full 3 minutes or the pastry cream will separate once it is cool. After the 3 minutes, whisk in the butter. Add the coconut flakes. Pour into a shallow dish to cool.

Cover with plastic wrap pressed right against the pastry cream. This will prevent a thick skin from forming on the surface. Refrigerate for at least an hour or freeze for 30 minutes. Once it is cold, stir the pastry cream to loosen. Whip the 1/2 cup cream to medium peaks. Stir in 1/3 to the pastry cream to lighten. Fold in the remaining cream until the pastry cream is nice and light. When tart shell is cool, fill it with pastry cream.

To make whipped cream, beat all ingredients together until whipped cream reaches medium peaks. Pile onto coconut pastry cream filling and top with toasted coconut.

*NOTE: This recipe makes enough pastry cream for two tarts, so you can double the tart shell recipe if you want to make both. If you only want one tart, leave the tart shell recipe as-is and use your leftover pastry cream for something fun!

P.S. Not to oversell this weekend’s upcoming recipe, but um . . . it’s the best dessert I’ve ever eaten. Yeah.


Share Share this post with friends!

Chocolate Tart with Pretzels

Funny story: I decided to take a well-loved recipe for a chocolate tart and update it for Mike’s birthday by filling the shell with pretzels before pouring the chocolate in. While planning said tart, I started to have a nagging feeling that something was wrong. Hadn’t Mike said something before about not liking chocolate covered pretzels? Uh-oh.

Trying not to ruin the surprise, I nonchalantly brought up chocolate and pretzel combos on the phone with him while baking (try casually working chocolate and pretzels into a conversation — difficult!) “Did you say once you didn’t like chocolate covered pretzels?” I asked. His reply? “I don’t know. I don’t really like pretzels, period.” I stared at my pretzel-filled tart crust. “Oh.”

Well, it isn’t the first time I’ve boldly gone where Mike’s tastebuds hadn’t gone before. Or didn’t think they wanted to go. For instance, Mike thought he didn’t like lemon until he had Lemon Burst Fairycakes. He also thought he didn’t like plums until he took his first bite of Plum and Cream Mini-Tortes. And then there’s pumpkin, which he realized he enjoyed thanks to Jack-o’-Lantern Whoopie Pies (no comment on the recent pumpkin ravioli disaster that may have him reverting back to pumpkin hatred).

But this is the first time I pushed his taste boundaries on his birthday. On his freakin’ birthday! You know, the day when you’re supposed to make your boyfriend’s FAVORITE dessert, not a dessert featuring a food he currently dislikes. Oops. Happy birthday, Mike, here’s a tart filled with something you hate!

Thankfully, I reminded myself, I was making him two desserts. Surely if he didn’t like this one, he’d like the other (stay tuned for a post on that dish later this week), right? So it wasn’t so much of a gamble?

Turns out, I needn’t have worried at all . . . because first off, you couldn’t taste the pretzels! They got soft (should’ve seen that coming) and didn’t add too much to the overall texture or flavor. I ended up putting some pretzels on my piece before serving to experience the salty-n-sweet combo I was looking for, and Mike abstained. Perfecto!

The tart had the same amazing, rich, deep chocolate flavor as last time I made it, except with a slight bitter edge from adding in some bittersweet chocolate. I love the taste of a complex, bittersweet chocolate with a sweet whipped cream.

So, this post isn’t really a new recipe. It’s more of a serving suggestion and a reminder of an amazing old recipe. Go make this fantastic tart and serve it with a handful of pretzels for a tasty salty-n-sweet combination! You could also top the tart with a layer of pretzels after baking and before adding the whipped cream topping. Enjoy!

Chocolate Tart with Pretzels


Recipe by: Adapted from Tyler Florence
Yields: one standard tart, serves about 10

Tart Shell Ingredients:
2 cups all-purpose flour, plus more for dusting
3 tablespoons sugar
1/4 teaspoon salt
3/4 cup (1 1/2 sticks) unsalted butter, cold and chopped
1 large egg, separated
2 tablespoons ice water, plus more if needed

Filling Ingredients:
1 cup heavy cream
1/2 cup milk
8 oz. semisweet chocolate, chopped
2 oz. bittersweet chocolate, chopped (or use semisweet for the whole amount, if desired)
2 tablespoons sugar
1/4 teaspoon salt
2 large eggs, at room temperature
salted pretzels for serving

Whipped Cream Topping Ingredients:
2 cups heavy cream
5 tablespoons granulated sugar
1/2 teaspoon vanilla extract

Directions:
To make the pastry: combine the flour, sugar, and salt in a large mixing bowl (or food processor). Add the butter and mix with a processor or hands until the mixture resembles coarse crumbs. Make a well in the middle of the pastry. Combine the egg yolk with the ice water in a small bowl, whisking to blend; pour it into the well and work it in to bind the dough until it holds together without being too wet or sticky. Squeeze a small amount together, if it is crumbly, add more ice water, 1 tablespoon at a time. When the dough is coming together but still in crumbs, pour the crumbs into your tart pan and press them out to fill the pan. Press them up the sides evenly and trim off any excess. Dock the dough (prick it slightly) with a fork all over. Put the tart shell in the refrigerator for at least 15 minutes to relax.

Preheat the oven to 350 degrees F. Place the tart pan on a sturdy cookie sheet so it will be easy to move in and out of the oven. Line the tart with aluminum foil and add pie weights or dried beans to keep the sides of the tart from buckling. Bake for 30 minutes, then remove the foil and weights. Using a pastry brush, lightly coat the crust with a beaten egg white. Return to the oven and continue to bake for another 8 minutes until the tart is golden in color, but not brown. Remember the tart will be cooked again with the filling. It should be cooked but light in color so that it will not burn on the second bake. Set aside to cool and lower the oven temperature to 325 degrees F.

To make the filling: Heat the heavy cream and milk in a pot over medium-low flame, until it simmers slightly around the edges. Remove from the heat; add the chopped chocolate and stir until melted and smoothed out. Add the sugar and salt and whisk until well incorporated. Beat the eggs in a small bowl until blended and add them to the chocolate mixture, stir until completely blended. Pour the filling very carefully into the cooled tart shell. Bake at 325 degrees F for 15 to 25 minutes until the filling is set (wiggle the pan to test) and the surface is glossy. If you see any bubbles or cracks forming on the surface, take the tart out right away – that means it is beginning to become over baked. Cool completely before topping with whipped cream. You can layer pretzels on before topping with whipped cream, or sprinkle them on top afterward.

To make the whipped cream, beat all ingredients together until cream thickens to correct consistency. Pile the mound of whipped cream onto your cooled tart and use a spatula to spread it (messy = more rustic). Shave some leftover chocolate over the cream for decoration.

PS – Stay tuned for Mike’s birthday dessert number two!

PS 2 – There are also tarts out there with pretzel crusts if you wanted to go that route, but I wasn’t willing to give up this buttery, amazing tart shell!


Share Share this post with friends!

Pitiful Pumpkin Ravioli, or Mike’s Birthday Dinner Disaster

Every now and then I stumble on an ethereal recipe that melts on my tongue and makes me draw in deep, appreciative breaths between every bite. I post these recipes hastily and urge you all to run into your kitchens and get to mixing. I stamp little hearts next to their names on my Recipe Index. I bring them up in conversations with Mike long after the last morsel has been devoured. I even long to whip them up again — a significant sentiment, since I rarely make the same dish twice.

This is not one of those recipes.

Actually, this is one of those recipes where I, um, don’t post the recipe. Because I’m terrified someone will skip over all of these paragraphs where I reveal how awful it tasted and end up making it. I can only imagine the creative hate mail I’d receive after folks spent 3 or 4 hours in the kitchen prepping this disaster. It could get ugly.

Instead, I’ll just tell you the story. It all started at my desk at school, where I sat one day eating one of those low-calorie frozen meals. They’re typically flavorless concoctions of funky-textured “meat” and rubbery veggies, but at least they’re quick sustenance. This particular frozen meal was tasty, though: a slightly sweet pumpkin ravioli in a butter sage sauce with hunks of butternut squash and asparagus. I thought to myself (somewhat smugly), “I bet I could make this even better from scratch . . . .”

It turns out that I cannot make it better from scratch. It also turns out that I should not try risky, experimental recipes on Mike’s birthday. After hours of work (roasting the squash, making and kneading the pasta dough, rolling and filling the ravioli, cooking the asparagus, mixing the sauce and veggies and pasta, and photographing the whole thing), Mike and I took our first bites and made eye contact. In that one silent moment, our eyes said all there was to say. Mike’s eyes were panicking: “Oh crap, what can I say about this ravioli that isn’t insulting?!” and my eyes were remorseful: “Oh crap, I’ve ruined his birthday dinner, of all the dinners to ruin!”

What Mike actually said was, “It’s good,” while concentrating hard (a little too hard) on cutting the next bite. What I actually said was, “This stuff is disgusting. Maybe we should order pizza.” The sweet guy ended up eating every bite in his bowl (and, ahem, politely declining seconds) while I scarfed down the from-frozen garlic bread he had brought over. That’s right: the only edible part of the meal was the garlic bread I made MIKE buy on his way over for his own birthday dinner! Have I won the girlfriend of the year award yet?

In summary, do not make this pasta. The odd, bitter combination of pumpkin and parmesan in the filling was nauseating. The butter sage sauce was greasy and bland. The squash . . . well, okay, the squash was good. Go roast yourself a butternut squash and call it a day, y’all. I’m comforting myself with the fact that my homemade ravioli technique has improved (I rolled thinner, creating a better-textured pasta) and dessert was fantastic. Ah, dessert: a balm on dinner disaster wounds. Stay tuned and I’ll tell you all about it.


Share Share this post with friends!

1 110 111 112 113 114 127