Ina Garten’s Lemon Loaf Cake and Raffaldini Vineyards

So what have you been up to this summer? As you know, up until this past weekend, I had not fulfilled my summer quota of fun sunshiney activities — no beach, no pool, no picnic. With school looming ahead of me (teacher meetings start tomorrow), something had to be done. Quickly.

My friend Vada saved the day (er, the season?). We Jazzercise together and she invited me to join her and a group of her fun friends for a road trip. It was her friend Lori’s birthday and they were headed to Raffaldini Vineyards in Ronda, NC.

When she first suggested it, I wasn’t sure. I don’t drink, so what would I do at a vineyard? Would I end up counting grapes in the corner as everyone else played wine pong (that’s what they do at vineyards, right)? As it turns out, though, Vada doesn’t drink either, and she was certain it would still be fun. I’m up for fun! I told her to count me in.
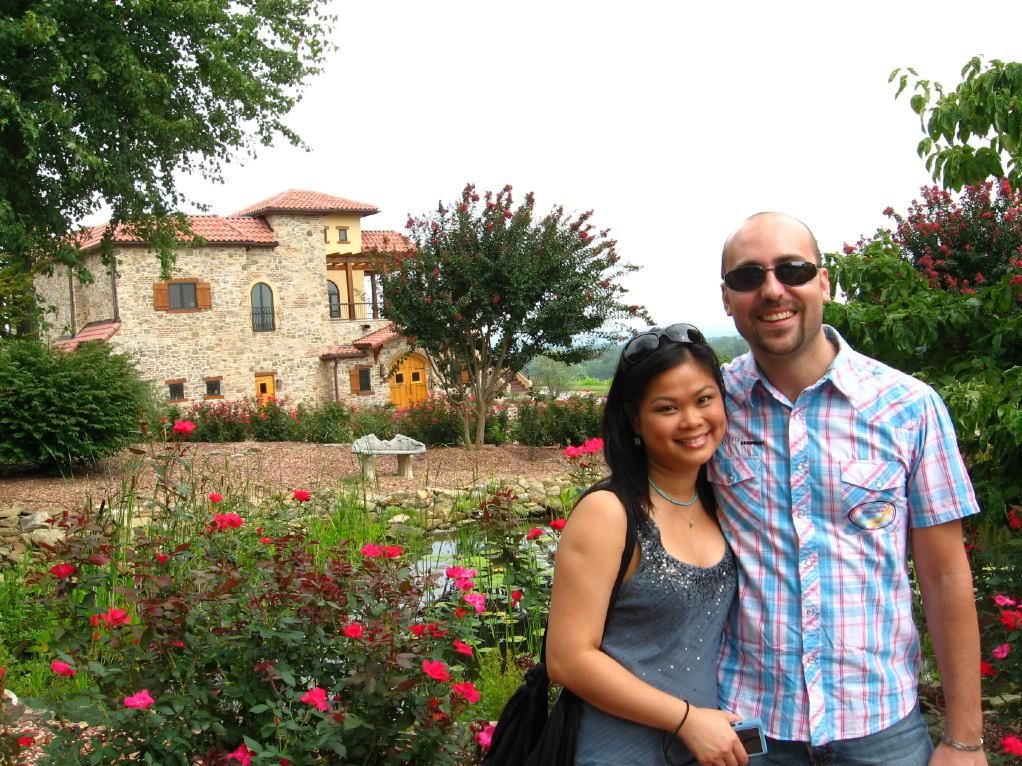

Vada and Luca

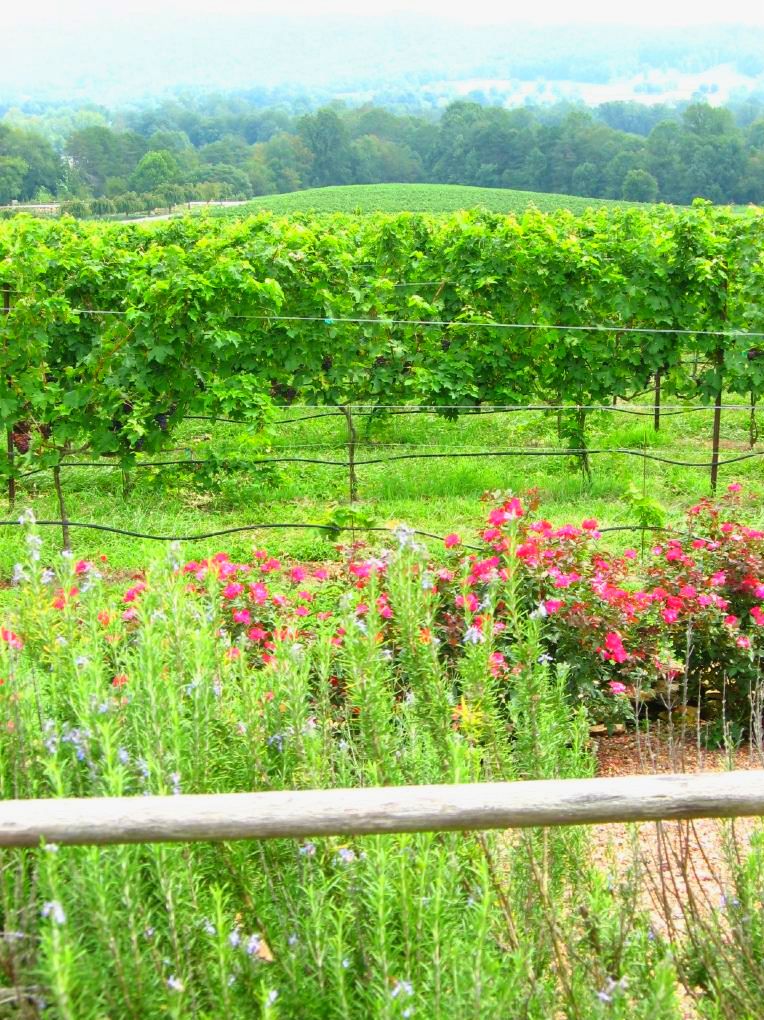
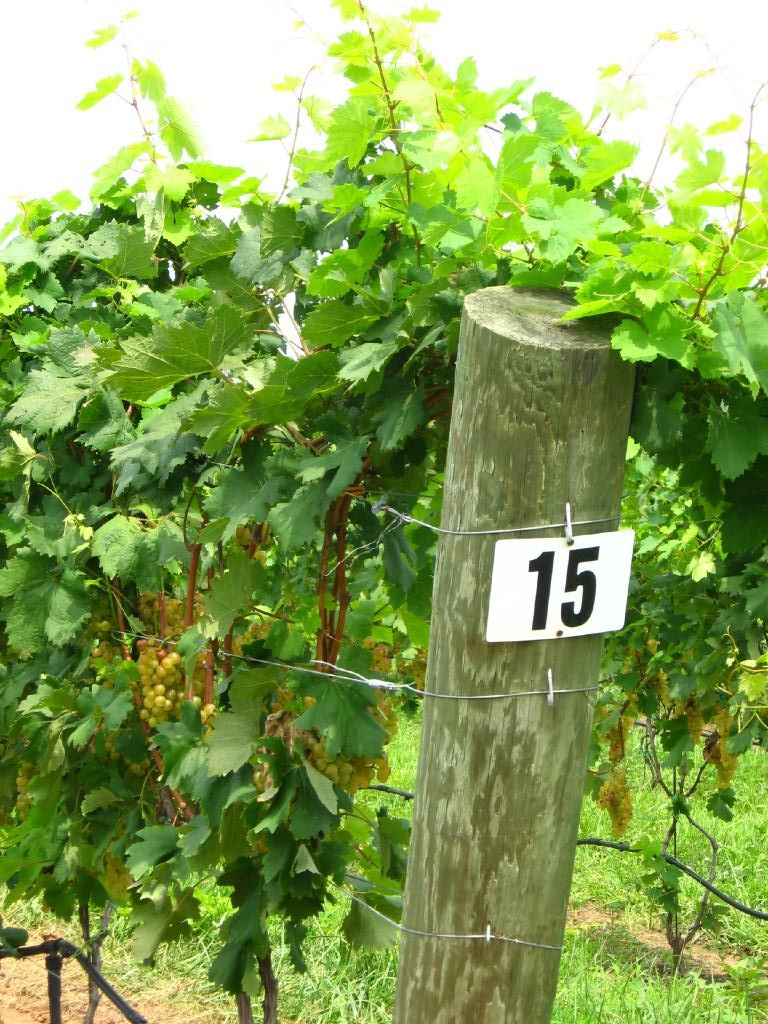
I’m so glad I went, because it was fun. Turns out, vineyards are beautiful — or at least Raffaldini Vineyards certainly were! We drove about an hour out of Charlotte and suddenly it felt like we were in Italy. Vada’s friend Luca, our resident Italian, agreed that it reminded him of home — a nice stamp of authenticity. As promised, fun ensued.

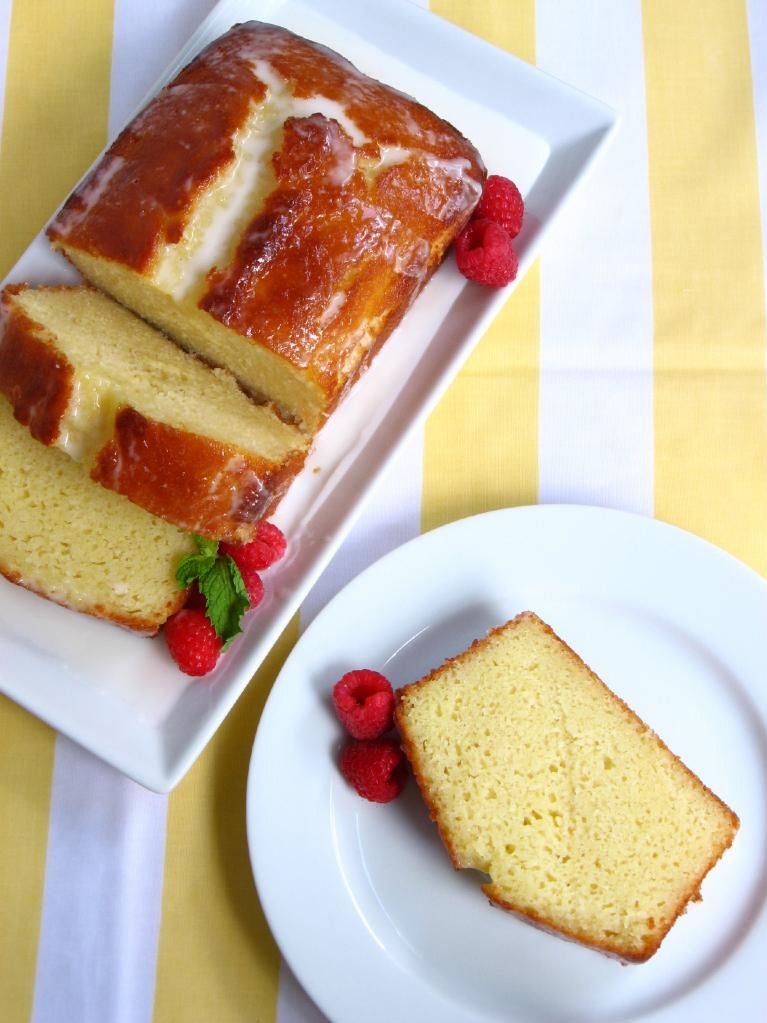
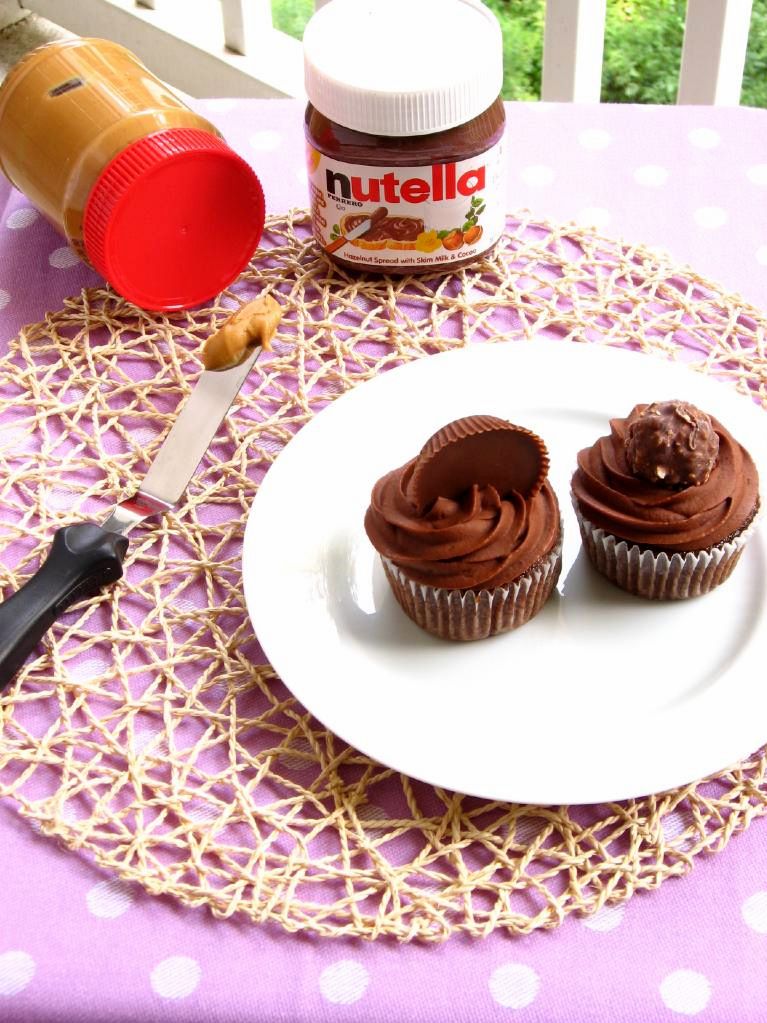
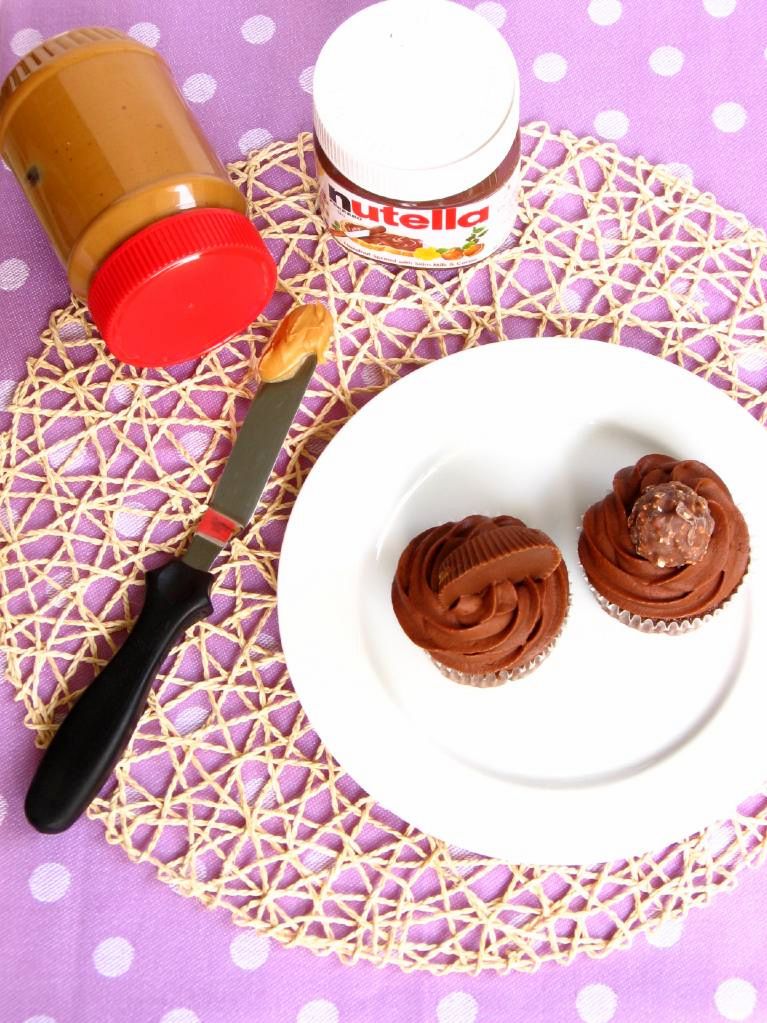
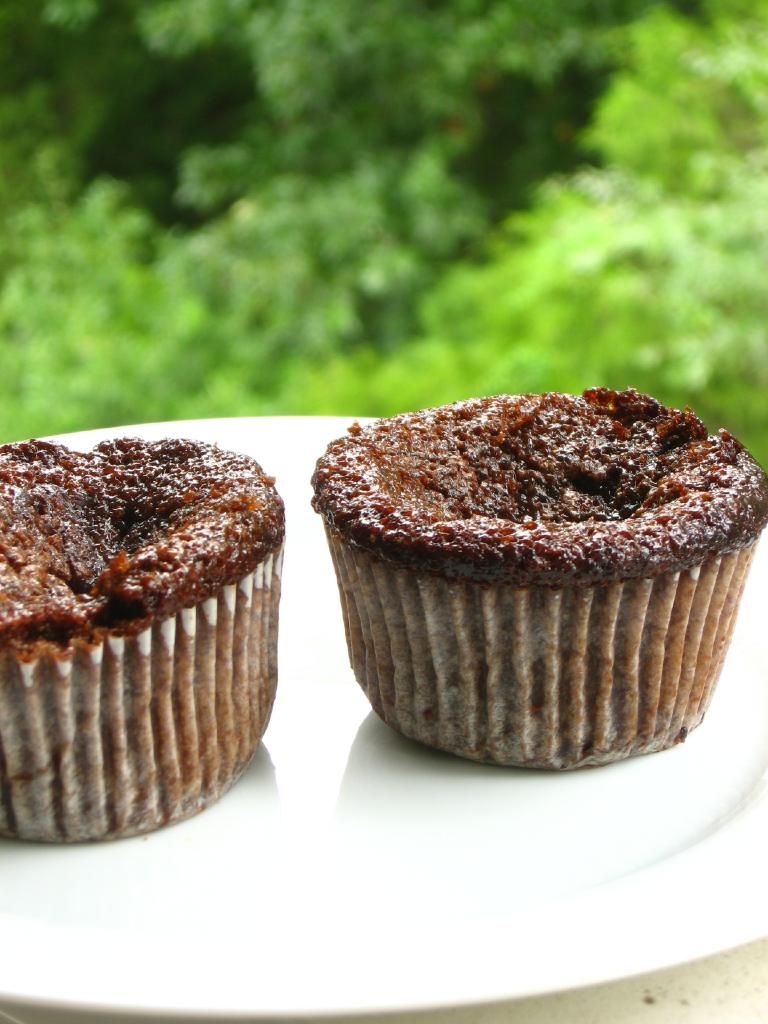
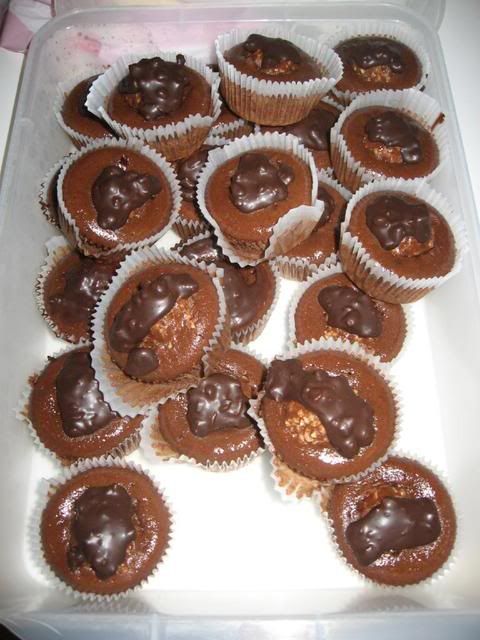
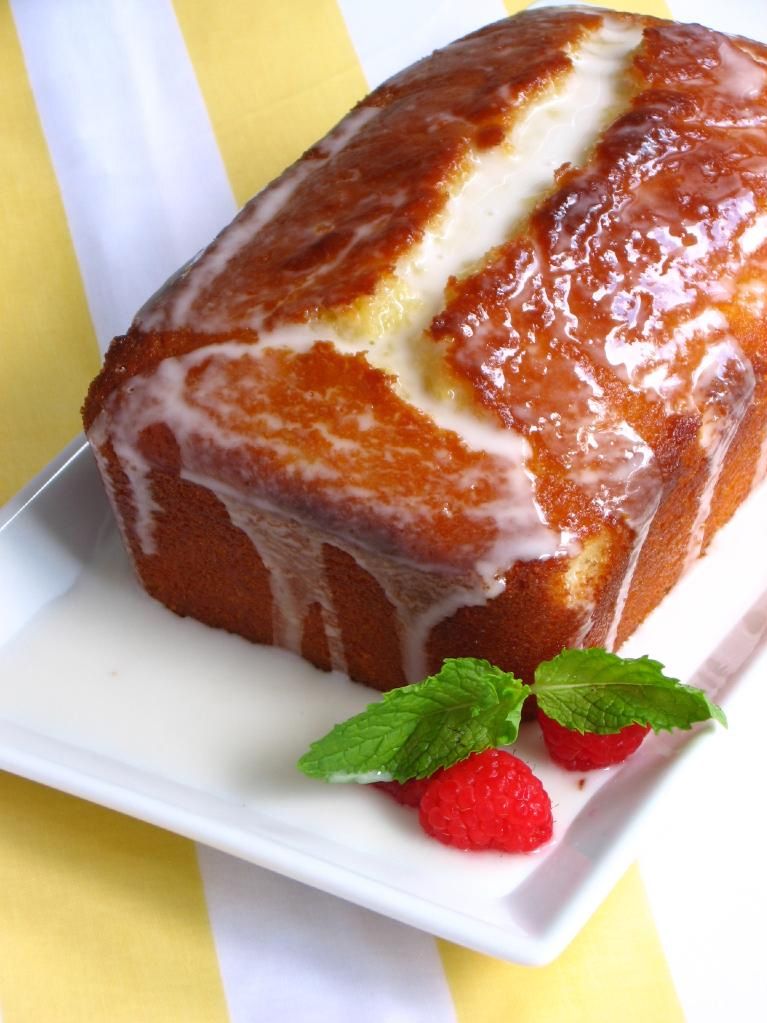
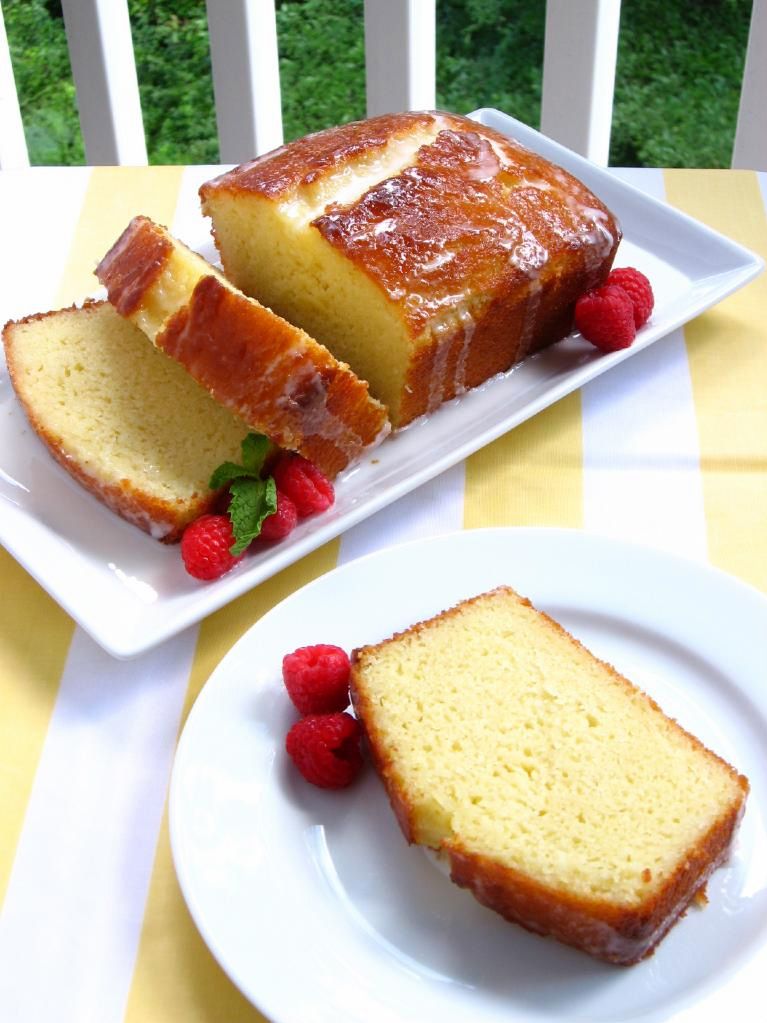
First, we ate a lovely picnic on an outdoor patio overlooking the vineyards and mountains in the distance. The vineyards offered a whole menu of food you could purchase on-site, but I brought a little packed lunch to save money. I also brought this bright, summery Lemon Loaf Cake, which was moist and traveled so well. Vada, who is an absolutely extraordinary cake decorator, brought cupcakes along. We had quite a feast!

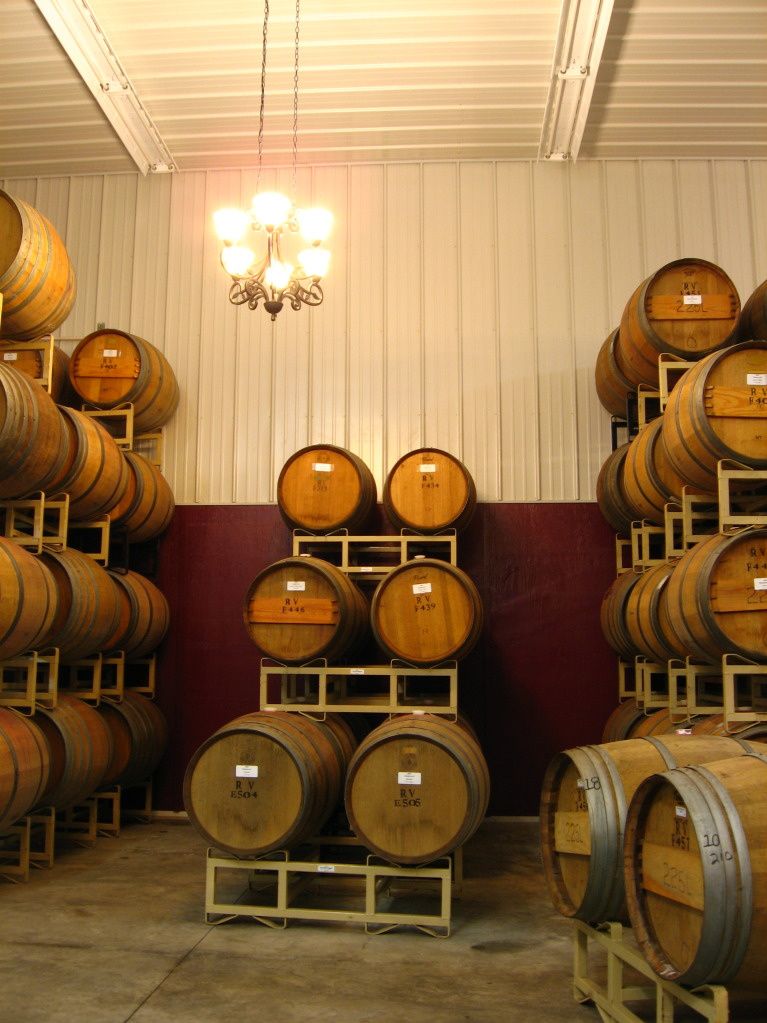
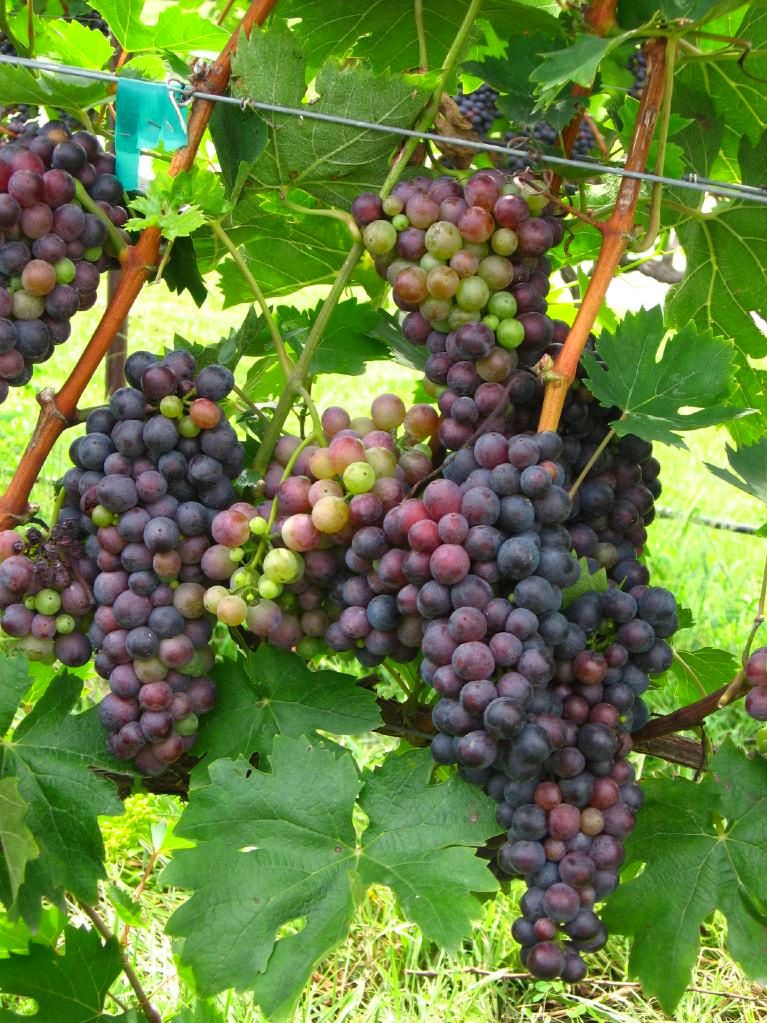
After our picnic, we took a brief tour of the vineyard, learning about the soil, growing practices, and types of grapes grown. While others enjoyed a wine tasting, Vada and I took a walk around the grounds and had a photo shoot. Finally, we took a tour of the winery and learned how the wines were made. It was so informative — not being a drinker, I tend to think of grapes as the basis of jelly and “tannin” as something you do at the beach. I learned a lot! The best part? The entire day only cost me $8 — and that included buying a bottled water on-site.


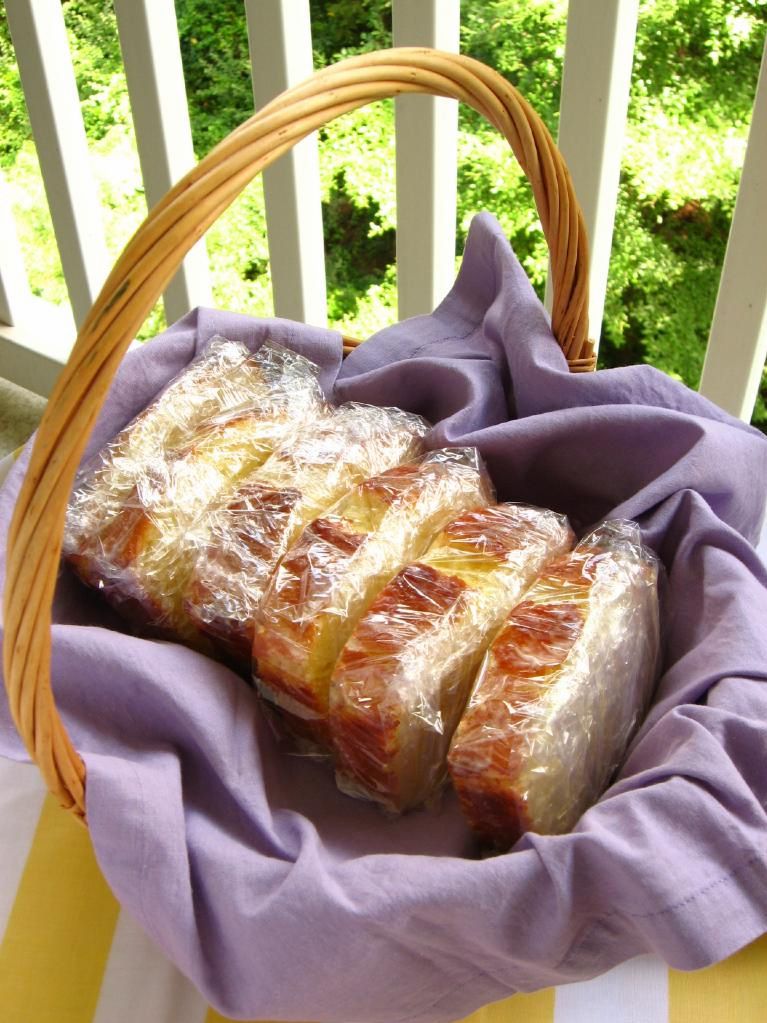
Vada’s gorgeous cupcakes and the quick Lemon Loaf Cake packed for traveling!

This one little day trip kind of made my summer! It was filled with sweet people, good food, beautiful surroundings. How about you? Does one event or activity this summer stand out as your favorite?

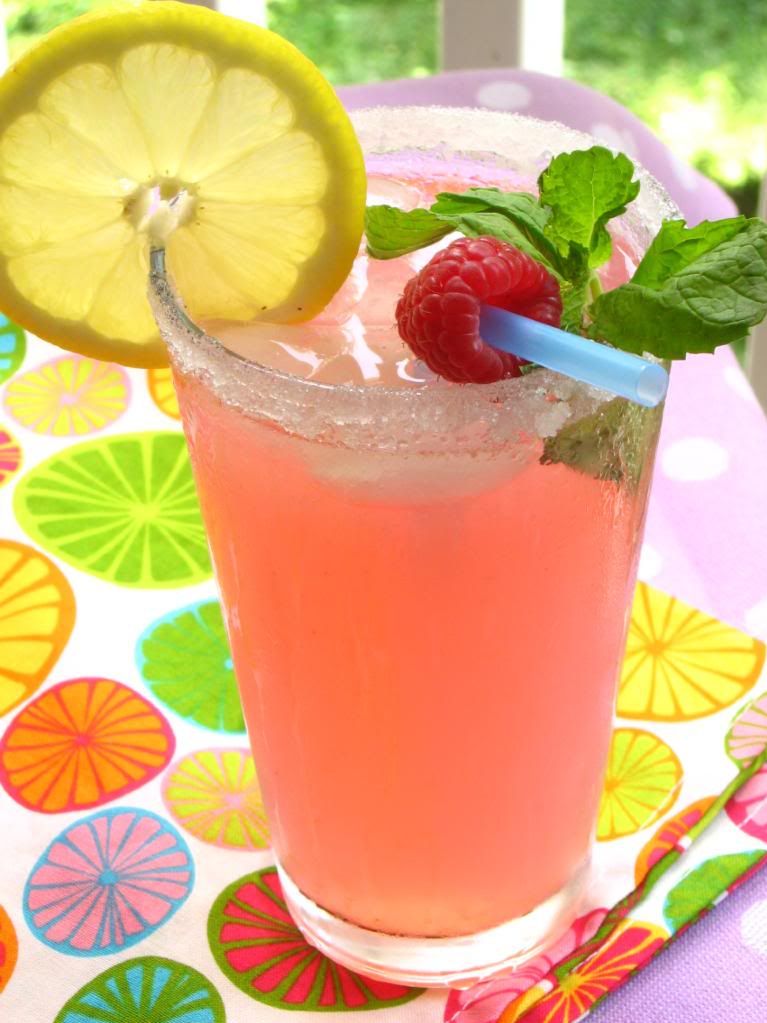
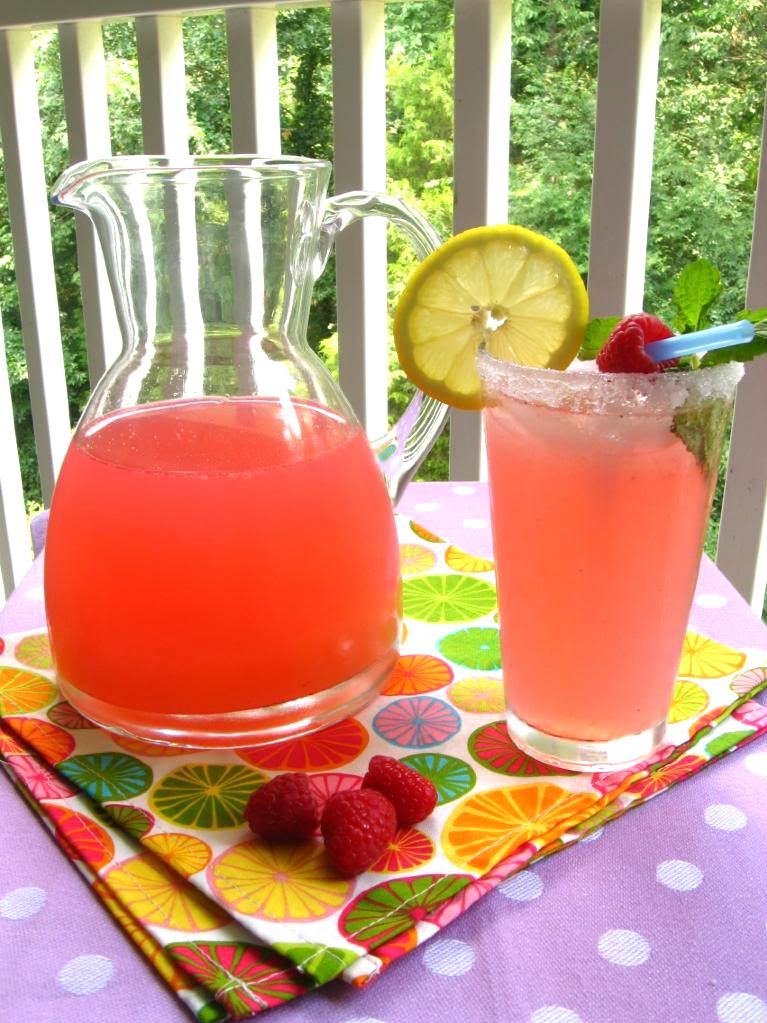
You can relive part of my end of summer fun by making this quick, simple loaf cake for yourself. It has a tangy, drenched lemon flavor that will help you kiss the summer days farewell.

5 from 1 reviews
Ina Garten's Lemon Loaf Cake
 
Prep time
Cook time
Total time
 
A delicious, tangy, easy lemon loaf cake. Be careful not to overbake!
Author:
Serves: 6
Ingredients
Cake Ingredients:
  • 1 1/2 cups all-purpose flour
  • 2 teaspoons baking powder
  • 1/2 teaspoons kosher salt
  • 1 cup plain whole-milk yogurt or sour cream
  • 1 1/3 cups sugar, divided
  • 3 eggs
  • 2 teaspoons grated lemon zest or 2 teaspoons lemon extract
  • 1/2 teaspoons pure vanilla extract
  • 1/2 cup vegetable oil
  • 1/3 cup freshly squeezed lemon juice
Glaze Ingredients:
  • 1 cup powdered sugar
  • 2 tablespoons freshly squeezed lemon juice
Instructions
  1. Preheat the oven to 350 degrees F. Grease an 8 1/2 x 4 1/4 x 2 1/2-inch loaf pan (I use Wilton’s Cake Release). Line the bottom with parchment paper and butter and flour the entire pan.
  2. Sift the flour, baking powder, and salt together into a medium bowl. In a large bowl, whisk together yogurt, 1 cup of the sugar, eggs, lemon zest or extract, and vanilla. Slowly add the dry ingredients into the wet, whisking to combine (I did this in 2-3 additions). Use a rubber spatula to fold the vegetable oil into the batter until it’s fully incorporated. Pour into the prepared pan and bake for about 50 minutes, or until a cake tester stuck in the center of the loaf comes out clean.
  3. While the cake is baking, combine the 1/3 cup lemon juice and remaining 1/3 cup sugar in a small saucepan over medium heat and cook until the sugar dissolves and the mixture is clear. Set aside.
  4. When the cake is done, allow it to cool in the pan for 10 minutes before removing it and placing it on a baking rack over a sheet pan. Use a cake tester, wooden skewer, or toothpick to carefully pierce holes throughout the cake (I used a toothpick so the holes wouldn’t be too obvious, but a skewer might have made deeper holes in the cake, allowing more syrup to get through). While the cake is still warm, pour the lemon-sugar mixture over the cake and allow it to soak in. Cool completely.
  5. In a small bowl, combine the powdered sugar and lemon juice, whisking to form a smooth glaze. Pour over the cake. Slice and serve with fresh berries, whipped cream, or ice cream.


Wacky Candy Cupcakes: Ferrero Rocher and Reese’s Cup

When my sister called and asked me to make a dessert for her office party, I jumped at the chance to recreate an old favorite. Way back toward the beginning of Willow Bird Baking, I made some fun Ferrero Rocher Cupcakes in which I stuck a whole frozen candy into each cupcake prior to baking. I enjoyed those (despite the candy losing a bit of crunch), but always wanted to find the time to tweak the concept a bit.

This was my chance! I wanted to take a moist chocolate cupcake, fill it with a giant dollop of the hazelnut-chocolate spread Nutella, ice it with rich chocolate frosting, and crown the whole thing with a Ferrero Rocher. The entire cupcake was designed to imitate the flavors in the candies themselves.

And why stop there? How easy would it be to fill some of the cupcakes with peanut butter instead, topping them with a huge Reese’s Cup? Hurray for candy cupcakes!

I could have gotten even more carried away (cupcakes filled with coconut pastry cream and topped with Mounds? Cupcakes filled with caramel and topped with Snickers?), but I reeled it in. That doesn’t mean we have to turn our imaginations off, though. What Candy Cupcake would you make?

Now, I am Wacky McWackerson. I’m as silly as they come. But that’s not why these cupcakes are called Wacky Candy Cupcakes instead of just regular ol’ Candy Cupcakes. Raise your hand if you’ve heard of Wacky Cake! Anyone?

Wacky Cake is NOT what you call the 2nd batch of cupcakes you make after ruining the previous batch and just barely convincing yourself not to throw your muffin pan across the apartment, spewing chocolate lava on your roommate’s couch (hey Barb!), but good guess. I did make these Wacky Cakes after a first batch of chocolate cupcakes flopped, but that’s not why they’re wacky.

Wacky Cake is actually just a vegan chocolate cake — no eggs, no milk — and is probably called “Wacky” ’cause vegans are just a little nutty sometimes . . . just kidding, just kidding! I love you, vegans! The truth is, no one really knows why it’s called wacky. Some say it’s because it’s a little wacky to make a cake with no eggs, which is just as good a reason as any, I guess. Regardless, Wacky Cake happens to be the perfect recipe to resort to after a flop that uses most of your eggs. Just call me MacGyver.

Turns out, Wacky Cake is also yummy and rich — the perfect cupcake base for my creation. I went and added un-vegan ingredients to complete the recipe, but if you’re a vegan looking for a great chocolate cupcake, the base recipe here is perfect for you. It’s also just plain easy to make.

The frosting, on the other hand, was a bit of a hassle. It doesn’t whip up very firm, so I had to refrigerate it for a bit and re-whip before frosting the cupcakes and sticking them in the fridge in a hurry. After sitting in the fridge overnight, though, the frosting is firm — and very chocolatey and delicious. I’d use it again for the taste, but I’d make sure to have refrigerator space cleared out ahead of time to chill the cakes immediately.

Speaking of refrigerating these cupcakes, the Nutella jar expressly says not to refrigerate Nutella. Don’t worry — it’s not because the product turns toxic or anything, but actually because it firms up into almost a nougat texture, which for our purposes, is awesome. The center of the Ferrero Rocher Cupcakes was a hunk of hazelnut-chocolate love.

Overall, these cupcakes were tremendous! I greedily devoured the few I kept to sample, and Sarah says her coworkers were enthusiastic about them as well! Both varieties are the perfect imitations of their respective candies, incredibly indulgent, and simple to make. If you’re used to making a plain cupcake-n-frosting combo, why not get a little feisty, add a sweet filling and a candy topping, and pump up your cupcakes? It’s a quick and easy way to turn a dull dessert into something special.

Now it’s your turn: Think up a cupcake-version of your own favorite candy. Tell me about how you’d make it in the comments section — and bonus points for ACTUALLY DOING IT! Send me photos of your candy cupcake creations to post on Willow Bird Baking!

Ferrero Rocher and Reese’s Cup Cupcakes


Recipe by: Adapted Wacky Cake recipe from Being Wife and frosting from Hershey’s
Yields: about 30 cupcakes

Wacky Cake Ingredients:
3 cups flour
2 cups sugar
6 tablespoons cocoa
1/2 teaspoons salt
2 teaspoons baking soda
2 teaspoons vanilla extract
2 tablespoons vinegar
12 tablespoons of mazola or vegetable oil
2 cups water

“Perfectly Chocolate” Chocolate Frosting Ingredients:
1 cup (2 stick) butter
1 1/3 cup cocoa powder
6 cups powdered sugar
2/3 cup milk
2 teaspoon vanilla extract

Candy supplies needed:
Creamy peanut butter (I don’t use the natural sort for this because I kind of want a processed, sweet flavor)
Nutella
15 Ferrero Rocher candies
15 Reese’s Peanut Butter Cups (I use the big sort!)

Directions:
NOTE: You may want to make these cupcakes the night before you intend to serve them, since the frosting needs time to set in the refrigerator.

Preheat oven to 350 degrees. Line 30 cupcake wells with cupcake liners. In a large bowl, whisk together flour, sugar, cocoa, salt, and baking soda.

Add vanilla, vinegar and oil, stirring until smooth. It’s normal for the mixture to seem thick and pasty right now. Add the water and mix (carefully to avoid splattering) until there are no lumps in the batter.

Pour mixture into prepared cupcake pans. Bake 12-15 minutes, or until toothpick comes out clean. Allow to cool completely.

Carefully hollow out each cupcake using a table knife, and reserving the scraps for another use (maybe cake balls?). Using a piping bag or a ziplock with the corner cut off, fill half the cupcakes with peanut butter and the other half with nutella.

Make frosting: Melt the butter and stir in the cocoa. Alternate adding powdered sugar and milk, and beat to spreading consistency. Stir in vanilla. I refrigerated my frosting after beating to give it a thicker consistency, since it wasn’t as firm as I’d like. Unwrap all your candies while it refrigerates, because you’ll have to work quickly.

Have a platter ready in the fridge to receive finished cupcakes (the frosting is not very secure until it’s been refrigerated for at least a few hours). Pipe a big rosette onto each cupcake, covering your filling, and plop the appropriate candy onto the middle. Place finished cupcakes directly in the fridge to sit for a few hours, and take out immediately before serving.

Other fun candy cupcakes around the internet: 100 Grand Cupcakes, Snickers Cupcakes, another version of Ferrero Rocher Cupcakes.

If you liked this post, please:
Subscribe to Willow Bird Baking
Follow Willow Bird Baking on Twitter
Follow Willow Bird Baking on Facebook
Give this post a thumbs up on StumbleUpon


ShareOther ways to share this post with friends!

Secret Garden Recipe: Sparkling Raspberry Lemonade

Dear Summer,

I know I haven’t always treated you the way you deserve to be treated. There were plenty of days this summer when I slept through the best part of the morning. I only went out for ice cream one time, and that was after nightfall. I didn’t get to the beach or the pool even once. I never accomplished the picnic I’d planned in the mountains.

Listen, Summer, I know that being a teacher makes this even harder to excuse. I, better than anyone else (besides my students, maybe), should know the value of a great summer. I should have played in sprinklers. I should have driven around town with a slushy in one hand (and hopefully the steering wheel in the other). I should have gone on at least a couple of spontaneous road trips. Trust me, I know.

Give me some credit, though, Summer. I did almost exclusively wear a rotation of 3 sundresses all summer long. I stopped wearing clothes with finicky washing/drying directions to facilitate my summer laziness. I stocked up on dollar store flip flops and barely wore a legitimate shoe the entire season — except for that one time I wore my sassy heels. I started watching some of the horrible reality television that I’m embarrassed to talk about. I met my friend Beth for Indian, and just the other day, met my friend Andrea for sushi.

I filled up my hummingbird feeder! Not with raspberry lemonade, true, but I think the hummingbirds were plenty happy with sugar-water.


Changing up garnishes!

And I didn’t just flit around, either — I also used you, precious Summer, to be productive in ways I love. I planned a Secret Garden surprise party for my sister, for which I made this gorgeous lemonade. I blogged and blogged and blogged. I wrote the syllabus for the new cooking classes I’m teaching this fall. I diligently kept up with Top Chef.

Wait, watching Top Chef counts as productive, right?


Aw, a few raspberries in the pitcher look so nice. Maybe I should have added a lemon slice or two, too?

Summer, even though I’ve made some mistakes, it’s obvious that I care about you. I’m begging you, pleading with you — stay just a little longer. I’ll make amends; I’ll make sparkling raspberry lemonade. I’ll sit on the balcony with little Byrd, sippin’ this tart, fruity, sweet summertime beverage, just like I’m supposed to. Pretty please?

Love,
Julie

Sparkling Raspberry Lemonade


Recipe by: Adapted from Sunset
Yields: about 5 1/2 cups of lemonade

Ingredients:
1 1/2 cup raspberries, washed and patted dry
2/3 cup sugar
1 cup lemon juice
1 1/2 cup sparkling water
2 1/2 cups water*

Directions:
Mash raspberries with sugar in a small bowl and let stand for 10 minutes. Press this mixture through a fine mesh strainer into a pitcher and discard the seeds. Add lemon juice, sparkling water, and water, stirring to combine. Taste and add more sugar if desired. Dip each serving glass’s rim into lemon juice and then into sugar. Serve lemonade in these glasses with ice, and garnish with raspberries, mint, pretty straws, lemon slices, etc. as desired.

*NOTE: I am so lame. I fiddled with the original amount of liquid in the recipe and of course didn’t write down the changes I made. This is my best guess as to how much water and sparkling water I added, based on memory, but you can always fiddle with the ratio of ingredients after tasting.

And, because I would be frustrated if someone mentioned their sassy heels on a blog without showing me a picture:

If you liked this post, please:
Subscribe to Willow Bird Baking
Follow Willow Bird Baking on Twitter
Follow Willow Bird Baking on Facebook
Give this post a thumbs up on StumbleUpon


ShareOther ways to share this post with friends!

Flops Happen: A Chronicle of My Kitchen Failures

I tilted my head, hoping that it might help me understand why the chocolate cupcake batter sitting in front of me had the consistency of muddy water. Head tilting doesn’t seem to increase the comprehension of the dogs of the world (even if they really, really tilt) and sure enough, it didn’t work for me either. I just didn’t get it. I’d completed the whole recipe correctly — carefully measured, included all of the ingredients, mixed the appropriate amount of time. But still, the bowl in front of me was full of a batter that might have been dredged up from the bottom of the Mississippi.

With considerable misgivings, I poured some of the glop into each little cupcake paper. Maybe magic would happen in the oven?

Or maybe Mt. freaking Vesuvius would erupt in the oven, complete with a fiery, chocolate lava flow. Yeah.

The batter burned in sticky mounds all over the surface of the pan, the middle of the cupcakes inexplicably caved, and I was left with some sort of sculptural oddity that, while mildly fascinating, would probably get me kicked off of Work of Art.


The photograph’s not distorted. The cupcake is.

This kind of volcanic eruption of doom always seems to happen when the dessert is for a really special occasion, usually one replete with strangers tasting your food for the first time after hearing so much about your fancy blog. You know, when it matters.

In this case, I had only a few hours to pull up my bootstraps, find another recipe that conveniently didn’t use the ingredients I was now out of, and make it happen. “It” being a fabulous cupcake recipe I’ll post later this week.


Ferrero Rocher Cupcake Catastrophe.

When folks ask if I have kitchen flops, it’d be fun to look at them quizzically (maybe with a head tilt) and say something along the lines of, “You mean sometimes recipes don’t work for you? That’s odd.” But in the interest of keepin’ it real and fulfilling the mission of this blog (to inspire kitchen confidence in home cooks), I have to tell you — flops happen.

Often.


Thanksgiving pie — er, soup.

My Thanksgiving Coconut Cream Pie was Coconut Cream Soup. Same with the Thanksgiving Chocolate Pie. My pie pockets disintegrated. The meringue on my coconut cake was toasted in stripes that made it look like it had recently escaped from dessert prison. My pink poured fondant glopped up and made most of my kitchen surfaces look like they’d been finger-painted with Pepto Bismol. I forgot the leavener in my first batch of Ferrero Rocher Cupcakes and ended up with Ferrero Rocher Hockey Pucks. My chicken and dumplings cooked too long, and I kept adding stock to replenish the liquid — ever eaten a block of salt? My first Red Berry Pie was a blood-red, runny mess that vaguely resembled a crime scene. And my pumpkin ravioli — oh my goodness, did you read about my pumpkin ravioli?!


Pie crust or pie dust?

Maybe the possibility of failure seems like a deterrent to you. Why spend time, energy, and ingredients on something that might fail? In actuality, though, flops should encourage you, and here’s why: much of what I’ve learned in the kitchen, I’ve learned from flops. That’s why when lovely Lauren of Celiac Teen suggested we share our flops, I jumped on board the self-humiliation train.

When a recipe fails, especially when it matters, you have to be resourceful. My pie filling is ruined, but can I fill the crust with something else? My pie crust is ruined, but can the filling double as an ice cream topping? My cake is wobbly, but can I tear it up and make cake balls? My croissants are pale and ugly, but can I shred them and make a caramel croissant bread pudding? My macarons don’t have feet, but can I use them as a crunchy sundae topping? My cupcakes imploded, but can they double as doorstops? (okay, that one isn’t very helpful.)

This kind of thinking is what chefs do. The more you’re able to turn things around and put something fantastic on the table despite your difficulties, the more confident you’ll become that there really are no kitchen failures: just kitchen detours.


Coconut Cake Convict

Flops also force you to start over. The repetition of a recipe is always enlightening for me. When I have to remake a pie crust from scratch, I realize that I’m growing: I know the amount of flour by heart, I refrigerate my cubed butter reflexively, I’m a little more savvy about rolling out the dough. The more recipes you try, the more you learn — so it stands to reason that having to try the same recipe twice in one go can be an informative experience.


The runny pie massacre.

Finally, flops help you keep perspective. So much of our personal misery comes from seeking perfection in the wrong things. We want our houses to be perfectly clean, our kids perfectly behaved, our hair perfectly coiffed, our croquembouche perfectly . . . bouched. We need the perfect pair of jeans, the perfect car, the perfect body. The truth is, sometimes the fun is in the sloppy details. Cooking isn’t supposed to be perfect. It’s supposed to be an experience, a process, and something to share. And sometimes sharing the flops is just as fun as sharing the fancy stuff.

Now, how about you? What are your favorite kitchen flops?

To see other bloggers’ favorite flops, check out the links on Lauren’s Kitchen Flops and Disasters post.

If you liked this post, please:
Subscribe to Willow Bird Baking
Follow Willow Bird Baking on Twitter
Follow Willow Bird Baking on Facebook
Give this post a thumbs up on StumbleUpon


ShareOther ways to share this post with friends!

Quick Tip: How to Freeze Strawberries

Summer’s coming to a close, but your strawberry frenzy doesn’t have to. This quick tutorial demonstrates how to freeze fresh strawberries for later use.

1. Wash, hull, and dry strawberries. Cover a baking sheet with wax paper and set each strawberry, point up, on the wax paper without letting them touch. Firmer strawberries fare better in this process than very ripe or soft ones. This gives you the perfect excuse to eat any of the particularly juicy berries that cross your path. You’re welcome.


That one in the next-to-back-row leaning wayyy over to the right is my favorite. He’s just begging to be chomped — and several strawberries did suffer that fate in the making of this tutorial.

2. Freeze the strawberries for a few hours until hard, and then place them in an airtight plastic zipper bag. Make sure to squeeze out all the air. Label with the date and contents.

3. To thaw, set strawberries in the fridge overnight or out at room temperature for a few hours.

If you liked this post, please:
Subscribe to Willow Bird Baking
Follow Willow Bird Baking on Twitter
Follow Willow Bird Baking on Facebook
Give this post a thumbs up on StumbleUpon


ShareOther ways to share this post with friends!

1 103 104 105 106 107 127