strawberry

(Freshly Picked!) Strawberry Cream Pie

Before we get to the pie: prayers go out for those of you in any of the areas affected by tornadoes this year — you are on our hearts and minds daily.

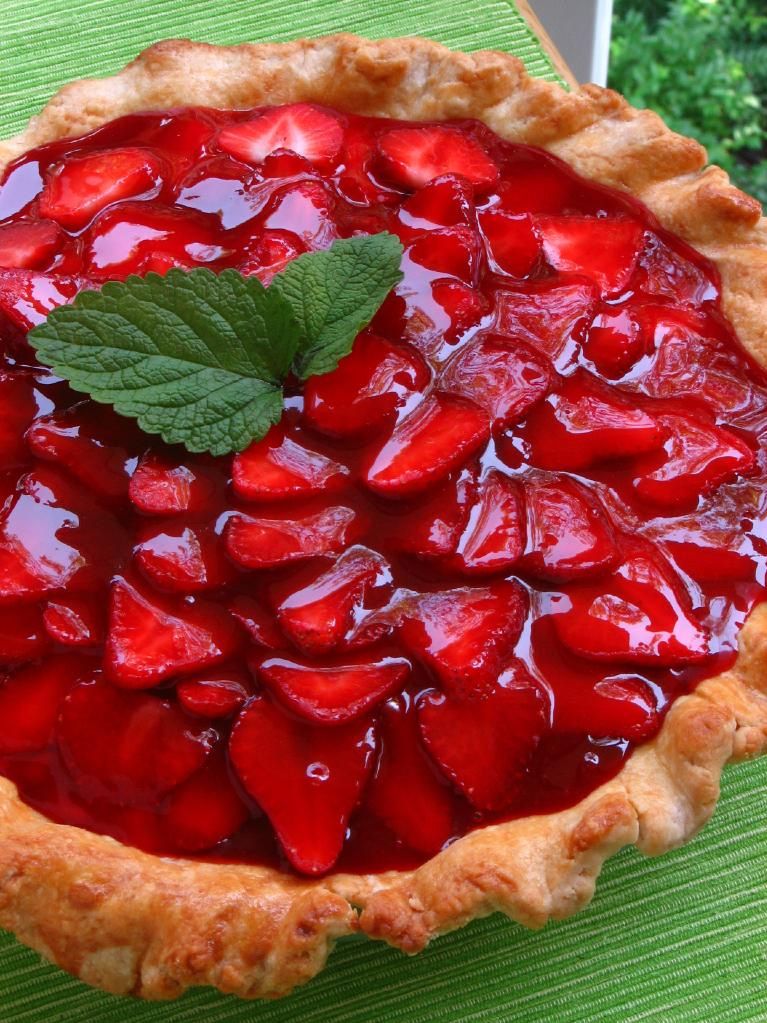
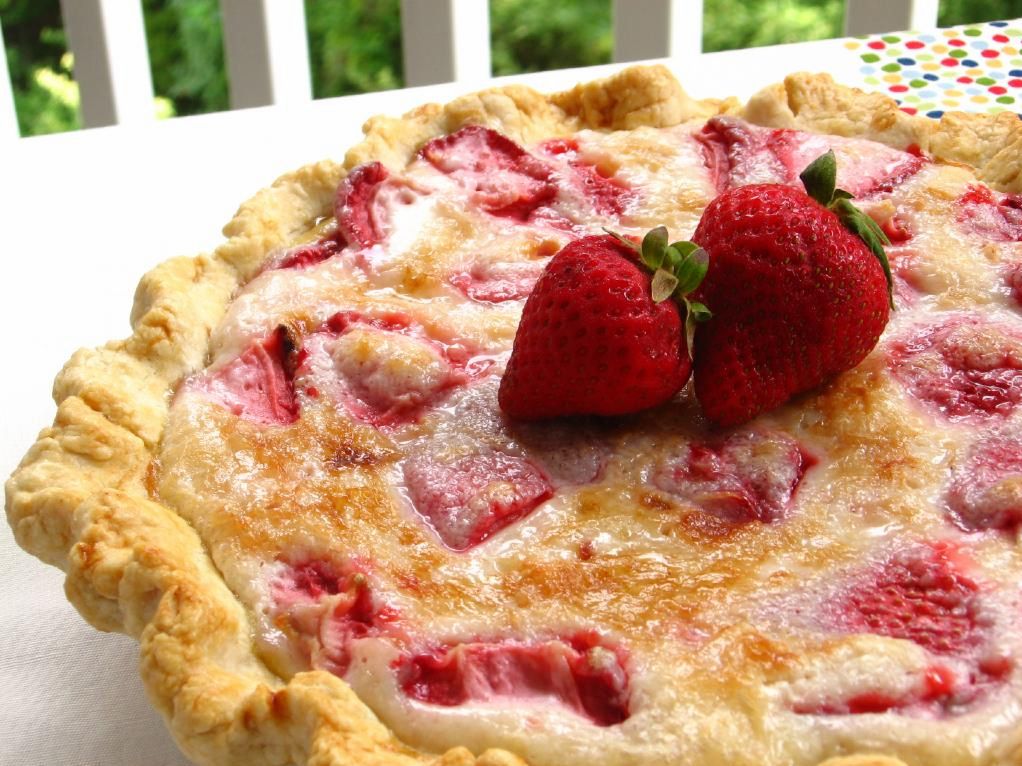
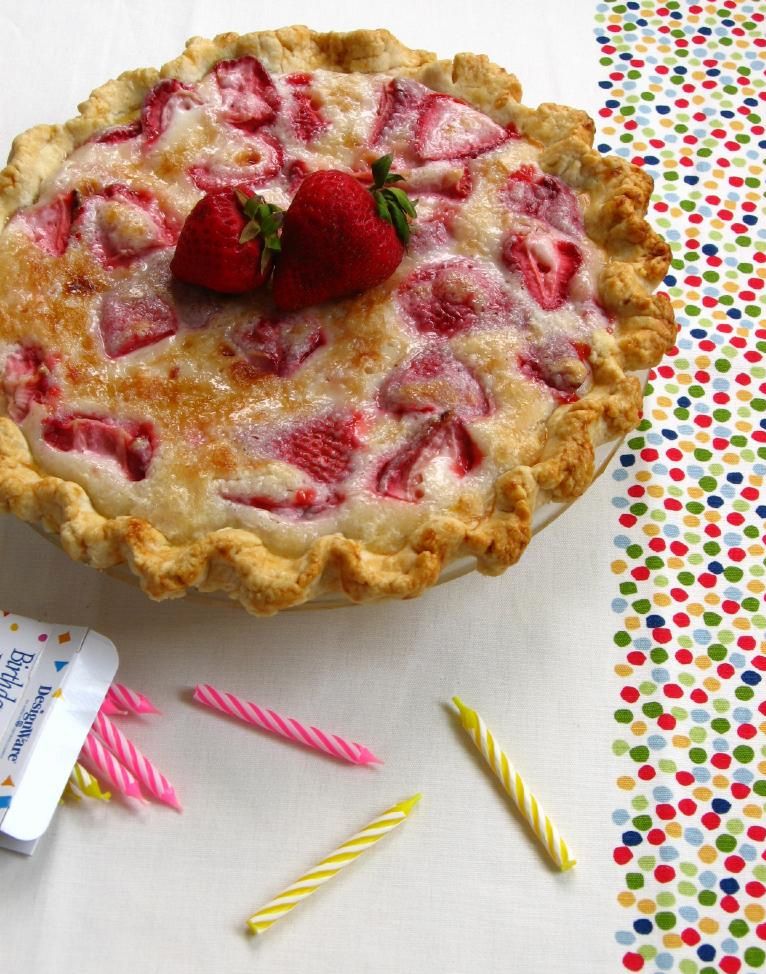
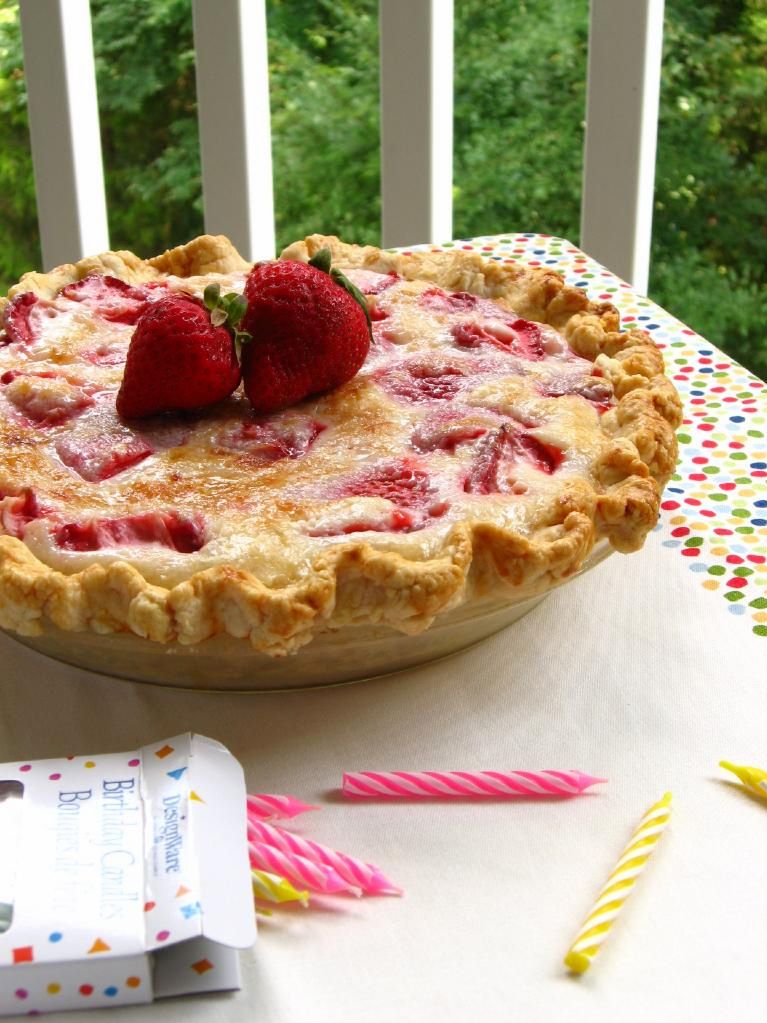
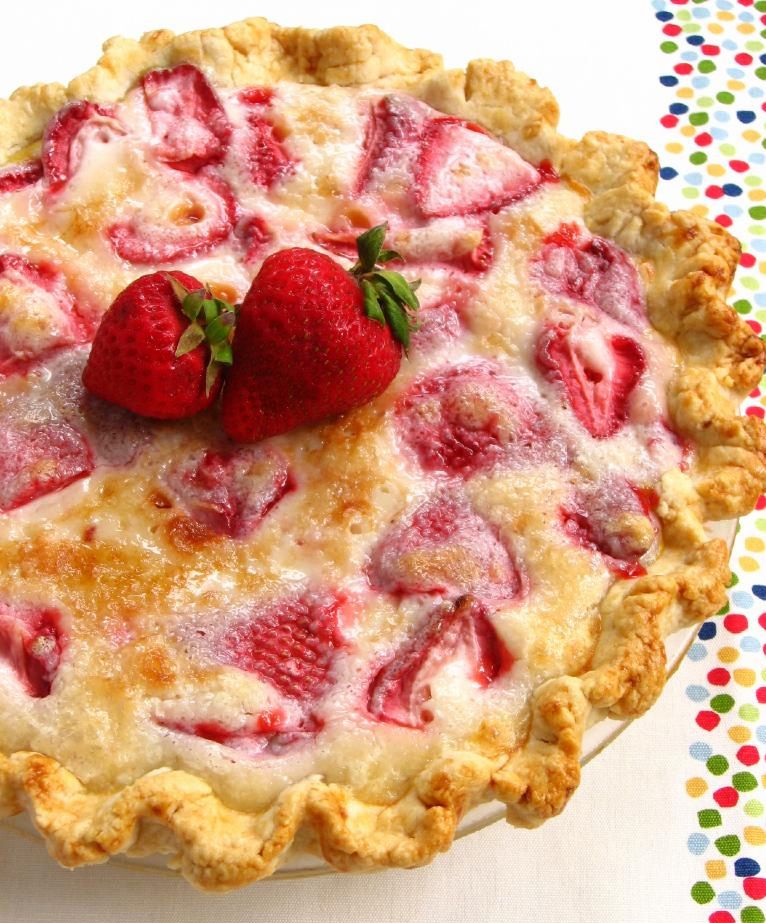
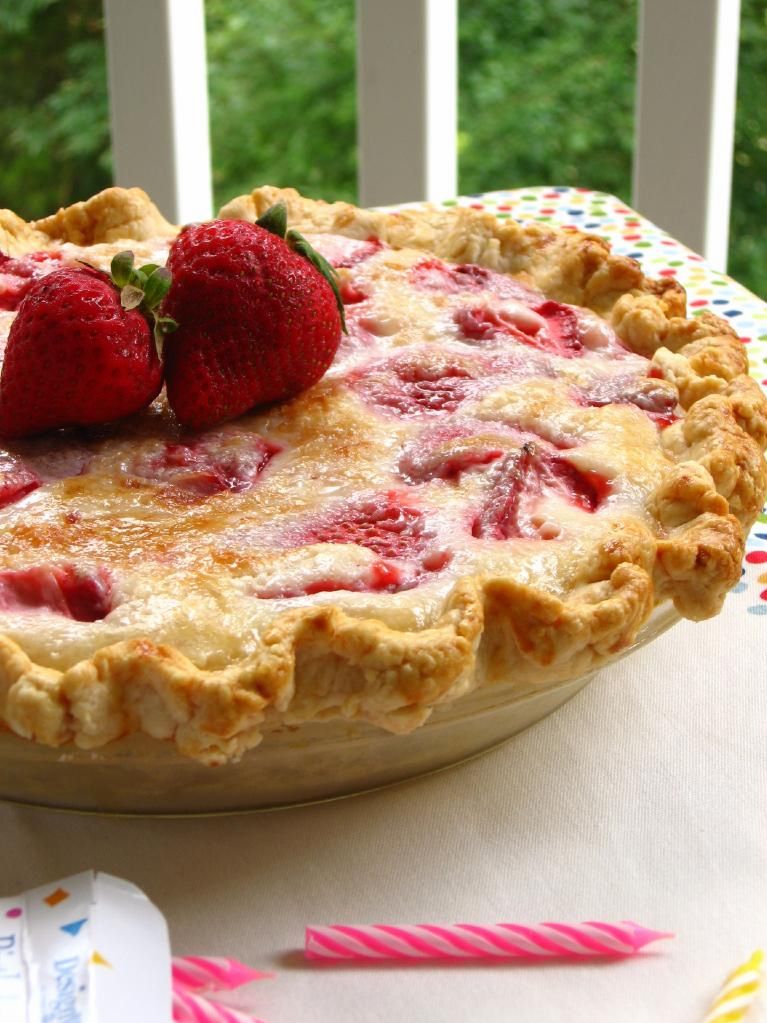
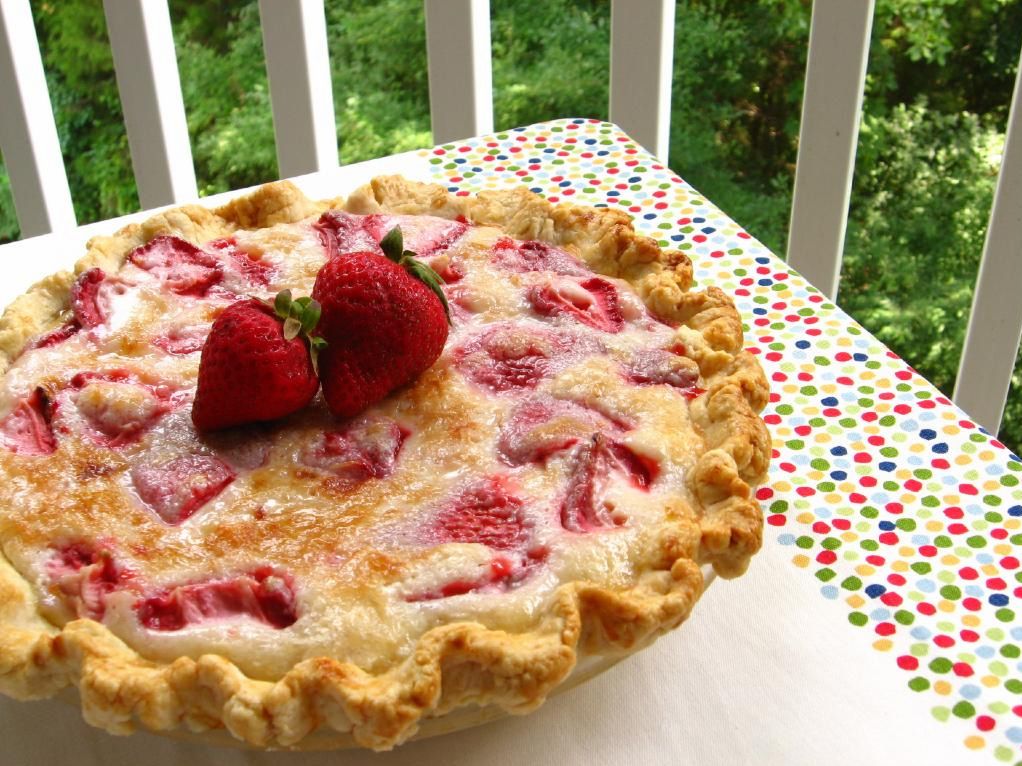
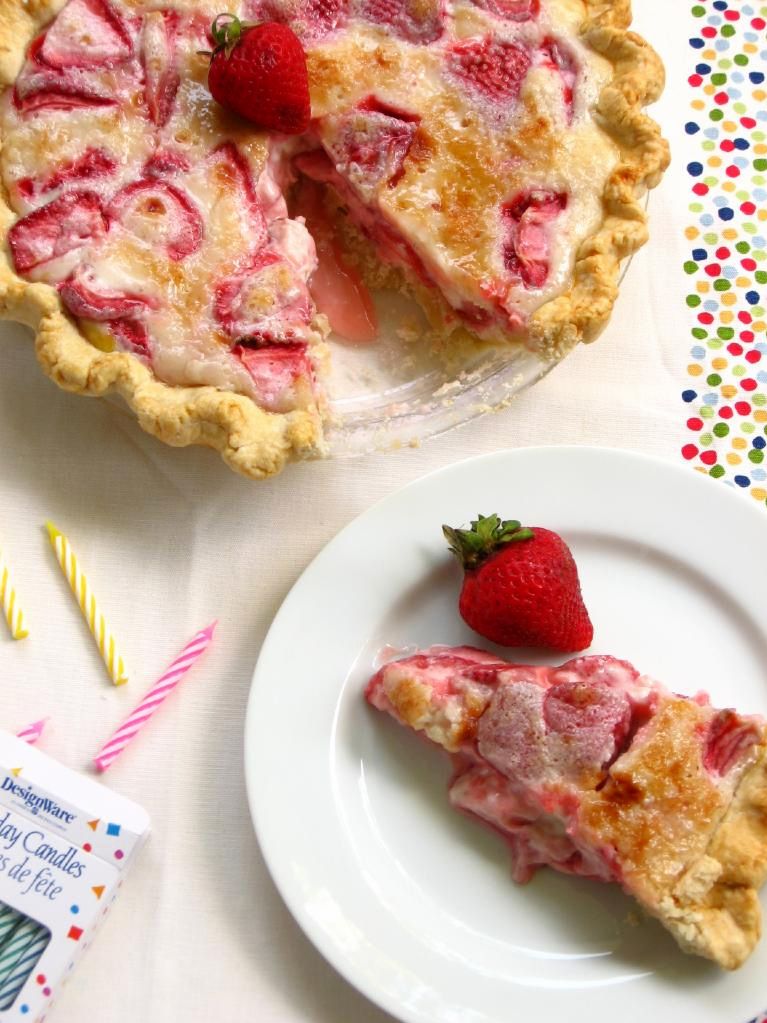
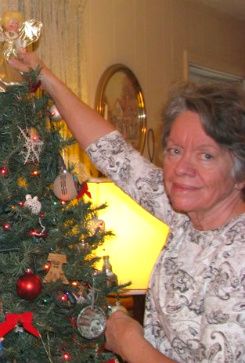
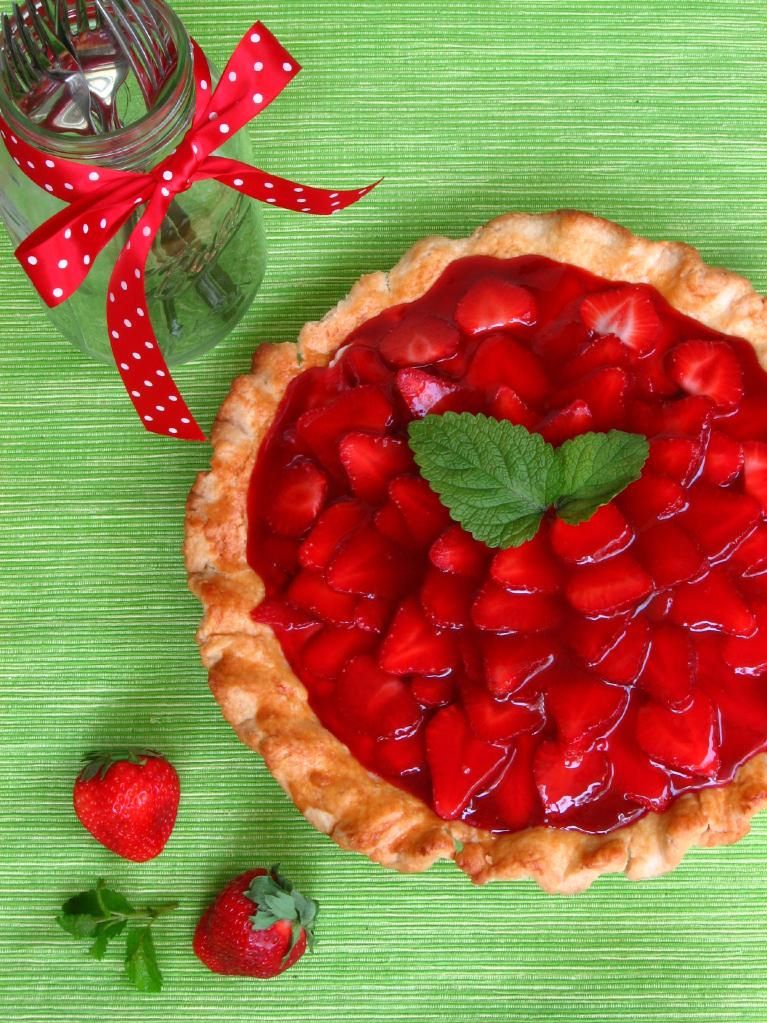
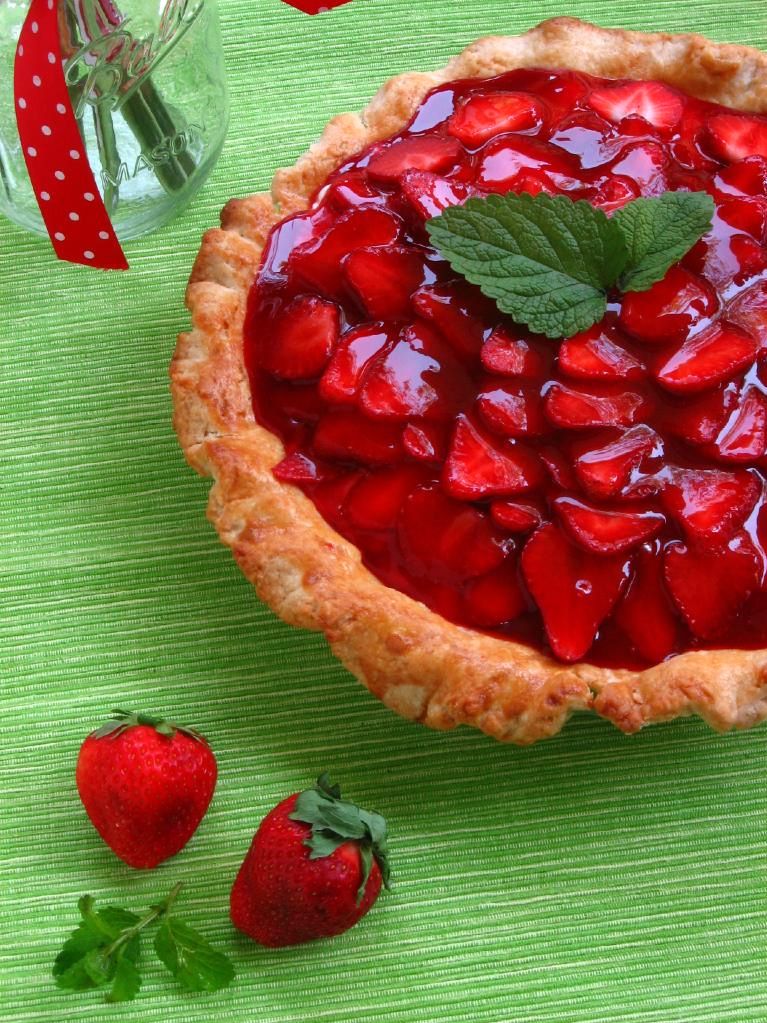
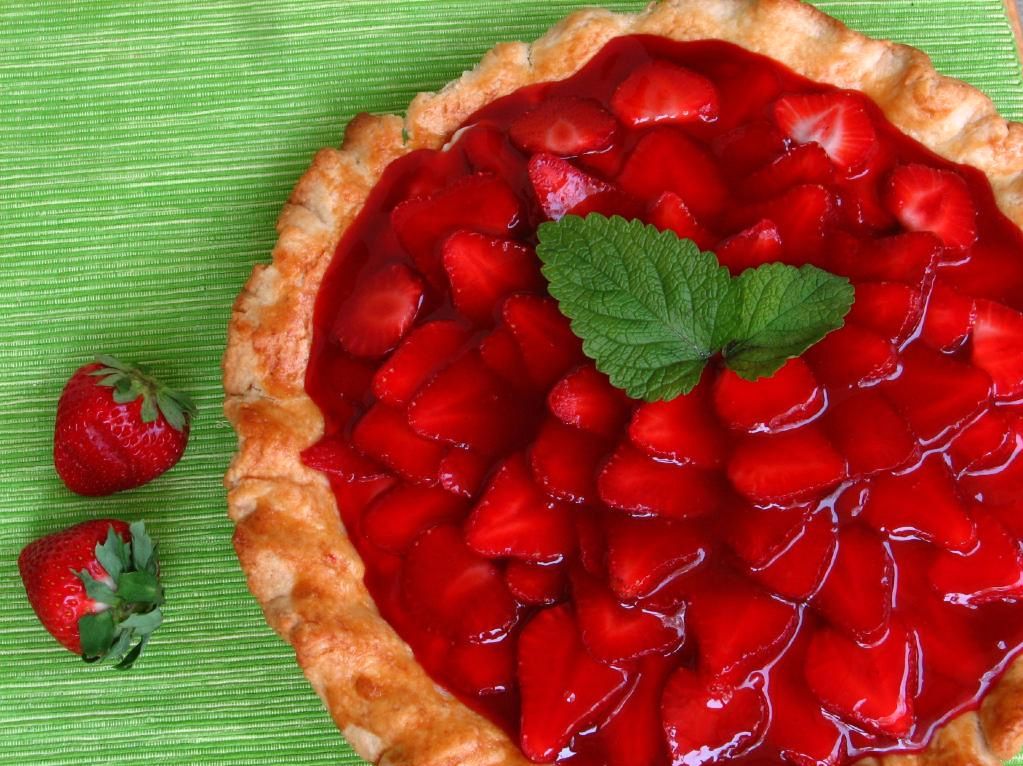
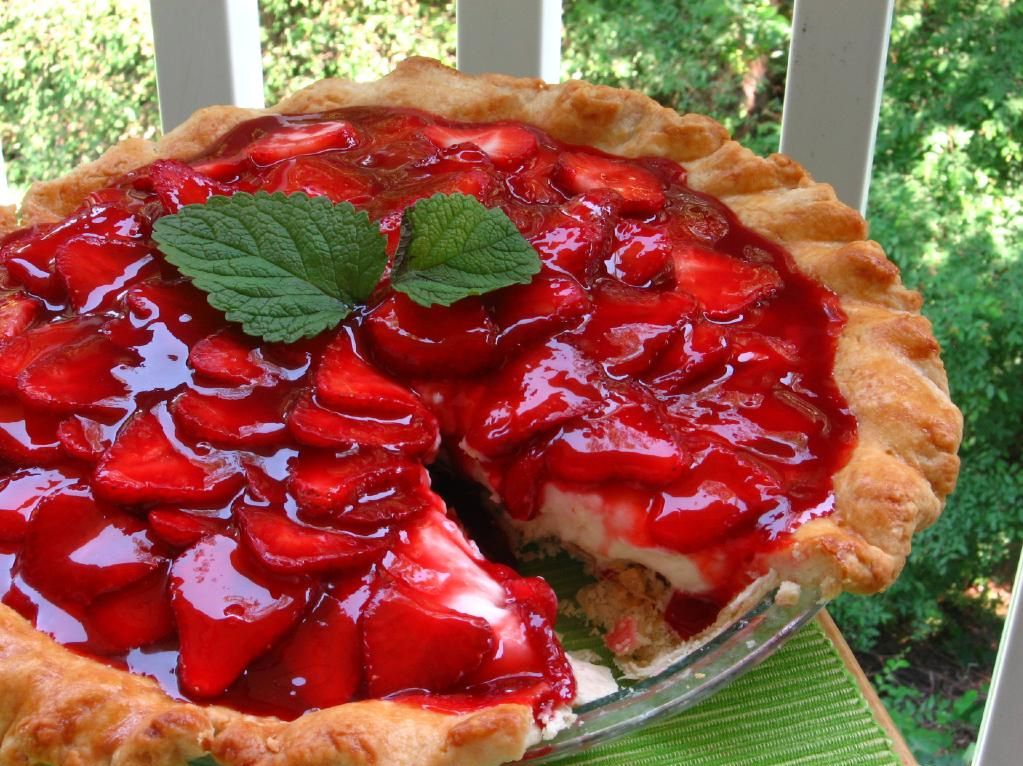
I just made perhaps the prettiest, most scrumptious pie I’ve had the privilege of shoveling into my mouth. Encased in a flaky, tender pie crust are billowy mounds of pastry cream, toasted almonds, and fresh glazed strawberry slices. Making it even sweeter (not as if it needed it or anything) is the source of the recipe. It comes from this lovely lady, my Aunt Pat, who’s also responsible for this lovely flower garden. Just call her a domestic genius:

My cousin sent me this recipe mounted on a gorgeous wooden plaque and it now sits by my computer desk as a reminder of my sweet family and all of the food memories that bind us — grandma’s homemade sausage gravy and biscuits, all the potluck Thanksgiving treats, and now, thankfully, this Strawberry Cream Pie.

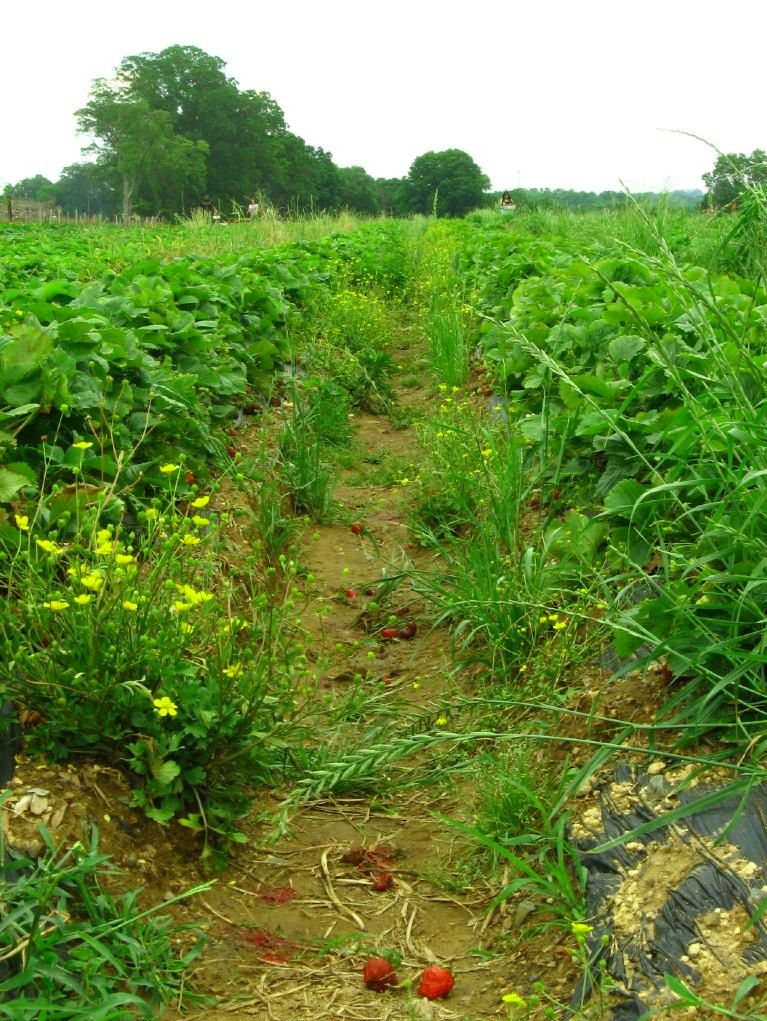
Another sweet thing about this pie is that it comes to you during May, which is National Strawberry Month! The Charlotte Food Bloggers celebrated by going strawberry pickin’ at Miller’s Farm in South Carolina.


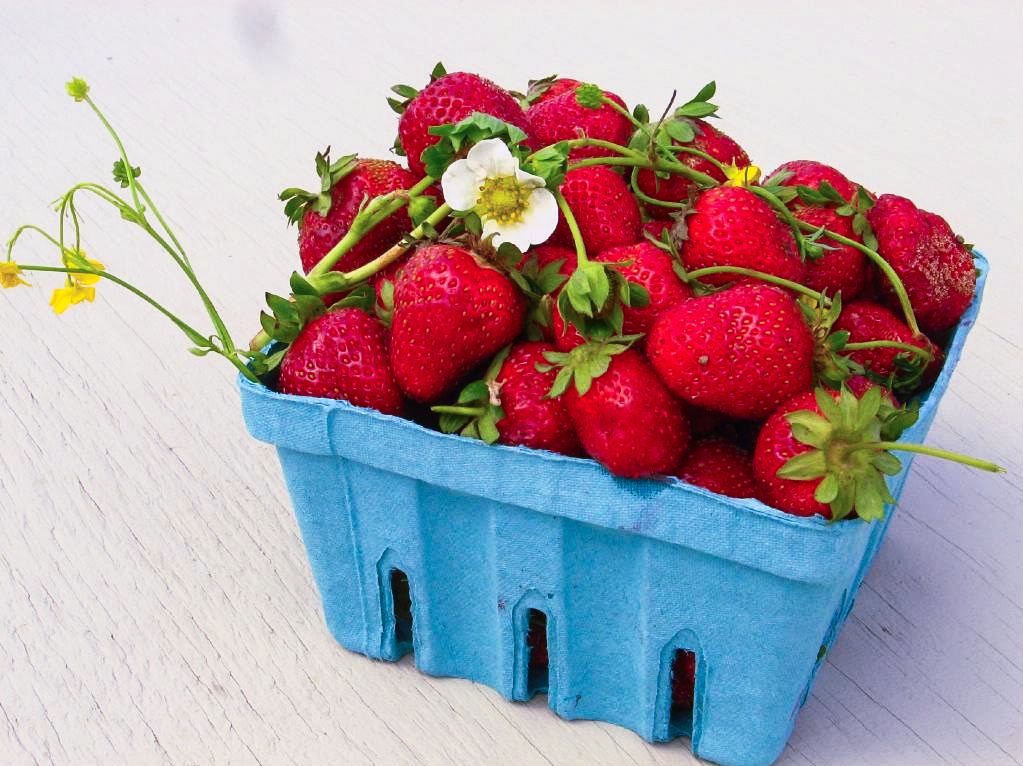
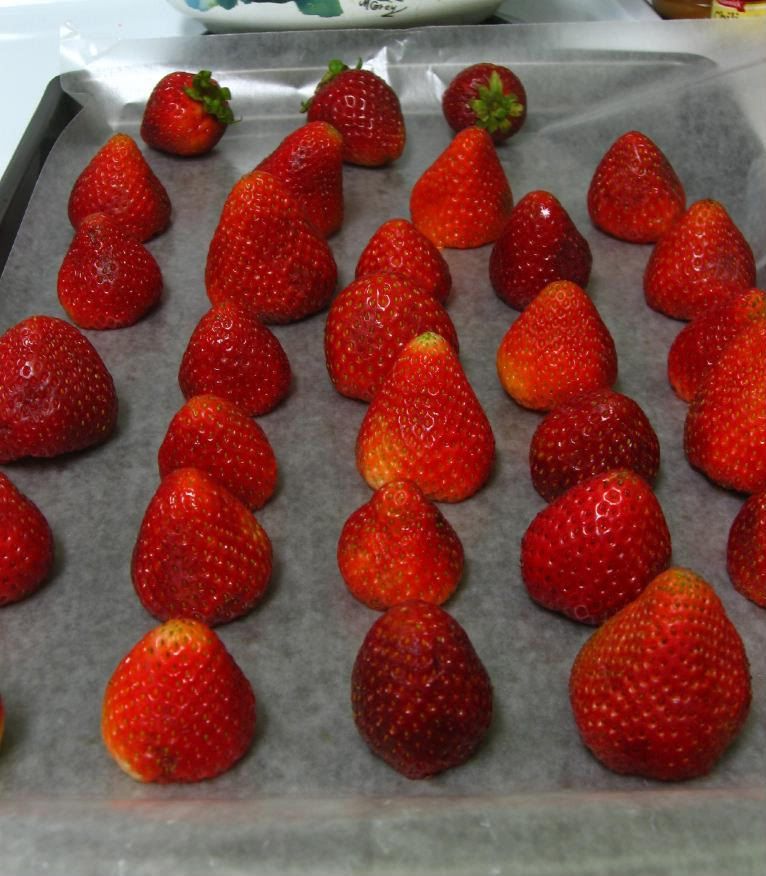
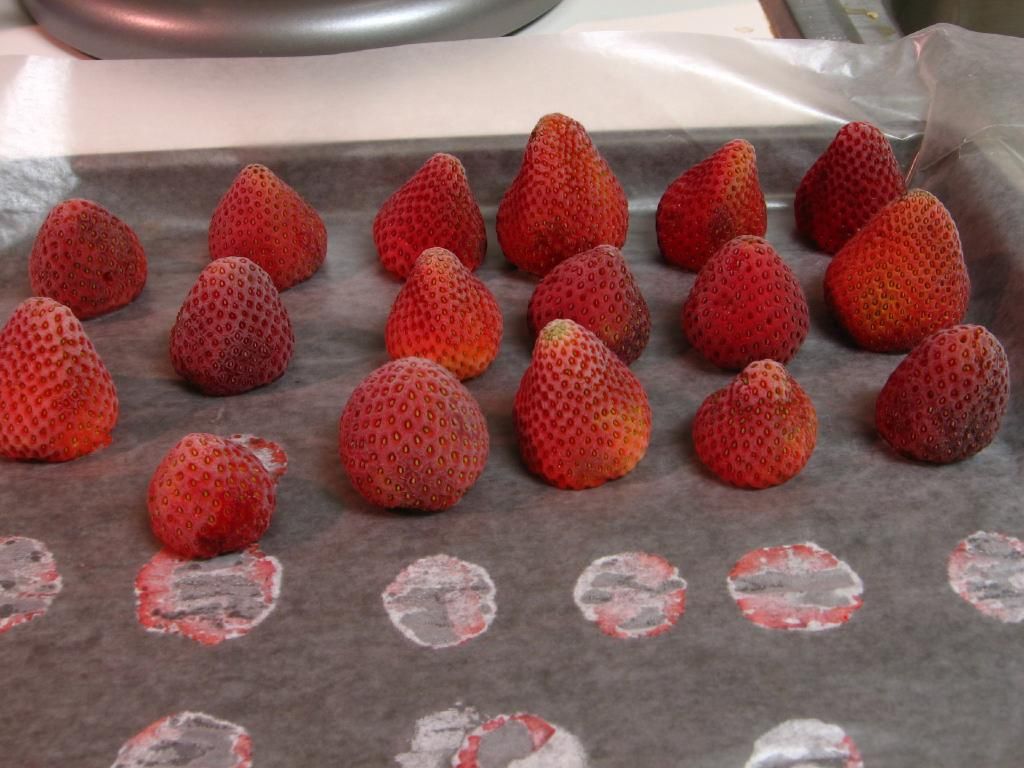
freshly picked strawberries!

I’d never been strawberry picking, but the thought of dancing around the kitchen whipping up this pie spurred me along row by row, bush by bush. Along my journey, I realized that one could glean many a life lesson from the berry-picking process. Here are just a few:

Life Lessons from Strawberry Pickin’:

1. The best berries are in the middle of the bush. Sometimes the things in life that are worthwhile also require more effort. Sitting in the sunshine and playing in the sand is worth the hassle of loading the beach chairs into the car and slathering on sunscreen. Showing love to a friend is worth the time it takes to create a special dessert for them. Seeing your family is worth enduring an hours-long road trip and a few embarrassing childhood anecdotes. Go for what’s worthwhile, even if it’s hard.

2. There will be bugs. They’ll even, like, bite you and stuff. But the hard and annoying parts of your life are still parts of your life — not just times to get through, but times to experience! Every hardship is an opportunity to react with grace and integrity, and to grow as a person. And, in the case of bugs, to itch.

3. Don’t be afraid to get a little muddy. Life’s more relaxing when you stop trying to keep things perfect.

4. Pet the pig . . . You know, like “smell the roses,” except cuter. There were a few random animals at the farm that we decided to love on after our berry baskets were full: a porker aptly named Juicy, a goat, a duck, and a donkey. Don’t hurry past the fun parts of life.

5. . . . But watch out for the donkey, because he flippin’ bites, especially if you have strawberry juice on your fingers. This probably has no life application. But really, watch out for that beast.

6. Being “hot, sticky, sweet” is not all that Def Leppard made it out to be, but it does make you thankful for showers.

7. Be sure to wear some flowers in your hair. Everything’s more fun when you’re purposeful about enjoying yourself. Optimism and positivity come naturally for some people — and some of us have to make it happen.

8. Sweet experiences are best enjoyed with people you love. And even the not-so-sweet experiences can be helped along by great company. Like these crazies:


Charlotte bloggers Crosby, Diana, Katie, and Erin pick berries (not pictured: Vanessa, Taylor, and Julia)

9. The early picker gets the berry. Plan ahead and keep your life organized according to the systems that work best for you. We went picking when the strawberries were just past their peak, so others nabbed the better berries. Next time, we’ll be proactive!

10. Use your strawberries before they go all mushy. Don’t wait for great things to happen, and don’t let your talents and energy be wasted on sitting around, fearing failure. If you think an endeavor is worthwhile, give it your all and make it happen.

This life lesson can also be translated as: get in the kitchen this instant make a Strawberry Cream Pie!

Have you ever been strawberry picking? What’s your favorite use for delectable strawbs?

Strawberry Cream Pie


Recipe by: Pat Howard
Yields: about 10 servings

Crust Ingredients:
2 cups flour
1 teaspoons salt
3/8 cup cold shortening or lard
3/8 cup cold butter, chopped
3-4 tablespoons cold water

Cream Ingredients:
1/2 cup sugar
3 tablespoons cornstarch
3 tablespoons flour
1/2 teaspoon salt
2 cups milk
1 egg, slightly beaten
1/2 cup whipping cream
1 teaspoon vanilla extract

Other Ingredients:
1/2 cup sliced almonds
1 1/2 cups fresh strawberries
1/2 cup water
1/4 cup sugar
2 teaspoons cornstarch
red food coloring (optional; I skipped this)
mint leaves or whole strawberries for garnish (optional)

Directions:
Note on timing: There are several components of this pie, but their preparation fits together nicely. You can make the crust dough and while it’s chilling, toast your almonds and set them out to cool. While the crust is baking and cooling, make and refrigerate the cream and slice your strawberries. Assemble these things once the crust is cool, and chill your almost-completed pie while you whip up the glaze. Chill the whole concoction for a few hours before slicing for best results.

Make the crust dough: Pulse flour and salt together to combine. Add scoops of lard and pulse into the mixture has the texture of coarse sand, about 10 seconds. Add in chunks of butter and pulse until butter pieces are no larger than small peas, about 10 pulses. Add minimum amount of water and pulse on low. If dough remains crumbly and doesn’t come together, add another 2 tablespoons of water. Add as little as is required to enable the dough to be rolled into a ball. Form the dough into a disk, wrap in plastic, and refrigerate for 20-30 minutes.

Toast your almonds: While the crust dough is chilling, preheat your oven to 350 degrees F and spread your sliced almonds out on a baking sheet. Toast for about 4-6 minutes, using a spatula to gently flip and stir the almonds ever 2 minutes. They burn quickly, so keep a close watch on the nuts and remove them when they just start to get some color and are fragrant. Mine took about 5 minutes.

Finish making your crust: Preheat oven to 450 degrees F. Roll disk of dough out to around 2 inches larger than your (9-inch) pie plate and transfer it, situating it in the plate. Fold the excess dough around the edges and crimp, trimming where necessary. Cover the dough with parchment paper and fill with pie weights or dried beans, pressing to the edges. Bake for around 20 minutes. Remove weights and paper, egg wash crust, and bake 5-10 minutes more, until golden brown (you won’t be baking it again, so make sure it has good color — shielding edges with foil if they begin getting too dark). Let crust cool completely.

Make cream filling: While the crust bakes, prepare your cream filling. Prepare an ice water bath in a bowl big enough to accommodate your saucepan. Mix sugar, cornstarch, flour, and salt in a saucepan over medium-high heat. Stir in the milk and bring to a boil, stirring constantly. Reduce heat and cook until thickened, still stirring constantly. Spoon out about 1/4 cup of your hot mixture and gradually drizzle it into your beaten egg, whisking constantly. This will temper the egg so that when you add it back into the hot mixture, it won’t cook. Add the egg into the hot mixture, continuing to stir constantly. Bring this just to boiling.

Set the saucepan in the ice water bath and stir it periodically as it cools. Once cool enough, chill the mixture in the refrigerator. During this time, whip the cream and vanilla together to stiff peaks. Take the chilled mixture from the fridge and beat it to break it up. Stir in about 1/3 of the cream to lighten it, and then gently fold in the rest of the cream until well combined. Chill until ready to use.

Assemble the pie: Cover bottom of crust with toasted almonds, and then dollop in chilled cream mixture, spreading it smooth with an offset spatula or the back of a spoon. Slice about a cup of fresh strawberries and layer them in overlapping concentric circles on the top of your pie. Chill this while you make your glaze.

Make the glaze: Crush remaining 1/2 cup of strawberries and cook with water in a saucepan over medium-high heat for two minutes. Strain through a fine mesh sieve and discard the pulp. Add the juice back to the saucepan over medium-high heat and gradually stir in sugar and cornstarch. Cook until thickened. If you want, you can tint this glaze with food coloring to desired hue, but mine was plenty bright enough! Cool the glaze slightly (I transferred mine to a heat-proof measuring cup with a pour spout to cool for a bit) and then pour over top of strawberry slices on your pie. Garnish with big mint leaves, if you’d like, or whole strawberries. Chill entire pie for at least a few hours for best results; cut with a knife held under hot water and then dried.


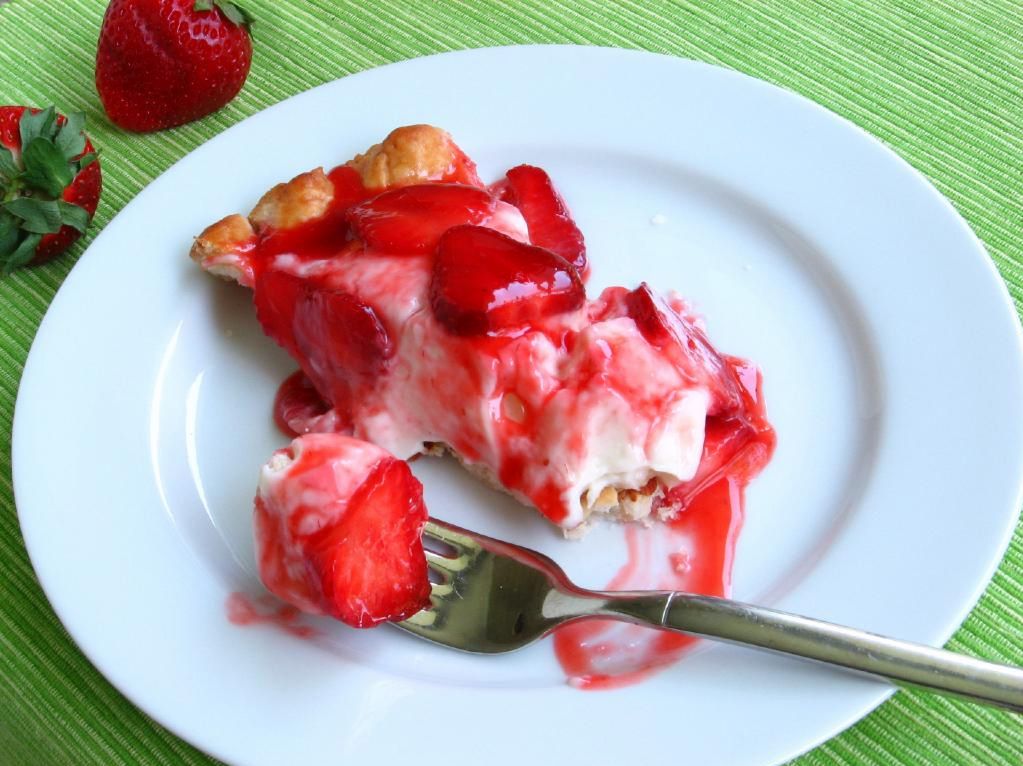
life’s too short — eat strawberries!

If you liked this post, please:
Subscribe to Willow Bird Baking
Follow Willow Bird Baking on Twitter
Follow Willow Bird Baking on Facebook
Give this post a thumbs up on StumbleUpon


ShareOther ways to share this post with friends!

Strawberry Cheesecake Stuffed Amaretto Cake Pops (on Pretzel Sticks!)

Dear Rebecca Black,

For the record, I think you’re adorable and I want you to be in my 7th grade class. We talked about you a little bit when we were all having fun fun fun fun with your song, and about how mean some folks on the interwebz can be.

My students realized that you were their age (just 13!), and we all felt like if it’d been one of them taking the brunt of jokes and criticism, we’d be sad. So we want you to know that we’re sorry about the meanies, and we hope you’re enjoying all the good-spirited parodies of your song as much as we are.

Oh, but my 7th grade students told me about the “censored” parody of your song — don’t enjoy that one. Don’t even watch it. Cover your ears, young lady! I’ll redirect you to the Sunday school parody instead.

Anyway, your song has brightened up lots of my weekends! Sometimes I blast it at the beginning of class on Fridays and it never fails to produce smiles. And yeah, we break it down — everyone needs a 5 minute dance party now and then.

And you know what? I get it, girl. You so excited about Friday that you’re dropping verbs and everything else, and I want you to know that I understand.

In fact, I’m a little obsessed with your song right now. It just describes so perfectly how I feel about so many things. I’m going out to eat? I-I-I so excited! It’s only 4 weeks until summer vacation? I-I-I so excited! I’m making flippin’ Strawberry Cheesecake Stuffed Amaretto Cake Pops on flippin’ pretzel sticks?! I SO EXCITED!

These cake pops started as a bright spark of inspiration from CakeSpy: pops on a pretzel stick! Using an edible, salty vehicle for a sweet treat struck me as absolutely bee’s-knees brilliant. I had to try it immediately.

Then there was this other idea I’d been toying with, too: mixing up no-bake cheesecake filling, freezing it into little pearls, and hiding the pearls in the center of each cake ball. A cheesecake-stuffed cake ball on a pretzel stick? It couldn’t get any better — unless you used an amaretto-spiked version of the best pound cake in the world for your cake!

This cake pop endeavor turned out so easy and so fantastic. I made a video tutorial (located at the bottom of this post) so that you can follow along with the steps as you make them; it’ll show you how to pipe your cheesecake centers, form the cake balls around them, insert the pretzel sticks, and dip and decorate the pops.

But the cake pop tutorial isn’t the only video I made.

What can I say, Rebecca? These cake pops just made me wanna sing! So here’s my tone-deaf tribute to plucky middle schoolers, cake pops, and YOU. Thanks for the fun!

P.S. I have a newfound respect for you after trying to sing this song a billion times and realizing I was basically the worst singer on the planet.

Strawberry Cheesecake Stuffed Amaretto Cake Pops (on Pretzel Sticks!)


Recipe by: Willow Bird Baking
Yields: about 40 cake pops
Print this Recipe

Cream Cheese Pound Cake Ingredients:
3/4 cups butter, softened
4 ounces cream cheese, softened
1.5 cups sugar
3 large eggs
3/4 tsp vanilla
1/4 cup amaretto
1.5 cups flour
pinch salt

Strawberry “Cheesecake” Ingredients:
1 8-oz. package cream cheese, softened
2 tablespoons sugar
1/2 cup diced strawberries

Cream Cheese Frosting Ingredients:
4 oz. cream cheese, softened
1/4 cup (1/2 stick) of butter, softened
1/4 teaspoon vanilla extract
1 cup confectioners’ sugar, sifted

Other Ingredients:
2 pounds candy melts (I chose light pink)
about 40 pretzel sticks (I used Snyder’s because they were longer and sturdier than others)
white chocolate or candy melts for drizzling

Directions:
*NOTE: See the cake pop video tutorial below to see many of these steps being completed!

Make the pound cake: Preheat oven to 300 degrees F. Butter and flour a loaf pan. Beat butter and cream cheese at medium speed of an electric mixer 2 minutes or until creamy. Gradually add sugar and beat 5-7 minutes until light and fluffy. Add eggs, one at a time and beat only until yellow disappears. Stir in vanilla and amaretto.

Combine flour and salt and add to creamed mixture beating on low speed of electric mixture just until blended after each addition. Fill a 2-cup ovenproof dish with water and place in oven with cake (keeps it moist!). Bake at 300 degrees for about 1 hour and 20 minutes, or until a knife inserted into the middle comes out clean (check in several areas of the cake to be sure it’s completely done). You may need to cover cake with foil the last 20-30 minutes of baking if it looks like it’s getting too brown on top. Let cool on wire rack for 10 minutes then remove from the pan by inverting it into a bowl. Once cool enough to handle, crumble the cake in the bowl, removing any hard outer crust portions. Let cool completely.

Make the strawberry cheesecake middles: While the cake is baking, mix all the cheesecake ingredients together well. Fill a gallon sized plastic zip bag with the mixture and cut off the corner (big enough so that the diced strawberries won’t get stuck). Pipe the cheesecake mixture into small swirls on a silicone mat or wax paper (see video tutorial below to see this step). Freeze these until firm.

Make frosting: Mix all frosting ingredients together on medium-high speed until combined. When cake is cooled and crumbled, mix frosting into it until you reach a dough-like consistency. I used most of my frosting but not quite all of it.

Make cake balls: Once your cake mixture is ready and your cheesecake middles are frozen firm, you’re ready to assemble your cake balls! Take a frozen cheesecake middle and pack some cake around it. Roll it into a ball and place it on a silicone mat or wax paper. Continue until all cake balls are rolled. Chill these in the refrigerator overnight. I don’t freeze mine like some sites suggest, because I find chilling them in the fridge instead reduces cracking after I dip them.

Mount and dip cake balls: After cake balls have chilled overnight, melt your candy melts according to the package directions. I keep my bowl of candy melts situated in a bigger bowl of hot water to keep them warm and fluid, but be careful no water gets into the melts! To mount each cake ball, take a pretzel stick and dip the end in candy melts. Gently but firmly push the end of the pretzel stick into the cake ball. Put these back on their silicone mat or wax paper to chill. Repeat until all cake balls are mounted and chill for about 30 minutes.

After chilling, you’re ready to dip! Dip each cake ball into the candy melts, using a spoon to help coat them. After dipping, hold your cake ball over the bowl and gently bounce to drain the excess off. Turn the pop as you drain. When well-drained, gently place the pop in a foam block to continue drying. I placed mine in the fridge to reduce drying time.

Decorate dried pops: Once your pops are dry, melt some white chocolate according to package directions. Let it cool slightly before spooning it into a small plastic zip bag with the tiniest bit of the corner cut off. With the pops standing in their foam block, quickly and confidently pipe a zigzag design over each one. Let these dry. Serve immediately or store in an airtight container in the refrigerator.

VARIATIONS:
-You can leave the cheesecake middles out of this recipe and roll the cake into a solid ball if you want traditional cake pops.
-You can use any flavor of cake (or even a cake mix) for your cake, but this one is absolutely the best I’ve ever had!
-You can leave the strawberries out of your no-bake cheesecake mixture or even add in other berries, chocolate, etc., to produce different flavors of cheesecake in the center.
-You can use lollipop sticks instead of pretzel sticks, or leave the sticks out altogether and make regular cake balls instead of cake pops.
-You can decorate with sprinkles instead of zigzags.

And just for my lovely Willow Bird Bakers, here’s a tutorial for how to make cheesecake stuffed cake pops. This video would also be useful for making regular cake pops. WBB is all about inspiring kitchen confidence in home cooks by encouraging them to tackle challenges — so if you’ve never made cake pops before, this is your double-triple-dog dare! Get in the kitchen and try it out! Don’t forget to snap some photos of your finished product for us to see!

If you liked this post, please:
Subscribe to Willow Bird Baking
Follow Willow Bird Baking on Twitter
Follow Willow Bird Baking on Facebook
Give this post a thumbs up on StumbleUpon


ShareOther ways to share this post with friends!

Quick Tip: How to Freeze Strawberries

Summer’s coming to a close, but your strawberry frenzy doesn’t have to. This quick tutorial demonstrates how to freeze fresh strawberries for later use.

1. Wash, hull, and dry strawberries. Cover a baking sheet with wax paper and set each strawberry, point up, on the wax paper without letting them touch. Firmer strawberries fare better in this process than very ripe or soft ones. This gives you the perfect excuse to eat any of the particularly juicy berries that cross your path. You’re welcome.


That one in the next-to-back-row leaning wayyy over to the right is my favorite. He’s just begging to be chomped — and several strawberries did suffer that fate in the making of this tutorial.

2. Freeze the strawberries for a few hours until hard, and then place them in an airtight plastic zipper bag. Make sure to squeeze out all the air. Label with the date and contents.

3. To thaw, set strawberries in the fridge overnight or out at room temperature for a few hours.

If you liked this post, please:
Subscribe to Willow Bird Baking
Follow Willow Bird Baking on Twitter
Follow Willow Bird Baking on Facebook
Give this post a thumbs up on StumbleUpon


ShareOther ways to share this post with friends!

Summer Strawberry Sour Cream Pie

I have a love-hate relationship with Twitter. Twitter is related to this big ol’ Strawberry Sour Cream Pie, I promise.

On one hand, I hate Twitter. Twitter moves at the speed of light during prime tweeting hours. My OCD urge to not “miss out” on what’s going on slams head-on into a wall built with millions of 140-character bricks. Suddenly, I realize I’ve been watching my twitter feed for the better part of an hour. My eyes glaze over, my back hurts, and my brain starts translating each thought into its shortest possible expression. At this point, I need to tweet myself:

@julieruble Time 2 get off twitter immediately #beforeyoureyeballsfallout

That hashtag’s gonna catch on, just you wait and see.

But I love Twitter. I’m connected to hundreds of great people — other bloggers, Willow Bird Baking readers, the occasional celebrity chef. I keep in touch with an extended web of lovely folks that I might not have time to call or write a lengthy email to. There’s a level of casual interaction that brooks folks jumping into a conversation that pertains to their interests. You can easily meet fabulous new people, keep up with the dynamic blogosphere, and support fellow writers. Cool.

Even more cool? Sometimes twitter magic happens, and someone amazing (cough cough Jaden Hair of wonderful Steamy Kitchen) finds your blog and drools over some S’mores Cereal. Now that’s cool.

Like most things, there’s a twitter balance — for me, it involves checking in a few times a day, and that’s it. Thankfully, during one of my forays into the land of tweets, I found a gem. Lovely Patti at Worth the Whisk posted that one of her pies had been chosen as Pie of the Day by KCRW Radio’s Good Food Blog: Strawberry Sour Cream Pie.

Listen, you don’t scroll past an award-winning Strawberry Sour Cream Pie. You just don’t.

You stop, you ogle, you marvel, you salivate a little (in a classy way, of course), and then you go pick up some sour cream.

I knew while baking that this pie, along with the heavier Chocolate Mousse Pie, would be the perfect treats to take in for my dear Sunday school leader Joyce’s birthday.

I love the combination of fruit and sour cream, and it really sings in this gorgeous, lazy-day treat. The strawberries stay juicy, and the tangy-sweet fruit is delicious against the buttery crust. And pies like this are the reason people started saying things were “easy as pie.” You don’t need to blind bake the crust, pre-cook the filling, or any other fussy stuff. You roll out your dough, fill it, bake it, cool it, eat it . . . lick the plate.

If you’ve never made a pie before, this is a lovely place to start. It’s a single crust pie and simple as can be. Tell me: what’s your favorite pie to eat during sweltering summertime?

Summer Strawberry Sour Cream Pie


Recipe by: Worth the Whisk
Yields: one 9-inch pie, serves 6-8

Pie Crust Ingredients: (or you can use an unbaked, prepared crust)
2 cups flour
1 teaspoons salt
1/4 cup cold lard (non-hydrogenated if available)*
1/2 cup cold butter, chopped
3-4 tablespoons ice cold water
1 egg and 1 teaspoon heavy cream for egg wash
*you can substitute vegetable shortening here if you wish, but I highly recommend the lard!

Filling Ingredients:
1 quart fresh strawberries
1 cup flour
1 1/4 cup sugar, reserve 1 tablespoon
Dash salt
1 cup sour cream (not fat-free)

Directions:
Preheat oven to 450 degrees F. To make the crust, pulse flour and salt together to combine. Add scoops of lard and pulse into the mixture has the texture of coarse sand, about 10 seconds. Add in chunks of butter and pulse until butter pieces are no larger than small peas, about 10 pulses. Add minimum amount of water and pulse on low. If dough remains crumbly and doesn’t come together, add another tablespoon of water. Add as little as is required to enable the dough to be rolled into a ball. Form the dough into a disk, wrap in plastic, and refrigerate for 20-30.

Roll disk of dough out to around 2 inches larger than your pie plate and transfer it, situating it in the plate. Fold the excess dough around the edges and crimp, trimming where necessary.

Hull and wash the strawberries and slice them in half. Set aside. Sift flour, sugar, and salt into a large mixing bowl. Add sour cream, blending until creamy. Gently fold in the berries without overmixing. Pour fruit into pie shell and spread to edges without packing down — there should be spaces throughout the filling. Sprinkle the top with the last 1 tablespoon sugar.

Bake the pie for 10 minutes, then reduce the heat to 350 degrees F (I leave the oven door open a minute during this period to let the temperature drop a little) and bake an additional 30 minutes or until crust is golden brown.

Broil the pie for 2-3 minutes to brown up the top. Allow to cool completely (4-5 hours in the fridge, I’d say) before cutting, and serve with fresh whipped cream or ice cream.

If you liked this post, please:
Subscribe to Willow Bird Baking
Follow Willow Bird Baking on Twitter
Follow Willow Bird Baking on Facebook
Give this post a thumbs up on StumbleUpon


ShareOther ways to share this post with friends!

Black and White Croquembouche

One of the key components to elegance is often simplicity. An elegant science experiment is one that arrives at a significant conclusion using a simple, clever process. An elegant math proof is one that uses straightforward logical turns to simplify what seems to be a complicated concept. An elegant dress is classic, easy, timeless. An elegant dessert is . . . the cream puff. Dressed in chic black and white for our elegant occasion, of course.

Cream puffs are the sort of thing people buy in tubs from the freezer section. I actually love those icy little things, but they pale (and shiver) in comparison to these homemade, creamy little clouds. The distinct taste difference isn’t the only reason you should make some cream puffs, though.

You should make them because they’re easy. They look fancy, they’re classy enough for company, they’re impressive — but they’re easy! Not just the cream puffs, either, but the actual mounted cream puff tower (the croquembouche) is easy, too! If you can put some cookie-like dollops of batter in the oven, if you can pipe some cream, if you can dip something in chocolate . . . you can make this recipe.

Imagine the look on your husband’s (or wife’s, or sister’s, or dog’s) face when you carry this beauty to the table, calmly announcing, “Dessert’s ready!”

Cream puffs are made with a simple cooked dough called pâte à choux. It’s quick as a whip to make, and then it’s simply piped onto parchment paper, the little peaks are dabbed down with a wet finger, and the dough is egg washed. After a bit in the oven, the puffs are ready for action. I always make my puffs the day before and freeze them, baking them for a few minutes out of the freezer the next day and cooling them before filling (and serving immediately). It may seem odd to freeze the puffs for just one day’s storage, but they’ll get soggy otherwise, so it really is best.

This here lovely tower of creamy puffiness is suffering from a delicious identity crisis. I opted for two flavors of puffs: puffs filled with vanilla cream and dipped in chocolate, and puffs filled with strawberry cream and dipped in white chocolate. They were both delicious and cute, but the consensus was that the vanilla cream puff was best. Feel free to make just one flavor, both flavors, ten different flavors — maybe even a rainbow croquembouche? You go for it!

For my last croquembouche, I used caramel as the building glue. It stuck a lot quicker and was easier to work with in that way, but cooled off too quickly and became too viscous. This time I used melted chocolate, and had the opposite experience. It didn’t harden quickly and was a little shakier during the build, but stayed melty throughout the entire process.

I think the best of both worlds is using chocolate but refrigerating the structure periodically to harden, so that’s what I’ve written into the recipe below.

If you love cream puffs but are used to defrosting them first, it’s time to step out on a limb, get into your kitchen, and construct something beautiful! Tell me: what’s the most elegant dessert you’ve ever made?

Black and White Croquembouche


Recipe by: Willow Bird Baking, with help from: Mike’s Table (strawberry pastry cream), Chef Lou Jones (vanilla pastry cream), Peter Kump and Nick Malgieri (cream puffs)
Yields: 45-50 puffs

Pâte à Choux Ingredients:
1 1/8 cups water
9 tablespoons unsalted butter
3/8 teaspoons salt
1.5 tablespoons sugar
1.5 cups all-purpose flour
6 large eggs
Egg wash (1 egg yolk and 1/2 cup heavy cream, lightly beaten)
chocolate for dipping (I used white chocolate bark for the white puffs and a combo of bitter- and semisweet chocolate for the brown puffs — the bark hardened faster, but you can use whatever you like)

Vanilla Pastry Cream Ingredients:
2 1/4 cups whole milk
6 large egg yolks
2/3 cup sugar
1/3 cup cornstarch
1 vanilla bean, split lengthwise (or 2-3 teaspoons vanilla extract)
2 cups heavy cream

Strawberry Pastry Cream Ingredients:
1/2 recipe of vanilla pastry cream (above)
scant 1 cup strawberries, hulled and chopped
1/16 cup sugar (half of a 1/8 cup measure)

Directions:
I love to watch this video from Martha Stewart anytime I begin a croquembouche, to visualize the process of making pâte à choux, filling puffs, and constructing the tower — take a look at it before you begin.

Make vanilla pastry cream: In medium bowl, whisk together milk, egg yolks, sugar, and cornstarch.

Put remaining 1 3/4 cups milk in a heavy, medium saucepan. Scrape in seeds from vanilla bean; add pod (or add vanilla extract here). Sprinkle remaining 1/3 cup sugar over the milk, letting sugar sink undisturbed to bottom. Set pan over moderate heat and bring it to simmer without stirring.

Temper the egg yolk mixture by adding 1/4 cup of the hot milk mixture to it while whisking. Then, while whisking, gradually whisk egg yolk mixture into the hot milk. Cook over moderate heat, whisking constantly, until pastry cream simmers and thickens, about 1 minute. Remove from heat, discard vanilla pod (if used), and whisk cream until smooth. Transfer to bowl, removing half to another bowl for the strawberry pastry cream, and press plastic wrap directly onto surface (I let it cool a moment first).

Make strawberry pastry cream: toss sugar with strawberries and set aside for 15 minutes. Then simmer them over medium heat for 10-15 minutes, until they begin to thicken a bit. Let cool. Add into 1/2 recipe of pastry cream set aside above and stir to combine well. Press plastic wrap directly onto surface of both bowls of pastry cream, chilling until cold, about 4 hours.

After chilling, whip heavy cream into soft peaks. Add about 1/2 cup of whipped cream into each pastry cream to lighten. Now carefully fold the rest of the whipped cream into the pastry creams (about half into each). NOTE: Pastry cream can be made in advance and refrigerated, wrapped well with plastic wrap on surface, for up to 3 days.

Make the pâte à choux: Combine water, butter, salt and sugar in a saucepan over medium heat. Bring to a boil and stir occasionally. At boil, remove from heat and sift in the flour, stirring to combine completely.

Return to heat and cook, stirring constantly until the batter dries slightly and begins to pull away from the sides of the pan. Transfer to a bowl and stir with a wooden spoon 1 minute to cool slightly.

Add 1 egg. The batter will appear loose and shiny. As you stir, the batter will become dry-looking like lightly buttered mashed potatoes. It is at this point that you will add in the next egg. Repeat until you have incorporated all the eggs.

Pipe the batter using a pastry bag and a plain tip. Pipe choux about 1 inch-part in the baking sheets. Choux should be about 1 inch high about 1 inch wide. Using a clean finger dipped in hot water, gently press down on any tips that have formed on the top of choux when piping. You want them to retain their ball shape, but be smoothly curved on top. Brush tops with egg wash while trying not to drip the wash down the puffs onto the pan (which could somewhat inhibit rise).

Bake the choux at 425 degrees F until well-puffed and turning lightly golden in color, about 10 minutes. Lower the temperature to 350 degrees F and continue baking until well-colored and dry, about 20 minutes more. Remove to a rack and cool (tip from a pro: poke each puff with a toothpick while cooling to release the steam inside. It shouldn’t cause your cream to leak, but will help the puffs stay crisp). Can be stored in a airtight box overnight, but I recommend, if you aren’t using them right away to create your croquembouche, that you freeze them. When you’re ready to use them, bake them at 350 degrees F for 5-6 minutes to refresh and recrisp them.

Fill your puffs: When puffs are cool, use a thin, plain tip to fill them generously with plain or strawberry cream (the strawberry cream will have chunks, so use a wider tip).

Assemble your croquembouche: Melt chocolates in the microwave per packaging instructions (chips are usually melted on half power in increments of 30 seconds, stirring after each). I run a bit of hot water into a large bowl and set my bowl of chocolate down into the larger bowl to keep it melty, but be careful not to get water in the chocolate, which would cause it to seize.

Dip each puff’s head into the chocolate (white or brown as desired), setting them right-side up on wax paper to dry. After you’ve dipped all of the puff tops, begin with the largest puffs, dipping the bottoms and/or corners as needed to build the base of your croquembouche on a plate. After building each level, stick the croquembouche into the refrigerator to harden the chocolate a bit before moving on. Sudden temperature changes aren’t ideal for chocolate and may change the color a little (though it didn’t for me), but I find this preferable to my tower collapsing!

Once the tower is built, serve immediately. I refrigerated mine for a few hours and was fine with the texture, but it’s better served as quickly as possible so the puffs don’t get soggy. Enjoy!


Need to start simpler? Try one of these shortcuts:
-Filling puffs with just one flavor of pastry cream instead of two.
-Filling cooled puffs with simple whipped cream instead of pastry cream.
-Serving puffs on a platter instead of mounted.
-Only using one kind of dipping chocolate.


If you liked this post, please:
Subscribe to Willow Bird Baking
Follow Willow Bird Baking on Twitter
Follow Willow Bird Baking on Facebook
Give this post a thumbs up on StumbleUpon


ShareOther ways to share this post with friends!

1 5 6 7 8 9