I was reading over the William Carlos Williams poem, “This is Just to Say,” again this weekend after a sweet reader made my Blueberry Lemon Cheesecake Cupcakes and thoughtfully sent me a picture. Those blueberry gems were the first entry on Willow Bird Baking, and I still remember the ice cold blueberries; the cool, dense crumb; the frigid frosting . . . all that cool deliciousness is what led me to paste Williams’ poem into the entry. What was really lovely about reading the poem again is the word that jumped out at me this time around.
This Is Just to Say
I have eaten
the plums
that were in
the iceboxand which
you were probably
saving
for breakfastForgive me
they were delicious
so sweet
and so cold
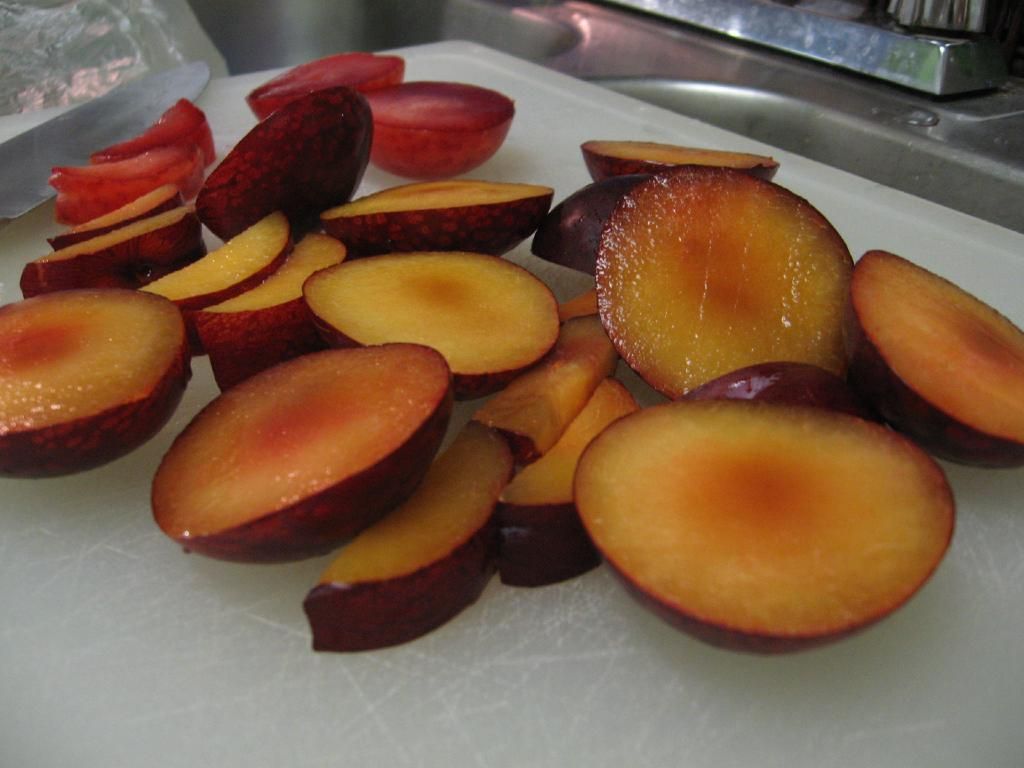
PLUMS. Ice cold plums. Purple orbs bursting with juice, beaded with water, basking in my colander. Bulging indigo skins covering deep orange-red flesh, plucked up to the cutting board and sliced with a splush. Plush, perfect, plump plums perforated between my . . . teeth. If only there were a p-word for teeth! But you get the idea, alliterated or not. I began fantasizing about performing great culinary feats with those delicious spheres.
A friend told me about an Original Plum Torte recipe she has fond childhood memories of. The recipe sounded delicious: cinnamon and sugar sprinkled over roasted plums inside a spongy cake. The recipe also sounded gorgeous: I love the look of naked plum halves baked until they bubble with fruity sugar. It’s a lovely presentation. I was sold.
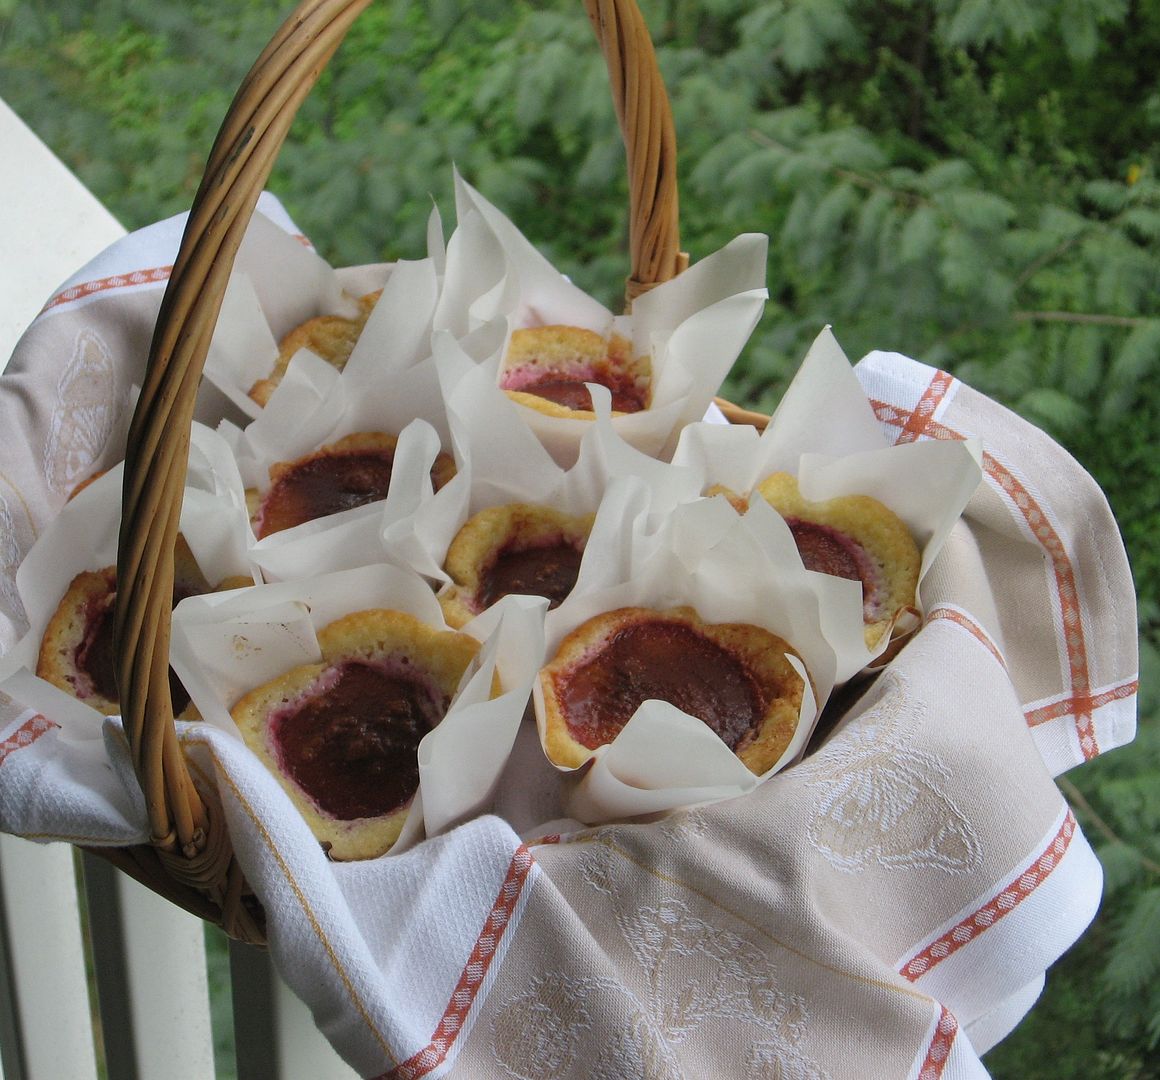
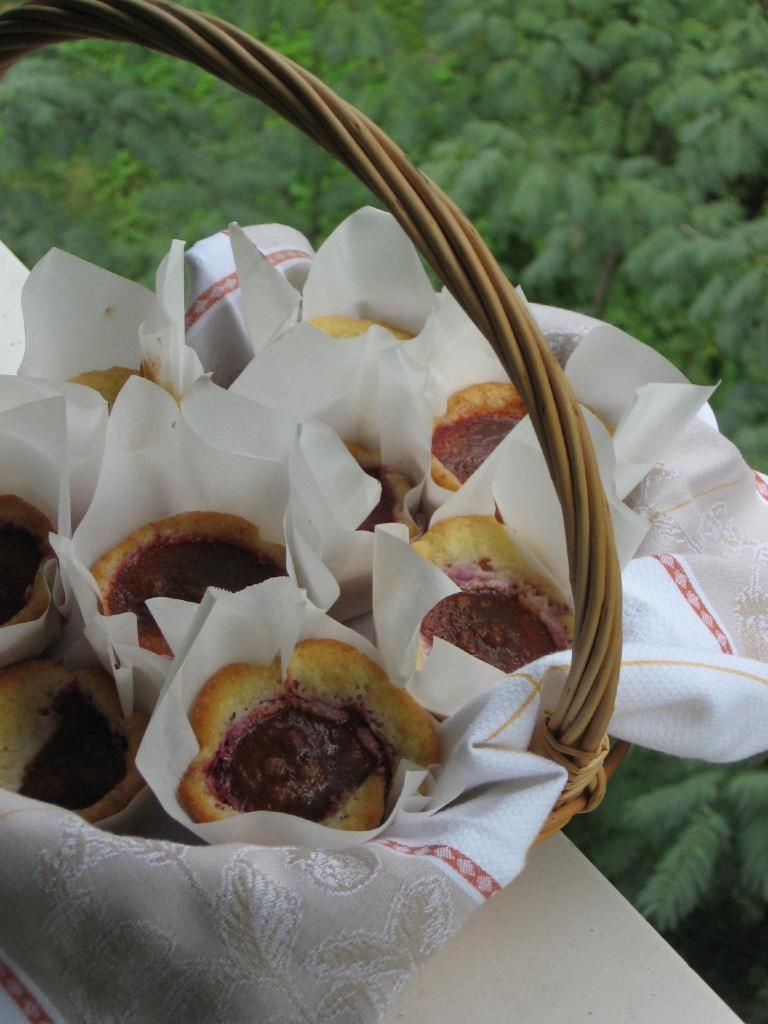
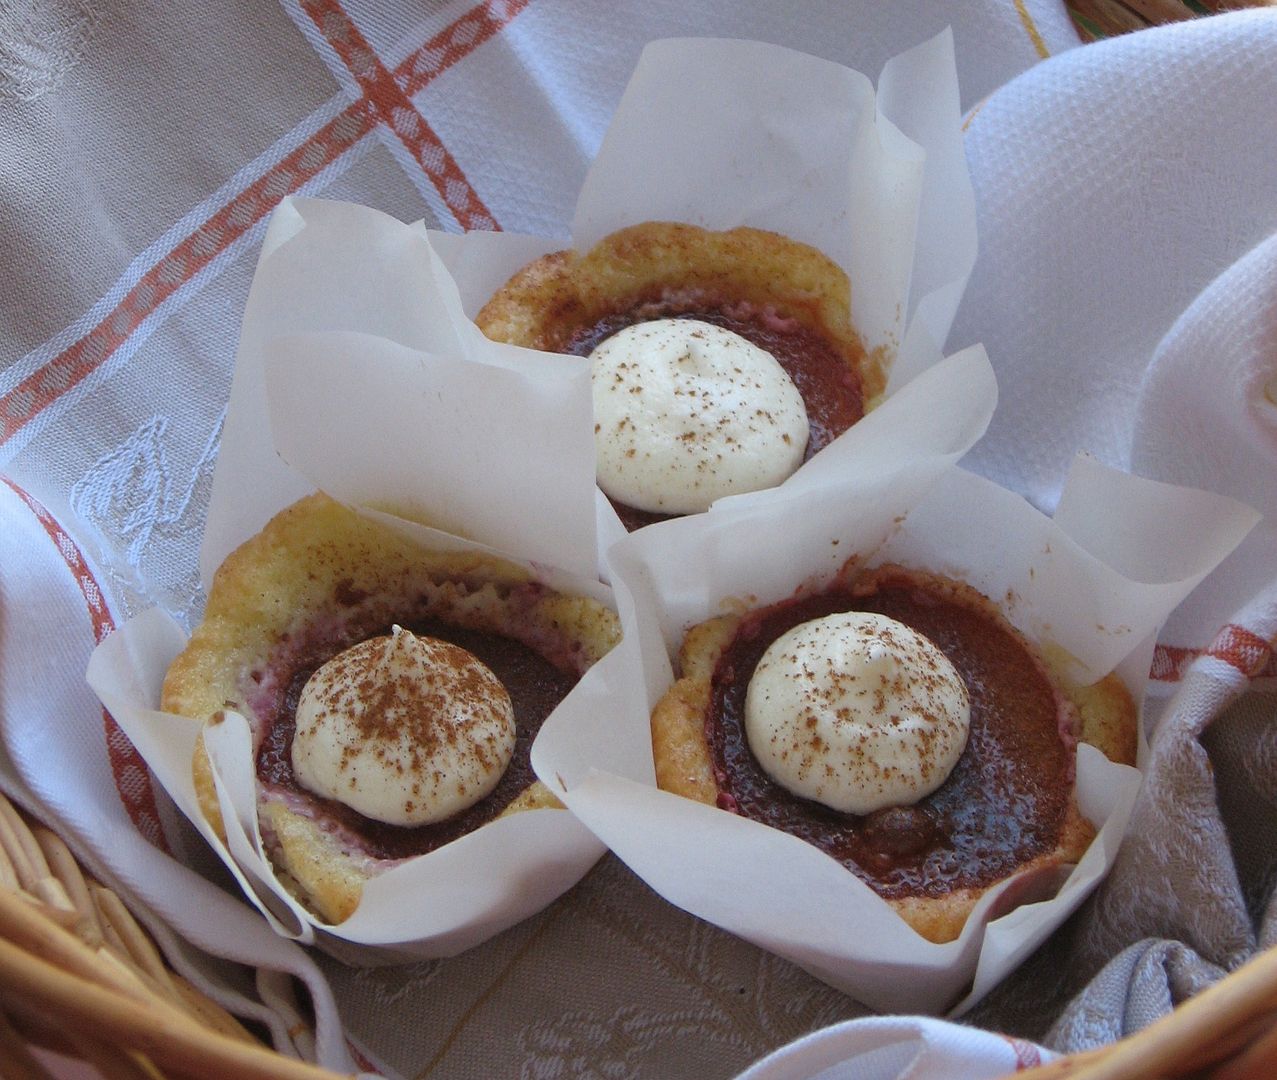
To add to the charm, I decided to turn the torte into rustic mini-tortes in parchment paper liners, topped with a dollop of Ricotta Cream Cheese Frosting and a dusting of cinnamon. I wanted to hand each person their own rich, juicy little plum, surrounded by cake and wrapped like a present in crisp paper.
The Ricotta Cream Cheese Frosting is just something I whipped up today. I wanted a creamy component to slather on like clotted cream on a scone. I decided to use ricotta because I love the texture and flavor, especially with fruit, and I wanted to give the mini tortes a rustic Italian feel. I was sorry more of the ricotta flavor didn’t come through — it’s just so mild, and perhaps I shouldn’t have added vanilla — but the cheese did add a rich facet to the flavor and mellow the sugar. This ensured that the frosting had just the right amount of sweetness for this hearty dessert.
I say all this like it was a given that these were going to be amazing. But really, I was nervous. I bought big plums; what if the torte didn’t rise around them enough? What if they simply fell apart when unwrapped (some were a little messy)? What if Ricotta Cream Cheese Frosting is disgusting? My lovely friend Katie can attest to my uncertainty — today at an amazing Beth Moore simulcast, we caught up after not seeing each other in over a year! While chatting about our lives (by the way, Katie bakes, so expect some joint baking endeavors! Yay!), I mentioned these mini tortes only to immediately disclaim: they could be kitchen failures, I hadn’t tried them yet, they looked wonky, and so on and so forth.
Thankfully, my fears have now been allayed. Every beautiful, splushy Plum and Cream Mini Torte I bit into (I won’t bother telling you how many I ate . . . ahem) resulted in mmmms and ahhhhs. Sometimes it’s hard to read between the lines on a food blog and decide if a given dish was really fantastic or just good. In the interest of clearing up confusion: these are fantastic, and perhaps one of my favorite desserts of all time. And since the recipe is so simple (so glad my friend shared it), you should definitely give them a try. Hope you love them!
Plum and Cream Mini Tortes
Recipe By:–The New Elegant But Easy Cookbook, by Marian Burros and Lois Levine (plum torte, adapted by me)
-Me (frosting)Yields: About 12-15
Mini Torte Ingredients:
1/4 pound (1 stick) unsalted butter, softened
3/4 cup plus 1 or 2 tablespoons sugar
1 cup unbleached flour, sifted
1 teaspoon baking powder
2 eggs
Pinch salt
6-8 halves small, pitted Italian (prune or purple) plums
1 teaspoon cinnamon or more, to tasteRicotta Cream Cheese Frosting Ingredients:
4 ounces cream cheese, softened
1/4 cup butter, softened
3/4 cup ricotta cheese
1/2 teaspoon vanilla
2 1/2 cups confectioners’ sugar
1/4 teaspoon cream of tartarDirections:
1. Arrange a rack in the lower third of the oven. Preheat the oven to 350 degrees. Line a cupcake pan with paper liners or parchment paper.2. Cream the butter and the 3/4 cup of sugar. Add the flour, baking powder, eggs, and salt and beat to mix well. Spoon about a tablespoon of batter into each well. Resist the urge to overfill — the batter will rise! Gently press a plum, skin side down, into each well. Mix the cinnamon with the remaining 1 or 2 tablespoons of sugar and sprinkle over the top.
3. Bake for about 18-20 minutes, until a cake tester inserted in the center of the cake part comes out clean. Remove from the oven and let cool; refrigerate or freeze if desired. (If not adding frosting, serve as follows: let the torte return to room temperature and reheat at 300 degrees until warm. Serve plain or with vanilla ice cream.)
4. Make the frosting: mix all ingredients together until fluffy. Pipe or dollop frosting onto the center of each plum mini torte.
Notes: Try to buy small plums and cut them about 1/4 inch away from the center or a little more. You want small rounds to fit in the center of your mini-tortes without making the cake spread too much. If the cake spreads too much, it won’t snuggle around the plum as it rises and may fall apart when you peel off the paper.
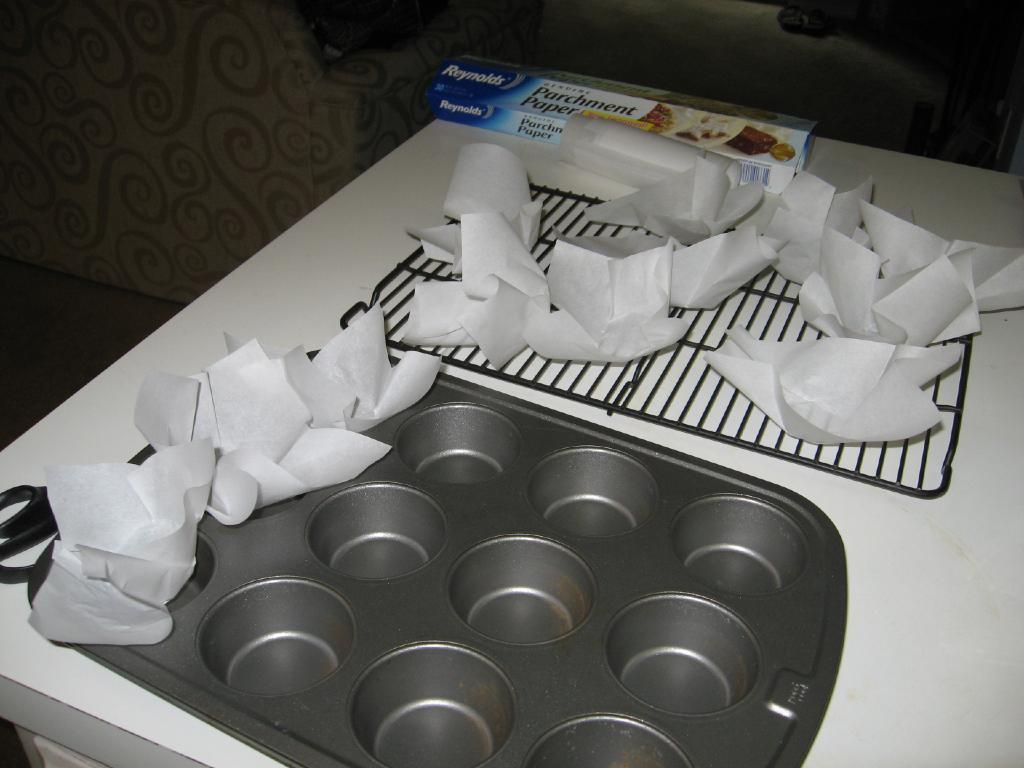
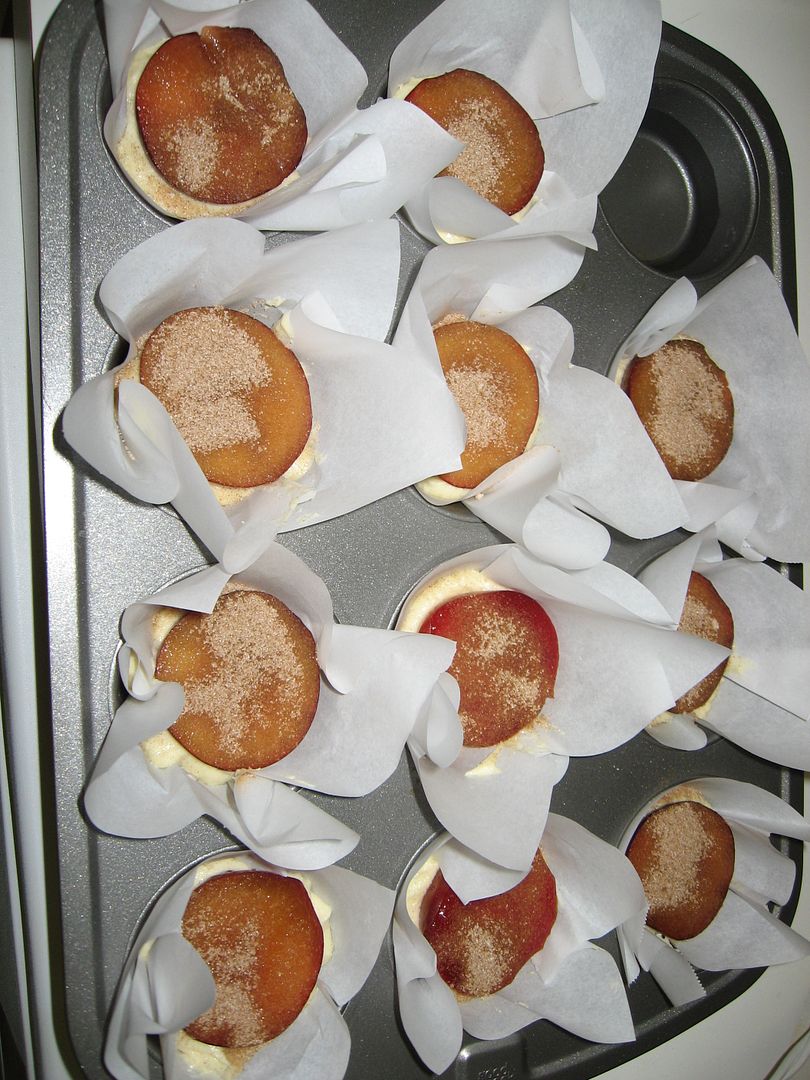
Making my parchment paper liners and readying my mini tortes for the oven.
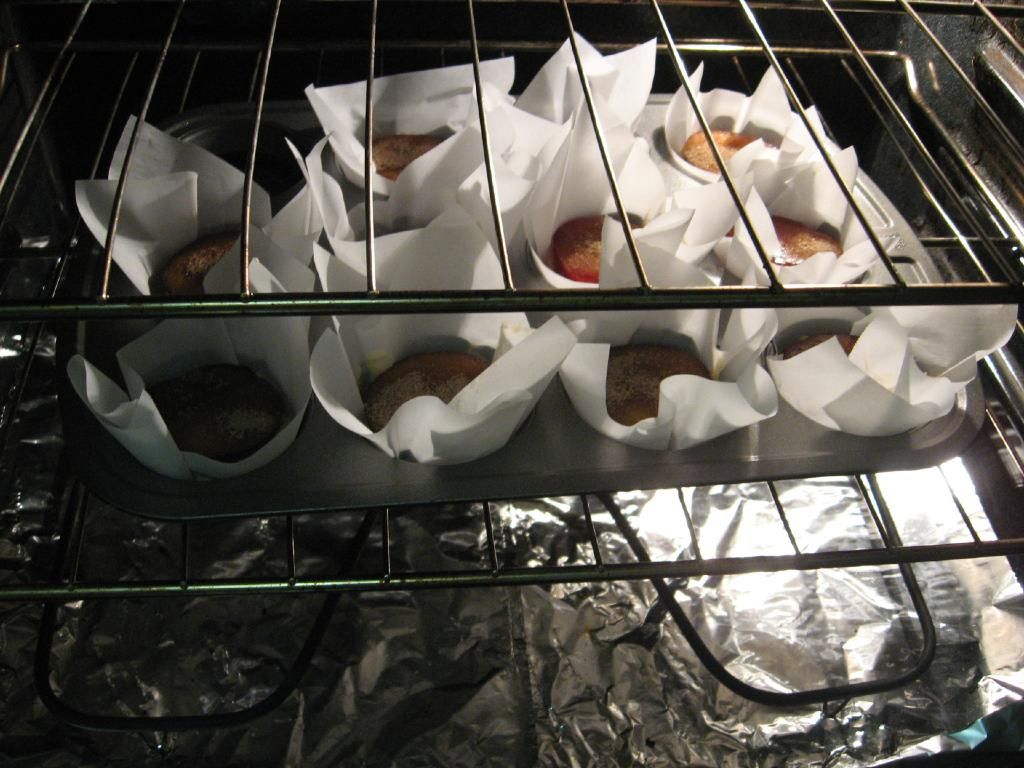
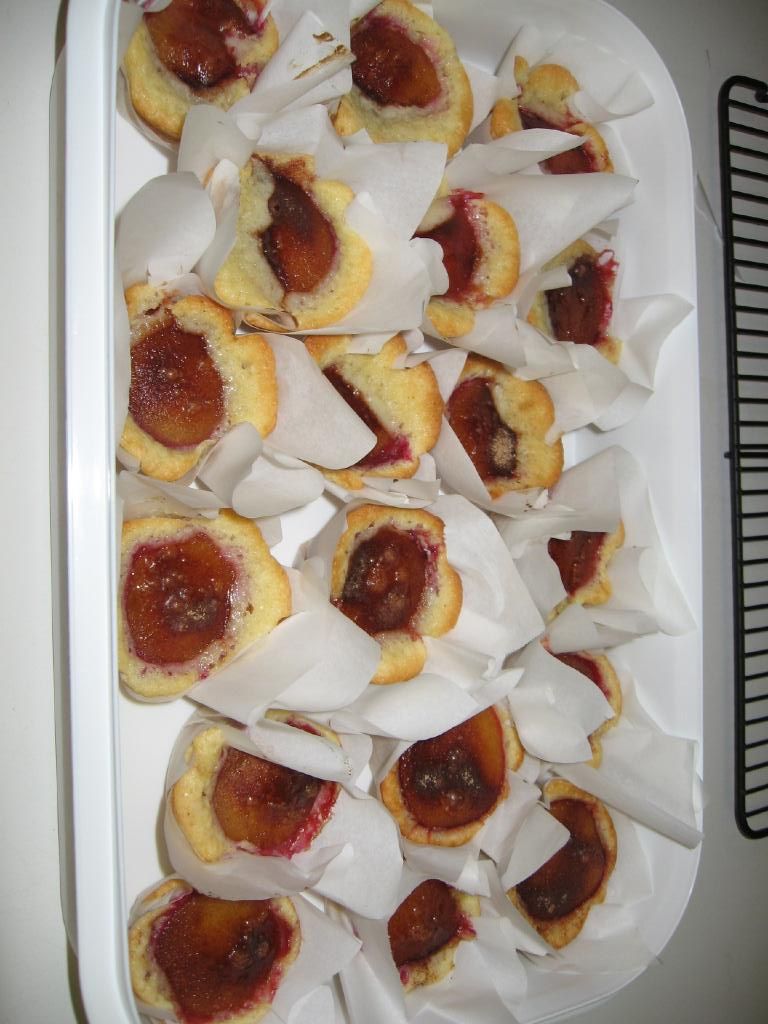
Baking and fresh out of the oven.