pumpkin

Pumpkin Cheesecake Stuffed Snickerdoodles

A few evenings ago I was driving home on Harris Boulevard straight into the hot-gold sunset. The windows were rolled down — enough so that the tepid autumn air rushed into the car across my forehead, but not enough to assault me with a face full of blonde tangles. My favorite 80s song tumbled out of the speakers and vibrated the swirling air around me.

I acquiesced: okay, fall.

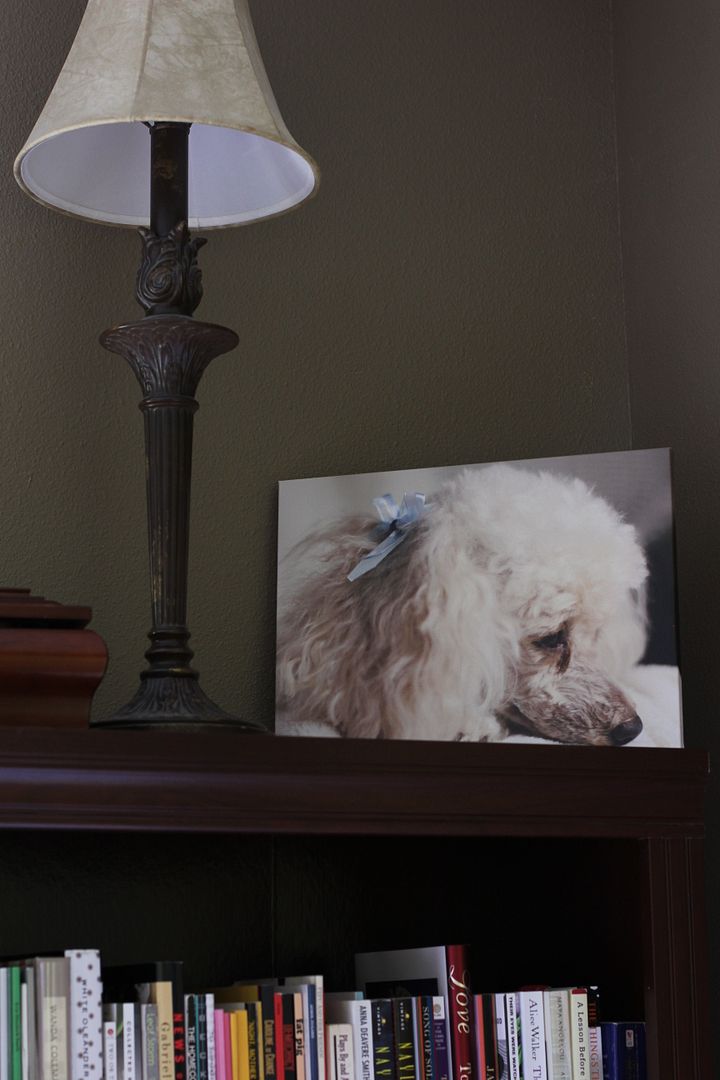
I’m a summer girl. Cold air feels like a heavy restraint: every trip outside with Byrd involves shrugging on two coats, two pairs of pajama pants, a scarf, and some mittens. I have to wrangle her into her snuggie (what? don’t act like you don’t own a dog snuggie) and wrap her in my scarf. It feels like I’ve doubled in weight as I lumber down the stairs like an abominable snowperson (with an abominable — but adorable — little snowdog in my arms).

It’s harder to move. The ice-edged air is harder to breathe. It takes longer to get up the gumption to do something as simple as take a walk.

Besides the discomfort, there’s that slate winter sky. Every day is a sloshy gray, and the sky seems lower somehow. Some summer days breeze in with mountainous clouds; their enormity makes the ocean of blue sky seem endless. In winter, though, the clouds form a heavy wool blanket that seems to sit just overhead. All summer we drift about in miles of free space; all winter we’re squashed like heavily-clothed little bugs.

I dislike winter so strongly that even on the most oppressively hot days this summer, I refused to complain. Sweat? Okay. Sunburn? No problem. Heat stroke? I’ll deal. Because the alternative is disgusting, wet, despicable, muddy, gray, depressing winter.

Facebook friends pined all summer for cooler weather and it was all I could do to avoid responding, “If you wish away my summer, I will find a way to haunt you all. winter. long.”

I dislike winter so strongly that every year, I initially dislike fall. Fall is a premonition of winter’s evil, marching stolidly across the globe toward us, indifferent to our terrified screams–

Okay, well that’s a little much. But fall means winter’s coming, and that makes me sad. Instead of accepting the advent of cooler air, I hang on to summer as long as possibly.

Others get out their boots while I stubbornly continue wearing my bohemian beach flip flops. I wear tiny sundresses, budging in my resolve only to slip on a sweater with a scowl when the temperature drops to 40 degrees each evening. I heat my house like the tropics and continue wearing my beloved nightgowns. I eat ice cream sundaes.

But every year, things start to happen that weaken my resolve. I’ll realize that I can light my fir tree and cinnamon spice candles at the same time and make my apartment smell like Christmas. I’ll see that the Southern Christmas Show (only my favorite event of the year!) is coming to town. I’ll remember the awesome sweater I was sad to put away last spring.

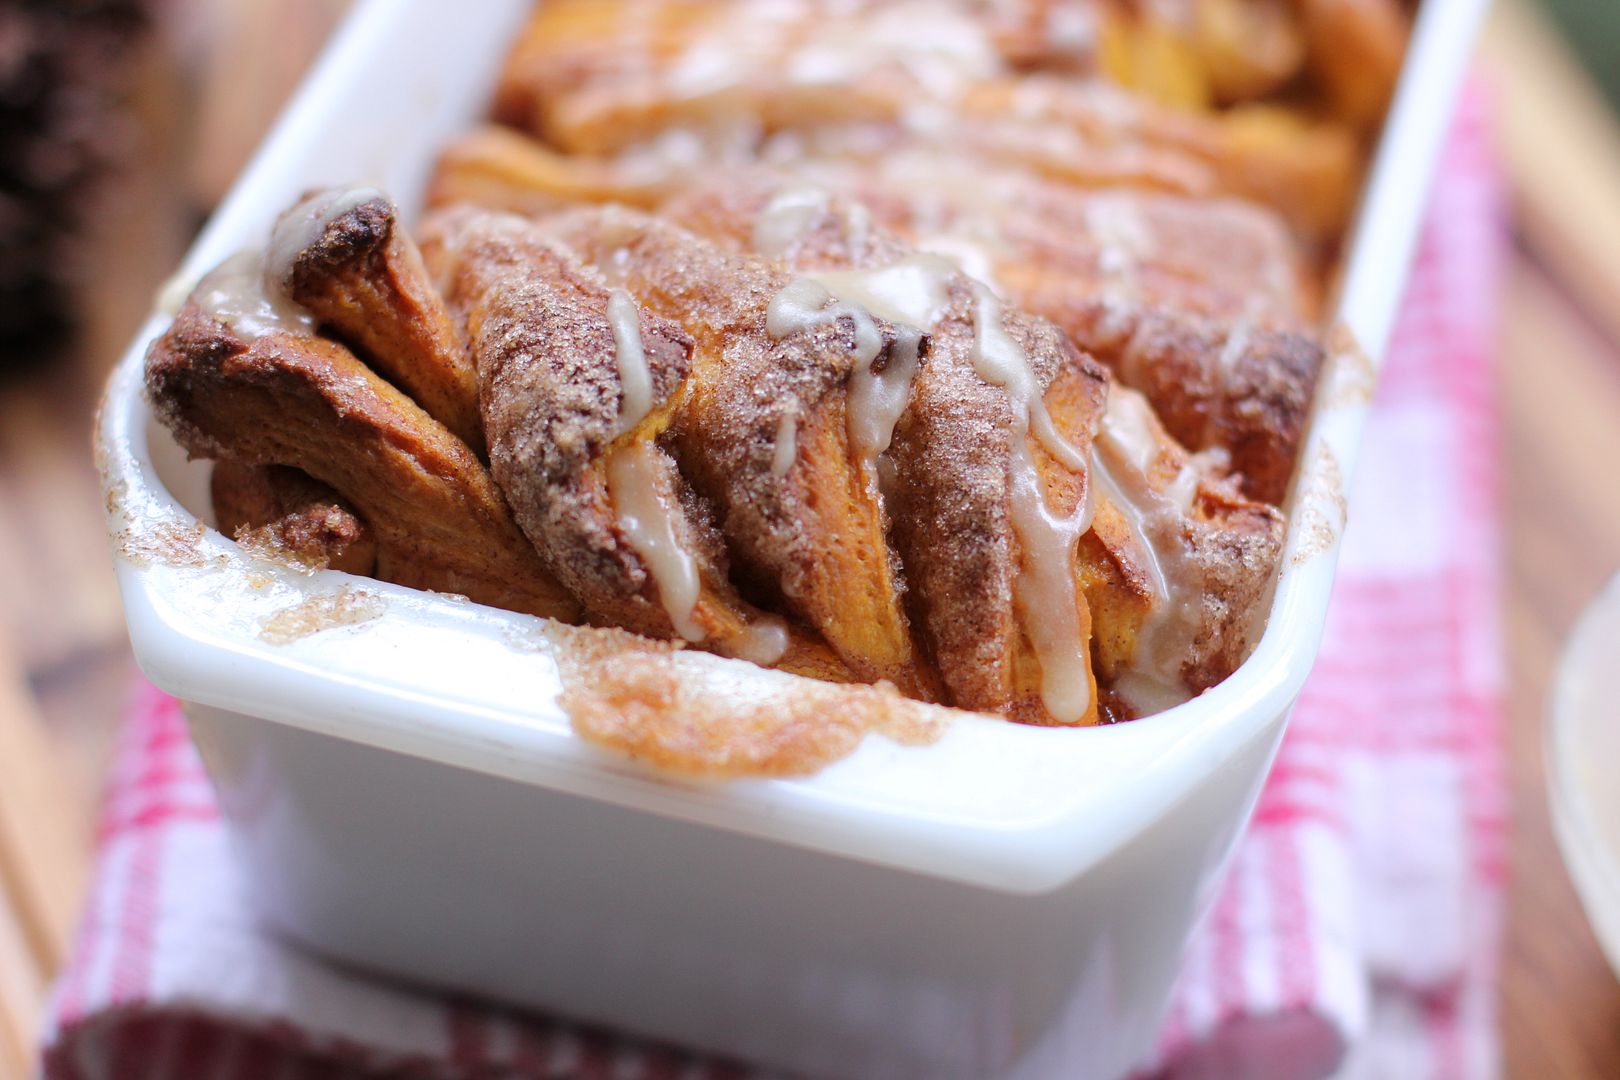
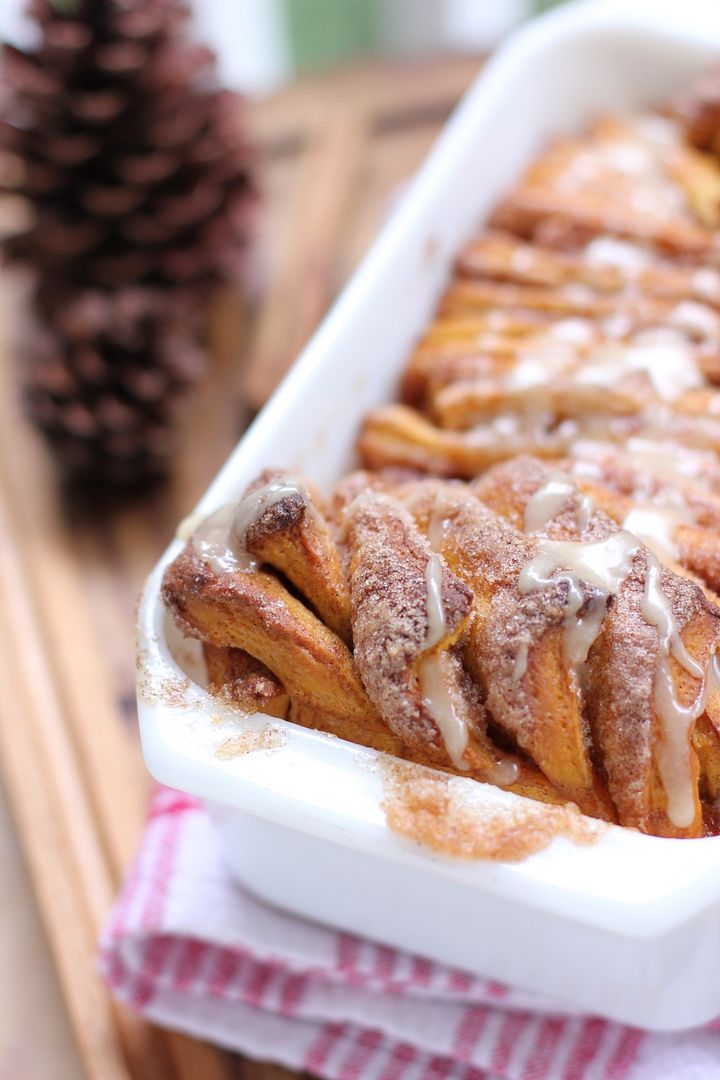
And finally, most importantly of all, I’ll realize there’s a whole new season of recipes to be created. Y’all know I bake anything and everything with pumpkin as soon as the first can hits the shelf. I love apples and nuts and cranberries, but there is no ingredient that winterizes the summery cockles of my heart (wait, that doesn’t sound like a good thing?) as much as that gourd.

Eventually there comes a moment when I accept the inevitable. Jamming out in my car a few evenings ago, I finally welcomed fall. And you know, I might have even been a little joyful to do so.

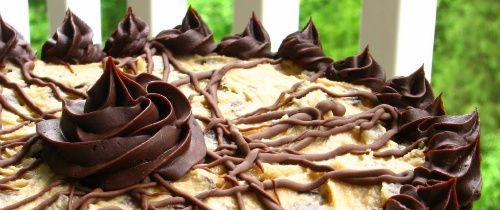
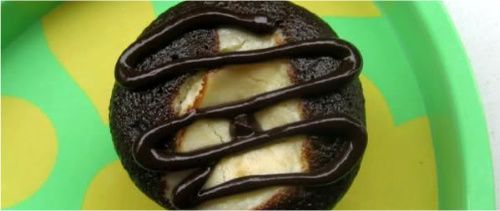
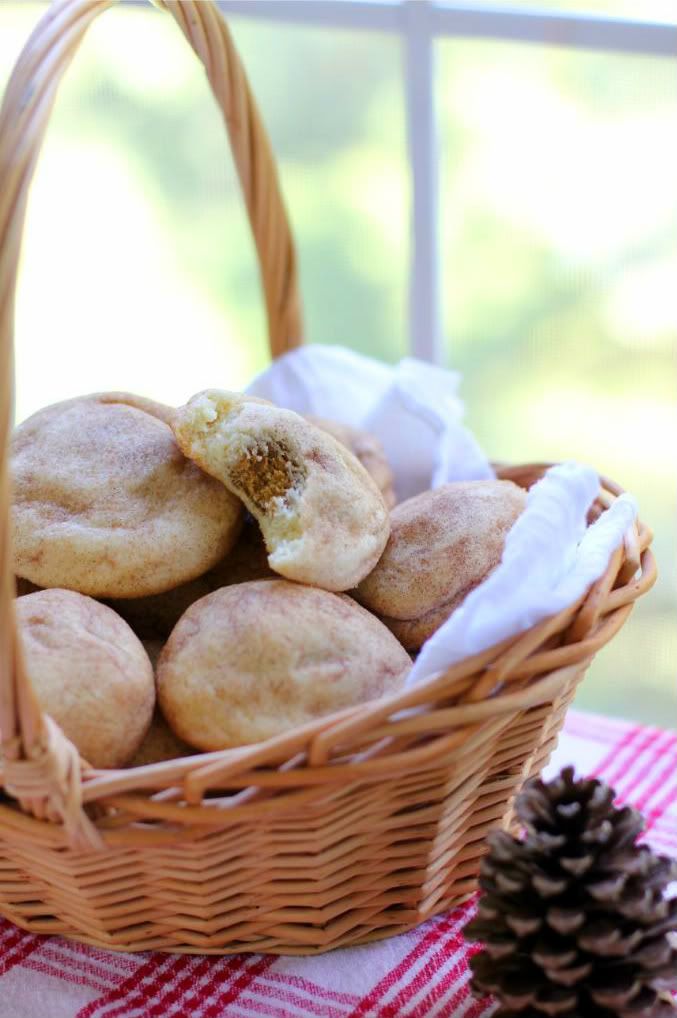
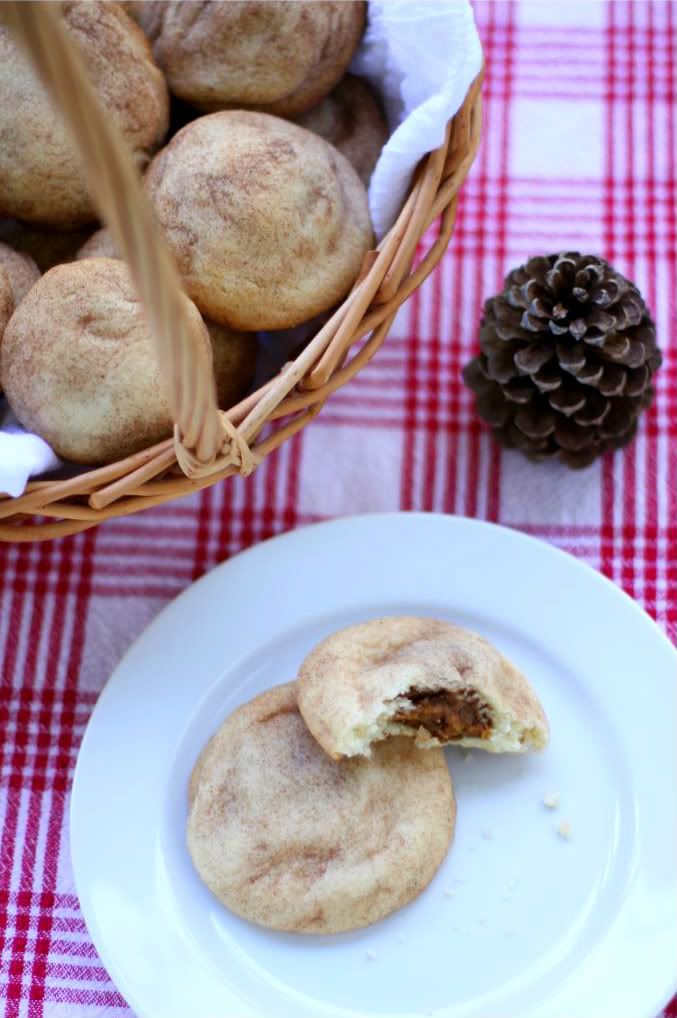
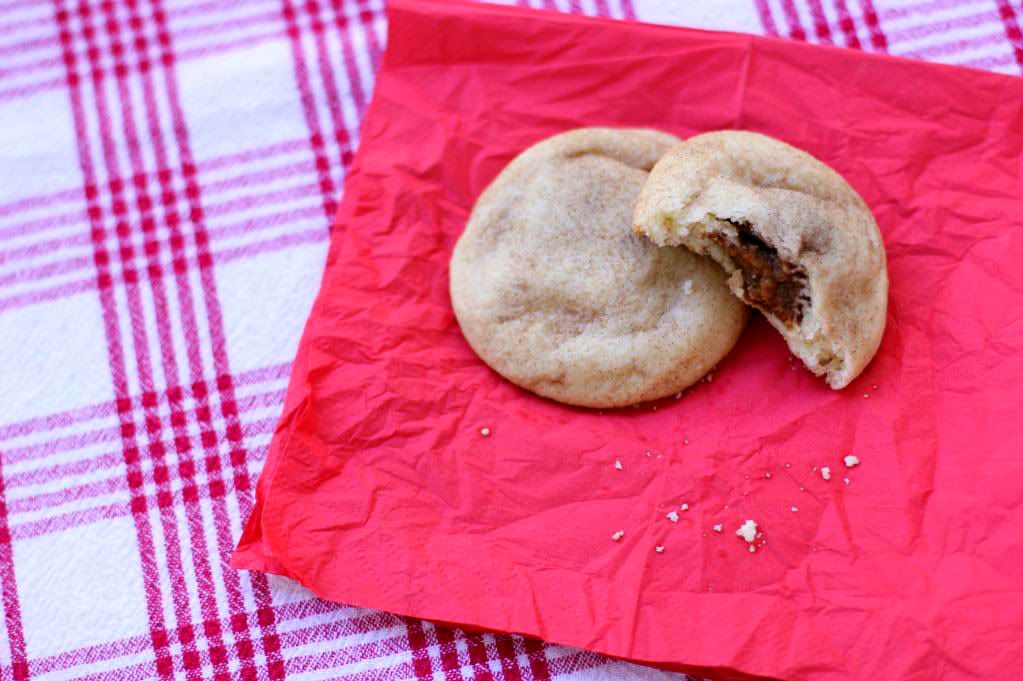
Whether you’re still having trouble accepting the change of seasons or not, these cookies will make you joyful. I don’t say this often because it totally ruins your street cred if you just throw it out there about every recipe you create, but these cookies are one of the best things I’ve ever made. Warm snickerdoodles are already the cinnamony, sugary bees’ knees, but when you stuff them plumb full of an autumn-spiced pumpkin cheesecake mixture, they become otherwordly. Who needs summer?

What’s your favorite season?

Pumpkin Cheesecake Stuffed Snickerdoodles


Recipe by: Willow Bird Baking, cobbled together from Whole Foods (filling) and Sunset, 1998 (via Bakergirl) (cookies)
Yield: about 30-35 large cookies

Make these cookies as soon as you can — they are incredible! Warm, cinnamon-sugar snickerdoodles surround a creamy ball of pumpkin cheesecake spiced with graham cracker and gingersnap crumbs. These cookies are crumbly, buttery, melt-in-your-mouth nuggets of autumn love. Sure, they have a lot of fat and a lot of sugar — so reserve them for a special occasion. But don’t skimp! They’re worth it. Also, while the cookies look fancy, they’re quite simple to make. Store leftovers in an airtight container in the fridge and heat them for 20-30 seconds or so before serving them with a tall glass of milk.

Snickerdoodle Ingredients:
1 cup butter, softened
1 cup vegetable oil
3/4 cup granulated sugar
1 cup powdered sugar
2 large eggs
4 1/4 cups all-purpose flour
1 teaspoon baking soda
1 teaspoon cream of tartar
1/2 teaspoon salt
1/2 cup granulated sugar + 1 tablespoon cinnamon for rolling cookies

Filling Ingredients:
2 cups white chocolate chips (about 10 ounces)
1 cup pumpkin puree
1 1/2 cups finely ground gingersnaps
1 1/2 cups graham cracker crumbs
4 tablespoons powdered sugar
1/2 teaspoon ground cinnamon
Pinch of orange zest (I used a dash of orange extract)
1 (8-ounce) package cream cheese, softened

Directions:
First, make the pumpkin spice truffle filling. Melt the white chocolate chips in the microwave on half power. Start with 1 minute and stir. Continue to heat the chocolate in 15 second intervals, stirring well after each to aid the melting, until it is smooth (be careful not to overheat). Set this aside to cool slightly. In the meantime, mix the pumpkin, gingersnap and graham cracker crumbs, confectioners’ sugar, cinnamon, orange zest or extract, and cream cheese together. Add the white chocolate and mix well until thoroughly combined. Transfer the mixture to the refrigerator to chill and firm up. In the meantime, make the snickerdoodle dough.

Mix together the butter, vegetable oil, granulated sugar, powdered sugar, and eggs in a large bowl. In a separate large bowl, whisk together the flour, baking soda, cream of tartar, and salt. Add the flour mixture into the butter mixture in 3-4 additions, mixing until just combined between each. Place the finished dough in the refrigerator to chill. While the cookie dough chills, roll pumpkin mixture into balls and place the balls on a wax paper lined baking sheet. Cover, and freeze until firm (about 1 hour).

In a small bowl, whisk together 1/2 cup granulated sugar and cinnamon. Preheat oven to 375 degrees F. Take a few pumpkin balls out of the freezer at a time to work in small batches (so they stay firm). Scoop out about a tablespoon of chilled cookie dough. Press a frozen pumpkin cheesecake ball into the center, then cover with another bit of dough, working the dough around the whole ball. Roll in cinnamon-sugar and place on a greased baking sheet. Repeat the process, placing cookies 3-4 inches apart. If cookie dough gets too soft, re-chill it for a bit and continue working. I made sure to stick it back in the fridge during any downtime (like when the cookies were in the oven).

Bake for 12-15 minutes, or until edges are slightly browned. Let the cookies cool on the pan for a few minutes before removing them to a cooling rack to cool completely.

If you liked this post, please:
Subscribe to Willow Bird Baking
Follow Willow Bird Baking on Twitter
Follow Willow Bird Baking on Facebook
Give this post a thumbs up on StumbleUpon


ShareOther ways to share this post with friends!

Easy Sopapilla Pumpkin Cheesecake Bars

There’s a banner that hangs above the whiteboard at the front of my classroom. It’s about six feet long and so high that you can see it from anywhere in the room — unless you’re hiding under my desk, I guess, but why would you be doing that? You’re just asking for a behavior tally.

I made the banner by hand, writing its message (which comes from a book I read before I started teaching) in huge blue block letters: THERE ARE NO SHORTCUTS.

For most of my students, middle school is just the right time to be confronted with this reality. New 6th graders walk into my classroom fresh from the cottony, comforting cocoon of elementary school. Their elementary school teachers did a little more hand-holding, offered a little more amnesty. It’s not because they were softies; rather, it’s because students aren’t typically ready to be independent learners at that point in their development. Some of my 6th graders aren’t ready when they first meet me, either — but it’s my job over the course of two years to get them there.

Sometimes it happens the hard way. I can see the surprise in their eyes when I give them their first zero on a homework assignment. They stammer, “But my printer was broken! I couldn’t print it!” I ask if they followed the advice given at the beginning of the year to find a “printer buddy,” a classmate willing to print for them in case of technical difficulties. The blank stare I get in response speaks volumes. I pencil in the zero, and as I move along briskly to the next student, there’s a heavy lesson being learned in my wake.

They don’t quite know what hit them, but if they asked, I could tell them: it’s responsibility. The whole weight of it just fell on their little shoulders! It feels like a heavy load, but actually, they can manage that zero. In doing so, in fact, they get used to managing (and working to prevent) discomfort, disappointment, and failure. They get used to making their own choices and experiencing the results. They become independent learners.


This was supposed to be a drizzle, but I got carried away.

Teaching them that there are no shortcuts (you just have to buckle down and complete the work, study for the tests, take ownership of your learning experience) is invaluable, but I also work with some kids who need a different message.

There are a few kids every year who come in with everything color coded. Their handwriting is perfect. They create mile-high stacks of flashcards before every quiz. It’s a teacher’s dream — until you notice the tiny cracks in their morale that are widening under pressure. You hear that they’re agonizing over their homework for hours to make it perfect, or you see them tearing up over a few missed points on a quiz. You feel their tension when you confer with them about their essay. These kids are the perfectionists. I empathize with them because I’m a perfectionist, too. I know what a heavy load it is to bear.


Drenched. This is too much honey, but it looks nice.

Perhaps this sounds hypocritical considering the first half of this post, but for the perfectionists, my message is often: THERE ARE SHORTCUTS. While it’s not a message I’d want to post on the wall of my classroom (the perfectionists are a small minority, after all), it’s a crucial one to convey.

These are children who need to be given permission to give 80% rather than trying their “best,” which is often overkill. They need help scaling their efforts down for smaller assignments with lower point values, and saving their ardor for important endeavors. They sometimes need advice, believe it or not, on how to relax.

One of my college English professors said it best — and I repeat this to my students every year — when he said something to the effect of, “Your cat will still love you if you don’t make an A.” The perfectionists need to know that there’s life beyond working hard for the sake of working hard. This literally didn’t sink in for me until after college, when I tried my hardest at something and for the first time, failed miserably — but that’s a story for another day. For now, I just want to tell you: THERE ARE SHORTCUTS.


I ate this.

Last winter I bought some pumpkins to chop in half, seed, roast, and strip for pumpkin puree. It was lovely to work with the pumpkins, but I did it mostly for the sake of having made the dish completely from scratch. I was in the middle of Project Food Blog and certainly didn’t want to take any unnecessary shortcuts. There’s nothing wrong with that — except that it was another hour in the kitchen, another mess to clean up. Did I really have to do all of that just to be “perfect”? Probably not: America’s Test Kitchen determined with taste tests that people can’t really differentiate between canned and fresh pumpkin in a recipe.

It’s not that there’s no point in ever making things from scratch. Apart from being able to fully control how you nourish your body, you gain confidence by making something beautiful from a collection of raw ingredients. Every now and then, though, when a simple and satisfying dessert is your primary goal, there are shortcuts. In this recipe, for instance, two cans of premade crescent roll dough and some canned pumpkin make a gorgeous autumn treat in 40 minutes flat. Enjoy a restful recipe now and then.

Where do you take shortcuts?

Easy Sopapilla Pumpkin Cheesecake Bars


Recipe by: Willow Bird Baking, using adapted versions of Pillsbury’s Sopapilla Cheesecake Bars and Philadelphia’s No-Bake Pumpkin Cheesecake
Yield: about 15-20 bars

I first saw the recipe for Sopapilla Cheesecake Bars on Cookies and Cups and decided to give them some pumpkin love. In these bars, two layers of premade crescent roll dough sandwich a thick layer of simple pumpkin cheesecake — it couldn’t get easier and quicker! The top bakes into a crisp, buttery cinnamon-sugar “sopapilla.” I served the bars heated up a few seconds (just to remove the chill), sprinkled with toasted pecans, and drizzled with a little honey.

Bar Ingredients:
2 cans crescent rolls
2 (8-ounce) package cream cheese, softened
2 cup canned pumpkin
5/8 cup sugar
2 teaspoon vanilla extract
2 teaspoons ground cinnamon*
1/4 teaspoon ground allspice*
1/2 teaspoon nutmeg*
1/2 teaspoon ginger*
*or substitute 2 teaspoons of pumpkin pie spice for these spices.

Topping Ingredients:
6 tablespoons butter, melted (for topping)
1/2 cup sugar (for topping)
1 teaspoon cinnamon (for topping)

Optional Extras:
honey
toasted pecans (see directions below)

Directions:
Preheat oven to 350 degrees F. Grease a glass 9×13 inch baking dish. Unroll one can of crescent roll dough (all in one piece) and lay it in the dish, pressing it out to cover the bottom and pinching any seams together.

In a large mixing bowl, beat together the cream cheese and sugar until light and fluffy. Add pumpkin, vanilla, cinnamon, ginger, nutmeg, and allspice, and beat to combine. Spread this mixture over the crescent roll dough in your pan. Unroll the other can of crescent roll dough and lay it over top of the pumpkin cheesecake mixture (I actually found it easier to lay it on some plastic wrap secured over a cutting board — this gave me a surface on which to pinch the seams closed and make it into one big rectangular sheet. I then used the plastic wrap to “flip” it carefully over onto the cheesecake mixture).

In a small bowl, whisk together 1/2 cup sugar with 1 teaspoon cinnamon. Pour melted butter over top of crescent roll dough and sprinkle cinnamon and sugar mixture evenly across the surface. Bake for 30 minutes or until golden brown. While the bars bake, you can also toast the pecans on another rack — just spread them out in a single layer on a baking sheet and toast for about 6 minutes or until fragrant, stirring about halfway through the cook time. Transfer nuts to a plate to cool.

Let bars cool completely before covering them and placing them in the refrigerator to chill for at least a couple of hours (I left mine overnight). Cut into squares, heat for just about 20 seconds to take off the chill, and serve with a drizzle of honey and a sprinkle of toasted pecans.

If you liked this post, please:
Subscribe to Willow Bird Baking
Follow Willow Bird Baking on Twitter
Follow Willow Bird Baking on Facebook
Give this post a thumbs up on StumbleUpon


ShareOther ways to share this post with friends!

Pumpkin Spice Pull-Apart Bread with Butter Rum Glaze

So I’m currently joining the rest of the blogosphere in doing a happy dance and singing, “Pumpkinnnnnnnn!”

Before I gush about this Pumpkin Spice Pull-Apart Bread, though, I have to tell you about my other Pumpkin: my little pumpkin-wumpkin fluffypants.


…no fluffypants, here.

Pets make people weird. One day you’re a normal, reasonable adult that people can take seriously. Then you get a pet.

Suddenly you’re schnookie-wookums-ing, buying them furniture that is bigger and more expensive than your own, dressing them up in Santa hats for the annual Christmas card, and giving them their own theme posts on your blog (Caturday is the best day!)

I’ve been a little weird from the beginning, so when I got my pets (Byrd the toy poodle and Squirt the red eared slider), all bets were off. Sure enough, a couple of years ago I got this idea. You’re going to make fun of me, so let’s just get this over with.

I decided to, um, commission a painting of my pets.


Here’s that pull-apart bread again to distract you from what I just said.

I would try to defend myself, but I know plenty of you are in the process of making a birthday cake for your cat or buying your dog one of these right now. You don’t have even a millimeter of room to talk. Ha!

Anyway, the painting was going to be an ironic interpretation of Grant Wood’s American Gothic. It would have the same surreal quality, but look something like this:


Don’t worry, Squirt’s happy. He always frowns.

The painting unfortunately never came to fruition, but I got an email a couple of weeks ago that revived the dream. It was from Easy Canvas Prints, a company that transforms pictures to canvas. They asked if I might like to create a canvas from one of my photos and write up a review.

I often turn down product reviews because they don’t fit my vision for Willow Bird Baking (I could talk for hours about my philosophy on blog-brand relations and the role of bloggers in journalism and integrity, etc., but I’ll spare you). But when I’m asked to review a product I’m genuinely excited about, I have no problem giving it an honest try.


I want to give this an honest try, too. Or a dozen honest tries.

Easy Canvas Photos offered me a free small canvas print or a discount on a larger one to review. I chose to get a larger one and, though I seriously considered printing a big ol’ cheesecake on it, decided to finally create that pet portrait. Thankfully, my new camera had just been ordered and Byrd had a grooming appointment scheduled. Once she was coiffed, we had a little photo shoot.

Some of the photos were, um, less than canvas-worthy:


Really, Byrd? Really?!

We finally got a good one, though, and ordering my canvas took literally minutes. Once you choose a canvas size, you upload your photo. The site determines if it’s high enough quality for the canvas so you don’t have to wonder. You then choose how to have the canvas wrapped (you can get a solid color on the sides of the canvas, or let the image wrap around the edges — I chose the latter). And just like that, your work of art is finished.

When my canvas arrived in the mail, I was overjoyed with it. It’s high quality and downright adorable. If I weren’t just about as poor as a pile of dirt (and if I had infinite patience) I would put a bowtie on Squirt and take a billion photos (“FLIPPIN’ HOLD STILL AND WILL YOU GET YOUR HEAD OUT OF YOUR SHELL!!”) to make one of him, too. Maybe someday.

Want to see how it turned out?


Awwww. Sweet haircut thanks to Tami at the Dog Salon.

In short, my experience with Easy Canvas Prints was a great one. It was an easy process with reasonable prices and a lovely result. I think you should go immortalize your pumpkin-wumpkin, too.

Now about that other pumpkin — Pumpkin Spice Pull-Apart Bread! Hopefully you’ve seen this lovely loaf being rebaked and reposted around other blogs, but Willow Bird Baking is the home of the original recipe. I cobbled it together from pumpkin yeast dough and cinnamon pull-apart bread recipes and had no idea if it would be the right texture or even come together at all. I’m so glad I had the courage to experiment, though, because it was phenomenal.

The aroma of yeast dough alone was enough to make it a success, but the sweet autumn flavors were the real victory. The buttery rum glaze complemented the mild pumpkin and cinnamon spice of the warm, tender yeast dough. The recipe takes a bit of time, but most of that is waiting for dough to rise — and of course the taste more than makes up for every minute of work.

Okay, spill it: What silly things have you done for your pets?

Pumpkin Spice Pull-Apart Bread with Butter Rum Glaze


Recipe by: Willow Bird Baking, adapted from All Recipes, Joy the Baker, and Pumpkin Tart
Yields: one loaf, about 8 servings
Prep Time: (including dough rising) about 3 hours

This sticky, sweet pumpkin pull-apart loaf is irresistible. It’s made from layers of fluffy pumpkin yeast dough coated with browned butter, cinnamon, sugar, and nutmeg. Let it cool until it has just a hint of warmth left, drizzle on some glaze, and enjoy — preferably with the windows open to let in a crisp autumn breeze. Oh, and by the way, this recipe makes use of a stand mixer fitted with a dough hook, but there’s no reason you can’t knead this dough by hand. It’ll just take a little longer (and a little more elbow grease).

Pumpkin Pull-Apart Bread Ingredients:
1/2 cup milk
3/4 cup pumpkin puree
1/4 cup white sugar
2 tablespoons unsalted butter
1 teaspoon salt
2 1/4 teaspoons (1 envelope) active dry yeast
2 1/2 cups bread flour

Filling Ingredients:
1 cup granulated sugar
2 teaspoons ground cinnamon
1/2 teaspoon fresh ground nutmeg
2 tablespoons unsalted butter

Butter Rum Glaze Ingredients:
2 tablespoons unsalted butter
1/8 cup brown sugar
1 tablespoon plus 1 1/2 teaspoons milk
1/2 cup powdered sugar
1/4 teaspoon rum (the original recipe called for extract, which I found too strong)

Directions:
Make the pull-apart bread dough: Grease and flour a loaf pan and set aside. In a saucepan over medium-high heat, brown the 2 tablespoons of butter. Let it bubble and foam and when you see it start to brown, stir it so that it browns evenly. When it’s the color of dark honey, remove it from the heat and pour it into a large heat-safe mixer bowl to cool. In the same saucepan over medium-low heat, warm the milk until it bubbles. Remove it from the heat and pour it into the bowl with the butter. Let these cool until they’re about 100-110 degrees F (use a candy thermometer to check). Set the saucepan aside for another use later. I use the same one throughout the entire recipe; why do more dishes?

Stir the sugar and yeast into the milk/butter mixture and let it sit for about 10 minutes to proof (it should foam; if it doesn’t, discard it and try again with new yeast). Stir in pumpkin, salt, and 1 cup flour. If you haven’t already, fit your mixer with a dough hook. Add the rest of the flour 1/2 cup at a time, stirring between each addition. When the dough is combined, knead on low speed with a dough hook until smooth and elastic (about 4 minutes with a mixer).

Place the dough in a greased bowl and cover it with a damp cloth. Let it rise in a warm place for about an hour until it doubles in size (After it rises, you can put it in the fridge overnight to use it in the morning, but let it sit out for half an hour before rolling if you do.)

Make the filling: While the dough is rising, whisk the sugar, cinnamon, and nutmeg together in a small bowl. Toward the end of the rising time, melt the 2 tablespoons of butter for the filling in the saucepan over medium-high heat and brown it as directed above. Put it in a small heat-safe bowl to cool for use later.

Shape and bake pull-apart bread: Knead a sprinkling of flour (about 1 tablespoon) into the dough, deflating it, and recover it. Let it sit to relax for 5 minutes. Flour a large work surface and turn your rested dough out onto it. Roll it out to a 20 inch long and 12 inch wide rectangle, lifting corners periodically to make sure it’s not sticking. If it seems to be snapping back, cover it with your damp towel and let it rest for 5 minutes before continuing (I had to do this twice during the process).

Spread the browned butter over the surface of the dough with a pastry brush and then sprinkle the sugar mixture over the top, patting it down to ensure it mostly sticks. Joy the Baker encourages you to use it all even though it seems like a ton, but I admit I got squeamish at the amount and only used most. It was fine despite my nerves. Go ahead and pile it on.

With the long edge of the rectangle toward you, cut it into 6 strips (do this by cutting the rectangle in half, then cutting each half into equal thirds. I used a pizza cutter). Stack these strips on top of one another and cut the resulting stack into 6 even portions (again, cut it in half, and then cut the halves into equal thirds). Place these portions one at a time into your greased loaf pan, pressing them up against each other to fit them all in. Cover the pan with your damp cloth and place it in a warm place for 30-45 minutes to double in size.

While dough rises, preheat oven to 350 degrees F (or 325 if you have a glass loaf dish instead of a metal pan). When it’s risen, place the loaf in the center of the oven and bake for 30-35 minutes until dark golden brown on top (if you take it out at light golden brown, it’s liable to be raw in the middle, so let it get good and dark). Cool for 20-30 minutes on a cooling rack in the loaf pan while you make the glaze.

Make the glaze: In your saucepan, bring the butter, milk, and brown sugar to a boil over medium-high heat. Remove it from heat, add the powdered sugar and rum, and whisk it to a smooth consistency.

Assemble and serve: Use a butter knife to loosen all sides of the bread from the loaf pan and gently turn it out onto a plate. Place another plate on top and flip it to turn it right side up. Drizzle glaze over top. Serve each piece slightly warm with a drizzle of glaze.

Easy Canvas Prints offered me a discount on the canvas I ordered and asked for an honest review. My opinions are unvarnished and never influenced by products or discounts provided.

If you liked this post, please:
Subscribe to Willow Bird Baking
Follow Willow Bird Baking on Twitter
Follow Willow Bird Baking on Facebook
Give this post a thumbs up on StumbleUpon


ShareOther ways to share this post with friends!

Celebrating Cheesecake — and a challenge for you!

Taylor from Taylor Takes a Taste tweeted me yesterday with a very, very important message: Today is National Cheesecake Day! Well, okay, it’s actually National White Chocolate Cheesecake Day, but I’ve never made a white chocolate cheesecake, so just ignore that part. I’ll add it to my to-do list.

In order to celebrate, I thought I’d compile Willow Bird Baking’s many cheesecake recipes and issue a challenge for you!

My goal is to inspire kitchen confidence in home cooks by encouraging them to tackle fun, challenging new recipes. So I’m challenging you this month! Here’s what you do:

Choose one of the cheesecake recipes below that feels like a challenge to you and make it for friends, family, or coworkers.

– Take a photo and email it to me at juruble ‘at’ gmail ‘dot’ com with a few comments about how it went and a link to your blog (if you have one — if you don’t, that’s okay too!).

– Do this before April 5, 2011. In exactly a month, I’ll post all of your cheesecake masterpieces here on Willow Bird Baking!

– You can also grab the badge at the bottom of this post if you’d like to let your readers know that you’re participating in the Cheesecake Challenge, but it’s optional.

If you’d like to participate, leave me a comment below and let me know! If you’ve already made one of the recipes below, that counts too! Just send me a photo!

Willow Bird Baking’s Cheesecake Recipes:

1. Coffee Cookie Dough Fudge Cheesecake


2. Red Velvet Cheesecake


3. Caramel Fudge Brownie Cheesecake


4. Chocolate Peanut Butter Bliss Cheesecake


5. Blueberry Lemon Cheesecake Cupcakes


6. Chocolate Cheesecake-Stuffed Cupcakes with Ganache


7. Lemon Blueberry Cheesecake Squares with Shortbread Crust


8. Marbled Chocolate Cheesecake Brownies


9. Pumpkin Cheesecake Bread Pudding

And don’t forget to watch my (slightly embarrassing) cheesecake tutorial for great cheesecake pointers!

Finally, here’s the Cheesecake Challenge badge if you want to grab it:

If you liked this post, please:
Subscribe to Willow Bird Baking
Follow Willow Bird Baking on Twitter
Follow Willow Bird Baking on Facebook
Give this post a thumbs up on StumbleUpon


ShareOther ways to share this post with friends!

Heart-Shaped Palmiers and a Pesto Giveaway

What does it say about me that I have more fun at middle school dances as a grown-up than I ever did as a middle schooler?

Woodlawn’s 7th graders hosted a February dance last night. The theme was BRIGHT COLORS to avoid any romantic drama involving Valentine’s Day, so everyone dressed in their rainbow best.

I waltzed in fashionably late in a magenta and turquoise get-up, danced with a gaggle of my 6th grade students to “Fly Like a G6” (though we sing, “now I’m feelin’ so fly / like a fruitbat,” which we feel more accurately characterizes us), and filmed all the hair-whipping that occurred when “Whip My Hair” came on.

We stopped mid-dance to run outside and play freeze tag. I ditched my heels and joined the math teacher, also named Julie, as “it.” Once our feet and hands were frozen, we all filed back in for more dancing. Julie and I sang a duet of “Ice Ice Baby” at one point, showing our age.

Every now and then I’d have a chaperonely duty to perform: directing cleanup, vetoing a song or two, telling the 6th graders to stop screaming. But in general, the dance was exactly what a middle school dance should be: fun and happy. Why didn’t I have this much fun when I was actually in middle school?

I vividly recall my 7th grade Valentine’s dance. My teachers were apparently not as sensitive to the delicate hormonal phase we were in, so they thought it’d be a great idea to make the dance as sappy as possible. Everything was covered in red and pink, with hearts papering the walls. It looked like cupid had thrown up love and romance on every available surface of the multipurpose room where the dance was held. Not only that, but a table was set up outside the bathrooms where the PTA was selling roses and candy for the suave middle school boys who had come to the dance unprepared for their dates.

Someone had asked me to this particular dance. We’ll call him Jeb, and he was not my type. I told him I would go with him as a friend because I wanted to be nice, but once I arrived at the dance, the middle school social pressure overwhelmed me. I didn’t want to be seen with Jeb, much less have to, like, dance with him and stuff.

Just after walking in, I caught sight of him at the aforementioned table buying a rose for me and I booked it to the girls’ bathroom, where I hid for the majority of the night. Every now and then I’d poke my head out and watch him wandering around quizzically, looking for me in the crowd, and then I’d duck back in to hide some more. Part of me felt guilty, but the part that felt mortified won out.

Jeb moved away shortly thereafter, and I felt so bad for having ditched him at the dance. Thankfully, he returned in high school and I got the opportunity to apologize. I chalk the whole experience up to middle schoolitis, the inflammation of your social nerve. For some reason when you’re a middle schooler, it matters so much what others are thinking about you. You don’t want to dance, because what if people think you dance funny? You don’t want to hang out with certain people, because what if people think you’re like them? You don’t want to wear certain clothes, because what if they send the message that you’re uncool?

Phew, I’m so glad that’s over. And so glad that I, unlike a lot of grown-ups, have a second chance at the middle school dance! Call it one of the perks of being a teacher.

Anyway, after all that fun last night, I didn’t have much time for baking. I knew I wanted to make something sweet and Valentinesy, but it also needed to be quick. Voila: easy heart-shaped palmiers that can be sweet or savory depending on what you spread in them.

Pestos With Panache by Lauren sent me two pesto flavors to review, Fig & Gorgonzola and Pumpkin Chipotle, so I decided to make two varieties of pesto palmiers. To satisfy my sweet tooth (who’m I kidding? it’s insatiable), I also made Fig Jam & Almond Palmiers and Chocolate, Pecan, & Coconut Palmiers. I love that palmiers are so customizable that you can create a variety of them at once (the method below will inspire you to get creative!), but what I love even more is that you can whip up a batch of these cuties in 20 minutes. Perfect for a last-minute addition to your Valentine’s meal!


Speaking of Valentines — the Valentine’s Fairy heard my lamentations about not getting any valentines as an adult, so I got this in the mail from my Sunday school teacher, Joyce. Too sweet!

Regarding the pesto, Pestos With Panache by Lauren has all-natural, preservative free products. The pestos keep well in the freezer for up to two years, and the company boasts a number of zany, creative flavors.

I wasn’t wild about the Pumpkin Chipotle Pesto; it combined mild pumpkin with some heat, and it seemed like it would work better in a recipe with bolder flavors to complement it. The Fig & Gorgonzola Pesto, though, was deep and delicious, and I can’t wait to try some of the other fruity flavors. I can imagine lots of creative uses for them, including (of course) palmiers!

Would you like to win two of the fun pesto flavors from Pestos With Panache? They’d love to send one lucky commenter a sample. To enter:

1. Required Main Entry (your other entries won’t count unless you do this one!): Visit Pestos With Panache by Lauren and tell me what 2 pesto flavors you’d love to try.

To get up to five extra entries, do each of the following items (one entry per item). Please be sure to leave a separate comment for each item you complete, or you will not receive the entry for that item. If you already do these things, it still counts (just leave me a comment and tell me so).
2. “Like” Pestos With Panache on Facebook.
3. “Like” Willow Bird Baking on Facebook.
4. Follow Pestos With Panache on Twitter.
5. Follow Willow Bird Baking on Twitter.
6. Tweet the following message: “Just entered to win 2 pesto flavors from @PestosWPanache on Willow Bird Baking! http://su.pr/2diNLK #giveaway @julieruble”

The contest will close at 12 noon (EST) on February 19, 2011, and the winner will be chosen via random.org. In the meantime, make some palmiers!

Heart-Shaped Palmiers


Recipe by: Willow Bird Baking
Yields: 25-28 palmiers

Ingredients:
1 frozen puff pastry sheet, thawed (or use homemade puff pastry!)
sprinkle of flour
moist spread*
toppings**

*you can use pestos, jellies, Nutella, thicker sauces, etc.
**such as cheeses, toasted nuts, chocolate chips, etc.

Directions:
Preheat oven to 425 degrees F. Line two baking sheets with parchment paper. Roll out the puff pastry sheet on a lightly floured surface so that it’s just slightly longer, and then cut it in half horizontally with a pizza cutter. You now have two rectangles of puff pastry.

Spread your pesto, jelly, or other moist spread onto the puff pastry sheets leaving about 1/4-inch border around the edges. Sprinkle toppings on lightly, taking care not to overstuff and make your palmiers difficult to roll. Apart from my two pesto palmiers, I made palmiers spread with fig jam and sprinkled with toasted almonds, and palmiers sprinkled with sugar, cocoa powder, toasted pecans, mini chocolate chips, and toasted coconut. The sky’s the limit in terms of the combinations you can create.

Once you’ve spread and topped your pastry rectangle, grab the long edge and fold it in toward the middle. Repeat with the other long edge, such that they meet in the middle:

Now fold one side of the dough onto the other:

At this point, stick the dough in the freezer on wax paper for about 10 minutes so that it’s easier to cut. Using a sharp knife, cut the log into 1/2-inch slices:

Set each slice on one of the prepared baking sheets with one of the cut sides up. If the knife smooshed them a little, prod them back into shape. Bake at 425 degrees F for 8 minutes before turning the temperature down to 400 degrees F and gently flipping each palmier. Bake for 4-5 minutes extra. Remove the palmiers from the oven and transfer them to a cooling rack. Serve slightly warm.

Note: Pestos With Panache by Lauren provided me with 2 pesto flavors to review at no cost to me and offered to sponsor this giveaway. I’m committed to giving you my honest opinion about any product mentioned on Willow Bird Baking.

If you liked this post, please:
Subscribe to Willow Bird Baking
Follow Willow Bird Baking on Twitter
Follow Willow Bird Baking on Facebook
Give this post a thumbs up on StumbleUpon


ShareOther ways to share this post with friends!

1 7 8 9 10 11