lemon

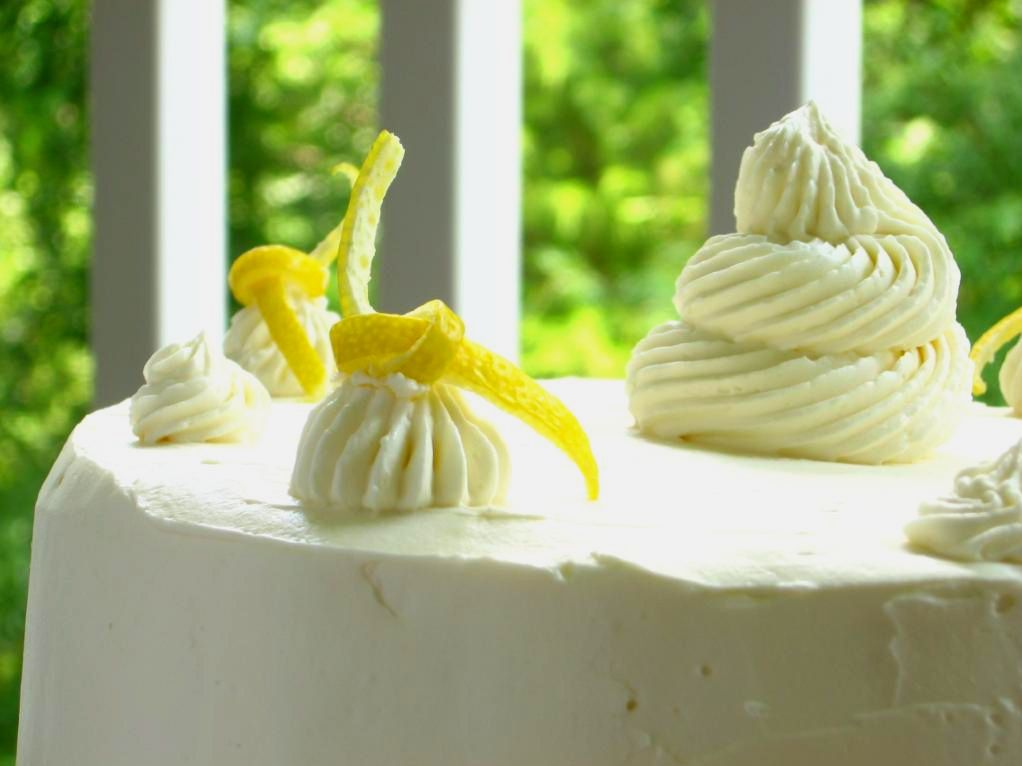
Lemon Triumph Cake

The looming summertime has given me the perfect excuse to indulge my love of lemons. Oh! Lemons! The pungent aroma of lemon juice on my fingers from a fresh squeeze! The bright yellow, spoked discs dripping with juice! The tang! The sweetness!
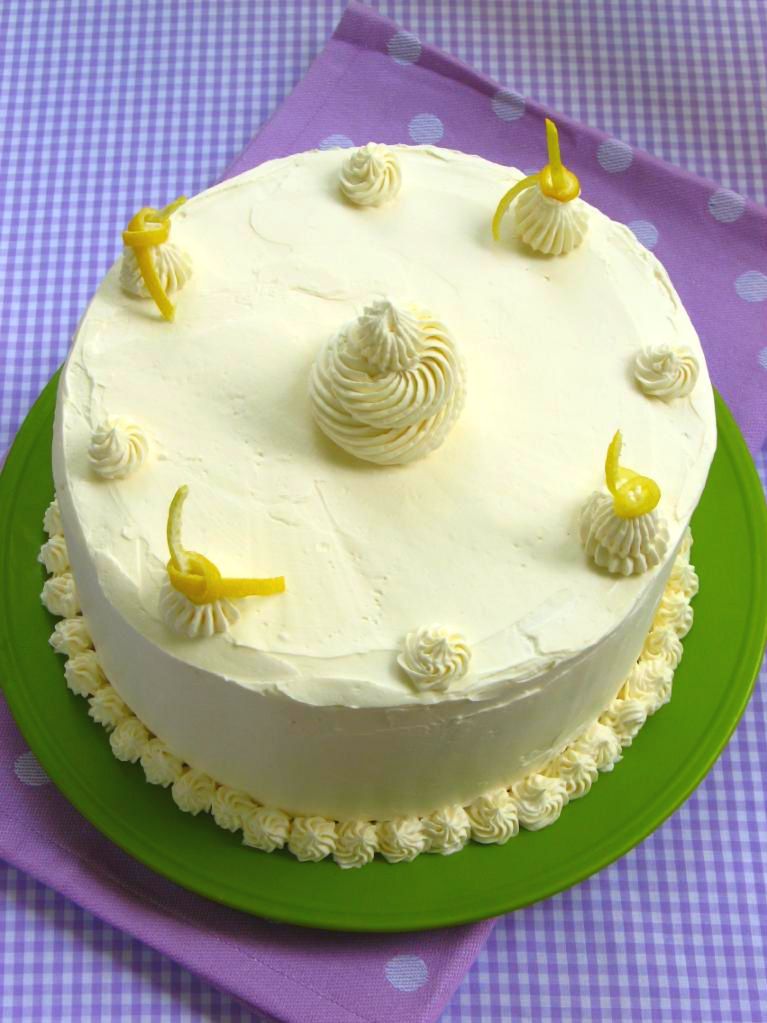
I was thrilled when my mom was pondering what sort of cake she wanted for her birthday and mentioned lemon. She made a fantastic lemon and lemon cream jellyroll cake awhile back from a cake mix and thought she might like something similar. I put on my Dr. Frankenstein hat and began piecing recipes together to oblige.
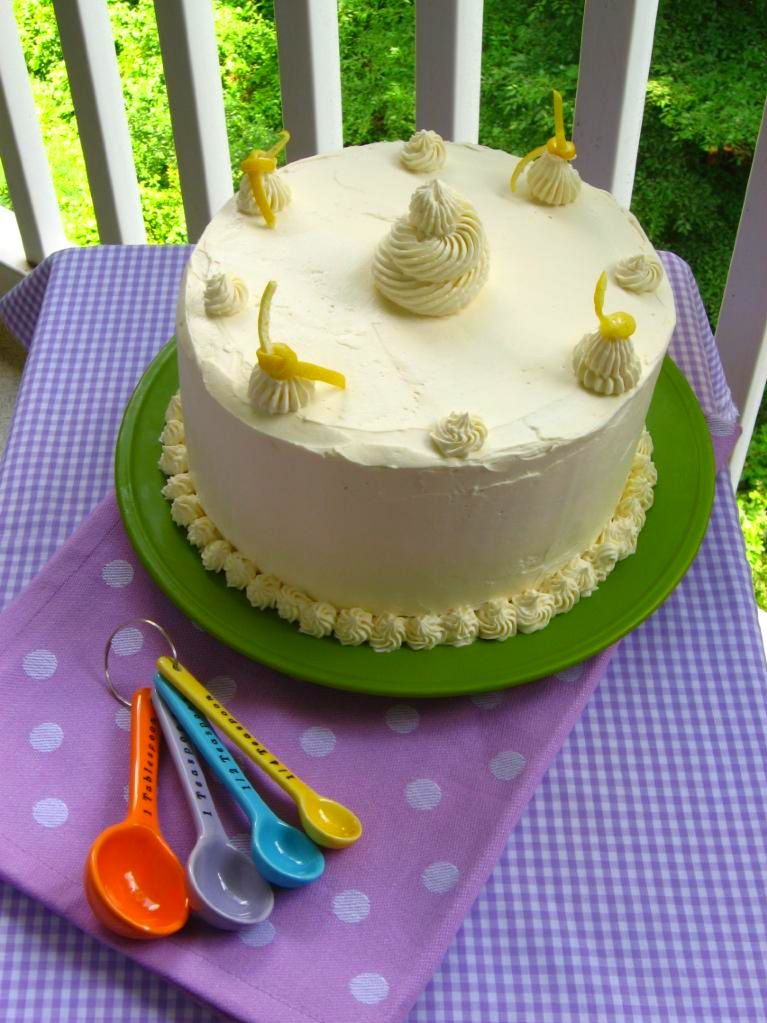
My first dilemma was how to make a cake from scratch that tasted like a cake mix cake. I always get a kick out of foodies who disdain the taste of cake mix. Being an avid baker, I have news for those folks: many of us are constantly trying to attain a cake-mix-like level of moistness and buttery flavor. There are definitely downsides to cake mix (preservatives and the fact that you don’t get all the fun of baking from scratch, of course!) but in terms of taste . . . yeah, they’re pretty good at that.
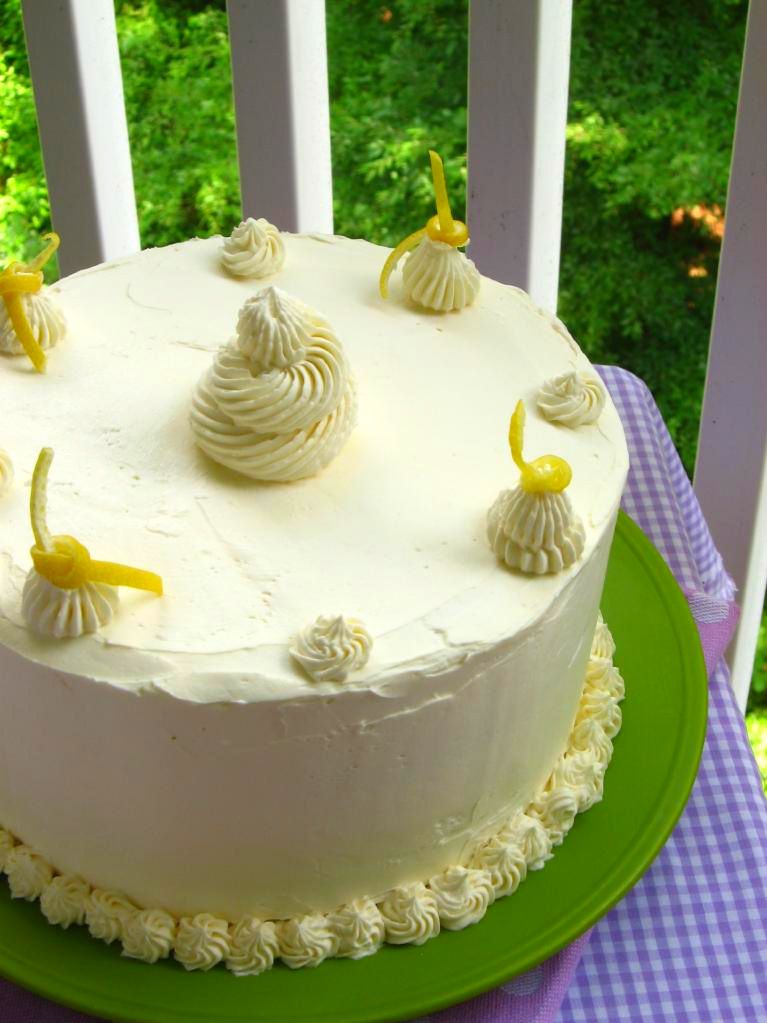
So how to make a delicious, preservative-free yella cake that was just as moist and scrummy as a cake mix? While considering this conundrum, I happened to see this recipe for a homemade cake mix and decided to give it a try. It smelled buttery and magnificent while mixing it up, just as it was supposed to, and baked into a lovely lemon cake with a bit of additional flavoring.
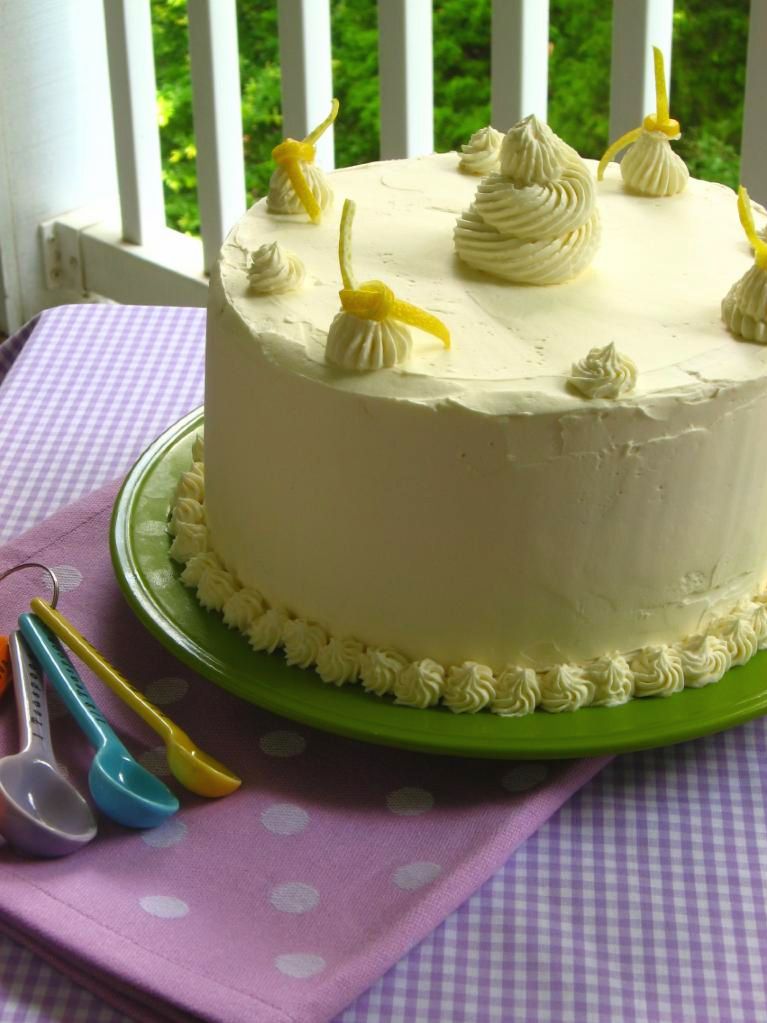
Now about that lemon cream. I decided I wanted to do a lemon mousse instead, and had my heart set on a big ol’ fancy mousse layer cake. I was going to buy a cake ring and build the cake with two cake layers sandwiching a thick layer of mousse. Only problem? Well, that first part . . . the part about the cake ring. You let me know if you find one, but after visiting three stores, I’ve come to the conclusion that there aren’t any cake rings in Charlotte. Lame.
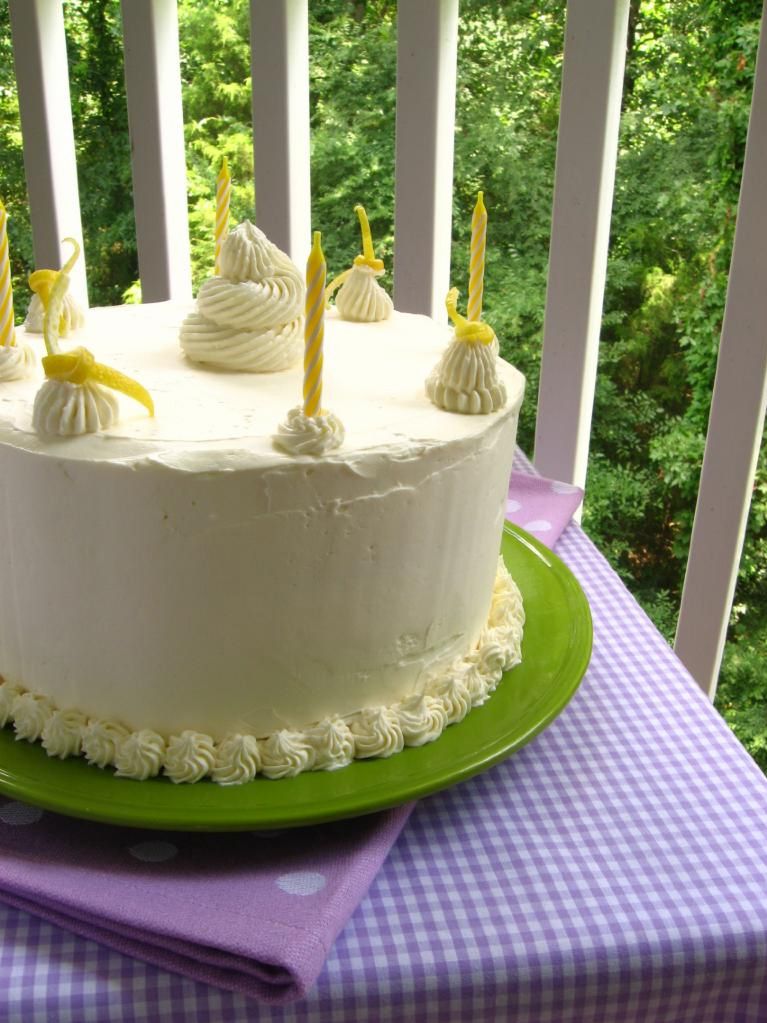

And again, with candles!

Well, kind of lame, but kind of awesome, because it gave me an excuse to buy this Wilton Heart Tasty-Fill Pan I’ve had my eye on for months (Note to calm your fears: I always mention if I’ve been asked to review a product or have received something for free to review, but that’s not the case here. Wilton, y’all are welcome to send me free pans and all, but I bought this pan with my own hard-earned money and decided to share it without being asked). I am so excited about this pan! All the filling possibilities! I’m already pondering: banana cake with caramel cream filling, chocolate cake with caramel cream filling, yellow cake with chocolate mousse filling . . . but I digress! Back to the Lemon Triumph Cake at hand.

I did love the Wilton pan, but I think it’ll take a bit of practice to get used to. As you can see in some of the pictures, the heart wasn’t aligned correctly on one side of the pan. This has to do with me forgetting to trim the sides of the cake so that the top and bottom were even. I feel like it might be a bit difficult to get it lined up straight, though, and it’s hard to know until you cut into it . . . at which point (after 8 hours of baking, in the case of this cake) you don’t really want to know if something’s wrong. I’ll let you know next time I use it (which will hopefully be soon!) if it’s easier to align, having had a bit of practice.
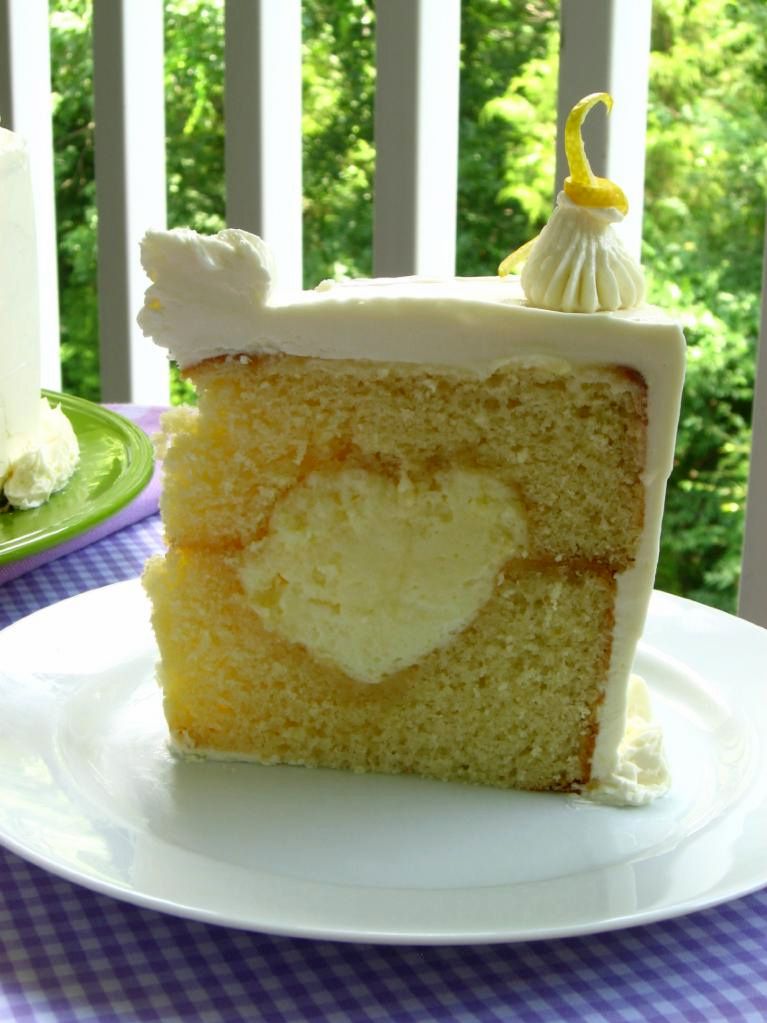

Crooked heart this time around!

If you don’t have the Tasty-Fill Heart Pan, don’t worry! You can make this as a regular mousse cake using a cake ring per my original plan. Just layer a 9-inch cake on the bottom and a thick layer of mousse on top of that. Chill until the mousse is firm and place another 9-inch layer of cake on top. Chill again before frosting, taking care around the mousse layer not to mix the frosting and mousse. Alternatively, if your city also has no cake rings, serve this as a regular two-layer lemon cake with the mousse on the side.
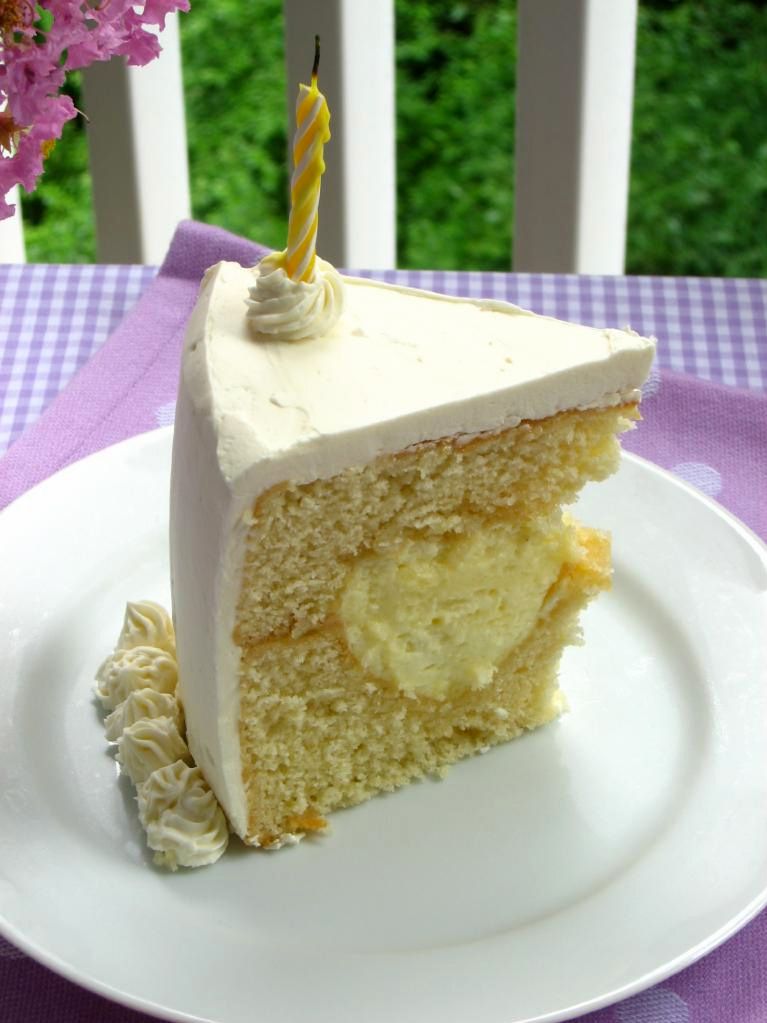

Better <3 on this side of the cake.

Nevertheless, crooked hearts notwithstanding, this cake was worth the effort. The yellow cake drenched in lemon syrup was moist and buttery, just like I hoped. This method of making Swiss buttercream produces hands-down the fluffiest, smoothest, silkiest, tastiest frosting I’ve ever had the pleasure of licking off my spatula. And the lemon mousse was, well, a triumph! Lemon curd folded into mousse that sets up like a bright, creamy-tangy cloud in the middle of the cake. Close your eyes and imagine a satisfying summer day — birdsong, sprinklers, green grass, sunshine, lemonade, lounge chair, long naps and good books — with a little sophistication mixed in. That’s what this cake tastes like. If that doesn’t make you want a slice, I don’t know what will!
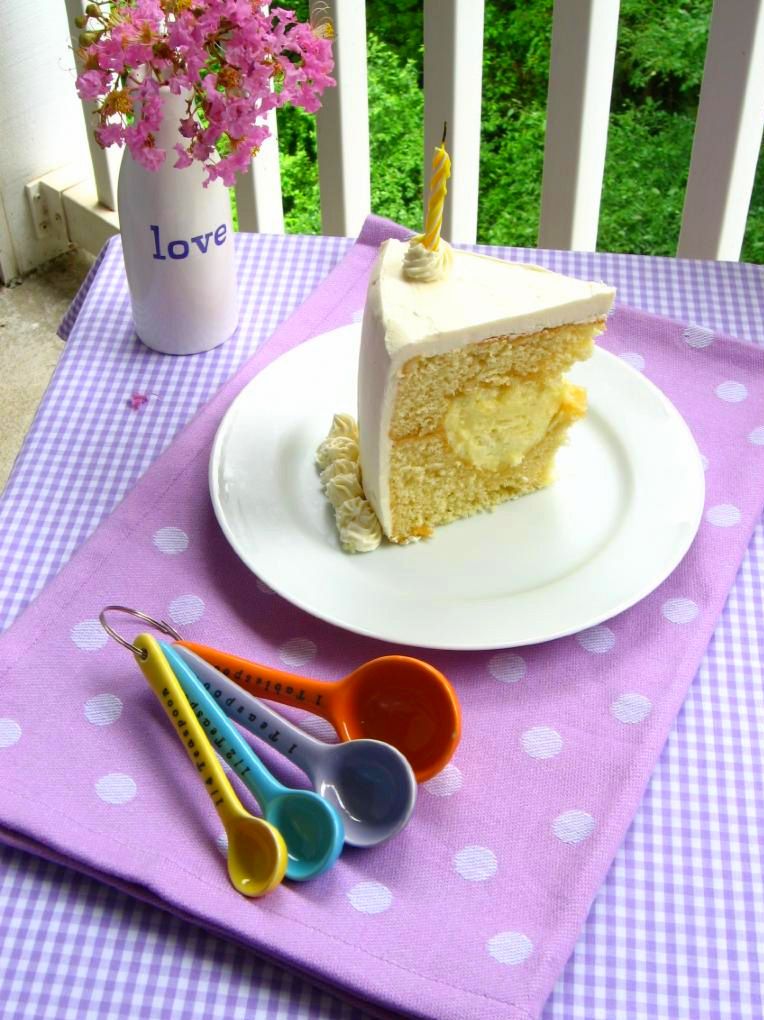
Lemon Triumph Cake


Recipe by: Willow Bird Baking, compiled from Fine Cooking (lemon curd), Giada DiLaurentis (lemon syrup, adapted), Gina DePalma (Swiss buttercream, adapted), Bon Appétit (lemon mousse), My Kitchen Cafe (homemade cake mix)
Yields: one 9-inch, two layer cake

Yellow “Cake Mix” Cake Ingredients:
2 cups granulated sugar
1 1/2 cups all-purpose flour
1 1/2 cups cake flour
1/2 cup nonfat dry milk powder
1 tablespoon baking powder
1 teaspoon salt
16 tablespoons butter (2 sticks), cut into 1/2-inch pieces and chilled
1 tablespoon vanilla extract
1 tablespoons lightly packed finely grated lemon zest
1-2 teaspoons lemon extract
strands of lemon peel for garnish

Lemon Curd Ingredients:
6 tablespoons unsalted butter, softened at room temperature
1 cups sugar
2 large eggs
2 large egg yolks
2/3 cup fresh lemon juice
1 teaspoon grated lemon zest

Lemon Mousse Ingredients:
1 recipe lemon curd (above)
2.5 tablespoons water
2 teaspoons unflavored gelatin
3 large egg whites
3/8 cup sugar
3/4 cups chilled heavy whipping cream

Lemon Syrup Ingredients:
1/2 cup sugar
1/8 cup water
1/8 cup lemon juice

Lemon Swiss Buttercream Ingredients:
1 cup sugar
4 large egg whites , at room temperature
24 tablespoons (3 sticks) unsalted butter, at room temperature
2 teaspoon vanilla extract
1 teaspoon lemon extract

Directions:
Note on scheduling: I might schedule this cake baking in the following way. Make lemon curd and refrigerate two days in advance. Bake cake and coat with lemon syrup one day in advance, wrapping carefully and freezing. On day of serving, make mousse, trim and fill cake (much easier with frozen layers!), make frosting, and assemble.

To make lemon curd: In a large bowl, beat the butter and sugar with an electric mixer, about 2 min. Slowly add the eggs and yolks. Beat for 1 min. Mix in the lemon juice. The mixture will look curdled, but it will smooth out as it cooks.

In a medium, heavy-based saucepan, cook the mixture over low heat until it looks smooth. (The curdled appearance disappears as the butter in the mixture melts.) Increase the heat to medium and cook, stirring constantly, until the mixture thickens, about 15 min. It should leave a path on the back of a spoon and will read 170°F on a thermometer. Don’t let the mixture boil.

Remove the curd from the heat; stir in the lemon zest. Transfer the curd to a bowl. Press plastic wrap on the surface of the lemon curd to keep a skin from forming and chill the curd in the refrigerator. The curd will thicken further as it cools. Covered tightly, it will keep in the refrigerator for a week and in the freezer for 2 months.

To make cake: Process sugar, flours, milk powder, baking powder, and salt in a food processor for 15 seconds to combine. Add butter and vanilla and pulse until the mixture resembles coarse meal (you want this much finer than, say, a pie crust). Freeze the dry mixture in a zipper-lock bag for up to 2 months or use immediately.

To make the cake, adjust an oven rack to the middle position and preheat the oven to 350 degrees. Grease and flour two 9-inch cake pans (the Tasty-Fill pans, if you’re using those).

With an electric mixer, beat the prepared cake mix, 1 1/4 cups warm water and 2 large room-temperature eggs until the mixture is smooth, about 2 minutes. Scrape the batter into the prepared cake pans and bake until a toothpick inserted in the center comes out clean, about 25-27 minutes for two 9-inch layer cakes. Cool the cakes in pans for 10 minutes, then turn them out onto a wire rack. Poke holes in them and spoon lemon syrup over generously. Cool for about 30 more minutes before placing cake layers in freezer for at least 30 minutes. This helps a ton with trimming, filling, and decorating!

To make lemon syrup: In a small saucepan, combine the sugar, water, and lemon juice over medium heat. Bring to a boil, reduce the heat, and simmer until the sugar has dissolved, about 5 minutes, stirring occasionally, Remove the pan from the heat and allow the syrup to cool, about 20 minutes.

To make the mousse: Pour 2.5 tablespoons water into small saucepan. Sprinkle gelatin evenly over. Let stand until gelatin softens, about 15 minutes. Meanwhile, place 7/8 cups lemon curd in large bowl. Stir 3/8 cup curd in another small saucepan over medium-low heat until very warm.

Stir gelatin mixture over medium-low heat until dissolved and liquid is clear (do not boil). Whisk warm gelatin mixture into 3/8 cup warm curd. Gradually whisk gelatin-curd mixture into curd in large bowl. Using electric mixer, beat egg whites in medium bowl until soft peaks form. Gradually add sugar, beating until whites are thick and glossy. Fold whites into curd mixture in 3 additions. Using same beaters, beat cream in another medium bowl until peaks form. Fold into egg white-curd mixture in 3 additions.

To make lemon Swiss buttercream icing: Combine sugar and 1/2 cup water in a small saucepan and bring to a boil over medium-high heat, stirring to dissolve sugar. Boil without stirring until syrup reaches 240° on a digital thermometer, about 5 minutes.

Meanwhile, in a stand mixer with whisk attachment, beat egg whites on medium-high speed until soft peaks form. With mixer on medium speed, gradually pour in hot syrup in a thin stream; avoid pouring syrup on whisk. Increase speed to medium-high and beat until stiff peaks form and mixture is cool, about 8 minutes. Reduce speed to medium and add butter 1 tablespoon at a time, beating after each addition. (If at any time buttercream appears curdled, beat on high until smooth, then reduce speed to medium and continue beating in butter.) Once all butter is added, beat on high speed until buttercream is smooth and fluffy, about 1 minute. Beat in vanilla and lemon extract.

To assemble the cake: Level the layers using a long serrated knife. If using a Tasty-Fill Heart Pan, align heart and then trim sides of cake to make them even. Fill both sides of the heart with mousse, leveling it off using a spatula (see instructions in the note below for making this a regular mousse cake).* Place the top layer on the bottom layer, aligning the heart. Cover cake with a thin coat of icing as a crumb coat and chill until the icing is set, 20 minutes or so. Frost cake and decorate with slices of lemon peel. Store, covered, in refrigerator. Set out about 10 minutes before serving to soften the icing.

*NOTE: Make this as a regular mousse cake by using a cake ring. Layer a 9-inch cake on the bottom and a thick layer of mousse on top of that. Chill until the mousse is firm and place another 9-inch layer of cake on top. Chill again before frosting, taking care around the mousse layer not to mix the frosting and mousse. Alternatively, serve this as a regular two-layer lemon cake with the mousse on the side.

Share Share this post with friends!

Lemon Raspberry Cake

Willow Bird Baking is the namesake of my darling little noodle (read: poodle), Byrd. As I sit here writing this post (and listening to the cooing of mourning doves outside my window), she is at the veterinary hospital recovering from a double knee surgery. Judging by her exuberance about riding in the car yesterday morning, she wasn’t really expecting it.

Apparently both her little kneecaps were popping out of place, and she couldn’t do some of her favorite things (fetching, jumping) without limping. Poor puppy pumpkin. The vet tech just called and said she is standing, but won’t try to walk, and won’t eat a thing. No wonder, since she’s in a strange place without her mama. We go pick her up at 12:30 today, so keep us in your prayers.


Get it? It’s decorated to look like a lemon.

Because of this unexpected $2,400 surgery, my finances have not been my friends lately. I’ve been cutting back: we haven’t been eating out, I’ve been trimming my grocery budget, and the last time I got my hair cut or colored was last August — I’m about ready to pick up some scissors myself. In addition to limiting my spending, another issue needed to be addressed: waste!

I’ve been a bad steward of my kitchen for too long. Buying a bag of cheese with the best intentions, but letting it mold. Buying a bag of fresh herbs, using them once, and letting them brown in the back of my fridge. Buying expensive ingredients (hello, pancetta, I’m talking to you) with the intention of using every last hunk, only to open my fridge drawer a month later and guiltily remember that broken resolution.

So, I’ve been trying to be better. Leftover creams, frostings, and doughs from one pastry become the basis for the next. I survey the fridge for unused ingredients before deciding what to make for Saturday dinner. It’s not perfect, but it’s better than it was!

This past weekend, leftover raspberry curd, nine egg whites left from making the curds, and some extra lemons provided my inspiration.

After buying only some butter, some fresh raspberries, and some white chocolate bark, I whipped up this cool, bright, summer dessert: Lemon Raspberry Cake. The cake itself is my favorite white cake recipe because it’s moist with the perfect crumb. Each layer is brushed with lemon syrup for moisture and tang before being coated in a luxurious raspberry curd. The frosting is rich and decadent, and even the white chocolate decorations added a nice dimension to the overall flavor of each slice.

My “lemon” decoration broke as I was trying to release it from the wax paper I piped it on, so I pieced it together on top of the cake. It’s a little crooked! I’m sure you can do better. I also completely forgot the poppy seed until I made the third cake layer (I mixed it separately), so you’ll notice that only my middle layer has the seeds. Oh well! Crooked citrus or not, seeds or not, we all loved the refreshing taste of this layer cake! Happy eating!

Lemon Raspberry Cake


Recipe by: compiled from adaptations of The Way the Cookie Crumbles (white cake), Notes from my Food Diary (frosting and raspberry curd), Bon Appétit (lemon syrup)
Yields: 12 servings

Cake Ingredients:
3 3/8 cups cake flour, plus more for dusting the pans
1 1/2 cups + 3 tablespoons whole milk, at room temperature
9 large egg whites, at room temperature
3 teaspoons almond extract
1 1/2 teaspoons vanilla extract
2 1/4 cups + 3 tablespoons granulated sugar
6 teaspoons baking powder
1 1/2 teaspoons table salt
18 tablespoons unsalted butter (2 sticks and 2 tablespoons), softened but still cool
1 1/2 tablespoons poppy seed (optional)

Lemon Syrup Ingredients:
1/2 cup sugar
1/2 cup boiling water
1/4 cup fresh lemon juice

Raspberry Curd Filling Ingredients:
1/2 cup (1 stick) unsalted butter
Two 1/2-pints ripe raspberries or one 12-ounce package frozen raspberries, thawed
5 large egg yolks, lightly beaten
3/4 cup sugar
Pinch of salt
2 to 3 teaspoons fresh lemon juice

Lemon Buttercream Frosting Ingredients:
1 cup (2 sticks) unsalted butter, at room temperature
2 tablespoons finely grated lemon zest (I opted for a teaspoon or two of lemon extract instead)
3 cups sifted confectioners’ sugar
3 tablespoons fresh lemon juice

Directions: Make raspberry curd: Melt the butter in a large saucepan over medium heat. Add the raspberries, egg yolks, sugar, and salt and cook, mashing the berries and stirring frequently at first and them constantly at the end, until thickened, about 10 minutes (this took longer for me — about 15+). Pour this mixture through a coarse strainer, pressing to get out the maximum amount of liquid. Add in lemon juice to taste. Allow this to cool and then cover (with plastic wrap touching surface of curd to prevent skin from forming) and refrigerate until ready to use.

For the Cake: Set oven rack in middle position. (If oven is too small to cook both layers on a single rack, set racks in upper-middle and lower-middle positions.) Heat oven to 350 degrees. Spray three 9-inch round cake pans with nonstick cooking spray; line the bottoms with parchment or waxed paper rounds. Spray the paper rounds, dust the pans with flour, and invert pans and rap sharply to remove excess flour. (I brush my pans with Wilton’s cake release, then add the parchment circle and brush again. Be sure the parchment circles reach to the edges of your pan to ensure easily release).

Pour milk, egg whites, and extracts into 2-cup glass measure, and mix with fork until blended.

Mix cake flour, sugar, baking powder, poppy seed, and salt in bowl of electric mixer at slow speed. Add butter; continue beating at slow speed until mixture resembles moist crumbs, with no powdery streaks remaining.

Add all but ½ cup of milk mixture to crumbs and beat at medium speed (or high speed if using handheld mixer) for 1½ minutes. Add remaining ½ cup of milk mixture and beat 30 seconds more. Stop mixer and scrape sides of bowl. Return mixer to medium (or high) speed and beat 20 seconds longer.

Divide batter evenly between prepared cake pans; using rubber spatula, spread batter to pan walls and smooth tops. Arrange pans at least 3 inches from the oven walls and 3 inches apart. (If oven is small, place pans on separate racks in staggered fashion to allow for air circulation.) Bake until thin skewer or toothpick inserted in the center comes out clean, 23 to 25 minutes.

Let cakes rest in pans for 3 minutes. Loosen from sides of pans with a knife, if necessary, and invert onto wire racks. Reinvert onto additional wire racks. Let cool completely, about 1½ hours.

Make lemon syrup: Place sugar in small metal bowl. Add 1/2 cup boiling water; stir to dissolve sugar. Stir in lemon juice.

Make frosting: Beat the butter and zest with an electric mixer on medium speed in a medium bowl until light and fluffy. Gradually add the sugar and beat until light and fluffy. Add the lemon juice and beat for 1 minute longer.

Assemble the cake: I love Smitten Kitchen’s Layer Cake Tips — especially the one about freezing your layers before working with them. It makes it so much easier.

When cakes are completely cool, level each layer using a long, serrated knife. Use a little frosting to attach your bottom layer to a cake board or serving platter. Brush layer generously with lemon syrup. Spread a scant 1/2 cup raspberry curd on the layer (I may have used a little more). Continue building the layers this way, with syrup and curd, until all three layers are stacked. Frost with lemon buttercream frosting. I used white chocolate to create decorations for the sides and top of my cake. Cut into wedges and serve with fresh raspberries. Store in refrigerator.


Enjoy!


Share Share this post with friends!

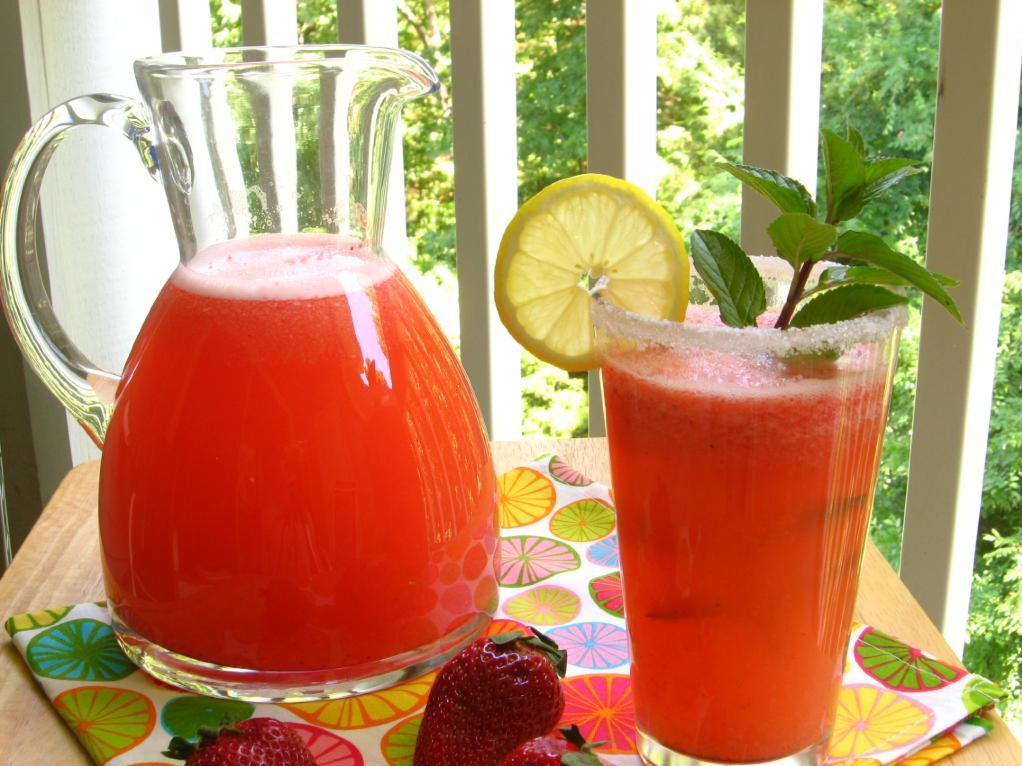
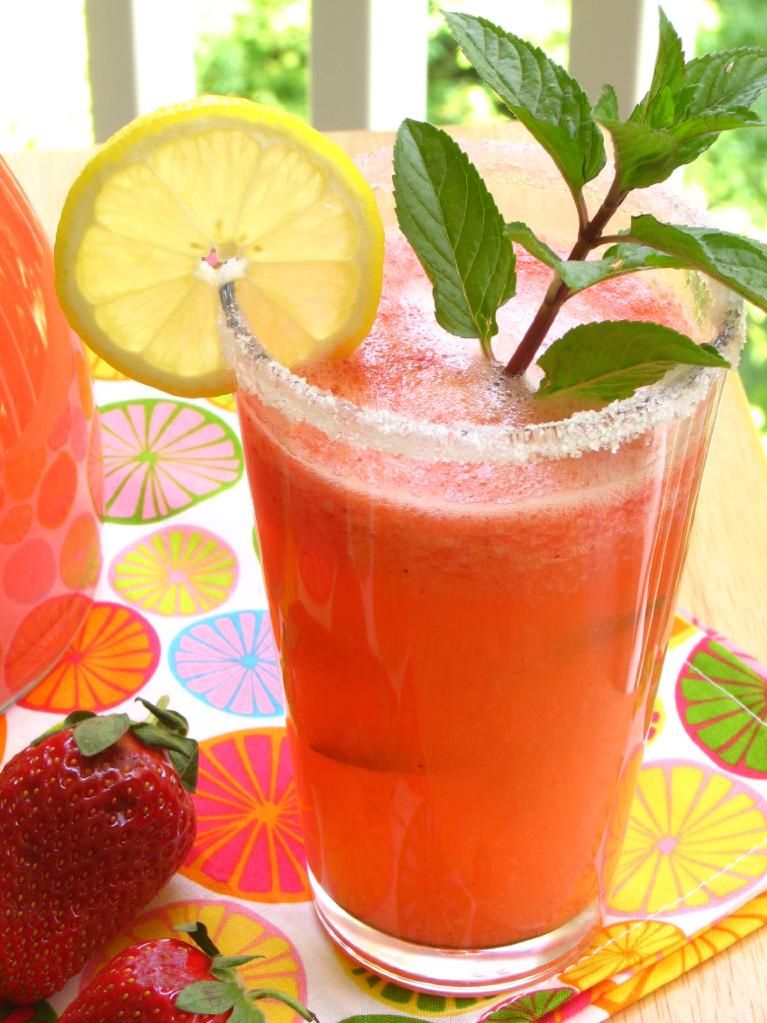
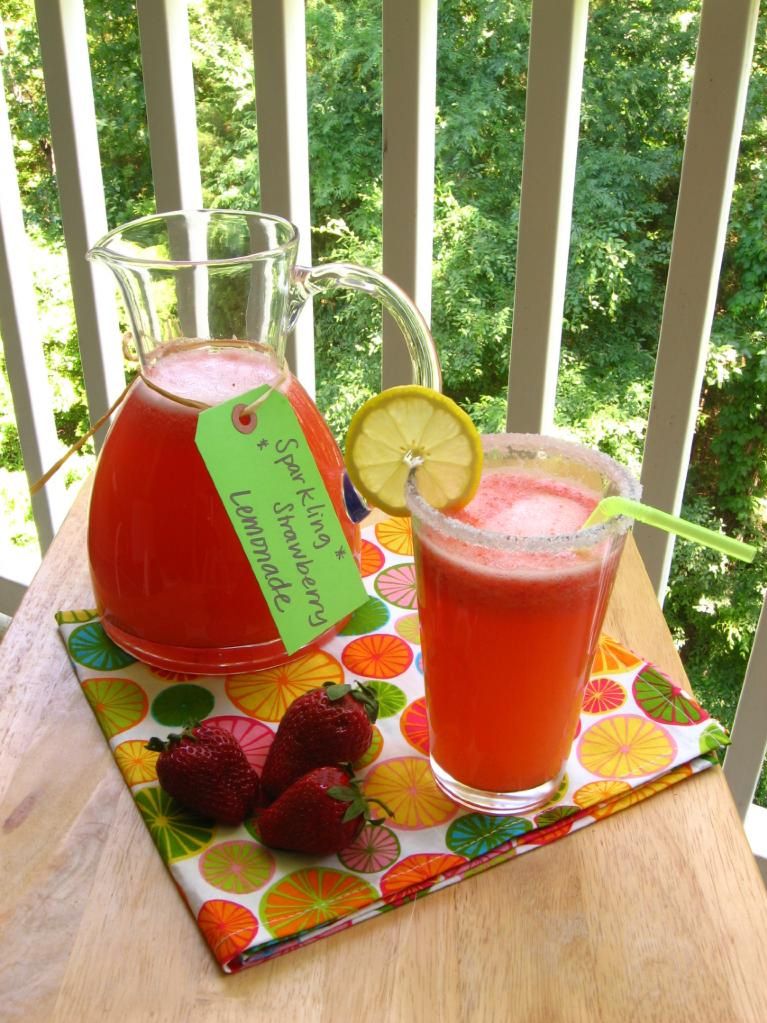
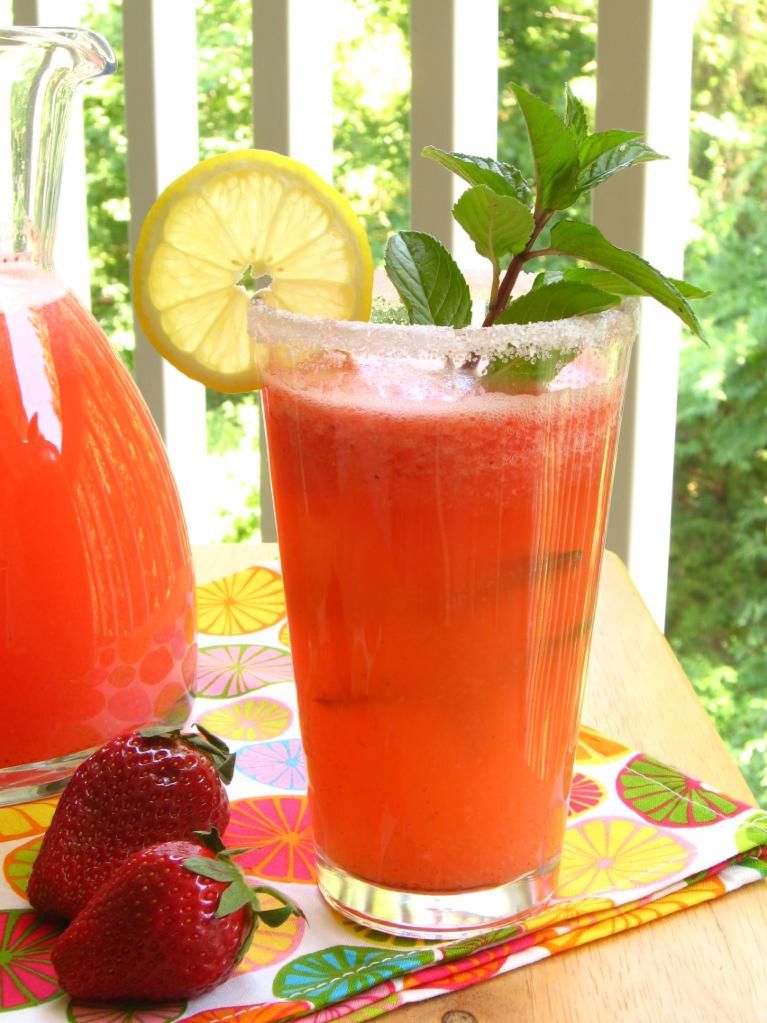
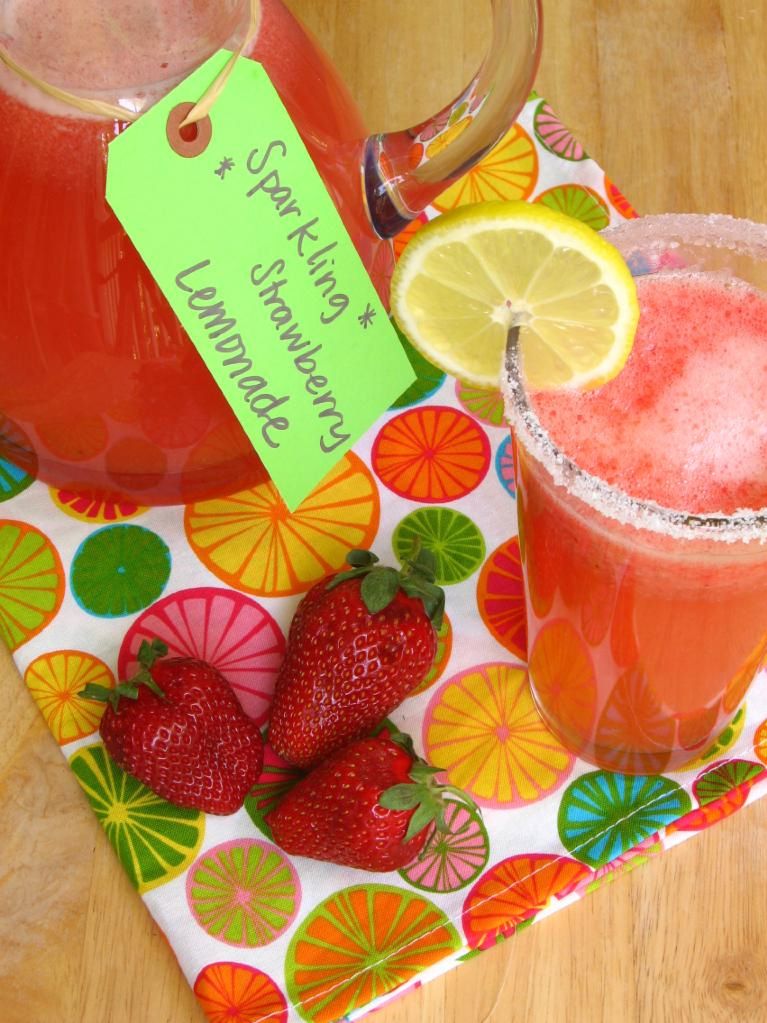
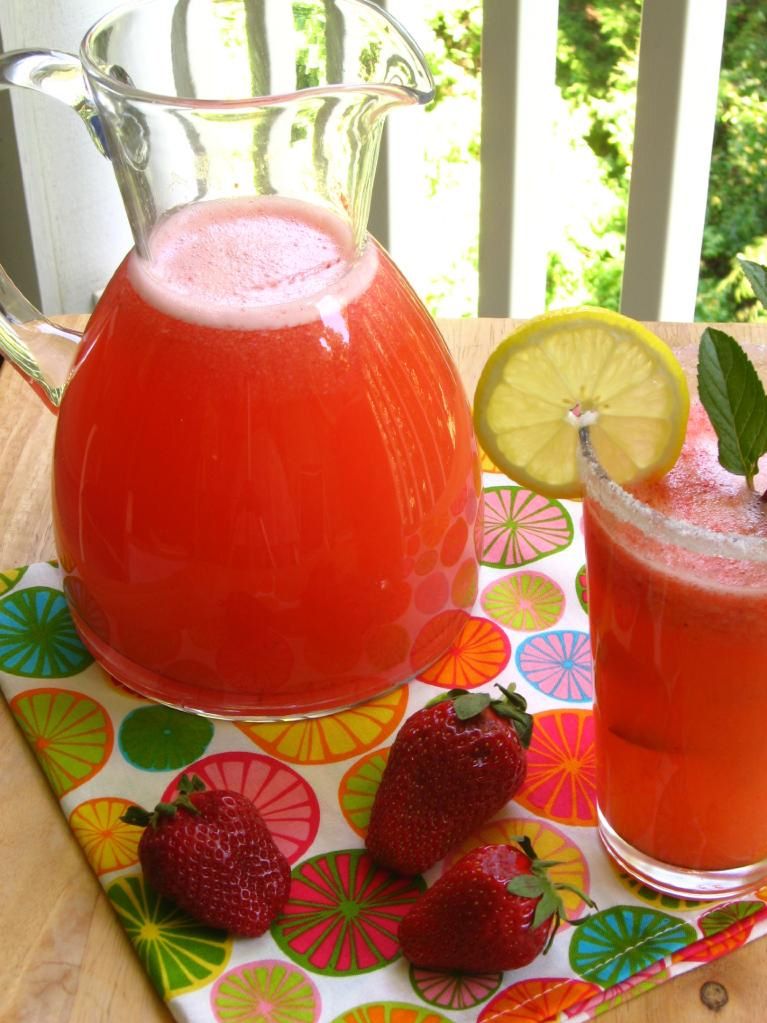
Sparkling Strawberry Lemonade

Historically, I’ve been biased against beverage-making. First off, Coke Zero exists in the world — why would anyone feel the need to make a different beverage?! Would you be completely ashamed of me if I told you that I drink Coke Zero with breakfast, lunch, and dinner? Would it help if I promised that I drink a lot of water, too?

Second off, why make a beverage when you could be making cupcakes?! Or cakes, or pies, or tarts, or enchiladas, or . . . anything!

It took a great professor to show me the error of my beverage discriminating ways. First, a little background info. I was blessed to go to an amazing college — Davidson College, that is — where I learned so many important life lessons: how to pull an all-nighter studying for multivariable calculus, how to write more simultaneous essays than humans are actually capable of, how to illegally park to turn in an exam before the deadline, and, perhaps most importantly, all the lyrics to Vanilla Ice’s “Ice, Ice Baby.” I jest, but really, I did learn an incredible amount, hone my work ethic, and generally enjoy every moment at that fantastic school.

One facet of Davidson I particularly valued was the faculty and the close bonds formed between professors and students. Classes were invited to dinners at professors’ houses, faculty doors were open wide to chat with students about academics or life in general. I had many wonderful professors (in fact, only one not-so-wonderful professor, which has to be a miracle in 4 years!), including Dr. Peroni. Dr. Peroni is a biology professor with an infectious laugh who is passionate about the outdoors and a great biostatistician. My turtle, Squirt, and I lived above her garage my senior year of college, when he was just a wee shellbaby. It was Dr. P who introduced me to experiencing a beverage, and I’m sure she doesn’t even know it!

One summer I was doing research at Davidson and Dr. P invited a bunch of us lab rats (ha ha) over to her house to make DNA earrings (like these). Shut up! What, you don’t have random biological jewelry?! I’ll have you know that I also proudly own neuron and microscope pendants. So there.

Anyhow, at her house she poured us some freshly brewed ice tea and offered us each a big sprig of mint from her garden to stir it with. The taste itself wasn’t even the point for me — but adding the home-grown mint, the act of sprucing up a beverage and enjoying it slowly instead of just glugluglugging it out of a Coke bottle . . . that was galvanizing. Oh, just like food, drinks can be an experience.

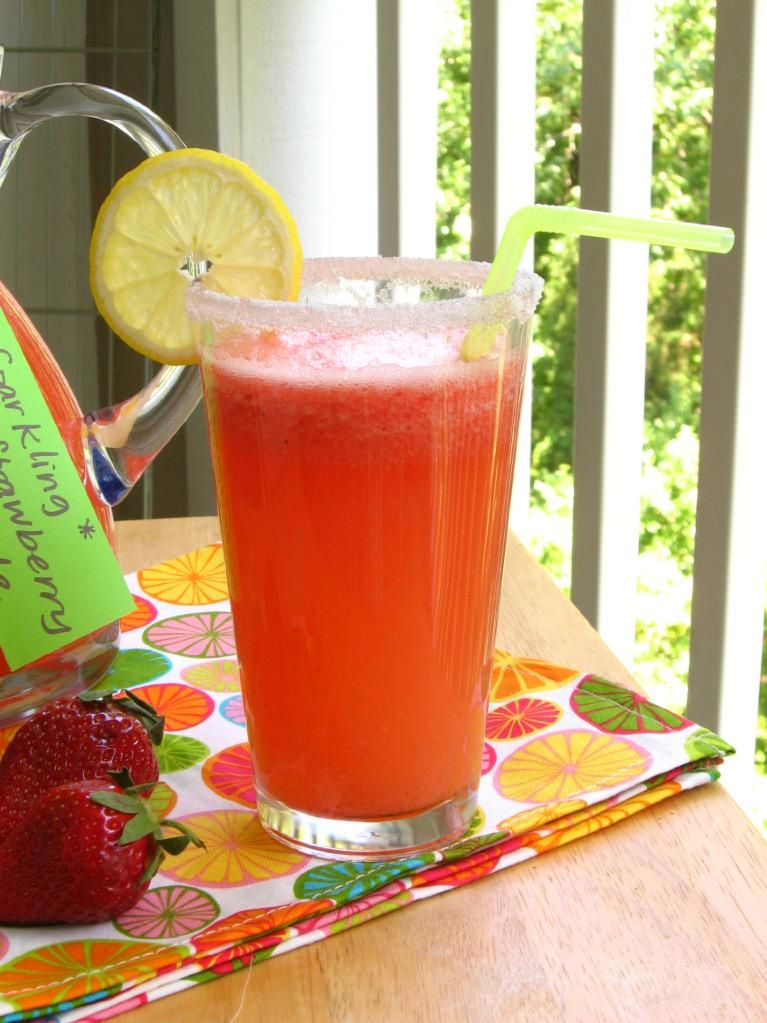
Since then, I’ve been on the lookout for possible drink recipes. All sorts of fantastic lemonades have been catching my eye on the interwebs lately — berry lemonades, herb and lavender lemonades, plain ol’ lemon lemonades. Also catching my eye have been mocktails — snazzy juice and seltzer concoctions that fellow teetotalers enjoy instead of their alcoholic counterparts. When working on my summer dessert, I decided it was also the perfect time to roll out a summer drink. Combining my mocktail and lemonade inspiration, I decided to make some gorgeous Sparkling Strawberry Lemonade — with lots of accoutrements, of course: slices of juicy lemon, plump strawberries, ice cubes, a sugar-crusted rim, green bendy straws, and of course, big sprigs of fresh mint! After all, it’s all about the experience.

Next time I might add more strawberries, because I want an even bolder strawberry-lemon ratio, but the lemonade was perfectly tart and sweet. After embellishing my glass with the above additions, I thoroughly enjoyed sip-sip-sipping my time away. Make a big pitcher of this fresh summer treat and enjoy it on your porch or balcony tonight!

Sparkling Strawberry Lemonade


Recipe by: Adapted from The Sweet Melissa Baking Book by Melissa Murphy
Yields: about 6.5 cups of lemonade

Fresh Strawberry Sauce Ingredients:
1 dry pint fresh strawberries, rinsed and hulled (or maybe a little more)
2 tablespoons sugar
1 teaspoon fresh lemon juice
2 tablespoons cold water

Lemonade Ingredients:
3/4 cup sugar
1 cup very hot water
1 cup fresh lemon juice
4-1/2 cups cold seltzer or sparkling water

Optional Accoutrements:
lemon juice and sugar for glass rims
sprigs of fresh mint
fresh strawberries
slices of lemon
crushed ice
bendy straws!

Directions:
Make strawberry sauce: In a food processor or blender, puree the berries, sugar, lemon juice and water until smooth. Strain the berry mixture into a clean bowl and discard the seeds. Stir in additional sugar, if needed. Cover and refrigerate until used.

Make lemonade: In a pitcher, combine the sugar and hot water and stir until the sugar has dissolved into a syrup. Stir in the lemon juice and cold seltzer water. Add the strawberry sauce and stir to combine. Pour over ice into tall glasses rimmed with sugar (dip rims into lemon juice and then sugar). Garnish with fresh strawberries and other accoutrements, if using. Strawberry lemonade keeps at least 3 days in the refrigerator.


Enjoy!


Share Share this post with friends!

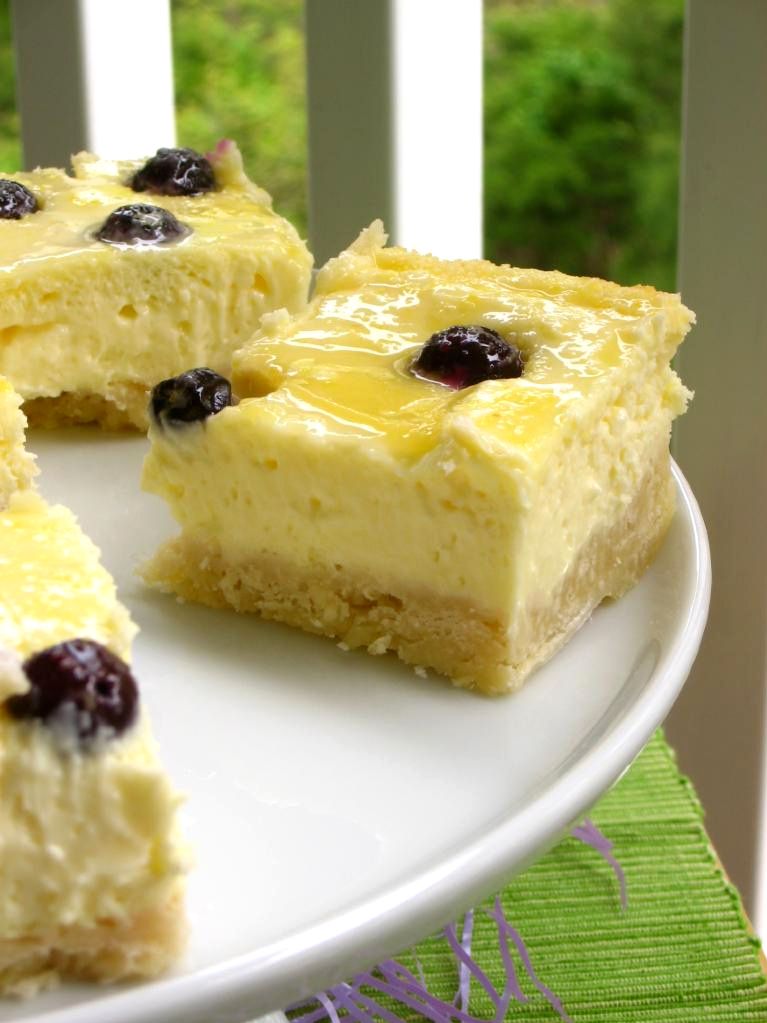
Lemon Blueberry Cheesecake Squares with Shortbread Crust

This post could also be titled, “Lessons on Planning” (please don’t confuse that with “lesson planning” — I’m on Spring Break!).

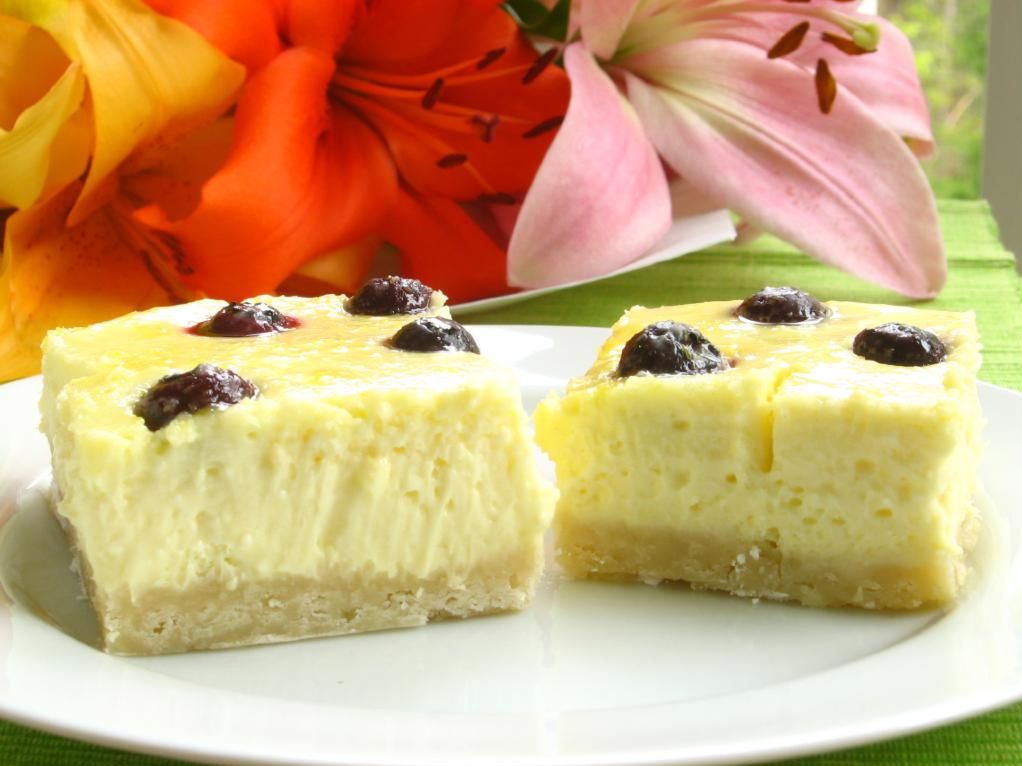
My plans this weekend were exciting. I wanted to create a triple layered dessert with joyful Spring flavors. Doesn’t this sound amazing: lemon squares on a shortbread crust with a delicious layer of blueberry cheesecake. Can’t you see the gorgeous, pale shortbread layer; the bright yellow layer of lemony bliss; the creamy cheesecake layer studded with purple blue orbs — all topped with a fine sprinkling of powdered sugar? Well, take a good look at your fantasy, because that’s the only place you’ll be seeing that image.


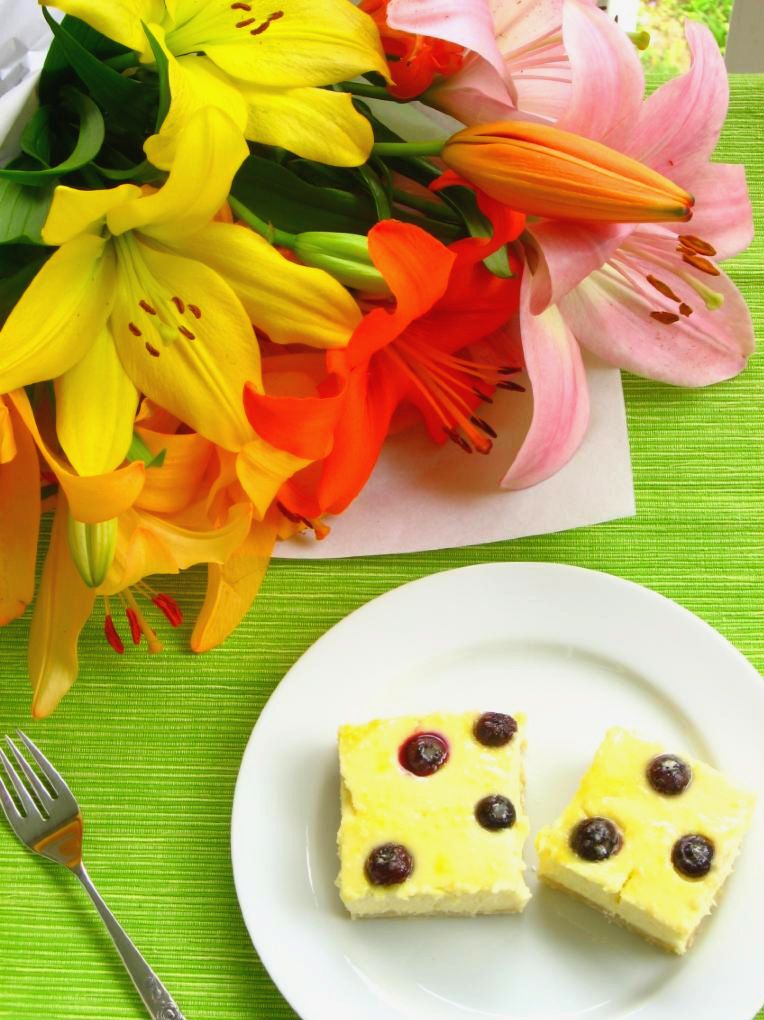
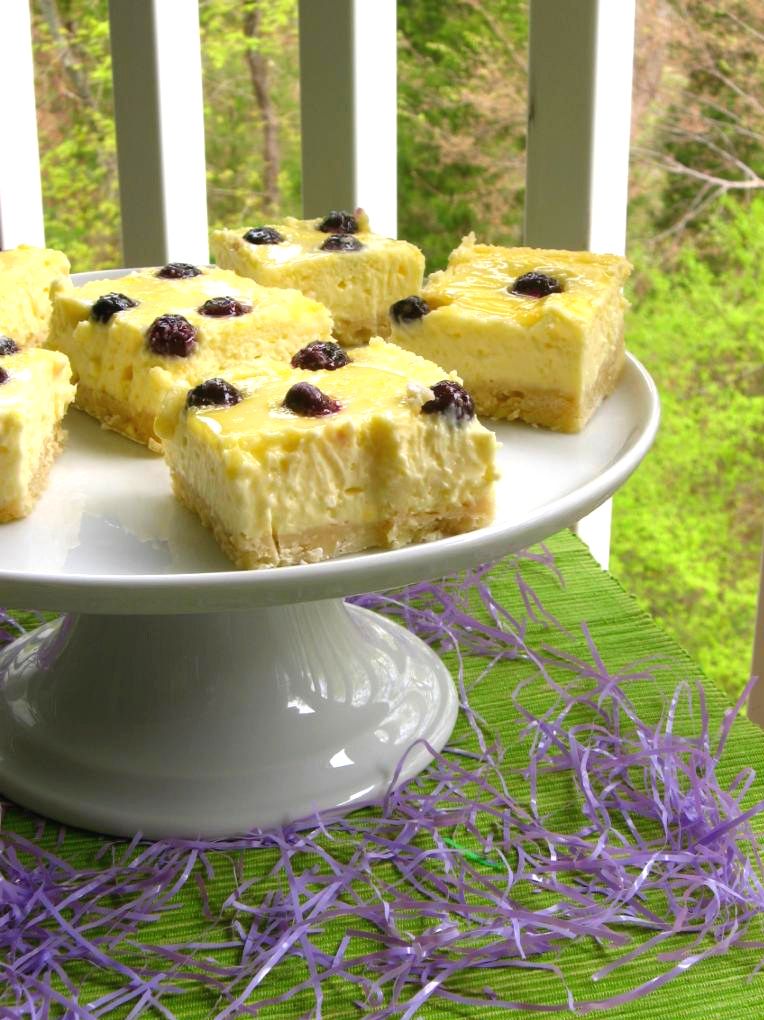
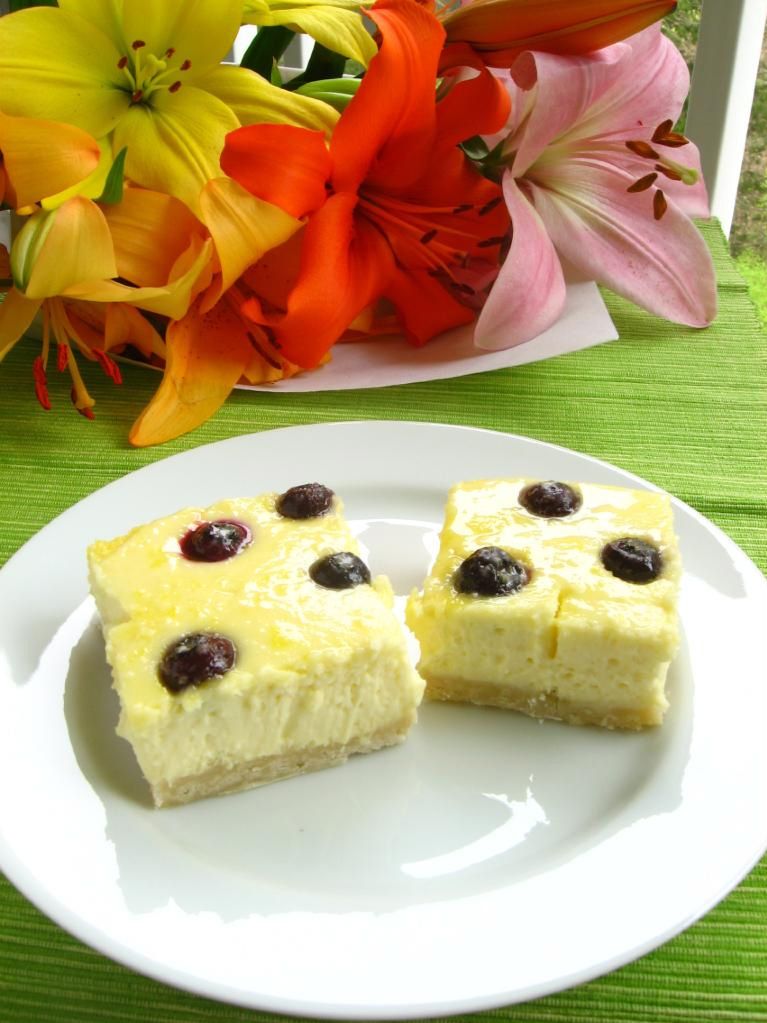
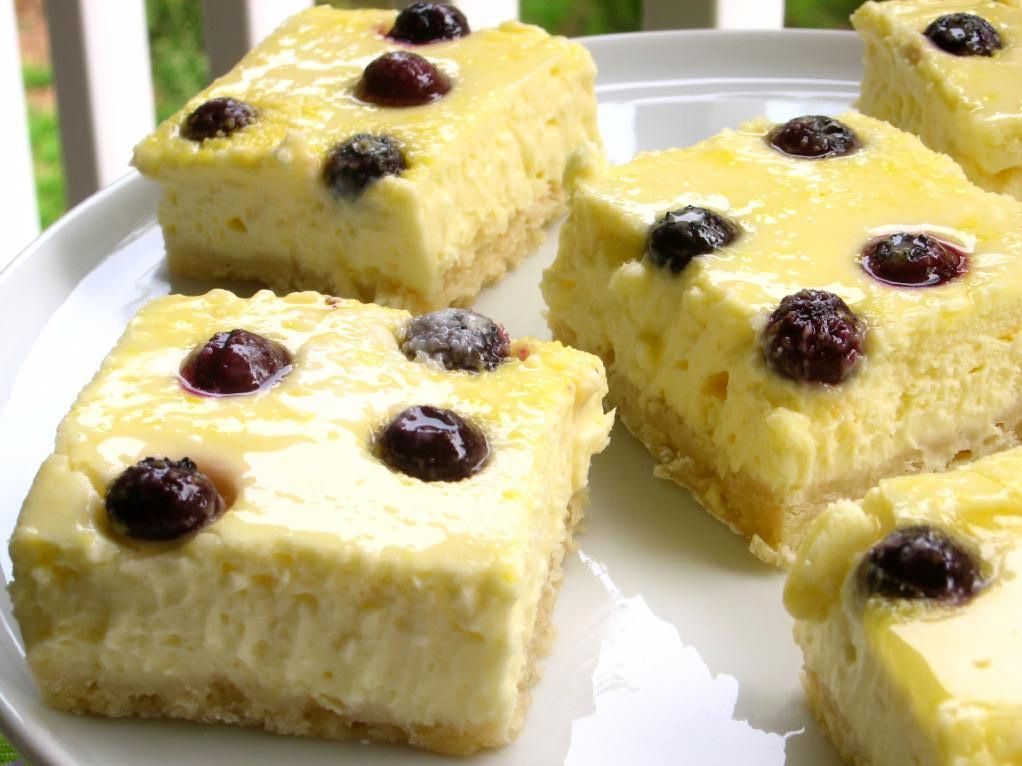
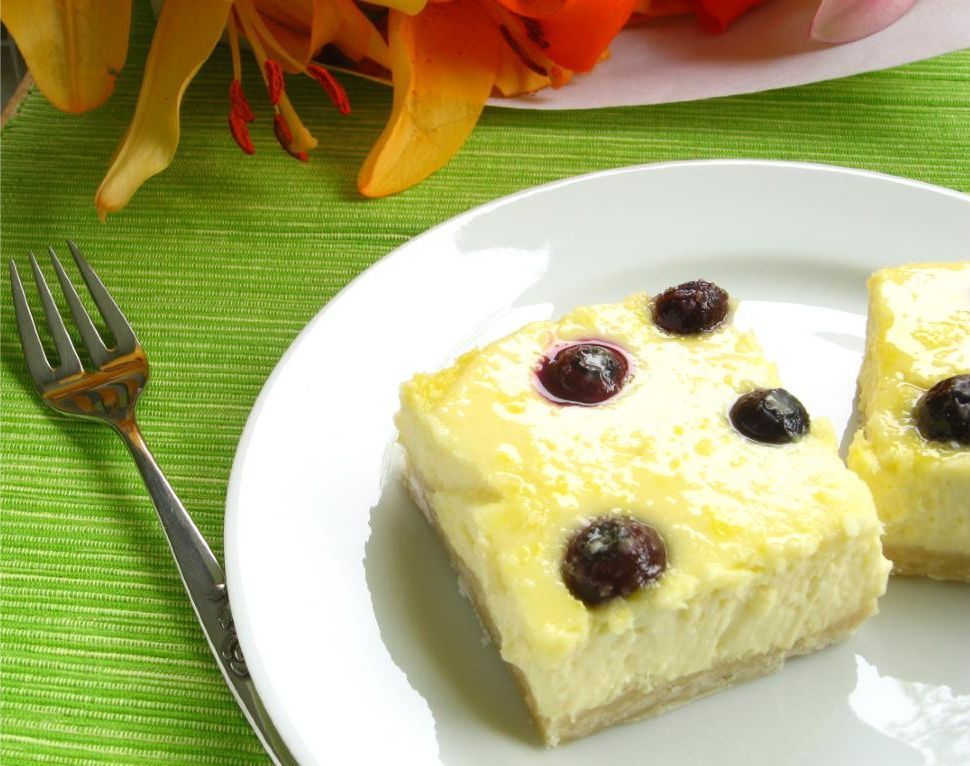
Not exactly as planned, but delicious.

See, it didn’t quite go according to plan. My blueprints for this recipe began when I saw these delicious lemon blueberry cheesecake squares on Shared Sugar. I started pining for them, but I’ve also been pining for lemon squares. Naturally, it dawned on me that I should combine the two.

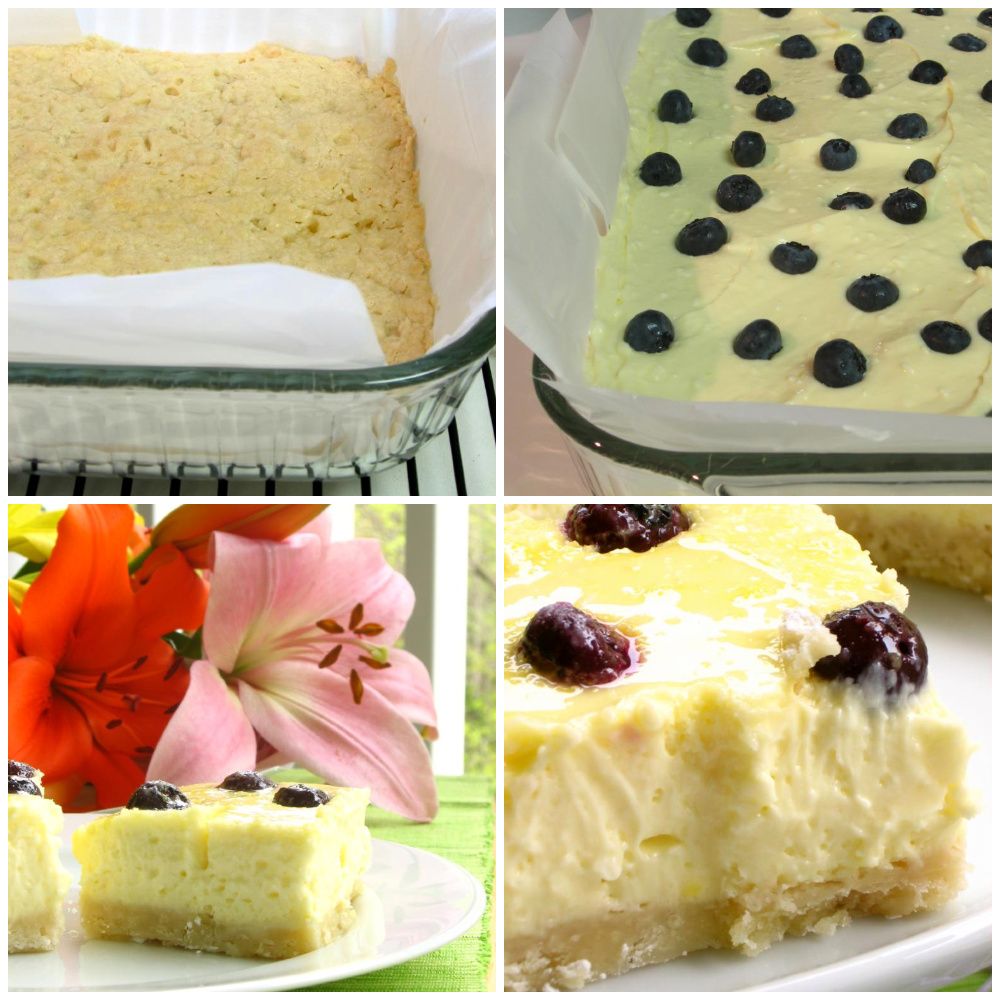
My process (which you shouldn’t repeat) was to bake the shortbread crust for lemon squares as usual, top it with a cheesecake layer, pour the lemon mixture on top, and bake. Sounds great. But what actually happened was that the lemon mixture leaked under the parchment paper I’d lined my pan with and coagulated underneath the entire dessert. Um, so in a way, I actually ended up with a quadruple layer dessert . . . if you count the parchment paper?


Flowers from a student’s parents! So gorgeous!

Some of the lemony liquid stayed on top of the cheesecake forming an odd lemon “glaze” of sorts. The entire dessert now looks a bit weepy, but I assure you, it tasted amazing. How can you go wrong with these flavors? Nevertheless, I decided you wouldn’t want to repeat the whole frustrating process. I’ve deleted the lemon layer from the recipe below, leaving you with a simple two layer dessert: lemon blueberry cheesecake squares on a shortbread crust. Still amazing, bright, springy, creamy, indulgent.

So much for plans. I’m a big planner, and it can be hard on me when things don’t work out like I think they should (pat on the back for myself, though, because I think I handled this culinary detour well). Thank God that He’s had big plans since before the foundation of the world — plans to send His only Son as a sacrifice for us, even while we were still sinners ignoring the God who loved us.

And of course, with Easter around the corner, thank God for the miracle He had planned for three days after that sacrifice: Christ’s resurrection from the dead to triumph over death and the grave.

My plans in the kitchen and in life don’t always work out. I leave out the baking soda, don’t thicken the fruit filling enough, or who even knows what else (yeah, I never even posted that travesty). But God says, “As the heavens are higher than the earth, so are my ways higher than your ways and my thoughts than your thoughts” (Isaiah 55:9). His plans worked — thank God — and we can now have abundant and eternal life because of them.

So, I can’t be too upset about my cheesecake squares not having a lemon layer. I’ve tweaked the recipe below so you can now go make these amazing cheesecake squares without worrying about that either. I’ll try again soon — I’m thinking of making lemon squares as usual, and then doing a no-bake cheesecake layer on top. We’ll see how that works. But it’s okay if my plans don’t work out, because you know how planning goes!

Lemon Blueberry Cheesecake Squares with Shortbread Crust


Recipe by: Adapted from King Arthur Flour (crust) and Shared Sugar (cheesecake)
Yields: about 18 bars

Crust Ingredients:
1 cup (2 sticks) butter
2 cups all-purpose flour
1/2 cup confectioners’ sugar

Cheesecake Layer Ingredients:
32 ounces cream cheese, at room temperature
4 eggs
4 tablespoons lemon juice
1 cup sugar
2 cup blueberries

powdered sugar for topping

Directions:
Preheat your oven to 350°F. Prepare a 9 x 13 in. baking dish with a parchment paper sling. Cut the butter into the flour and confectioners’ sugar and press into the baking dish (I used a food processor to cut the fat into the flour, and then the bottom of a dish to press the mixture into the pan). Bake 20 minutes or until light brown. Let cool on wire rack.

In a bowl with an electric mixer, add the cream cheese, eggs, lemon juice and sugar. Mix until the ingredients are creamy and the cream cheese is fully incorporated. Pour into the pan with the cooled crust. Then evenly distribute the blueberries.

Bake 30-35 minutes or until filling is set. Remove from the oven and cool completely. Then refrigerate for at least 3 hours. Remove the cheesecake from the pan using the parchment paper. Cut into bars and sprinkle with powdered sugar.


Byrd loves these flowers — imagine a very excited toy poodle with her curly snout stuffed into one of these big blooms. I know: awwww!


Share Share this post with friends!

Fresh Blueberry Pie

…with a surprising crust. No, the surprise is not the vodka — y’all have all heard about the vodka crust trick by now.

Adding too much water to pie dough makes it tough, whereas adding too little results in a dry, crumbly mess (that was supposed to be a pie pocket. Ahem). Adding vodka and water to your pie dough instead of just water allows you to incorporate more liquid, making your dough workable without making it tough. The alcohol vaporizes while cooking so the final pie doesn’t taste like vodka. This was my first trial of this nice little trick, but it’s old news for many of you.

This was also, incidentally, the first time I’d ever encountered vodka first hand (being a teetotaler). I just want to know why someone would drink something that smells exactly like rubbing alcohol? I guess taste is really not the point? Please fill me in.

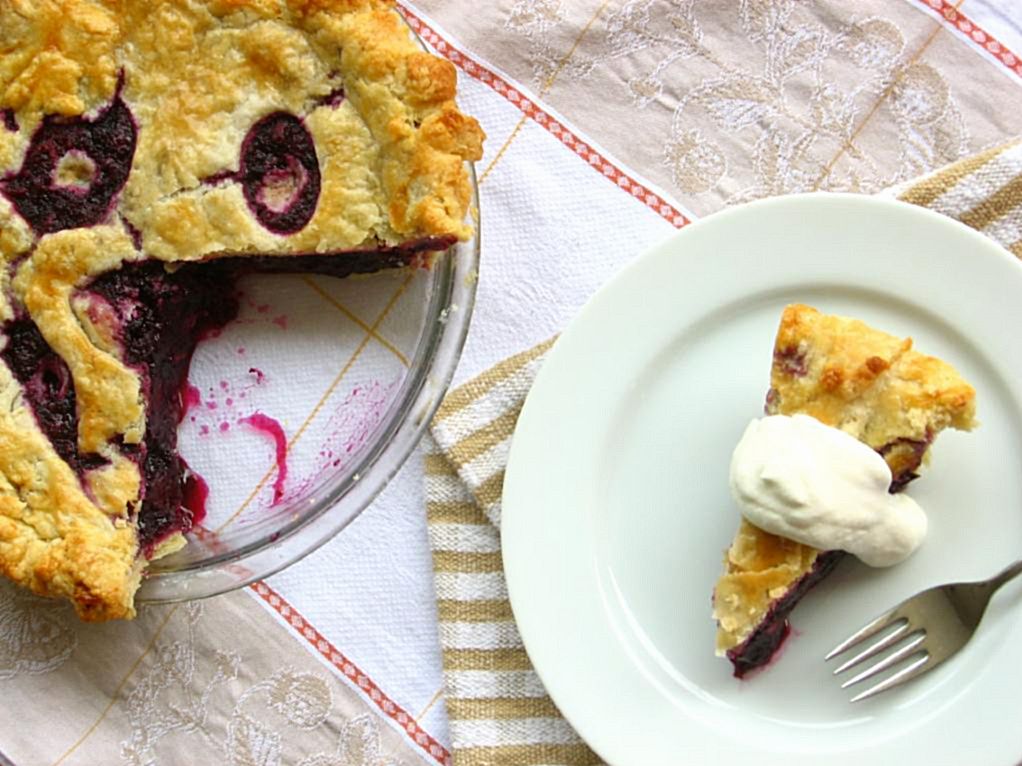
Anyway, vodka’s not the surprise. The surprise is how seriously I debated throwing this pie over my balcony, pie plate and all. It’s not because the pie wasn’t delicious . . . because WOW, it was! It’s a gorgeous flaky, tender crust with a thick filling full of plump, juicy berries. In fact, it’s not because of the finished pie at all. It’s because of what America’s Test Kitchen ironically calls their foolproof pie dough.

Ohhh this dough was a sticky, frustrating mess until I finally got it shoved into the oven with a huff! Despite the utter gobs of flour strewn all over my counter, my cute apron, my cute dog, and my cute boyfriend, the dough stuck to everything it could get its doughy little tentacles on. Even more fun, it tore apart rebelliously whenever moved. If you’re wondering why this pie looks like it got in a fight with an unruly pastry cutter . . . that’s why.

My attempts to crimp the edges resulted in dough-covered fingers and one ragged pie. Let’s just say this kitchen disaster was not weathered gracefully. There may have been some apron throwing. At least I didn’t chuck the pie into the woods behind my apartment after struggling for the umpteenth time trying to roll out the dough, right? Honestly, if it hadn’t been Mike’s mom’s pie plate . . . who knows what could’ve happened!

After eyeing the evil pie dough and the trash can a few times, I finally decided to buckle down and see my recipe through to the end. I rechilled, refloured, griped about America’s Test Kitchen, rechilled again, cried, switched to rolling on parchment, yelled a little, switched back to flour . . . and held my breath every time I moved that pie dough anywhere.

I’m glad I stuck it out. The crust, as I mentioned, is delicious and the perfect texture. I may switch back to my standard lard/butter vodkaless crust next time to avoid a kitchenpocalypse and protect my typically reasonable blood pressure, but it was very good. And let me tell you about these BLUEBERRIES!!

One of the reasons this pie is beautiful to me despite its decidedly Quasimodo-esque appearance is because it has the perfect consistency, bright flavor, and is full of plump, rich berries! ATK, redeeming themselves for now, formulated a recipe for blueberry pie filling thickened with tapioca and a grated apple, which releases its pectin upon being cooked. No runny filling or smushed berries here — just the perfect blueberry pie. It even has a tangy complexity to the blueberry flavor imparted by Ms. Granny Smith. I was such a fan of every bite I took.

So perfect, in fact, that I tried the same nifty apple trick with another sort of pie. A pie that actually turned out pretty and even tastier than this one — but you’ll have to wait until the next post to hear more! For now, here are some tips on managing this beastly dough (that, in all fairness, many cooks on the interwebs apparently loved working with. Go figure):

-Let it chill for a long time. At least overnight, but two days might be even better.
-Don’t be timid about flouring your surface and rolling pins generously. That’s the point of having a wet dough, and you’re gonna need it.
-Rechill any time you (or your dough) are losing your cool.
-Imagine the final product. While struggling with my dough, I was already drafting a post in my head telling you about how the final pie wasn’t worth the trouble, but truthfully . . . it was.

What’s your favorite pie crust trick? Anyone ever actually chucked their dough into the garbage? Tell me your pie secrets!

Best Blueberry Pie with Foolproof Pie Dough


Recipe by: America’s Test Kitchen
Yields: one 9-in, double-crust pie

Crust Ingredients:
2 1/2 cups unbleached all-purpose flour (12 1/2 ounces)
1 teaspoon table salt
2 tablespoons sugar
12 tablespoons cold unsalted butter (1 1/2 sticks), cut into 1/4-inch slices
1/2 cup chilled solid vegetable shortening, cut into 4 pieces (I use butter flavor)
1/4 cup vodka, cold
1/4 cup cold water
1 large egg, lightly beaten with 1 teaspoon water

Blueberry Filling Ingredients:
6 cups fresh blueberries (about 30 ounces)*
1 Granny Smith apple, peeled and grated on large holes of box grater
2 teaspoons grated zest and 2 teaspoons juice from 1 lemon
3/4 cup sugar (5 1/4 ounces)
2 tablespoons quick-cooking tapioca, ground*
Pinch table salt
2 tablespoons unsalted butter, cut into 1/4-inch pieces

Directions:
1. For The Pie Dough: Process 1 1/2 cups flour, salt, and sugar in food processor until combined, about two 1-second pulses. Add butter and shortening and process until homogenous dough just starts to collect in uneven clumps, about 15 seconds; dough will resemble cottage cheese curds and there should be no uncoated flour. Scrape bowl with rubber spatula and redistribute dough evenly around processor blade. Add remaining cup flour and pulse until mixture is evenly distributed around bowl and mass of dough has been broken up, 4 to 6 quick pulses. Empty mixture into medium bowl.

2. Sprinkle vodka and water over mixture. With rubber spatula, use folding motion to mix, pressing down on dough until dough is slightly tacky and sticks together. Divide dough into 2 even balls and flatten each into 4-inch disk. Wrap each in plastic wrap and refrigerate at least 45 minutes or up to 2 days.

3. Remove 1 disk of dough from refrigerator and roll out on generously floured (up to 1/4 cup) work surface to 12-inch circle, about 1/8 inch thick. Roll dough loosely around rolling pin and unroll into pie plate, leaving at least 1-inch overhang on each side. Working around circumference, ease dough into plate by gently lifting edge of dough with one hand while pressing into plate bottom with other hand. Leave dough that overhangs plate in place; refrigerate while preparing filling until dough is firm, about 30 minutes.

4. For The Filling: Adjust oven rack to lowest position, place rimmed baking sheet on oven rack, and heat oven to 400 degrees. Place 3 cups berries in medium saucepan and set over medium heat. Using potato masher, mash berries several times to release juices. Continue to cook, stirring frequently and mashing occasionally, until about half of berries have broken down and mixture is thickened and reduced to 1 1/2 cups, about 8 minutes. Let cool slightly.

5. Place grated apple in clean kitchen towel and wring dry. Transfer apple to large bowl. Add cooked berries, remaining 3 cups uncooked berries, lemon zest, juice, sugar, tapioca, and salt; toss to combine. Transfer mixture to dough-lined pie plate and scatter butter pieces over filling.

6. Roll out second disk of dough on generously floured (up to 1/4 cup) work surface to 11-inch circle, about 1/8 inch thick. Using 1 1/4-inch round biscuit cutter, cut round from center of dough. Cut another 6 rounds from dough, 1 1/2 inches from edge of center hole and equally spaced around center hole. Roll dough loosely around rolling pin and unroll over pie, leaving at least 1/2-inch overhang on each side.

7. Using kitchen shears, trim bottom layer of overhanging dough, leaving 1/2-inch overhang. Fold dough under itself so that edge of fold is flush with outer rim of pie plate. Flute edges using thumb and forefinger or press with tines of fork to seal. Brush top and edges of pie with egg mixture. If dough is very soft, chill in freezer for 10 minutes.

8. Place pie on heated baking sheet and bake 30 minutes. Reduce oven temperature to 350 degrees and continue to bake until juices bubble and crust is deep golden brown, 30 to 40 minutes longer. Transfer pie to wire rack; cool to room temperature, at least 4 hours. Cut into wedges and serve.

*This recipe was developed using fresh blueberries, but unthawed frozen blueberries (our favorite brands are Wyman’s and Cascadian Farm) will work as well. In step 4, cook half the frozen berries over medium-high heat, without mashing, until reduced to 1 1/4 cups, 12 to 15 minutes. Grind the tapioca to a powder in a spice grinder or mini food processor. If using pearl tapioca, reduce the amount to 5 teaspoons. Vodka is essential to the texture of the crust and imparts no flavor; do not substitute.


Want a slice?


Share Share this post with friends!

1 7 8 9 10