chocolate

Thanksgiving Recipe Ideas

The students have all closed their novels and packed up their supplies for Thanksgiving Break, so it’s time for me to take a deep breath and relax — until the baking begins tomorrow, of course! Because I enjoyed reading Jillicious‘s list of things she’s thankful for this year, here are a few of my own:

  1. Jesus, who made the greatest sacrifice for me.
  2. My family — they’re crazy, wonderful, and so supportive.
  3. Mike, who has never disliked anything I’ve ever cooked, whether overseasoned, underseasoned, burnt, or weird.
  4. Cake.
  5. Friends, for joining me in ridiculous escapades.
  6. My students, who make me laugh every day and (usually) make me feel like I’m making a difference through my teaching.
  7. Writing.
  8. Byrd and Squirt, my poodle and red-eared slider. One is fluffy and hyper, the other is scaly and . . . frowny; nevertheless, they’re both the sweetest pets anyone could ask for, and have made my little apartment a home.
  9. My snuggie. Shut up; it’s comfortable!
  10. Food, which is one language through which history, family, culture, and emotion has been communicated to me. I love joining the conversation.

On that note, here are some dishes that have warmed the pages of Willow Bird Baking in the past months that would be lovely on your Thanksgiving dinner table. May you enjoy the sharing of mirth, love, and calories with your family this year!


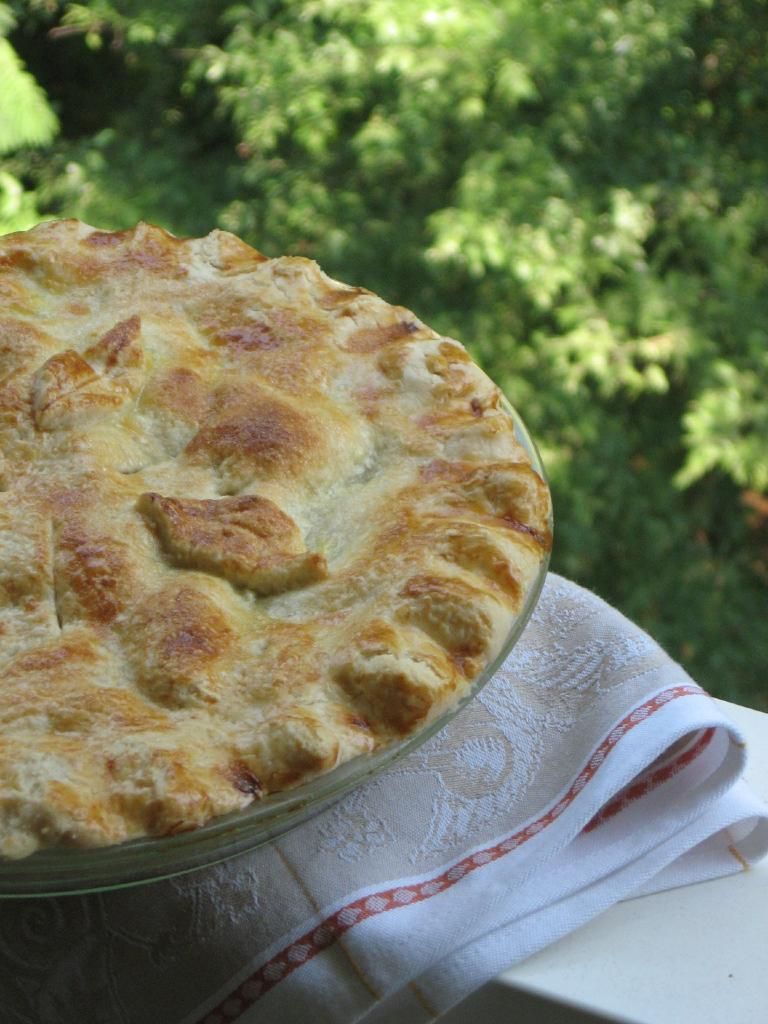
Mini-Pies: Pumpkin, Peach Crisp, and Sour Cream Apple — Add some variety to your Thanksgiving pie choices! Everyone gets to choose their own flavor. The pumpkin and peach pies are especially scrumptious.


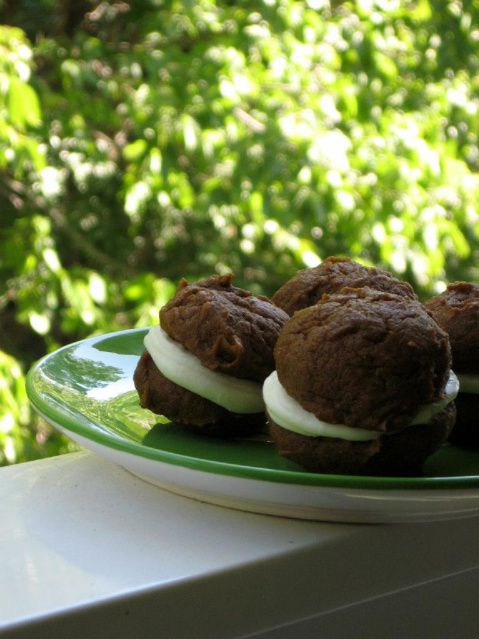
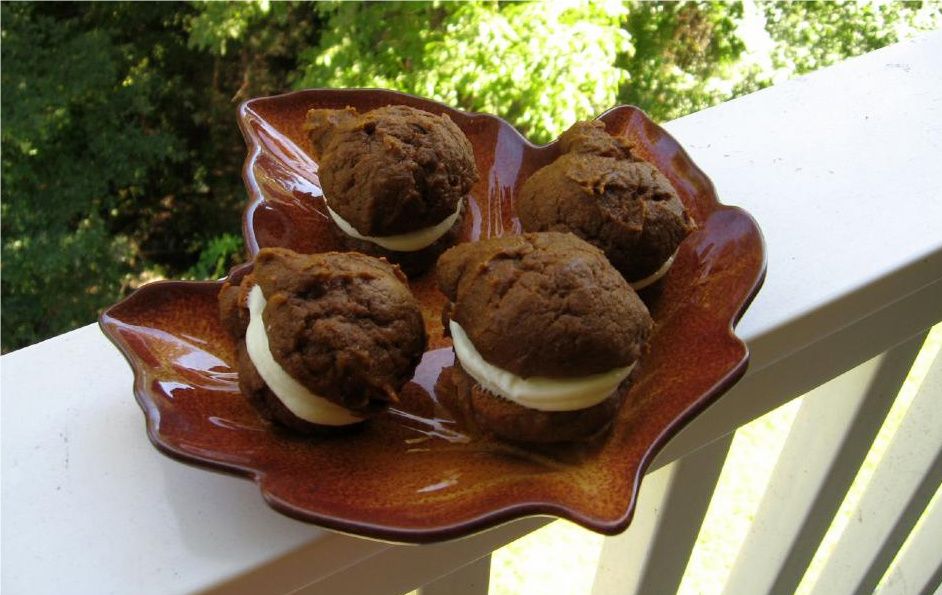
Jack-O’-Lantern Whoopie Pies — These cakey cookies are hearty, moist, spicy, and addictive. Whoopie pies should be part of every family’s Thanksgiving tradition.


Peach Crisp Pie — Delicious, gooey peaches and crispy oats fill a tender, flaky crust. This is my favorite pie of all time!


Best Ever Cream Cheese Pound Cake with Easy Caramel Frosting and Spiced Apples — This moist, dense, finely-crumbed cake is heavenly with or without some spicy cinnamon apples on the side. “Best Ever” is not an exaggeration!


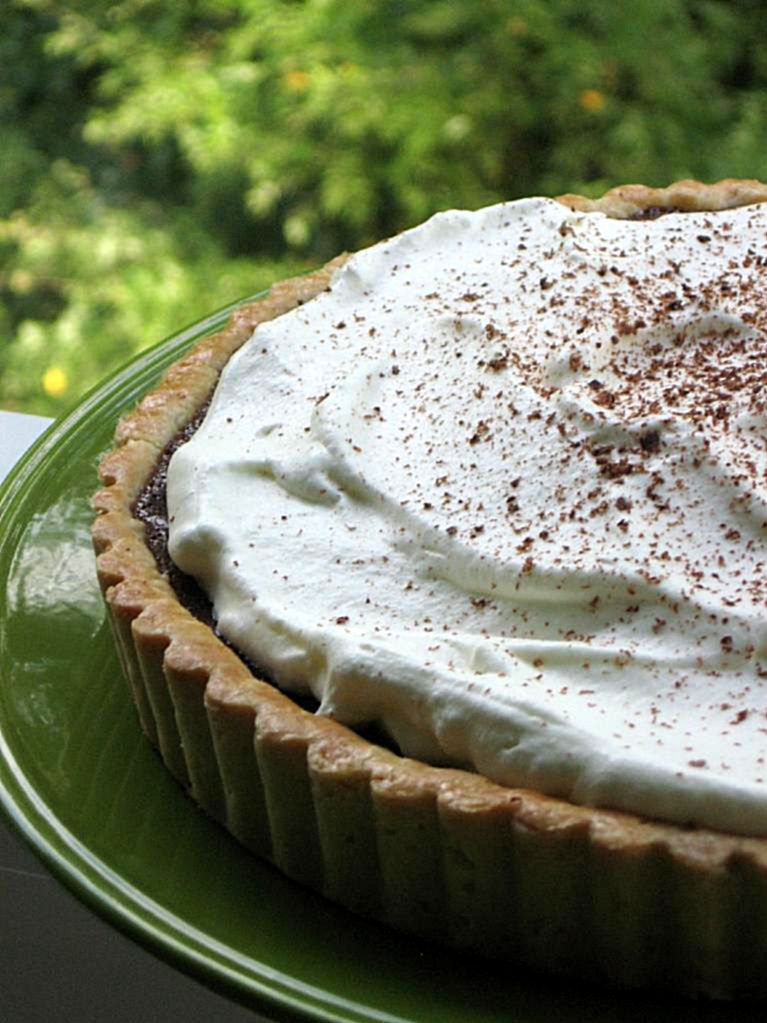
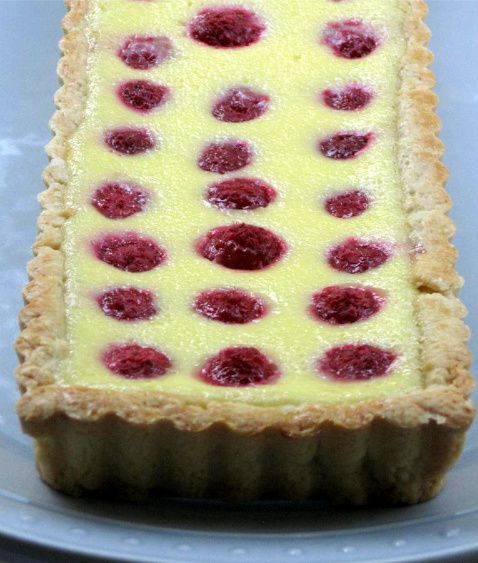
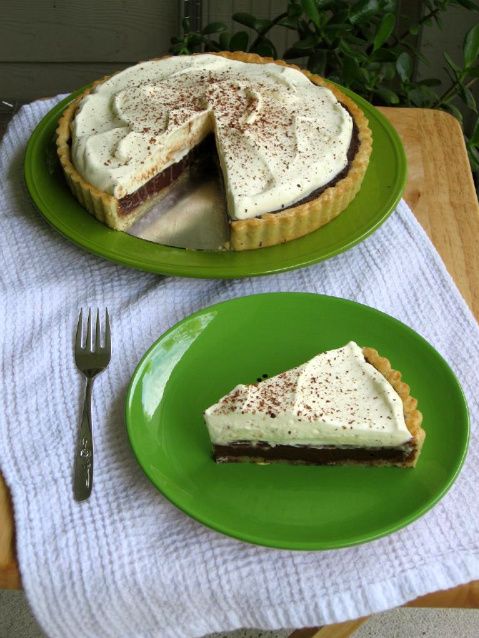
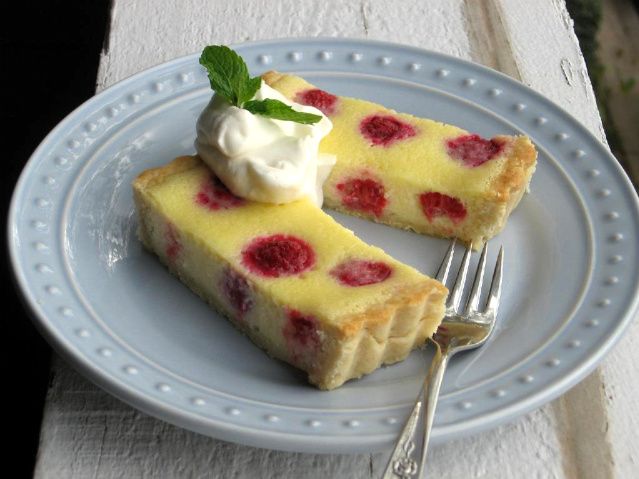
Chocolate Tart — Tired of pumpkin? If you’re a chocolate lover, this tart is a must-eat. Rich, indulgent chocolate fills the buttery tart crust, and a pile of freshly whipped cream accompanies each bite. This post also includes a bright and tangy Raspberry Cream Cheese Tart.


Overnight Yeast Rolls — These fluffy, delicious, buttery yeast rolls are part of my family’s annual Thanksgiving tradition. When I realized I was old enough to make them myself (and at any time of year, too), it was one ecstatic day in the kitchen!


Cardamom Pumpkin Macarons — Having an elegant Thanksgiving? These gluten-free cookies combine cardamom with traditional Thanksgiving pumpkin. Macarons are the perfect bite: crisp on the outside, chewy on the inside.


Barefoot Contessa’s Carrot Pineapple Cake — Looking for a big, beautiful cake to adorn your Thanksgiving table? Barefoot Contessa’s Carrot Pineapple Cake is brimming with hunks of pineapple, carrot, walnut, and raisin. With cream cheese frosting slathered on in a thick layer, it’s an elegant and decadent Thanksgiving dessert.

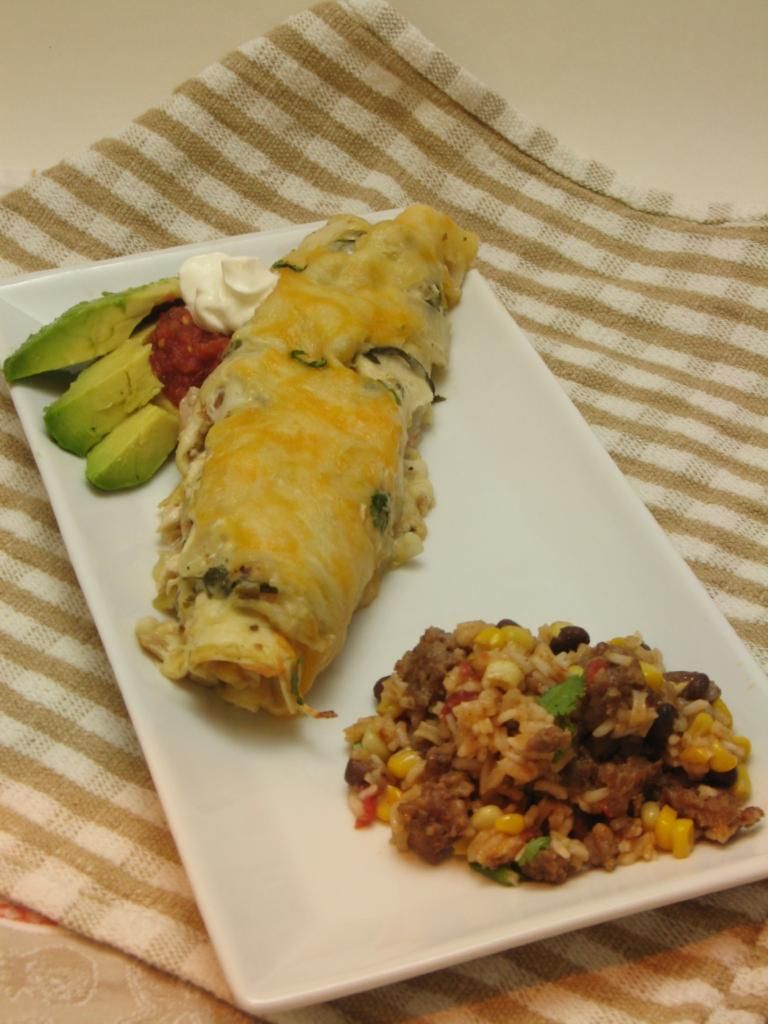
Green Chile TURKEY Enchiladas — Okay, these don’t quite fit on the Thanksgiving dinner table, but maybe you find yourself wondering what to do with all your juicy turkey leftovers? These Green Chile Chicken Enchiladas can be transformed into turkey-filled treats, and what a great way to spice up leftovers. The recipe is so seductive, yet very simple — it won’t take up all of your Black Friday!


Share Share this post with friends!

Un Petit Trésor: Les Macarons

The time has come. What a lovely night: I’m sitting in my little white desk chair, burning my raspberry scented candle, and weaving together a story I’ve been itching to tell you for ages. Why haven’t I told it sooner? It’s about an endeavor that until this month, I simply haven’t had the nerve to attempt. In keeping with their character and mission, however, the Daring Bakers have once again pushed me out of my comfortable nest. For weeks now I’ve been flapping my wings in a frenzy, uncertain as to whether I’d fly through this challenge like a graceful (albeit nonexistent) Willow Bird, or fall to my (melodramatic) doom. Well, here I am telling you the story I’ve longed to tell you, so it must be good news, right? Let me tell you a tale of magnificence, of magic, of madness, of . . . feet?

Of feet.

Don’t be grossed out, podophobics — these aren’t the sort of feet with heels, arches, and toes. These are the sort of feet that bakers across the world have been dreaming of long before this month’s challenge rolled around. You’ve probably guessed by now that I’m referring to the sweet little feet on a lovely French macaron.

The 2009 October Daring Bakers’ challenge was brought to us by Ami S. She chose macarons from Claudia Fleming’s The Last Course: The Desserts of Gramercy Tavern as the challenge recipe.

Macarons are unique, delicate sandwich cookies with a crisp shell, soft innards, and a variety of different fillings. They’ve been called “the new cupcakes” because of their petite portion sizes, their diverse flavorings, and their meteoric increase in popularity in recent years. While I don’t think they’ll be replacing cupcakes anytime soon, macarons are infinitely versatile. The shells can be flavored with cocoa, powdered fruits, and teas; colored with bright powdered food coloring; and filled with any one of myriad ganaches, frostings, creams, nut butters, or jams.

The recipe for macarons is deceptively short and (forgive my beloved puns) sweet. The plethora of nit-picky addendums to said recipe, however, expose the truth: macarons are difficult to perfect. They’re finicky about ingredient ratios, oven temperatures, folding intensity and duration, your kitchen decor . . . you get the idea. I was nervous but determined as I set my first batch of egg whites out on the counter to age. To be honest, the aforementioned nit-picky how-tos probably added to my anxiety more than they aided my technique. My obsessive compulsive nature was on overdrive trying to compile the 847,948 macaron tips I had read, some of which conflicted and some of which were insanely detailed. I wouldn’t have been at all surprised to find someone prescribing optimal wrist angles for folding batter or proper macaron-making hairstyles.

At some point, you have to stop reading the mountain of macaron manuals and just jump on in. In that spirit, I picked up some cardamom in the bulk spice section of my local grocer and set to work on Cardamom Pumpkin Macarons.

Macaron recipes all typically follow a basic pattern: beat egg whites and sugar to a stiff meringue, process almonds and powdered sugar together until fine, sift to remove lumps, fold dry ingredients into wet ingredients to form the macaronage, pipe out into circles, and bake. I added the cardamom into my macaron shells and whipped up Tartelette’s Pumpkin Cream Cheese Filling to sandwich between them. I sprinkled some roasted, salted pumpkin seeds in the center of some of these macarons for good measure.

When I knelt to peer into my oven window and saw feet on my macarons, I grabbed my phone and my camera. The former was to call Mike and share my elation, while the latter provided a video memento of my victorious achievement. I love knowing that so many fellow bakers (daring or otherwise) have felt the joy of this very moment while sitting in front of their own ovens.

Despite my elation, my first batch of macarons certainly wasn’t perfect. They were delicious, but the shells were a bit flat. After reflecting and reading, I decided the flatness of the shells was probably due to overfolding my macaronage, and that the Daring Bakers recipe was a risk, seeing as it used a different ratio of ingredients than the accomplished Tartelette. Thus I made the following changes: I would count my strokes as I folded in my dry ingredients, ensuring that they were under 50, and I would use Tartelette’s recipe.

Batch #2 was comprised of plain macaron shells with two fillings: Cream Cheese Buttercream with Strawberry Jam, or David Lebovitz’s Chocolate Filling. And finally, using only 45 folding strokes, egg whites aged for 48 hours, and Tartelette’s careful ratio, I achieved a magnificent macaron!

While both fillings were good, we strongly preferred the chocolate filling to the somewhat overly tangy cream cheese buttercream. Y’all know I love cream cheese, but the taste of this recipe struck me as a bit odd (maybe I did something wrong). I do love the idea of cold, fruity jam on top of cream, but next time I’ll use a regular vanilla buttercream.

These gorgeous bites would be perfect with tea or coffee (I have to admit, though, I’m not a coffee drinker. In fact, that’s Coke Zero in the mug up there — go ahead and laugh). Because of their flexible flavoring, macarons are also ideal for any time of day. Eat a light jam macaron on the patio for breakfast, a buttercream macaron for a late morning brunch, or a ganache-filled macaron for a decadent dessert. Don’t be discouraged if your first try doesn’t yield perfection; the eventual success and satisfaction is worth the wait!

Cardamom Pumpkin Macarons


Recipe By:

-Claudia Fleming’s The Last Course: The Desserts of Gramercy Tavern (adapted by me)
Tartelette (pumpkin cream cheese filling)

Yields: around 2 dozen macarons (48 shells)


Macaron Ingredients:
2 ¼ cups (225 g, 8 oz.) icing sugar
2 cups (190 g, 6.7 oz.) almond flour
2 tablespoons (25 g , .88 oz.) granulated sugar
1/2 heaping teaspoon ground cardamom
5 (Have at room temperature) egg whites, at room temperature (I followed the popular recommendation and aged my egg whites for 24-48 hours on a counter top, covered with a paper towel)


Pumpkin Cream Cheese Ingredients:
2 oz (60gr) cream cheese, at room temperature
2 oz (60gr) freshly cooked or canned pumpkin
1/8 tsp ground cloves


Directions:
1. Preheat the oven to 200°F (93°C). Combine the icing sugar and almond flour in a medium bowl. If grinding your own nuts, combine nuts and a cup of confectioners’ sugar in the bowl of a food processor and grind until nuts are very fine and powdery.
2. Beat the egg whites in the clean dry bowl of a stand mixer until they hold soft peaks. Slowly add the granulated sugar and beat until the mixture holds stiff peaks.
3. Sift half of the almond flour mixture into the meringue and fold to combine. Fold quickly at first and then gently. Add cardamom to your batter. Sift in the remaining almond flour and continue to fold, but be gentle! Don’t overfold, but fully incorporate your ingredients. Note: Count your strokes and try to stay under 50. The macaronnage should “flow like magma,” whatever that means, when it’s ready.)
4. Spoon the mixture into a pastry bag fitted with a plain half-inch tip (Ateco #806). You can also use a Ziploc bag with a corner cut off. It’s easiest to fill your bag if you stand it up in a tall glass and fold the top down before spooning in the batter.
5. Pipe one-inch-sized (2.5 cm) mounds of batter onto baking sheets (double up on baking sheets if they aren’t professional grade) lined with nonstick liners (or parchment paper). Note: I piped mine too close together. Be careful.
6. Bake the macaroon for 5 minutes. Remove the pan from the oven and raise the temperature to 375°F (190°C). Once the oven is up to temperature, put the pans back in the oven and bake for an additional 7 to 8 minutes, or lightly colored. Note: Don’t get so excited about their feet that you yank them out too soon; if you do, the feet will collapse into a sad ruffle. Don’t ask me how I know this.
7. Cool on a rack before filling.

For filling: In a medium bowl, mix the cream cheese, pumpkin and cloves until completely incorporated. Fill a pastry bag with this mixture and pipe onto half the shells and top with another shell.

Note: If I had this to do over again, I’d use Tartelette’s recipe (below) with cardamom added for the macarons.

Plain Macarons with Two Fillings: Cream Cheese Buttercream with Strawberry Jam and Chocolate Ganache


Recipe By:

Tartelette (macarons, cream cheese buttercream, adapted by me)
David Lebovitz (chocolate filling)

Yields: around 15-17 macarons (30-34 shells)


Macaron Ingredients:
3 egg whites (about 90 gr)
30 gr granulated sugar
200 gr powdered sugar
110 gr almonds


Cream Cheese Buttercream Filling Ingredients: Note: I would have preferred regular buttercream. This filling had an odd flavor.
1 1/2 sticks (170 gr) butter at room temperature
4 oz (120gr) cream cheese, softened
3 egg whites
1/2 cup (100gr) sugar
2 Tb water
1 tsp vanilla extract or 1/2 vanilla bean split open and seeded.
Strawberry jam (or flavor of your choice)


Chocolate Filling Ingredients:
½ cup (125 ml) heavy cream
2 teaspoons light corn syrup
4 ounces (120 gr) bittersweet or semisweet chocolate, finely chopped
1 tablespoon (15 gr) butter, cut into small pieces


Directions:
For the whites: the day before (24hrs), separate your eggs and store the whites at room temperature in a covered container. If you want to use 48hrs (or more) egg whites, you can store them in the fridge. In a stand mixer fitted with the whisk attachment, whip the egg whites to a foam, gradually add the sugar until you obtain a glossy meringue. Do not overbeat your meringue or it will be too dry and your macarons won’t work. Combine the almonds and powdered sugar in a food processor and give them a good pulse until the nuts are finely ground. Pass through a sieve. Add them to the meringue,with the coloring and give it a quick fold to break some of the air and then fold the mass carefully until you obtain a batter that flows like magma or a thick ribbon. Give quick strokes at first to break the mass and slow down. The whole process should not take more than 50 strokes. Test a small amount on a plate: if the tops flattens on its own you are good to go. If there is a small beak, give the batter a couple of turns. Fill a pastry bag fitted with a plain tip (Ateco #807 or #809) with the batter and pipe small rounds (1.5 inches in diameter) onto parchment paper lined baking sheets (double up on baking sheets if they aren’t professional grade). Preheat the oven to 300F. Let the macarons sit out for 30 minutes to an hour to harden their shells a bit and bake for 8-10 minutes, depending on their size. Note: Don’t get so excited about their feet that you yank them out too soon; if you do, the feet will collapse into a sad ruffle. Don’t ask me how I know this. Let cool. If you have trouble removing the shells, pour a couple of drops of water under the parchment paper while the sheet is still a bit warm and the macarons will lift up more easily do to the moisture. Don’t let them sit there in it too long or they will become soggy. Once baked and if you are not using them right away, store them in an airtight container out of the fridge for a couple of days or in the freezer.

For strawberry cream cheese filling: In the bowl of stand mixer, whip the egg whites until they have soft peaks. In the meantime, combine 2 Tb water with the sugar to a boil in a heavy saucepan and bring the syrup to 250F. Slowly add the sugar syrup to the egg whites. If you use hand beaters, this is even easier and there is less hot syrup splatter on the side of your bowl and in the whisk attachment of the stand mixer. Continue to whip until the meringue is completely cooled. Slowly add the butter, one tablespoon at a time. The mass might curdle but no panic, continue to whip until it all comes together. Add the cream cheese, the same way, a little at a time until everything is smooth. Whisk in the vanilla extract, or paste or bean. Keep it to spreadable consistency for the macarons and refrigerate the leftover for cupcakes or mini toast in the fridge up to 3 days or in the freezer.

To assemble macarons, pipe cream cheese buttercream onto one side topped with a dollop of jam. Sandwich the other shell on top. Refrigerate to set.

For chocolate filling: Heat the cream in a small saucepan with the corn syrup. When the cream just begins to boil at the edges, remove from heat and add the chopped chocolate. Let sit one minute, then stir until smooth. Stir in the pieces of butter. Let cool completely before using. When cool, I whipped the chocolate with a handmixer to achieve a good spreading consistency. I then piped a large dollop in the middle of shells and sandwiched other shells on top. Refrigerate.


Piping batter onto a macaron template and then the cookies fresh out of the oven (and a little wonky).


Blurry proof of feet for batches 1 and 2!


I hope you enjoyed this post! Don’t forget to cruise the Daring Bakers blogroll to see all of the creative French macarons.


Share Share this post with friends!

Two Terrific Tarts: Chocolate and Raspberry Cream Cheese

You may have realized by now that I’m prone to bouts of exuberance over kitchen achievements. There’s something about tackling a recipe you’re inexperienced with, doing some kitchen acrobatics, and actually succeeding that just brightens the whole week. After crossing puff pastry off my to-bake list, my next goal was a tart. Ohhhh, tarts. They’re so gorgeous — those lovely scalloped edges; dense, golden brown shells; and artfully arranged fillings. I’d never tasted a homemade tart before, so I didn’t even realize that in addition to being beautiful, they’re also heavenly and scrumptious. I definitely found a new favorite dessert, and around this apartment, that’s saying a lot!


I decided on a Chocolate Tart and a Raspberry Cream Cheese Tart for my adventure. Both tarts use the same tart dough, a version of pâte sucrée from Tyler Florence. Pâte sucrée, also called “sweet dough,” is popular for dessert tarts, whereas it’s sibling, pâte brisée (“short dough”) is widely used for both dessert and savory tarts.

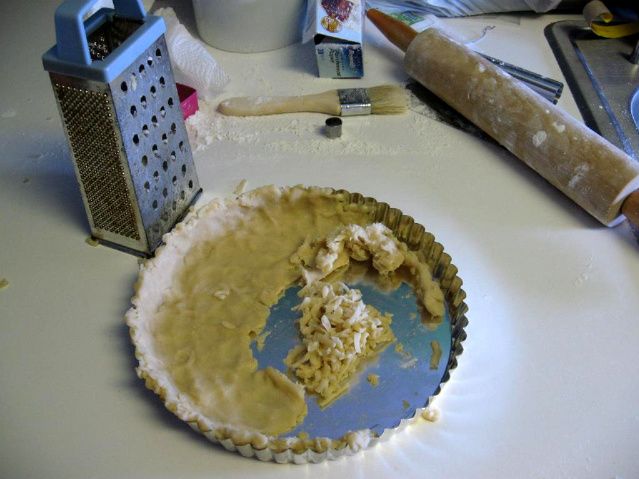
Pâte sucrée is apparently notoriously difficult to roll, and after trying once, I decided not to bother. Martha Stewart recommends (and she makes it looks very easy, of course) grating the chilled dough into your tart pan and gently pressing it into place. I found my dough too soft for this (even after freezing). In fact, when I pressed the dough against the grater, it gave way and I sliced my pinky on my tart pan — they’re not kidding when they say those edges are sharp! It’ll come as no surprise that after almost slicing off a finger, I only grated some of my dough. I tore the rest of it into smaller pieces and pressed them into the pan. After this struggle, I found the perfect technique: simply don’t let the dough come together in a ball in the food processor, but stop processing while it’s still in large crumbly pieces. Then pour these pieces into your tart pan and press them out. Perfect, easy, safe. Watch your fingers!

Once in the pan, the tart dough is chilled and blind-baked into a delicious, buttery crust. You end up with a dense but flaky, beautiful edge surrounding whatever sumptuous filling you choose. Want to know which of these two tarts I think you should make? Follow me on a little tangent . . .

I’m addicted to rating things. I’m always creating arbitrary rating scales in my head for movies, outfits, books, restaurants, nail polish colors . . . the list goes on! After eating a meal, I can instantly rank every component on the plate from favorite to least favorite, and am appalled when Mike can’t do the same (this often results in a conversation about my brain being weird).

In fact, you know the little clicky stars for rating things on Goodreads and Netflix? I love those! I wish there were little rating stars floating around in real life; imagine the rating convenience! You could walk around and poke at the stars next to stores, food, people . . . okay, maybe rating people isn’t the best idea. Yikes! At any rate (ha ha), despite the fact that Mike thinks it’s weird, I love to rate. But why am I telling you all this? Here’s why: I want you to know how impressive it is that I cannot decide which one of these amazing tarts I like the best. They’re very different flavors, and both so indulgent and delicious — I just can’t choose! Hopefully this is all the persuading you need to make both of them. You know you want to!

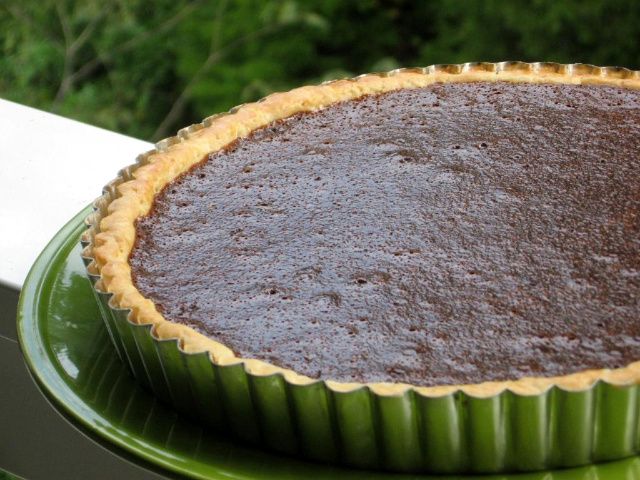
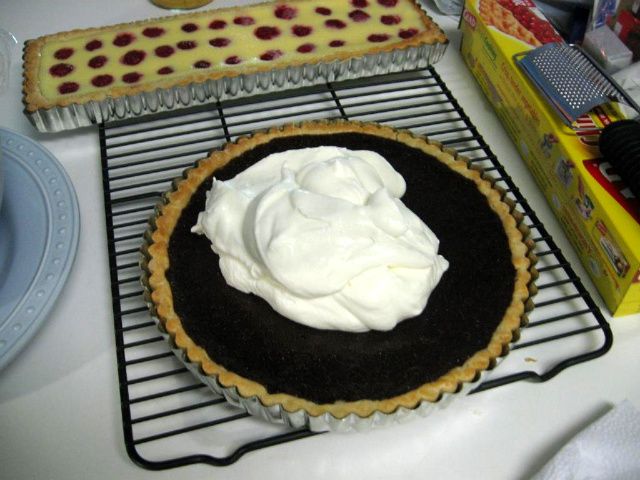
The Chocolate Tart is rich, decadent, and fudgy. The original recipe actually doesn’t include the mounds of fluffy whipped cream, but I knew we’d need more than just the crust to cut the richness of the filling. I have trouble believing even the biggest chocoholic could eat a piece of this tart without a pile of whipped cream or a scoop of vanilla ice cream. Then again, maybe other folks don’t eat a gigantic slab o’ tart like I do (I don’t have the restraint to do slivers, y’all). Regardless, the balance here of the chocolate with the whipped cream topping was perfect — and beautiful.

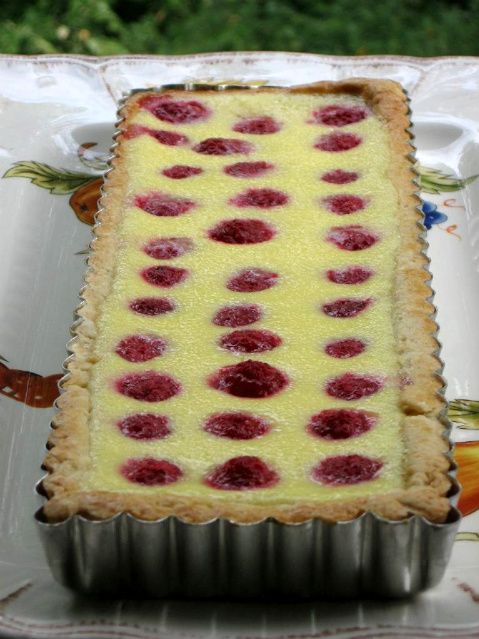
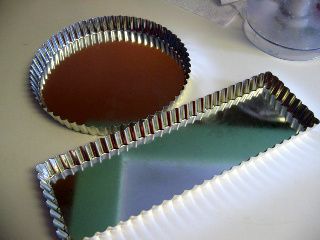
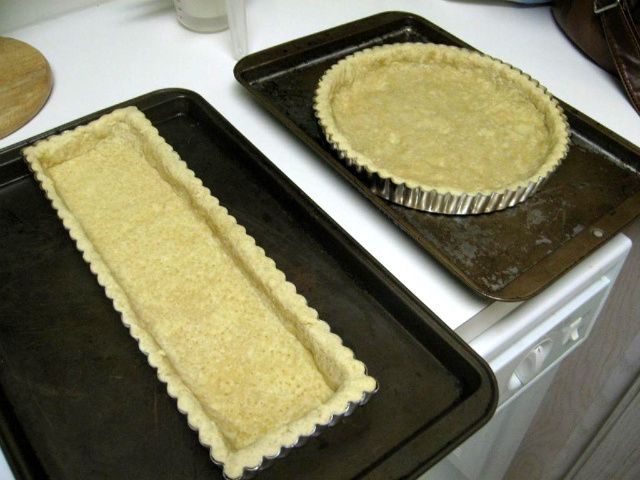
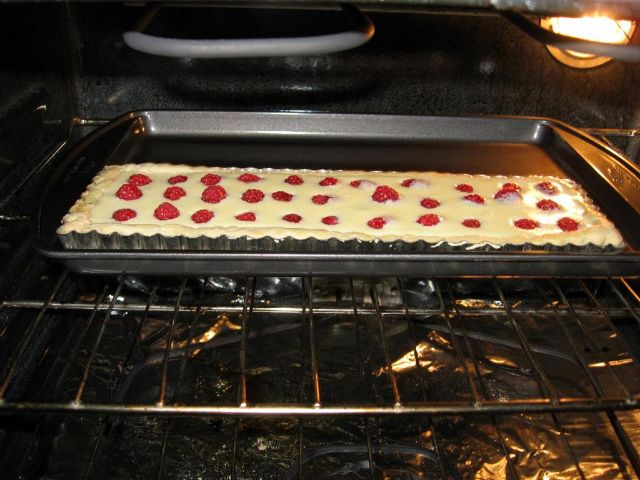
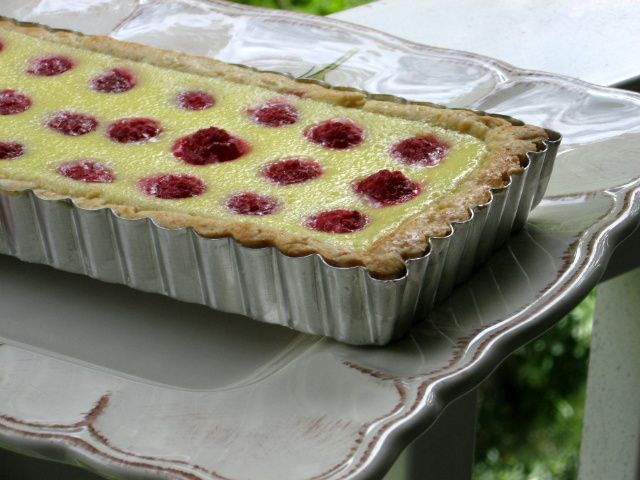
I picked the raspberry tart because I love combining raspberries with mellow cheeses: brie, ricotta, and (obviously) cream cheese. The tart berries in the luxurious, sweet cream cheese were the perfect flavors to pile into my fancy rectangular (!) tart crust once it was cooled from the oven. (Can you tell I’m excited about this tart being a gigantic rectangle? Oh, how I love Williams-Sonoma! I should’ve taken a fan-girl picture with the sales associate that recommended the rectangular pan. Do you think that would’ve seemed creepy? Nah, I’m sure she gets it all the time.) Anyway, once baked, each little raspberry peeks up from its creamy bed just begging to be slathered with whipped cream and devoured. Of course, Mike and I were willing to oblige.

Both of these tarts were so fantastic that I know you’re going to love them. If you don’t own a tart pan, pick one up — mine was only $9 even at fancy Williams-Sonoma, a price well worth the beauty and enjoyment a tart brings. Then roll up your sleeves and create a beautiful dessert.

Chocolate Whipped Cream Tart


Recipe by: Tyler Florence (adapted by me)
Yields: one standard tart, serves about 10

Tart Shell Ingredients:
2 cups all-purpose flour, plus more for dusting
3 tablespoons sugar
1/4 teaspoon salt
3/4 cup (1 1/2 sticks) unsalted butter, cold and chopped
1 large egg, separated
2 tablespoons ice water, plus more if needed

Filling Ingredients:
1 cup heavy cream
1/2 cup milk
10 ounces semisweet chocolate, chopped
2 tablespoons sugar
1/4 teaspoon salt
2 large eggs, at room temperature

Whipped Cream Topping Ingredients:
2 cups heavy cream
5 tablespoons granulated sugar
1/2 teaspoon vanilla extract

Directions:
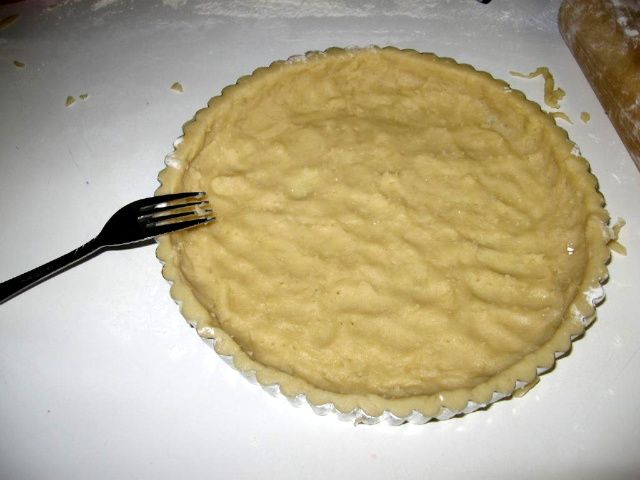
To make the pastry: combine the flour, sugar, and salt in a large mixing bowl (or food processor). Add the butter and mix with a processor or hands until the mixture resembles coarse crumbs. Make a well in the middle of the pastry. Combine the egg yolk with the ice water in a small bowl, whisking to blend; pour it into the well and work it in to bind the dough until it holds together without being too wet or sticky. Squeeze a small amount together, if it is crumbly, add more ice water, 1 tablespoon at a time. When the dough is coming together but still in crumbs, pour the crumbs into your tart pan and press them out to fill the pan. Press them up the sides evenly and trim off any excess. Dock the dough (prick it slightly) with a fork all over. Put the tart shell in the refrigerator for at least 15 minutes to relax.

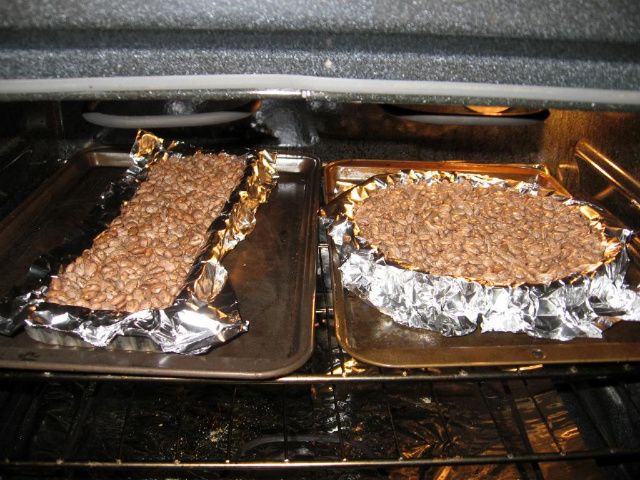
Preheat the oven to 350 degrees F. Place the tart pan on a sturdy cookie sheet so it will be easy to move in and out of the oven. Line the tart with aluminum foil and add pie weights or dried beans to keep the sides of the tart from buckling. Bake for 30 minutes, then remove the foil and weights. Using a pastry brush, lightly coat the crust with a beaten egg white. Return to the oven and continue to bake for another 8 minutes until the tart is golden in color, but not brown. Remember the tart will be cooked again with the filling. It should be cooked but light in color so that it will not burn on the second bake. Set aside to cool and lower the oven temperature to 325 degrees F.

To make the filling: Heat the heavy cream and milk in a pot over medium-low flame, until it simmers slightly around the edges. Remove from the heat; add the chopped chocolate and stir until melted and smoothed out. Add the sugar and salt and whisk until well incorporated. Beat the eggs in a small bowl until blended and add them to the chocolate mixture, stir until completely blended. Pour the filling into the cooled tart shell and bake at 325 degrees F for 15 to 20 minutes until the filling is set (wiggle the pan to test) and the surface is glossy. If you see any bubbles or cracks forming on the surface, take the tart out right away – that means it is beginning to become over baked. Cool completely before topping with whipped cream.

To make the whipped cream, beat all ingredients together until cream thickens to correct consistency. Pile the mound of whipped cream onto your cooled tart and use a spatula to spread it (messy = more rustic). Shave some leftover chocolate over the cream for decoration.


Raspberry Cream Cheese Tart still cooling in its pan.

Raspberry Cream Cheese Tart


Recipe by: Joy of Baking (with crust by Tyler Florence)
Yields: one standard tart, serves about 10

Tart Shell Ingredients:
2 cups all-purpose flour, plus more for dusting
3 tablespoons sugar
1/4 teaspoon salt
3/4 cup (1 1/2 sticks) unsalted butter, cold and chopped
1 large egg, separated
2 tablespoons ice water, plus more if needed

Filling Ingredients:
4 ounces (125 grams) cream cheese, room temperature
1/2 cup (100 grams) granulated white sugar
2 large eggs
3/4 cup (180 ml) light cream or half-and-half (coffee cream)
1/2 teaspoon pure vanilla extract
zest of 1 medium lemon or lime (I used just a spritz of lemon juice)
1 – 1 1/2 cups (110 – 165 grams) fresh raspberries

Whipped Cream Ingredients:
1 cup heavy cream
3 tablespoons granulated sugar
1/4 teaspoon vanilla extract

Directions:
To make the pastry: combine the flour, sugar, and salt in a large mixing bowl (or food processor). Add the butter and mix with a processor or hands until the mixture resembles coarse crumbs. Make a well in the middle of the pastry. Combine the egg yolk with the ice water in a small bowl, whisking to blend; pour it into the well and work it in to bind the dough until it holds together without being too wet or sticky. Squeeze a small amount together, if it is crumbly, add more ice water, 1 tablespoon at a time. Form the dough into a disk and wrap in plastic; refrigerate for at least 30 minutes.

Roll out the pastry* on a lightly floured surface into a 12-inch circle, about 1/4-inch thick. Carefully roll the dough up onto the pin (this may take a little practice) and lay it inside a 9-inch tart pan with a removable bottom. Press the dough into the pan so it fits tightly; press the edges into the sides of the pan. It is important to press the dough evenly into every nook and corner of the ring, especially the scalloped edges. Shave off the excess hanging dough with a knife. Dock the dough (prick it slightly) with a fork all over. Put the tart in the refrigerator for 15 minutes to relax.

*Note: As mentioned above, I found it very difficult to roll the dough, and instead carefully grated as much chilled dough as possible into the pan, tearing the rest. I then pressed it into all areas of the pan, being absolutely sure it covered every surface.

Preheat the oven to 350 degrees F. Place the tart pan on a sturdy cookie sheet so it will be easy to move in and out of the oven. Line the tart with aluminum foil and add pie weights or dried beans to keep the sides of the tart from buckling. Bake for 30 minutes, then remove the foil and weights. Using a pastry brush, lightly coat the crust with a beaten egg white. Return to the oven and continue to bake for another 8 minutes until the tart is golden in color, but not brown. Remember the tart will be cooked again with the filling. It should be cooked but light in color so that it will not burn on the second bake. Set aside to cool.

To make the filling: In a food processor or electric mixer place the cream cheese and process until smooth. Add sugar and beat until incorporated. Add eggs, one at a time, and process until thoroughly combined. Add remaining ingredients and beat until well blended and smooth.

Place the tart pan on a larger baking pan. Carefully pour the filling into the pre-baked tart shell. Arrange the raspberries evenly around the tart shell and then bake the tart for about 30 – 35 minutes or until the filling is set (test by gently shaking the pan). Transfer tart to wire rack to cool. Serve warm or cold accompanied by softly whipped cream and fresh raspberries. Refrigerate leftovers.


Off to Williams-Sonoma for some tart pan shopping!


Grating and docking the tart dough (and trying not to lose any digits).


Blind baking the crust with beans as weights.


Raspberry Cream Cheese Tart baking and fresh from the oven.


Chocolate Tart cooling, and then getting the whipped cream treatment.

Want to read more about crusts? My article, “Journey Towards a Perfect Crust,” chronicles my quest for buttery, flaky pies and tarts. Read it at The Daring Kitchen.

Jack-o’-Lantern Whoopie Pies

I love how the vibrant online community of food blogs has erupted into autumnal flavors. A flickering fireplace on a chilly day has nothing on the cinnamon-and-spice glow of recipes flickering across my computer screen. The latter keeps not my toes but my tastebuds warm and cozy. Okay, okay, I’ll admit we haven’t had much need of it lately in Charlotte. The South still can’t make up its mind about the season, so temperatures have been in the 80s the past few days! Sorry to those in New England who are grumbling a bit right now. Soon enough, the chill will settle into North Carolina. In the meantime, I’ll enjoy fall flavors without the appropriate meteorological accoutrement.

My friend Katie and I had a date to bake together last weekend, and I was thrilled to hear that she was craving pumpkin just like I was. You may have heard about the pumpkin shortage, but thankfully I’d stocked up on a few cans of pumpkin before even hearing about it! So Katie and I brainstormed via email and decided to use our scarce squash to bake these gorgeous pumpkin whoopie pies. The recipe is from Matt Lewis of Baked bakery in New York City.

I’m a huge whoopie pie fan. My mom makes traditional whoopie pies each Thanksgiving and the rich, cakey chocolate and cream combination is something I look forward to all year. Imagine that same extremely moist, cakey texture with a beautiful pumpkin spice flavor instead: rich, dark brown sugar; ginger; ground cloves; and cinnamon. The result is a darker than average, plump pie that when slathered with sweet cream cheese spread, is the perfect fall bite.

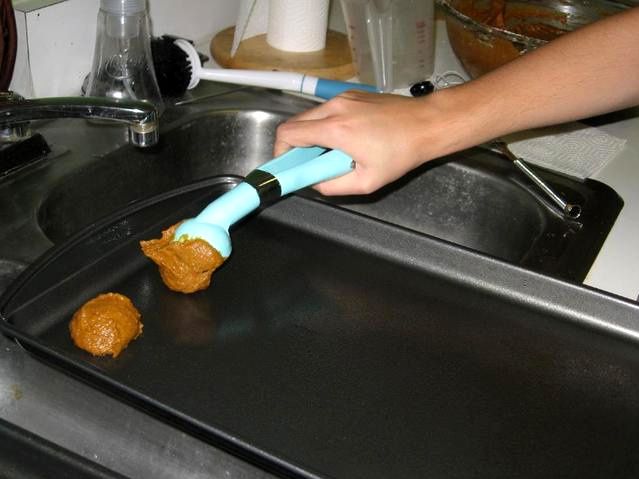
This is also the perfect recipe for cooking in partners. Katie measured out dry ingredients while I whisked pumpkin and sugars together. We found that she (with previous ice cream shop experience) was an expert cookie scooper — wonderful, especially since I quickly realized I was lousy at it!


Katie showing off her scooping skills.

I went behind her and sculpted batter in the shape of pumpkin stems on each pie in hopes that they’d look like little pumpkins after baking. Sometimes this worked beautifully. Sometimes we ended up with whoopie pies shaped like triangles, snowmen, or the state of Idaho. It was a cute little Idahoan whoopie pie, don’t get me wrong, but the pumpkins were cuter:

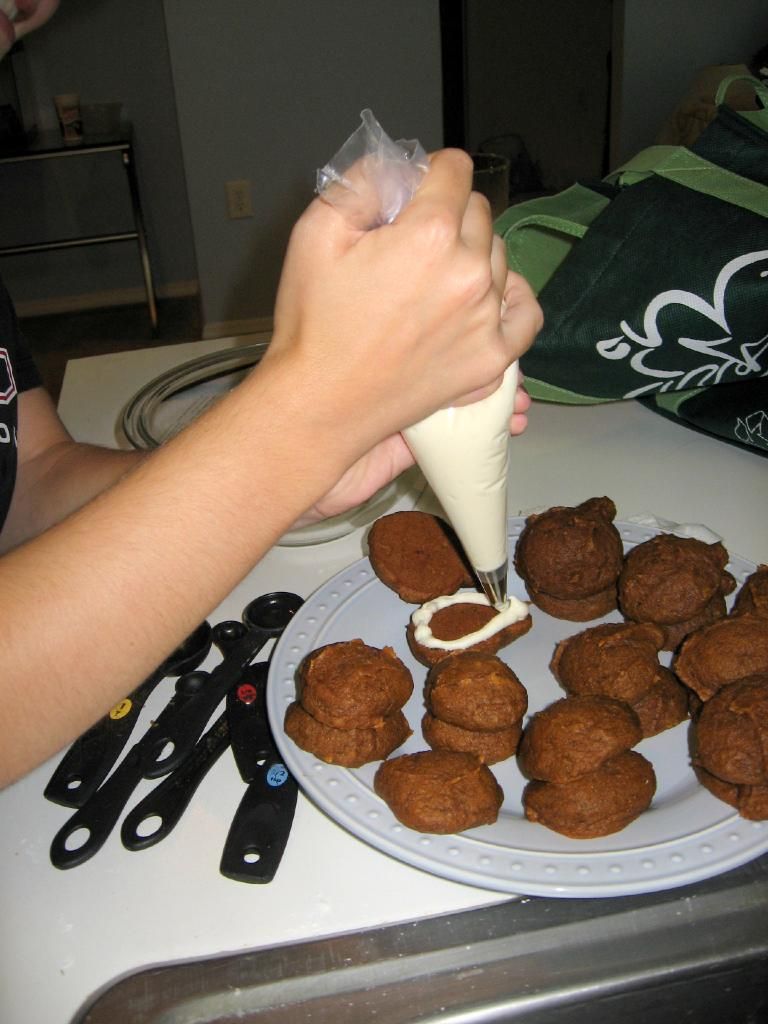
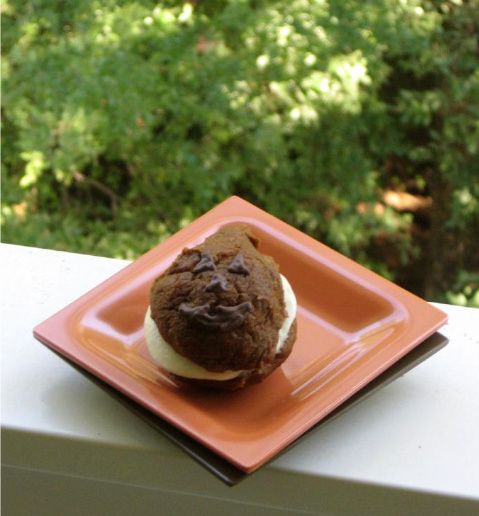
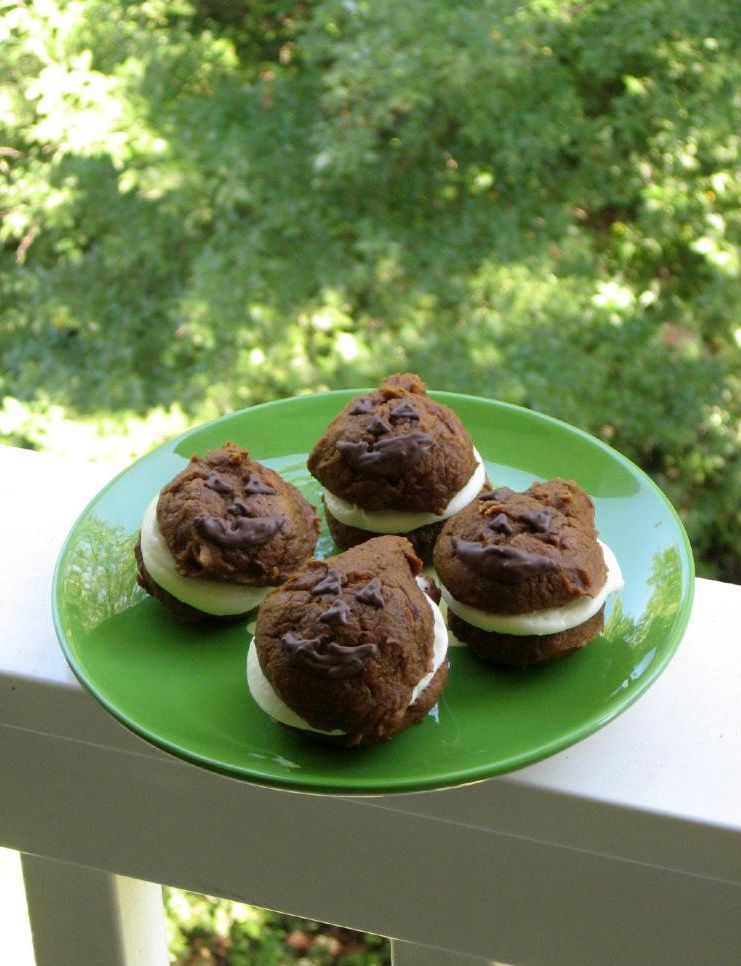
After seeing Bakerella’s cute twist on her pumpkin pie bites (Jack-o’-lantern faces drawn on in chocolate), I knew I wanted to try faces on our whoopie pies. Katie piped cream cheese filling into each sandwich while I melted up some Candiquik (any chocolate candy melt will do) and set to work. When finished, the faces were adorable — but a little hard to see against the dark whoopie pies! Perhaps using light brown sugar in the pies would make the faces stand out more, but then you’d lose a bit of that great molasses flavor. Use your personal tastebuds and aesthetic to decide!


Katie doing some fantastic filling.


Jack-o’-lantern face!

One thing I didn’t anticipate was how good chocolate and pumpkin taste together! Y’all already knew this, didn’t you?! Why didn’t anyone tell me?! The richness of the milk chocolate was a perfect partner to the spicy pumpkin flavor, and I’ve even been inspired to search for more recipes that use this combination. Give it a try if you haven’t already!

There are so many satisfying facets of these whoopie pies: the simple recipe, the deep and indulgent fall taste, the cute Jack-o’-lantern grins. The most satisfying part, though, was definitely the time spent baking with a friend. I hope you’ll invite a friend over (or maybe just invite a husband, wife, son, or daughter into the kitchen) to help you make some of these sweet pun’kins!

Jack-o’-Lantern Whoopie Pies
Recipe by: Matt Lewis of Baked Bakery (adapted slightly by me)
Yields: 24 medium whoopie pies or about 34 small-scoop whoopie pies


Pumpkin Whoopie Pie Ingredients:
3 cups all-purpose flour
1 teaspoon salt
1 teaspoon baking powder
1 teaspoon baking soda
2 tablespoons ground cinnamon
1 tablespoon ground ginger
1 tablespoon ground cloves
2 cups firmly packed dark-brown sugar
1 cup vegetable oil
3 cups pumpkin puree, chilled (chilling ensures pies won’t spread too much)
2 large eggs
1 teaspoon pure vanilla extract


Cream Cheese Filling Ingredients:
3 cups confectioners’ sugar
1/2 cup (1 stick) unsalted butter, softened
8 ounces cream cheese, softened
1 teaspoon pure vanilla extract
melted chocolate for piping on Jack-o’-Lantern faces


Directions:
1. Make the cookies: Preheat oven to 350 degrees. Line two baking sheets with parchment paper or a nonstick baking mat; set aside.
2. In a large bowl, whisk together flour, salt, baking powder, baking soda, cinnamon, ginger, and cloves; set aside. In another large bowl, whisk together brown sugar and oil until well combined. Add pumpkin puree and whisk until combined. Add eggs and vanilla and whisk until well combined. Sprinkle flour mixture over pumpkin mixture and whisk until fully incorporated.
3. Using a small ice cream scoop with a release mechanism, drop heaping tablespoons of dough onto prepared baking sheets, about 1 inch apart. Transfer to oven and bake until cookies are just starting to crack on top and a toothpick inserted into the center of each cookie comes out clean, about 15 minutes. Let cool completely on pan.
4. Make the filling: Sift confectioner’ sugar into a medium bowl; set aside. In the bowl of an electric mixer fitted with the paddle attachment, beat butter until smooth. Add cream cheese and beat until well combined. Add confectioners’ sugar and vanilla, beat just until smooth. (Filling can be made up to a day in advance. Cover and refrigerate; let stand at room temperature to soften before using.)
5. Assemble the whoopie pies: Line a baking sheet with parchment paper and set aside. Transfer filling to a disposable pastry bag and snip the end. When cookies have cooled completely, pipe a large dollop of filling on the flat side of half of the cookies. Sandwich with remaining cookies, pressing down slightly so that the filling spreads to the edge of the cookies. Use a ziplock bag with a tiny corner cut off to pipe on melted chocolate in the shape of Jack-o’-Lantern faces. Allow these to harden (stick them in the fridge for a bit to speed it up). Transfer sandwiched and decorated cookies to a prepared baking sheet and cover with plastic wrap. Refrigerate cookies at least 30 minutes before serving and up to 3 days.

NOTE: There’s a lovely video of Matt Lewis making these whoopie pies located here (click on “Watch Video.”) Though the recipe above seems to have a lot of spice, it’s really the perfect balance — don’t skimp.

Dobos Torte

Mike’s a history buff in addition to being a math superhero. Every now and then he’ll be looking at photos of something like a spoon from Pompeii or a statue from Greece and geeking out over how neat it is. It’s thrilling to think of people centuries and millennia ago actually using the objects and living in the homes we now have as artifacts of their existence. Last summer he finally went on a trip to some of the places he’s always loved to read about: Rome, Greece, and Turkey. Looking through his pictures when he returned, it was so sweet to see him living one of his dreams.


I understand Mike’s excitement about the cultures of the past, and sometimes I feel it too, but it doesn’t come naturally to me. I usually have to sort of ponder artifacts and give my imagination a shove to really appreciate how neat they are. With this past Daring Bakers challenge, however, I finally got a taste of how Mike must feel. After reading through the recipe and researching the challenge, I realized that I was about to bake a piece of history: the Dobos Torte.

The August 2009 Daring Bakers’ challenge was hosted by Angela of A Spoonful of Sugar and Lorraine of Not Quite Nigella. They chose the spectacular Dobos Torte based on a recipe from Rick Rodgers’ cookbook Kaffeehaus: Exquisite Desserts from the Classic Caffés of Vienna, Budapest, and Prague.

Reading about the Dobos Torte gave me goosebumps. The torte is the namesake of József C. Dobos, its Hungarian creator. It was created with the intent of making a cake with a longer shelf life, and was debuted in 1885 at the National General Exhibition of Budapest. What really excited me was learning that Franz Joseph I and his wife, the Empress Elisabeth (also called Sisi), were among the first to taste the dessert! For those of you who don’t teach your 6th graders about the Russian Revolution like I do, I’ll fill you in. Franz Joseph I was the uncle of Archduke Franz Ferdinand, who was assassinated by Serbian terrorists in 1914. This act effectively started World War I and contributed to the Russian Revolution. I won’t give you a full history lesson, but isn’t that amazing? This torte has such a rich history, and here I am baking it in my own kitchen!

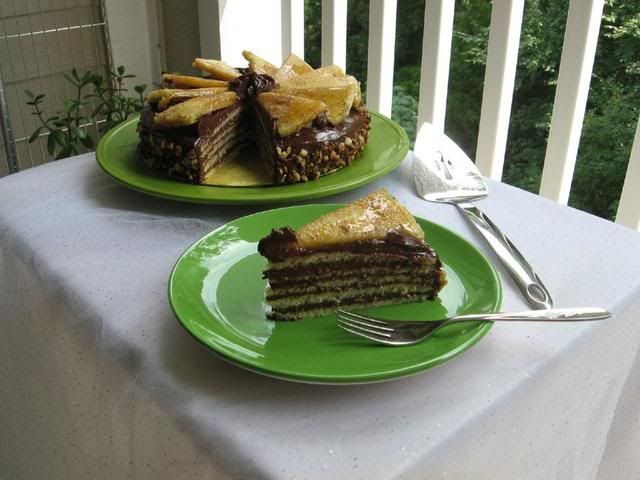
Dobos kept the recipe for his torte a secret until his retirement in 1906, and since then, the popular dessert has been made around the world. The torte is comprised of multiple layers (anywhere from 6-12 is typical) of thin sponge cake, a thick American buttercream, and a slightly lemony caramel coating on the top layer. The recipe was quite intimidating at first, but I enjoyed the process and felt nudged out of my cupcake comfort zone, as all Daring Bakers should!

I chose to make my torte the classic size and shape, but did change a few things. I brushed each sponge layer with a simple syrup when assembling the torte to ensure that they’d stay moist. I also used macadamia nuts to prop up my caramel wedges instead of hazelnuts, but that wasn’t an artistic decision — I couldn’t find any whole hazelnuts at my grocery store.

If I could change a few things about the recipe, I’d add flavoring to my simple syrup and apply more of it to the sponge layers. I found my layers a bit dry (good thing they were smooshed between so much buttercream). I’d also nix the lemon from the caramel — it tasted a little odd — and use cream instead. Finally, I can attest that creating the perfect caramel texture is the hardest part of this cake. I took my sugar mixture off of the stove too soon and ended up with a sticky caramel that made my sponge cake layer a bit soggy. Using a candy thermometer might be a better idea than relying on your instincts (especially if you tend to be jumpy/hasty/caffeinated about your baking). For caramel, you’ll want the temperature of your sugar mixture between 320 to 350 degrees based on this handy chart.

One thing I’m glad I didn’t change was the frosting. I used unsweetened Belgian chocolate, and the result spread like a dream and tasted rich and indulgent. I can’t wait to make this chocolate buttercream again and slather it on — you guessed it — some cupcakes!

There are lots of opportunities for creative alterations with this torte. You can bake all the batter in sheet pans and cut it into as many rectangular layers as you’d like, or even use a cookie cutter to create some adventurously shaped layers. You could also use different nuts to decorate the cake (almonds, hazelnuts, cashews), different flavors of syrup on the sponge cake, and different flavors of buttercream to frost. One particularly daring baker brushed each sponge layer with a hazelnut liqueur and used Ferrero Rocher to prop up her caramel wedges! You know I love Ferrero Rocher, so I’m a fan of that idea!

I hope you’ll take the plunge and try making a Dobos Torte on your own. The recipe is a mile long, yes, but that’s partially because of the clear, thorough instructions. Angela has thoughtfully created a printable version of this recipe to make the process a bit easier! It was such a lovely achievement when all the work was finished, and I relished each bite thinking of the legacy I was eating!


Dobos Torte


Recipe by: Kaffeehaus: Exquisite Desserts from the Classic Cafés of Vienna, Budapest, and Prague, by Rick Rodgers
Yield: about 11-12 pieces of torte

Equipment
2 baking sheets
9” (23cm) springform tin and 8” cake tin, for templates
mixing bowls (1 medium, 1 large)
a sieve
a double boiler (a large saucepan plus a large heat-proof mixing bowl which fits snugly over the top of the pan)
a small saucepan
a whisk (you could use a balloon whisk for the entire cake, but an electric hand whisk or stand mixer will make life much easier)
metal offset spatula
sharp knife
a 7 1/2” cardboard cake round (or just build cake on the base of a sprinfrom tin)
12 whole hazelnuts, peeled and toasted (I used macadamia nuts)
½ cup (50g) peeled and finely chopped hazelnuts
piping bag and tip, optional

Prep times
Sponge layers 20 mins prep, 40 mins cooking total if baking each layer individually.
Buttercream: 20 mins cooking. Cooling time for buttercream: about 1 hour plus 10 minutes after this to beat and divide.
Caramel layer: 10-15 minutes.
Assembly of whole cake: 20 minutes

Sponge Cake Ingredients
6 large eggs, separated, at room temperature
1 1/3 cups (162g) confectioner’s (icing) sugar, divided
1 teaspoon (5ml) vanilla extract
1 cup plus 2 tablespoons (112g) sifted cake flour
pinch of salt

Chocolate Buttercream Ingredients
4 large eggs, at room temperature
1 cup (200g) caster (ultrafine or superfine white) sugar
4oz (110g) bakers chocolate or your favourite dark chocolate, finely chopped (I used Belgian chocolate)
2 sticks plus 2 tablespoons (250g) unsalted butter, at room temperature.

Caramel Topping Ingredients
1 cup (200g) caster (superfine or ultrafine white) sugar
12 tablespoons (180 ml) water
8 teaspoons (40 ml) lemon juice
1 tablespoon neutral oil (e.g. grapeseed, rice bran, sunflower)

Directions for the sponge layers:
NB. The sponge layers can be prepared in advance and stored interleaved with parchment and well-wrapped in the fridge overnight.

1. Position the racks in the top and centre thirds of the oven and heat to 400F (200C).
2. Cut six pieces of parchment paper to fit the baking sheets. Using the bottom of a 9″ (23cm) springform tin as a template and a dark pencil or a pen, trace a circle on each of the papers, and turn them over (the circle should be visible from the other side, so that the graphite or ink doesn’t touch the cake batter.)
3. Beat the egg yolks, 2/3 cup (81g) of the confectioner’s (icing) sugar, and the vanilla in a medium bowl with a mixer on high speed until the mixture is thick, pale yellow and forms a thick ribbon when the beaters are lifted a few inches above the batter, about 3 minutes. (You can do this step with a balloon whisk if you don’t have a mixer.) Note: I leveled each sponge layer after baking per a great suggestion from other Daring Bakers. I did this by covering the layer with an oiled, cocoa powder dusted sheet of parchment paper and then pressing another sheet pan down on the layer to even it out.
4. In another bowl, using clean beaters, beat the egg whites until soft peaks form. Gradually beat in the remaining 2/3 cup (81g) of confectioner’s (icing)sugar until the whites form stiff, shiny peaks. Using a large rubber spatula, stir about 1/4 of the beaten whites into the egg yolk mixture, then fold in the remainder, leaving a few wisps of white visible. Combine the flour and salt. Sift half the flour over the eggs, and fold in; repeat with the remaining flour.
5. Line one of the baking sheets with a circle-marked paper. Using a small offset spatula, spread about 3/4cup of the batter in an even layer, filling in the traced circle on one baking sheet. Bake on the top rack for 5 minutes, until the cake springs back when pressed gently in the centre and the edges are lightly browned. While this cake bakes, repeat the process on the other baking sheet, placing it on the centre rack. When the first cake is done, move the second cake to the top rack. Invert the first cake onto a flat surface and carefully peel off the paper. Slide the cake layer back onto the paper and let stand until cool. Rinse the baking sheet under cold running water to cool, and dry it before lining with another parchment. Continue with the remaining papers and batter to make a total of six layers. Completely cool the layers. Using an 8″ springform pan bottom or plate as a template, trim each cake layer into a neat round. (A small serrated knife is best for this task.)
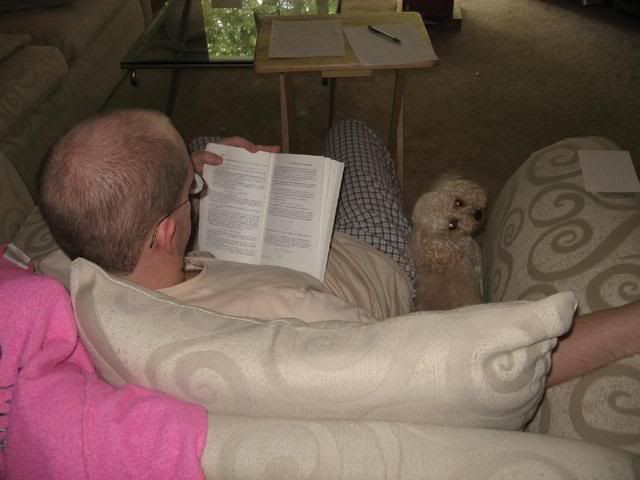

I love when I have two cookin’ buddies! Mike and Byrd cheer me on from the couch.
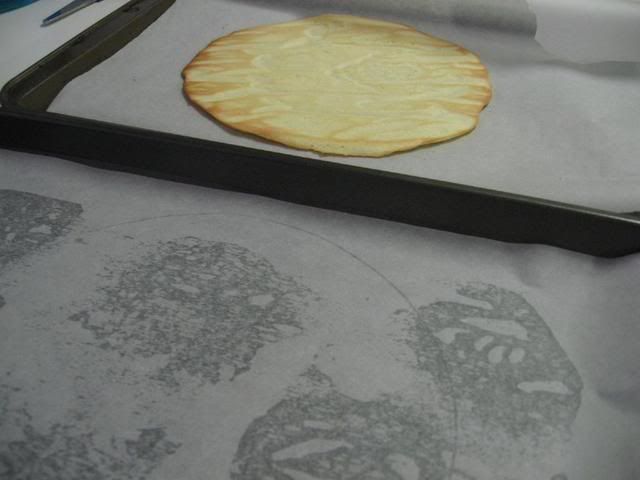
  
Drawing my circles, spreading my batter, and baking my layers. What sort of recipe requires artwork?

Directions for the chocolate buttercream:
NB. This can be prepared in advance and kept chilled until required.

1. Prepare a double-boiler: quarter-fill a large saucepan with water and bring it to a boil.
2. Meanwhile, whisk the eggs with the sugar until pale and thickened, about five minutes. You can use a balloon whisk or electric hand mixer for this.
3. Fit bowl over the boiling water in the saucepan (water should not touch bowl) and lower the heat to a brisk simmer. Cook the egg mixture, whisking constantly, for 2-3 minutes until you see it starting to thicken a bit. Whisk in the finely chopped chocolate and cook, stirring, for a further 2-3 minutes.
4. Scrape the chocolate mixture into a medium bowl and leave to cool to room temperature. It should be quite thick and sticky in consistency.
5. When cool, beat in the soft butter, a small piece (about 2 tablespoons/30g) at a time. An electric hand mixer is great here, but it is possible to beat the butter in with a spatula if it is soft enough. You should end up with a thick, velvety chocolate buttercream. Chill while you make the caramel topping.

Lorraine’s note: If you’re in Winter just now your butter might not soften enough at room temperature, which leads to lumps forming in the buttercream. Male sure the butter is of a very soft texture I.e. running a knife through it will provide little resistance, before you try to beat it into the chocolate mixture. Also, if you beat the butter in while the chocolate mixture is hot you’ll end up with more of a ganache than a buttercream!
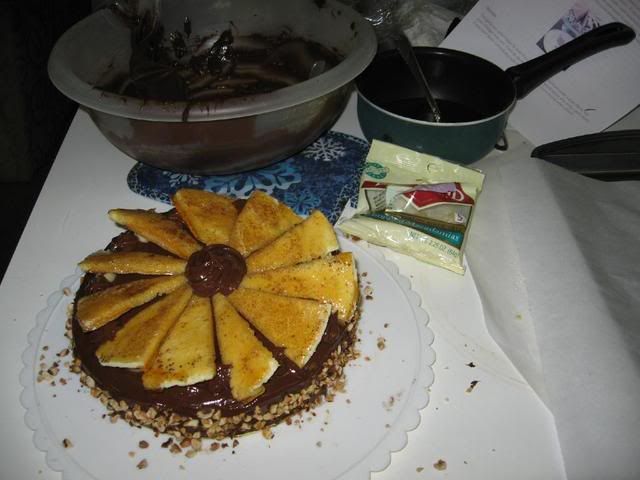

Frosting and decorating the torte.

Directions for the caramel topping:
1. Choose the best-looking cake layer for the caramel top. To make the caramel topping: Line a jellyroll pan with parchment paper and butter the paper. Place the reserved cake layer on the paper. Score the cake into 12 equal wedges. Lightly oil a thin, sharp knife and an offset metal spatula.
2. Stir the sugar, water and lemon juice in a small saucepan. Bring to a boil over a medium heat, stirring often to dissolve the sugar. Once dissolved into a smooth syrup, turn the heat up to high and boil without stirring, swirling the pan by the handle occasionally and washing down any sugar crystals on the sides of the pan with a wet brush until the syrup has turned into an amber-coloured caramel.
3. The top layer is perhaps the hardest part of the whole cake so make sure you have a oiled, hot offset spatula ready. I also find it helps if the cake layer hasn’t just been taken out of the refrigerator. I made mine ahead of time and the cake layer was cold and the toffee set very, very quickly—too quickly for me to spread it. Immediately pour all of the hot caramel over the cake layer. You will have some leftover most probably but more is better than less and you can always make nice toffee pattern using the extra to decorate. Using the offset spatula, quickly spread the caramel evenly to the edge of the cake layer. Let cool until beginning to set, about 30 seconds. Using the tip of the hot oiled knife (keep re-oiling this with a pastry brush between cutting), cut through the scored marks to divide the caramel layer into 12 equal wedges. Cool another minute or so, then use the edge of the knife to completely cut and separate the wedges using one firm slice movement (rather than rocking back and forth which may produce toffee strands). Cool completely.

Angela’s note: I recommend cutting, rather than scoring, the cake layer into wedges before covering in caramel (reform them into a round). If you have an 8” silicon round form, then I highly recommend placing the wedges in that for easy removal later and it also ensures that the caramel stays on the cake layer. Once set, use a very sharp knife to separate the wedges.

Assembling the Dobos:
1. Divide the buttercream into six equal parts.
2. Place a dab of chocolate buttercream on the middle of a 7 1/2” cardboard round and top with one cake layer. Spread the layer with one part of the chocolate icing. Repeat with 4 more cake layers. Spread the remaining icing on the sides of the cake.
3. Optional: press the finely chopped hazelnuts onto the sides of the cake.
4. Propping a hazelnut under each wedge so that it sits at an angle, arrange the wedges on top of the cake in a spoke pattern. If you have any leftover buttercream, you can pipe rosettes under each hazelnut or a large rosette in the centre of the cake. Refrigerate the cake under a cake dome until the icing is set, about 2 hours. Let slices come to room temperature for the best possible flavour.
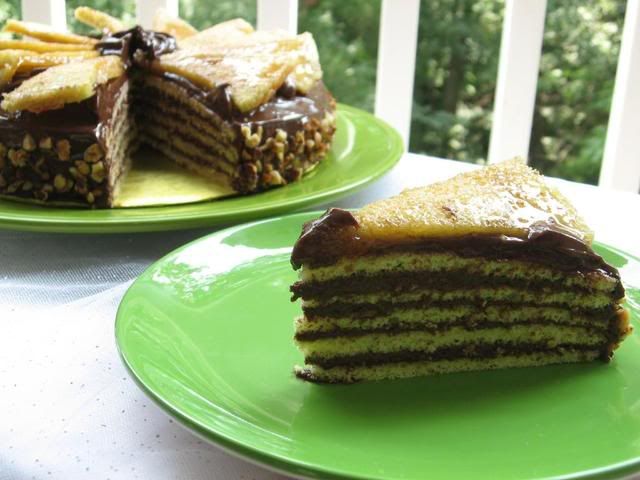

Don’t forget to visit other Daring Bakers and see the imaginative combinations and configurations of the Dobos Torte they created!

1 18 19 20 21 22