chocolate

Red Velvet and Oreo Kisses

Need a kiss? Everyone does sometimes, and these past few weeks, it was Mike. He’s been studying intensely for the math GRE this summer. He’s interested in stellar grad schools, so he needs to hit the ball (or the sphere, perhaps? or the open ball? or the unit circle? okay, enough with the bad math jokes) out of the park on this exam. I have complete faith in his ability to do so, but he needs some encouragement now and then. What’s better for encouragement than a little kiss? Well, maybe a BIG kiss!
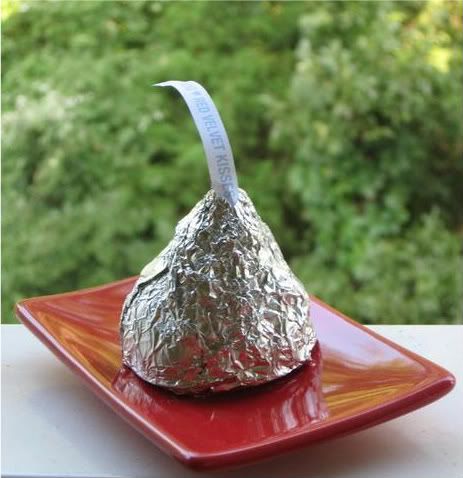
I think I’ve mentioned before that Bakerella is one of my heroes. I love cuteness, and she’s the Queen of Cute. When I saw her Oreo Kisses, I knew they couldn’t wait until Valentine’s Day. They were the perfect surprise to lift Mike’s spirits.

In addition to Oreo, I decided to make some red velvet kisses. While the Oreo version is a no-bake combo of crushed cookies and cream cheese, the red velvet version is essentially a cake ball (or a cake cone in this case). You bake a cake, rip it up (heartbreaking, I know), add frosting, and form the mixture into balls (or cones, or hearts, or zebras) and dip into your candy coating (incidentally, if you try out the zebra shape, please do send a photo). Any flavor combination of cake and frosting will do. And don’t let the idea of baking a cake deter you; while I bake mine from scratch, cake mixes and canned frosting work just fine!
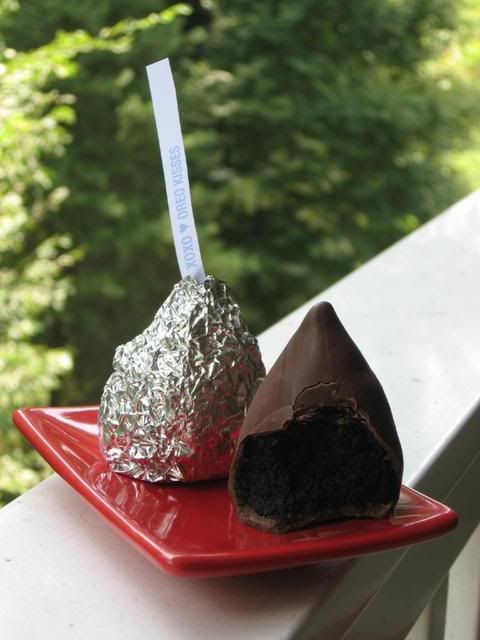

Oreo Kisses


Red Velvet Kisses

Dipping these kisses (or any cake ball) is always the most (ahem) interesting part of the process. I use Candiquik as my chocolate coating of choice, but you can use any chocolate bark or dipping chocolate. I don’t recommend baker’s chocolate or chocolate chips, however, as they don’t form the same hard shell. You should be able to find Candiquik at Lowes Food, SuperTarget, or (I recently discovered) Bloom.

Regarding the act of dipping itself, you’re going to have to get a little creative. Bakerella’s instructions (below) say to use a spoon to dip your kisses and then drain the excess chocolate against the side of the bowl. This hasn’t ever worked for me, though; I’ve used everything from forks to toothpicks to bamboo skewers to dip cake balls. I’ll go ahead and admit that I’ve had visions of standing on the counter lowering a cake ball into chocolate with dental floss (thankfully, I haven’t resorted to this just yet). For dipping these kisses, I used a two-tined grill fork to support the kiss while I spooned chocolate over it. I then let the excess drain off for a long while before sliding the kiss onto wax paper. When it was dry, I went back and re-dipped the bottom. You can try this technique, but the most important message to take home is this: experiment with your kitchen supplies. Necessity is the mother of invention and all that, so try any utensil that looks promising and keep your sense of humor!

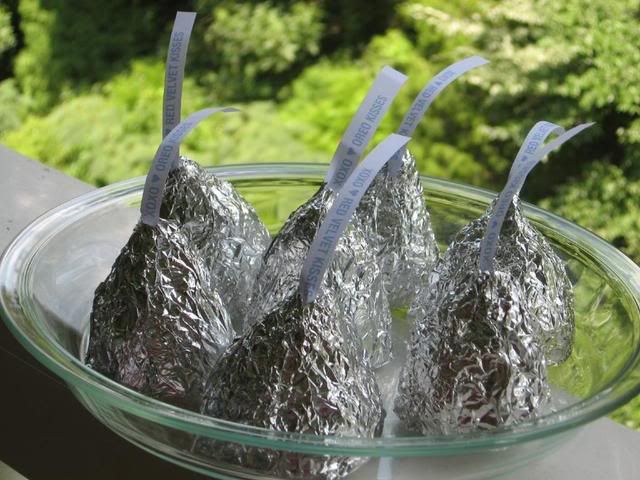
One thing I love about these sweet kisses (apart from, oh, everything about them) is the messages you can attach. I used a word processing program (font: light blue, 14 point, Helvetica Neue Bold) to create the little strips of paper that sail out of each kiss. Get creative: you can label various kiss flavors; send encouragement, congratulations, and thank yous; or even say happy birthday. My wonderful Dad’s birthday is this coming Monday — the perfect occasion for a special message! Whether with Oreo kisses, cake kisses, or plain old hugs and kisses, tell someone you love them today!
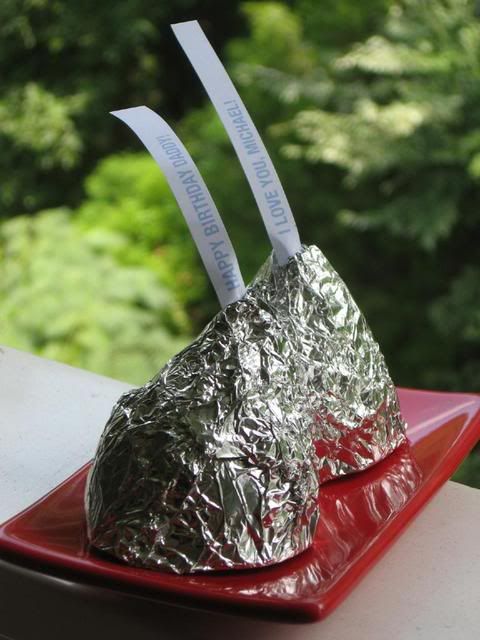
Oreo Kisses


Recipe By: Bakerella (kisses decoration/assembly)
Yields: About 11 2-inch high kisses

Oreo Kisses Ingredients:
1 package oreo cookies (divided; use cookie including the cream center)
1 8-ounce package cream cheese (softened)
chocolate bark (chocolate candy coating)

Directions

1. Finely crush all but seven cookies in a food processor or place them in a ziploc bag and crush into a fine consistency. Note: As for the extra 7 cookies, just eat them. Or, if you have extra dipping chocolate, make some chocolate covered oreos.
2. Stir in softened cream cheese. Use the back of a large spoon to help mash the two together.
3. Roll the mixture into 1-2″ balls and place on wax paper covered cookie sheet.
4. Then, begin to form the shape of a kiss. Flattening the bottom and forming a point at the top. Note: mine ended up about 2 inches tall and 1.5 inches wide.
5. It helps to put the uncoated balls in the freezer for a few minutes to keep the mixture from starting to fall apart when you drop into the melted chocolate. Note: I refrigerated mine overnight and then froze for a couple of minutes before dipping.
6. Melt chocolate as directed on package and then dip “kisses” one at a time into chocolate, tap off extra and slide them off spoon onto wax paper covered cookie sheet to dry. Note: Dipping is often the most difficult part. These are Bakerella’s instructions, but find what works for you. Let your kitchen be your playground. Look through your utensils for useful tools, and be creative. I used a grill fork to hold my kisses while spooning chocolate over them, and then redipped the bottoms separately.

To decorate:
1. Handwrite your messages or create them on the computer. Cut out the strips (about 1/4″ tall and however wide you need).
2. Cut up some square sheets of aluminum foil (about 6″ square)
3. Place dry kiss in center and start wrapping the foil around the base. Insert message near top and secure it by pressing the foil together at top. Note: It really helps to use cheap foil here! The thinner and more malleable the better. Crush it a little first to make it more flexible.
4. Refrigerate in an airtight container.
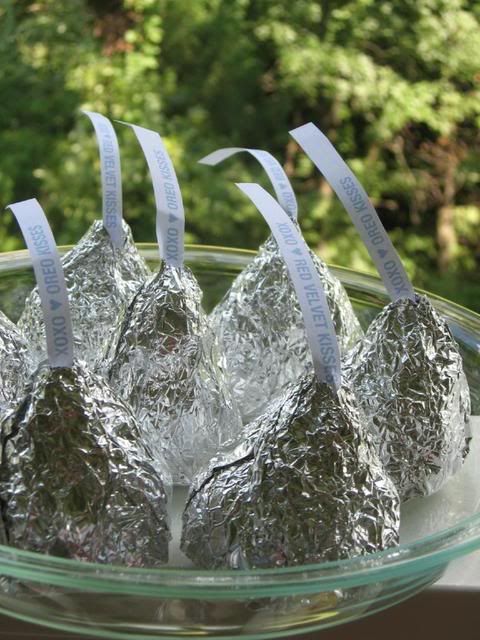
Red Velvet Kisses


Recipe By:

Bakerella (kisses decoration/assembly)
-Mom (red velvet cake)
Paula Deen (cream cheese frosting)

Yields: About 28 2-inch high kisses

Red Velvet Cake Ingredients:
1/2 cup Crisco shortening
2 eggs
2 tablespoons cocoa
1/2 teaspoon salt
1 1/2 cups sugar
1 teaspoon vanilla
1 cup buttermilk
2 1/2 cups flour
1 teaspoon baking soda
1 tablespoon white vinegar
2 ounces red food coloring
chocolate bark (chocolate candy coating; for kisses)

Cream Cheese Frosting Ingredients:
8 ounces cream cheese, softened
1 stick butter, softened
1/2 teaspoon vanilla extract
2 cups sifted confectioners’ sugar

Directions

Make the cake: Preheat oven to 350 degrees. Cream Crisco, sugar, and eggs. Make a paste of the cocoa and coloring and add to the Crisco mixture. Add salt and vanilla. Add buttermilk alternately with the flour, beginning and ending with flour. Mix vinegar and soda right before using and add to mixture by folding in. Pour batter into a 9 x 13 in. pan and bake at 350 degrees for 25-30 minutes (check periodically, and if the edges are getting too done, you might want to shield them with foil while the middle continues to bake). Cool completely.

Make the frosting: In a large mixing bowl, beat the cream cheese, butter and vanilla together until smooth. Add the sugar and on low speed, beat until incorporated. Increase the speed to high and mix until very light and fluffy.

Make the kisses:
1. After cake is cooked and cooled completely, crumble into large bowl.
2. Mix thoroughly with about 2 cups cream cheese frosting. (It may be easier to use fingers to mix together, but be warned it will get messy.)
3. Roll mixture into 1-2″ size balls and lay on cookie sheet.
4. Then, begin to form the shape of a kiss. Flattening the bottom and forming a point at the top. Note: mine ended up about 2 inches tall and 1.5 inches wide.
5. It helps to put the uncoated balls in the freezer for a few minutes to keep the mixture from starting to fall apart when you drop into the melted chocolate. Note: I refrigerated mine overnight and then froze for a couple of minutes before dipping.
6. Melt chocolate as directed on package and then dip “kisses” one at a time into chocolate, tap off extra and slide them off spoon onto wax paper covered cookie sheet to dry. Note: Dipping is often the most difficult part. These are Bakerella’s instructions, but find what works for you. Let your kitchen be your playground. Look through your utensils for useful tools, and be creative. I used a grill fork to hold my kisses while spooning chocolate over them, and then redipped the bottoms separately.

To decorate:
1. Handwrite your messages or create them on the computer. Cut out the strips (about 1/4″ tall and however wide you need).
2. Cut up some square sheets of aluminum foil (about 6″ square)
3. Place dry kiss in center and start wrapping the foil around the base. Insert message near top and secure it by pressing the foil together at top. Note: It really helps to use cheap foil here! The thinner and more malleable the better. Crush it a little first to make it more flexible.
4. Refrigerate in an airtight container.

Process Photos:
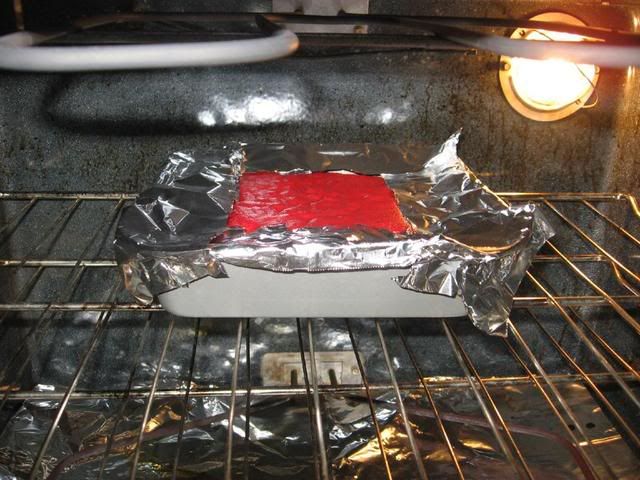

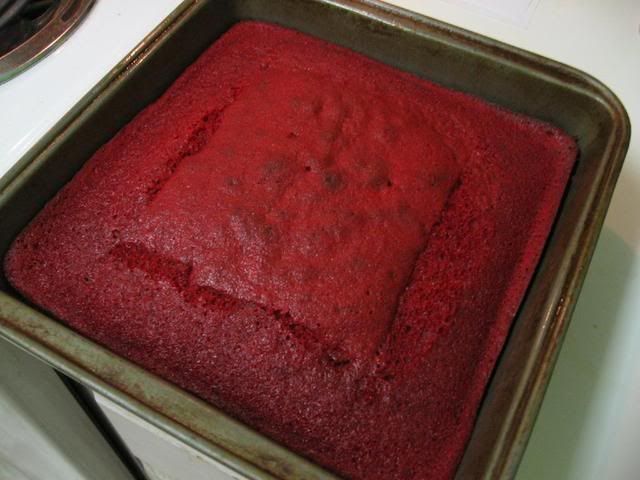
You may need to shield the sides of the red velvet cake if they’re done before the middle. I halved my cake recipe since I was making two kinds of kisses; if you do this, half the frosting too.
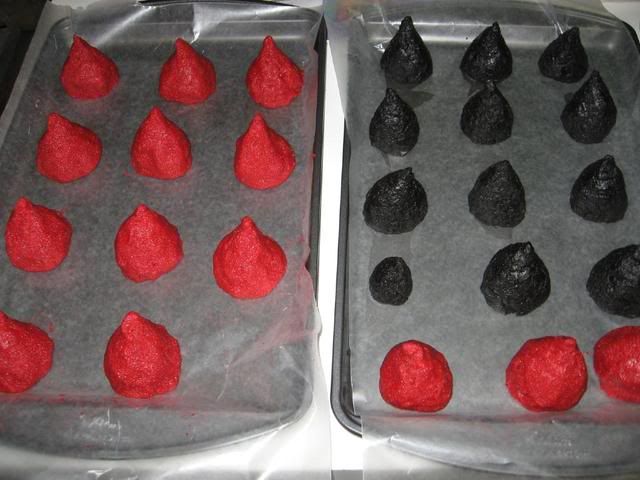
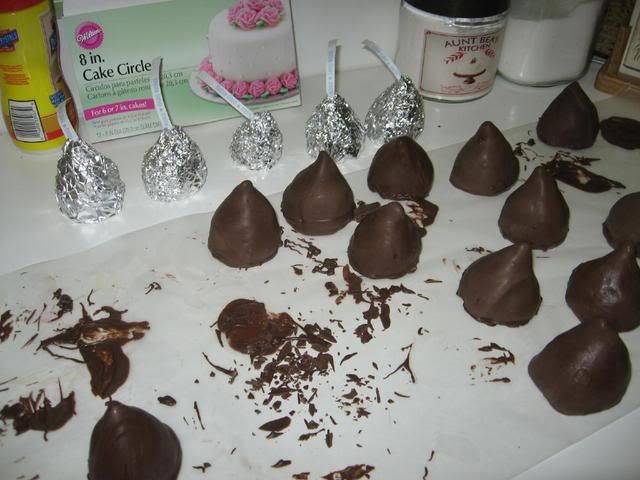
Shaped into cones and then dipping.
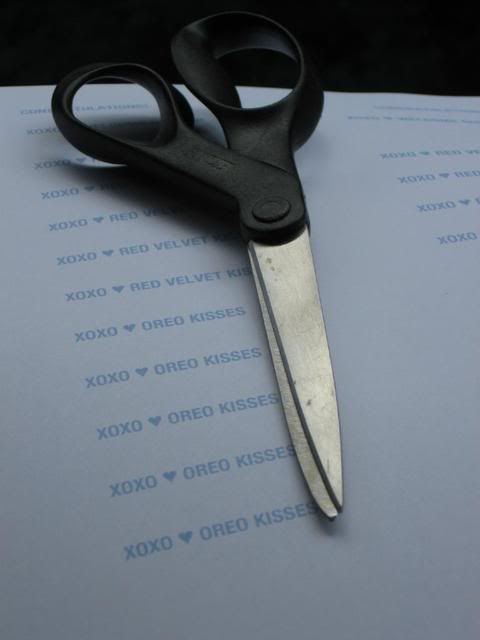

Cutting messages into strips.
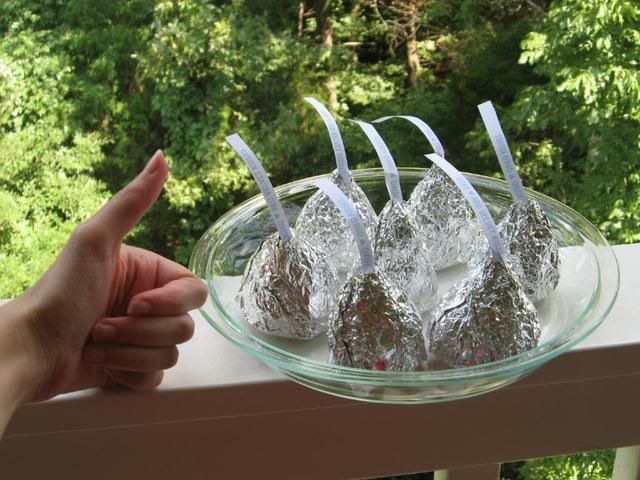


Did I mention that they were giant?


XOXO


Share Share this post with friends!

Chocolate Cheesecake Stuffed Cupcakes with Ganache

I did some super secret daring baking this weekend, but I can’t do the big reveal until later in the month. I’m not too disappointed, though, because I have a stack of past baking endeavors just waiting for their internet debut. Like Chocolate Cheesecake Stuffed Cupcakes, for example.

These cupcakes — which are also floating around the internet as Black Bottom Cupcakes — remind me of the chocolate cake cookies Mike and I used to buy from the local grocery store and scarf down shamelessly. They had a cream cheese filling and when you heated them for a few seconds in the microwave, they were exquisite. In fact, I was secretly excited when Mike started eating less sugar, because that meant more cheesecake cookies for me! Oh sure, I would offer him some — but what a relief when he refused! Mike’s sugar abstinence aside, I knew I had to make these Chocolate Cheesecake Stuffed Cupcakes when I saw them. They were pure genius: moist chocolate cake AND creamy cheesecake combined in one cute cupcake! I was sure that even Mike with all his willpower wouldn’t be able to resist. I eagerly awaited the perfect occasion to make a batch.

I have a confession we may as well get out of the way: I’m a bit hokey. I like Scrabble. Mike and I are watching our way through Star Trek: Deep Space Nine. I collect Nancy Drew books even though I’m over 10 years old. I own and love those turtle plates above. And I adore theme dinners! You know, you pick a theme ingredient or idea and create dishes to match. I finally got my chance to make the cupcakes as part of one of these very dinners. The theme was “stuffed,” so we dined on my semi-homemade Taco Stuffed Crescent Rolls (one of Mike’s favorites), a pan of hearty stuffed portobello mushrooms, and last but not least, the Chocolate Cheesecake Stuffed Cupcakes.


“Stuffed” Dinner — after which we were stuffed!

Never content to leave delicious enough alone, I decided to make a smooth ganache to drizzle over each cupcake, adding some goo factor. What’s chocolate without some gooeyness? It turned out to be an exceptional addition to an already exceptional cupcake.


Some ganache for good measure.

In addition to being delightful, these cupcakes are also extremely simple to whip up. It’s one of those great recipes where the taste far outweighs the effort. I hope you’ll give it a try and let me know what you think.

Chocolate Cheesecake Stuffed Cupcakes with Ganache


Recipe By:

JoyofBaking.com (cupcakes)
JoyofBaking.com (ganache)

Yields: 12 cupcakes

Cream Cheese Filling Ingredients:
8 ounces (227 grams) cream cheese, room temperature
1/3 cup (65 grams) granulated white sugar
1 large egg
1/2 teaspoon pure vanilla extract

Chocolate Cupcake Ingredients:
1 1/2 cups (195 grams) all purpose flour
1 cup (210 grams) light brown sugar
1/3 cup (30 grams) natural unsweetened cocoa powder (not Dutch processed)
1 teaspoon baking soda
1/4 teaspoon salt
1 cup (240 ml) water
1/3 cup (80 ml) unflavored vegetable oil
1 tablespoon white vinegar
1 teaspoon pure vanilla extract

Ganache Ingredients (optional):
8 ounces (227 grams) semisweet or bittersweet chocolate, cut into small pieces
3/4 cup (180 ml) heavy whipping cream
2 tablespoons (28 grams) unsalted butter
1 tablespoons cognac or brandy (optional)

Directions:

Preheat oven to 350 degrees F (177 degrees C) and line 12 muffin cups with paper liners, or generously butter or spray each cup with a non stick vegetable spray.

Cream Cheese Filling: In your electric mixer, or with a hand mixer, beat the cream cheese until smooth. Add the sugar, egg, and vanilla extract and beat until creamy and smooth. Set aside while you make the Chocolate Cupcake batter.

Chocolate Cupcakes: In a large bowl sift together the flour, sugar, cocoa powder, baking soda, and salt. In a separate bowl mix the water, oil, vinegar, and vanilla extract. Make a well in the center of the dry ingredients and stir in the wet ingredients until nice and smooth. Evenly divide the batter among the 12 muffin cups (resist the urge to overfill — remember that the cream cheese filling needs some space too). Spoon a few tablespoons of the cream cheese filling into the center of each cupcake.

Bake in the preheated oven for about 25 minutes, or until the cream cheese filling is a little brown and the cupcakes feel springy to the touch (a toothpick inserted into the chocolate part of the cupcake will come out clean). Remove from oven and place on a wire rack to cool.

Ganache: Place the chopped chocolate in a medium sized stainless steel bowl. Set aside. Heat the cream and butter in a medium sized saucepan over medium heat. Bring just to a boil. Immediately pour the boiling cream over the chocolate and allow to stand for 5 minutes. Stir with a whisk until smooth. If desired, add the liqueur. Makes enough ganache to cover a 9 inch (23 cm) cake or torte.

These cupcakes can be stored in an airtight container in the refrigerator for about 3-4 days.


Ready to bake!


Enjoy!

Milan Cookies

Saying that I love to try new recipes and techniques is an understatement. Even when I’m making a tried and true dessert that I’ve made repeatedly, I always have a crazy urge to try a new decorating technique or another twist. It was a wonderful decision, therefore, to join The Daring Bakers.

Each month, one of the Daring Bakers is responsible for hosting a challenge that they issue to all of the others. Bakers complete the challenge and everyone posts their results on the 27th of the month. This is my first month in the group, and I can already tell I’m going to love it.

The July Daring Bakers’ challenge was hosted by Nicole at Sweet Tooth. She chose Chocolate Covered Marshmallow Cookies and Milan Cookies from pastry chef Gale Gand of the Food Network (to see my Mallows, go to this post).

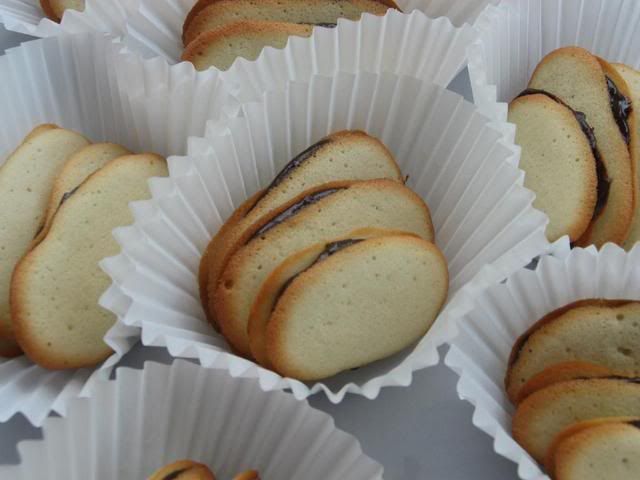
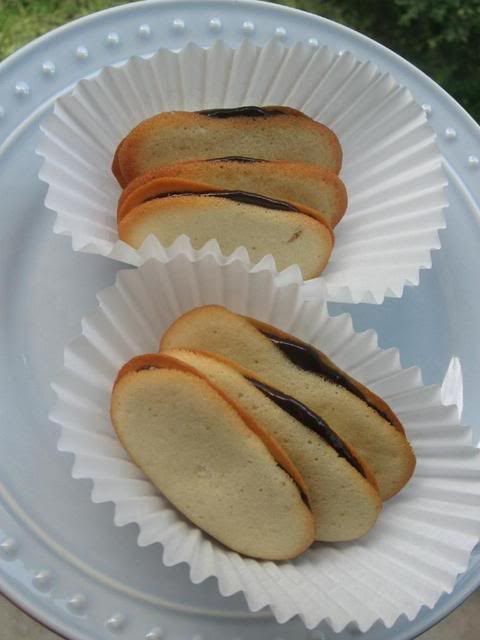
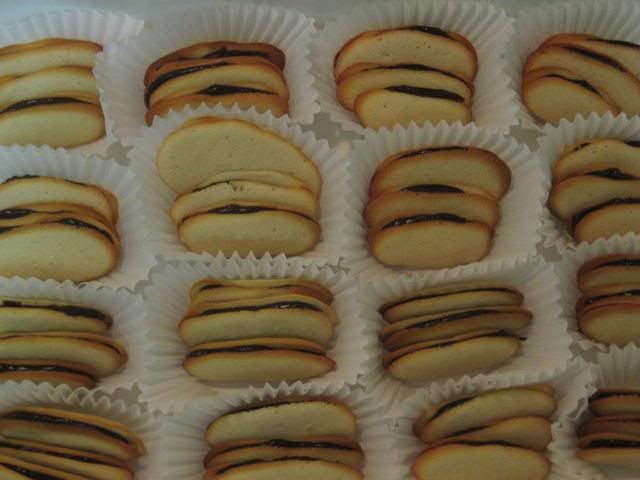
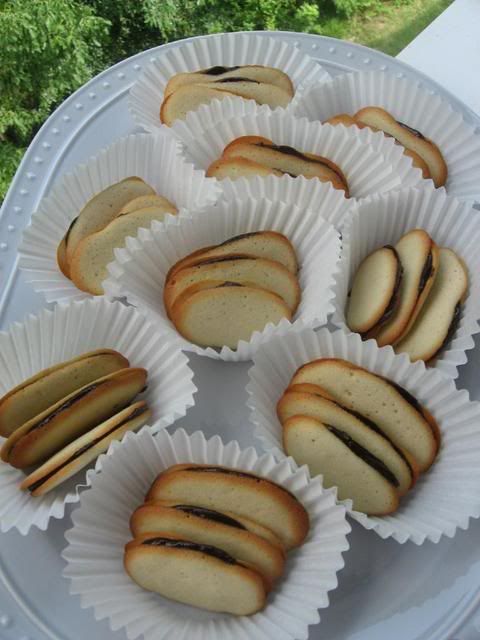
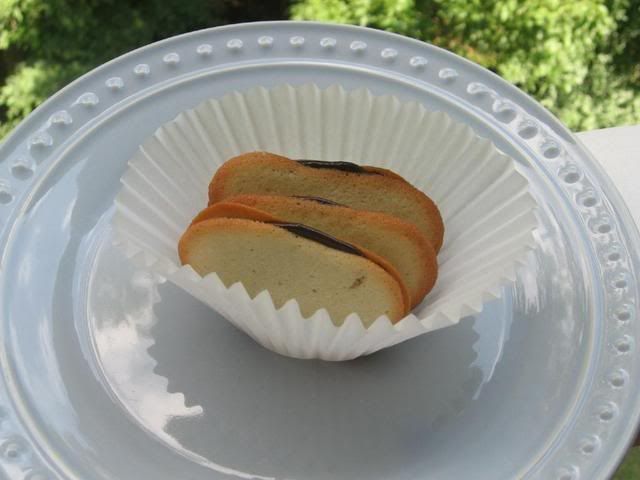
First and foremost, I think the Daring Bakers will encourage me to try recipes I might not otherwise consider. These Milan Cookies, for example, aren’t something I would have decided to try on my own, but they are delicious and sophisticated. I can picture them being served at tea; they’re so prim in their little paper bowls! The cookie filling is a thick ganache with a hint of orange zest that complements the slightly citrus flavor of the cookie itself. Everyone who tried these loved them!

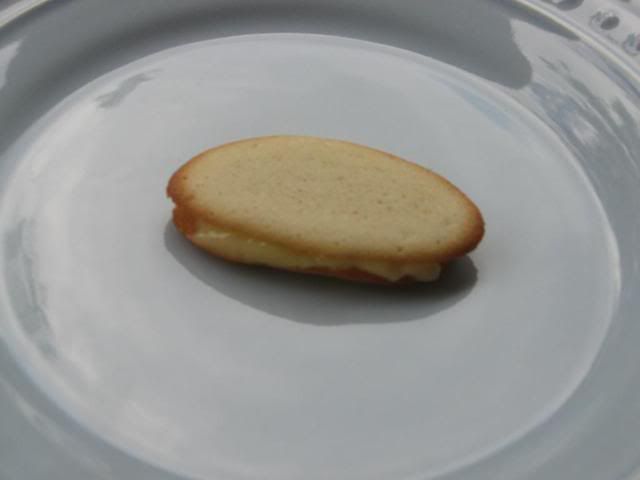
Just a hint: I had some lemon curd frozen from my Lemon Burst Fairycakes, so I spread it on a cookie and gave it a taste. It was heavenly! You could even sandwich some lemon curd between two cookies and dip them in ganache! Clearly, these cookies have inspired me.


Milan Cookie with lemon curd filling in the place of ganache.

This recipe is from Gale Gand and Food Network, but of course, I tweaked some things. Changes to the recipe are marked in italics below. I hope you enjoy these cookies, and be sure to send me a photo and/or leave me a comment if you make them! I’d love to see your results!

Milan Cookies


Recipe By: Gale Gand (slightly tweaked — changes in italics)
Yields: about 50 sandwich cookies

Ingredients:
12 tablespoons butter, softened
2 1/2 cups powdered sugar
7/8 cup egg whites (from about 6 eggs)
2 tablespoons vanilla extract
2 tablespoons lemon extract
1 1/2 cups flour
Cookie filling, recipe follows

Cookie filling ingredients:
1/2 cup heavy cream
8 ounces semisweet chocolate, chopped
1 orange, zested

Directions:

Cream the butter with a paddle attachment then mix in the sugar. Add the egg whites gradually and then mix in the vanilla and lemon extracts. Add the flour and mix until just incorporated. With a small (1/4-inch) plain tip, pipe thick 2-inch sections of batter onto a parchment-lined sheet pan (note: it’s easier to pipe onto parchment if you “glue” it to the pan using some nonstick cooking spray), spacing them 2 inches apart as they spread. Bake in a preheated 350 degree oven for 7-8 minutes or until light golden brown around the edges. Let cool on the pan.

Cookie Filling: In a small saucepan over medium flame, scald cream. Pour hot cream over chocolate in a bowl. Whisk to melt chocolate, add zest and blend well. Set aside to cool (the mixture will thicken as it cools). Spread a thin amount of the filling onto the flat side of a cookie while the filling is still soft and press the flat side of a second cookie on top. Repeat with the remainder of the cookies.

NOTES on storage from Audax Artifex: Let cookies cool completely before storing them, or the residual heat will produce steam that will soften the cookies and accelerate spoilage. Separate layers of cookie with wax paper or foil.

In a dry climate, keep unfilled cookies crisp by storing them in a loosely covered container, such as a cookie jar without a snug lid. In a damp, humid climate, store in a tightly covered container.

Also keeping the unfilled cookies in an air tight container with a muslin bag of salt or bicarbonate of soda – this will absorb the dampness keeping your cookies crisp.

All of that said, I will tell you, my cookies got soft. We actually enjoyed them that way, so don’t fret if yours aren’t as crisp on day 2. Many of the Daring Bakers also tried fun combinations — chocolate Milan cookies with chocolate mint ganache, plain Milan cookies with no citrus, etc. So do some experimenting!

Process Photos:


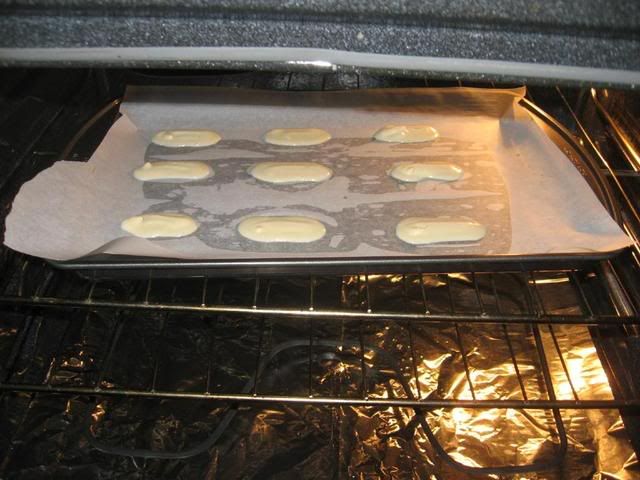
Baking in the oven.


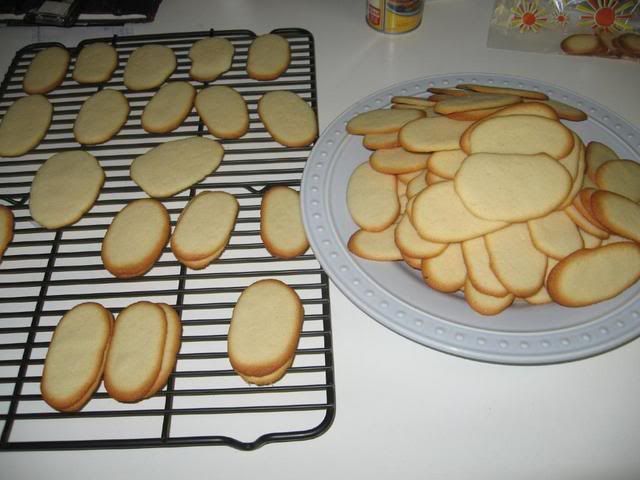
Cooling off (here you can see that a few were quite
wonky! To reduce the number of crooked cookies,
quickly and confidently pipe a thick, straight line.)


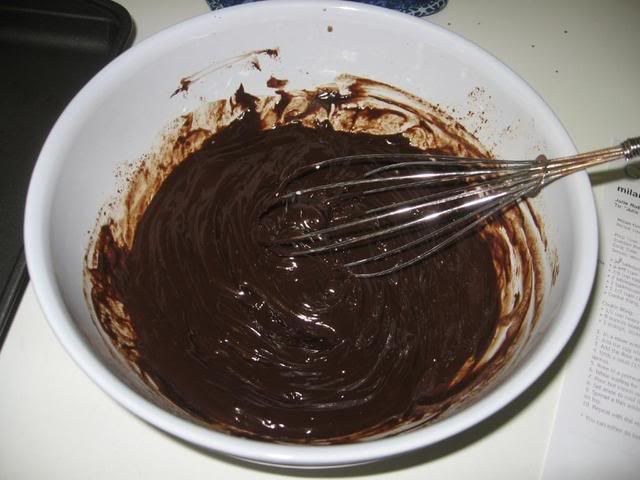
Mixing cookie filling.


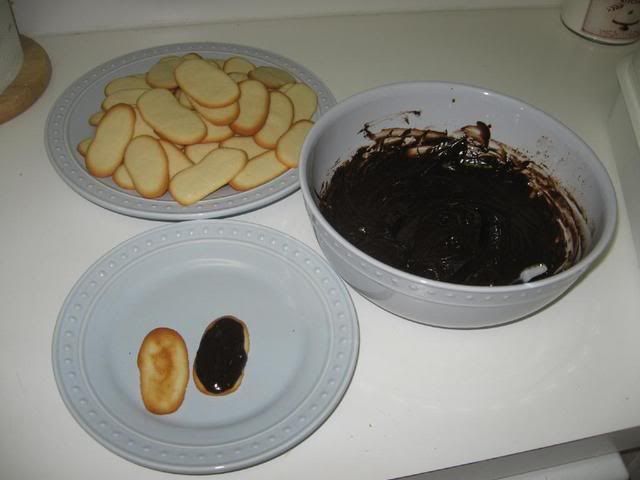
The sandwich construction station!


LOTS of cookies!


Enjoy!

Visit the Daring Bakers (temporary) Blogroll to see more of these treats from amazing bakers!

Since I mentioned challenges, what’s the most challenging recipe you’ve tried?

Mallows

As I mentioned in my previous post, the July Daring Bakers’ challenge was hosted by Nicole at Sweet Tooth. She chose Chocolate Covered Marshmallow Cookies and Milan Cookies from pastry chef Gale Gand of the Food Network. While the Milan cookies were delicious and dainty, the Mallows were scrumptious and indulgent. They were two very different types of cookies, but I learned from each recipe and enjoyed the variety! If I had to choose a favorite, though — and you know I do — it would be these Mallows.


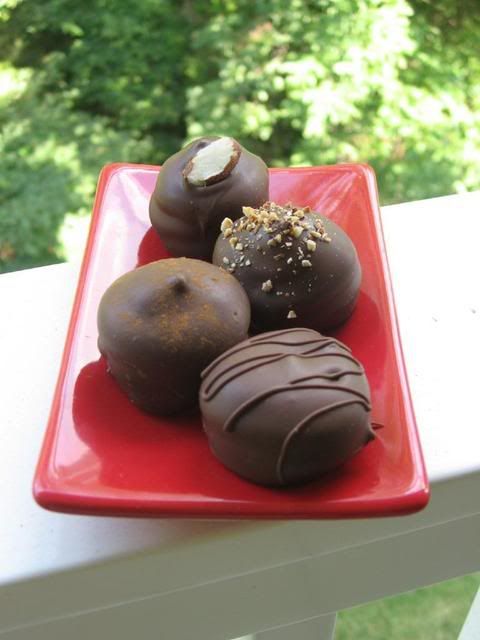
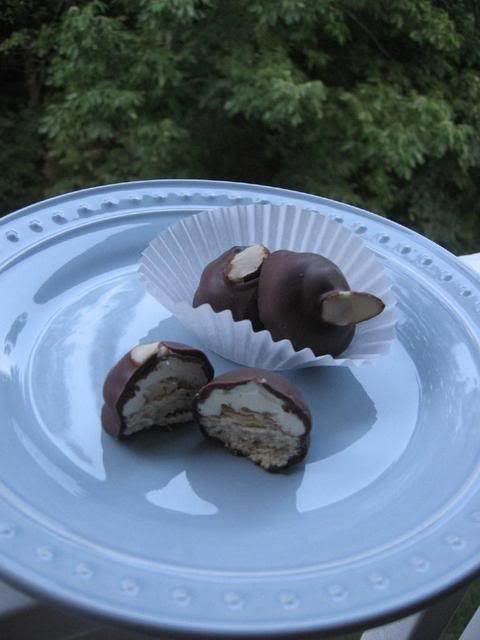
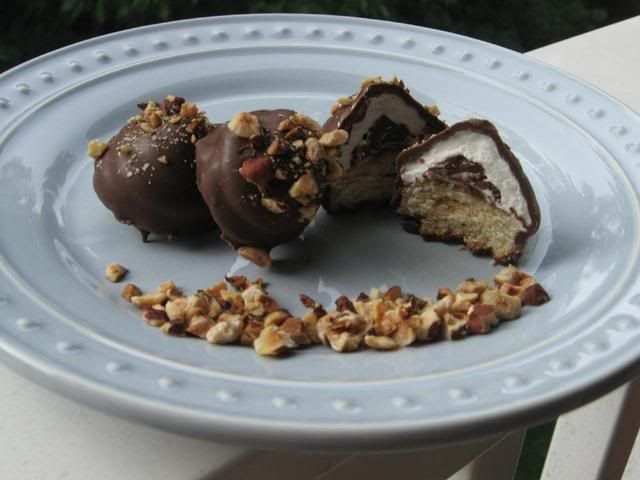
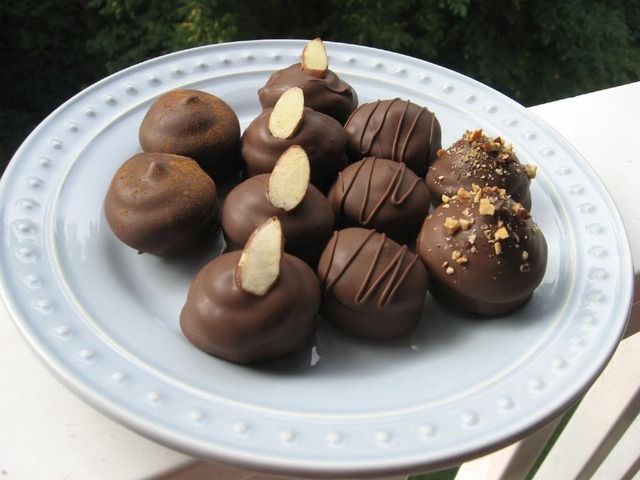
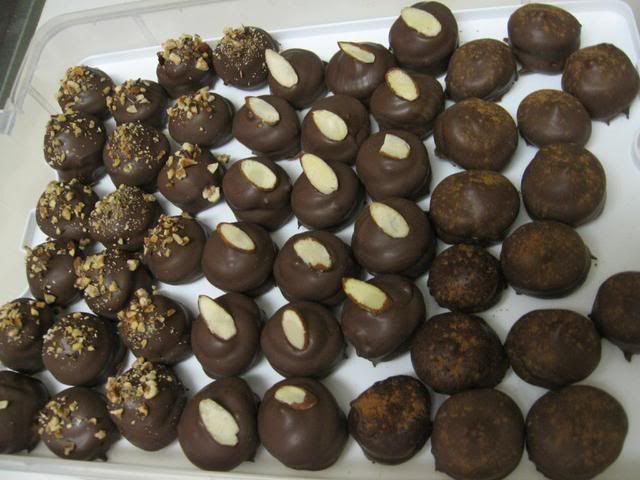
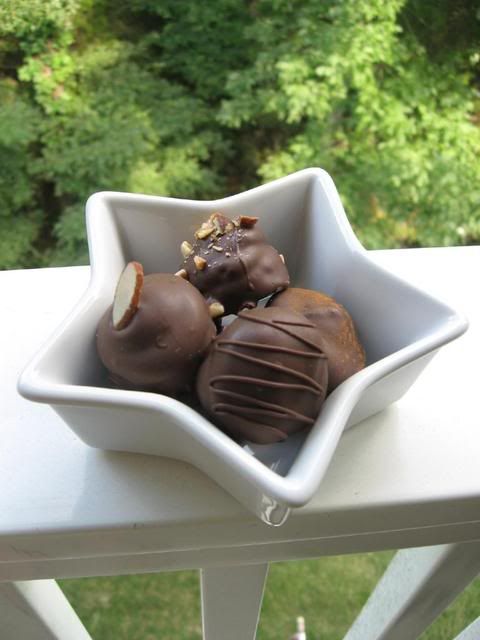
Four types of Mallows (from back): Almond Mallows, Hazelnut Mallows, Cinnamon Mallows, and Plain Mallows

Mallows are chocolate-covered, marshmallow-topped cookies. The wonderful thing about these Mallows (besides the amazing flavor) is how versatile they are. Homemade marshmallows are very easily flavored and customized, so I was able to make four Mallow “flavors” with hardly any more trouble than just making one. I chose Almond, Hazelnut, and Cinnamon Mallows in addition to the plain.


Almond Mallows

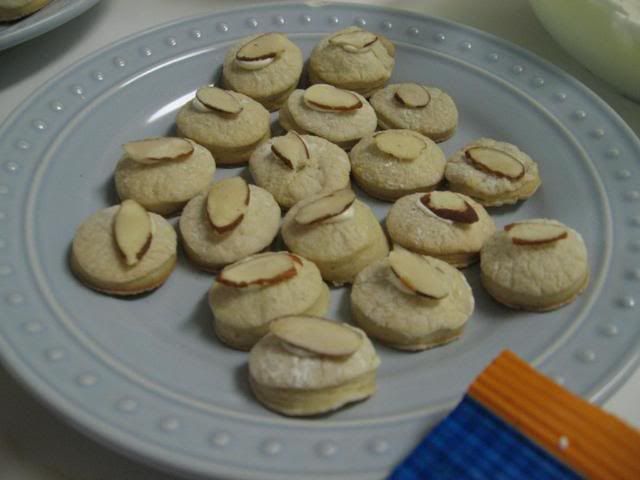
Almond Mallows have an almond sliver between the cookie and marshmallow, and another atop the cookie. In addition, their marshmallows are flavored with vanilla, almond, and butter flavorings. The marshmallow is as rich as a buttercream frosting, and so tasty! I bet this version would also be delicious with some creamy almond butter piped on under the marshmallow.


Hazelnut Mallows

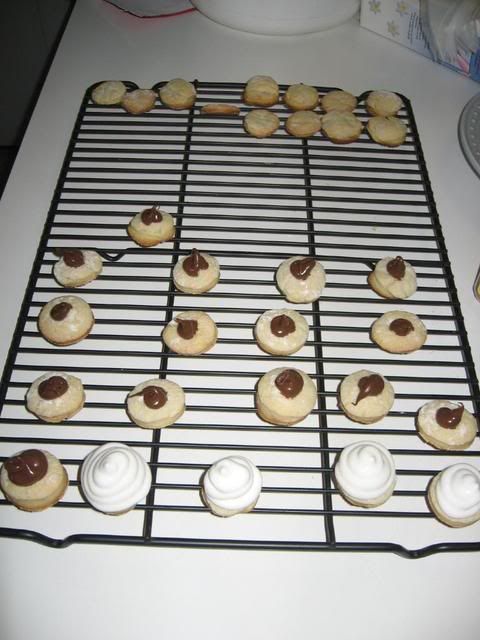
Hazelnut Mallows (my favorite!) have Nutella piped on under plain marshmallow, and are topped with toasted hazelnuts.


Cinnamon Mallows

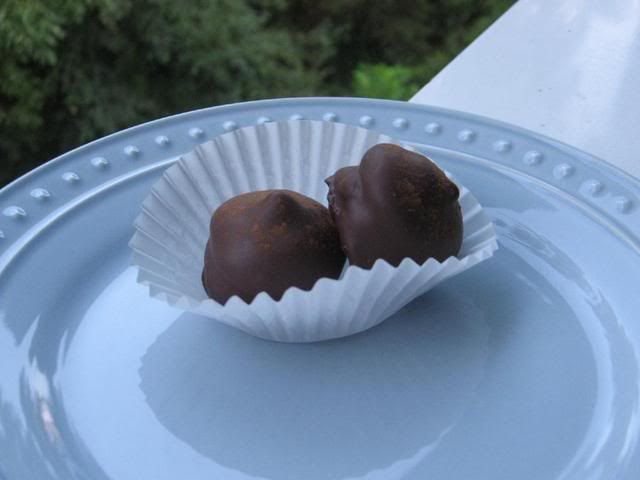
Cinnamon Mallows have cinnamon and nutmeg flavored marshmallow, and a light dusting of cinnamon and cocoa powder on top.

Enjoy experimenting with flavors! Different sorts of nuts, spices, and extracts are all tools for tweaking your mallows. Some Daring Bakers piped a bit of jam or nut butter below their marshmallows for an added surprise. Use food coloring to denote different flavors of marshmallow. There’s a lot of room for creativity here.


All four types of Mallows again (from left): Cinnamon Mallows, Almond Mallows, Plain Mallows, and Hazelnut Mallows

Gale Gand’s original recipe seemed to need some tweaking, since Daring Bakers typically ended up with — I kid you not — hundreds of cookies, and only enough marshmallows to cover around 50. I’ve adjusted the recipe below to hopefully yield the correct amounts! Also, Gand’s original recipe called for melting semisweet chocolate and vegetable oil to make your coating. After reading that about half of the Daring Bakers’ were having trouble with their chocolate not setting — especially those who live in warm or humid climates — I decided not to take a chance with it. Instead, I used my beloved CandiQuik dipping chocolate, which dries in literally minutes! You can probably find this at Lowes Food or SuperTarget. A friend of mine over at Barbara Bakes uses Ghiradelli dipping chocolate, which is another option.

Enjoy playing with your Mallows! My family and friends loved these cookies, and I hope yours will too.

Mallow Cookies


Recipe By: Gale Gand (tweaked quite a bit!)
Yields: about 80 small (bite-sized) Mallows

Cookie Ingredients:
1.5 cups all purpose flour
1/2 cup white sugar
1/2 teaspoon salt
3/8 teaspoon baking powder
1.5/8 teaspoon baking soda (this is an odd measurement — eyeball it as best you can!)
1/4 teaspoon ground cinnamon
6 tablespoons unsalted butter
1.5 eggs, whisked together (to get half an egg, crack it into a separate cup and lightly beat it; then discard 1.5 tablespoons and add the rest to the recipe)
Dipping chocolate (I used 2 bags of chocolate CandiQuik)

Homemade Marshmallow Ingredients:
1/4 cup water
1/4 cup light corn syrup
3/4 cup (168.76 grams/5.95oz) sugar
1 tablespoon powdered gelatin
2 tablespoons cold water
2 egg whites , room temperature
Flavoring (either Plain, Almond, or Cinnamon)

-Plain = 1/4 teaspoon vanilla extract
-Almond = 1/8 teaspoon vanilla extract, 1/8 teaspoon almond extract, 1/8 teaspoon imitation butter flavoring, and 4 drops of yellow food coloring (optional).
-Cinnamon = 1/4 teaspoon vanilla extract, 1/4 teaspoon cinnamon, and a pinch nutmeg

Directions:

Begin by making cookies:
1. In a mixer with the paddle attachment, blend the dry ingredients.
2. On low speed, add the butter and mix until sandy.
3. Add the eggs and mix until combine.
4. Form the dough into a disk, wrap with clingfilm or parchment and refrigerate at least 1 hour and up to 3 days.
5. When ready to bake, grease a cookie sheet or line it with parchment paper or a silicon mat.
6. Preheat the oven to 375 degrees F.
7. Roll out the dough to 1/8-inch thickness, on a lightly floured surface. Use a 1 1/2 inches cookie cutter to cut out small rounds of dough (see my tips for rolling out dough, below).
8. Transfer to the prepared pan and bake for 8 minutes or until light golden brown. Let cool to room temperature.

While cookies are cooling, make your marshmallows:
1. In a saucepan, combine the water, corn syrup, and sugar, bring to a boil until “soft-ball” stage, or 235 degrees on a candy thermometer (though soft ball stage can be eyeballed with a simple cold water test, I love having a candy thermometer around. Mine even has a line marked “soft-ball stage”).
2. Sprinkle the gelatin over the cold water and let dissolve.
3. Remove the syrup from the heat, add the gelatin, and mix.
4. Whip the whites until soft peaks form and pour the syrup into the whites.
5. Add the flavoring of your choice and continue whipping until stiff (it will take around 15 minutes, so I hope you took your vitamins this morning!). Note: You can also separate the marshmallow into multiple bowls and make multiple flavors, but if you do, reduce the amounts of the ingredients so they don’t overpower the smaller volume they’re flavoring.
6. Transfer to a pastry bag.

Now to finish the cooled cookies:
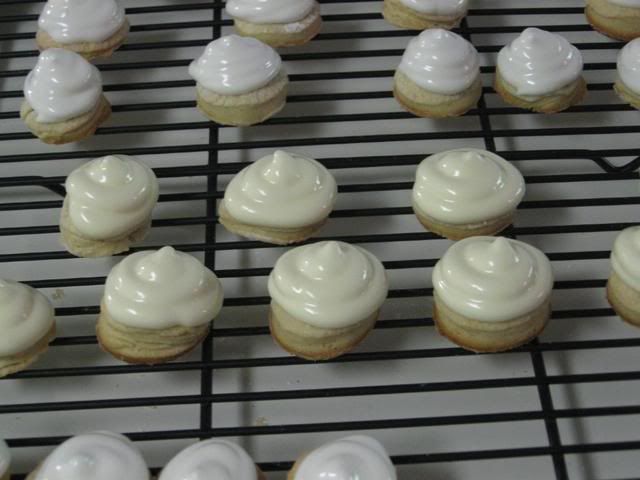
1. Pipe a “kiss” of marshmallow onto each cookie. Let set at room temperature for 2 hours.
2. Line a cookie sheet with parchment or silicon mat and cover with a cooling rack — this will be your drying rack!
3. Melt dipping chocolate according to package instructions. I like to set my bowl of chocolate in a larger bowl of hot water to keep it melted while I work. Just be careful not to let the water touch the chocolate, or it will seize and you won’t be able to work with it.
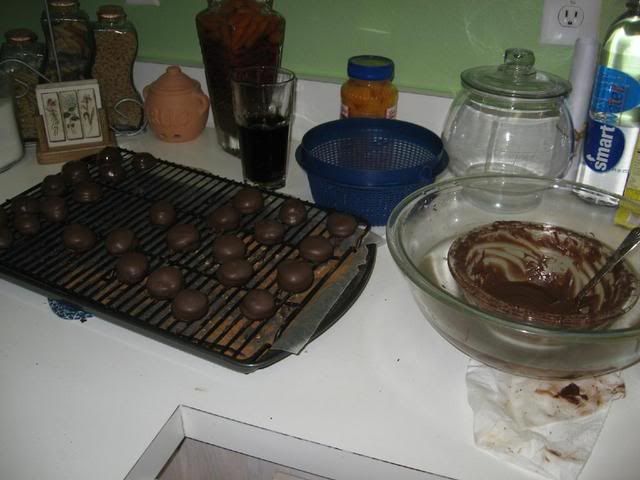
3. One at a time, gently drop the marshmallow-topped cookies into the hot dipping chocolate (see my video demonstration below!).
4. Lift out with a fork and let excess chocolate drip back into the bowl. Now’s the time to add toppings if you wish, while the coating is wet. For a chocolate squiggle, let coating dry and use a ziplock of CandiQuik with the corner cut off to drizzle over cookies.
13. Place on the prepared pan and let set at room temperature until the coating is firm, about 10 minutes. Store in an airtight container at room temperature (unless you’re in a very hot environment and notice melting, in which case, store in fridge).

Note: if you don’t want to make your own marshmallows, you can cut a large marshmallow in half and place on the cookie base. Heat in a preheated 350-degree oven to slump the marshmallow slightly, it will expand and brown a little. Let cool, then proceed with the chocolate dipping.

Julie’s tips for rolling, gathered from various internet sources, my mother, and some lovely friends during a moment of panic:

  • Work with small batches (about 1/3 of the dough) at a time, while keeping the rest chilling in the refrigerator.
  • You can coat your workspace in equal parts confectioners’ sugar and flour if you’re worried about using too much flour (which can cause dough to get dry/tough).
  • Roll dough immediately from the refrigerator, turning it often and redusting lightly with flour mixture to prevent sticking.
  • If you don’t have a cool metal counter or marble slab (which I don’t), set some frozen vegetables out on your counter for a bit before you roll to cool it off. Then dry your workspace and roll. You can also refrigerate or freeze your rolling pin for a few minutes.
  • Have a sheet pan in the freezer. If you sense your dough is getting sticky/warm, put a sheet of wax paper on the dough and press the frozen sheet pan on top to cool it down quickly.

The One Minute Dipping Demonstration!
[youtube=http://www.youtube.com/watch?v=dvyI3i4nYLY&hl=en&fs=1&rel=0&color1=0x2b405b&color2=0x6b8ab6&border=1]

Process Photos!


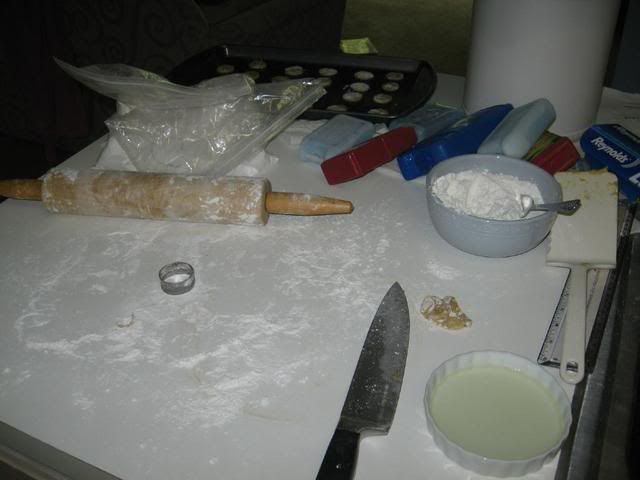
Ready to roll!


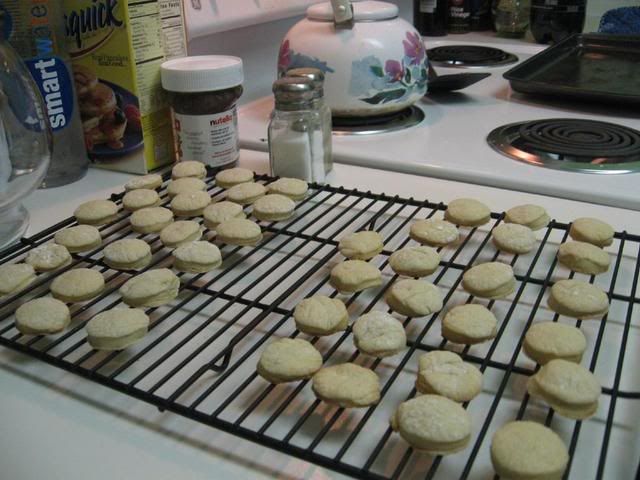
Fresh from the oven and not so pretty.


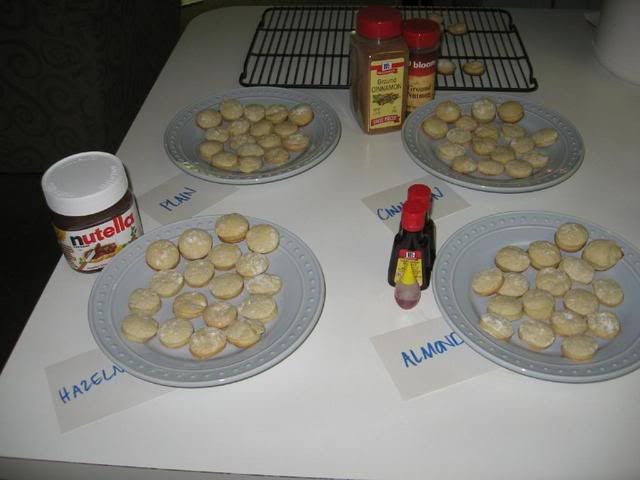
Getting organized to make my four types of Mallows (and not confuse them!)


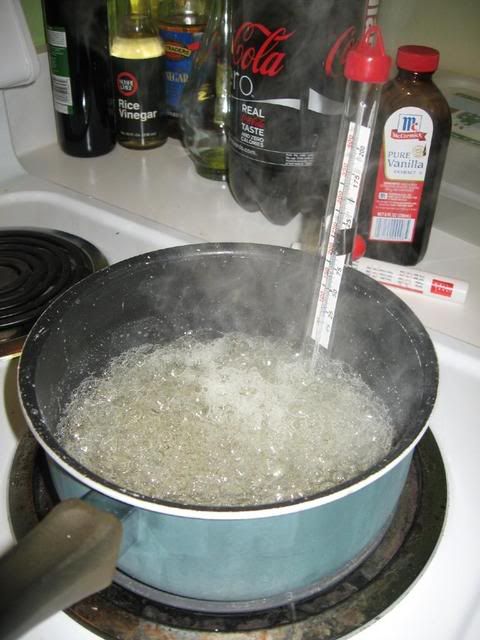
Is it soft-ball stage yet? (notice my faithful Coke Zero in the background!)


Piping Nutella filling onto my Hazelnut Mallows. The more you can fit, the better!


For Almond Mallows, I used a bit of the almond marshmallow mixture to “glue” an almond sliver on the cookie before piping my marshmallow.


Marshmallows of all flavors piped on.


Dipping — see video above for a demonstration!


Finished!


Mmm! Have one of each!

Visit the Daring Bakers (temporary) Blogroll to see more of these treats from amazing bakers!

Baking to Freeze: Chunky Peanut Chocolate and Cinnamon Cookies

Chunky Peanut, Chocolate, and Cinnamon Cookies are the third and final recipe in my “baking to freeze” series (see the introduction post here, if you missed it!). These cookies taste festive: cinnamon and spice, along with crunchy peanuts and rich chocolate chips.


Ziplock of Chunky Peanut, Chocolate, and Cinnamon Cookie dough partitioned into 4-cookie logs, with thawing/baking instructions.


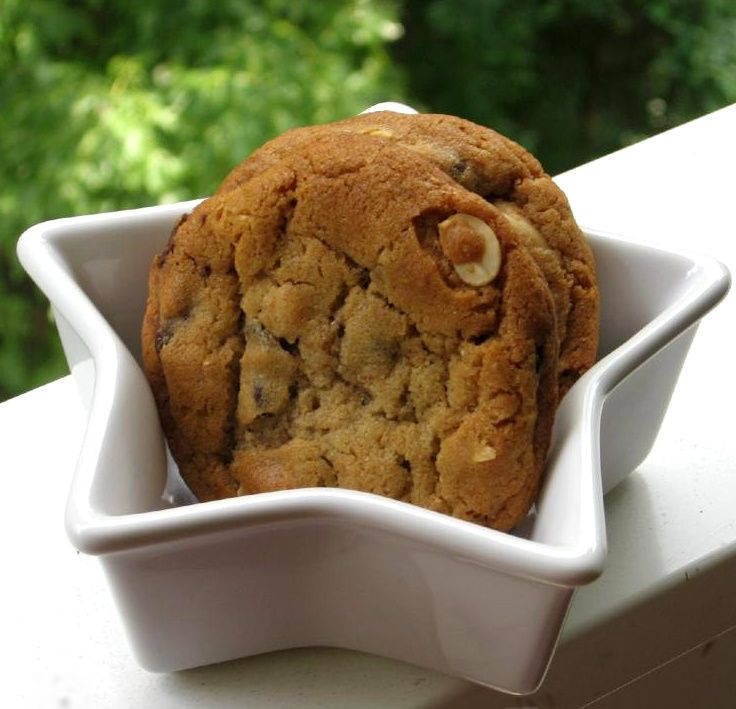
Cookies after baking.


Baking to Freeze Recipe #3: Chunky Peanut, Chocolate, and Cinnamon Cookies


Recipe by: Martha Stewart
Yields: About 40-50 cookies

2 cups all-purpose flour
1 teaspoon baking soda
1 teaspoon salt
1/2 teaspoon ground cinnamon
3/4 cup (1 1/2 sticks) unsalted butter, softened
1/2 cup smooth peanut butter
1 cup packed light-brown sugar
1/2 cup granulated sugar
2 large eggs
1 1/2 cups semisweet chocolate chips
2/3 cup roasted, salted peanuts, coarsely chopped
2 teaspoons pure vanilla extract

Directions:
Preheat oven to 350 degrees. Whisk together flour, baking soda, salt, and cinnamon in a medium bowl. Put butter and peanut butter in the bowl of an electric mixer fitted with the paddle attachment; mix on medium speed until combined, about 2 minutes. Add sugars; mix 2 minutes. Mix in eggs. Gradually add flour mixture; mix until just combined. Fold in chocolate chips, peanuts, and vanilla with a mixing spoon until well distributed. Refrigerate dough until it is slightly firm, 15 minutes. If freezing, roll into logs using wax paper. Double wrap logs of cookie dough (in desired portions) in plastic wrap and seal in a ziplock bag. Freeze for up to 6 weeks.

Roll dough into 1-inch balls. Space balls 2 to 3 inches apart on baking sheets lined with parchment paper. Flatten slightly. Bake until just golden, about 13 minutes. Transfer cookies to wire racks to cool. Can serve with ice cream.

Thawing Instructions: Thaw desired amount of cookie dough in refrigerator for several hours. Preheat oven to 350 degrees. Roll dough into 1 inch balls. Space 2-3 inches apart on greased cookie sheet and flatten slightly. Bake until golden, about 13 minutes.

Click here to download thawing/baking instruction labels and recipe card to include with this dish.

Preview:

1 19 20 21 22