candy

Deep Fried Cake Batter Cookie Dough

Cake Batter Cookie Dough is like a birthday party. A sweet, colorful, happy birthday party with balloons and trick candles.

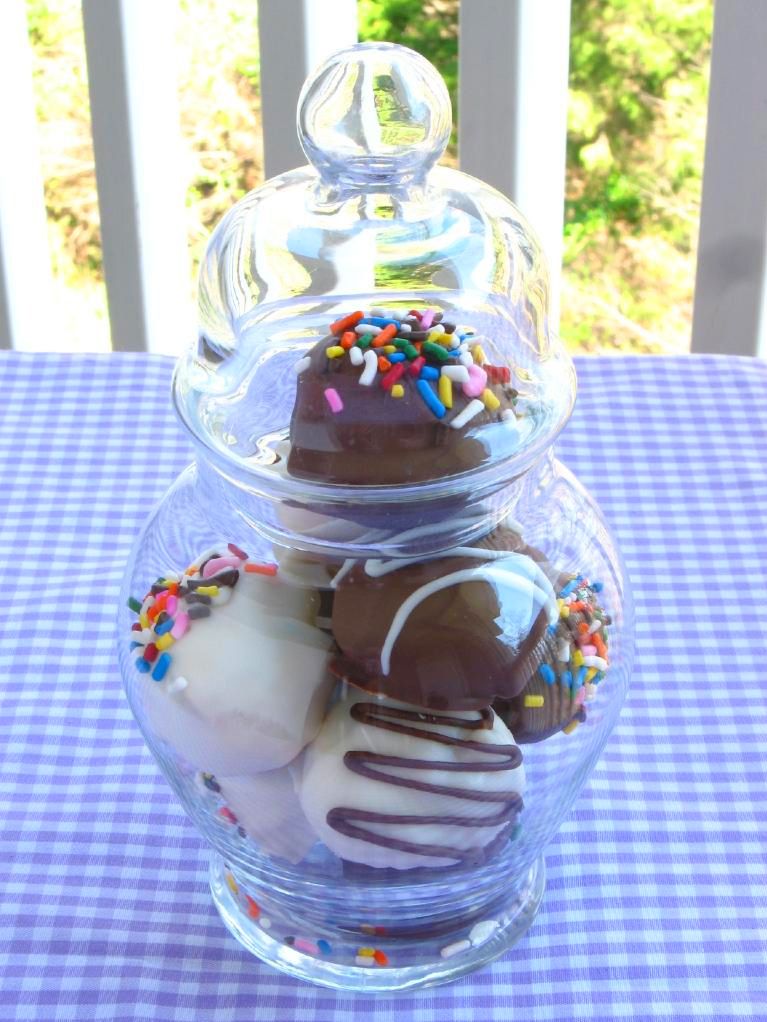
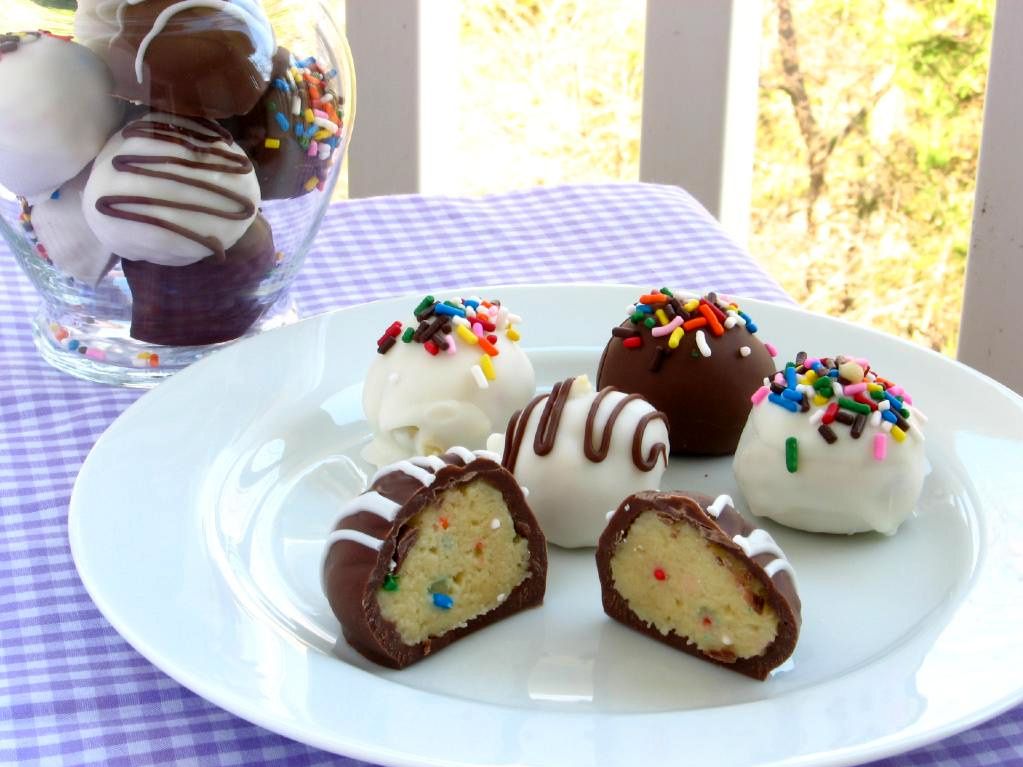
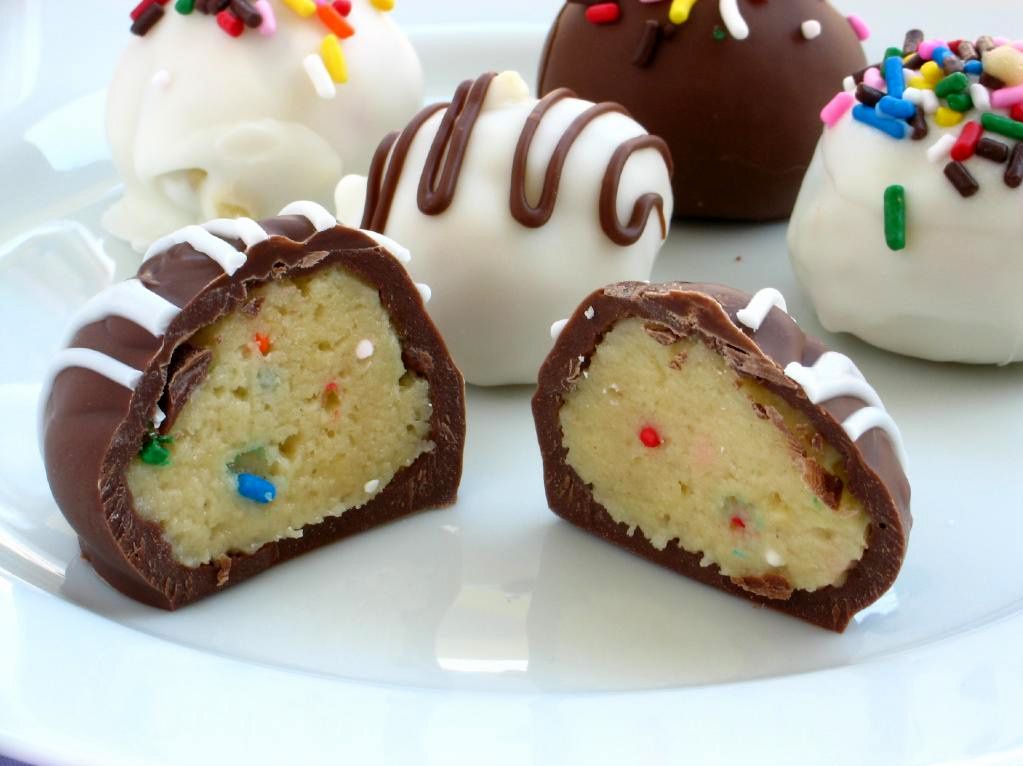
Cake Batter Cookie Dough Truffles are like a birthday party that, in addition to those things, has a bouncy house and pony rides from a pony named Whinny.

That’s nice and all.

But Deep Fried Cake Batter Cookie Dough is like a birthday party with all of those things — held on a flippin’ yacht in the French Riviera, with David Beckham serving you lemonade while Posh Spice feeds Whinny sugar cubes.

Oh, and with Prince performing “Raspberry Beret” in one of his funky outfits.

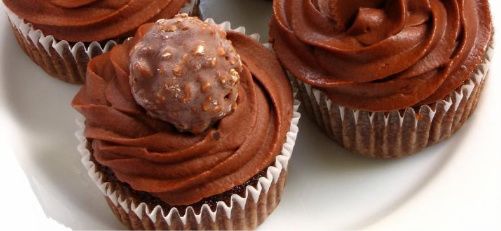
And with Nigella Lawson in the galley whipping up cupcakes.

And with one of those little bendy straws in the lemonade.

What I’m trying to say is that Deep Fried Cake Batter Cookie Dough is one of the best things I’ve ever had the pleasure of devouring. I mean, it was so good — an absolutely magical bite. I think it tasted a little like Heaven would taste.

And now that I’ve accidentally equated Heaven to a nautical birthday party with assorted celebrities (and Whinny!), I’m going to stop with that train of thought.

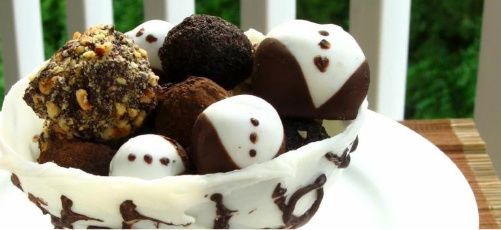
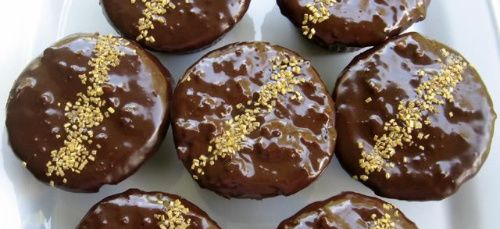
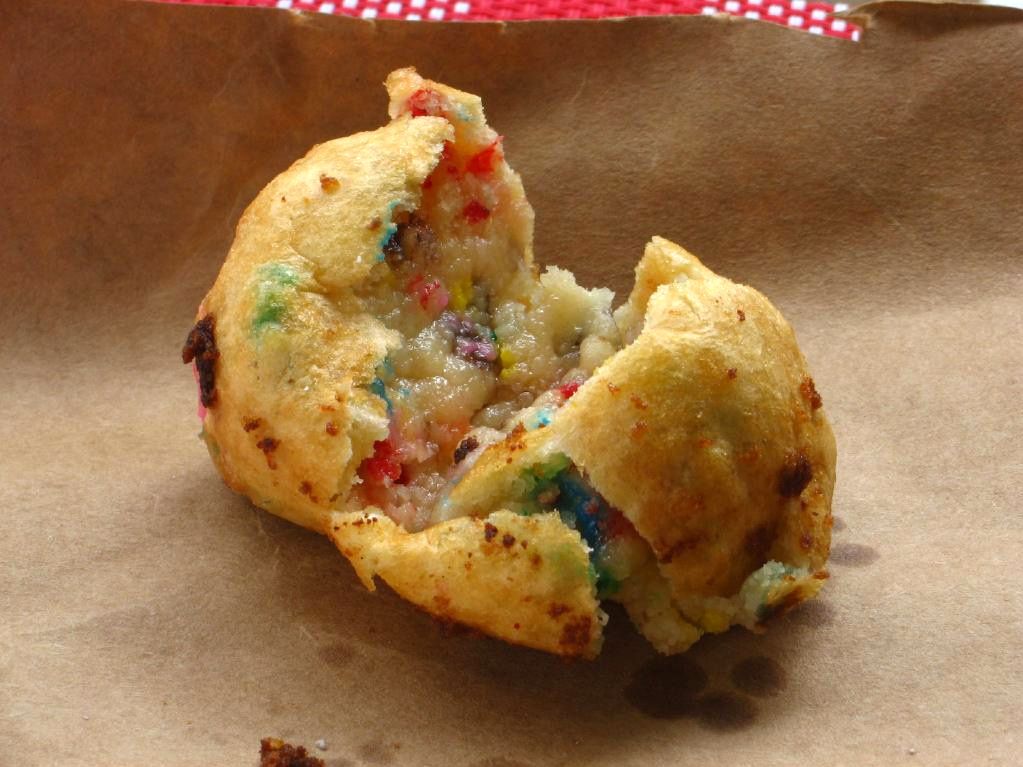
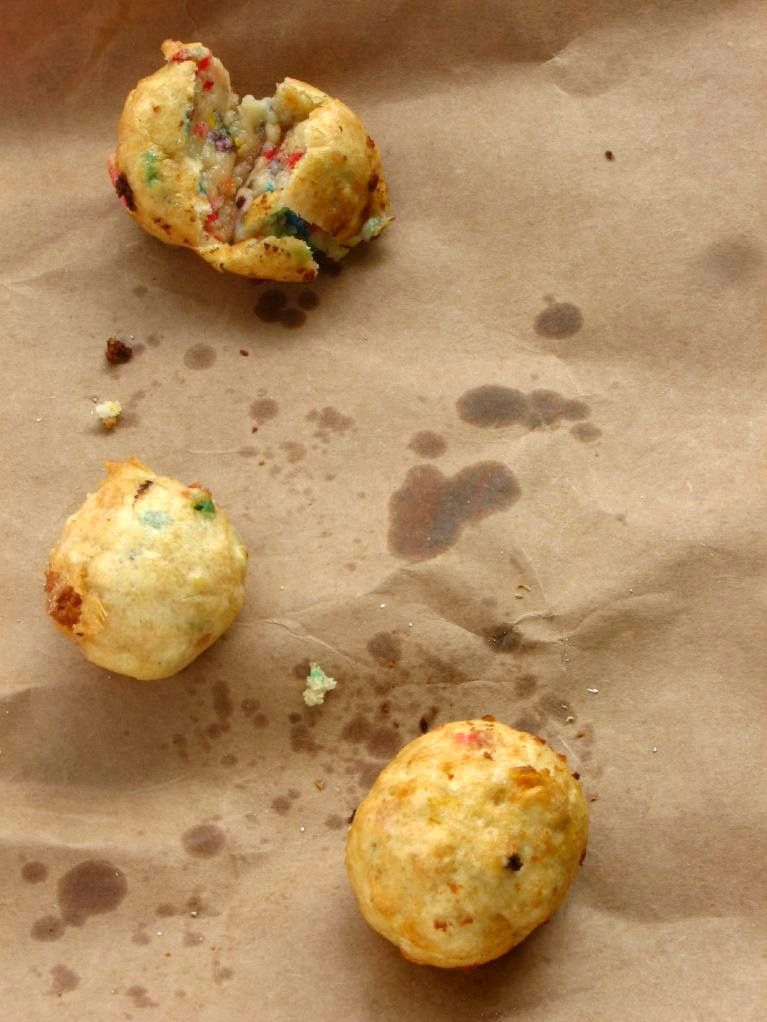
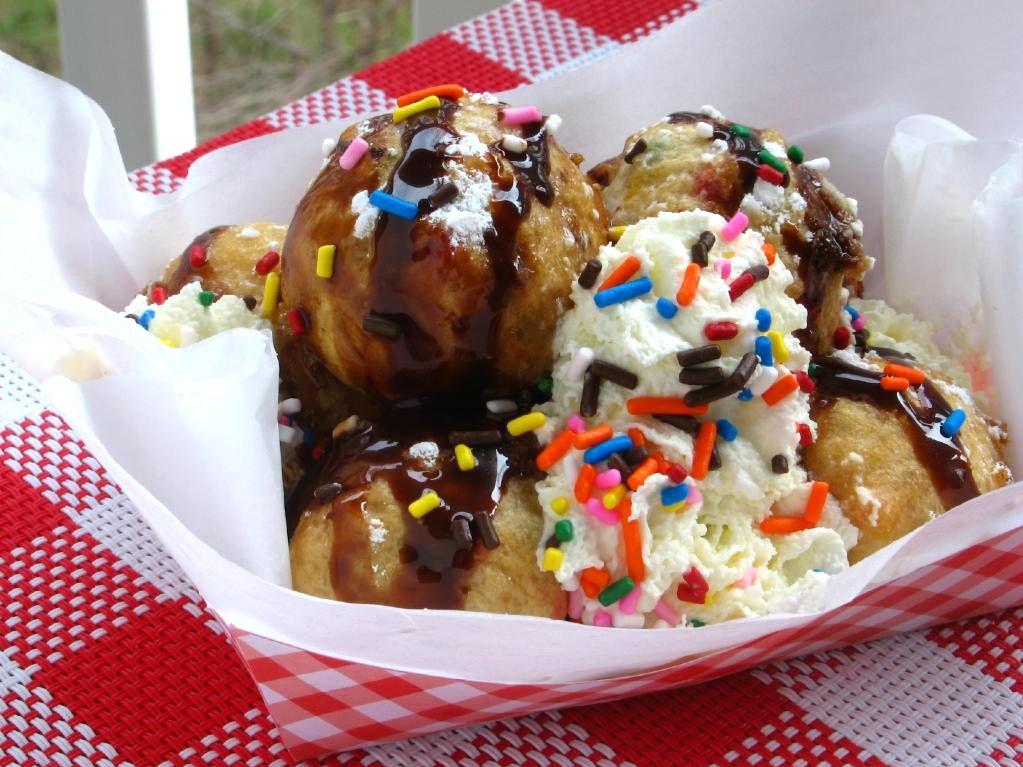
Back to deep fried dough. The buttery, cake batter-flavored dough encased in a thin, crispy shell was surprisingly light and pop-able. Despite being indulgent, it didn’t feel heavy or overwhelming.

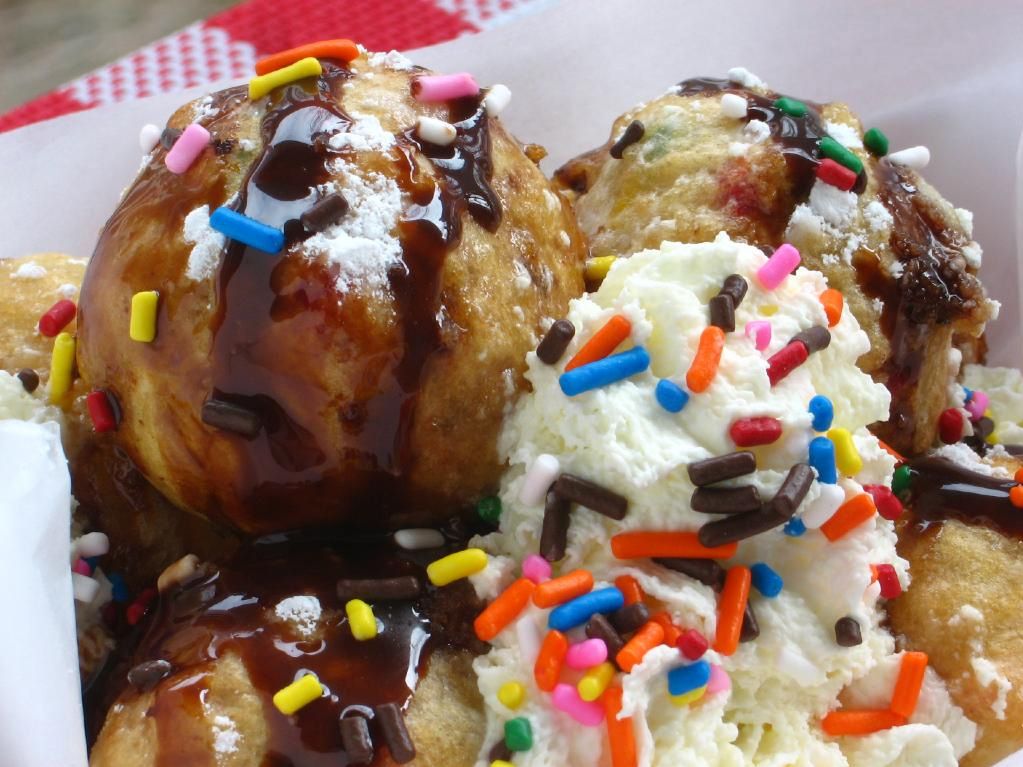
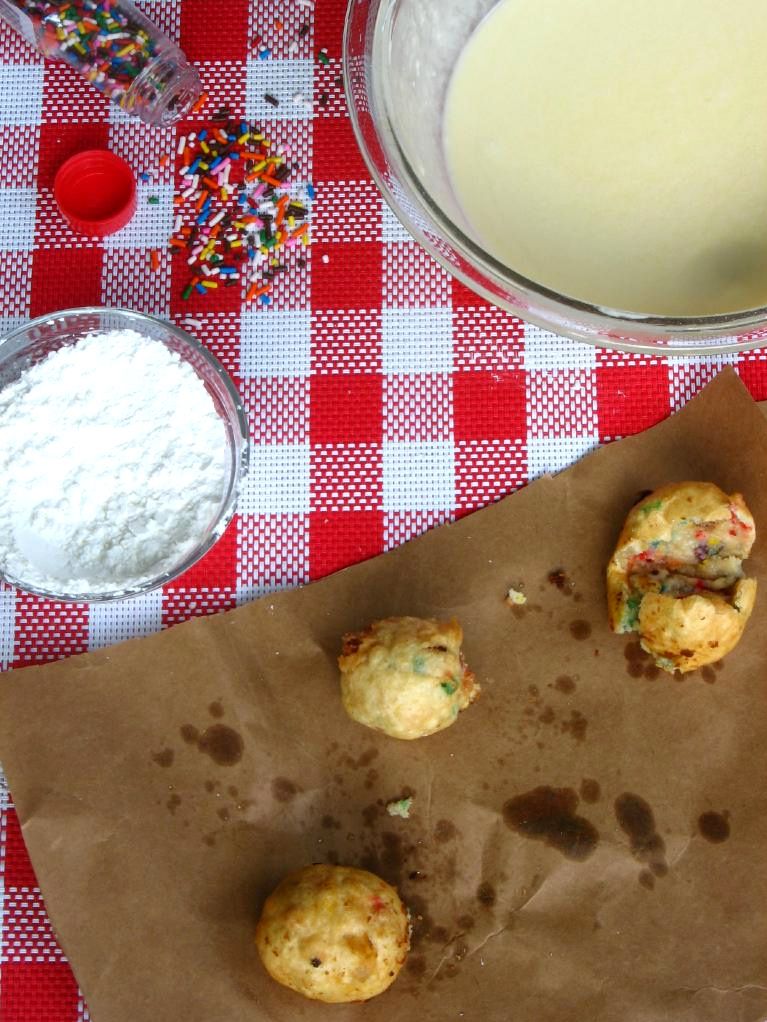
Of course, I stuck several of them in a paper tray with chocolate sauce, whipped cream, and sprinkles to really round out the experience.

I know some of you are going to say, “Well, I’m not really a fan of frying things.” Me neither! Frying things is scary business. Hot oil splatters can result in burnt fingers and forearms, and the whole process kind of smells weird. And maybe you’re health conscious and frying is a dirty word in your house.

Listen, these fried dough balls are beyond worth it! I suited up in goggles, put my hair up, plugged in my GranPappy, got down to business — and came out unscathed. And maybe, in terms of health, we shouldn’t eat deep fried dough balls every day; but then again, we shouldn’t have tricked out birthday parties every day either. It would spoil the fun of the occasional indulgence.

I want to leave you with a parting plea. Turn on your inner state-fair-attending, carnival-loving, birthday-party-throwing child and deep fry some cookie dough.

Time to get a little crazy: What’s your ideal birthday party?

Deep Fried Cake Batter Cookie Dough


Recipe by: Willow Bird Baking (cake batter cookie dough) and Taylor Takes a Taste (deep frying)
Yields: about 12 fried dough balls, depending on size

Dough Ingredients:
1 1/2 cups all-purpose flour
2/3 cup yellow cake mix
1/4 teaspoon salt
1/2 cup unsalted butter, room temperature
1/2 cup granulated white sugar
1 teaspoon pure vanilla extract
2 tablespoons sprinkles
4-8 tablespoons water

Batter Ingredients:
1 egg
1 cup ice cold water
1 cup self-rising flour
2 tbsp confectioners’ sugar

Other Ingredients:
small bowl of cornstarch for rolling dough balls in
oil or shortening for frying
confectioners’ sugar for sprinkling (optional)
chocolate sauce (optional)
whipped cream (optional)
sprinkles (optional)

Directions:
To make dough, in a medium bowl, cream together butter and sugar for 2-3 minutes until light, fluffy, and pale yellow. Mix in salt, flour, cake mix, sprinkles, and vanilla. Add water one tablespoon at a time, mixing after each, until you reach cookie dough consistency. Roll your dough into balls and chill until your batter and oil are ready.

Heat your oil to 375 degrees. To make batter, mix together egg and water. Add flour and sugar and mix. Roll each dough ball in cornstarch, shaking off the excess, and then dip into the batter, making sure the ball is entirely coated. Use a slotted spoon to place 3 or 4 balls at a time into the hot oil. Fry for 1-3 minutes or until golden brown. Drain on paper towels and serve with confectioners’ sugar, chocolate sauce, whipped cream, and sprinkles.

P.S. Love that cute little checkered paper tray? Download the template here, print it on cardstock, cut around the outside borders, fold the tabs over and glue them.

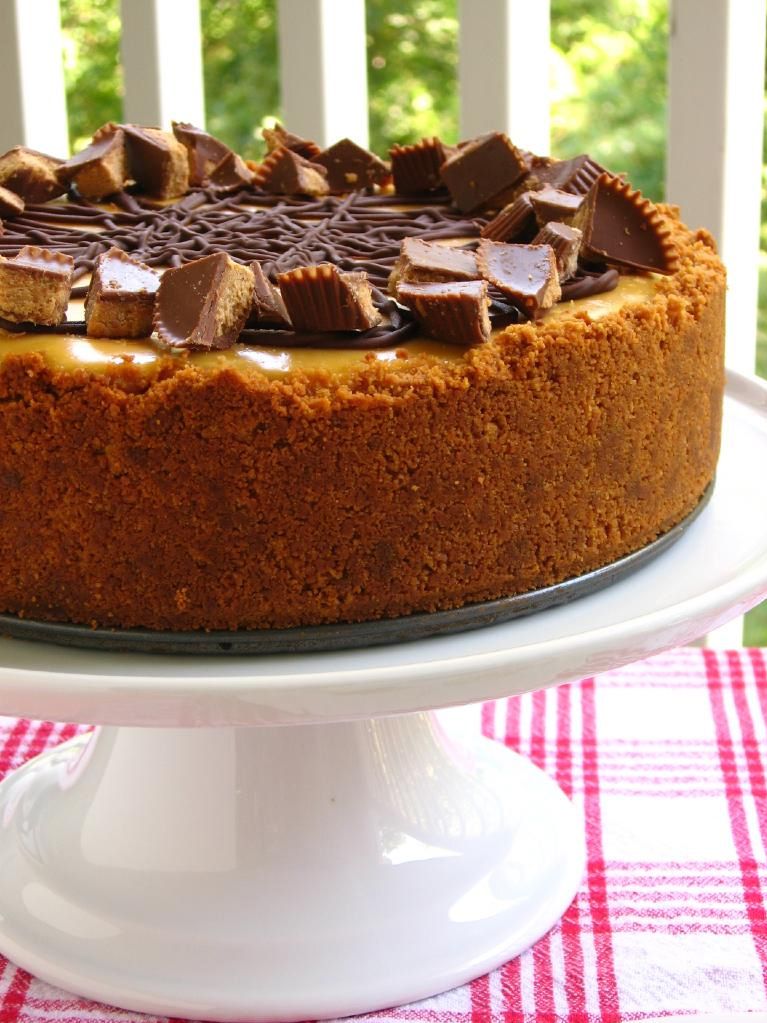
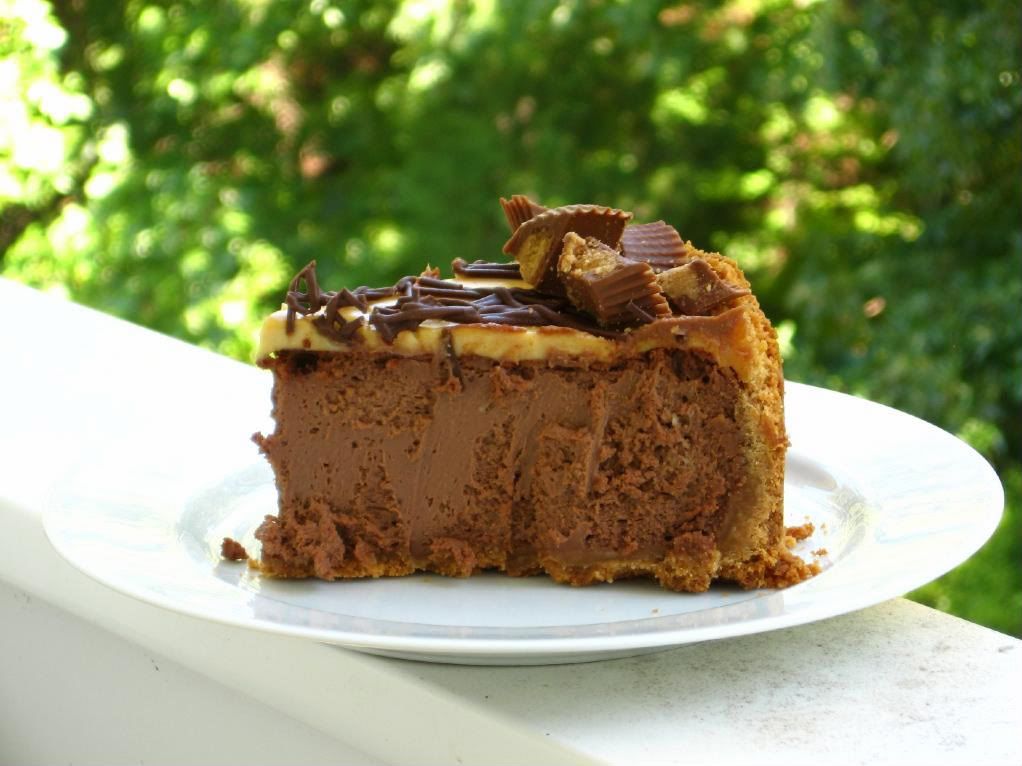
P.S. 2 Only 1 week left in my Cheesecake Challenge! Choose any one of 9 cheesecake recipes to prepare within the next month. Email a photo to me by 4/5/2011 to be featured on Willow Bird Baking! Get more details about the challenge here.

If you liked this post, please:
Subscribe to Willow Bird Baking
Follow Willow Bird Baking on Twitter
Follow Willow Bird Baking on Facebook
Give this post a thumbs up on StumbleUpon


ShareOther ways to share this post with friends!

Cake Batter Cookie Dough Truffles

What a mess of a weekend. While I was blowing my nose repeatedly and hacking unattractively on Saturday night, I noticed that Byrd was lethargic. After a little investigating (read: walking around the apartment), I found that she had eaten about a metric ton of kleenex from the trash can. Her tissue escapades must have been her attempt at staying occupied while I tried to sleep off my cold; alas, it was a bad life decision. She was one unhappy puppy.

She curled up next to me and tried to look as pitiful as possible while I massaged her sick little body. Every now and then she’d look up at me as if to say, “Why aren’t you fixing it, Mommy?” Then I’d cry a little and she’d lick my face a little and we’d continue spooning.

Finally the tissues worked their way out of her system, but not until the entire weekend had been spent fretting and giving her sips of olive oil. I’m ready for everyone in the apartment to be healthy now! At least my turtle hasn’t contracted any plagues as of yet.

Needless to say, the safe-to-eat cookie dough I posted on Sunday has been a welcome ray of sunshine in an otherwise germy, sickly sort of week. In fact, I found two recipes in which to use said cookie dough that almost made everything feel downright cheery. And here’s one of them now: cookie dough truffles.

I usually use the eggless chocolate chip cookie dough in my Coffee Cookie Dough Fudge Cheesecake — a noble purpose, for sure. But if you’re not feeling making an entire cheesecake, you can whip up a batch of these simple truffles. I made them with each type of cookie dough and unsurprisingly, the cake batter cookie dough truffles were my absolute favorite. The cake batter cookie dough was the perfect buttery and festive filling inside of the rich chocolate shell. I’m just sorry poor Byrd couldn’t join in for a bite!

Cake Batter Cookie Dough Truffles


Recipe by: Willow Bird Baking
Yields:about 12 truffles, depending on size

Ingredients:
one recipe cake batter cookie dough (or other flavor)
chocolate candy melts (I use Candiquik)
sprinkles!

Directions: Roll your cookie dough into 1 inch balls and refrigerate for a few hours or overnight.

Melt candy melts according to package instructions. I place the bowl of melted candy melts into a bigger bowl with hot water in it. This keeps the candy melts warm and viscous as you work. Just be careful not to get any water in the chocolate, which will cause it to seize and be unusable. Prepare a sheet of wax paper to let your truffles dry on.

Take only a few dough balls out of the fridge at a time. Spear one with a toothpick and dip it, using a spoon to help you coat the outside and wiggling it a little over the bowl to let the excess drip off. Now wiggle it off onto your wax paper and top with sprinkles, chocolate chips, crushed oreos, or other cute toppings. Let them harden. Serve immediately or keep in an airtight container in the fridge.

If you liked this post, please:
Subscribe to Willow Bird Baking
Follow Willow Bird Baking on Twitter
Follow Willow Bird Baking on Facebook
Give this post a thumbs up on StumbleUpon


ShareOther ways to share this post with friends!

Three Delicious Ways to Celebrate World Nutella Day

Groundhog Day’s okay. I mean, Punxsutawney Phil is kind of fat and cute. I like his handlers’ top hats. And Phil said winter was going to be shorter this year, so that’s cool, I guess. At least one of my students is determined to celebrate Groundhog Day (please head over to support his young blog).

But honestly, y’all, it’s hard to be too enthusiastic. Just three measly days later, it’s World Nutella Day. Pshhhh. Punxsutawney who?

If you’re anxious to celebrate today’s clearly superior holiday in creamy-chocolatey-hazelnutty style, here are three of Willow Bird Baking’s favorite Nutella treats!


Wacky Candy Cupcakes


Nutella Truffles in a Chocolate Bowl


Ferrero Rocher Cupcakes

P.S. You may have noticed that I never revealed that announcement mentioned on my Red Velvet Cheesecake post — that’s because there’s been a slight change and I want to wait until things are settled. Can’t wait to let you know!

If you liked this post, please:
Subscribe to Willow Bird Baking
Follow Willow Bird Baking on Twitter
Follow Willow Bird Baking on Facebook
Give this post a thumbs up on StumbleUpon


ShareOther ways to share this post with friends!

Chocolate Peanut Butter Bliss Cheesecake and Project Food Blog

I have something important to tell you.

In a world that boasts thousands upon thousands of food blogs, I have to tell you what makes my little corner of the web something special.

Foodbuzz is hosting Project Food Blog, a competition to crown the next food blog star. Willow Bird Baking is a contestant, and the first challenge isn’t a challenge for me at all. It’s simply to tell you why I’m here, and what I stand for — something I’ve been convicted of over and over again.

Listen, I cook accessible food. I try to take lovely photos. I write in tune with my personal life — sometimes laughing, sometimes crying, always eating. Those things are special, but they’re not what makes me unique.

What really makes me unique are two things: Chocolate Peanut Butter Bliss Cheesecake, and a stranger’s 91-year-old grandfather.

This rich cheesecake was more than just a cheesecake. It was an experiment. It was a gift. It was an experience. It embodies what makes Willow Bird Baking unique:

1. I believe in creativity. I dream of combining individual desserts into super desserts, mixing dessert with breakfast, and drizzling caramel all over everything. Maybe a few dollops of cookie dough, too? I’m constantly creating and improving food. Over the past year, it’s been so rewarding to see photos and read accounts of how your creativity was sparked by a recipe here!

This cheesecake was born of my desire to innovate. A peanut butter sandwich cookie crust instead of an chocolate sandwich cookie crust? Sure! I’m smitten with fun ideas. Sure enough, with a creamy chocolate cheesecake slapped into that crust and a cool, soft peanut butter mousse spread on top, it was the best peanut butter and chocolate dessert combo I’d ever tasted.

2. I believe in challenging yourself. Like any home cook, I have family recipes I love to make, but I’m also adamant about the value of trying new things. Especially fancy things that make you want to say, “Oh, that’s lovely, but I could never do that.”

My culinary journey was one of continually tackling challenging recipes, and with every puffy puff pastry or foot-ed macaron, I felt proud of myself. It’s an incredible feeling to know that by encouraging you to take on these challenges as well, I can give you that sense of pride and accomplishment. For instance, the Croissant Challenge on Willow Bird Baking inspired 17 readers to make homemade croissants in their own kitchens for the very first time — and many more have committed to do so! I have never had a prouder blogging experience than seeing those beautiful croissant pictures roll in.

3. I believe in cooking impressive meals for those you love. This Chocolate Peanut Butter Bliss Cheesecake was made on a whim. Mike was coming to visit and I knew I wanted to make him dessert, but having just started teaching with a heavier load than usual, I was exhausted. I decided to make some simple bar cookies and began gathering supplies in the grocery store.

Somewhere near the butter aisle, though, I realized that we only get so much time to show our love to the special people in our lives. After imagining his face upon seeing a ridiculous surprise cheesecake in the fridge, I replaced the bar cookie ingredients and set about gathering cheesecake supplies. I worked all evening to create this recipe for him. It was so worth the effort to see him enjoying each bite, and I think it did more for my heart than it did for his.

You can have take-out days. We all do that. But every now and then, you need a recipe that you can set in front of your family to say, you are so important to me. I’ve got those for you.

Speaking of sharing love through food, there’s one last story to tell: the story of how a stranger’s 91-year-old grandfather reminded me of my blogging purpose.

Almost a month ago, I went to explore a blog post that had linked to my Peach Cobbler Cupcakes.

What I found was Songs of the Self, a blog by Jessica, a mom from Georgia. The post recounted how she’d made the Peach Cobbler Cupcakes for her grandfather’s 91st birthday party. As I read about her experience, I saw a photo that gave me pause — one of her husband helping her to sprinkle streusel on each cupcake and smiling for the camera.


photos used with permission by Jessica

I don’t know why it hit me like it did, but suddenly I was reading through tears. I realized that this was a family somewhere, working together to make a recipe that I created, following each little direction. The post from the next day shows the birthday party: her sweet grandfather in a silly party hat blowing out candles, her grandmother laughing, her tiny daughter Olivia representing the youngest generation.

At the end of her post, Jessica noted, “My cupcakes were beyond a hit! Everyone ranted and raved about them! …Yippee for crafty me!” Being able to participate in her special occasion in some meaningful way, and especially knowing that my recipe had a part in making her feel proud of herself reminded me of why I blog. As I closed her post with a filled heart, I thought of my friend Maranda’s proud post after making her first batch of homemade croissants — a post that inspired a similar effect in me.

The truth is, I blog to create a virtual communal table. Come sit, bake, eat, learn, and enjoy. Come try new things within a comfortable web of support. Come forgive yourself for your flaws, laugh at your kitchen flops, and ponder your life with a popsicle in hand.

Perhaps most of all, come and eat some Chocolate Peanut Butter Bliss Cheesecake. I saved a piece just for you.

Please take a look at my Project Food Blog profile and consider voting for Willow Bird Baking on September 20, 2010. Thank you so much for your support — you are precious to me!

Chocolate Peanut Butter Bliss Cheesecake


Recipe by: Willow Bird Baking, pieced together from Jerome Chang (peanut butter mousse), Joelen (chocolate cheesecake)
Yields: 15-20 pieces

Crust Ingredients:
1 pack (32) of peanut butter sandwich cookies, processed into crumbs
5 and 1/3 tablespoons butter, melted

Cheesecake Ingredients:
4 packages (8 oz. each) of cream cheese, room temperature
1 cup sugar
1 teaspoon of vanilla extract
4 eggs, room temperature
3 (1oz) squares semisweet bakers chocolate (melted and cooled)

Peanut Butter Mousse Ingredients:
1/2 teaspoon powdered gelatin
2 tablespoons cold water
1 cup heavy cream
2 large egg yolks
1 1/2 tablespoons sugar
3 tablespoons salted smooth peanut butter

Optional decorations:
Reese’s cups
melted chocolate
whipped cream

Directions: Preheat the oven to 350 degrees. For the crust, mix the crust ingredients together and press into bottom and up the sides (about 3 inches) of a springform pan. Set aside.

For the cheesecake: Mix cream cheese and sugar in a large bowl until well blended and creamy. Add the eggs and continue mixing until combined. Add chocolate and continue mixing until combined. Pour mixture into prepared crust and smooth top with a spatula.

Bake for 55 minutes or until center of cake is almost set. The top may crack, but it doesn’t particularly matter, since you’ll be covering it anyway. Let the cake fully cool. When almost cool, place it in refrigerator to chill while you prepare peanut butter mousse.

For peanut butter mousse, dissolve the gelatin over the water in a small bowl and let stand for 5 minutes. In a saucepan over moderate heat, cook the cream until it bubbles around the edges. In another bowl, whisk together egg yolks and sugar. Temper the eggs: pour about 1/2 cup hot cream into the egg yolks slowly while whisking vigorously. Then slowly pour the egg mixture into the saucepan of cream (whisking constantly). Cook over low heat, stirring constantly, until thickened, about 3 minutes. Remove from the heat and whisk in the peanut butter and the gelatin. Place mixture into a wide bowl to allow it to cool for a bit, then chill it for just a little while — not until set, but until it’s not so runny. Pour the mixture onto the top of the pie and refrigerate at least one hour or overnight. You can pipe on melted chocolate and decorate with chopped Reese’s cups, if desired.

When completely chilled, loosen the cake from rim of springform pan by wrapping the pan in warm dishtowels. The remove the springform pan. Refrigerate the cheesecake for one day or overnight before serving. Garnish with fresh whipped cream if desired.

If you liked this post, please:
Subscribe to Willow Bird Baking
Follow Willow Bird Baking on Twitter
Follow Willow Bird Baking on Facebook
Give this post a thumbs up on StumbleUpon


ShareOther ways to share this post with friends!

Bittersweet Marbled Chocolate Cheesecake Brownies

Sometimes it’s easier to skip the hard stuff. Maybe you know what I mean. Maybe you never read Marley and Me because you saw your friends (or in my case, students) feeling weepy towards the end. Maybe you switch off the sad songs, avoid the poignant movies. Maybe you make a joke in the difficult moments to defend yourself from the truth of your emotions, but also keep a secret stash of tissues in your purse for when it doesn’t work.

Some things you can’t skip, though. Some trials are ordained for you. God has known them — and you — since before the foundation of the world, and when He says you’re going through and not around, it’s the right path. Go.

One of the things I can’t skip is the fact that Mike is no longer a Charlottean. Wonderfully and sadly, he moved to Raleigh at the beginning of August to start his graduate program in math.

Mike and I have been together for 11 and a half years now. He saw me complete my first year of high school, get my license, graduate, enroll at Davidson College. He sat with me the morning before my Teach for America interview, picked up the pieces with me as I quit my first real job and moved on to my second real job, and shared my joy when I found Woodlawn, where I teach now. He saw the demise of my first website, the beginning of my blogs, the constant ebb and flow of my poetry. He’s been there.

During my difficult high school years, I’d sometimes drive straight to his apartment after school and play housewife, making Hamburger Helper and eating it on the couch with him while watching Star Trek. On a trip to Charleston in 2003, he bought me flowers that I still have dried in my closet. I saw him eat his first funnel cake in Gatlinburg. During our relationship, I’ve been the girlfriend of a cable guy, a dental technician, a programmer, a mathematician, a college student, a college grad, and now a graduate student. I can’t explain how his transition has inspired me.

What with all that “being there” we’ve done for over a decade, it was particularly difficult to see him pack up his things and move at the beginning of August. While I haven’t been able to ignore the fact that he now lives three hours away and can’t pop over as needed, I have been able to skip talking about it much, so instead I’ve been talking about popsicle molds and Piers Morgan. I know you understand.

The week before he moved, Mike came over and we made going-away brownies. He loves brownies, but I’d never made him any — something I felt I had to remedy before he moved. We mixed and baked together, another thing I’d always meant to do with him, and the final product was sweeter for it.

These brownies were a great choice — they’re indulgent and fudgy, with the gorgeous tang of cream cheese that I love. The marbling on top looks fancy, but is extremely easy to accomplish. In half the pan, we embedded funsize Snickers in the batter, which added a superb nutty, caramelly crunch to the brownie base. Naturally, knowing he was moving in a week made each bite a bittersweet experience, but the brownies themselves were the perfect treat for us to enjoy together.

Marbled Chocolate Cheesecake Brownies


Recipe by: adapted from Joy of Cooking
Yield: 9 large or 16 smaller brownies

Brownie Layer Ingredients:
1/2 cup (113 grams) unsalted butter, cut into pieces
4 ounces (115 grams) unsweetened chocolate, coarsely chopped
1 1/4 cups (250 grams) granulated white sugar
1 teaspoon pure vanilla extract
2 large eggs
1/2 cup (65 grams) all purpose flour
1/4 teaspoon salt
funsize Snickers (optional)

Cream Cheese Layer Ingredients:
8 ounces (227 grams) cream cheese, at room temperature
1/3 cup (65 grams) granulated white sugar
1 teaspoon pure vanilla extract
1 large egg

Directions: Preheat oven to 325 degrees F (160 degrees C) and place the rack in the center of the oven. Prepare a 9-inch square baking pan: Spray pan with nonstick cooking spray. Create a foil sling for the pan by cutting two 16-inch lengths of foil and fold them to widths of 5 inches each. Fit foil pieces into baking dish, one overlapping the other, pushing them into corners and up sides of pan; allow excess to overhang pan edges. This creates a sling that will help you remove the brownies after baking and cooling. Spray foil lightly with nonstick cooking spray.

Place a heat-proof stainless steel bowl over a saucepan of simmering water to create a double-boiler. Place the butter and chocolate in the bowl to melt. Remove from the heat and stir in the sugar and vanilla extract. Add the eggs one at a time and beat well with a wooden spoon after adding each. Add the flour and salt and continue stirring with the wooden spoon until the batter is glossy, smooth, and pulls away from the side of the bowl (about one minute). Reserve 1/2 cup of brownie batter for topping. Pour the rest of the batter carefully into prepared pan (here, you can stud the batter with rows of funsize Snickers if desired.

In a separate bowl, use a hand mixer to blend the cream cheese until smooth. Add the sugar, vanilla extract, and egg and blend just until smooth. Spread this mixture carefully over the brownie layer, and then place dollops of the 1/2 cup reserved brownie batter at even intervals over the top. Use a table knife or wooden skewer to carefully marble the dollops through the cream cheese, careful not to mix the batters.

Bake for about 25 minutes or until the brownies just begin to pull away from the sides of the pan and are just starting to brown. Remove from the oven and cool on a wire rack until almost cool. Then, chill the brownies in the refrigerator for about two hours, until they’re firm enough to cut into squares. Once chilled, remove the brownies from the pan by lifting the ends of the foil sling carefully. Transfer to a cutting board and cut into 9 or 16 squares as desired, cleaning the knife with a warm, damp cloth between cuts. You can store leftovers in airtight container in the refrigerator for several days.

P.S. – Some people are experiencing even greater trials right now. Erika of Ivory Hut just lost her house and all her possessions in a horrific house fire. Would you consider donating to help her through this difficult time?

P.S. 2 – In the midst of a trial, there is great blessing. We received news recently that my dad is still cancer-free!

If you liked this post, please:
Subscribe to Willow Bird Baking
Follow Willow Bird Baking on Twitter
Follow Willow Bird Baking on Facebook
Give this post a thumbs up on StumbleUpon


ShareOther ways to share this post with friends!

1 2 3 4