Mike’s a history buff in addition to being a math superhero. Every now and then he’ll be looking at photos of something like a spoon from Pompeii or a statue from Greece and geeking out over how neat it is. It’s thrilling to think of people centuries and millennia ago actually using the objects and living in the homes we now have as artifacts of their existence. Last summer he finally went on a trip to some of the places he’s always loved to read about: Rome, Greece, and Turkey. Looking through his pictures when he returned, it was so sweet to see him living one of his dreams.


I understand Mike’s excitement about the cultures of the past, and sometimes I feel it too, but it doesn’t come naturally to me. I usually have to sort of ponder artifacts and give my imagination a shove to really appreciate how neat they are. With this past Daring Bakers challenge, however, I finally got a taste of how Mike must feel. After reading through the recipe and researching the challenge, I realized that I was about to bake a piece of history: the Dobos Torte.

The August 2009 Daring Bakers’ challenge was hosted by Angela of A Spoonful of Sugar and Lorraine of Not Quite Nigella. They chose the spectacular Dobos Torte based on a recipe from Rick Rodgers’ cookbook Kaffeehaus: Exquisite Desserts from the Classic Caffés of Vienna, Budapest, and Prague.
Reading about the Dobos Torte gave me goosebumps. The torte is the namesake of József C. Dobos, its Hungarian creator. It was created with the intent of making a cake with a longer shelf life, and was debuted in 1885 at the National General Exhibition of Budapest. What really excited me was learning that Franz Joseph I and his wife, the Empress Elisabeth (also called Sisi), were among the first to taste the dessert! For those of you who don’t teach your 6th graders about the Russian Revolution like I do, I’ll fill you in. Franz Joseph I was the uncle of Archduke Franz Ferdinand, who was assassinated by Serbian terrorists in 1914. This act effectively started World War I and contributed to the Russian Revolution. I won’t give you a full history lesson, but isn’t that amazing? This torte has such a rich history, and here I am baking it in my own kitchen!
Dobos kept the recipe for his torte a secret until his retirement in 1906, and since then, the popular dessert has been made around the world. The torte is comprised of multiple layers (anywhere from 6-12 is typical) of thin sponge cake, a thick American buttercream, and a slightly lemony caramel coating on the top layer. The recipe was quite intimidating at first, but I enjoyed the process and felt nudged out of my cupcake comfort zone, as all Daring Bakers should!

I chose to make my torte the classic size and shape, but did change a few things. I brushed each sponge layer with a simple syrup when assembling the torte to ensure that they’d stay moist. I also used macadamia nuts to prop up my caramel wedges instead of hazelnuts, but that wasn’t an artistic decision — I couldn’t find any whole hazelnuts at my grocery store.
If I could change a few things about the recipe, I’d add flavoring to my simple syrup and apply more of it to the sponge layers. I found my layers a bit dry (good thing they were smooshed between so much buttercream). I’d also nix the lemon from the caramel — it tasted a little odd — and use cream instead. Finally, I can attest that creating the perfect caramel texture is the hardest part of this cake. I took my sugar mixture off of the stove too soon and ended up with a sticky caramel that made my sponge cake layer a bit soggy. Using a candy thermometer might be a better idea than relying on your instincts (especially if you tend to be jumpy/hasty/caffeinated about your baking). For caramel, you’ll want the temperature of your sugar mixture between 320 to 350 degrees based on this handy chart.
One thing I’m glad I didn’t change was the frosting. I used unsweetened Belgian chocolate, and the result spread like a dream and tasted rich and indulgent. I can’t wait to make this chocolate buttercream again and slather it on — you guessed it — some cupcakes!
There are lots of opportunities for creative alterations with this torte. You can bake all the batter in sheet pans and cut it into as many rectangular layers as you’d like, or even use a cookie cutter to create some adventurously shaped layers. You could also use different nuts to decorate the cake (almonds, hazelnuts, cashews), different flavors of syrup on the sponge cake, and different flavors of buttercream to frost. One particularly daring baker brushed each sponge layer with a hazelnut liqueur and used Ferrero Rocher to prop up her caramel wedges! You know I love Ferrero Rocher, so I’m a fan of that idea!
I hope you’ll take the plunge and try making a Dobos Torte on your own. The recipe is a mile long, yes, but that’s partially because of the clear, thorough instructions. Angela has thoughtfully created a printable version of this recipe to make the process a bit easier! It was such a lovely achievement when all the work was finished, and I relished each bite thinking of the legacy I was eating!
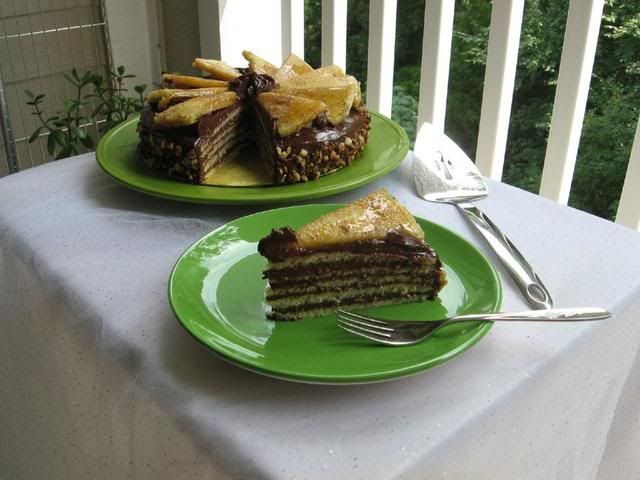
Dobos Torte
Recipe by: Kaffeehaus: Exquisite Desserts from the Classic Cafés of Vienna, Budapest, and Prague, by Rick Rodgers
Yield: about 11-12 pieces of torte
Equipment
2 baking sheets
9” (23cm) springform tin and 8” cake tin, for templates
mixing bowls (1 medium, 1 large)
a sieve
a double boiler (a large saucepan plus a large heat-proof mixing bowl which fits snugly over the top of the pan)
a small saucepan
a whisk (you could use a balloon whisk for the entire cake, but an electric hand whisk or stand mixer will make life much easier)
metal offset spatula
sharp knife
a 7 1/2” cardboard cake round (or just build cake on the base of a sprinfrom tin)
12 whole hazelnuts, peeled and toasted (I used macadamia nuts)
½ cup (50g) peeled and finely chopped hazelnuts
piping bag and tip, optional
Prep times
Sponge layers 20 mins prep, 40 mins cooking total if baking each layer individually.
Buttercream: 20 mins cooking. Cooling time for buttercream: about 1 hour plus 10 minutes after this to beat and divide.
Caramel layer: 10-15 minutes.
Assembly of whole cake: 20 minutes
Sponge Cake Ingredients
6 large eggs, separated, at room temperature
1 1/3 cups (162g) confectioner’s (icing) sugar, divided
1 teaspoon (5ml) vanilla extract
1 cup plus 2 tablespoons (112g) sifted cake flour
pinch of salt
Chocolate Buttercream Ingredients
4 large eggs, at room temperature
1 cup (200g) caster (ultrafine or superfine white) sugar
4oz (110g) bakers chocolate or your favourite dark chocolate, finely chopped (I used Belgian chocolate)
2 sticks plus 2 tablespoons (250g) unsalted butter, at room temperature.
Caramel Topping Ingredients
1 cup (200g) caster (superfine or ultrafine white) sugar
12 tablespoons (180 ml) water
8 teaspoons (40 ml) lemon juice
1 tablespoon neutral oil (e.g. grapeseed, rice bran, sunflower)
Directions for the sponge layers:
NB. The sponge layers can be prepared in advance and stored interleaved with parchment and well-wrapped in the fridge overnight.
1. Position the racks in the top and centre thirds of the oven and heat to 400F (200C).
2. Cut six pieces of parchment paper to fit the baking sheets. Using the bottom of a 9″ (23cm) springform tin as a template and a dark pencil or a pen, trace a circle on each of the papers, and turn them over (the circle should be visible from the other side, so that the graphite or ink doesn’t touch the cake batter.)
3. Beat the egg yolks, 2/3 cup (81g) of the confectioner’s (icing) sugar, and the vanilla in a medium bowl with a mixer on high speed until the mixture is thick, pale yellow and forms a thick ribbon when the beaters are lifted a few inches above the batter, about 3 minutes. (You can do this step with a balloon whisk if you don’t have a mixer.) Note: I leveled each sponge layer after baking per a great suggestion from other Daring Bakers. I did this by covering the layer with an oiled, cocoa powder dusted sheet of parchment paper and then pressing another sheet pan down on the layer to even it out.
4. In another bowl, using clean beaters, beat the egg whites until soft peaks form. Gradually beat in the remaining 2/3 cup (81g) of confectioner’s (icing)sugar until the whites form stiff, shiny peaks. Using a large rubber spatula, stir about 1/4 of the beaten whites into the egg yolk mixture, then fold in the remainder, leaving a few wisps of white visible. Combine the flour and salt. Sift half the flour over the eggs, and fold in; repeat with the remaining flour.
5. Line one of the baking sheets with a circle-marked paper. Using a small offset spatula, spread about 3/4cup of the batter in an even layer, filling in the traced circle on one baking sheet. Bake on the top rack for 5 minutes, until the cake springs back when pressed gently in the centre and the edges are lightly browned. While this cake bakes, repeat the process on the other baking sheet, placing it on the centre rack. When the first cake is done, move the second cake to the top rack. Invert the first cake onto a flat surface and carefully peel off the paper. Slide the cake layer back onto the paper and let stand until cool. Rinse the baking sheet under cold running water to cool, and dry it before lining with another parchment. Continue with the remaining papers and batter to make a total of six layers. Completely cool the layers. Using an 8″ springform pan bottom or plate as a template, trim each cake layer into a neat round. (A small serrated knife is best for this task.)
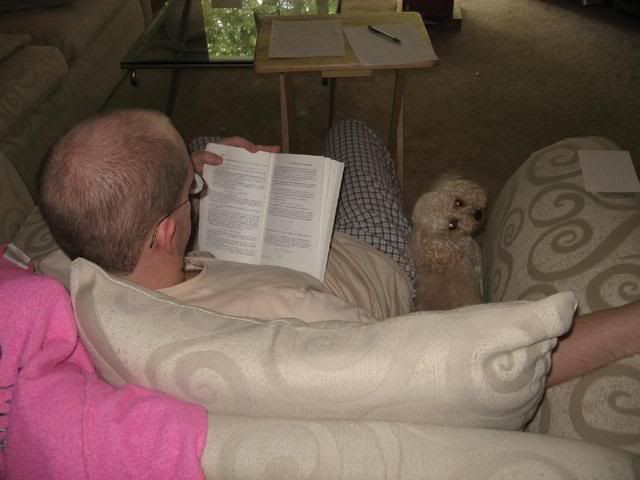
I love when I have two cookin’ buddies! Mike and Byrd cheer me on from the couch.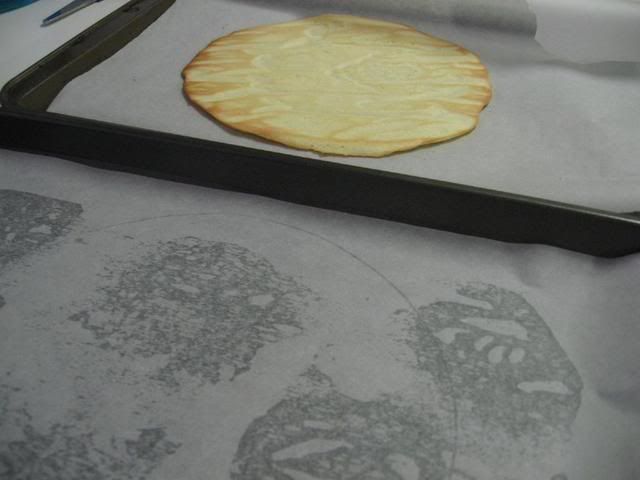

Drawing my circles, spreading my batter, and baking my layers. What sort of recipe requires artwork?
Directions for the chocolate buttercream:
NB. This can be prepared in advance and kept chilled until required.
1. Prepare a double-boiler: quarter-fill a large saucepan with water and bring it to a boil.
2. Meanwhile, whisk the eggs with the sugar until pale and thickened, about five minutes. You can use a balloon whisk or electric hand mixer for this.
3. Fit bowl over the boiling water in the saucepan (water should not touch bowl) and lower the heat to a brisk simmer. Cook the egg mixture, whisking constantly, for 2-3 minutes until you see it starting to thicken a bit. Whisk in the finely chopped chocolate and cook, stirring, for a further 2-3 minutes.
4. Scrape the chocolate mixture into a medium bowl and leave to cool to room temperature. It should be quite thick and sticky in consistency.
5. When cool, beat in the soft butter, a small piece (about 2 tablespoons/30g) at a time. An electric hand mixer is great here, but it is possible to beat the butter in with a spatula if it is soft enough. You should end up with a thick, velvety chocolate buttercream. Chill while you make the caramel topping.
Lorraine’s note: If you’re in Winter just now your butter might not soften enough at room temperature, which leads to lumps forming in the buttercream. Male sure the butter is of a very soft texture I.e. running a knife through it will provide little resistance, before you try to beat it into the chocolate mixture. Also, if you beat the butter in while the chocolate mixture is hot you’ll end up with more of a ganache than a buttercream!
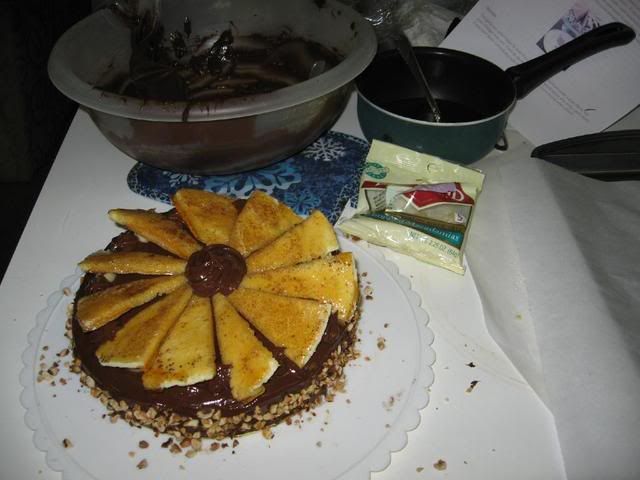
Frosting and decorating the torte.
Directions for the caramel topping:
1. Choose the best-looking cake layer for the caramel top. To make the caramel topping: Line a jellyroll pan with parchment paper and butter the paper. Place the reserved cake layer on the paper. Score the cake into 12 equal wedges. Lightly oil a thin, sharp knife and an offset metal spatula.
2. Stir the sugar, water and lemon juice in a small saucepan. Bring to a boil over a medium heat, stirring often to dissolve the sugar. Once dissolved into a smooth syrup, turn the heat up to high and boil without stirring, swirling the pan by the handle occasionally and washing down any sugar crystals on the sides of the pan with a wet brush until the syrup has turned into an amber-coloured caramel.
3. The top layer is perhaps the hardest part of the whole cake so make sure you have a oiled, hot offset spatula ready. I also find it helps if the cake layer hasn’t just been taken out of the refrigerator. I made mine ahead of time and the cake layer was cold and the toffee set very, very quickly—too quickly for me to spread it. Immediately pour all of the hot caramel over the cake layer. You will have some leftover most probably but more is better than less and you can always make nice toffee pattern using the extra to decorate. Using the offset spatula, quickly spread the caramel evenly to the edge of the cake layer. Let cool until beginning to set, about 30 seconds. Using the tip of the hot oiled knife (keep re-oiling this with a pastry brush between cutting), cut through the scored marks to divide the caramel layer into 12 equal wedges. Cool another minute or so, then use the edge of the knife to completely cut and separate the wedges using one firm slice movement (rather than rocking back and forth which may produce toffee strands). Cool completely.
Angela’s note: I recommend cutting, rather than scoring, the cake layer into wedges before covering in caramel (reform them into a round). If you have an 8” silicon round form, then I highly recommend placing the wedges in that for easy removal later and it also ensures that the caramel stays on the cake layer. Once set, use a very sharp knife to separate the wedges.
Assembling the Dobos:
1. Divide the buttercream into six equal parts.
2. Place a dab of chocolate buttercream on the middle of a 7 1/2” cardboard round and top with one cake layer. Spread the layer with one part of the chocolate icing. Repeat with 4 more cake layers. Spread the remaining icing on the sides of the cake.
3. Optional: press the finely chopped hazelnuts onto the sides of the cake.
4. Propping a hazelnut under each wedge so that it sits at an angle, arrange the wedges on top of the cake in a spoke pattern. If you have any leftover buttercream, you can pipe rosettes under each hazelnut or a large rosette in the centre of the cake. Refrigerate the cake under a cake dome until the icing is set, about 2 hours. Let slices come to room temperature for the best possible flavour.
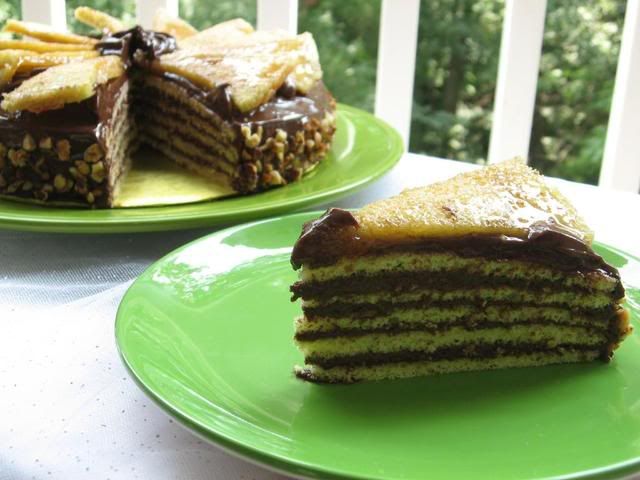
Don’t forget to visit other Daring Bakers and see the imaginative combinations and configurations of the Dobos Torte they created!

