cream cheese

German Chocolate Cheesecake

“You know, it doesn’t really matter,” I said with a shrug.

The AT&T tech looked perplexed by my indifference. I guess customers usually start foaming at the mouth when he tells them he can’t get their internet connection up and running. I explained: “I really don’t want the internet. You’d be amazed at how much you get done without it.”

For instance, things I’ve been getting done:

  • Napping.
  • Reading My Berlin Kitchen (Luisa of The Wednesday Chef‘s amazing new memoir. You have to read it.) on the couch with Byrd beside me.
  • Unpacking a box every now and then.
  • Arranging things in my new apartment.
  • Rearranging things in my new apartment.
  • Throwing all my windows open and lounging in the gorgeous new autumn.
  • Eating popcorn by the bucketful.
  • Trying to be bendy in yoga.

I’m going to be eating these words once my students turn in the first project for me to grade, but for now, I can’t believe how many hours there are in the day. I mean, I don’t know what I did on the internet all day to eat up the amount of time I’ve found myself with in its absence. Some worthy things, obviously: recipe research and development, writing about food, lesson planning, emailing students and their parents. But what consumed the rest of my time? Facebook? People.com? A prolonged email-checking stupor?

Actually, I know exactly why the internet was able to fill my schedule: my insidious addiction to multi-tasking.

I’ve spent the last, oh, sixteen years of my life running around like the proverbial headless chicken, completing each responsibility roughly 5 milliseconds before its due, and dealing with the not-infrequent crisis when a deadline slips by. I work on at least two things at a time, but usually five or six. For instance, right now I’m writing this, posting comments on two friends’ blogs, and reading the comments on Willow Bird Baking’s latest Facebook status. I’ll do each activity for a few seconds before switching to another, throwing in a glance at my email every few cycles for good measure. Why does my brain think this is an efficient way to manage tasks? And why must there be so many useless tasks available on the internet?

I’m going to go ahead and admit to the entire interwebz that I have a therapist. (I’m not even slightly shy about that fact, by the way — because I kind of think everyone should have a therapist. If you have one, you know what I mean! They’re wonderful. It’s like having a coach for life. Yes, please.) One thing she talks a lot about is mindfulness, which is being fully present, aware, and participatory in your every thought and action.

It’s amazing how many things we do mindlessly — things like scrolling through a billion pages of Dog Shaming (baaahaha, okay, I just added that to my list of things-I’m-doing-right-now), eating a whole bag of popcorn while watching a movie, having a phone conversation while working on other things. In fact, I think that if we really examined our daily lives, we’d find that we do most things mindlessly — or at least with split attention. And the internet reinforces that behavior. Time to confess: how many tabs or windows do you have open right now? (I have 13!) How many other activities are you completing while reading this post?

Having one of my favorite mindless-multi-tasking activities (that is, the internet) pulled right out from under me has made me realize how peaceful and productive mindfulness can really be. Sometimes I sit on my couch with a plate of food and do nothing but take bite after mindful bite, feeling the texture of the food, tasting each flavor, and enjoying the process. There’s no book in front of me, no television playing in the background. Nothing but me and the next bite. Eating thus becomes a meditation. Every activity I complete can be distilled down to its sensory components, down to the experience of completing it. And my spirit feels so much calmer and more satisfied.

I can’t go forever without the internet — I’m a food blogger, after all, and I do get tired of having to find a little café with wifi any time I want to check my email — but I will be using it differently when AT&T figures out what’s wrong with my wiring. At least, right after I catch up on Dog Shaming…

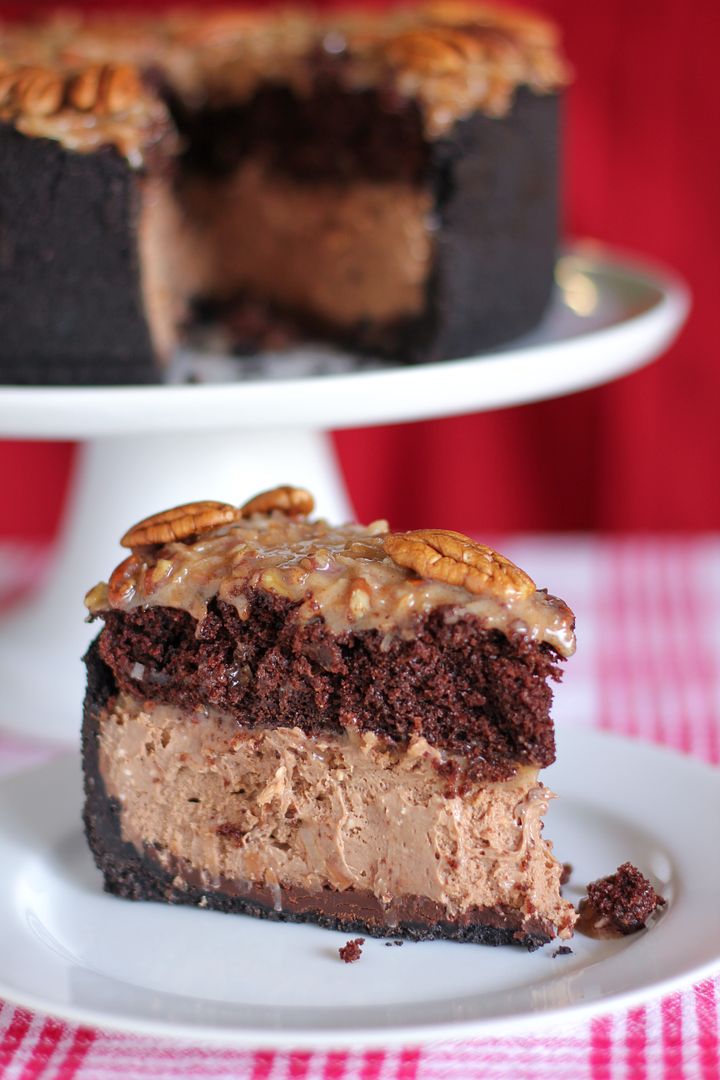
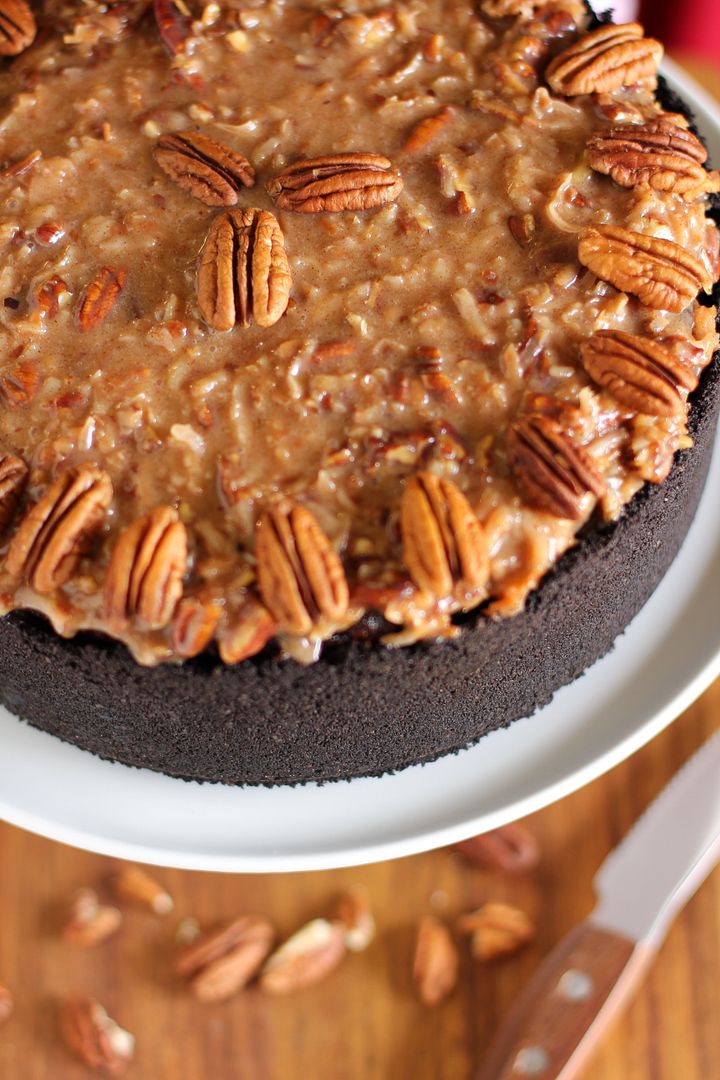
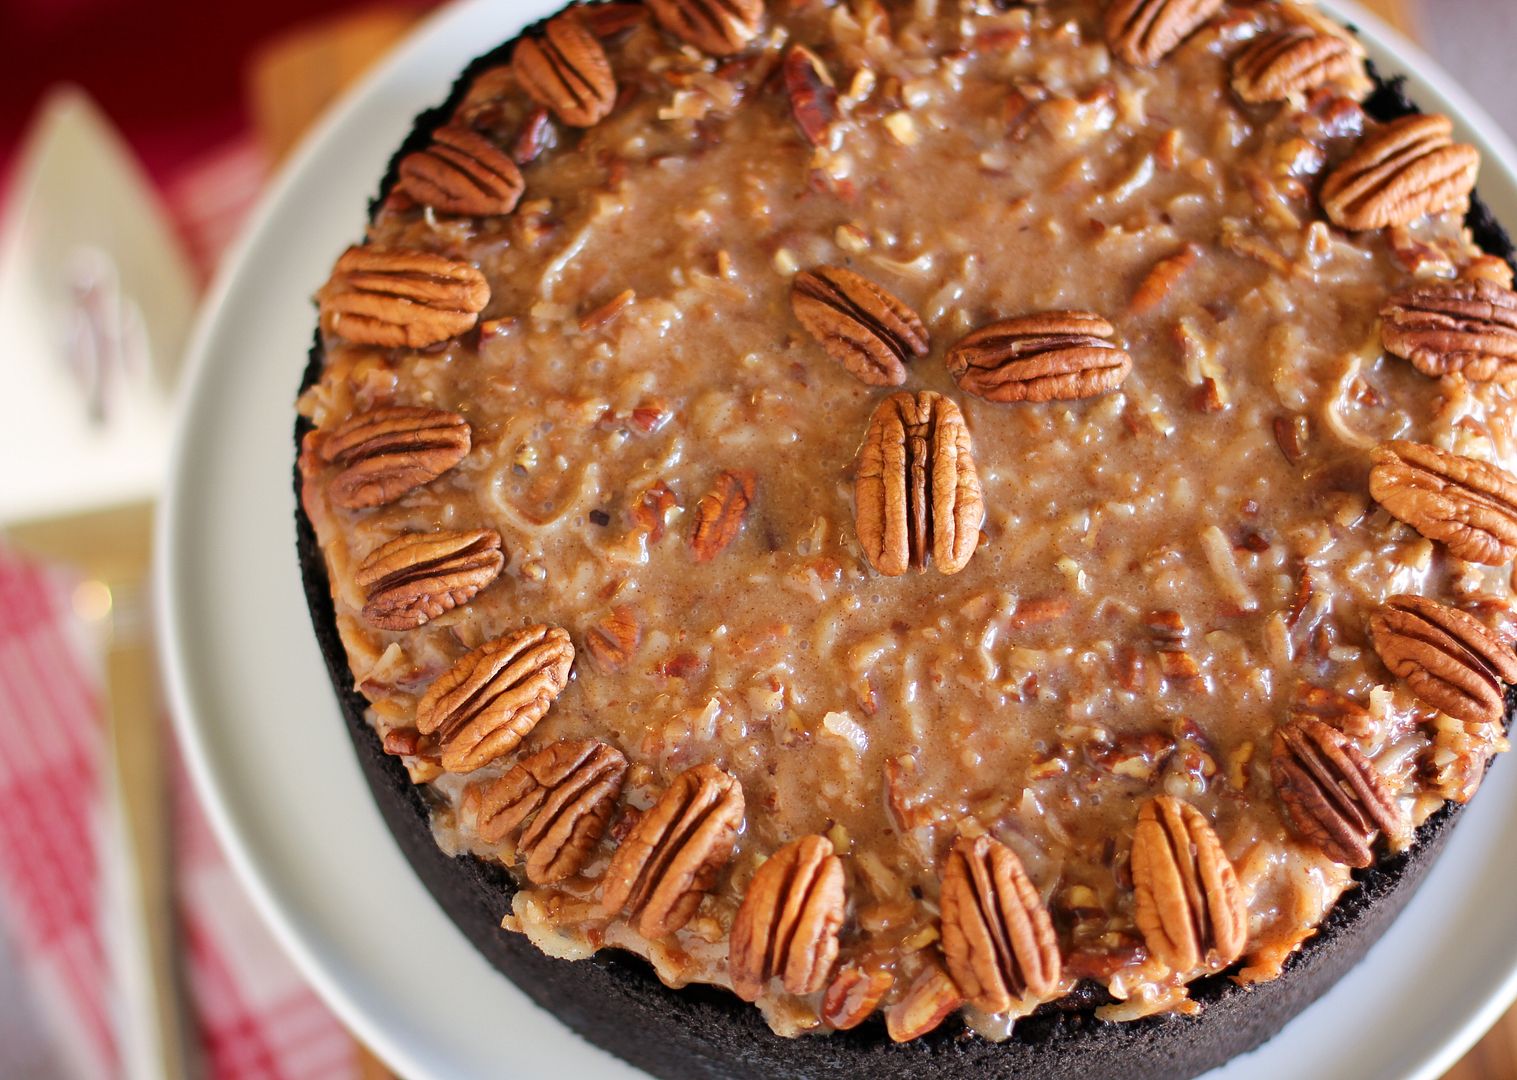
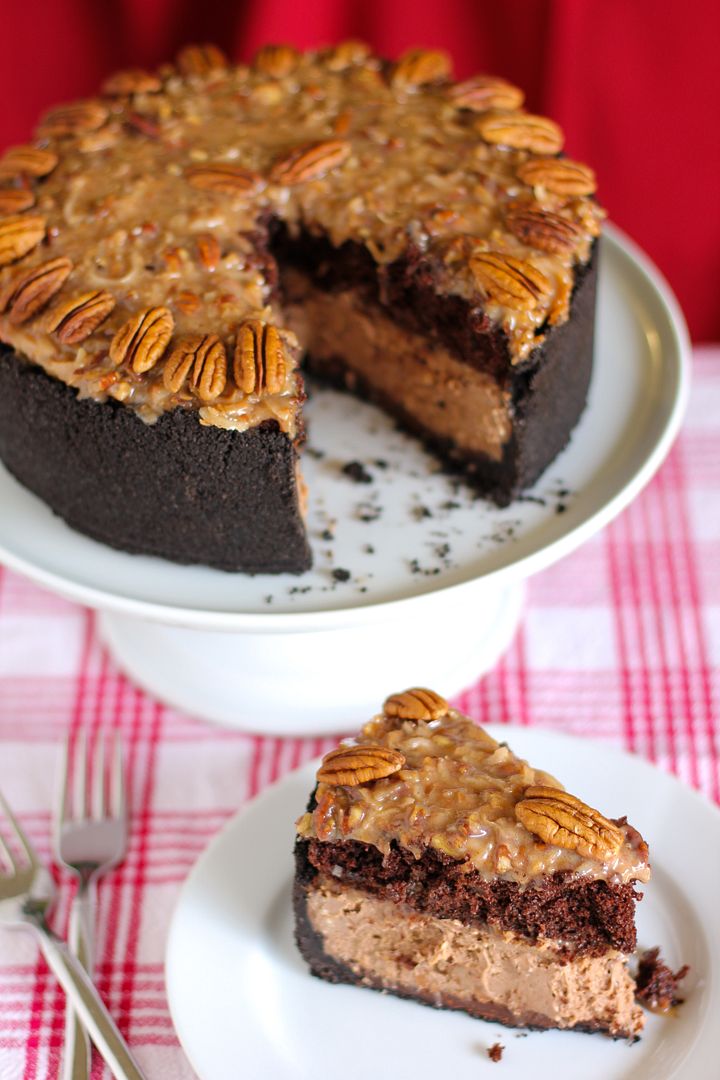
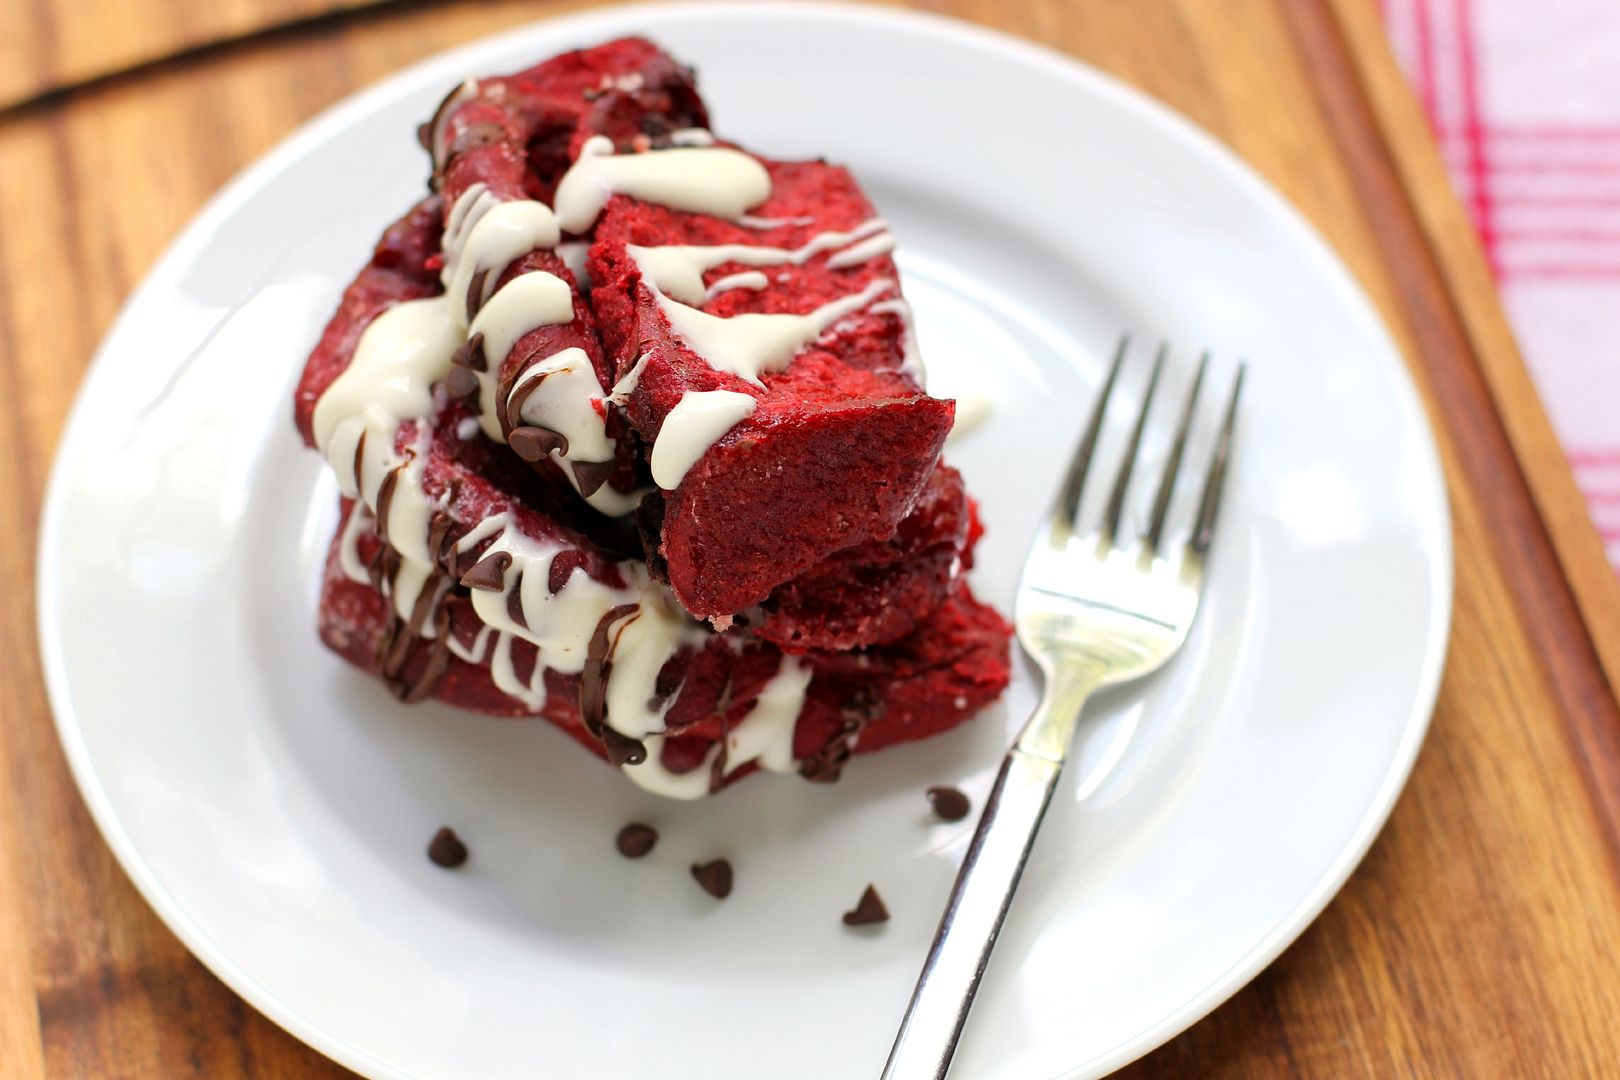
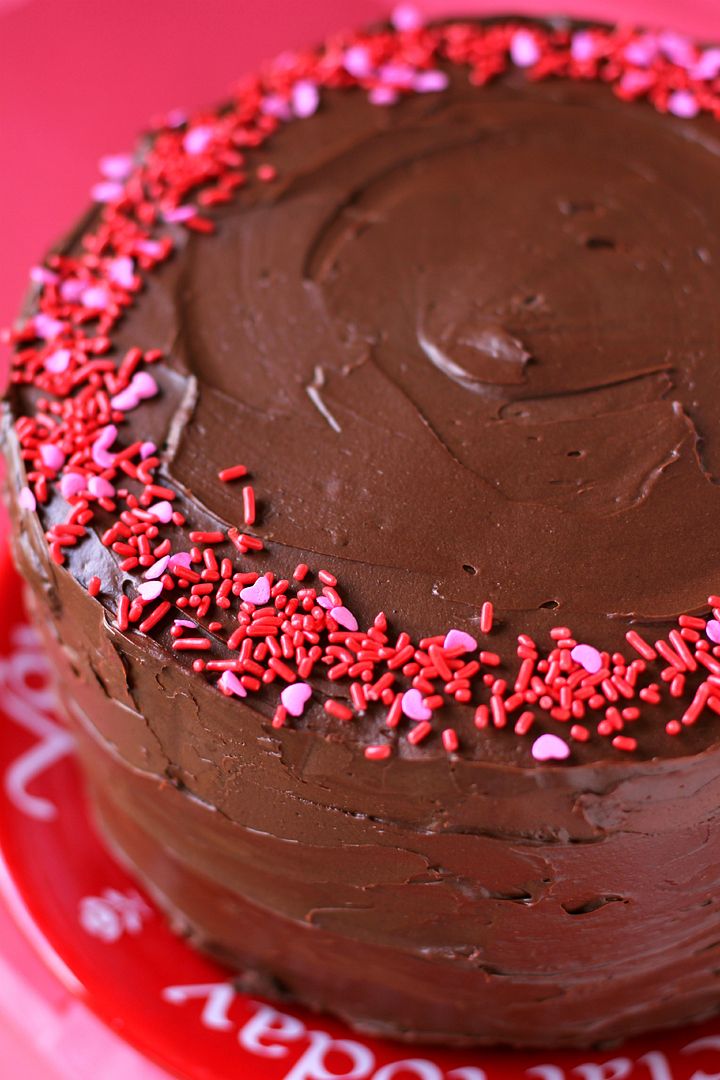
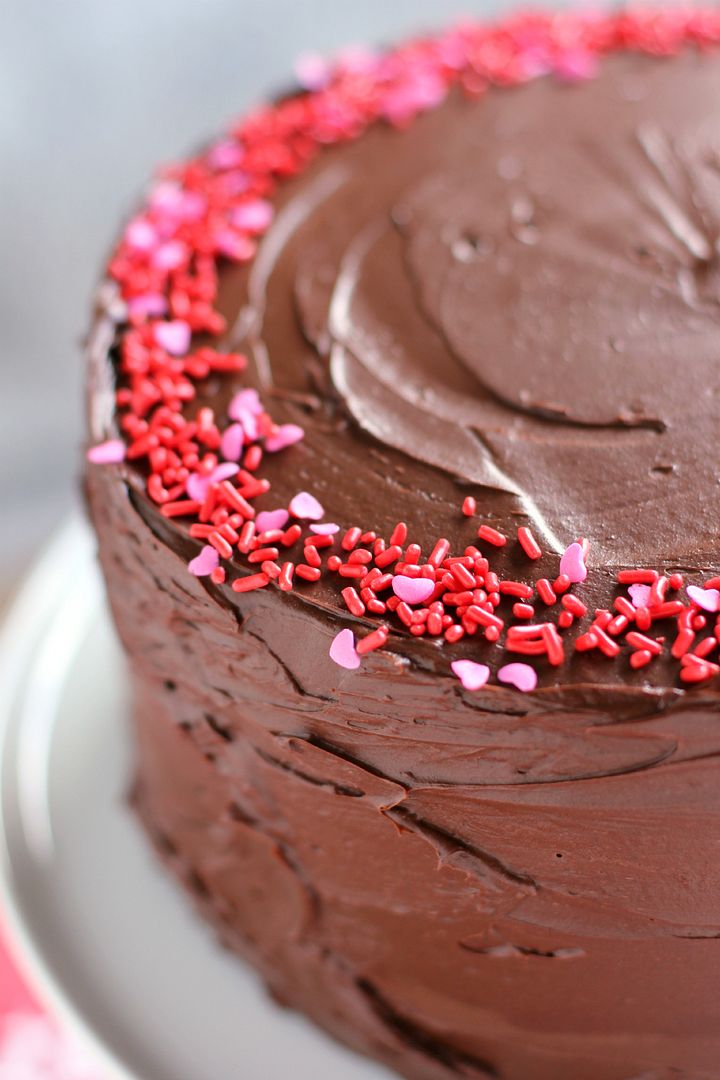
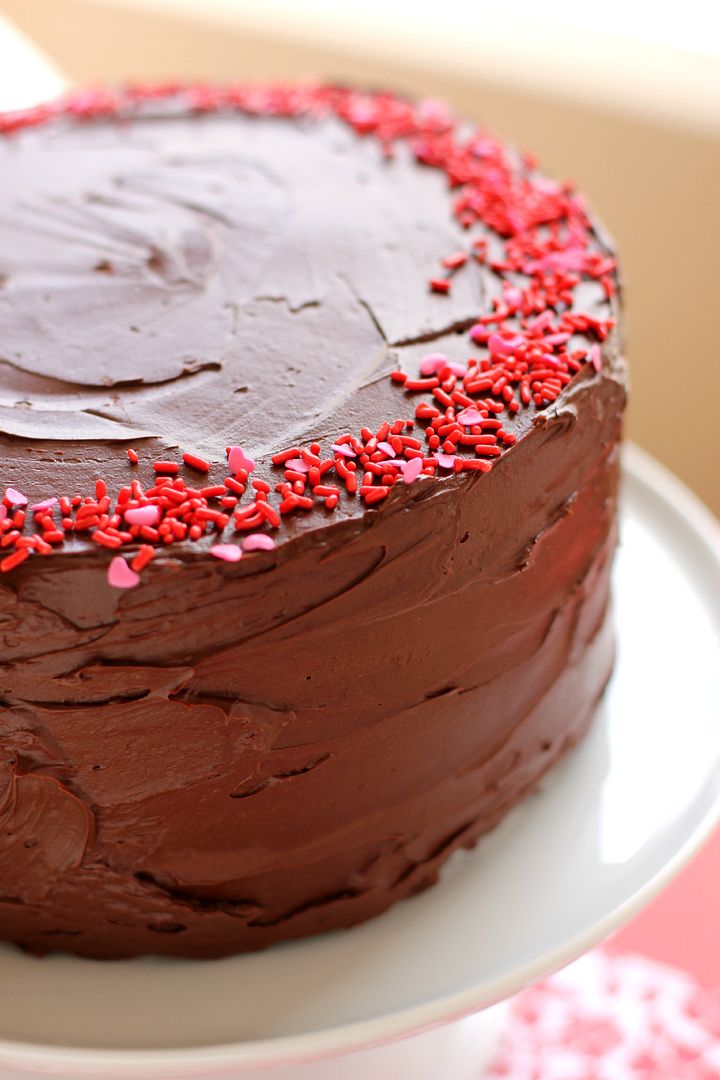
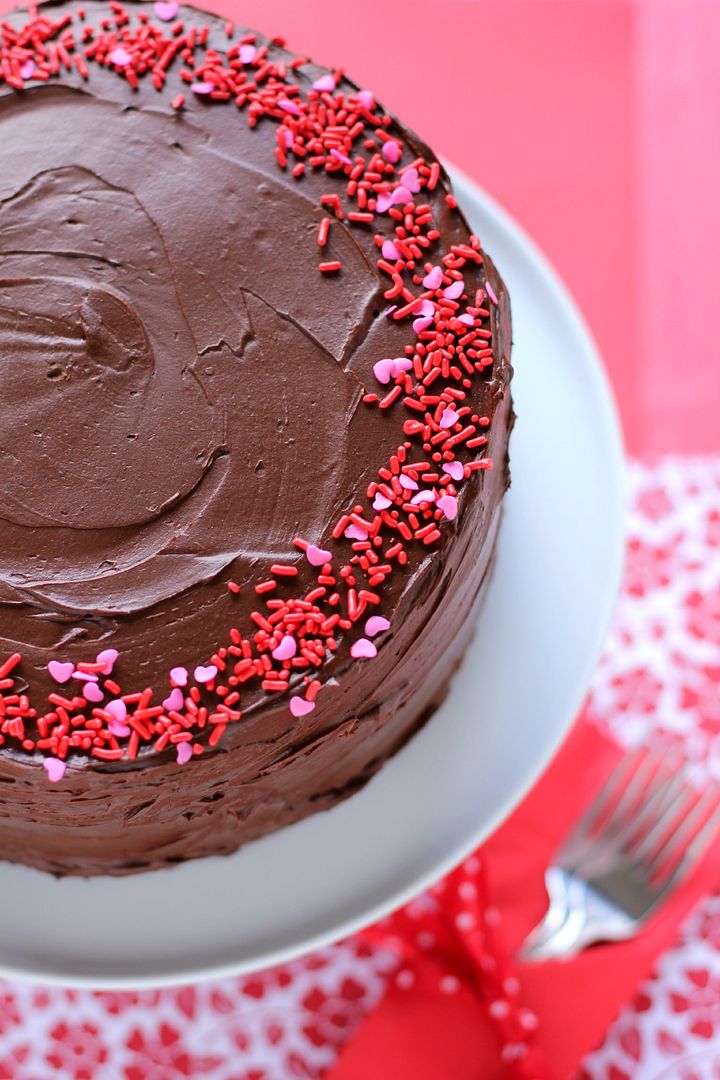
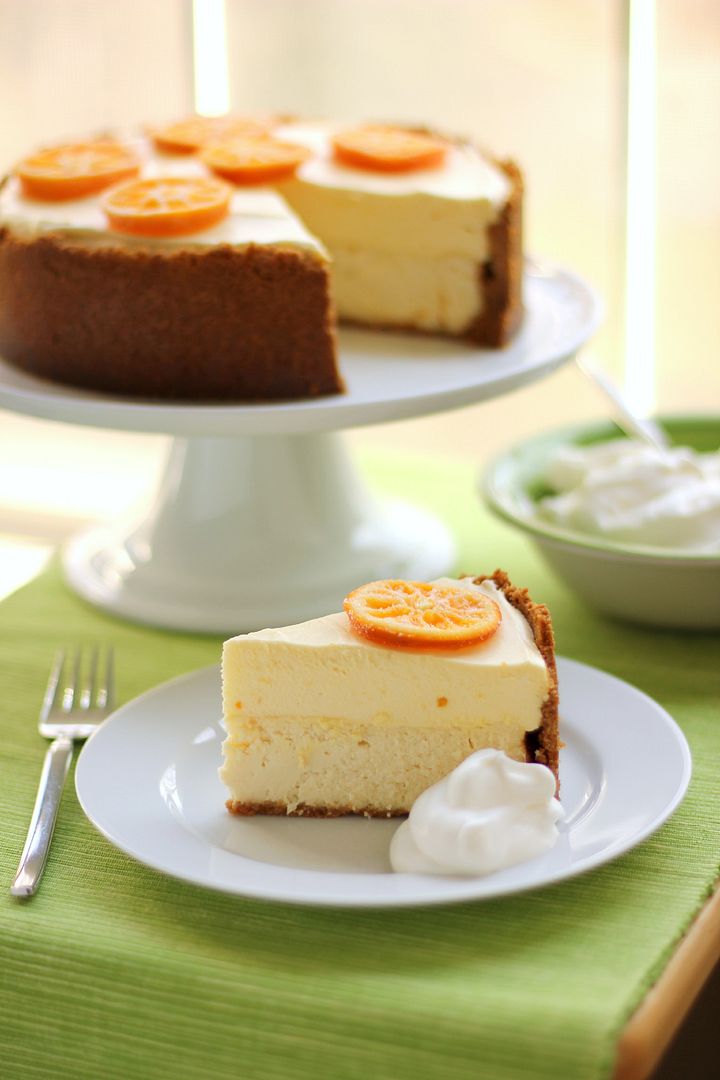
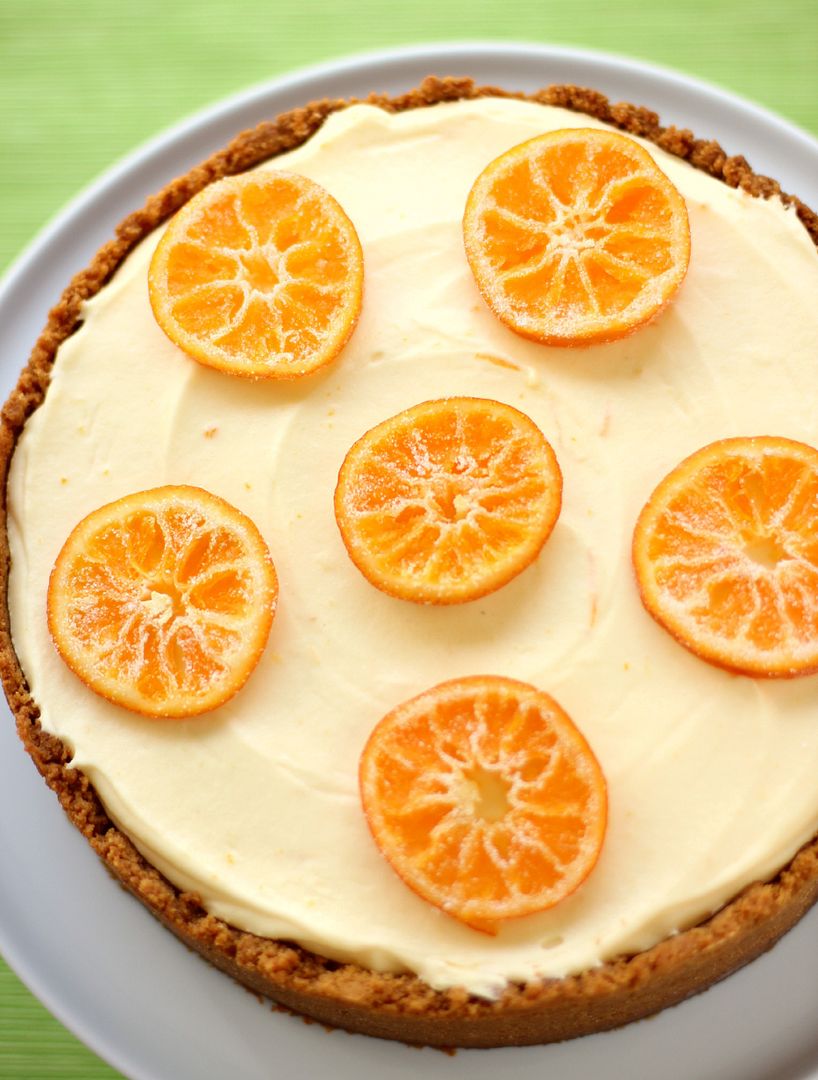
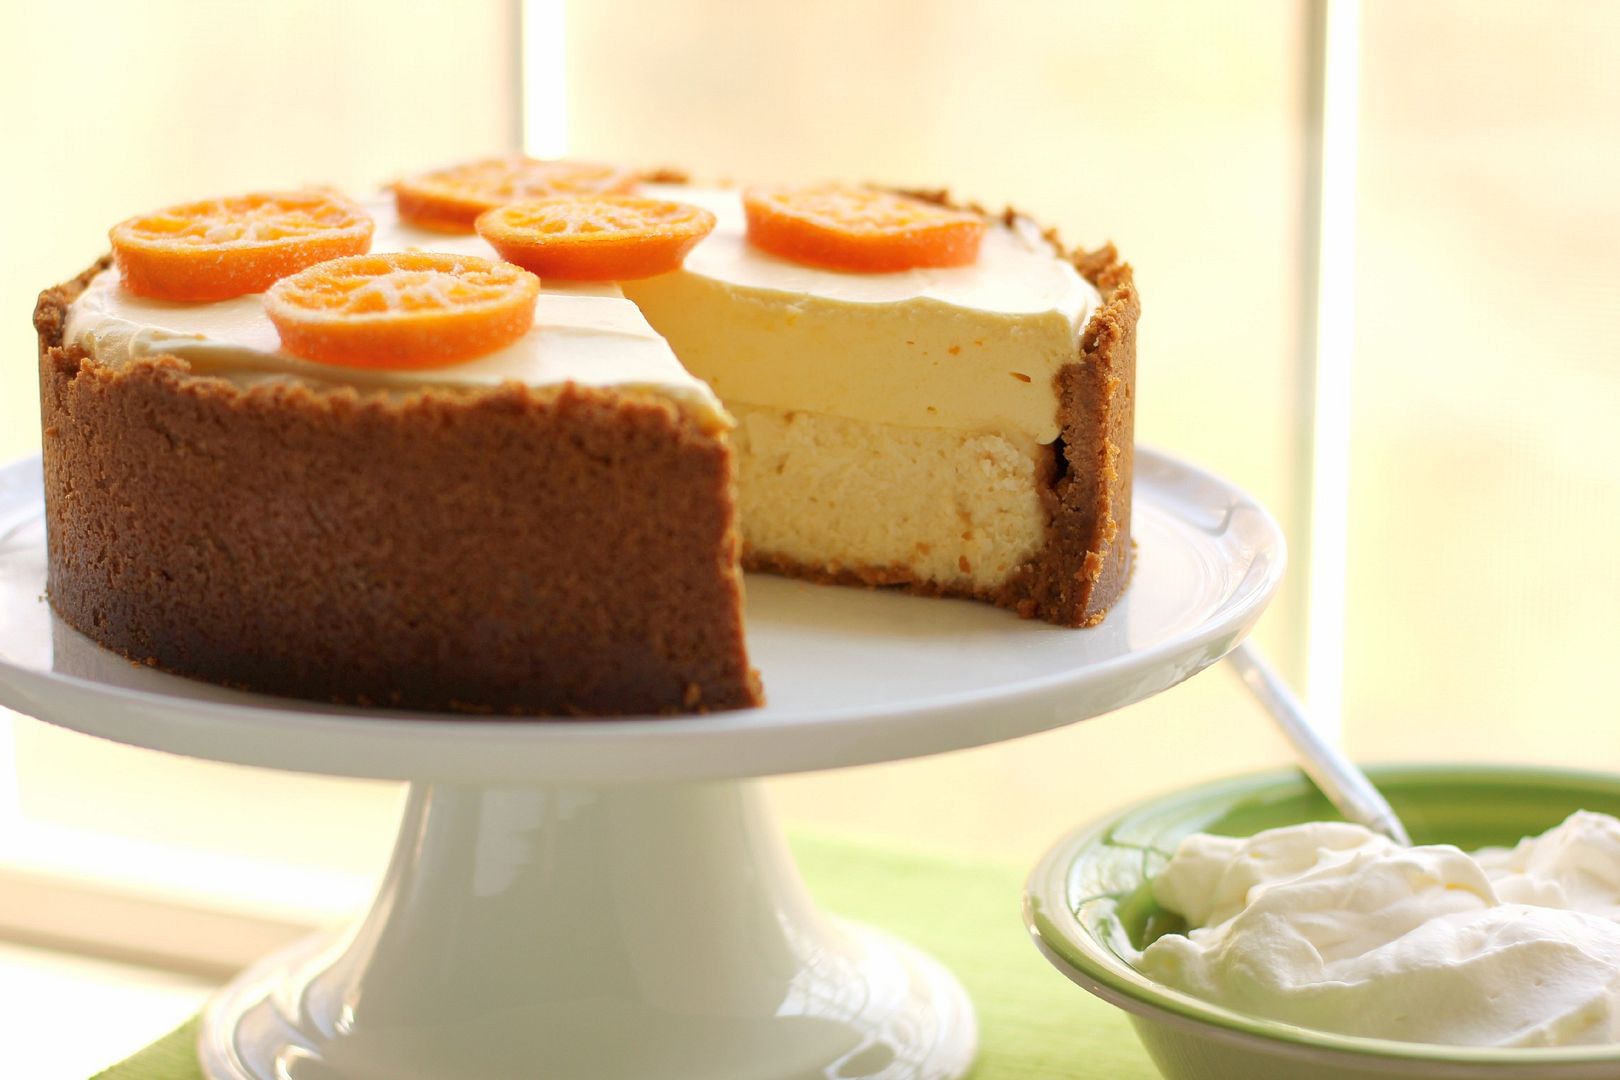
One thing I did (mostly!) mindfully Friday night was bake this German Chocolate Cheesecake. I did have soft music playing in the background, but other than that, it was just me, my new kitchen, and each ingredient. I expected the recipe to take forever, but the process actually went rather quickly — perhaps because I was focused on the tasks. I also have sharper memories of each moment: peeling the blocks of cream cheese off of their silvery paper, sticking the toothpick into the fragrant chocolate cake, stirring the coconut-pecan filling until the cold hunks of butter melted into the hot custard. The experience was just what I needed to make my new apartment into my new home. And I found one of those little wifi cafés just to share it with you!

One year ago: Gooey Cookies & Cream Bars
Two years ago: Bittersweet Marbled Chocolate Cheesecake Brownies
Three years ago: Peach Crisp Pie

P.S. Remembering a very special lady this week and always. We miss you, Rose!

5 from 1 reviews
German Chocolate Cheesecake
 
Prep time
Cook time
Total time
 
Like many of my cheesecakes, this gorgeous German Chocolate Cheesecake would be easy to make over several days. For instance, you could make the chocolate cake layer one day, make the cheesecake the next, and make the filling and assemble the third. Alternatively, you can make it all in one go. Either way, it’s rich, indulgent, and so delicious. Try getting all of your ingredients ready before you begin and baking each component mindfully, letting yourself enjoy the experience. NOTE: This filling calls for 2/3 cup sugar, but I only had about 1/3 cup sugar. I didn’t want to run to the store, so I used some Cinnabon Sprinkle Topping Cinnabon sent me in place of the rest of the sugar, and it was so good! I think you could get the same effect by just using the 2/3 cup sugar below and adding a teaspoon or so of cinnamon, if you’d like. Or just buy the Cinnabon Sprinkle Topping — it really is so yummy. Y’all know I don’t just do product placements for no reason.
Author:
Serves: 14-16
Ingredients
Crust Ingredients:
  • 1 package (about 38) chocolate sandwich cookies, finely processed into crumbs (cream and all – it’ll disappear when you crush them up!)
  • 6 tablespoons unsalted butter, melted and cooled
  • Small pinch of salt
Ganache Ingredients:
  • 3/8 cups heavy cream (6 tablespoons)
  • 5 ounces bittersweet or semisweet chocolate, finely chopped (I used half semisweet and half Ghirardelli 60% Cacao chocolate chips)
Cheesecake Ingredients:
  • 3 packages (8 ounces each) of cream cheese, room temperature
  • 3/4 teaspoon of vanilla extract
  • 3/4 cup sugar
  • 3 eggs, room temperature
  • 3 ounces or about 6 tablespoons chocolate chips, melted and cooled (I used half semisweet and half Ghirardelli 60% Cacao)
Cake Ingredients:
  • 3/4 cup all-purpose flour
  • 3/4 cup granulated sugar
  • 3/8 cups unsweetened cocoa powder
  • 3/4 teaspoon baking soda
  • 3/8 teaspoon baking powder
  • 1/4 teaspoon salt
  • 1 large egg
  • 3/8 cup low-fat buttermilk
  • 1/8 cup plus 1/2 tablespoons vegetable oil
  • 3/8 cups warm water
  • 1/2 teaspoon pure vanilla extract
Filling Ingredients:
  • 2/3 cup heavy cream
  • 2/3 cup sugar
  • 2 large egg yolks
  • 2 ounces butter, cut into small pieces
  • 1/3 teaspoon salt
  • 2/3 cup pecans, toasted and finely chopped
  • 1 cup unsweetened coconut, toasted
Instructions
  1. Make the cheesecake crust: Combine the chocolate cookie crumbs, melted butter and salt in a small bowl. Toss with a fork to moisten all of the crumbs. Press into a thin layer covering the bottom and sides of the springform pan (at least 3 inches up the sides). It’s hard to get the crust up that high, but keep pressing the crumbs up from the bottom with a smooth-sided glass (twisting the glass as you do so, so the crumbs don’t stick) and working them around — you’ll want it that high to hold the cake layer. Patience helps with this step.
  2. Make the ganache: Bring the cream to a simmer in a medium saucepan (or heat in the microwave for about a minute, watching to ensure it doesn’t boil). Place the chocolate in a medium bowl. Once the cream reaches a simmer, pour the cream over the chocolate and let stand 1-2 minutes. Whisk in small circles until a smooth ganache has formed. Pour the ganache over the bottom of the crust. Freeze until the ganache layer is firm, about 30 minutes.
  3. Make the cake: While the ganache is freezing, cut a circle of parchment paper and use cooking spray as “glue” to adhere it to a 9-inch round cake pan. Then grease the pan and the paper (I use Wilton’s Cake Release, but you could also use butter and flour). Preheat the oven to 350 degrees F.
  4. Whisk the flour, sugar, cocoa, baking soda, baking powder, and coarse salt together in a mixing bowl. Beat the dry ingredients on low until combined before increasing the speed to medium and adding the egg, buttermilk, warm water, oil, and vanilla. Beat about 3 minutes until the mixture is smooth. Pour it into the pan.
  5. Place the pan in the oven and bake until a toothpick inserted in the middle comes out with just a few moist crumbs, about 25-30 minutes. Rotate the pan about halfway through so it’ll bake evenly. When you take the cake layer out, leave the oven preheated for the cheesecake. Let the cake layer cool on a wire rack for about 10 minutes before turning it out onto a sheet of wax paper and leaving it to cool completely. Wrap the cake layer and stick it in the freezer to firm it up for assembly.
  6. Make the cheesecake: While the cake layer is baking, mix cream cheese, vanilla, and sugar in a large bowl until well blended and creamy. Add the eggs one at a time, mixing between each, and continue mixing until combined. Add the chocolate and continue mixing until combined. Pour mixture into prepared crust and smooth the top with a spatula.
  7. Bake for 55 minutes or until center of cake is almost set. The top may crack, but it doesn’t particularly matter, since you’ll be covering it anyway. Let the cheesecake fully cool. When almost cool, place it in refrigerator to chill while you prepare the filling.
  8. Make the filling: Place the butter, salt, toasted coconut, and toasted pecans in a medium bowl. In a small saucepan, heat the cream, sugar, and egg yolks over medium heat, stirring constantly, until the mixture is thickened, coats the spoon, and reads 170 degrees F on a candy thermometer. Pour this mixture over the coconut mixture and stir until the butter melts. Let the mixture cool completely (I set mine in the fridge once it was almost cool to thicken it some more.)
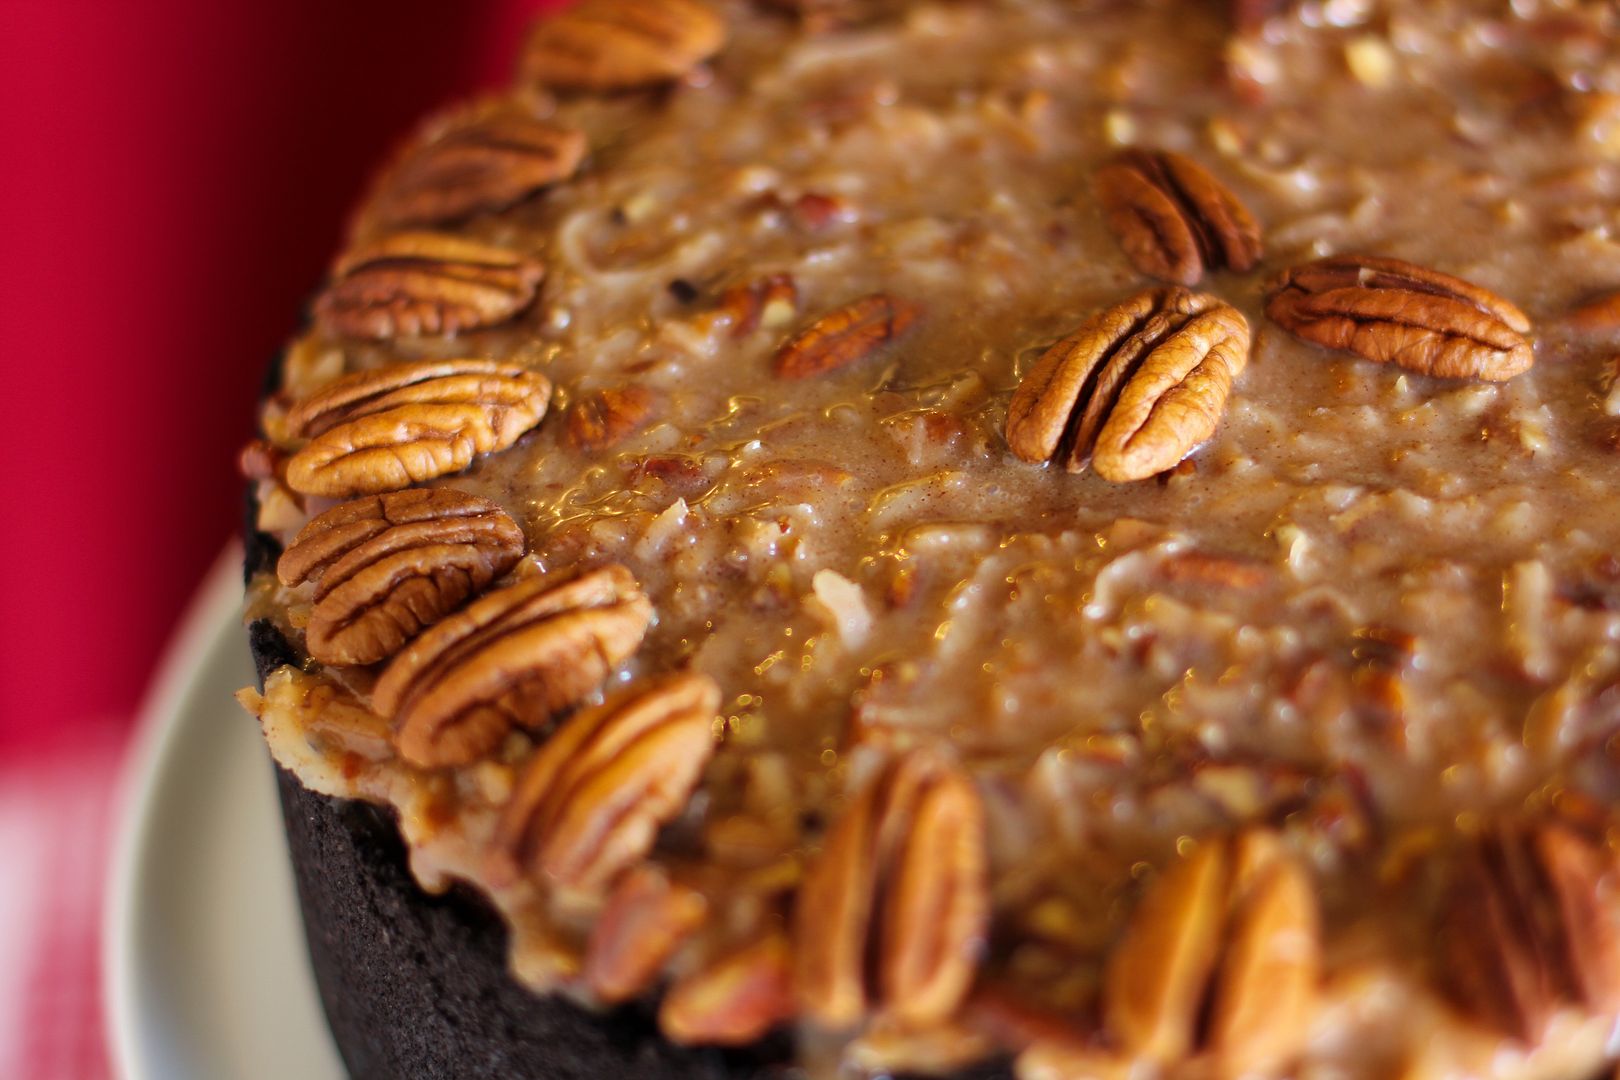
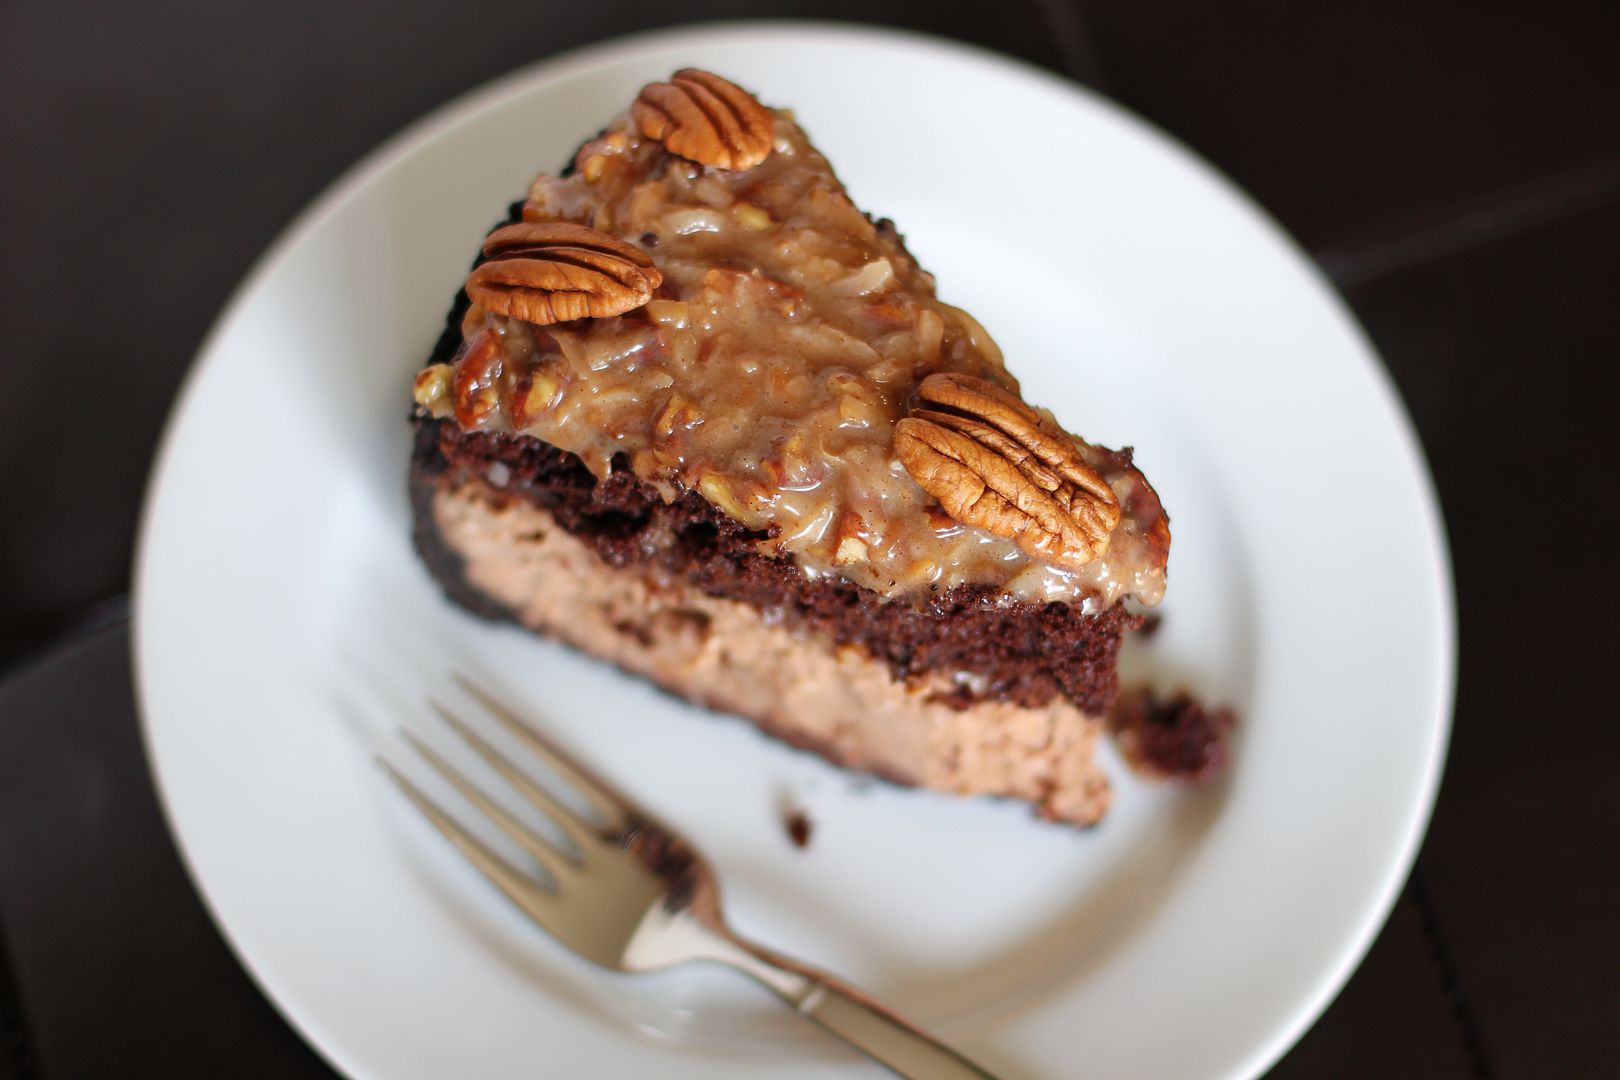
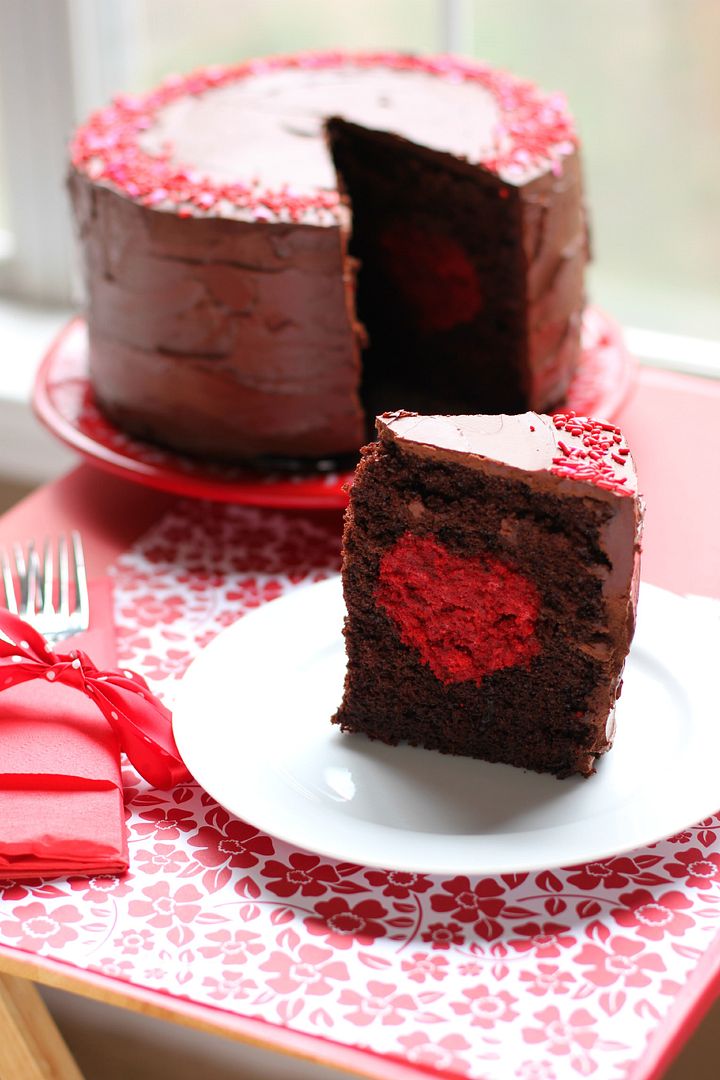
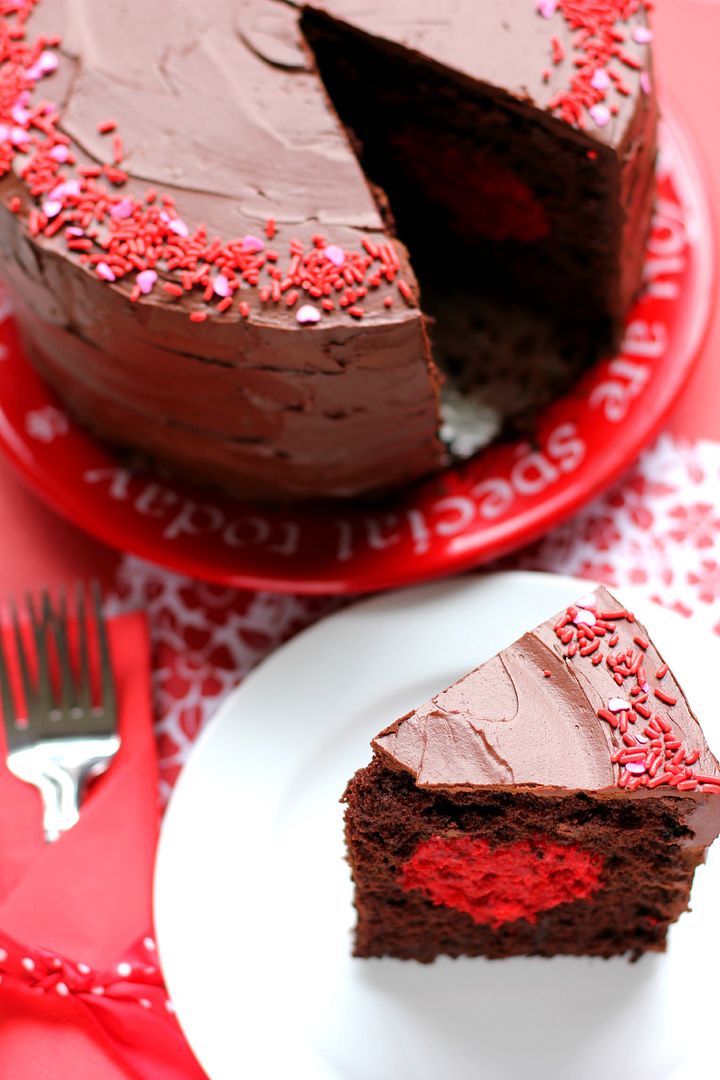
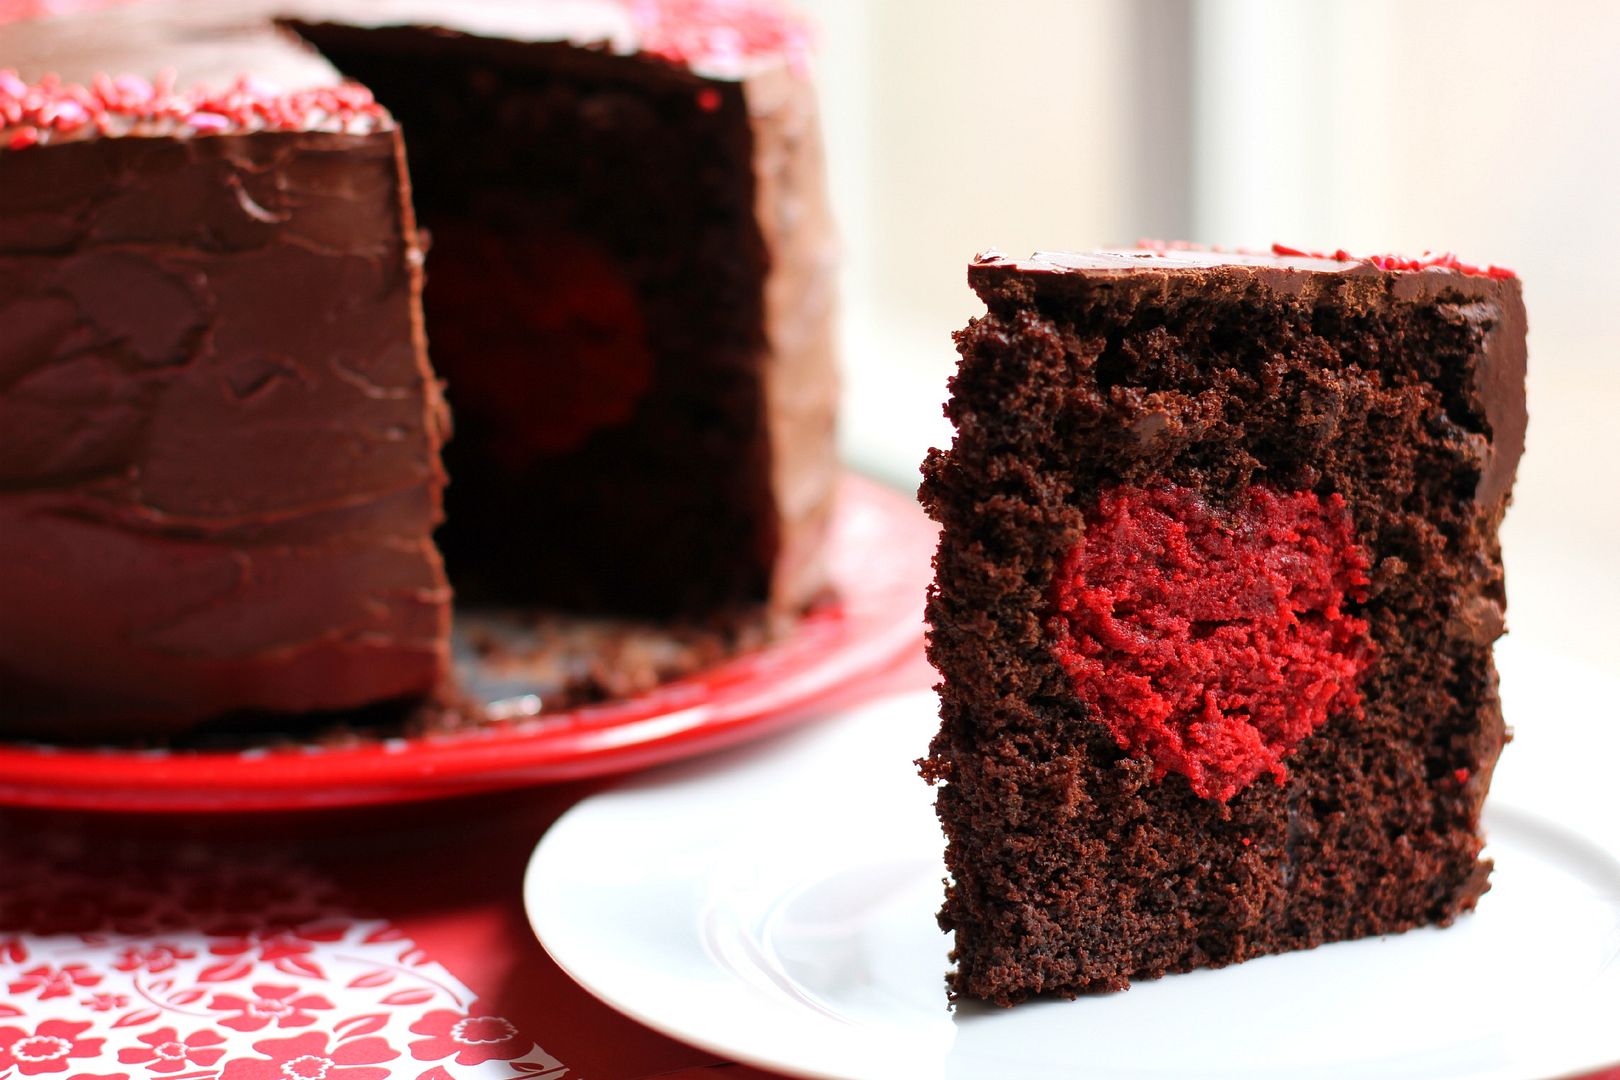
  9. Assemble the cake: Place half of the filling on top of the chilled cheesecake and spread it out. Carefully place the chocolate cake layer on top. Spread the rest of the filling on top of the chocolate cake layer. Decorate with pecans. Chill for 3 hours or overnight. When completely chilled, loosen the cake from rim of springform pan by wrapping the pan in warm dishtowels. Remove the springform pan and serve.

Disclaimer: I was sent Cinnabon Sprinkle Topping for free to try, but didn’t plan to use it in this recipe until a cooking emergency inspired me to. I would never mention a product to you unless it was something I truly enjoyed, and boy did I love this one!

Chocolatey Red Velvet Pull-Apart Bread with Cream Cheese Glaze

“I changed my mind.”

My mom shifted the car into park and turned off the ignition before looking over at me. “What do you mean? You can’t change your mind now; we’re already here.”

I looked out the window at the hair salon and then turned back to my mom. “Can’t I just get a trim, though? I really don’t want short hair. Please.” My 5-year-old voice teetered on the border between whining and shouting.

My mom shook her head. “We already made the appointment and told her what we wanted done. We aren’t spending all this money for just a trim. It’s just hair; it’ll grow back. Come on.”

Before I knew it, I was seated in a pleathery chair in front of a giant mirror, looking at my long blonde locks. Jessica, our hair stylist, sensed my unease. “Let’s just get it over with all at once, okay?” she asked as she tugged it into a ponytail. I could barely nod. A few snips later, my ponytail dropped to the floor with a whisp of finality, and the newly free remnants of my hair fell around my face. They barely reached my ears.

Silent tears began rolling down my cheeks as I calculated how long I’d have to wait to have long hair again.

My hair was really only one facet of my style troubles. In addition to bowl cuts, my mom had a penchant for “hammer pants.” She made many of my outfits by hand, including a hammer-panted onesie (I couldn’t make this up) with candy-pink stripes and gigantic, ceramic ice cream cone buttons. I think it might’ve also had a big lace collar. I posed in it with my bowl cut and a reluctant smile for many a photograph.

Then there was the red-and-denim hammer-panted contraption with the ceramic cow buttons. God bless my mother for sewing clothes for me, seriously, but I considered running away.

At least I was loved? Indeed, my childhood style woes remind me of this quote from food writer Angie Mosier about red velvet cake: “It’s the Dolly Parton of cakes: a little bit tacky, but you love her.”

Incidentally, I think I would’ve rather dressed like Dolly Parton than M.C. Hammer, but that’s neither here nor there.

This red velvet pull-apart bread has all the fun, tacky redness of red velvet with some extra chocolatey goodness thrown in. It began life as a chocolate yeast bread recipe that I modified into a pull-apart loaf. It’s sweet, melty, gooey, and with a cream cheese glaze drizzled over the top, reminiscent of your favorite red velvet desserts. As a plus, there are no hammer pants or bowl cuts in sight.

Tell me about your tackiest fashion choices (or the tackiest fashion “choices” imposed upon you by parents).

Chocolatey Red Velvet Pull-Apart Bread with Cream Cheese Glaze


Recipe by: Willow Bird Baking, adapted from Chocolate Bread by Paula Oland of the Balthazar Bakery
Yield: 2 loaves

Pull-apart loaves are downright addictive. Each layer is crisp on the outside and soft on the inside. This loaf is made from yeast dough with a sweet chocolate flavor, hunks of melty chocolate throughout, and a bright red hue! The cream cheese glaze kicks it right over the top. Schedule out the recipe in advance to allow for the rising/resting times and enjoy!

Bread Starter Ingredients:
1/4 teaspoon active dry yeast
1 cup lukewarm water (100-110 degrees F)
1 cup all-purpose flour, plus 3 tablespoons all-purpose flour

Red Velvet Yeast Bread Ingredients:
2 1/2 cups bread flour
1/4 cup cocoa powder
2 tablespoons (1 ounce) red food coloring plus 1 tablespoon water
1/3 cup sugar
2 teaspoons active dry yeast
1 cup minus 3 tablespoons lukewarm water (100-110 degrees F)
1 1/4 teaspoons table salt
2 tablespoons unsalted butter, room temperature
vegetable oil for lightly oiling bowl

Filling Ingredients:
3/8 – 1/2 cup granulated sugar (depending on how sweet you like things)
2 tablespoons semisweet chocolate chips
2 tablespoons bittersweet chocolate chips (I use Ghirardelli’s 60% cacao)
2 tablespoons unsalted butter, melted

Cream Cheese Glaze Ingredients:
2 ounces cream cheese, room temperature
1/2 cup powdered sugar
2 tablespoons unsalted butter, room temperature
1/4 teaspoon vanilla extract
about 3 tablespoons milk as
mini chocolate chips for sprinkling

Directions:
Note: In recipes that call for hunks of rising/resting time like this one, I like to draw out my schedule with different size boxes representing “hands on” and “hands off” prep time to get a visual feel for how long it will take. If you’re a visual person like me, drawing out your schedule is a great technique to try! Otherwise, a good old fashion list of what you’re doing at what time would also be beneficial.

Make bread starter: Dissolve the yeast in the 100-110 degree water for about 10 minutes. Completely mix in the flour. Cover the bowl loosely and leave it at room temperature to proof for around 6 hours.

Make red velvet yeast bread: Mix the cocoa powder, red food coloring, and 1 tablespoon water into a paste in a small bowl. In a medium bowl, mix together the paste, flour, 1/3 cup sugar, yeast, water, and 1/4 cup of your bread starter (save the rest to use for other recipes). Let this mixture rest for 15 minutes.

Knead in the salt and butter and then knead for about 10 minutes by hand or about 4 minutes on a mixer fitted with a dough hook, or until smooth and elastic. Scoop dough out into a lightly oiled bowl and cover it with a dish cloth. Let it rise until doubled in size, about 1 1/2 hours. Leave the dough in the bowl at this point but fold it in thirds like you’d fold a letter. Recover it and let it rest for 30 more minutes.

Shape and bake pull-apart bread: Prepare two 7″x 3″ x2″ loaf pans by greasing them (I use Wilton’s Cake Release, but you could also butter and flour them). Flour a large work surface. Use a dough scraper or sharp knife to help you cut your dough into halves. Turn out half of the dough onto your floured surface, keeping the other half covered.

Roll your dough out to a 15 inch long and 12 inch wide rectangle, lifting corners periodically to make sure it’s not sticking. If it seems to be snapping back, cover it with your damp towel and let it rest for 5 minutes before continuing.

Spread the melted butter over the surface of the dough with a pastry brush and then sprinkle the sugar and chocolate chips over the top, patting them down to ensure they mostly stick. Some will inevitably fall out as you do the following steps — just stuff ’em back in and don’t worry too much about perfection.

With the long edge of the rectangle toward you, cut it into 6 strips (do this by cutting the rectangle in half, then cutting each half into equal thirds. I used a pizza cutter). Stack these strips on top of one another and cut the resulting stack into 6 even portions (again, cut it in half, and then cut the halves into equal thirds). Place these portions one at a time into your greased loaf pan, pressing them up against each other to fit them all in. Cover the pan with your damp cloth and place it in a warm place for 45 minutes to an hour to double in size. Repeat the rolling and cutting process with the second half of dough.

While the dough rises, preheat oven to 350 degrees F (or 325 if you have a glass loaf dish instead of a metal pan). When it’s risen, place the loaf in the center of the oven and bake for 30-35 minutes until dark on top (if you take it out at light brown, it’s liable to be raw in the middle, so let it get good and dark). Cool until just warm on a cooling rack in the loaf pan while you make the glaze.

Make the cream cheese glaze: Beat the cream cheese until fluffy, and then add sugar and vanilla. Add the milk to thin it to drizzling consistency. Drizzle some of the glaze over the slightly warm bread (save the rest for drizzling over individual slices) and sprinkle it with mini chocolate chips. Serve immediately.

If you liked this post, please:
Subscribe to Willow Bird Baking
Follow Willow Bird Baking on Twitter
Follow Willow Bird Baking on Facebook
Give this post a thumbs up on StumbleUpon
Pin It


Shareother ways to share this post with friends

Thick Chocolate Cake with a Big Red (Velvet!) Heart

Okay, confession: I’m actually starting this post on Thursday, February 8. At this moment, I haven’t taken any photos of this cake yet, because I haven’t even baked this cake yet. I’ve only just drafted the recipe. It could be a total cake flop (or another trifle?) But hopefully, by the time I’m finished with this post in a few days’ time, there’ll be a great big gorgeous cake staring at you from the photographs.


hi.

I also haven’t driven up to Raleigh for my Valentine’s weekend yet, so I may be totally off-base with the following mushiness (I’m a city girl, so I’m unfazed by your aphoristic “counting-unhatched-chickens” nonsense.)

I’m gonna take a stab at predicting the future and tell you (and hopefully confirm for you later): Mike is the best boyfriend ever.

See, Mike is planning (or, by the time you see this, planned — is this getting confusing?) our Valentine’s celebration this year.

I got him a few presents (this novel, and some astronaut ice cream, because who doesn’t want to eat weird space food?)

I also attempted to paint my toenails for the weekend, but if you follow Willow Bird Baking on Facebook, you know that I actually only managed to make my toes look like they’d been gnawed off by a possum. Romantic?

But other than those little details (and, okay, this gigantic cake), it’s all Mike.

Update, Friday, February 9: Mike just emailed me to tell me to bring something nice to wear to dinner, but that’s my only clue so far. I bought him Reese’s hearts to tuck into his present. And Scooby Doo valentines to hide around his apartment, because I am apparently 5 years old.

I finally baked the cake and filled it with red velvet goodness (spiking the cream cheese frosting with amaretto on the fly was a fantastic choice). Hopefully tomorrow morning will find me frosting, photographing, and hitting the road with Byrd (my smaller, fuzzier valentine).

Update, Saturday, February 10: My suspicions were correct — Mike wins at romantic Valentine’s dinners! He took me to fancy schmancy Coquette in Raleigh, where I had gnocci that tasted just like Thanksgiving (how’d they do that?) and he had a mind-blowing cassoulet. The wind chill might’ve been hovering around negative eleventy billion, but the cockles of my heart were as warm as a . . . well, as a cassoulet. Because I ate a bunch of it.

Update, Sunday, February 11: My suspicions were even more correct — Mike wins at awesome Valentine’s surprises! I’ve been wanting to see Hugo since it came out but haven’t gotten a chance. After Mike and I tried but failed to go see it last time he was in Charlotte, I figured I was going to miss it in theaters entirely. But after church today (and some fantastic pizza), Mike drove me to the movies! Hugo was amazing.

Actually, though, the best thing Mike gave me was a card. He knew it was good when I cried for five solid minutes after reading it (and I’ve read it 3 or 4 times since and cried every time.) The best part: “I love you with all my heart. I’m so glad we’re together this Valentine’s.”

If he thinks he’s glad . . . !

I can now happily report that the cake, also, was a smashing success. It turns out if you combine the best chocolate cake you’ve ever tasted, the best red velvet cake you’ve ever tasted, the best (amaretto!) cream cheese frosting you’ve ever tasted, and the best chocolate frosting you’ve ever tasted, the result will be pretty flippin’ awesome.

What are your Valentine’s plans?

Thick Chocolate Cake with a Big Red (Velvet!) Heart


Recipe by: Willow Bird Baking, using chocolate cake and chocolate frosting recipes adapted from Martha Stewart
Yield: 10-12 slices

This is a capital-D Delicious show-stopper of a fancy schmancy special occasion cake. It’s a labor of love; however, even though it’s a lot of steps, they’re all pretty easy to accomplish! To make this cake (and so many others — it’s been a great investment for me), I used a Wilton Heart Tasti-Fill Pan. You can find this pan online or at Hobby Lobby, Michael’s, and probably AC Moore, if you’re looking for one. Or you can also use this tutorial by Amanda at i am baker to create a heart inside your cake without the pan!

Chocolate Cake Ingredients:
2 1/4 cups all-purpose flour, plus more for pans
2 1/4 cups granulated sugar
1 1/8 cups unsweetened Dutch-process cocoa powder
2 1/4 teaspoons baking soda
1 1/8 teaspoons baking powder
1 1/8 teaspoons coarse salt
3 large eggs, room temperature
1 1/8 cups low-fat buttermilk
1/4 cup plus 3 1/2 tablespoons safflower oil
1 1/8 cups warm water
1 1/2 teaspoons pure vanilla extract

Red Velvet Cake Filling Ingredients:
1/4 cup vegetable shortening
1 egg
1 tablespoon cocoa
1/4 teaspoon salt
3/4 cups sugar
1/2 teaspoon vanilla extract
1/2 cup buttermilk
1 1/4 cups flour
1/2 teaspoon baking soda
1 1/2 teaspoons white vinegar
1 ounce (about 2 tablespoons) red food coloring

Amaretto Cream Cheese Frosting Ingredients:
2 ounces cream cheese, at room temperature
2 tablespoons unsalted butter, at room temperature
1 3/4 cups powdered sugar
1/2 teaspoon vanilla extract
1 tablespoon amaretto or almond liqueur (optional)

Chocolate Frosting Ingredients:
1/4 cup plus 2 tablespoons Dutch-process cocoa powder
1/4 cup plus 2 tablespoons warm water
2 sticks unsalted butter, room temperature
1/2 cup confectioners’ sugar
Coarse salt
1 pound semisweet chocolate chips, melted and cooled
sprinkles

Directions:
NOTE: This cake has a lot of steps, but it’s easy to split up over several days. The cake layers can all be made days in advance (freeze the chocolate ones to make them easier to work with — no need to thaw before you assemble your cake — and stick the red velvet one in an airtight container in the fridge until you’re ready to use it). You can also assemble the cake and refrigerate it the night before you want to frost it (just cover it in the fridge).

Bake red velvet cake: Preheat oven to 350 degrees F and grease a 9-inch square baking pan. Cream together shortening, sugar, and eggs. Mix the cocoa and food coloring to form a paste and add this to the shortening mixture. Add the salt and vanilla extract. Add the buttermilk alternately with the flour, beginning and ending with flour. Mix the vinegar and soda together in a small bowl and immediately fold it into the cake batter. Pour the batter into your prepared pan and bake at 350 degrees for 25-30 minutes, or until a toothpick inserted into the center comes out with just a few moist crumbs. Cool completely. Keep the oven preheated for your chocolate cake.

Make the chocolate cake: Grease the Wilton Heart Tasti-Fill Pan well (You can find this pan at Hobby Lobby or Michael’s, if you’re looking for one, or you can also use this tutorial by Amanda at i am baker to create a heart inside your cake without the pan!). I use Wilton’s Cake Release to grease my pans, but you could also use butter and flour.

Sift the flour, sugar, cocoa, baking soda, baking powder, and coarse salt together in a mixing bowl. Beat the dry ingredients on low until combined before increasing the speed to medium and adding eggs, buttermilk, warm water, oil, and vanilla. Beat about 3 minutes until the mixture is smooth. Divide it among your prepared pans.

Place the pans in the oven and bake until a toothpick inserted in the middle comes out with just a few moist crumbs, about 30-35 minutes. Rotate the pans about halfway through so they’ll bake evenly. Let them cool on a wire rack for about 10 minutes before turning them out onto sheets of wax paper and leaving them to cool completely. Stick them in the freezer so they’ll be easier to work with.

Make the cream cheese frosting: Whip cream cheese and butter until fluffy. Mix in all other frosting ingredients and mix on medium-high speed until combined. When cake is cooled and crumbled, mix the cream cheese frosting in until the mixture has a dough-like consistency.

Make your chocolate frosting: In a small bowl, whisk together the cocoa and warm water. In a separate bowl, beat together butter, confectioners’ sugar, and a generous pinch of coarse salt until pale and fluffy. Gradually beat in the melted chocolate and the cocoa mixture. Let this sit for about 30 minutes before you use it to frost the outside of your cake. (You can assemble the cake while you wait.)

Assemble the cake: Take out your firm-from-the-freezer cake layers and stack them to see if you need to trim the sides with a serrated knife at all. Level them if they need it. Then place them cavity-side up on the counter. Knead your red velvet mixture a bit to make it soft and pliable and pack the cavities of both layers with it, making sure it gets down into the shape of the heart. I smoothed the red velvet mixture level with the back of a spoon.

Spread a touch of chocolate frosting on the middle and outside of the cake layer (not on the red velvet heart) as “glue” and then place the cake layers together (filled sides together, of course). Carefully align your heart. Smooth a very skimpy layer of chocolate frosting (the crumb coat) all over the outside of the cake, brushing away any crumbs, and place the cake in the fridge to harden the frosting and secure the crumbs. After chilling for about 20 minutes, remove the cake and frost completely. Decorate with fantastic sprinkles and lots of love. Serve immediately with ice cream or store, covered, in the fridge. If you store it, zap each slice for 20-30 seconds or let it sit out for 20 minutes or so to let the chocolate frosting soften.

If you liked this post, please:
Subscribe to Willow Bird Baking
Follow Willow Bird Baking on Twitter
Follow Willow Bird Baking on Facebook
Give this post a thumbs up on StumbleUpon
Pin It

Red Velvet Cheesecake-Stuffed Cake Balls

What’s your favorite color?

Alex‘s answer is pink. He’s the son of fellow Charlotte food blogger Julie of Mommie Cooks, and he just celebrated his 6th birthday in style with a gorgeous rainbow cake. Things haven’t all been rainbows lately, though, because Alex was recently informed by some kids at school that boys aren’t supposed to wear pink.

Julie’s post beautifully captures the struggle of a mom trying to empower her kid to hold tight to his unique personality when the world is trying to tuck him into a bright blue mold. It’s hard to explain to a 6-year-old that pink wasn’t always considered “girly.” Or that part of the reason pink is a “girl color” now is so businesses can make more money. Maybe Riley can help explain?

I shared Julie’s post with my 7th grade students, who wrote a reflection on it before we discussed their thoughts. Middle school is a particularly difficult time for finding your own way, so we talk a lot about bullying and how to be ourselves and love others. Given this (and the fact that they’re sweethearts), I wasn’t surprised at all that they were touched by Alex’s story.

Their indignant and protective voices cried, “He can like whatever color he wants to like!” and “He’s just a little boy! Why does it matter what color he wears?” Then someone — I think it was Matt — raised their hand with an idea. “We should all wear pink tomorrow to support him!”

And just like that, a plan was born: the 7th grade “color swap.”

That’s how it came to pass that the 7th grade boys filed into my room this morning in every shade of pink and red. The 7th grade girls donned blues, grays, greens, and browns, complete with sneakers and baseball caps. One boy snazzed his outfit up with a pink tie. Another topped off his ensemble with a pink fedora. Yet another wore cute socks. Their message was clear: colors don’t belong to a certain gender, and you should always be able to be yourself.


The 7th grade. Be yourself, love others!

This Valentine’s Day, don’t limit yourself to celebrating romantic love. Why not celebrate pink for Alex? Find a way this week to be your unique self, or to show support for someone else’s individual choices. Maybe you can find a day to wear pink for all the Alexes of the world, who shouldn’t ever have to conform to an arbitrary idea of normal.

In the spirit of loving yourself and others, here are some Valentine’s Day Red Velvet Cheesecake-Stuffed Cake Balls. Nothing says I love you like cheesecake, red velvet, and chocolate, am I right? And I definitely got some I love yous from the folks who devoured these.

How can you be yourself and love others?

Red Velvet Cheesecake-Stuffed Cake Balls


Recipe by: Willow Bird Baking
Yield: 30+ cake balls

People will seriously swoon when you show up with these cake balls. SWOON, I tell you. Red velvet cake and cheesecake and chocolate?! They’re also, despite looking really fancy, surprisingly straightforward to make. That being said, cake balls and pops are always fiddly the first time you make them and they require a little trial and error (should I dip with a toothpick or a spoon? Should I dry them at room temperature or in the fridge?), but the great thing about them is that they always taste amazing. The “recipe” below is more of a technique than a recipe. I’ve included lots of hints and even have a video tutorial to help you make these cuties! Also be sure to check out Candiquik’s great post on Common Cake Pop Problems.

Cake Ball Ingredients:
Your favorite red velvet cake recipe*, prepared and cooled
Chocolate candy coating (I love Candiquik or candy melts)
sprinkles

Cheesecake Filling Ingredients:
1 8-ounce package cream cheese, softened
2 tablespoons sugar

Cream Cheese Frosting Ingredients:
2 ounces cream cheese, at room temperature
2 tablespoons unsalted butter, at room temperature
1 3/4 cups powdered sugar
1/2 teaspoon vanilla extract

Directions:
*Note: I used a half recipe for these red velvet whoopie pies for my cake balls. They’re delicious as whoopie pies but were too oily for the cake balls, so mine cracked if I didn’t keep them in the fridge. I’d recommend using the red velvet cake recipe I used for these cake balls, which has always worked well for me. It might be more red velvet than you need, so you could try halving it and baking it in a loaf pan, but I haven’t attempted this. What the heck is too much red velvet, anyway?

Make the cheesecake middles: While the cake you chose is baking and cooling, mix all the cheesecake filling ingredients for 3-4 minutes or until fluffy. Fill a plastic zip bag with the mixture and cut off the corner. Pipe the cheesecake mixture into small swirls on a silicone mat or wax paper. Freeze these until firm (mine only took about 45 minutes).

Make frosting: Whip cream cheese until fluffy. Mix in all other frosting ingredients and mix on medium-high speed until combined. When cake is cooled and crumbled, start mixing frosting in. Start with about 1/2 cup of frosting and mash/stir with your fingers, pressing together to feel the texture. You’re looking to reach a playdough-like consistency. I think I used about 3/4 cup of frosting total, but the amount you use will depend on how much cake you have crumbled in your bowl.

Make cake balls: Once your cake mixture is ready and your cheesecake middles are frozen firm, you’re ready to assemble your cake balls! Take a frozen cheesecake middle and pack some cake around it. Roll it into a ball and place it on a silicone mat or wax paper. Continue until all cake balls are rolled. Chill these in the refrigerator overnight. I don’t freeze mine like some sites suggest, because I find chilling them in the fridge instead reduces cracking after I dip them.

Dip cake balls: After cake balls have chilled overnight, melt your candy melts or candy coating according to the package directions. I keep my bowl of candy melts situated in a bigger bowl of hot water to keep them warm and fluid, but be careful no water gets into the melts or they’ll seize!

To dip cake balls, I insert a toothpick into the center and dip them in the candy coating, using a spoon to help coat them. I then hold my cake ball over the bowl, gently bouncing and turning it to drain the excess coating off (letting them drain a good long while — but not long enough to fall off the toothpick — is how I avoid having a huge chocolate “foot”). When well-drained, I gently wiggle the cake ball off my toothpick onto a sheet of wax paper and add any sprinkles. I noticed my cake balls cracking (because I used an oilier cake), so I stuck them in the fridge as soon as they were dry to prevent this (it always helps for some reason). Serve immediately or store in an airtight container in the refrigerator.

VARIATIONS:
-You can leave the cheesecake middles out of this recipe and roll the cake into a solid ball if you want traditional cake pops.
-You can use any flavor of cake (or even a cake mix) for your cake.
-You can add chopped berries to your no-bake cheesecake mixture or even add in chocolate or other flavoring to produce different flavors of cheesecake in the center.
-You can use lollipop sticks or pretzel sticks to make these into cake pops.
-You can decorate with chocolate drizzle instead of (or in addition to) sprinkles.

Alex, this is for you. Be yourself! We think you’re awesome just the way you are.


Rainbows for Alex

If you liked this post, please:
Subscribe to Willow Bird Baking
Follow Willow Bird Baking on Twitter
Follow Willow Bird Baking on Facebook
Give this post a thumbs up on StumbleUpon
Pin It


Shareother ways to share this post with friends

Clementine Mousse Cheesecake

When I was still in high school, Mike moved into an apartment with one of his friends. Until then, we hadn’t had a place to hang out together alone (there was no metro in Charlotte, alas).

We had loafed about at our parents’ houses, sat in my driveway, and driven a billion miles all around Charlotte, but this was different. This was a living room, a television, a kitchen — an entire domestic space that could be (okay, with the exception of that roommate thing) ours.

High school was a hard time for me. I was both a feisty perfectionist and a social oddball. I didn’t fit in to anyone’s circle (now I realize this might’ve had more to do with my own choices than with anyone actually excluding me). I wrote poetry in my notebook, read novels no one else cared about, and walked the halls alone or with one close friend at lunch. I wore pajamas to school because I couldn’t be bothered getting dressed for that mess. I rebelled in tiny ways — writing the school board indignant letters, painting red x’s on my nails, scrawling lots of angsty notes — because in all of the ways that mattered, I had to be picture perfect.

Every day I’d walk around for 7 hours, surrounded by people but completely alone. I didn’t play an instrument so I didn’t hang out with the marching band. I was in a couple of plays but didn’t totally mesh with the drama crowd. I went to a couple of debate tournaments but never really made a connection. I excelled in everything I tried, but formed real relationships with no one. This is heavy stuff, I guess, but the reason I mention it is just to say that Mike’s apartment became a refuge.

(And also, as a side note, now would be a good time to ask why in the world I’m involved in planning my upcoming 10-year high school reunion.)

I’d spend all day long pushing myself, participating in class and working with classmates. Then the last bell would ring and I’d finally lug my 50 gajillion pound bookbag out to my blue Pontiac Sunbird. I’d drive way too fast (the speeding ticket I got the other day suggests that my driving habits haven’t changed) to Mike’s apartment. I’d knock on his window and a few seconds later, the door would open and I would fall into a hug, finally “home.”

And we did play house. I helped him with laundry. I went grocery shopping with him. I carefully prepared boxes of Hamburger Helper and proudly presented him with heaping plates of it. We’d snuggle on the couch and watch Star Trek: The Next Generation.

When I had to climb back into my car each evening (my limited provisional license imposed a curfew of 9 p.m.), I felt like I was leaving home instead of driving towards it.

Ah. Well. Time alone together isn’t a novel thing anymore. Mike and I often hang out at my apartment or at his place in Raleigh. We also still watch Star Trek, but we’ve moved on to Deep Space Nine. And I still cook him meals, though they usually don’t begin with a box.

Some things have changed; some things have stayed the same. But we talk about those Star-Trek-and-Hamburger-Helper days like my parents talk about their Sliding-Down-the-Hall-in-Socks days. They’re part of our mythology now, something we’ll give our children someday, a story they might not understand until they make a home in someone else. Maybe someday they’ll find themselves preparing a box meal in a sweet little kitchen, or sliding down the hallway in the middle of the night. Or maybe their story will be a different one altogether.

. . .

This cheesecake is certainly not a box meal, but it is something special I made for Mike recently. He loves clementines (or ‘tines, as we call them), and I was going to take him a bushel last time I went to Raleigh, but I opted to make a big cheesecake with them instead. The top layer is a sweet clementine mousse made with clementine curd, and the bottom layer is a traditional creamy cheesecake. I candied some clementine slices to decorate the top and served each piece of cake with a heap of freshly whipped cream. I can’t be sure, but I don’t think Mike missed the Hamburger Helper.

Tell me a story from your love mythology. What memories do you have from early on in your relationship (or from relationships past)?

Clementine Mousse Cheesecake


Recipe by: Willow Bird Baking
Yield: 10 pieces

Clementine Mousse Cheesecake is a creamsicle lover’s dream. Bright, airy clementine mousse sits atop a smooth, creamy traditional cheesecake in a cookie crust. I decorated mine with pretty candied clementines and served it with freshly whipped cream. In addition to being delicious, this recipe is also easy to break down over multiple days so there’s never too much to do at once.

Cheesecake Ingredients:
3 (8 ounce) packages cream cheese, at room temperature
1 cup granulated sugar
1½ tablespoons all-purpose flour
2 teaspoons vanilla extract
3 large eggs
34 Golden Oreos, processed to fine crumbs*
6 tablespoons butter
*Golden Oreos give off some grease while cooking, so you may want to place a baking sheet under your springform to catch this — you can also substitute graham cracker crumbs if you’d rather, but the oreos are delicious!

Clementine Mousse Ingredients:
1 1/4 cups clementine curd
2 1/2 tablespoons cold water
1 envelope (2 1/4 teaspoons) unflavored gelatin
1 cup chilled heavy whipping cream

Candied Clementine Ingredients:
3 clementines with firm (not loose) skin, well washed and dried
4 cups water
2 cup sugar

Directions:
Notes: Cheesecakes are simple and super customizable. New to cheesecake making? Watch my 6 minute Cheesecake Video Tutorial for visual assistance! This recipe can be divided up over several days — you can make the clementine curd and candied clementines in advance. Make the cheesecake the day before you want to assemble the dessert. Then make the mousse and assemble the cake with enough time to chill before serving.

Make candied clementine slices: (If you make these in advance, keep them in their syrup and store in the fridge. When ready, gently heat them again, remove the slices, and proceed with the drying procedure.) Cut each clementine into 6 horizontal slices. Remove any seeds carefully. Preheat the oven to 200 degrees and place a cooling rack over a baking sheet on the center rack. Prepare a plate of sugar and set it aside.

Heat the sugar and water in a saucepan (wide enough for the slices to sit in a single layer) over medium heat, stirring until the sugar dissolves. Place the slices in in a single layer and gently simmer them for 40-50 minutes, turning them once. The white bits should begin to get transparent. Pull them out of the syrup with tongs and place them on the cooling rack to dry for around 1 hour to 1 hour 15 minutes, or until they’re no longer sticky to the touch. Gently dredge them through the plate of sugar, shaking off excess, to coat any sticky portions. Cool completely.

Make the cheesecake: Preheat the oven to 350 degrees F. Lightly grease a springform cheesecake pan. Combine the cookie crumbs and melted butter in a small bowl. Toss with a fork to moisten all of the crumbs. Using a flat-sided glass, press into an even layer covering the bottom and sides of your cheesecake pan (you want it to be tall — try to get to about 2.5-3 inches high — and a little thicker than for your usual cheesecake; maybe 1/4 inch thick so it won’t crumble). Bake the crust for about 6 minutes and let it cool as you make your cheesecake filling.

In a large bowl, beat the cream cheese and sugar on medium-high speed until well blended. Beat in the flour. Add in the vanilla and beat until well incorporated, scraping down the sides of the bowl as needed. Beat in the eggs one at a time, scraping down the bowl between each addition. Pour the filling into your crust.

Bake until the top is lightly browned, puffed and cracked at the edges, and the center moves only very slightly when the pan is lightly shaken (about 40 minutes). Check while baking periodically and put a pie shield (or strips of foil) around the top of your pan to protect the crust edges if they’re getting too dark. Just don’t let the shield/foil touch the crust — it’s delicate and might crumble. When you pull the cheesecake out, you can use a sharp knife to score a circle around the top of the cheesecake about an inch inside the crust so that as it cools and chills/sinks, it won’t pull the crust in too much. Don’t worry if it’s pretty, because you won’t be able to see it in the finished product! Let cheesecake cool completely on a wire rack before chilling it in the fridge for at least 3 hours.

To make the mousse: Pour 2 1/2 tablespoons water into small saucepan. Sprinkle the gelatin evenly over the water and let it stand to soften for about 15 minutes. Meanwhile, place 7/8 cups of the clementine curd in large bowl. Stir the remaining 3/8 cup curd in another small saucepan over medium-low heat until very warm.

Stir the gelatin mixture over medium-low heat until the gelatin is dissolved and the liquid is clear (do not boil, or the gelatin may not set up your mousse anymore). Whisk the warm gelatin mixture into the 3/8 cup of warm curd. Then gradually whisk this gelatin-curd mixture into the curd in the large bowl. Let this cool slightly while you make your whipped cream.

Using an electric mixer, beat the heavy cream to stiff peaks (it helps to use a chilled bowl and whisk). Fold around 1/3 of this cream into the curd to lighten it, and then fold the rest in gently. Pour the mousse over the cheesecake and chill it to set. Top the cake with candied clementines and serve with fresh whipped cream (I whip up about a cup of cream with about 2-3 tablespoons of powdered sugar to make mine — it’s a good use for leftover cake and is lovely with the cheesecake!)

If you liked this post, please:
Subscribe to Willow Bird Baking
Follow Willow Bird Baking on Twitter
Follow Willow Bird Baking on Facebook
Give this post a thumbs up on StumbleUpon
Pin It


Shareother ways to share this post with friends

1 8 9 10 11 12 20