buttercream

The Ultimate Moist, Fluffy, Ridiculous Coconut Cake

The Ultimate Moist, Fluffy, Ridiculous Coconut Cake

I am very new to indoor cat ownership. Buckle has been with me for a little over a month now, and I’m only just now starting to “get” cats. As much as you can ever “get” cats, I should say. He’s quite the enigma.

Here are some things I’ve realized. And that you should have warned me about, you smug cat owners.

The Ultimate Moist, Fluffy, Ridiculous Coconut Cake

1. Cats are fluffy.

Yes, they are cute-fluffy, but they are also fur-tumbleweeds-on-all-surfaces, must-vacuum-all-the-time, why-is-there-cat-hair-in-my-mouth fluffy. I don’t think I’ve ever used up an entire lint roller in my life, but since Buckle got here, I’ve gone through two. I have to dust, vacuum, and wash all throws/rugs every weekend without fail or the creep of the cat dander will eventually cover me like an evil, carnivorous fur coat.

He also hates his furminator and tries to attack it. Good thing he loves the prickly hairbrush.

The Ultimate Moist, Fluffy, Ridiculous Coconut Cake

2. Cats are busybodies.

If you have cabinets, they need to know what’s in those cabinets. They don’t want a cursory glance. They want to get in those cabinets and roll around until they have fully explored the texture of the cabinet contents.

If you have some dinner, they need to smell that dinner. And paw at that dinner. And if at all possible (for instance, if you have gone to retrieve a forgotten napkin or fork), taste that dinner.

If they hear a noise, see you pick something up, detect a motion in their peripheral vision, or just have a weird hunch, immediate and thorough investigation is essential.

The Ultimate Moist, Fluffy, Ridiculous Coconut Cake
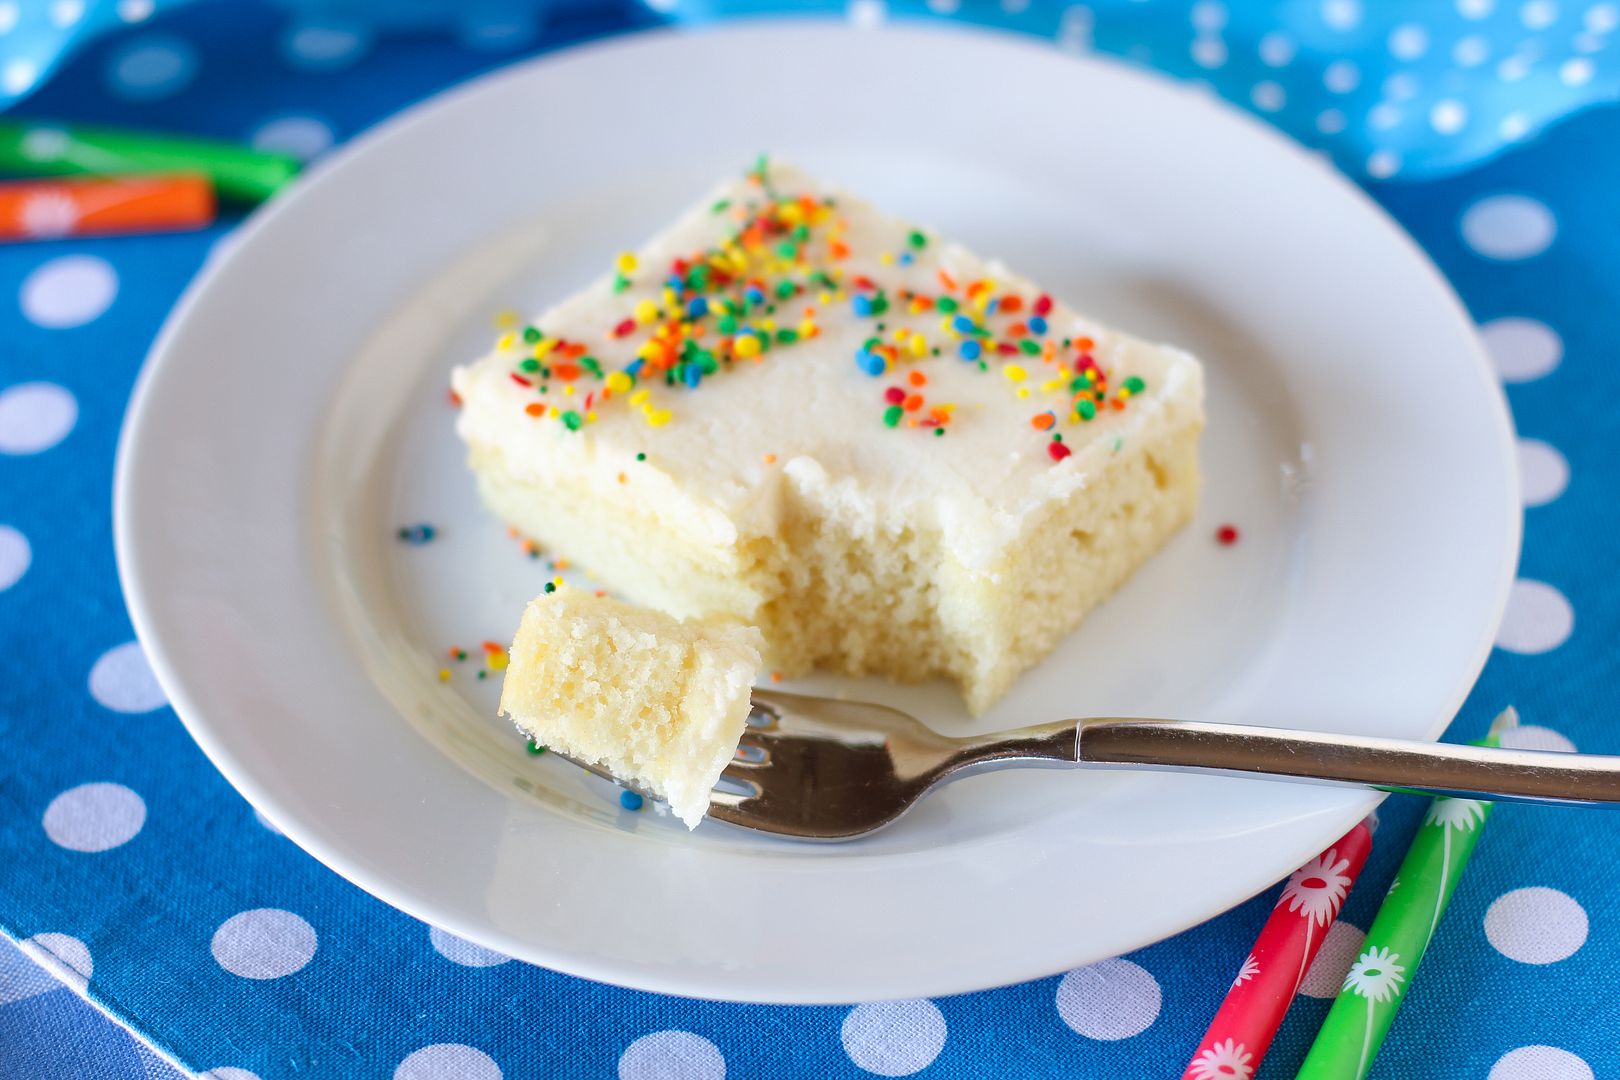
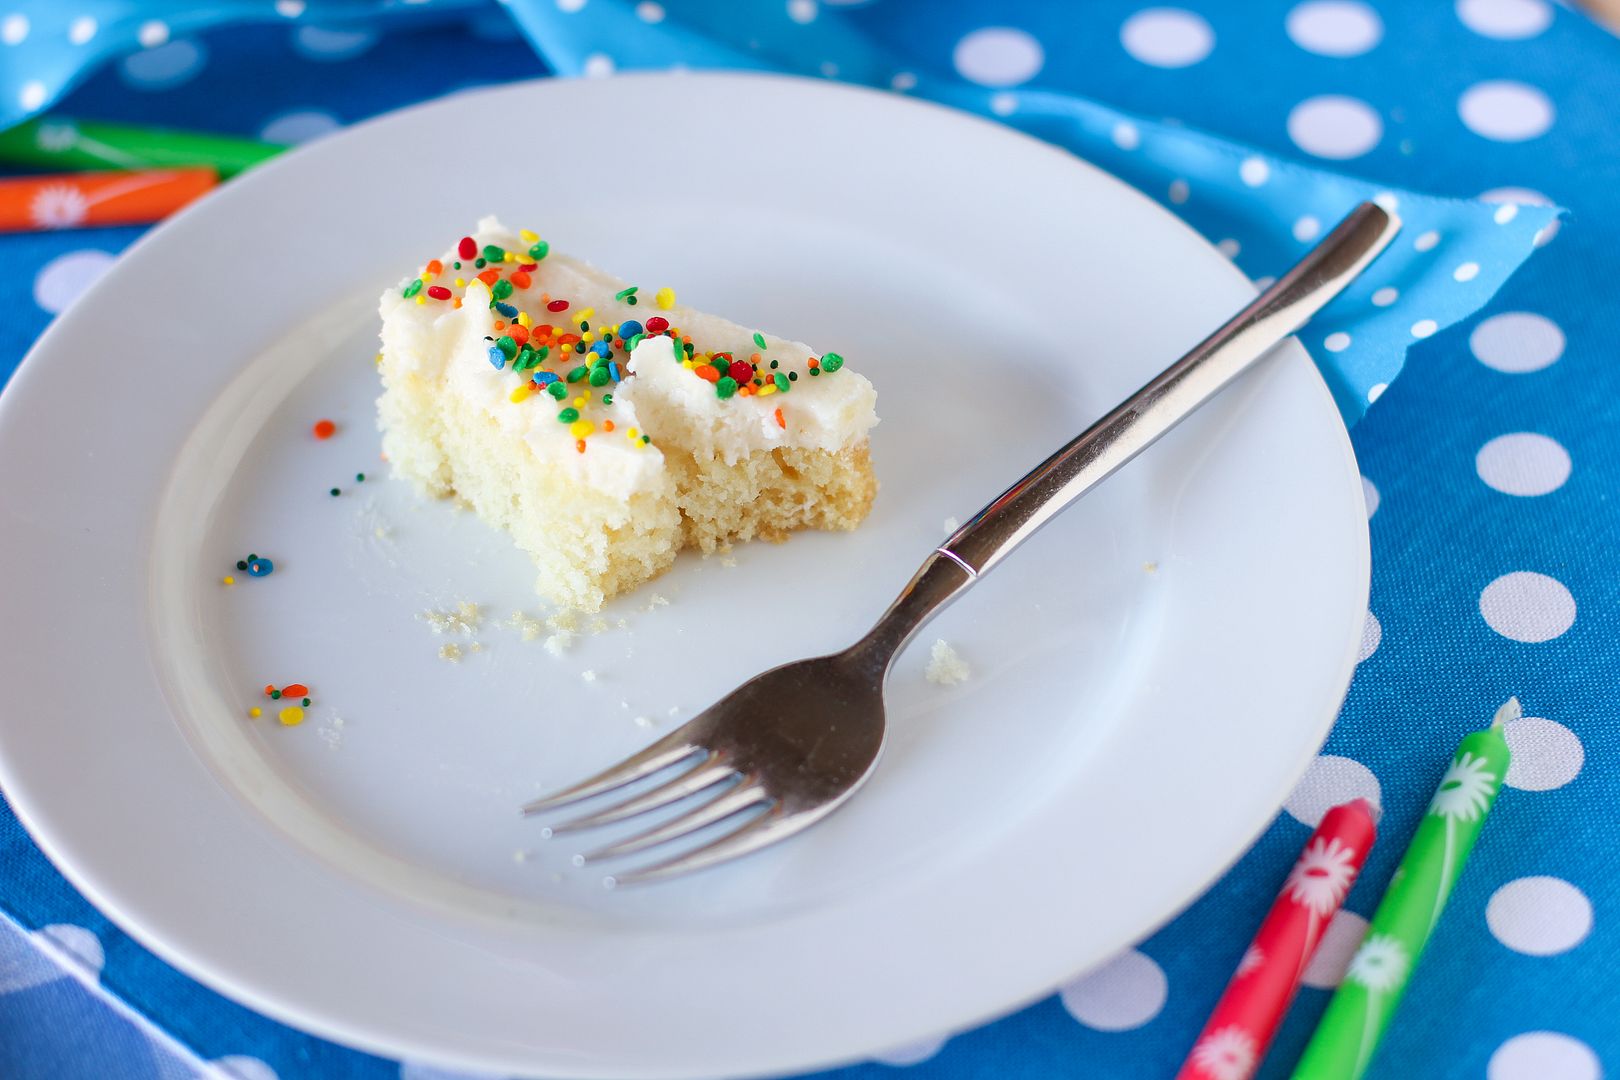
What’s this? Cake? What’s cake? I’m going to need to investigate that…

3. Cats are terrifying.

Every now and then Buckle will go bat-you-know-what-crazy for no apparent reason, dive through the house, tackle an utterly-terrified Byrd, jump on three or four separate pieces of furniture, knock something over, and then hide under the buffet.

During this time, I close my eyes tightly and hope nothing expensive is in his path.

The Ultimate Moist, Fluffy, Ridiculous Coconut Cake

4. Cats sleep a lot. In weird places.

I emailed my friend Jamie shortly after Buckle came home just to make sure he wasn’t sick: “Are cats supposed to sleep, like, 20 hours a day?” Apparently, yes.

Buckle’s favorite spot to sleep is on my bright orange tray, using The Wednesday Chef’s amazing book, My Berlin Kitchen, as a pillow. He’s got good taste in literature, I’ll admit, but there are fluffy pillows and blankets all over the room. And he chooses to sleep squished into a too-small tray with the corner of a book digging into his side. I don’t get it.

The Ultimate Moist, Fluffy, Ridiculous Coconut Cake

5. Cats are worth it.

Worth the fur, worth the terror, worth the furniture cleaning (We had an incident. Don’t get me started.) I’m already forgetting what it was like without Buckle here at home with us. As I punctuated that last sentence, he just stretched out and curled into an even more absurd position in his little book tray, as if to underscore my point. He’s a big sweet baby, and I’m glad he’s mine.

* * *

The Ultimate Moist, Fluffy, Ridiculous Coconut Cake

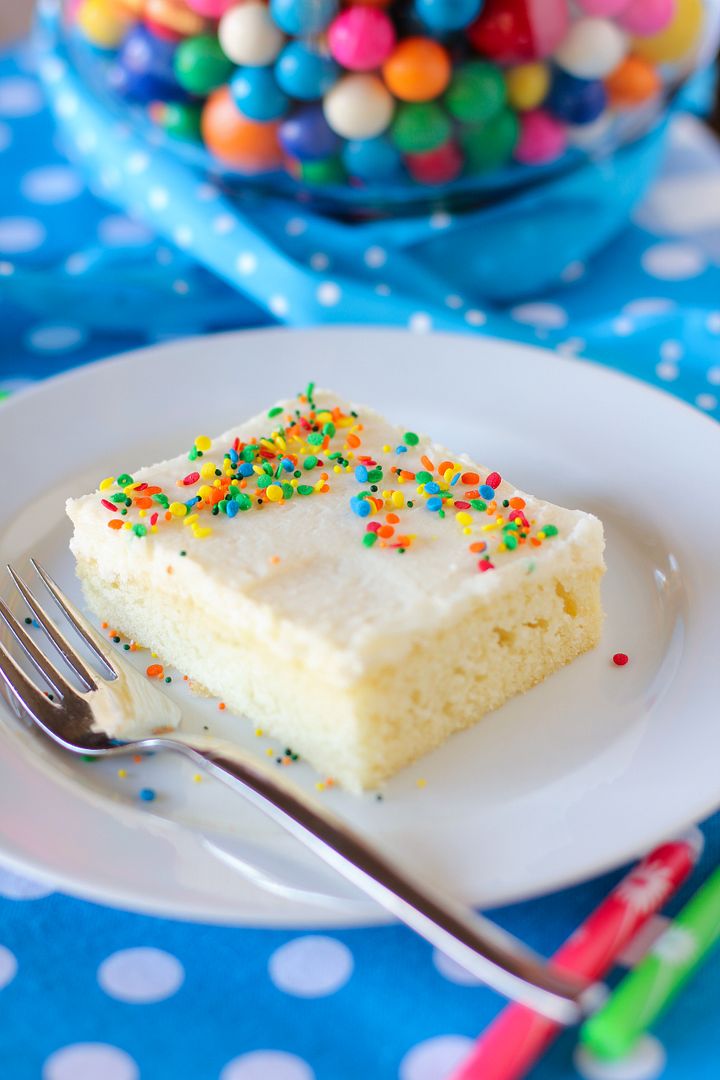
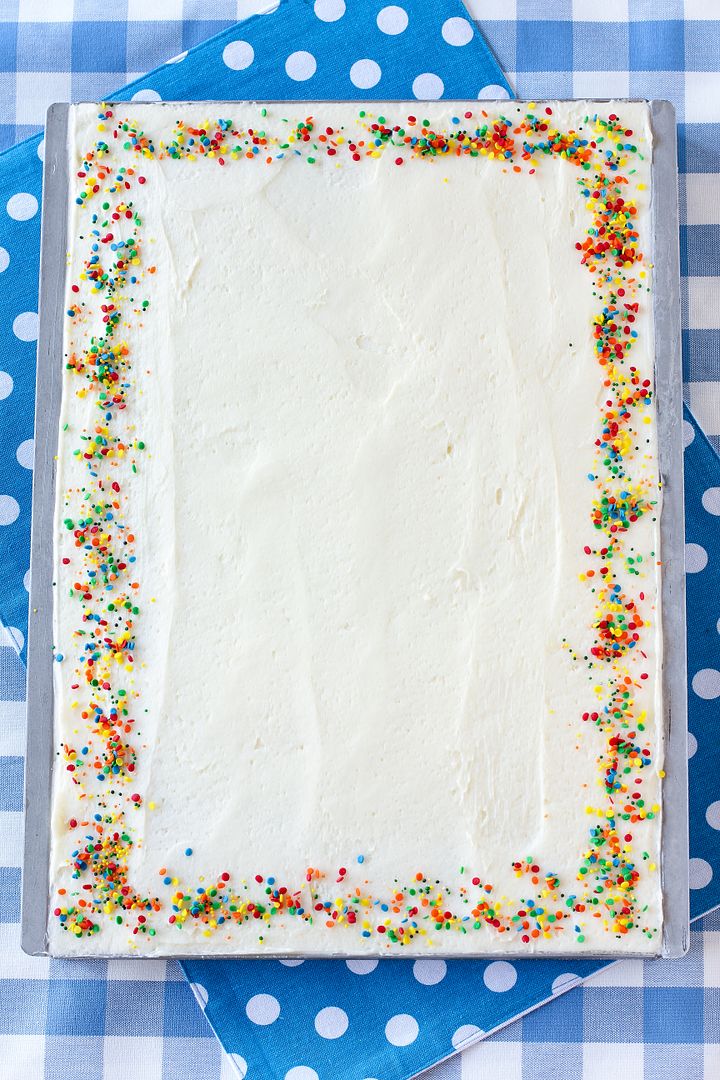
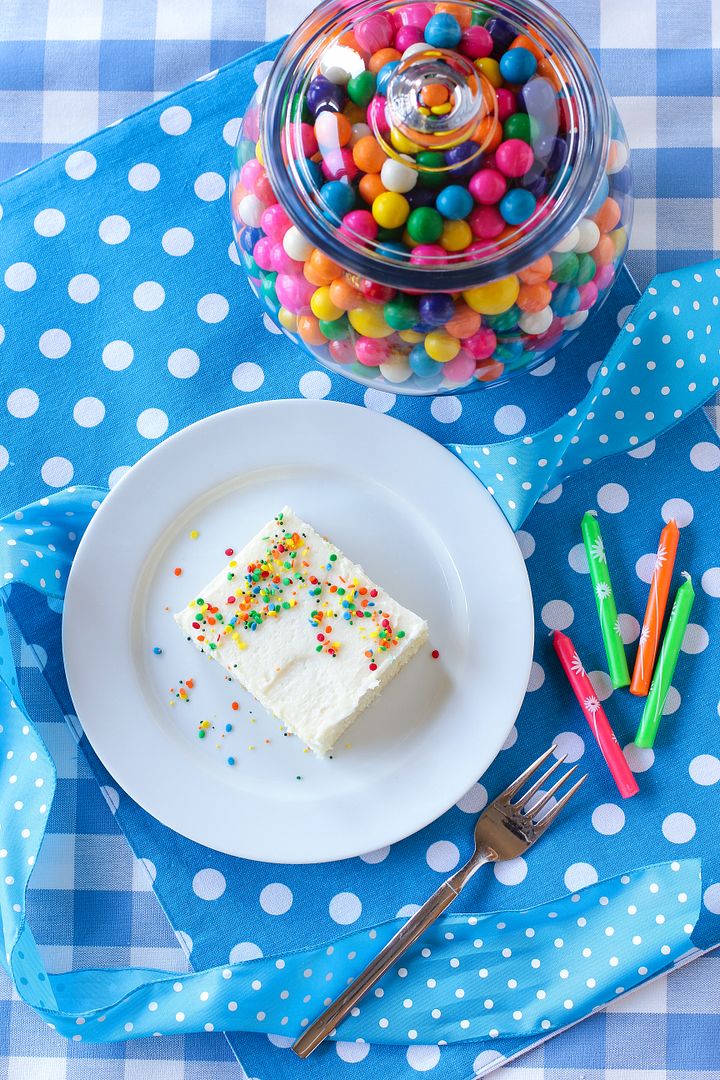
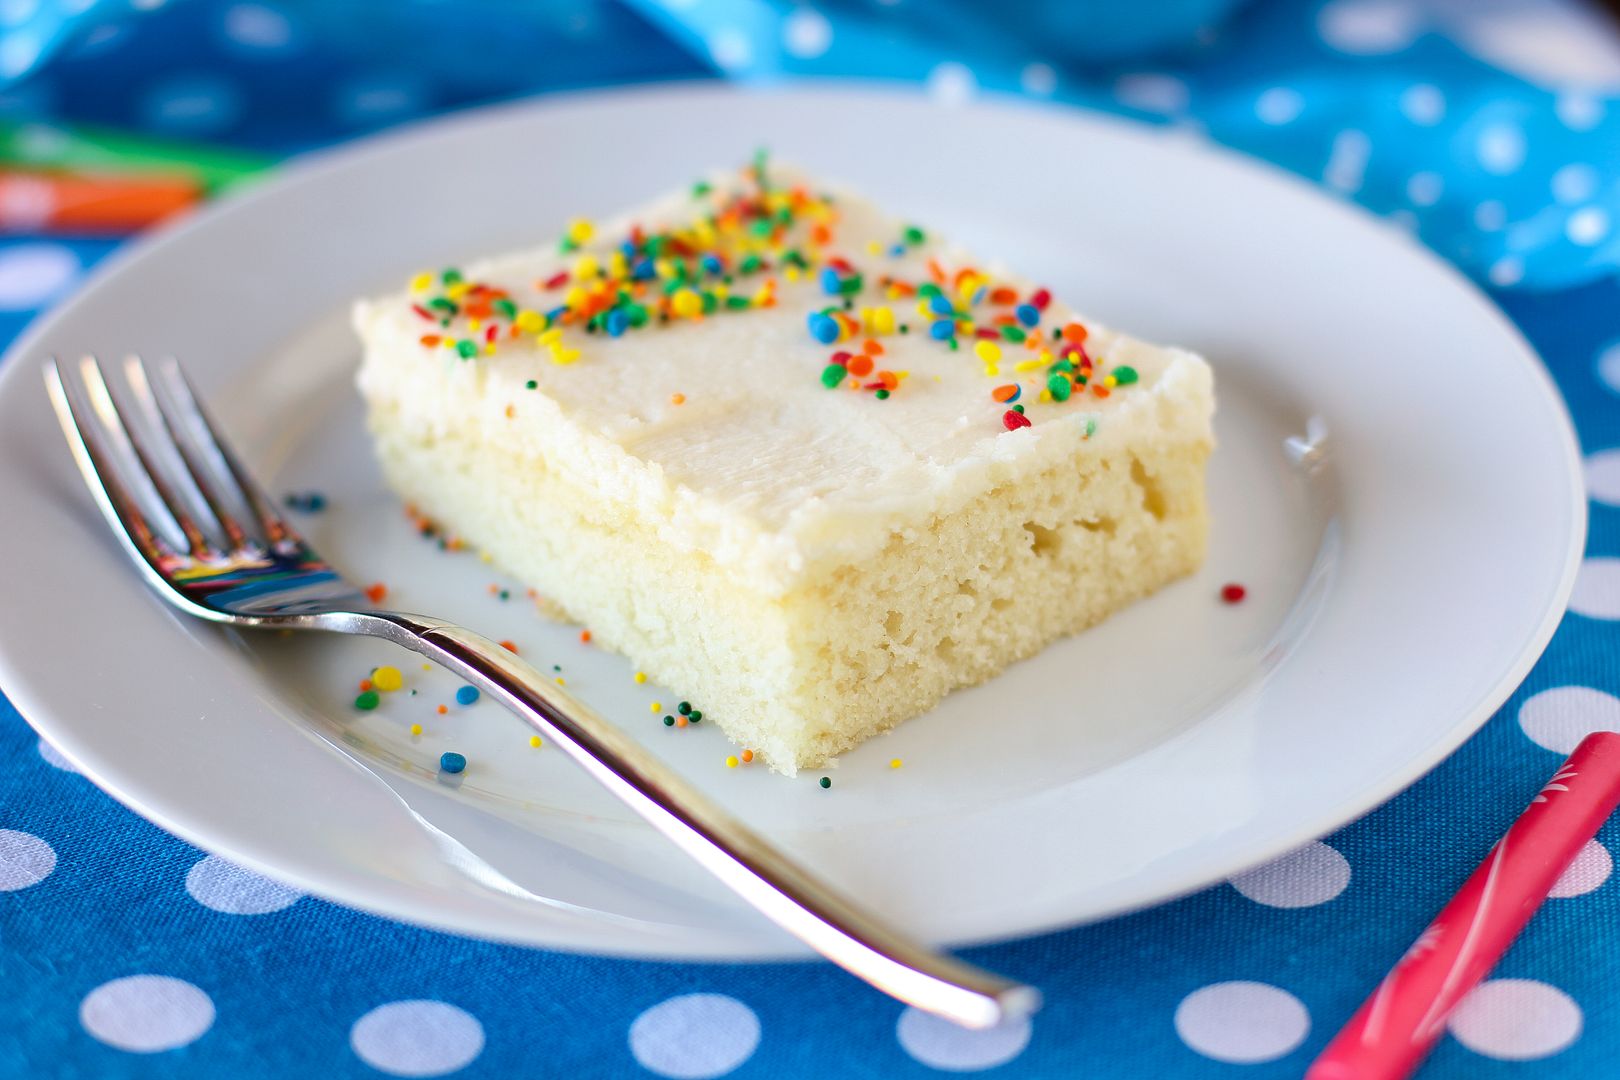
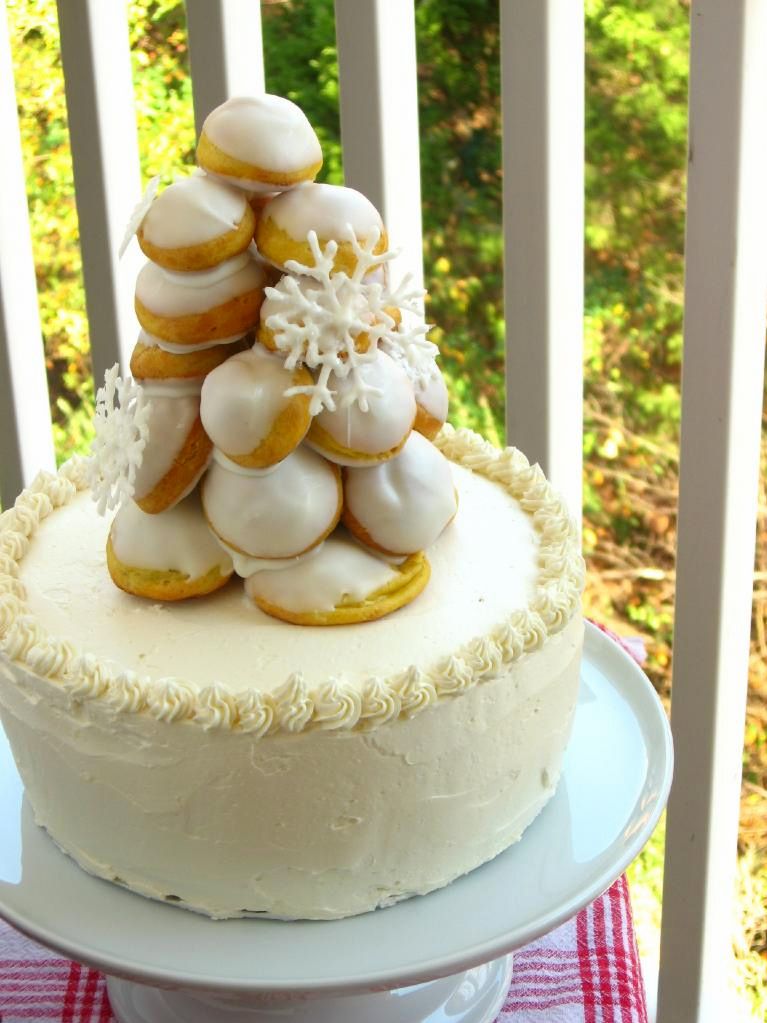
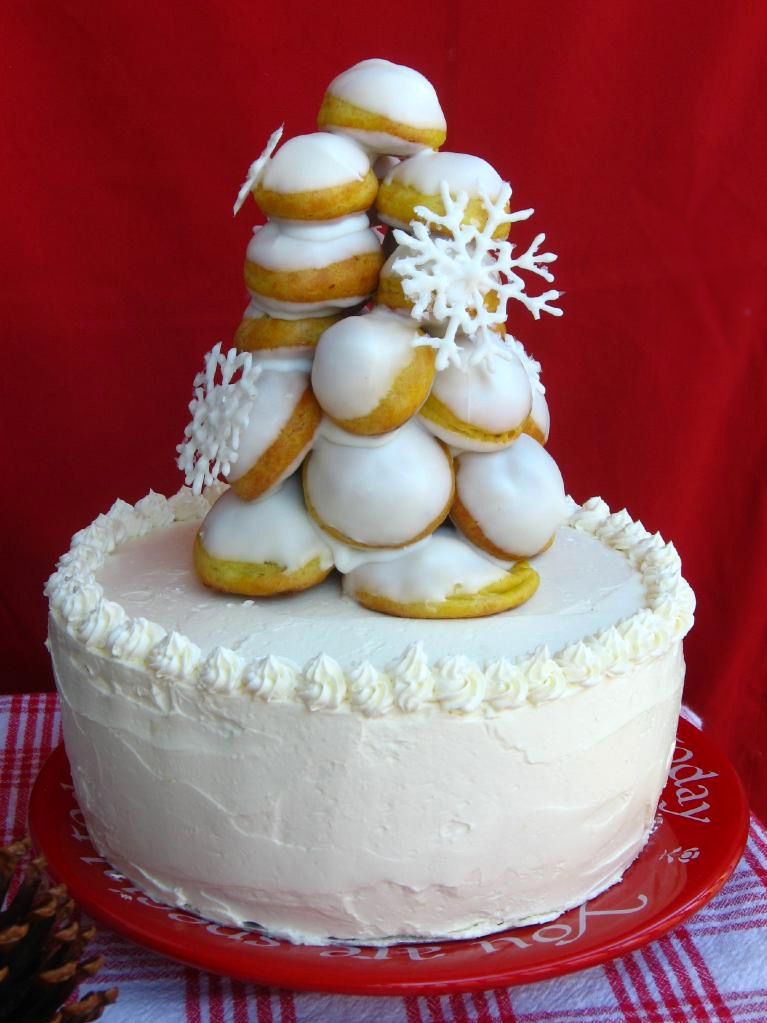
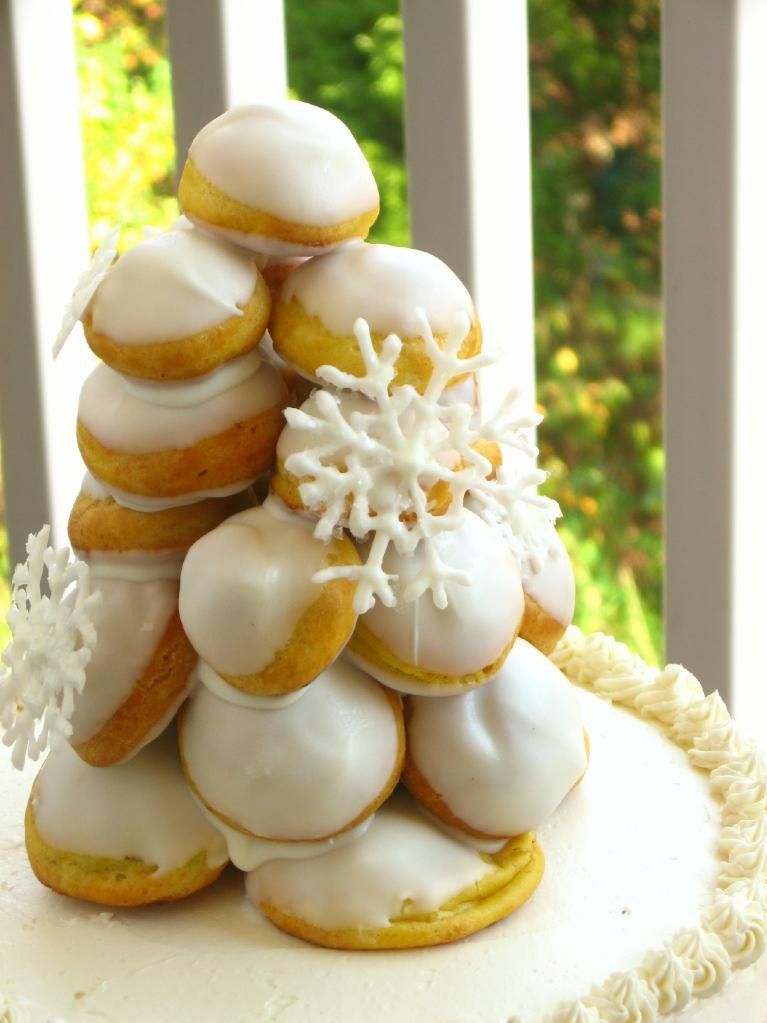
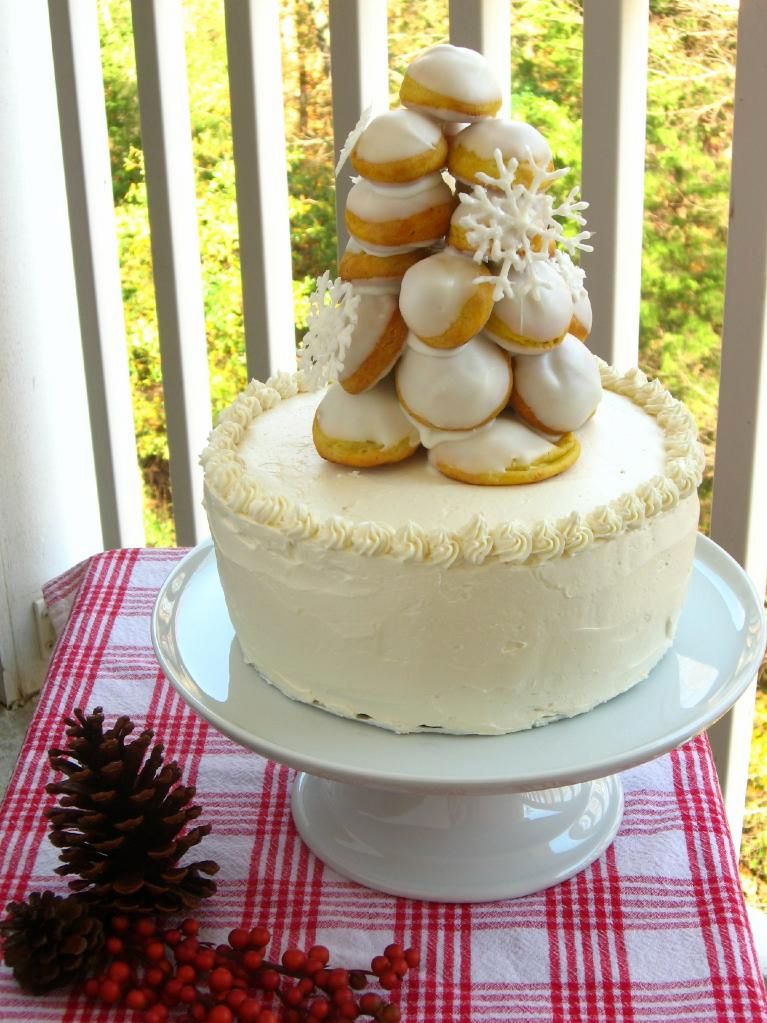
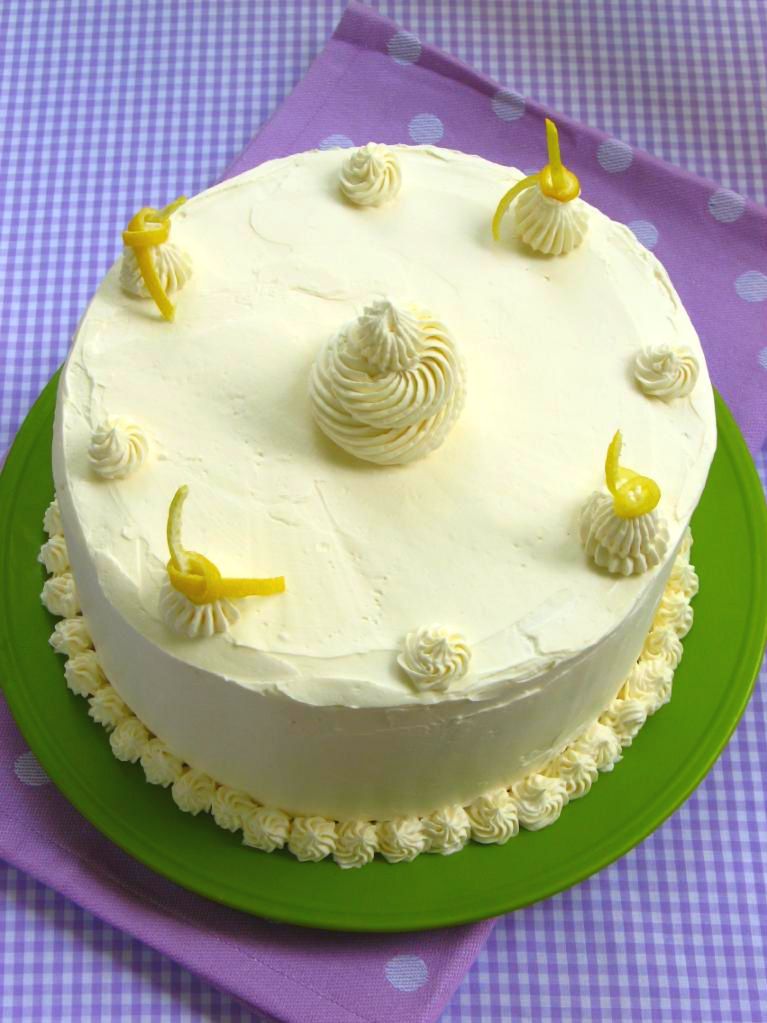
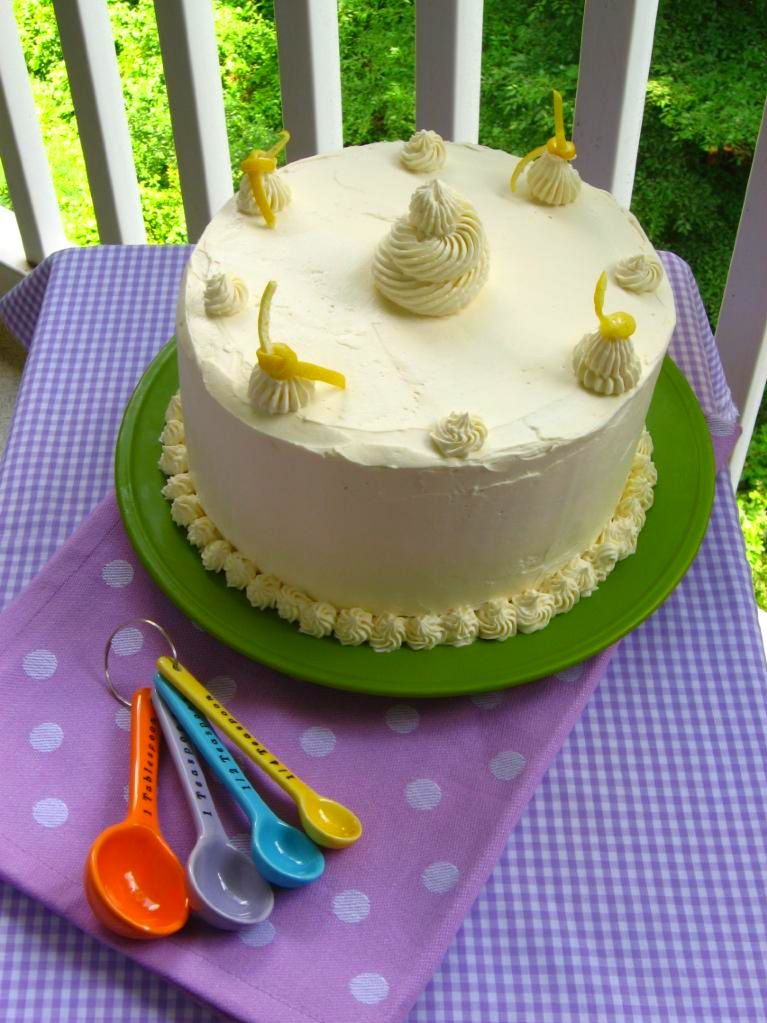
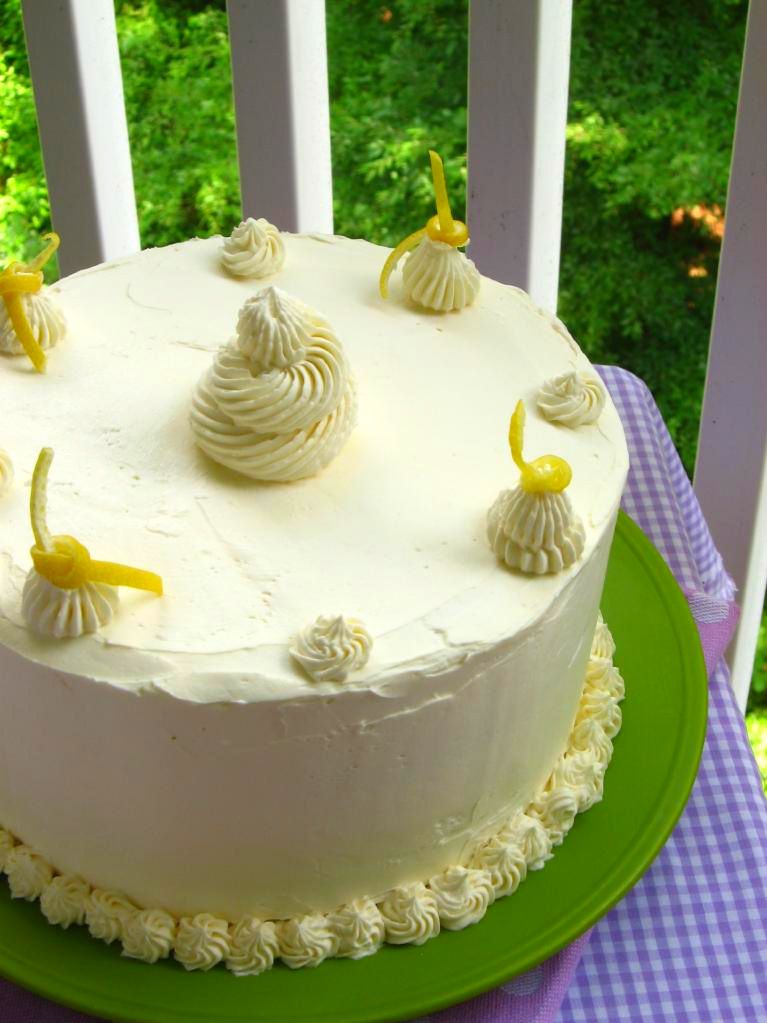
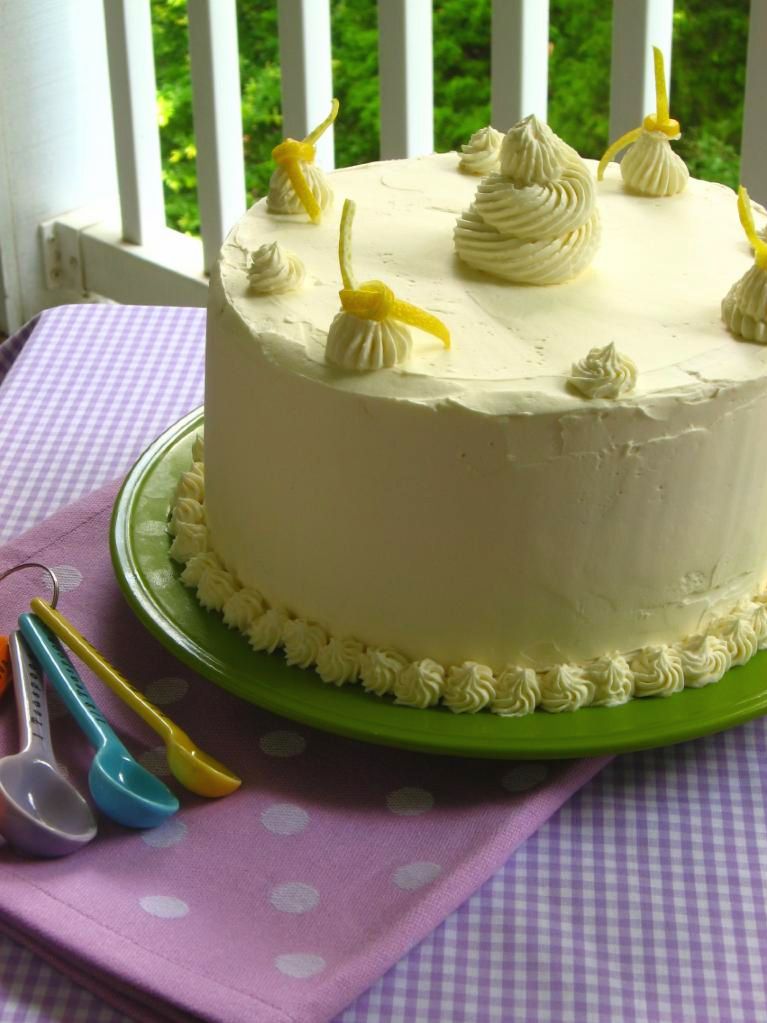
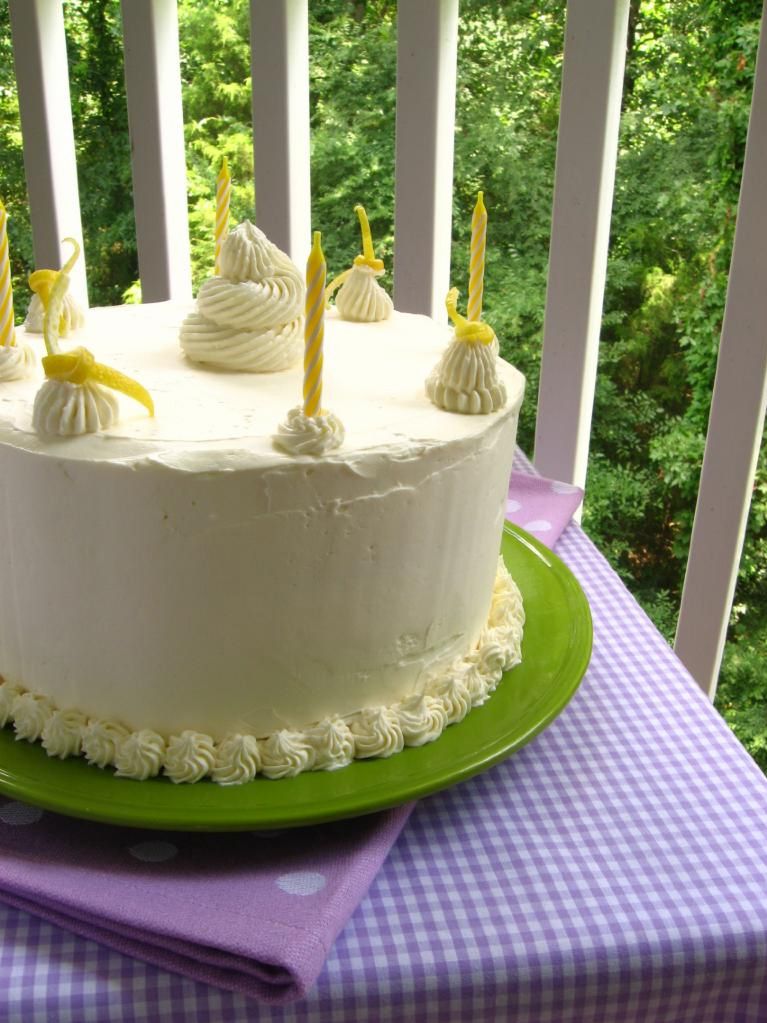
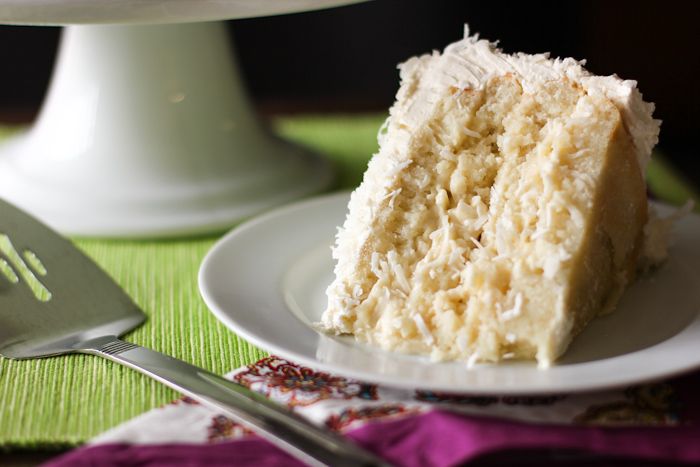
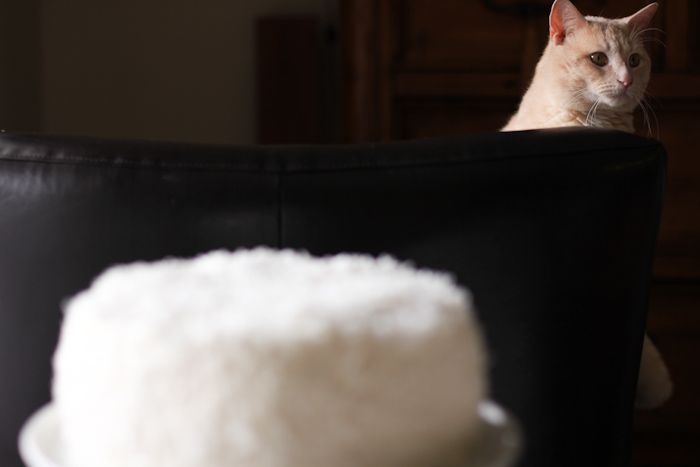
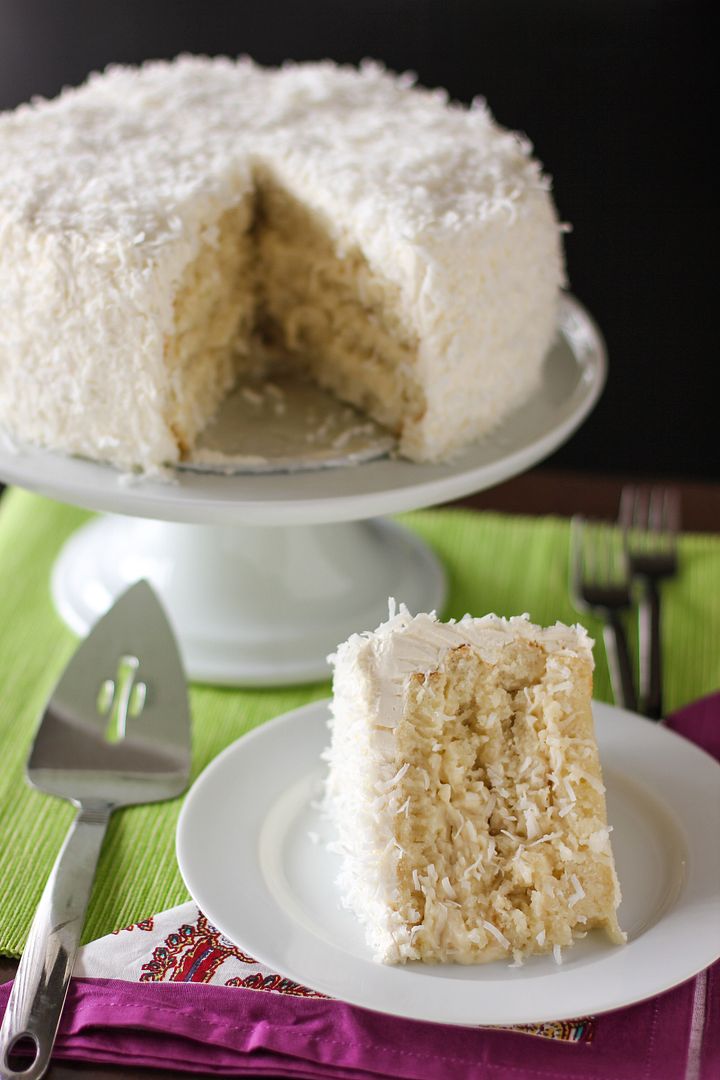
Buckle’s already given his furry “thumbs up” to this cake — he tried his best to reach it during the photo shoot. I love all coconut cakes, and have tried this one and this one. Both were amazing in their own ways, but I knew it was time to Frankenstein together the ultimate coconut cake. And this is it.

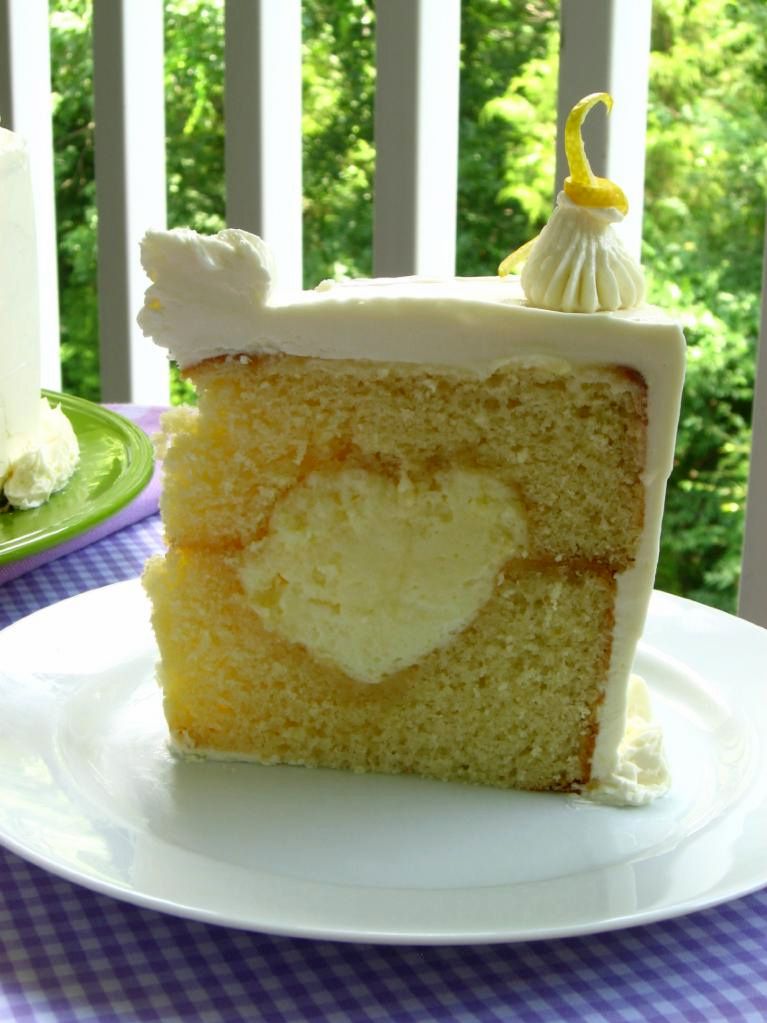
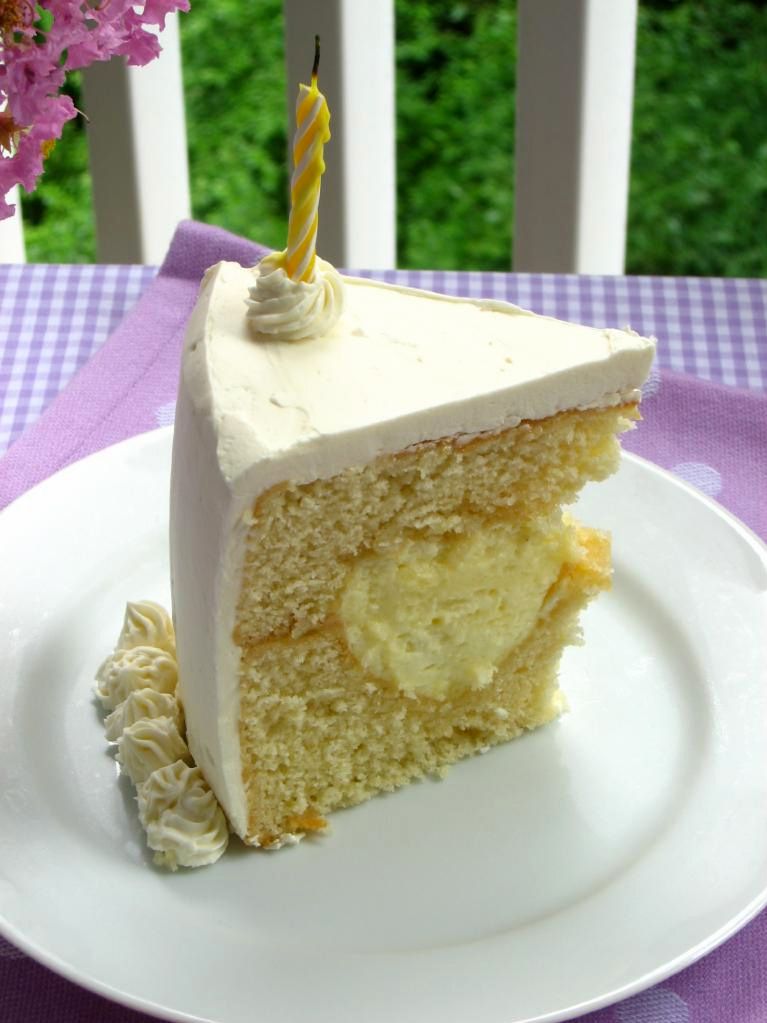
This cake combines the perfect white cake from The Way the Cookie Crumbles‘s careful experiments, an insane coconut pastry cream filling from Zoë Bakes, a thick coconut syrup drizzled onto each layer to keep it moist, and a buttery coconut French meringue buttercream to top it all off. It’s a time consuming recipe, but if you’re as crazy about coconut as I am, it’s worth it.

My sweet friend Mara and I were both gunning to make this ultimate treat, so we teamed up to present it to you two different ways! Go see her version of this masterpiece at What’s For Dinner? I love her version so much — not only is it an awesome coconut cake, but it tells a story!

The Ultimate Moist, Fluffy, Ridiculous Coconut Cake

One year ago: Savory Sweet Potato & Chorizo “Cinnamon Rolls”
Two years ago: April Fool’s Day Cupfakes
Three years ago: Lemon Blueberry Cheesecake Squares with Shortbread Crust

5 from 1 reviews
The Ultimate Moist, Fluffy, Ridiculous Coconut Cake
 
Prep time
Cook time
Total time
 
This is it. The ultimate coconut cake. Perfect white cake is drizzled with coconut syrup, filled with rich coconut pastry cream, and slathered with coconut French meringue buttercream. If you love coconut, this one’s for you.
Author:
Serves: 14-16
Ingredients
Perfect White Cake Ingredients:
  • 2¼ cups cake flour (9 ounces)
  • 1/2 cup + 2 tablespoons whole milk, at room temperature
  • 1/2 cup coconut milk
  • 6 large egg whites (¾ cup), at room temperature
  • 1 teaspoon coconut extract
  • 1 teaspoon almond extract
  • 1 teaspoon vanilla extract (or 1 inch vanilla bean seeds)
  • 1½ cups + 2 tablespoons granulated sugar (11.35 ounces)
  • 4 teaspoons baking powder
  • 1 teaspoon table salt
  • 12 tablespoons unsalted butter (1½ sticks), softened but still cool
Coconut Pastry Cream Ingredients:
  • 1 can (14 fluid ounces) unsweetened coconut milk
  • 3/4 cup sugar
  • 1 tablespoon vanilla extract
  • pinch kosher salt
  • 3 large egg yolks
  • 2 tablespoons corn starch
  • 2 tablespoons unsalted butter
  • 1 cup sweetened coconut flakes
  • 1/2 cup whipping cream
Coconut Syrup Ingredients:
  • 1 cup sugar
  • 1/4 cup water
  • 1/4 cup coconut water
Coconut French Buttercream Ingredients:
  • 1 cup sugar
  • 4 large egg whites , at room temperature
  • 24 tablespoons (3 sticks) unsalted butter, at room temperature
  • 2 teaspoon vanilla extract
  • 1 teaspoon coconut extract
  • 3 cups sweetened coconut flakes
Instructions
  1. NOTE ON TIMING: This cake has many steps, but none of them are particularly hard. For convenience, I’d split it up over 2-3 days. On the first day, bake the cake layers and let them cool before wrapping and freezing them. Make the coconut syrup and leave it covered in the fridge. On the second day, make the coconut pastry cream and frosting. Assemble the cake. Serve it then or on the third day.
  2. Make the cake: Set oven rack in middle position. Heat oven to 350 degrees. Grease or butter/flour two 9-inch cake pans very well. Add a parchment paper circle in the bottom of each and grease that too. You don’t want your layers to stick! Pour milk, coconut milk, egg whites, and extracts into a small bowl and whisk gently until blended.
  3. In a large bowl, whisk together cake flour, sugar, baking powder, and salt. Add the butter and continue beating until mixture resembles moist crumbs, with no powdery streaks left.
  4. Add all but about 1/2 cup of milk mixture to crumbs and beat at medium speed for 1 1/2 minutes. Add the remaining 1/2 cup of milk mixture and beat 30 seconds more. Scrape down the sides of bowl before beating just a little longer.
  5. Divide batter evenly between two prepared cake pans and smooth the tops with a spatula before dropping it from about 3 inches high to eliminate any bubbles in the batter. Arrange pans on middle rack. Bake until a thin skewer or toothpick inserted in the center comes out with just a few moist crumbs, 23 to 25 minutes. If you wait until the toothpick comes out totally clean, your cake might’ve gone too long and could be dry; be careful not to overbake! Check early and often.
  6. Let the cakes rest in pans for a few minutes before running a knife around the edges of the pan and inverting the cakes onto wire racks. Invert them again so they’ll be right-side up and let them cool completeley, about 1 1/2 hours, before wrapping in wax paper and plastic wrap to freeze until pretty firm, about 30 minutes.
  7. Make the coconut pastry cream: Heat the coconut milk, sugar, salt and vanilla bean or extract in a medium saucepan over medium heat. In a bowl, whisk together the egg yolks and corn starch. Once the cream is hot, remove the vanilla bean (if used), scraping out any remaining seeds and returning them to the cream. Add 1/2 cup of the hot cream slowly to the yolks, whisking as you add, to temper the eggs so they won’t cook into an omelette in the middle of your pastry cream. That would be a bummer. Then pour the yolk mixture into the pot of hot cream and whisk. Continue to whisk with heat on medium-high for 3 more minutes. The mixture will turn thick and bubble. You need to continue to whisk for the full 3 minutes or the pastry cream will separate once it is cool. After the 3 minutes, whisk in the butter. Add the coconut flakes. Pour into a shallow dish to cool.
  8. Cover with plastic wrap pressed right against the pastry cream. This will prevent a thick skin from forming on the surface. Refrigerate for at least an hour or freeze for 30 minutes. Once it is cold, stir the pastry cream to loosen. Whip the 1/2 cup cream to medium peaks. Stir in 1/3 to the pastry cream to lighten. Fold in the remaining cream until the pastry cream is nice and light. Avoid eating entire bowl of pastry cream with a spoon.
  9. To make coconut syrup: Combine the sugar, water, and coconut water in a small saucepan over medium heat. Bring to a boil, reduce the heat, and simmer until the sugar has dissolved, about 5 minutes, stirring occasionally. Remove the pan from the heat and allow the syrup to cool completely, about 20 minutes.
  10. Make Coconut French buttercream icing: Combine sugar and 1/2 cup water in a small saucepan and bring to a boil over medium-high heat, stirring to dissolve sugar. Boil without stirring until syrup reaches 240° on a digital thermometer, about 5 minutes.
  11. Meanwhile, in a stand mixer with whisk attachment, beat egg whites on medium-high speed until soft peaks form. With mixer on medium speed, gradually pour in hot syrup in a thin stream; avoid pouring syrup on whisk. Increase speed to medium-high and beat until stiff peaks form and mixture is cool, about 8 minutes. Reduce speed to medium and add butter 1 tablespoon at a time, beating after each addition. (If at any time buttercream appears curdled, beat on high until smooth, then reduce speed to medium and continue beating in butter.) Once all butter is added, beat on high speed until buttercream is smooth and fluffy, about 1 minute. Beat in vanilla and coconut extract.
  12. Assemble the cake: Carefully slice each cake layer in half with a long serrated knife. Drizzle a couple tablespoons of coconut syrup over the “inner” side (the one that seems most porous) of each layer. Spread 1/3 of the coconut pastry cream filling onto the first cake layer. Spread it almost to the edge, but pipe a thick bead of buttercream around the very outside edge of each layer to ensure no spillage. Sprinkle with flaked coconut. Repeat with the other layers. Frost the cake with a very thin crumb coat and set it in the freezer to set for about 15 minutes. Bring it out and continue frosting the rest of the cake generously. Carefully push handfuls of fluffy coconut all over the sides of the cake and on top. Keep the cake in the refrigerator, but let sit out for about 30 minutes before slicing and serving so the frosting will be soft.


White Sheet Cake with Fluffy Whipped Icing

“I want to start a blog.”

Those 6 words take me right back to June of 2009, when I snapped a (dark, blurry) photo of some blueberry lemon cheesecake cupcakes with lemon frosting, waxed poetic about them, and hit “Publish” on my very first Willow Bird Baking post. When I hear those words now, part of me wheezes under the weight of the work I know awaits the speaker. Another part of me, though, feels excited about the fun they’re about to have.

Because that speaker will often go on to ask me for advice, I thought of doing a post to sum up my “You’re Starting a Blog!” tips and ideas. It sounds like such an easy task, but actually, I’ve been racking my brain to think of what’s most important to convey.

There’s all the easy advice you’ve heard before: start your blog on WordPress, write about things you care about, write at least one post per week, include photos, use natural light to take those photos, create a social media presence on various websites (Facebook, Twitter, Pinterest, Google+, Instagram) and interact with your friends and readers there to build community. But all of that advice has been given a million times over on a million other blogs. What can I add to this conversation?

If I say that my advice is to be authentic, I know you’re gonna groan. I know you’re going to secretly think of this article that makes fun of giving that advice. (Incidentally, I found that article frustrating in that it took a variegated, organic field and created, facetiously or not, divisions: an “in” and “out” crowd if you will. I think it serves us better to recognize that there are organic trends that ebb and flow and to not be judgy-judgy about other people doing their thang, even “all in fun,” but I digress.) But despite all the lip-service people give to being authentic, I think there’s more to be said about it. And I think I’m the one to say it.

So here goes: the most important piece of advice I can give you is to be authentic.

If you’re finished with your eye rolling (and they’re not stuck), let me elaborate.

1. Define YOU — your values, your goals, your style. To be true to yourself, you have to have a firm idea of yourself. When you blog, you run into ethical dilemmas all the time: whether or not to post about a certain product, whether or not to accept offers from certain companies, whether or not to participate in certain contests. You also run into opportunities to define who you are all the time: from deciding on the content of your posts to choosing the visual design and layout of your blog. Without a clear vision from the beginning, things can get muddy, contradictory, and forgettable to your readers. Or worse: ethical faux pas can be offensive or exploitative.

Awhile back, people made the connection that a blog was a brand you were creating. Your online persona and really your entire blog package was marketing your brand both to readers and companies that might want to work with you. I both hate and love that terminology. I hate it because it reduces this beautiful, passionate extension of my life to a sterile business and also, in my humble opinion, tempts bloggers to become profit-machines, contracting with businesses, pushing products, and viewing their blog primarily as a means of income. There’s nothing wrong with that — but those certainly aren’t the blogs I love to read and it’s certainly not the route I hope you choose with your blog. Call it a personal preference.

I also love that people have realized their blog is a brand, just like I’d love it if people realized they themselves were walking BRANDS: advertising with their words, actions, and values who they are and what they stand for. Realizing this breeds intentionality, and I am nothing if not intentional about things — maybe even to a fault.

So define yourself. Make a list of the values that are important to you. For me, some of my values include honoring God, analyzing and processing in writing the journey He’s sent me on, being adventurous in the kitchen, being honest, and being humble.

Make a list of your goals. Is your goal just to tell your stories? To build traffic and be heard? To create a community? To make money? (It’s possible to do, but make sure it’s not your main goal or you’ll produce another of those spammy blogs with tons of coupons offers, pinnable recipe roundups, and no real voice. Am I being judgy-judgy? I’ll stop.)

Make a list of the words that define you (and your blog) as a “brand.” For me, that includes words like comforting, home, sweet, simple, humble, laughter, realistic, welcoming, loving. And, okay, snarky. ‘Cause I can’t keep the snark at bay. I know; I’ve tried.

2. Be intentional. After you define yourself and your “brand,” make every choice to build that representation of “you” in your online space. Choose the colors that communicate you. Find the voice that communicates you. Take the photos that communicate you. Write about the content that communicates you. Accept the offers that communicate you (and politely decline the ones that don’t.) Interact with your community in a way that communicates you.

Being intentional also includes being deliberate about building that community. Reach out to others — starting with friends and family — to share what you’re doing in a genuine way. Don’t become a salesman and pitch it to them. Be yourself and share it with them. Make connections with other people doing the same thing and support them; you’ll find that they often want to support you, too.

Be intentional about the way you accomplish your goals. I’m betting you didn’t say your goal was to “get a ton of blog traffic no matter WHAT I have to do,” so don’t act like it. Don’t spam people, don’t annoy your Facebook and Twitter friends, don’t become what I call a “climber”: someone who only interacts with others for their personal gain. Don’t sacrifice quality of posts for quantity. Don’t resort to being churning out quick-and-popular posts like an SEO-obsessed robot.

Instead, revel in the fact that “networking” for you can really mean making awesome friends in the blogging community and enjoying relationships with your readers. “Dress for the job you want” by trying to make your work consistent and professional. Print up some business cards to give friends and people you meet. Know how to describe your blog in a sentence or two for folks who are interested. All of these things are positive, intentional steps to get the word out about the great stuff you’re doing without becoming a slave to “success.” Keep sight of your ideals. You can care about growing your readership (slow and steady) and getting your name out there while still honoring your values.

3. Be yourself, but be yourself in the unique ways. There are so many food bloggers. Don’t worry; I still want to read your blog, too! But I do want to know you and not just another Food Blogger (TM). I want to know about your crazy life as a dental hygienist by day, culinary student by night. I want to read about your horrifying experiences as a retail clerk at an unnamed superstore. I want to know about your puppy rescue and the heartwarming lengths you go to to save animals. I want to hear all about how your kid painted herself blue and ate only blue foods at daycare on what they dubbed Smurf Day. I want you to explain how being a Catholic-Jewish Elvis impersonator went for ya.

One thing people love to read on my blog (and I’m glad, because it’s what I love to write!) is stories about teaching. My students are so surprising and smart and hilarious — so those are the unique stories I have to tell. Think about what you have to say. What’s your story?

There’s a lot more I could say, but I really think whatever you do will be lovely as long as you define yourself and then are intentional about being yourself. Just to answer some of the questions you all left on Willow Bird Baking’s Facebook page, though, I got together with the awesome Kaitlin Flannery of Whisk Kid (you’ll love her blog — it’s wonderful!) and recorded a little Food Blogging 101 chat for you. Hope you enjoy!


* * *

One thing I know you’ll enjoy is this white sheet cake. I’d been craving white sheet cake for awhile — one of those light, moist slabs o’ cake that you can pick up at Sam’s Club or Costco or Walmart slathered with white icing. And I don’t mean that crusty, heavy, dyed buttercream you scrape off, but the really light whipped icing. I don’t know what they put in that stuff, but it is all kinds of amazing! I’m always shocked that a store-bought cake can be that good.

After a little internet sleuthing, I made myself one of those satisfying white sheet cakes at home. This sheet cake is a white Texas sheet cake iced with a lovely whipped frosting I found on Cake Central. A hint of almond is what brings the entire recipe together and makes it taste bakery-quality. Since the cake is easy to throw together and comes out huge, it’s perfect for a birthday party! Or, you know, a Tuesday.

Do you have any blogging questions that didn’t get answered? Do you have some advice you’d add for new bloggers?

One year ago: Cheeseburger Bāozi (Steamed Cheeseburger Stuffed Buns)
Two years ago: Carrot Cake Sandwich Cookies with Honey Cardamom Cream Cheese
Three years ago: Ugly as Sin Coconut Cake

White Sheet Cake with Fluffy Whipped Icing


Recipe by: Adapted from recipes found at The Girl Who Ate Everything and Cake Central
Yield: 24 servings

This quick white sheet cake is light and moist with a hint of almond flavor and whipped icing on top. Let the cake sit out for 10-15 minutes before serving so the icing can get nice and soft.

Cake Ingredients:
1 cup butter
1 cup water
2 1/4 cups cake flour
2 cups white sugar
2 eggs, lightly beaten
1/2 cup sour cream
1/2 teaspoon almond extract
1/2 teaspoon vanilla extract
1 teaspoon baking soda
1 teaspoon salt

Frosting Ingredients:
1/2 cup salted butter, room temperature
1/2 cup vegetable shortening, room temperature
3 3/4 cup powdered sugar
1/4 teaspoon salt
1/2 teaspoon almond extract
1/2 teaspoon vanilla extract
3/4 cup heavy whipping cream
1 tablespoon meringue powder

Directions:
To make the cake: Preheat the oven to 375 degrees and grease (I use Wilton’s Cake Release) a 15 x 10 x 1″ baking sheet. In a medium saucepan over medium heat, bring the butter and water to a boil. In the meantime, in a separate large bowl, whisk together the cake flour and sugar before adding the eggs, sour cream, almond extract, vanilla extract, baking soda, and salt. Mix to combine. While mixing, slowly pour in the boiling butter and water mixture. Mix to combine completely. Your batter will be very runny. Pour the batter into the prepared baking sheet.

Bake at 375 degrees for 17-22 minutes or until a toothpick inserted in several places comes out with a few moist crumbs (don’t wait for the top to get golden brown, necessarily — mine stayed pale). Cool completely.

To make the frosting: Cream together the room temperature shortening and butter until fluffy. Cream in the powdered sugar. Add the salt, almond extract, vanilla extract, meringue powder, and whipping cream. Blend on low until just combined, and then beat on high until fluffy. Spread over cooled cake. Add sprinkles. Store in refrigerator, but let sit out for 10-15 minutes before serving so the icing can get nice and soft.

P.S. Here’s another great post on blogging you should read. And another.

Banana Coconut Cream Easter Cupcakes

Easter and I have a checkered past.

When I was a little girl, there were Easter baskets involved, and that seemed pretty awesome. An entire basket of treats and toys surround by that annoying-but-simultaneously-endearing Easter grass? A chocolate bunny bigger than my head that I’d eat about a quarter of before giving up? Plastic Easter eggs my mom had painstakingly filled with candy? Count me in.

Other Easters, though, were fraught with peril. Well, okay, peril might be a little dramatic. Perhaps fraught with inconvenience.

One Easter, for instance, I woke up and immediately realized that I was sick. I was nauseous, feverish, and definitely not interested in holiday cheer. My big plans of jumping out of bed and searching out the nearest stash of candy were dashed.

It was awful; birds were chirping joyfully in the freshly-bloomed Bradford pear trees outside while inside, little Julie was lying, miserable and a tad melodramatic, in the floor.

My parents brought my big Easter basket in and set it in front of me. They apparently thought the effect of this action would be to motivate me towards wellness. However, the piles of candy that should’ve been appetizing to me actually made me want to puke. I languished for hours before I so much as unwrapped a creme egg.

Maybe that Easter wasn’t the easiest one for me to celebrate, and nowadays I don’t even get an Easter basket, but the holiday is actually my favorite time of the year.

Easter is when Christians celebrate the miraculous resurrection of Jesus Christ. He died in our place, taking the punishment for our sins, and the fact that He then rose from the dead is an unspeakable victory that I will try my best to speak: a triumph over the power of death and the power of sin.

I walk around feeling bound a lot of the time. Bound by sadness, bound by financial worry, or bound by indecision; the truth is, what I have in Christ is the ultimate freedom. This holiday reminds me to rejoice, and to give away my worries — to recommit to living a free life for Him.

To celebrate this year, I made these moist banana cupcakes stuffed with my favorite edible substance in the universe, coconut pastry cream, and topped with my other favorite edible substance in the universe, Swiss meringue buttercream. They’re heavenly, dense little bites of Easter JOY.

I decorated the cupcakes with tiny chickie faces and some ginormous, delicious birds’ nests. The recipe below will tell you how to create the former, and keep an eye on Maranda’s blog in the coming days for instructions on how to create the cute nests!

If you want to know more about Christianity, what Jesus did, and what it means for us, please leave me a comment below and let me know that you’d like me to email you.

Banana Coconut Cream Easter Cupcakes


Recipe by: Willow Bird Baking, adapted from multiple sources including Piggly-Wiggly, Gina DePalma, and Zoë Bakes
Yields: about 32 cupcakes

Cupcake Ingredients:
3 cups all-purpose flour
2 tsp baking soda
1/2 tsp salt
2 sticks (8 ounces) unsalted butter at room temp
2 cups sugar
2 tsp pure vanilla extract
2 large eggs, preferably at room temp
~4 very ripe bananas, mashed (about 1.5-1.75 cups)
1 cup sour cream or plain yogurt

Coconut Pastry Cream Ingredients:*
1 can (14 fluid ounces) unsweetened coconut milk
3/4 cup sugar
1 vanilla bean
pinch kosher salt
3 large egg yolks
2 tablespoons corn starch
2 tablespoons unsalted butter
1 cup sweetened coconut flakes
1/2 cup whipping cream

Swiss Meringue Buttercream Ingredients:
1 cup sugar
4 large egg whites , at room temperature
24 tablespoons (3 sticks) unsalted butter, at room temperature
2 teaspoon vanilla extract
yellow food coloring (I used lots. Just add it slowly until you reach desired color)
mini chocolate chips (optional, for decorating chicks)
candy corn (optional, for decorating chicks)

Directions:
Make the Cupcakes: Preheat the oven to 350. Generously butter a mini-bundt cake pan or cupcake pan.

In a medium bowl, whisk the flour, baking soda and salt together. In a separate, large bowl, beat the butter until creamy. Add the sugar and beat at medium speed until pale and fluffy. Beat in the vanilla, then add the eggs, one at a time, beating for about 1 minute after each egg goes in. Reduce the mixer speed to low and mix in the bananas.

Mix in half the dry ingredients (the mixture may look curdled — just keep mixing), followed by all the sour cream and finally, the rest of the flour mixture. Fill each well of your prepared pan about 1/2 to 2/3 of the way full and rap the pan on the counter to remove bubbles from the batter and smooth the top.

Bake for 25 to 30 minutes, or until a toothpick inserted deep into the center of the cakes comes out clean. Transfer the pan to a rack and cool for 10 minutes before unmolding on the rack. Let cool to room temperature before adding cream filling and glaze.

Make the Coconut Pastry Cream: While cakes are baking and cooling, make coconut pastry cream. Heat the coconut milk, sugar, salt and vanilla bean in a medium saucepan over medium heat. In a bowl, whisk together the egg yolks and corn starch. Once the cream is hot, remove the vanilla bean, scraping out any remaining seeds and returning them to the cream. Add 1/2 cup of the hot cream slowly to the yolks, whisking as you add. Then pour the yolk mixture into the pot of hot cream and whisk. Continue to whisk with heat on medium-high for 3 more minutes. The mixture will turn thick and bubble. You need to continue to whisk for the full 3 minutes or the pastry cream will separate once it is cool. After the 3 minutes, whisk in the butter. Add the coconut flakes. Pour into a shallow dish to cool.

Cover with plastic wrap pressed right against the pastry cream. This will prevent a thick skin from forming on the surface. Refrigerate for at least an hour or freeze for 30 minutes. Once it is cold, stir the pastry cream to loosen. Whip the 1/2 cup cream to medium peaks. Stir in 1/3 to the pastry cream to lighten. Fold in the remaining cream until the pastry cream is nice and light.

To make Swiss buttercream icing: Combine sugar and 1/2 cup water in a small saucepan and bring to a boil over medium-high heat, stirring to dissolve sugar. Boil without stirring until syrup reaches 240° on a digital thermometer, about 5 minutes.

Meanwhile, in a stand mixer with whisk attachment, beat egg whites on medium-high speed until soft peaks form. With mixer on medium speed, gradually pour in hot syrup in a thin stream; avoid pouring syrup on whisk. Increase speed to medium-high and beat until stiff peaks form and mixture is cool, about 8 minutes. Reduce speed to medium and add butter 1 tablespoon at a time, beating after each addition. (If at any time buttercream appears curdled, beat on high until smooth, then reduce speed to medium and continue beating in butter.) Once all butter is added, beat on high speed until buttercream is smooth and fluffy, about 1 minute. Beat in vanilla and food coloring.

To assemble the cakes: When cakes are cool, hollow out the center of each mini-bundt cake (use the cone method). Pipe in as much of the coconut pastry cream as will fit and replace the top of the “cone.”

Use an offset spatula or the back of a spoon to smooth a layer of frosting over the top of the cupcake. Use a star tip to pipe a small circle of frosting in the middle of the cupcake (covering any imperfections). Give it two mini chocolate chip eyes and a candy corn beak (note: the color of these will start to run after a few days in the fridge, so if you aren’t serving these right away, you may want to wait to add them. You’ll have to remove the cupcakes from the fridge for a bit to let the frosting soften and then stick them on). Voila!

*NOTE: This recipe actually makes twice as much coconut pastry cream as you need to fill the cakes. I split my pastry cream and made these with half, and filled donuts with the other half. You can also just double the number of banana cakes you make to fill, or find some other creative use for the excess cream. I suppose you could also try halving the coconut pastry cream recipe, but I didn’t want to fiddle with halving three yolks and a can o’ coconut milk.

If you liked this post, please:
Subscribe to Willow Bird Baking
Follow Willow Bird Baking on Twitter
Follow Willow Bird Baking on Facebook
Give this post a thumbs up on StumbleUpon


ShareOther ways to share this post with friends!

Browned Butter Pumpkin Croquemcake with White Chocolate Chai Mousse (Project Food Blog Round 8!)

Because of YOU, Willow Bird Baking is one of only 24 blogs in Project Food Blog Round 8! I am so beyond grateful for your support and love throughout this process. Challenge #8 was to create a baked good using pumpkin. VOTING IS NOW OPEN! (Thank you for voting! Voting is now closed.) I’d love it if you’d pop over to cast a vote for me by clicking “Vote for this Entry” here. Thank you all!!

I am basically an architect. I know some folks who worked through countless hours of pesky schoolwork to call themselves architects and may disagree with me. But I think I have enough experience to go ahead and claim the title.

See, in 6th grade, my classmates and I were divided into teams and charged with a task of monumental proportions. We were to engineer a bridge out of toothpicks, string, and glue. Each of these “resources” was assigned a cost, and we were given a budget of imaginary money with which to purchase supplies. The team whose bridge could hold the most weight at the end of the competition would win epic bragging rights.


Moist, amazing Browned Butter Pumpkin Cake!

We must have been hyped up on marshmallowy breakfast cereal or something, because as soon as the teachers said GO, it was on.

We were ruthless. We pasted, chopped, measured, quarreled, budgeted, collaborated, and in a move that I’m still not sure was entirely legal, pilfered cast-off supplies from the trash can. Hey, we were just being green, right? Nowadays we’d obtain a high L.E.E.D. certification and get a pat on the back. I’m sure my teachers would’ve seen it that way . . .

I remember waxing intellectual about the structural integrity of domes, lecturing a classmate on how strong the ends of an egg were for this reason. Another peer gave an impromptu diatribe on the virtues of suspension bridges. We ended up with some sort of Frankesteinian hybrid, a bridge held up by suspension and bulky domes underneath. We were still furiously glopping on excess glue in hopes of bolstering the bridge’s integrity when the teachers called time.

We watched breathlessly as the teacher judging the competition picked up a thin book and placed it on our bridge. It held. Another volume was snapped up into her fingers and laid gingerly on our opponents’ bridge. It held.

One by one, she stacked books on top of our lopsided, aesthetically wreck-tastic but apparently strong-as-an-ox toothpick bridge. Every book our bridge held was matched by one on our opponent’s bridge — until the teacher picked up two textbooks. Ours held under the weight. Our opponents’ bridge collapsed — and so did we: we collapsed into cheers and giggles, inebriated with victory. We had done it! We were brilliant engineers! We had won!


Pumpkin profiteroles — with pumpkin in the choux dough itself — were filled alternately with White Chocolate Chai Mousse and ganache.

As the crowd thinned, we stood around and stared in wonder at our messy little Golden Gate. My friend Ashley was not yet satisfied. Sure, our bridge was stronger than the other team’s, but just how strong? With her hands on teammates’ shoulders for balance, Ashley stepped — first one foot, and then the other — onto the bridge.

It held.

I’ll never forget that moment standing in front of my elementary school, seeing Ashley’s huge grin, relishing the easy pulse of victory through our already-marshmallow-filled veins. So, yeah, I’m basically an architect. Right?

At least, it was this (misguided?) confidence that led me to believe that I could construct what I’ve officially dubbed the croquemcake.

I wanted to pull out all the stops for Project Food Blog Round 8 (do I say that every round? It’s definitely true every round!) The challenge was to create a baked good using pumpkin, and I was torn between building pumpkin profiteroles (made from pâte à choux) into a lovely croquembouche (mounted cream puff tower) or baking a pumpkin chai cake. Suddenly, it hit me. When in doubt, do both.


I may or may not have tweeted my desire to bathe in luxurious Swiss buttercream.

Thus, the croquemcake was born: a browned butter pumpkin cake filled with a comforting white chocolate chai mousse heart, frosted with velveteen Swiss buttercream frosting, and topped with a croquembouche of pumpkin profiteroles filled with chai mousse and ganache. The cake is served in slices accompanied by a few plucked cream puffs, and is essentially the embodiment of all things autumn.

At first I was panicky about trying to stack a tall, leany thing on top of a tall, frosted thing, but it turned out to be super easy, and it produced a ravishing effect.


The White Chocolate Chai Mousse is incredamazing, y’all. Even if you put off making the whole shebang until Christmas, you should make some bowls o’ mousse ASAP!

. . . oh, and it just might be my new favorite dessert ever. Every bite had an insanely satisfying combination of textures and flavors. This beautiful croquemcake would be the rockstar of any holiday table.

Don’t be scared of the length of the recipe. True to Willow Bird Baking’s mission, this dessert is also surprisingly easy to make. Let me qualify that: it takes three days and has tons of steps, but the steps themselves are simple and manageable. Use my note below on timing to space out the recipe steps into manageable chunks. It is so worth the effort.

What’s your favorite childhood memory?

Browned Butter Pumpkin CroquemCAKE with White Chocolate Chai Mousse


Recipe by: Willow Bird Baking, compiled and adapted from sources including Fine Cooking, Annie’s Eats, America’s Test Kitchen, Cookin’ Canuck, Martha Stewart, Gina DePalma, Alone and Unobserved
Yields: 15-20 servings, depending on your size o’ cake slices. You’ll have the topping croquembouche plus about 30 other cream puffs to serve alongside.

Pumpkin Puree Ingredients: (or use canned pumpkin puree)
about 7 pounds worth of sugar pumpkins (or pie pumpkins)
2-3 cups water

Browned Butter Pumpkin Cake Ingredients:
1 1/2 cups of your pumpkin puree
3/4 cup unsalted butter; more for the pans
2 cups unbleached all-purpose flour; more for the pans
1 1/2 teaspoon baking soda
1 1/2 teaspoon ground cinnamon
1 teaspoon ground ginger
3/4 teaspoon table salt
1/4 teaspoon ground cloves
1 1/2 cups granulated sugar
2/3 cup firmly packed light brown sugar
2 large eggs
1/3 cup buttermilk

White Chocolate Chai Mousse Ingredients: (I had a lot of leftover mousse; you could probably get by with 2/3 of this recipe)
2 1/4 teaspoons powdered gelatin
3 tablespoons water
18 ounces white chocolate chips (see note)
4 1/2 cups cold heavy cream
heaping 1/2 teaspoon ground cinnamon
heaping 1/2 teaspoon ground cardamom
1/4 teaspoon ground nutmeg
1/4 teaspoon ground ginger
1/4 teaspoon ground allspice
1/4 teaspoon ground pepper (white or black)
dash cayenne powder

Swiss Buttercream Frosting Ingredients:
1 cup sugar
4 large egg whites , at room temperature
24 tablespoons (3 sticks) unsalted butter, at room temperature
2 teaspoon vanilla extract

Profiterole (Cream Puff) Ingredients:
1 1/8 cups water
9 tablespoons unsalted butter
3/8 teaspoons salt
1.5 tablespoons sugar
1.5 cups all-purpose flour
6 large eggs
3/4 cup pumpkin puree
Egg wash (1 egg yolk and 1/2 cup heavy cream, lightly beaten)

Ganache Ingredients:
10 ounces bittersweet and semisweet chocolate chips
3/4 cup heavy whipping cream


Directions:
Note on timing: This dessert is easy to create, but involves many steps. For this reason, I divided the work over three days. On day 1, I roasted and pureed my pumpkins (you can nix this day if you use canned pumpkin). On day 2, I baked my cake and froze it, baked my profiteroles and froze them, and made my chai mousse. I also piped out white chocolate snowflake decorations to dry overnight. On day 3, I made my frosting, assembled and frosted my cake, made ganache, filled my profiteroles, and constructed my croquembouche.

To make pumpkin puree: Preheat oven to 350 degrees F. Cut the tops off of above 7 pounds worth of sugar pumpkins (also called pie pumpkins). Cut the pumpkins in half and scrape out the seeds and innards. Place the pumpkin halves peel-up, cut-side-down in a baking dish and fill the dish 1/4 inch deep with water (about 2-3 cups). Roast pumpkins for 60-90 minutes, or until flesh is fork tender. Allow them to cool for a bit before scooping all flesh out of the peel and placing it in a food processor. Puree for 2-3 minutes until completely pureed, then drain in a paper towel-lined colander for about an hour. Store your pumpkin puree in the fridge for up to 5 days or freeze it in 1-cup increments for later use. Alternatively, you can use canned pumpkin puree for this recipe.

To make browned butter pumpkin cake: I baked my cake in a pan that allows you to fill your cake with a heart-shaped tunnel of mousse (please comment if you’d like the details). If you don’t have one of these pans, you can still create the tunnel effect! You can use this technique by the fabulous Amanda, or this tunnel technique featured previously on my blog.

Preheat oven to 350 degrees F. Butter and flour two cake pans (either the heart-tunnel pan or regular 9-inch cake pans) very thoroughly. Melt the butter in a saucepan over medium heat and cook it, swirling occasionally, until it’s golden brown with a nutty aroma, around 4 minutes. Remove it from heat and pour it into a bowl to cool for about 15 minutes.
Whisk or sift together flour, baking soda, cinnamon, ginger, salt, and cloves in a small bowl. In a separate, large bowl, whisk together 1 1/2 cups of pumpkin puree, granulated sugar, brown sugar, eggs, and buttermilk until well combined. Use a spatula to stir in the dry ingredients until just combined, and then whisk in the browned butter. Pour batter evenly into prepared cake pans.

Bake the cakes until a toothpick inserted in the center comes out with just a few moist crumbs, around 28 minutes. Let cakes cool in their pans until mostly cool before turning them out onto wax paper to wrap and freeze. Freeze at least 30 minutes or until firm.

To make white chocolate chai mousse: Mix spices (cinnamon, cardamom, nutmeg, allspice, ginger, pepper, cayenne) together in a small bowl. Set aside.
Place 3 tablespoons of water in a small bowl and sprinkle the gelatin over top to dissolve and soften for at least 5 minutes. Place white chocolate in a medium bowl. Combine 1 1/2 cups of cream and spice mixture in a saucepan over medium heat and cook until simmering. Remove from heat, add gelatin, and stir to dissolve. Pour gelatin mixture over white chocolate and whisk in small circles until smooth. Cool completely to room temperature, stirring occasionally, around 5 to 8 minutes.

In a separate bowl, beat remaining cream to soft peaks. Use a whisk to fold about 1/3 of the whipped cream into white chocolate mixture to lighten. Then fold the rest of the whipped cream in until no streaks remain. Refrigerate your mousse until set, then stir slightly to break up before using.

To make profiteroles: Combine water, butter, salt and sugar in a saucepan over medium heat. Bring to a boil and stir occasionally. At boil, remove from heat and sift in the flour, stirring to combine completely.

Return to heat and cook, stirring constantly until the batter dries slightly and begins to pull away from the sides of the pan. Transfer to a bowl and stir with a wooden spoon 1 minute to cool slightly.

Add 1 egg. The batter will appear loose and shiny. As you stir, the batter will become dry-looking like lightly buttered mashed potatoes. It is at this point that you will add in the next egg. Repeat until you have incorporated all the eggs. Stir in pumpkin puree.

Pipe the batter using a pastry bag and a plain tip. Pipe choux about 1 inch-part in the baking sheets. Choux should be about 1 inch high about 1 inch wide. Using a clean finger dipped in hot water, gently press down on any tips that have formed on the top of choux when piping. You want them to retain their ball shape, but be smoothly curved on top. Brush tops with egg wash while trying not to drip the wash down the puffs onto the pan (which could somewhat inhibit rise).

Bake the choux at 425 degrees F until well-puffed and turning lightly golden in color, about 10 minutes. Lower the temperature to 350 degrees F and continue baking until well-colored and dry, about 20 minutes more. Remove to a rack and cool (tip from a pro: poke each puff with a toothpick while cooling to release the steam inside. It shouldn’t cause your cream to leak, but will help the puffs stay crisp). Can be stored in a airtight box overnight, but I recommend, if you aren’t using them right away to create your croquembouche, that you freeze them. When you’re ready to use them, bake them at 350 degrees F for 5-6 minutes to refresh and recrisp them.

To make ganache: Bring the cream to a simmer in a medium saucepan (or just stick it in the microwave for 2 minutes in a microwave-safe bowl). Place the chocolate in a medium bowl. Once the cream reaches a simmer, pour the cream over the chocolate and let stand 1-2 minutes. Whisk in small circles until a smooth ganache has formed. Let ganache stand at room temperature until fully cooled, then whip to frosting-like consistency for piping into cooled profiteroles.

To make Swiss buttercream frosting: Combine sugar and 1/2 cup water in a small saucepan and bring to a boil over medium-high heat, stirring to dissolve sugar. Boil without stirring until syrup reaches 240° on a digital thermometer, about 5 minutes.

Meanwhile, in a stand mixer with whisk attachment, beat egg whites on medium-high speed until soft peaks form. With mixer on medium speed, gradually pour in hot syrup in a thin stream; avoid pouring syrup on whisk. Increase speed to medium-high and beat until stiff peaks form and mixture is cool, about 8 minutes. Reduce speed to medium and add butter 1 tablespoon at a time, beating after each addition. (If at any time buttercream appears curdled, beat on high until smooth, then reduce speed to medium and continue beating in butter.) Once all butter is added, beat on high speed until buttercream is smooth and fluffy, about 1 minute. Beat in vanilla extract.

To assemble your cake: Line up cake layers and trim sides as needed with a long serrated knife. No need to thaw before you do this — it’s actually easier with frozen layers. Spoon white chocolate chai mousse into heart-shaped wells in your cake layers (if applicable — or spoon it into whatever shaped cavity you’re using). Carefully position the top layer on the bottom. Apply a thin coating of frosting all over as a “crumb coat” and refrigerate the cake for a half hour or so. Then frost the cake generously with the remaining frosting.

To assemble your croquembouche: Fill cooled profiteroles with leftover chai mousse and ganache as desired. Melt white chocolate bark and dip tops of each profiterole into the chocolate, lining up on wax paper to dry. Cover a plate with wax paper — this is where you’ll build your croquembouche. Start with bigger, broader profiteroles and use the white chocolate as “glue” to piece together a sturdy base. I refrigerate my croquembouche after the construction of each new layer, to harden the chocolate and avoid any toppling incidents! Continue building a cone, fitting the profiteroles together according to their shape. Use white chocolate to pipe snowflakes on wax paper, and to “glue” them onto your croquembouche once they’re dry. Refrigerate your croquembouche until you’re ready to assemble your final product.

To assemble your final croquemCAKE: Carefully ensure that your croquembouche isn’t sticking to your wax paper. Gently lift it onto the center of your cake. Surround your cake with leftover cream puffs for serving. Enjoy!


Roasting pumpkins! While there’s not a huge taste difference from using this process versus the canned stuff, it’s a fun, satisfying thing to try!

If you liked this post, please:
Subscribe to Willow Bird Baking
Follow Willow Bird Baking on Twitter
Follow Willow Bird Baking on Facebook
Give this post a thumbs up on StumbleUpon


ShareOther ways to share this post with friends!

Lemon Triumph Cake

The looming summertime has given me the perfect excuse to indulge my love of lemons. Oh! Lemons! The pungent aroma of lemon juice on my fingers from a fresh squeeze! The bright yellow, spoked discs dripping with juice! The tang! The sweetness!

I was thrilled when my mom was pondering what sort of cake she wanted for her birthday and mentioned lemon. She made a fantastic lemon and lemon cream jellyroll cake awhile back from a cake mix and thought she might like something similar. I put on my Dr. Frankenstein hat and began piecing recipes together to oblige.

My first dilemma was how to make a cake from scratch that tasted like a cake mix cake. I always get a kick out of foodies who disdain the taste of cake mix. Being an avid baker, I have news for those folks: many of us are constantly trying to attain a cake-mix-like level of moistness and buttery flavor. There are definitely downsides to cake mix (preservatives and the fact that you don’t get all the fun of baking from scratch, of course!) but in terms of taste . . . yeah, they’re pretty good at that.

So how to make a delicious, preservative-free yella cake that was just as moist and scrummy as a cake mix? While considering this conundrum, I happened to see this recipe for a homemade cake mix and decided to give it a try. It smelled buttery and magnificent while mixing it up, just as it was supposed to, and baked into a lovely lemon cake with a bit of additional flavoring.

Now about that lemon cream. I decided I wanted to do a lemon mousse instead, and had my heart set on a big ol’ fancy mousse layer cake. I was going to buy a cake ring and build the cake with two cake layers sandwiching a thick layer of mousse. Only problem? Well, that first part . . . the part about the cake ring. You let me know if you find one, but after visiting three stores, I’ve come to the conclusion that there aren’t any cake rings in Charlotte. Lame.


And again, with candles!

Well, kind of lame, but kind of awesome, because it gave me an excuse to buy this Wilton Heart Tasty-Fill Pan I’ve had my eye on for months (Note to calm your fears: I always mention if I’ve been asked to review a product or have received something for free to review, but that’s not the case here. Wilton, y’all are welcome to send me free pans and all, but I bought this pan with my own hard-earned money and decided to share it without being asked). I am so excited about this pan! All the filling possibilities! I’m already pondering: banana cake with caramel cream filling, chocolate cake with caramel cream filling, yellow cake with chocolate mousse filling . . . but I digress! Back to the Lemon Triumph Cake at hand.

I did love the Wilton pan, but I think it’ll take a bit of practice to get used to. As you can see in some of the pictures, the heart wasn’t aligned correctly on one side of the pan. This has to do with me forgetting to trim the sides of the cake so that the top and bottom were even. I feel like it might be a bit difficult to get it lined up straight, though, and it’s hard to know until you cut into it . . . at which point (after 8 hours of baking, in the case of this cake) you don’t really want to know if something’s wrong. I’ll let you know next time I use it (which will hopefully be soon!) if it’s easier to align, having had a bit of practice.


Crooked heart this time around!

If you don’t have the Tasty-Fill Heart Pan, don’t worry! You can make this as a regular mousse cake using a cake ring per my original plan. Just layer a 9-inch cake on the bottom and a thick layer of mousse on top of that. Chill until the mousse is firm and place another 9-inch layer of cake on top. Chill again before frosting, taking care around the mousse layer not to mix the frosting and mousse. Alternatively, if your city also has no cake rings, serve this as a regular two-layer lemon cake with the mousse on the side.


Better <3 on this side of the cake.

Nevertheless, crooked hearts notwithstanding, this cake was worth the effort. The yellow cake drenched in lemon syrup was moist and buttery, just like I hoped. This method of making Swiss buttercream produces hands-down the fluffiest, smoothest, silkiest, tastiest frosting I’ve ever had the pleasure of licking off my spatula. And the lemon mousse was, well, a triumph! Lemon curd folded into mousse that sets up like a bright, creamy-tangy cloud in the middle of the cake. Close your eyes and imagine a satisfying summer day — birdsong, sprinklers, green grass, sunshine, lemonade, lounge chair, long naps and good books — with a little sophistication mixed in. That’s what this cake tastes like. If that doesn’t make you want a slice, I don’t know what will!

Lemon Triumph Cake


Recipe by: Willow Bird Baking, compiled from Fine Cooking (lemon curd), Giada DiLaurentis (lemon syrup, adapted), Gina DePalma (Swiss buttercream, adapted), Bon Appétit (lemon mousse), My Kitchen Cafe (homemade cake mix)
Yields: one 9-inch, two layer cake

Yellow “Cake Mix” Cake Ingredients:
2 cups granulated sugar
1 1/2 cups all-purpose flour
1 1/2 cups cake flour
1/2 cup nonfat dry milk powder
1 tablespoon baking powder
1 teaspoon salt
16 tablespoons butter (2 sticks), cut into 1/2-inch pieces and chilled
1 tablespoon vanilla extract
1 tablespoons lightly packed finely grated lemon zest
1-2 teaspoons lemon extract
strands of lemon peel for garnish

Lemon Curd Ingredients:
6 tablespoons unsalted butter, softened at room temperature
1 cups sugar
2 large eggs
2 large egg yolks
2/3 cup fresh lemon juice
1 teaspoon grated lemon zest

Lemon Mousse Ingredients:
1 recipe lemon curd (above)
2.5 tablespoons water
2 teaspoons unflavored gelatin
3 large egg whites
3/8 cup sugar
3/4 cups chilled heavy whipping cream

Lemon Syrup Ingredients:
1/2 cup sugar
1/8 cup water
1/8 cup lemon juice

Lemon Swiss Buttercream Ingredients:
1 cup sugar
4 large egg whites , at room temperature
24 tablespoons (3 sticks) unsalted butter, at room temperature
2 teaspoon vanilla extract
1 teaspoon lemon extract

Directions:
Note on scheduling: I might schedule this cake baking in the following way. Make lemon curd and refrigerate two days in advance. Bake cake and coat with lemon syrup one day in advance, wrapping carefully and freezing. On day of serving, make mousse, trim and fill cake (much easier with frozen layers!), make frosting, and assemble.

To make lemon curd: In a large bowl, beat the butter and sugar with an electric mixer, about 2 min. Slowly add the eggs and yolks. Beat for 1 min. Mix in the lemon juice. The mixture will look curdled, but it will smooth out as it cooks.

In a medium, heavy-based saucepan, cook the mixture over low heat until it looks smooth. (The curdled appearance disappears as the butter in the mixture melts.) Increase the heat to medium and cook, stirring constantly, until the mixture thickens, about 15 min. It should leave a path on the back of a spoon and will read 170°F on a thermometer. Don’t let the mixture boil.

Remove the curd from the heat; stir in the lemon zest. Transfer the curd to a bowl. Press plastic wrap on the surface of the lemon curd to keep a skin from forming and chill the curd in the refrigerator. The curd will thicken further as it cools. Covered tightly, it will keep in the refrigerator for a week and in the freezer for 2 months.

To make cake: Process sugar, flours, milk powder, baking powder, and salt in a food processor for 15 seconds to combine. Add butter and vanilla and pulse until the mixture resembles coarse meal (you want this much finer than, say, a pie crust). Freeze the dry mixture in a zipper-lock bag for up to 2 months or use immediately.

To make the cake, adjust an oven rack to the middle position and preheat the oven to 350 degrees. Grease and flour two 9-inch cake pans (the Tasty-Fill pans, if you’re using those).

With an electric mixer, beat the prepared cake mix, 1 1/4 cups warm water and 2 large room-temperature eggs until the mixture is smooth, about 2 minutes. Scrape the batter into the prepared cake pans and bake until a toothpick inserted in the center comes out clean, about 25-27 minutes for two 9-inch layer cakes. Cool the cakes in pans for 10 minutes, then turn them out onto a wire rack. Poke holes in them and spoon lemon syrup over generously. Cool for about 30 more minutes before placing cake layers in freezer for at least 30 minutes. This helps a ton with trimming, filling, and decorating!

To make lemon syrup: In a small saucepan, combine the sugar, water, and lemon juice over medium heat. Bring to a boil, reduce the heat, and simmer until the sugar has dissolved, about 5 minutes, stirring occasionally, Remove the pan from the heat and allow the syrup to cool, about 20 minutes.

To make the mousse: Pour 2.5 tablespoons water into small saucepan. Sprinkle gelatin evenly over. Let stand until gelatin softens, about 15 minutes. Meanwhile, place 7/8 cups lemon curd in large bowl. Stir 3/8 cup curd in another small saucepan over medium-low heat until very warm.

Stir gelatin mixture over medium-low heat until dissolved and liquid is clear (do not boil). Whisk warm gelatin mixture into 3/8 cup warm curd. Gradually whisk gelatin-curd mixture into curd in large bowl. Using electric mixer, beat egg whites in medium bowl until soft peaks form. Gradually add sugar, beating until whites are thick and glossy. Fold whites into curd mixture in 3 additions. Using same beaters, beat cream in another medium bowl until peaks form. Fold into egg white-curd mixture in 3 additions.

To make lemon Swiss buttercream icing: Combine sugar and 1/2 cup water in a small saucepan and bring to a boil over medium-high heat, stirring to dissolve sugar. Boil without stirring until syrup reaches 240° on a digital thermometer, about 5 minutes.

Meanwhile, in a stand mixer with whisk attachment, beat egg whites on medium-high speed until soft peaks form. With mixer on medium speed, gradually pour in hot syrup in a thin stream; avoid pouring syrup on whisk. Increase speed to medium-high and beat until stiff peaks form and mixture is cool, about 8 minutes. Reduce speed to medium and add butter 1 tablespoon at a time, beating after each addition. (If at any time buttercream appears curdled, beat on high until smooth, then reduce speed to medium and continue beating in butter.) Once all butter is added, beat on high speed until buttercream is smooth and fluffy, about 1 minute. Beat in vanilla and lemon extract.

To assemble the cake: Level the layers using a long serrated knife. If using a Tasty-Fill Heart Pan, align heart and then trim sides of cake to make them even. Fill both sides of the heart with mousse, leveling it off using a spatula (see instructions in the note below for making this a regular mousse cake).* Place the top layer on the bottom layer, aligning the heart. Cover cake with a thin coat of icing as a crumb coat and chill until the icing is set, 20 minutes or so. Frost cake and decorate with slices of lemon peel. Store, covered, in refrigerator. Set out about 10 minutes before serving to soften the icing.

*NOTE: Make this as a regular mousse cake by using a cake ring. Layer a 9-inch cake on the bottom and a thick layer of mousse on top of that. Chill until the mousse is firm and place another 9-inch layer of cake on top. Chill again before frosting, taking care around the mousse layer not to mix the frosting and mousse. Alternatively, serve this as a regular two-layer lemon cake with the mousse on the side.


Share Share this post with friends!

1 2 3