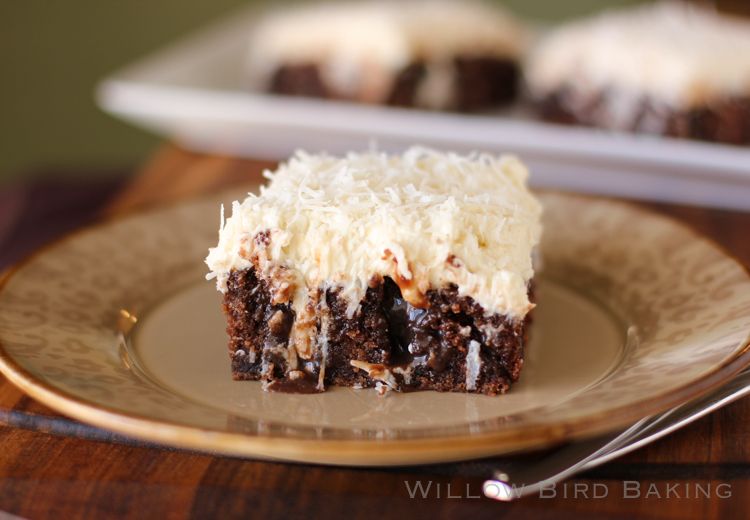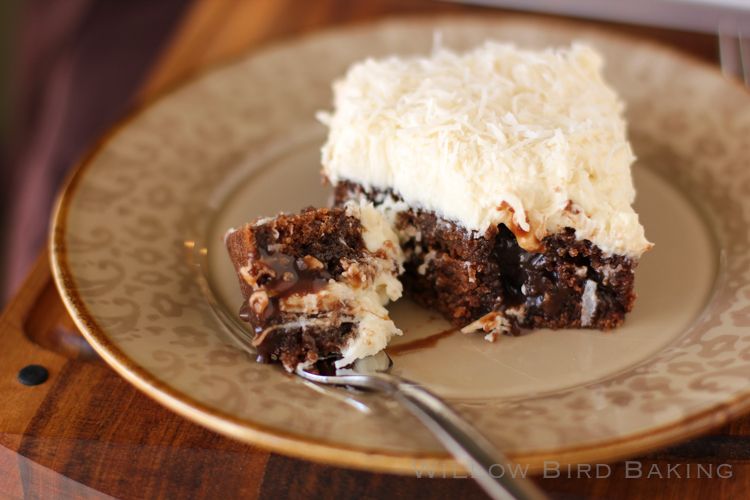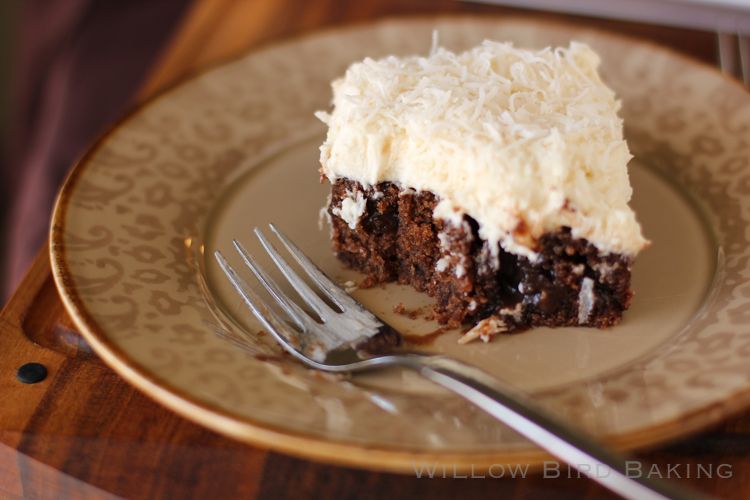
Chocolate Poke Cake with Whipped Coconut Icing
Cooking is very enjoyable to me, obviously, but when I started out, it felt like I was all thumbs in the kitchen. Recipes took hours longer than they seemed to take other people and I always ended up with a huge mess. So I completely understand why some people hate to cook – or want to like to cook but get turned off quickly.
Periodically I share insights for making cooking more enjoyable, and I thought I’d do that today. Cooking for my tiny family (just me and Mike) has seemed exponentially harder than cooking for just myself, but I’ve found some tips that make it satisfying and manageable.

Prep your kitchen in general:
1. Rearrange your kitchen. This is killing me right now, because my new apartment’s kitchen layout is cramped and not working for us! But I know what we need to do because I’ve done it in many apartment kitchens before this one. One weekend, rearrange your stuff! Put the items you use most in the front of your cabinets without any stacking. The items you use least can be stacked in the back or even in a storage closet. Clean out your fridge and freezer. Try to keep counters clear by hanging up pans, buying a utensil jar, and putting away infrequently used appliances. Create extra workspace with an over-the-sink cutting board or a portable island. If money permits, visit the store and get the shelving, cabinet and drawer organizers, and caddies that you need to make your space really functional for the recipes you want to start making.
The goal here is simple: it should feel fun and relatively easy to use the space in your kitchen. I’ve found places like Ikea and The Container Store help me to “think outside the box” when it comes to arranging my (limited!) space.

When you’re ready to cook:
2. Start with clear counters and a relatively empty dishwasher. It takes a couple of minutes to clear your counters, wipe them down, and empty the dishwasher before cooking, and you may be anxious to just dive in to your recipe. I understand that. But I also understand how discouraging it can be to realize your sink is filled to the brim and there’s nowhere to set your hot tray of cookies midway through your process.
Starting with clear counters means you have lots of tidy workspace. Starting with an empty dishwasher means that as you use each dish, you can toss it in. By the end of your recipe, your dish duty (and your blood pressure) will be manageable. It feels better to work when you have space to do it in.
3. Ferme your bouche and mise your place! (Apologies to France.) “Mise-en-place” is something I’ve harped on before. It’s a French phrase that just means prepping your ingredients and equipment before beginning to cook. Again, you may be excited to dive into cooking. Measuring out all your ingredients into prep bowls and getting out your pans may feel like an unnecessary hassle, but I bet you’ll be surprised at how easy-breezy cooking becomes when you do it!
First, mise-en-place requires you to read the full recipe before you begin, which has saved me many a time from getting halfway through a recipe and realizing I’m out of eggs. Reading the entire recipe also allows me space to visualize each step.
Secondly, mise-en-place separates cooking into two parts: the cathartic, mindless “idiot work” of chopping, measuring, prepping — and the action! This means I can relax through the prep and then confidently tackle the action because I know everything I need is right at hand. There’s never the stressful, rushed confusion that turns so many people off of cooking. Plenty of recipes would’ve burned if I hadn’t had my mise-en-place prepared. So invest in a set of prep bowls (I like ones like this) and give it a try.
4. The journey is the destination. Don’t make getting the product on the table your ultimate goal, if you can help it. Shoot for making the process peaceful and satisfying instead. Pour a glass of wine (or for me, Coke Zero), put on some music you love, tug on your favorite Kiss the Cook! apron, and enjoy yourself. Try to detach yourself from time pressures and the worries of your day. Be mindful about each thing you do — feel the food you’re working with, listen to the sound of the chopping and sizzling, smell the garlic or cinnamon (hopefully not both at once. Don’t get crazy.) The food will be a treat for someone else later — but for now, let the process be a treat for you.
* * * 
Over and over again, I’ve said, “I know you want to dive in, but wait!” Well finally, at the very end of this post, here’s one thing you can just dive into: a piece of this amazing cake! It’s absolutely incredible, y’all. Rich, moist Texas Sheet Cake gets aerated and doused with chocolate glaze before being topped with the fluffiest, most surprising coconut whipped icing you’ve ever tried! This whipped icing, especially, is a new treasure for me, and you can bet I’m going to be slathering it on everything.
This cake is also great because it’s special but perfect for a beginning cook. The recipe has several steps, but each one is very manageable. It’s the perfect time to try out the techniques listed above! And you’ll be so richly rewarded.
One year ago: “Magic” Chocolate, Coconut, and Pecan Pastry Braid
Two years ago: One-Skillet Gooey Pumpkin Cookie Cake
Three years ago: Homemade Hot Chocolate & Marshmallows
Four years ago: French Macarons
Chocolate Poke Cake with Whipped Coconut Icing
Recipe by: Willow Bird Baking with icing adapted from Missy Dew on Tasty Kitchen
Yield: 9 servings
Simply: one of the best cakes ever. A Texas Sheet Cake doused with chocolate glaze and topped with fluffy whipped coconut icing. You won’t believe the taste.
Cake Ingredients:
1 cup flour
1/2 teaspoon baking soda
1 cup sugar
dash salt
1/4 cup (1/2 stick) butter
1/4 cup vegetable oil
2 tablespoons cocoa powder
1/2 cup water
1/4 cup buttermilk
1 egg
1/2 teaspoon vanilla
Sauce Ingredients:
2 tablespoons butter
1 tablespoon cocoa
3 tablespoons milk
1 cup powdered sugar
1/4 teaspoon vanilla
Whipped Coconut Icing Ingredients:
1 cup milk
5 tablespoons flour
1 1/4 cups granulated sugar (not powdered sugar)
2 teaspoons vanilla extract
1 cup butter, at room temperature
1/2 cup coconut plus more for topping
Directions:
Preheat the oven to 350 degrees F. Line a 9-inch square baking pan with a parchment paper sling (I cut two 9-inch wide sheets that are longer than the pan so they’ll hang over the edges a bit, making it easy to pull the cake out later. I then lay them in the pan, one horizontal and the other vertical). Spray the parchment paper with cooking spray. In a large bowl, whisk flour, baking soda, sugar, and salt together and set aside.
In a small saucepan, bring the butter, vegetable oil, cocoa powder, and water to a boil over medium-high heat. Remove it from the heat and whisk in into the dry ingredients well. Mix in the buttermilk, egg, and vanilla. Pour into your prepared baking pan and bake at 350 degrees F for about 15-20 minutes or until a toothpick comes out with just a few moist crumbs.
Poke holes in the cake with the back of a wooden spoon. While the cake starts to cool, make the sauce. In a medium saucepan, bring the butter, cocoa, and milk to a boil. Remove them from the heat and add the icing sugar and vanilla. Stir to combine. Pour over the warm cake and let it sit to soak up the chocolate sauce and cool completely.
To make the frosting, heat the milk, flour, and granulated sugar together over medium heat, whisking constantly. Once it starts to boil, continue whisking and heating it for around 7 minutes or until it’s very thick, like cake batter consistency. Remove the mixture from the heat and add the vanilla extract. Remove the mixture to a shallow pan and let the mixture cool completely (after a bit, I stuck mine in the fridge to hurry it along). Once the mixture is cool, beat the butter in the bowl of a stand mixer until soft and fluffy. Add the completely cooled mixture and beat on high until you have fluffy frosting the consistency of stiff whipped cream. Mix in the coconut. Frost your completely cooled cake with a thick layer. Sprinkle more coconut on top.
30 Comments on Chocolate Poke Cake with Whipped Coconut Icing
2Pingbacks & Trackbacks on Chocolate Poke Cake with Whipped Coconut Icing
-
[…] chocolate poke cake with whipped coconut icing. probably made me […]
-
[…] Chocolate Poke Cake with Whipped Coconut Icing […]

Jess
October 28, 2013 at 3:45 pm (12 years ago)This looks amazing!
Amanda @ Once Upon a Recipe
October 28, 2013 at 4:30 pm (12 years ago)These are great suggestions for new and old cooks!I really need to work more on my mise en place – I often jump into a recipe headfirst and then end up scrambling throughout. And this cake – divine!
Elizabeth @ Confessions of a Baking Queen
October 28, 2013 at 5:14 pm (12 years ago)Great tips- starting with clean countertops and a clean sink/dishwasher is defo a number one thing to do! Dirty dishes can easily take over and make a disaster!! This poke cake looks great!
Jennifer | Bake or Break
October 28, 2013 at 9:49 pm (12 years ago)This looks incredible, Julie! I love, love, love coconut, and this frosting might be life-changing.
A_Boleyn
October 28, 2013 at 10:28 pm (12 years ago)I’ve heard of this cooked 7 minute frosting before and one day I’ll give it a try. Even though I’m quite adventurous about a lot of desserts, cakes are still something I hesitate in diving in to. I’m more likely to do cupcake versions of cake but sometimes, cupcakes just don’t ‘cut it’. 🙂 The combination of chocolate and coconut, of course, sounds like a great one.
Julie Ruble
October 28, 2013 at 10:32 pm (12 years ago)You’d be an excellent cake baker!! BTW, this one isn’t 7-minute frosting, although it is cooked. In 7-minute frosting, you cook egg whites and sugar together. This one’s almost a thickened milk frosting! It’s the weirdest thing, but SO fantastic. I think it’d be good on cupcakes, too!
Coco in the Kitchen
October 29, 2013 at 12:34 am (12 years ago)I sure wish I had a slice of this right now….
Dina
October 31, 2013 at 2:17 pm (12 years ago)it looks delish!
Barbara | Creative Culinary
November 1, 2013 at 2:21 pm (12 years ago)My daughter lives in a condo and has a galley kitchen. We recently did a mini kitchen makeover to free up some counter space and it was amazing what a few simple changes made. Our favorite? We created a spice rack on the one empty bit of wall space above her sink; some plain metal pieces were attached to the wall and then we put all of her spices into spice containers with magnetic bottoms and clear tops. She can see all of them right in front of her and it opened up a ton of cabinet space as well. Clutter was her demon; keeping your space free of clutter makes for a much more enjoyable working environment…so I’m onboard with your tips!
We’ve helped several of her friends do something similar so thought I would share this project. Simple IKEA metal frames and Container Store spice jars. She loves it!
http://www.creative-culinary.com/wp-content/uploads/after-sink-faucet-spices.jpg
LOVE this cake…seriously have to make it soon. I might have to add booze. 🙂
vanillasugarblog
November 1, 2013 at 8:39 pm (12 years ago)That frosting!
I am such a coconut-junkie!
This paired with an ice cold glass of milk–oh I would be in heaven.
Avanika {Yumsilicious Bakes}
November 2, 2013 at 12:46 am (12 years ago)This looks delicious, and I LOVE flour frosting. So light and airy!
Jenny @ BAKE
November 8, 2013 at 9:00 am (12 years ago)I think that I’d forgotten some of the joy of cooking in the busy-ness of life, I loved your point about pouring a drink and enjoying the process. I’m going to make time this weekend to do just that. This cake looks incredible too.
Mallory @ Because I Like Chocolate
November 8, 2013 at 9:48 pm (12 years ago)It’s like a chocolate version of sticky toffee pudding! You know I’m in!
Coty and Mariah@quirksandtwists
November 10, 2013 at 8:16 pm (12 years ago)Poke cakes are the best! The icing on this looks too good to be true!
Angela
November 10, 2013 at 8:59 pm (12 years ago)This looks delicious, def. getting added to my dessert “to make” list! thanks for sharing 🙂 http://www.handmadeintheheartland.com
Haley @ The Girly Girl Cooks
November 13, 2013 at 6:13 pm (12 years ago)Wow! This cake is the combination of everything I love….chocolate cake and coconut! This will definitely be loved by everyone in my family 🙂
Tiffany
November 13, 2013 at 7:32 pm (12 years ago)Looks delicious! Do you store the cake on counter at room temp after it’s frosted?
Julie Ruble
November 13, 2013 at 8:43 pm (12 years ago)I stuck mine in the fridge, just in case. But I do let it sit out for 25 minutes or so before eating so the frosting will be soft 🙂
Sam Ponce
November 15, 2013 at 8:51 am (12 years ago)This recipe sounds amazing and your tips are fantastic; I always start baking with a clean kitchen but I never prep… Gonna start though! I’ve got one question: when you poke the cooked cake with your wooden spoon, do you go all the way through the cake or just about half-way? I don’t mind repeating recipes to get them right, but thought I’d ask about this step! Thanks so much for sharing!
Julie Ruble
November 15, 2013 at 8:55 am (12 years ago)Thanks, Sam! I was pretty indiscriminate about my poking, but I’d say I went about 3/4 of the way through the cake — almost all the way down but not quite. Hope that helps 🙂 You’re gonna love the cake!
Kathy
November 18, 2013 at 5:58 pm (12 years ago)Oh My Goodness!!! My husband and I just cut this cake and it is divine. Thanks so much for sharing the recipe.
Julie Ruble
November 18, 2013 at 6:13 pm (12 years ago)Yay! I’m so glad to hear that, Kathy!!
Suzanne S
November 19, 2013 at 10:03 pm (12 years ago)I made this recipe for a girls get together and it was divine! Everyone loved it. I also shared my thoughts on it and one of your pictures on my blog with a link back here. Thanks for all of the great recipes!
Julie Ruble
December 19, 2013 at 8:39 pm (12 years ago)Thank you, Suzanne! I’m so glad you enjoyed it!
Ali R
April 20, 2014 at 3:23 pm (12 years ago)In the sauce ingredients when you say 1 tbs of cocoa, are you talking about powder cocoa?
Julie Ruble
April 20, 2014 at 6:24 pm (12 years ago)Yes, cocoa powder.
T
February 24, 2017 at 10:34 am (9 years ago)When I made the chocolate sauce, it seized when I put the powdered sugar in! What did I do wrong? Did I add the sugar too quickly?
Thanks!
Julie Ruble
February 24, 2017 at 2:24 pm (9 years ago)Hi T! Sorry that happened! You can potentially thin it out by heating it with a little more milk. It might be that the sugar all at once made it too thick? I’d say try gradually next time, and feel free to adjust the ratios of milk and sugar to make it sweet enough AND thin enough. Hope that helps!