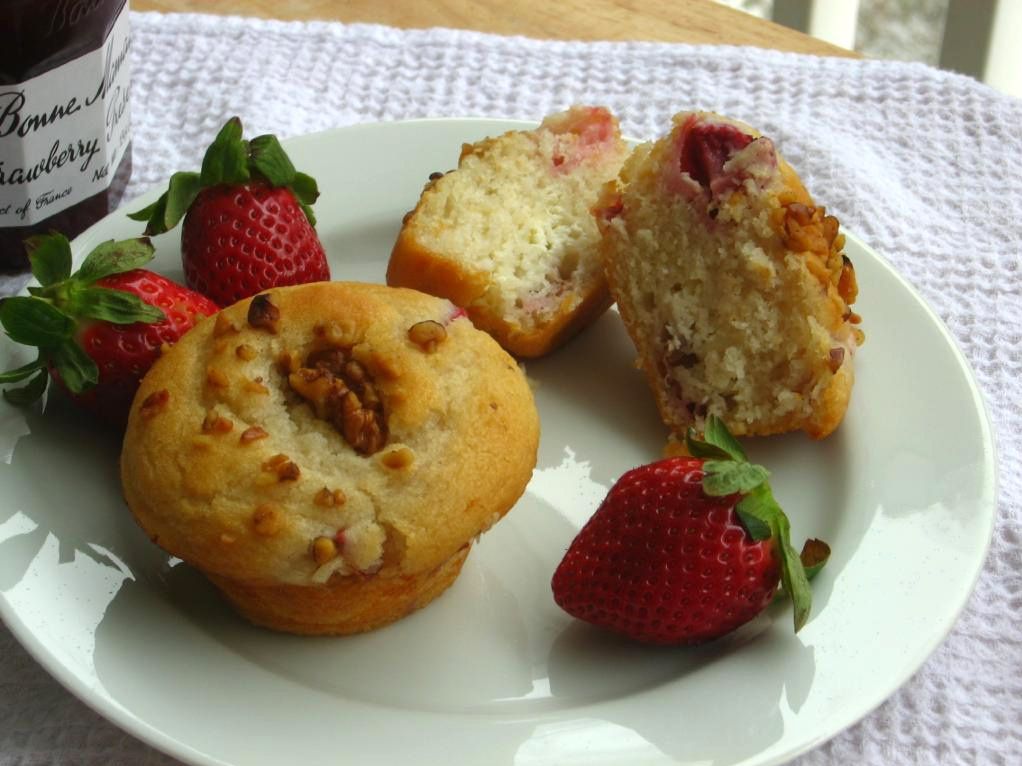
If you’re feeling bad, gather a roomful of 7th graders and pass out the Fruit Roll-Ups that have press-on tongue tattoos. In case you ever wondered: 7th graders are totally not too old for a good tongue tattoo.
These kids are so sweet and fun. I hope they’re just as sweet when they’re protected by a computer screen, shrouded in anonymity.
This comment stopped me in my tracks today on an online entertainment website: “Her voice sounds like screaming — it’s so annoying! I’ve never liked her! And she still looks like that even while working out twice a day?”
I had been scrolling through the comments of an article about a singer who just two years ago had tried to take her own life. She was now feeling happy, healthy, and back on track. In the article, the singer lit up about her kids, pilates, and other things that replenished her joie de vivre. It was a celebration. I was enjoying the sweet well wishes from her fans.
And then, like a punch to the gut: screaming . . . annoying . . . never liked her . . .

Listen, I don’t care what opinions you hold (unless they’re truly unacceptable: racism, sexism, a penchant for arson. You know.) You can like what singers you like. Detest each and every note of the singers you don’t like. That’s your business.
But stop being mean on the internet. No, really. STOP BEING MEAN ON THE INTERNET.
Remind yourself to THINK: Ask yourself, “Is it True, is it Helpful, does it Inspire, is it Necessary, is it Kind?” Sometimes we do have to say the hard stuff to help our friends, to stand up for what’s right. But that hateful comment that picked at everything from the singer’s voice to her weight was far from necessary. It was at best disrespectful and at worst, possibly destructive.
I know you’ll say: “Just don’t ever read the comments!” That’s my rule, too, but I break it far too often and always regret it. In fact, I can’t wait until online media outlets realize they shouldn’t include comment sections at all — that format inspires so much nastiness. Maybe comment sections provide an outlet for all the hateful, evil feelings we keep under wraps during our polite daily lives. The problem is that we don’t need to feed that part of ourselves, and doing so by venting on the internet is not without consequences.
Kim Kardashian might never see you talking about how you think that dress looks on her, but what do you gain by snarking about it?
And more importantly, what do you lose? What do the people that see your comment lose? Do they lose heart about what people think and won’t say to their face? Do they lose hope that people are really kind and good at heart? Do they lose confidence as they wonder what a stranger would say about how their own outfit looks today?
I always say that you can send positivity or negativity out into the world. Either way, you’re altering the balance. Maybe just the slightest bit — the weight of one snide remark in a comment section — but it counts. I know I’m not perfect, but I try. And I think it’s time for all of us to try a little harder. Will you?
* * *

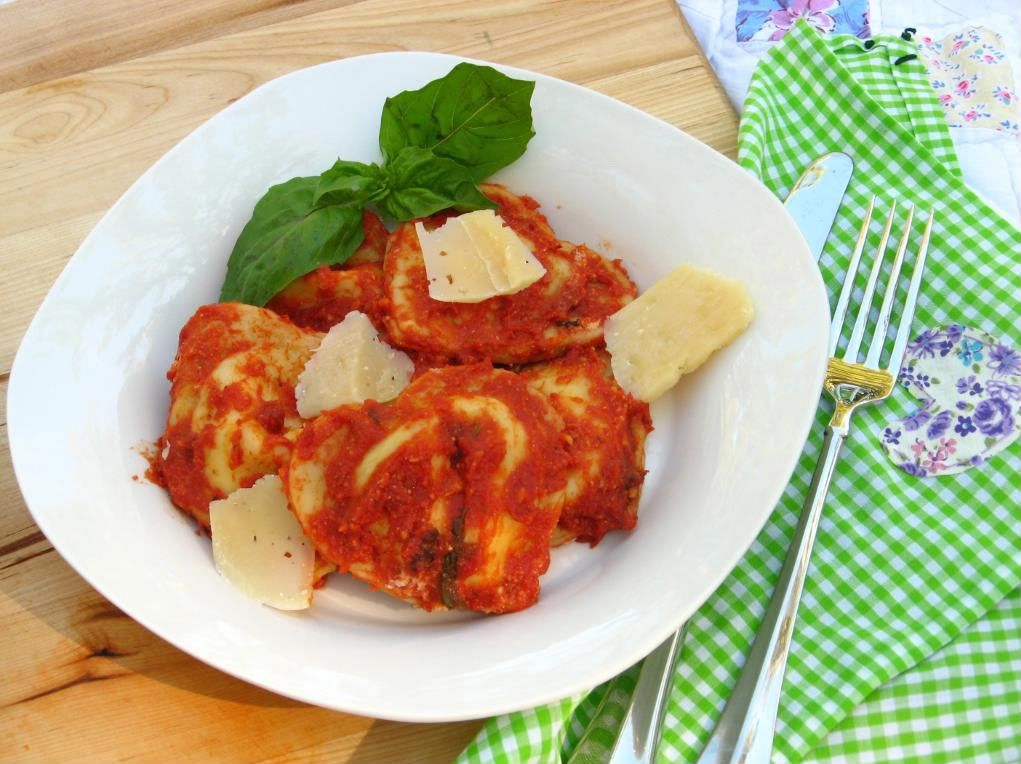
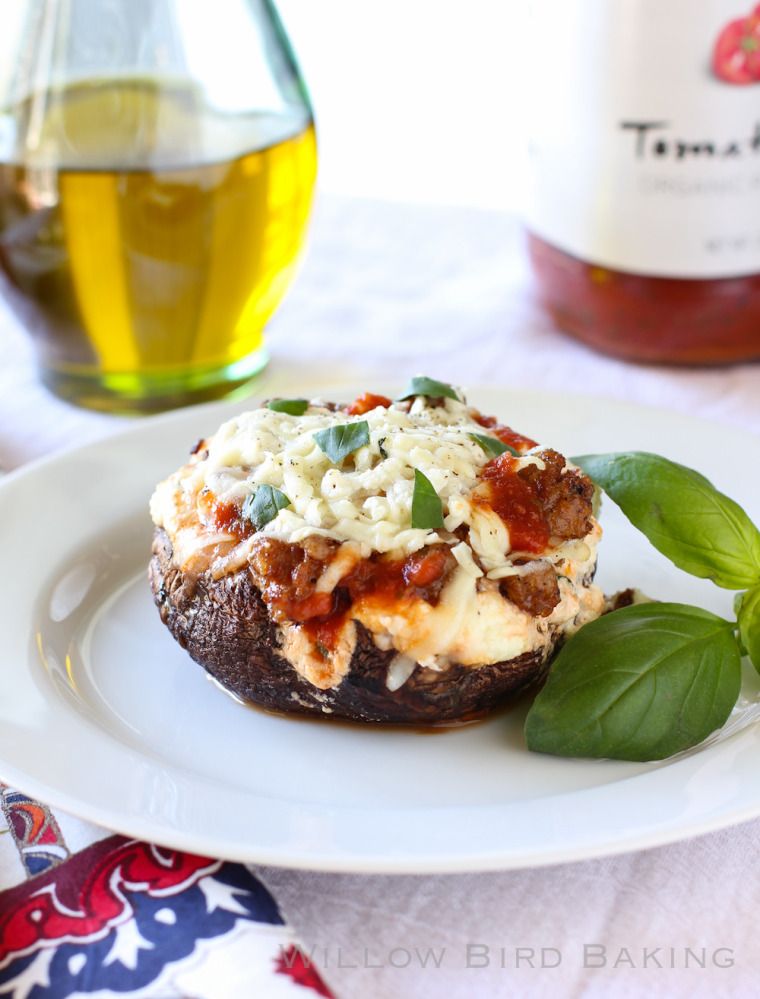
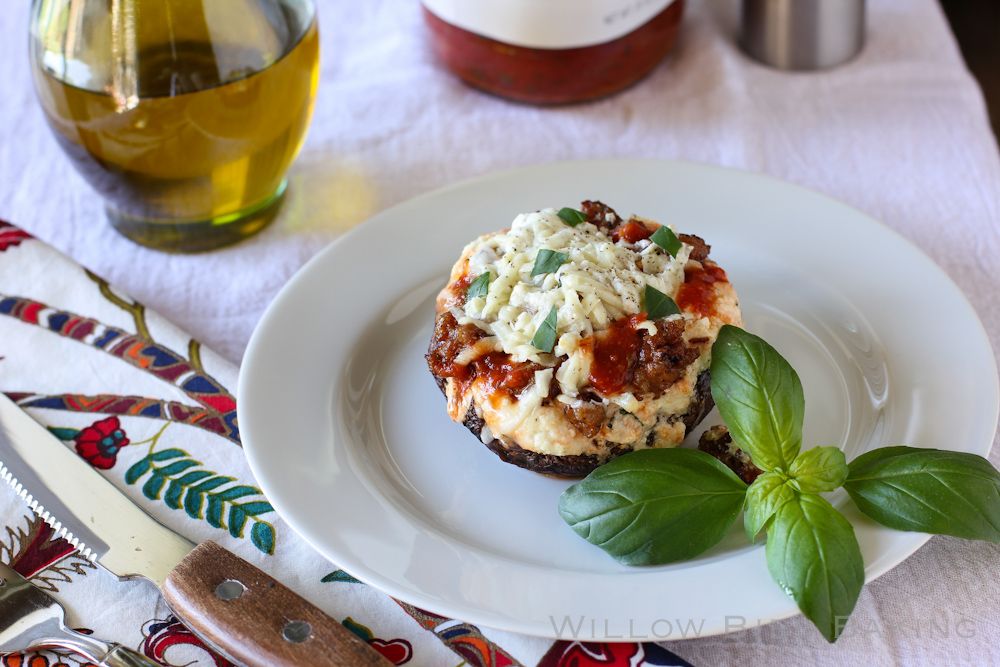
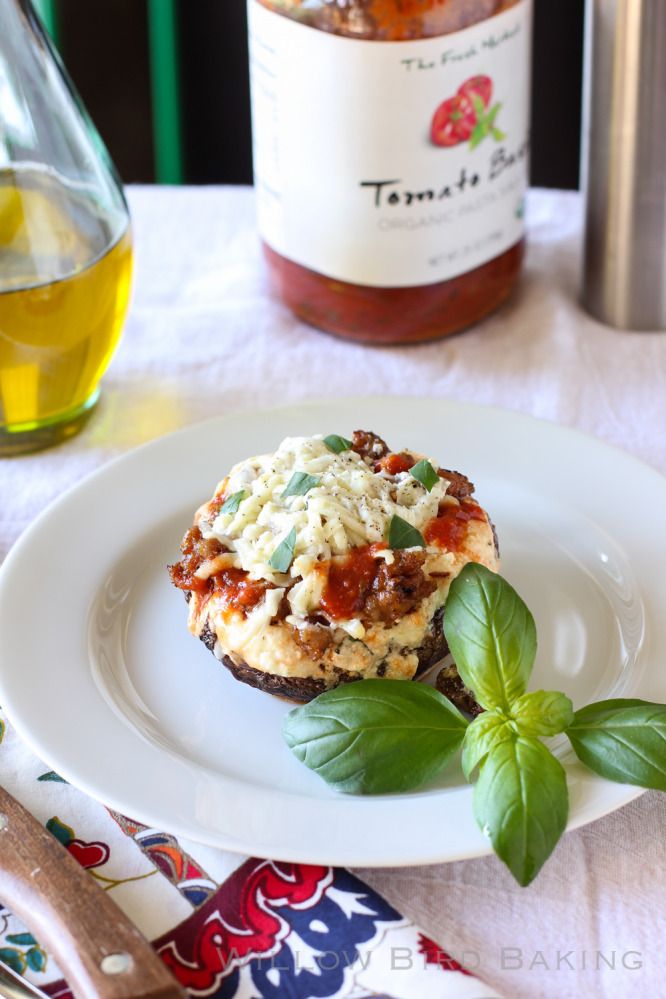
And now a little online positivity for us all: stuffed mushrooms! I love the fluffy ricotta and rich tomato sauce layered into traditional lasagna, but don’t always need the carb count from the noodles. These stuffed mushrooms are filling, hearty, and delicious. Double the recipe for a quick and easy dinner.
What’s your “policy” for yourself about how you behave and chat online?
One year ago: Brownie-Bottom Coconut Chocolate Cream Cake
Two years ago: Banana Coconut Cream Easter Cupcakes
Three years ago: Coconut Cream Tart
Lasagna Stuffed Portobello Mushrooms
Recipe by: Willow Bird Baking
Yield: 2 servings
Lasagna, stuffed into mushrooms. Simply fantastic.
Ingredients:
2 large portobello mushroom caps
3 tablespoons olive oil
kosher salt and freshly ground pepper
1/2 link hot Italian sausage
6 tablespoons tomato pasta sauce*
3/4 cup whole milk ricotta cheese
1/2 egg (lightly beat it, then discard half)
1 tablespoon fresh chopped basil
1/2 teaspoon fresh chopped rosemary
2 cloves roasted garlic**, smashed
freshly grated mozzarella and pecorino romano cheese, to taste
**I bought mine from the specialty grocer, but you can roast a head yourself using this guide — you won’t believe the sweet, mild flavor. You can use raw, but use less, because raw garlic is much hotter, spicier, and obnoxious. Not that there’s anything wrong with that!
*I just used a jarred brand I love.
Directions:
Preheat the oven to 425 degrees F. Clean the mushroom caps by brushing gently with a wet brush. Remove the stems from mushrooms and gently remove gills with a spoon. Brush each mushroom with a tablespoon of olive oil and sprinkle with a pinch of kosher salt and a grind of pepper. Roast for 15-20 minutes (depending on the size of the mushroom) or until they are nicely roasted but still holding their general shape.
While the mushrooms roast, heat 1 tablespoon of olive oil over medium-high heat in a medium skillet. Remove the casing of the Italian sausage with a sharp knife and cook the crumbles until browned. Place the sausage on a paper towel lined plate to drain.
Let the mushrooms cool until they can be handled. Drain any excess moisture from the caps. In a small bowl, mix the ricotta cheese, half a lightly beaten egg, basil, rosemary, 1/4 teaspoon of kosher salt, and a grind or two of pepper. Spoon 1-2 tablespoons of pasta sauce into each mushroom cap and top with a smashed garlic clove and a generous heap of the ricotta mixture. Press half of the Italian sausage into the ricotta mixture on each mushroom and top with another tablespoon or two of pasta sauce, a generous sprinkle of Mozzarella cheese, and another small grind of pepper. Place the mushrooms back into the oven until the ricotta mixture is set and the cheese is melted and bubbly, about 10 minutes. Serve immediately.