apple

The Big Reveal: Willow Bird Baking Challenge #4 Filled Cupcakes and the Final Challenge!

Willow Bird Baking Challenge is a 5-week series wherein I introduce a new challenge each week. The challenges require you to get creative and innovative in the kitchen. You create your dish, bake it, and send me a photo before the following weekend, when I show off the masterpieces on Willow Bird Baking!

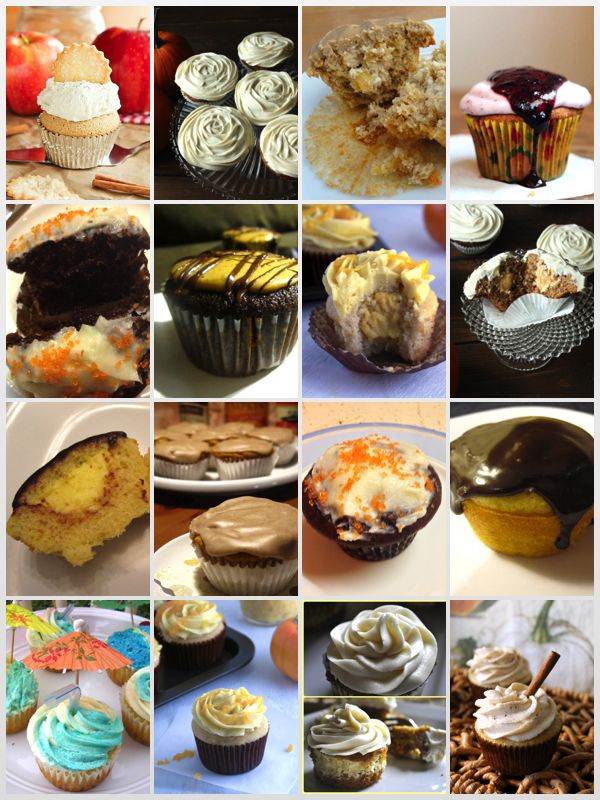
Challenge #5 was to innovate filled cupcakes to represent the season you were currently in. See if you can guess which season the folks below are enjoying!
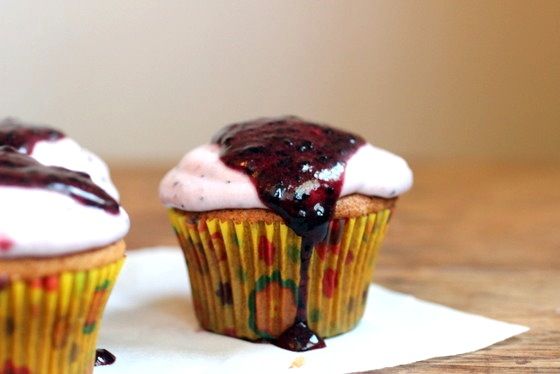

Paula

Paula Made: Lemon Curd Cupcakes with Blueberry Cream Cheese Frosting (see more at her blog, Vintage Kitchen Notes)

Comments:“I’m no cupcake baker. I’m all for bundt and layer cakes. So this was a real challenge. Lemon immediately came to mind, but then what? Fresh blueberries, that are popping up plump and dark, with the first sweetness in them. Not a new flavor combination idea, but the fresh berries in the frosting looks so pretty. I mean, cupcakes have to have some sort of prettiness to them. The cake part has some white chocolate, which really makes them moist and deepens tremendously the flavor of vanilla.”
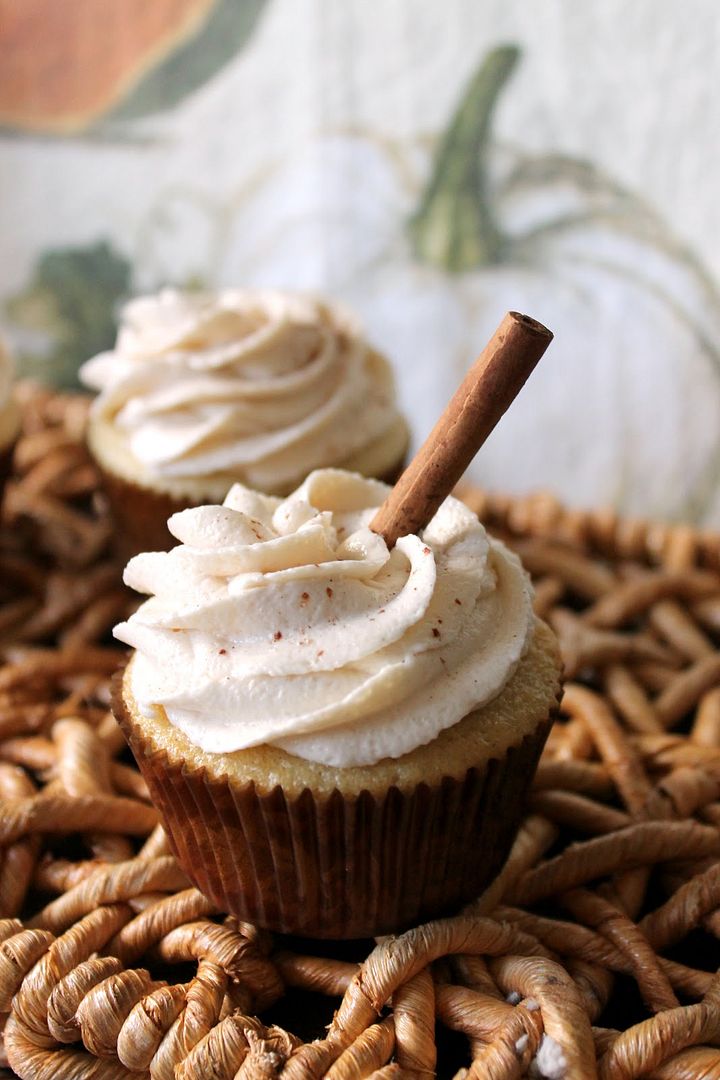


Dianna

Dianna Made: Vanilla Bean Cupcakes with Caramel-Pear Butter Filling (see more on her blog, The Kitchen Prep)

Comments: “A tender Vanilla Bean Cupcake, filled with a gooey Caramel-Pear Butter center topped with a seductive swirl of Brown Sugar & Cinnamon Frosting.”
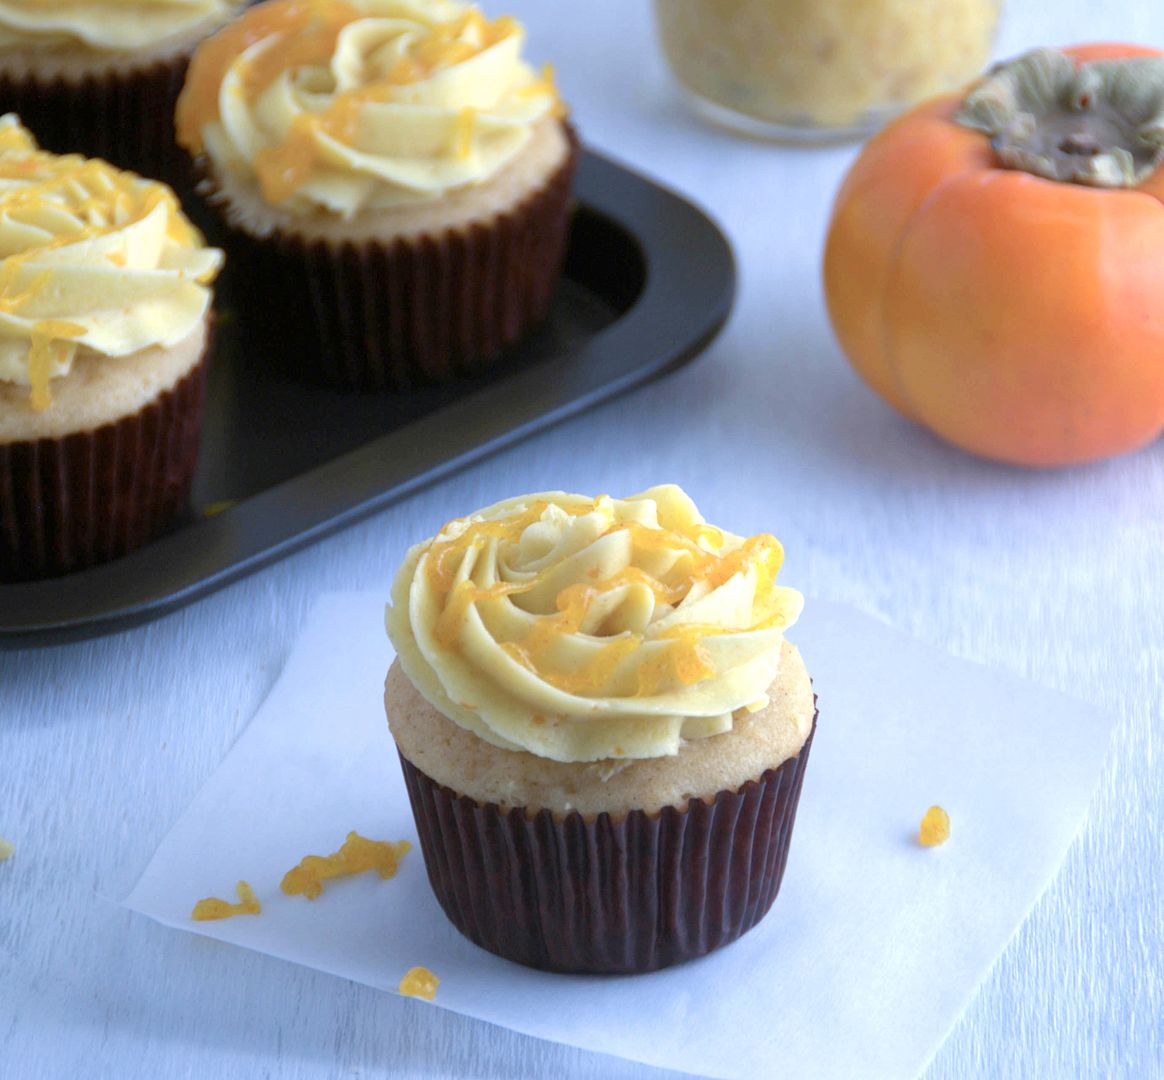


Shanna

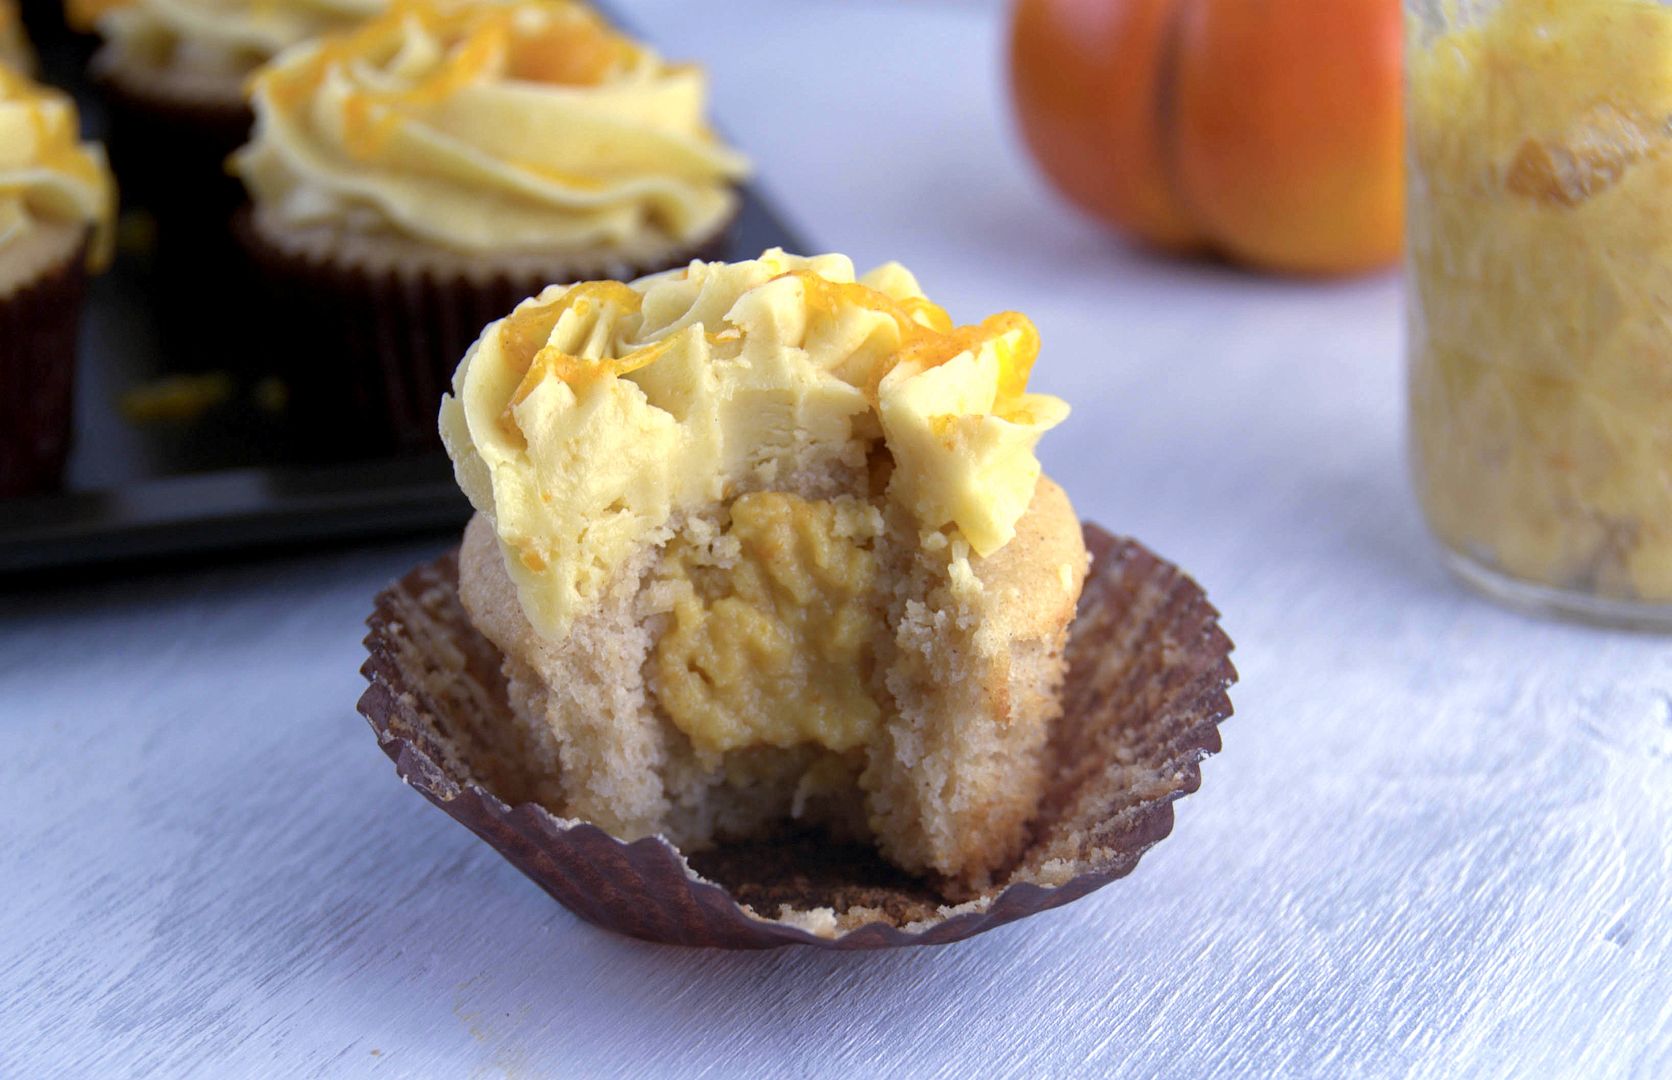
Shanna Made: Apple Cider Cupcakes filled with Fuyu Persimmon Curd and frosted with Fuyu Persimmon Swiss Meringue Buttercream (see more at her blog, Pineapple and Coconut)

Comments: “Apple Cider. Persmimmons. Yup just add in pumpkin and thats a trifecta of fall flavors. I love the word trifecta. Yes I am a dork. And these don’t have pumpkin in them. I took a break from pumpkin. For maybe a day.”


Nathan

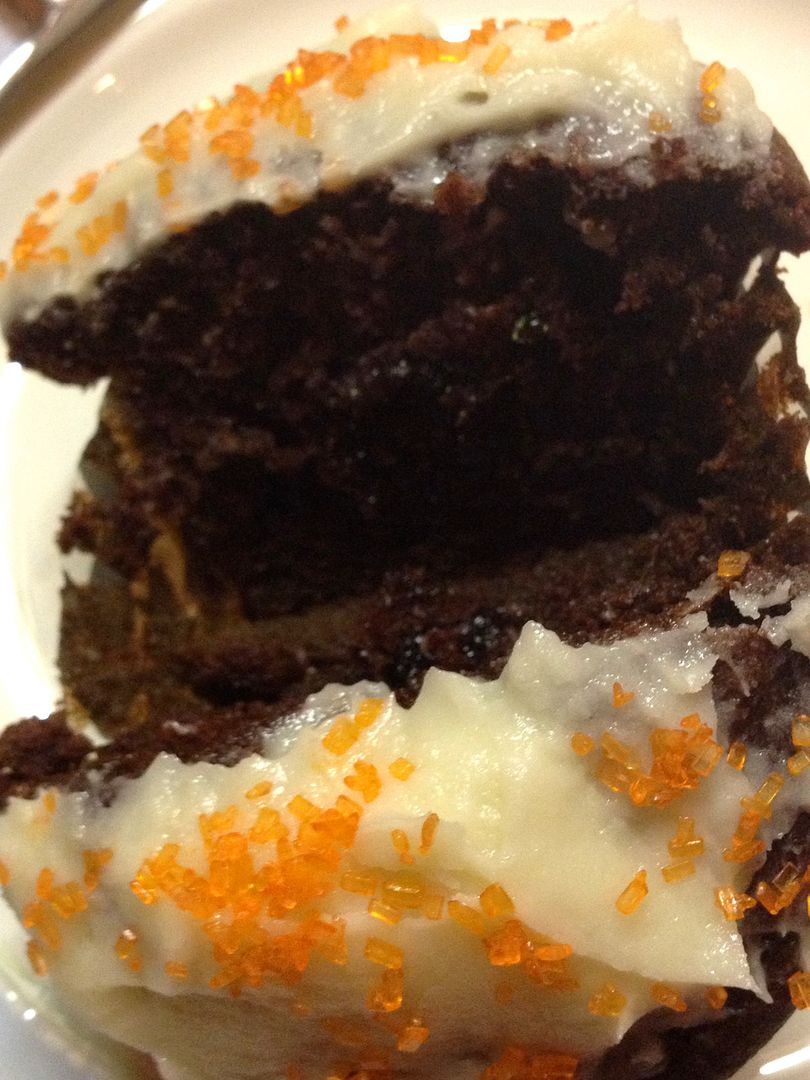
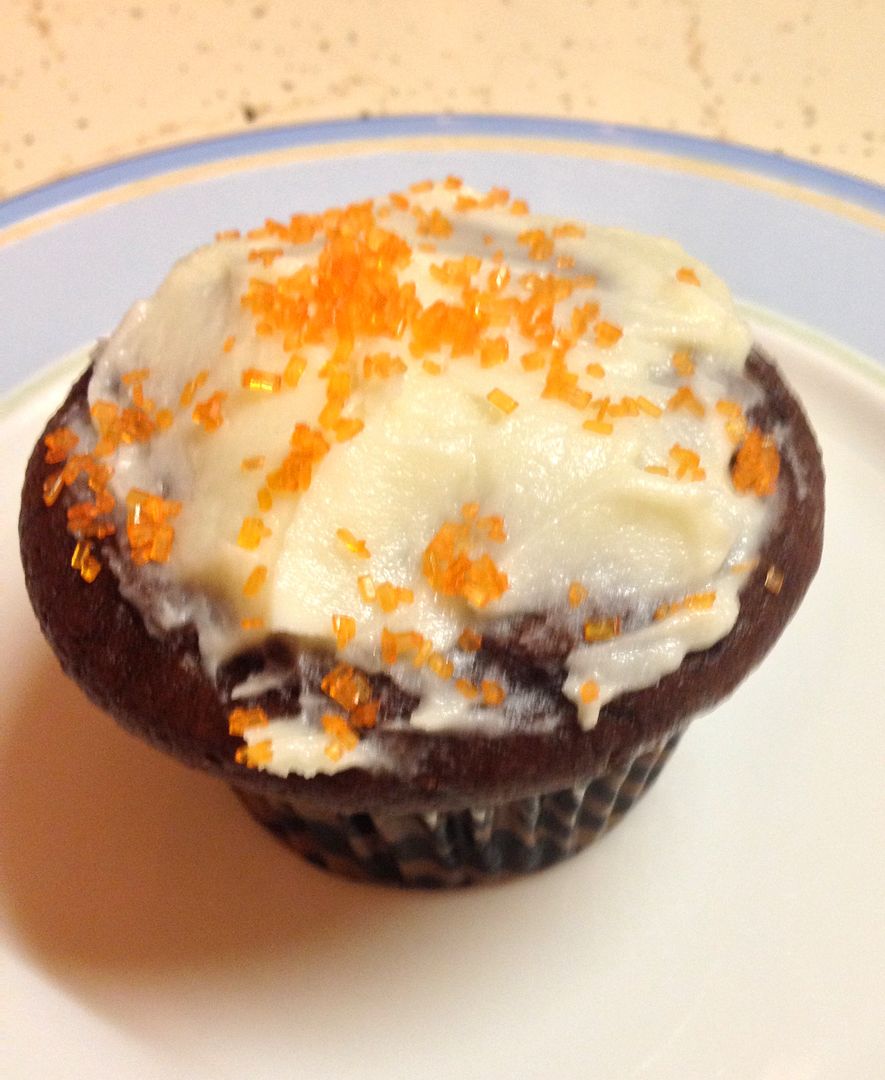
Nathan Made: Chocolate Mint Cupcakes

Comments: “Halloween cupcakes! Chocolate cupcakes with buttercream frosting and orange sugar topping. And for a surprise, green mint jelly for filling!”


Ala

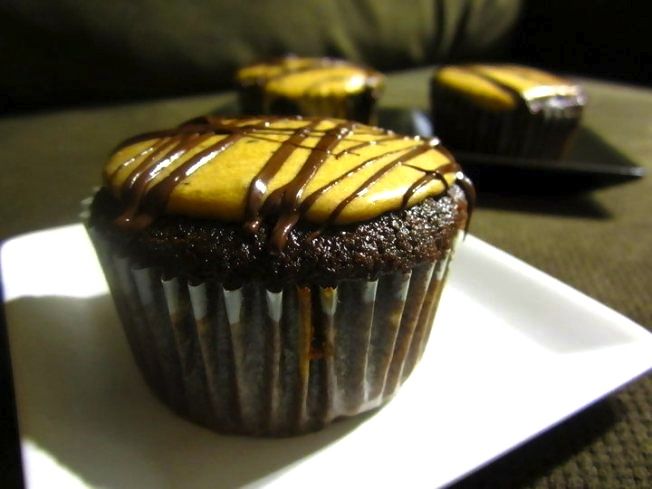
Ala Made: Cheesecake-Filled Chocolate Cupcakes with Coffee Cinnamon Frosting (see her blog Wallflour Girl)

Comments: “We whipped up a batch of these for one of the guys in our department celebrating his birthday this week. If you like a) the idea of a steaming mug of hot chocolate dipped into your morning wake-up call with a hint of autumnal flair, or b) being awesome, you need to try these cupcakes.”


Heather

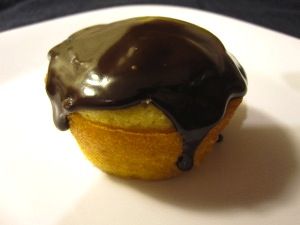
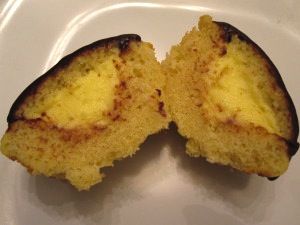
Heather Made: Boston Creme Pie Cupcakes (see more at her blog Bake Run Live)

Comments: “I made Boston Creme Pie Cupcakes! Sponge cake cupcakes, filled with vanilla pastry cream, then topped with a semi-sweet chocolate glaze! Each cupcake is the perfect portion for a wonderful dessert!”


Robyn

Robyn Made: Pumpkin Cupcakes with Cranberry Curd and Brown Butter Glaze (see more at her blog, Almacucina)

Comments: “I do love how the flavors play off each other; spicy pumpkin, sweet-tart curd and smoky glaze. Especially love the cranberry curd filling. All in all, I’d say I did a decent job! And got myself one step closer to jumping on the cupcake bandwagon.”
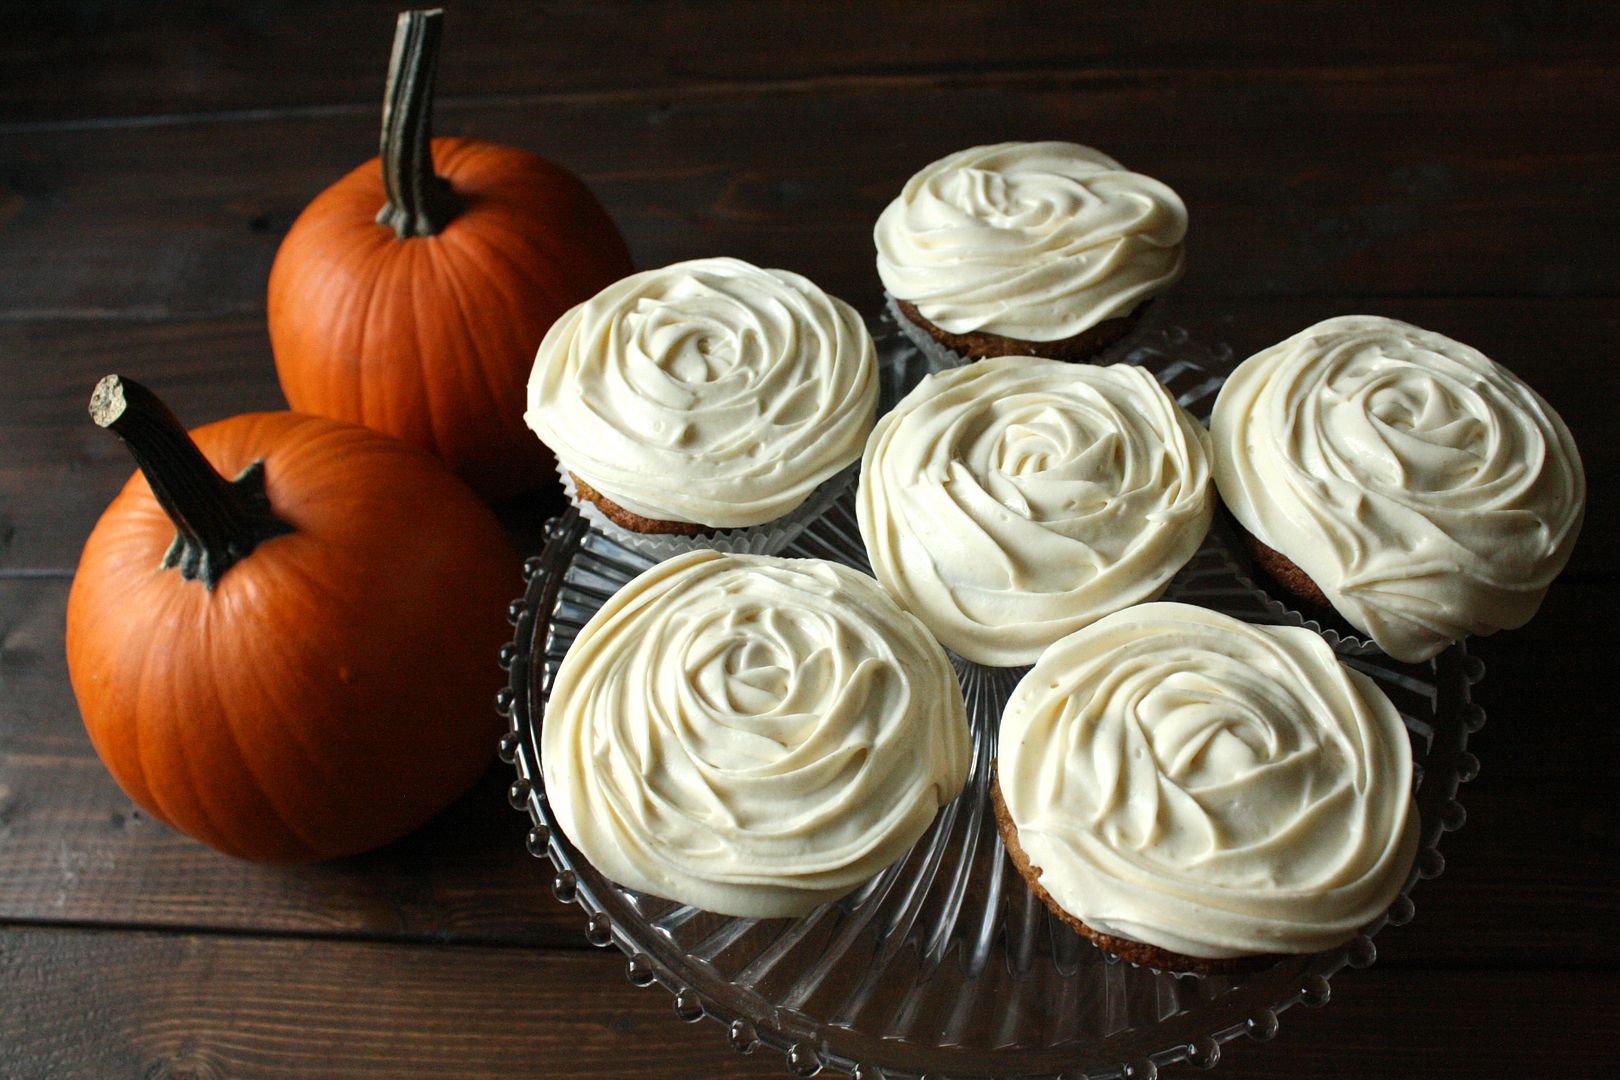
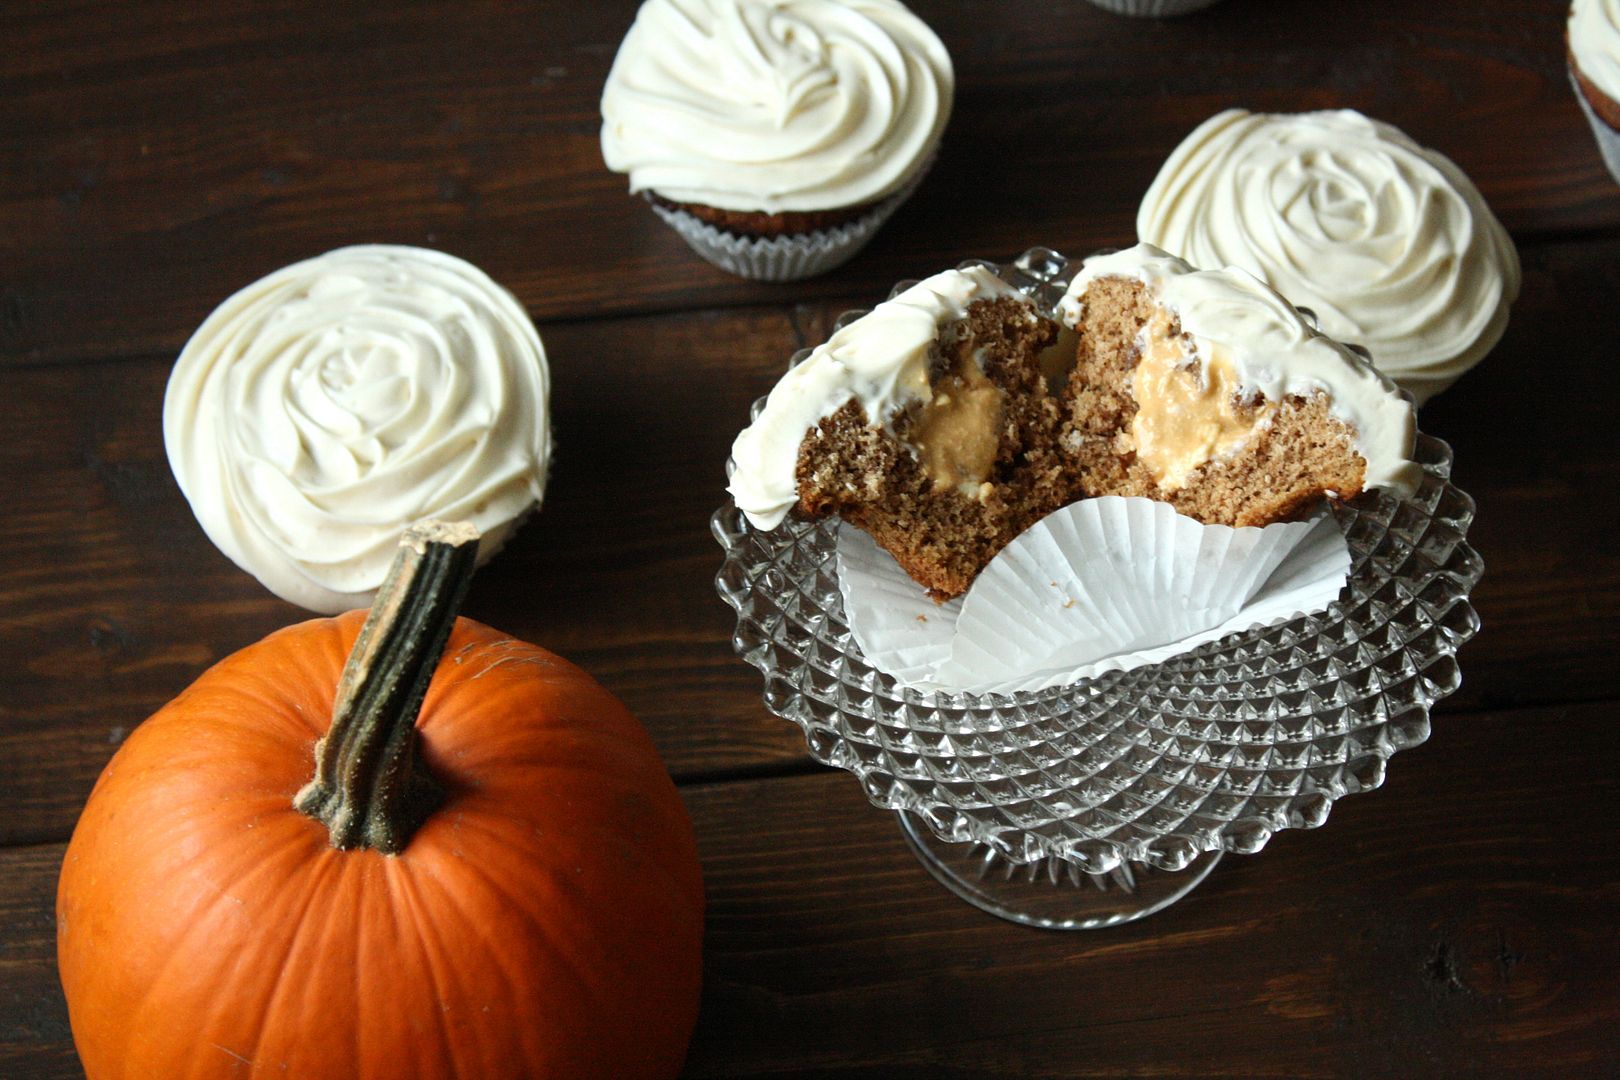


LeAndra

LeAndra Made: Pumpkin Spice Cupcakes (see more at her blog, Love & Flour)

Comments: “Yet another challenged cobbled together from previous recipes. I used one of my great-grandmother’s spice cake recipes and filled the cupcakes with a pumpkin cream cheese mixture I once called dip. I topped them off with a ginger cream cheese icing since ginger was the one spice not actually found in the cake.”
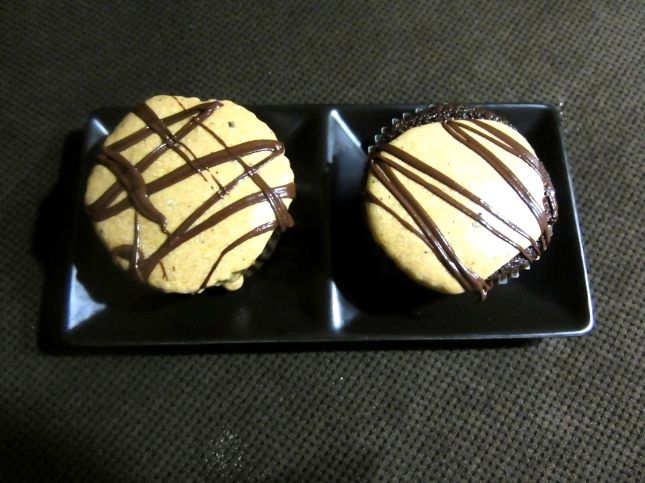
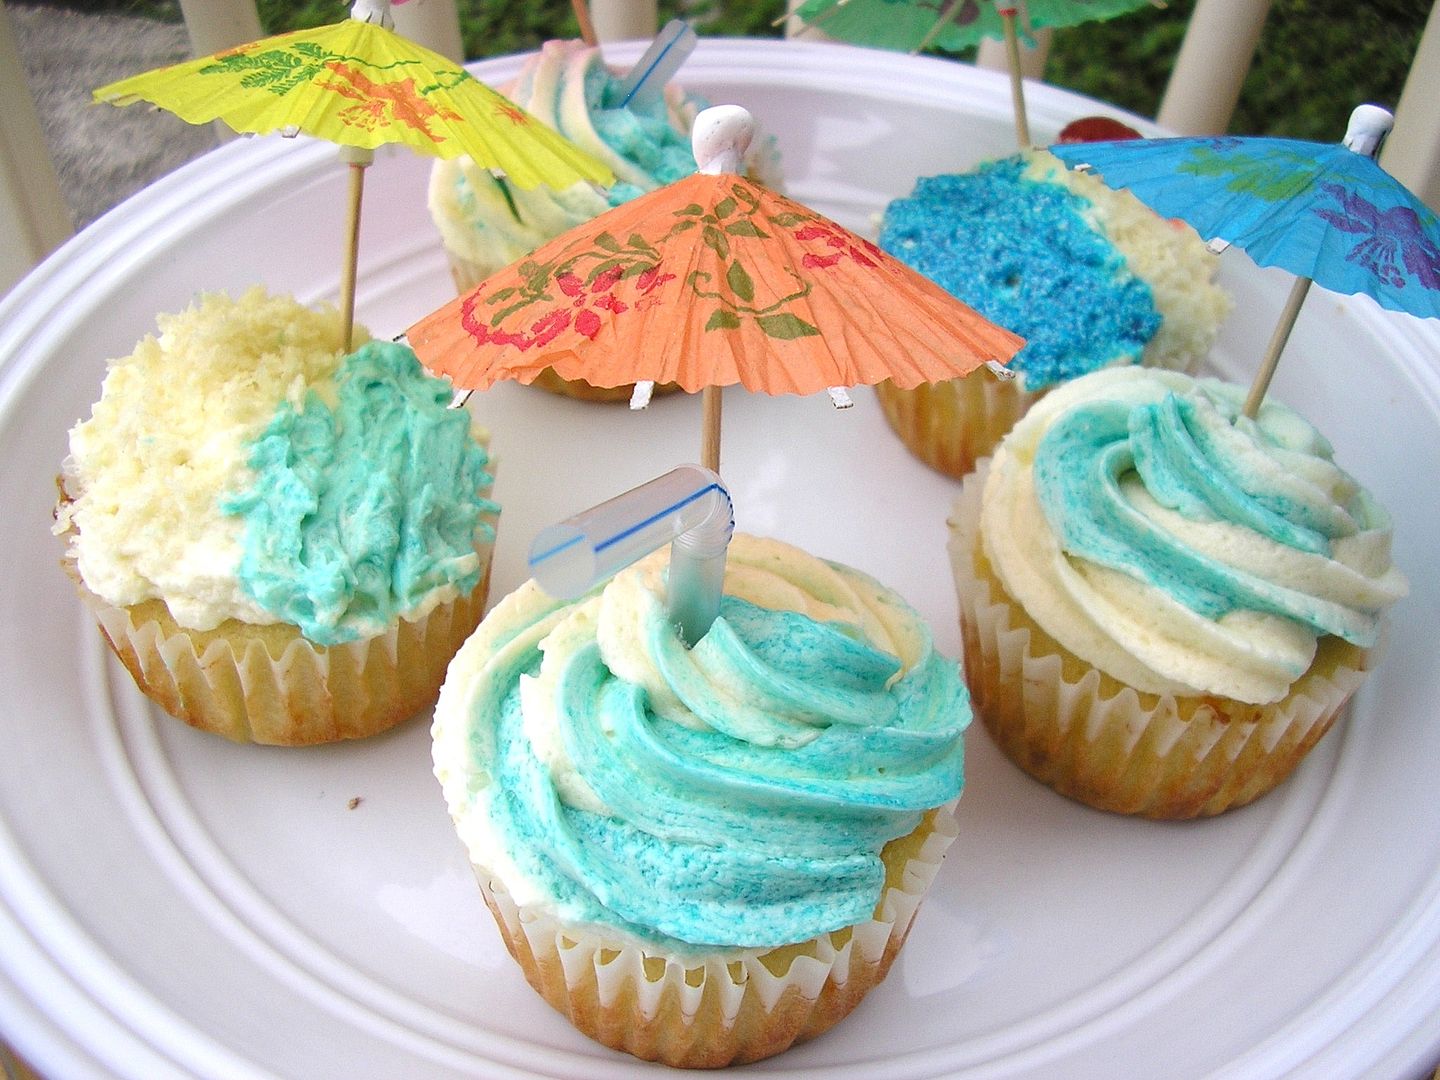


Kelly

Kelly Made: Chocolate cookies stuffed with either: peanut butter and guava jelly, a rum-soaked cherry, strawberry cheesecake, or funfetti cheesecake!

Comments: “While the rest of the country is donning boots and scarves, we are still playing on the beach here in Miami.I tried to combine the two for these cupcakes – lemon cupcakes filled with an apple-ginger curd. I then tried to make them look a little ‘beachy.’ Bear with me, the piping bag is not my friend (yet).”


Shelley C.

Shelley Made: Caramel Apple Cupcakes (see more at her blog, C Mom Cook)

Comments: “Once again, choosing a flavor combination was the hardest part of this challenge. There are so many delicious fall flavors, narrowing it down to something that would make a delicious cupcake was tough. Finally, I chose to make caramel apple cupcakes for the cupcake challenge (and, can I just tell you, I had so many thoughts of cupfakes for this one! Turkey meatloaf cooked in a cupcake pan, cranberry sauce ‘filling’ and mashed potato frosting! Cornbread ‘cupcakes’ with some kind of chili filling/spicy frosting! SO many possibilities!)”
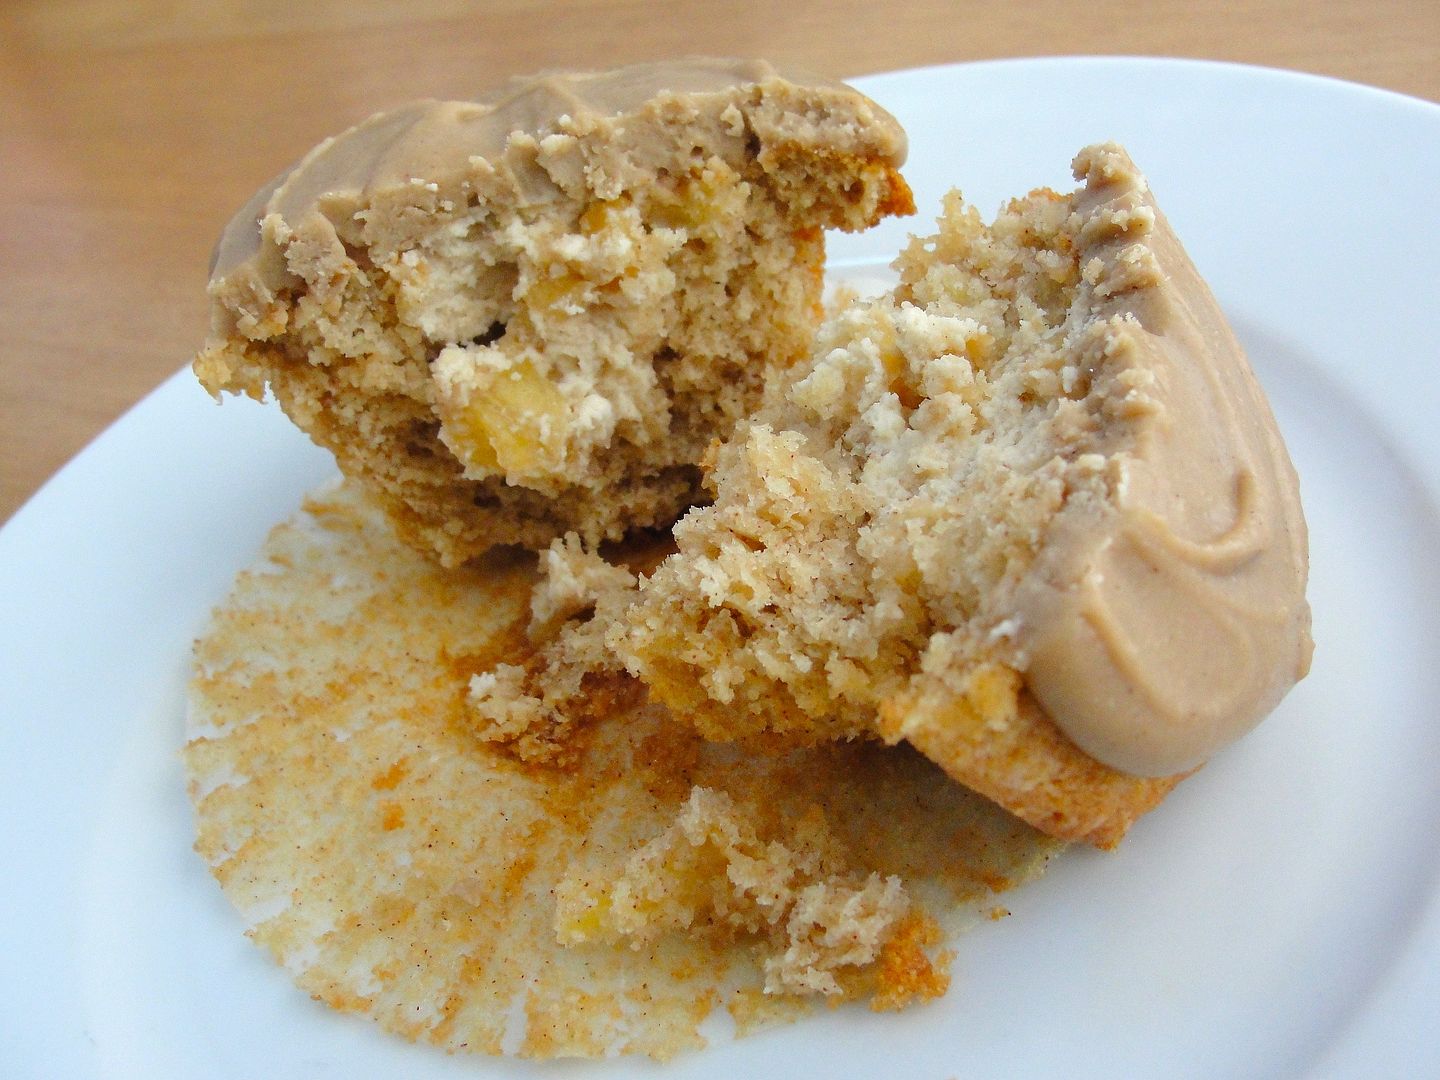


Erin

Erin Made: Maple Cream Cheese stuffed Squash cupcakes with Maple Cream Cheese Frosting (see her blog, Erin’s Exquisite Edibles and Excursions)

Comments: “I wanted to do something for the season like the challenge suggested. Up in New York pumpkin and apples are usually in abundance this time of year, however not this year… apples are sparce but somehow we had a HUGE pile of squash growing in our compost! So due to that I decided to make my cupcakes out of squash instead of pumpkin. These cupcakes turned out so moist and not too sweet, which is good because the frosting made up the majority of the sweetness!”
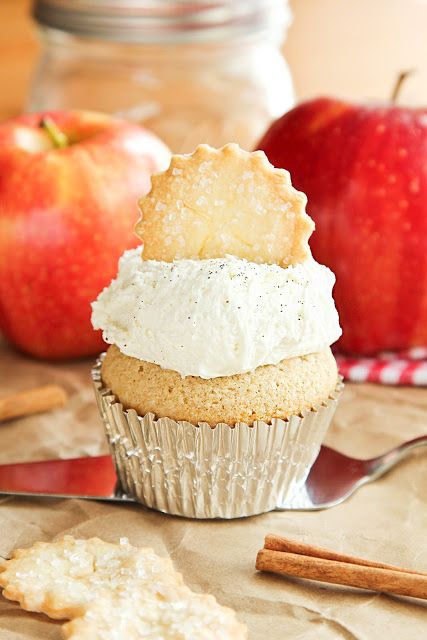


Natalie

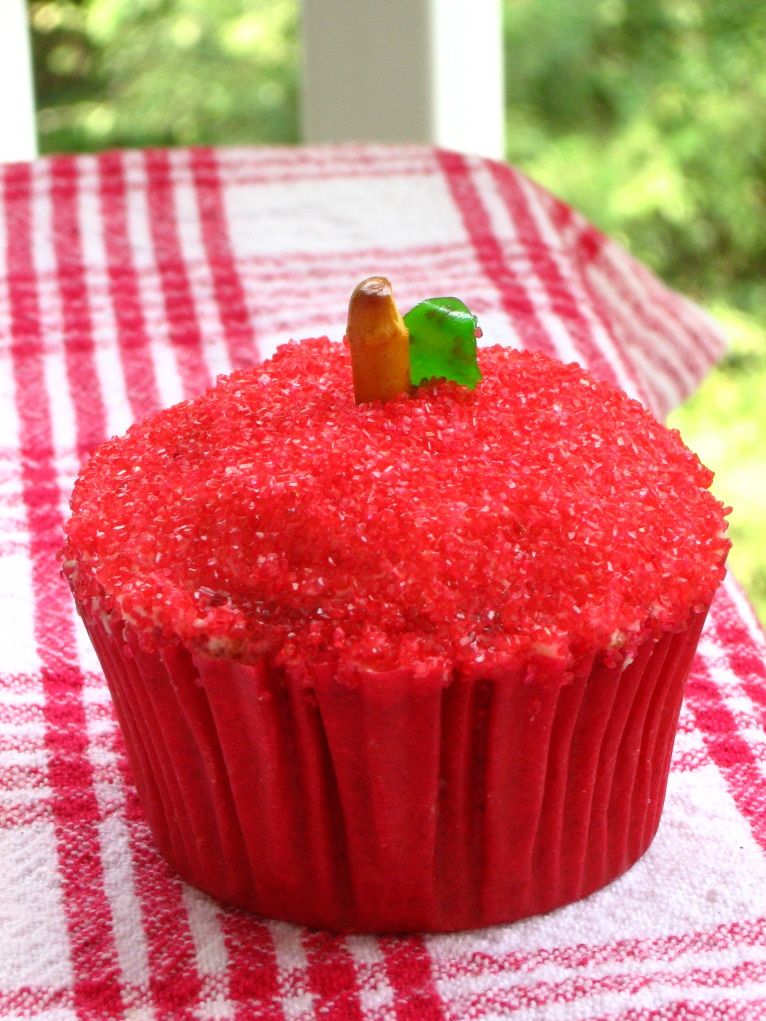
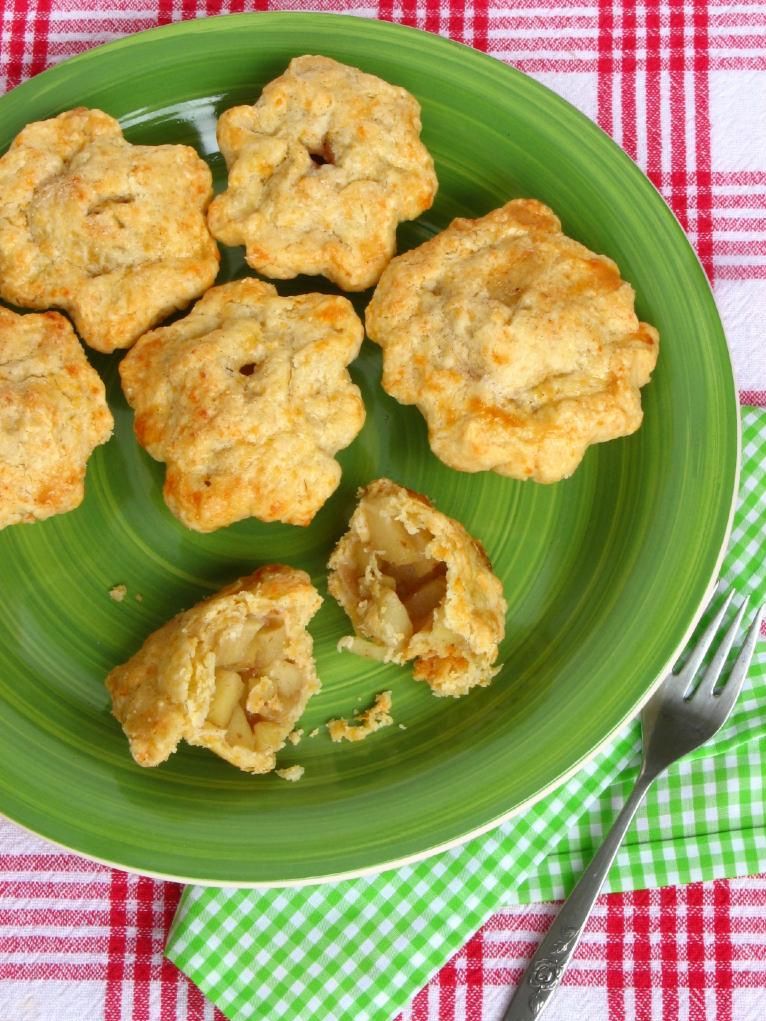
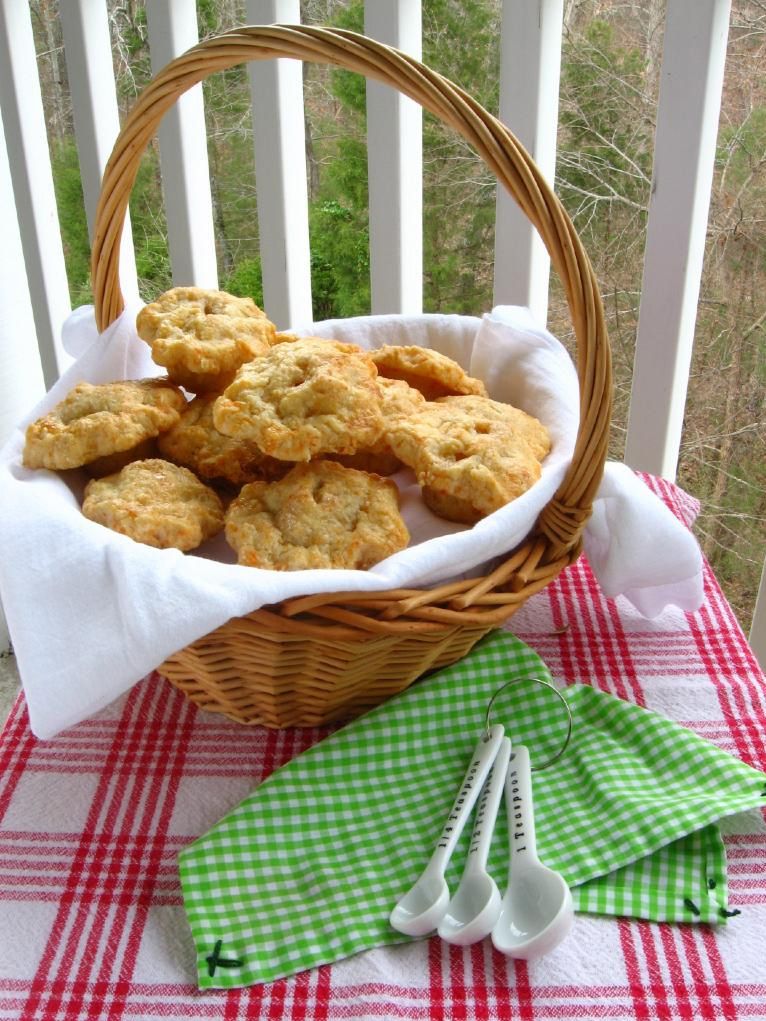
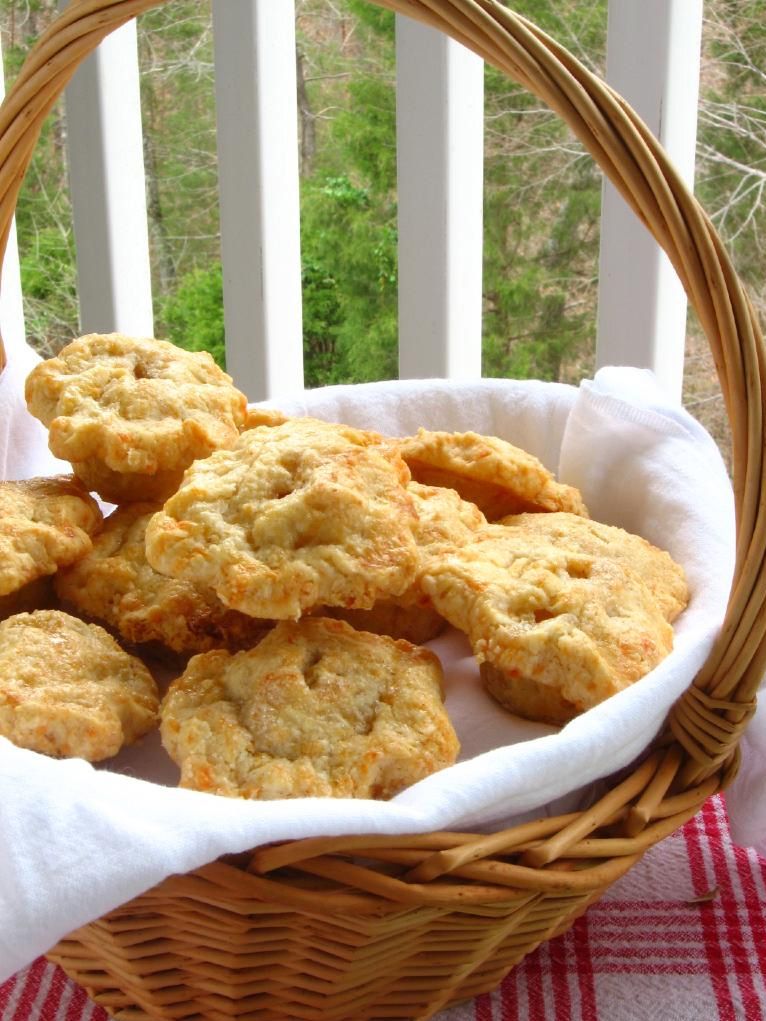
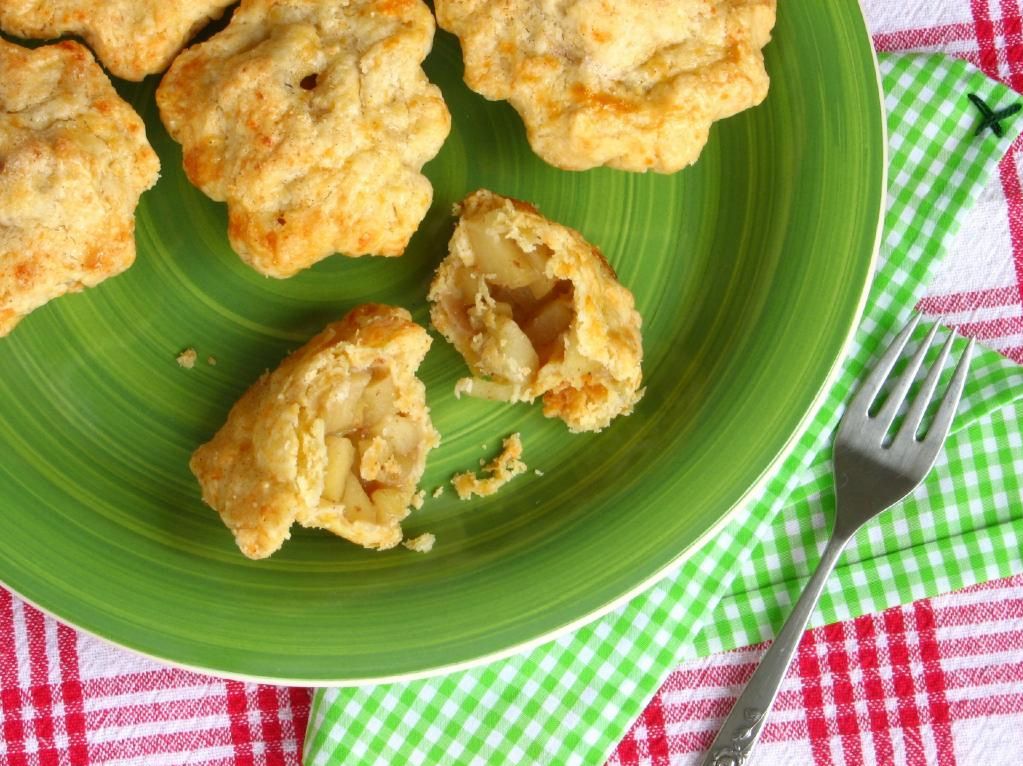
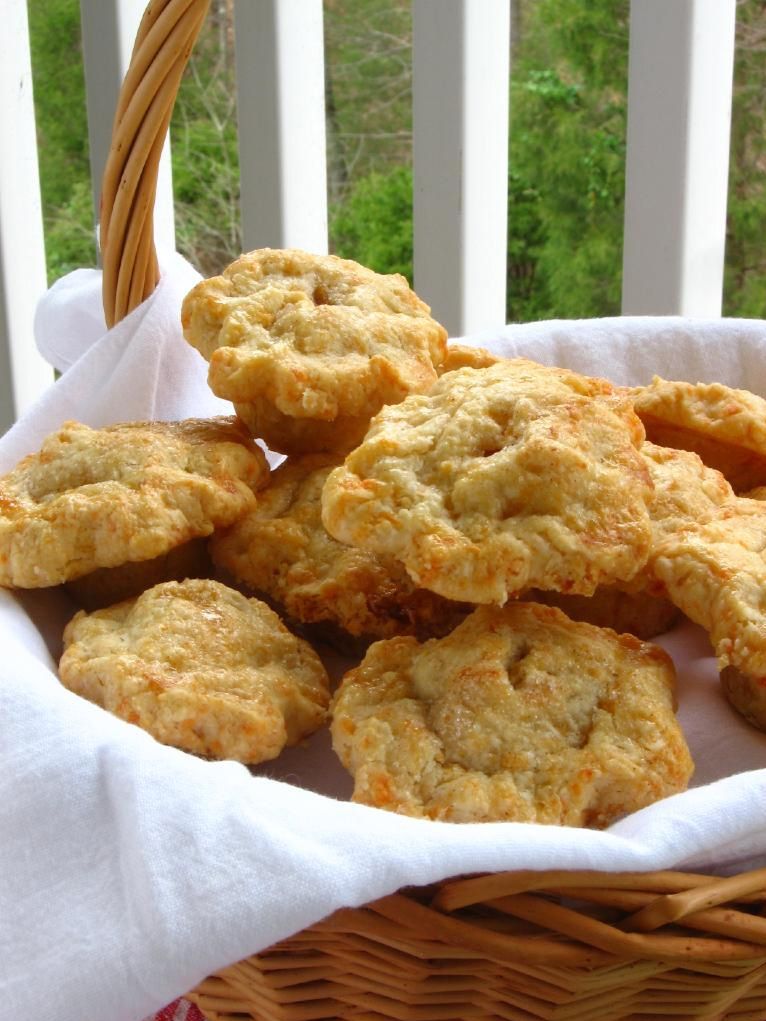
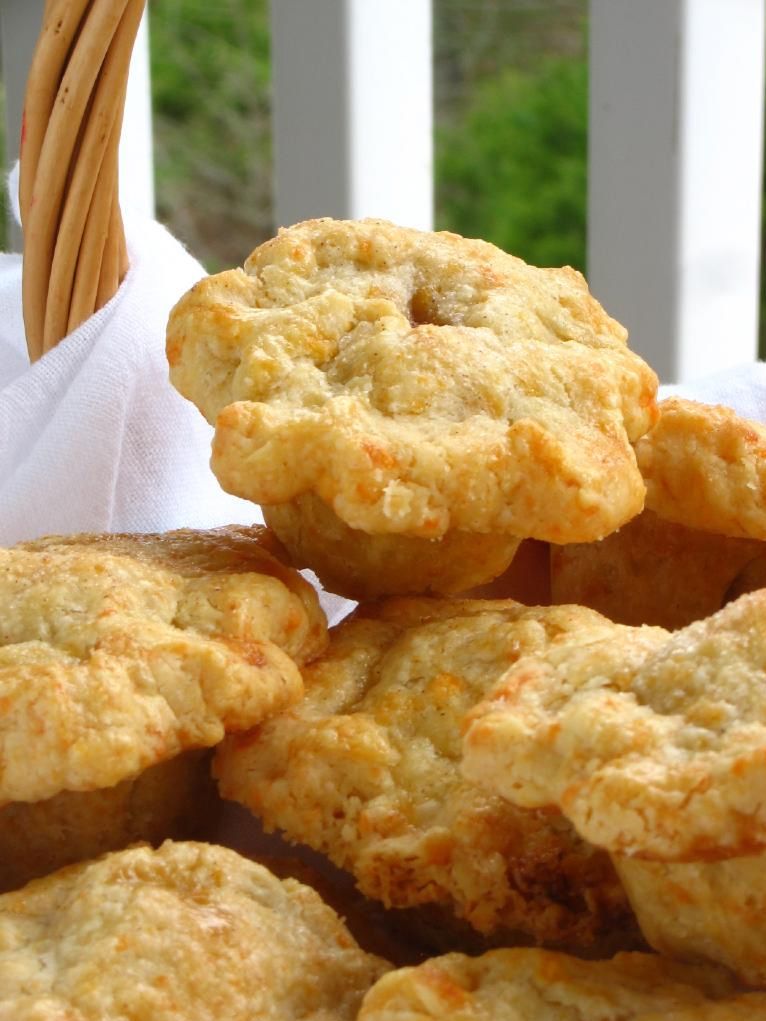
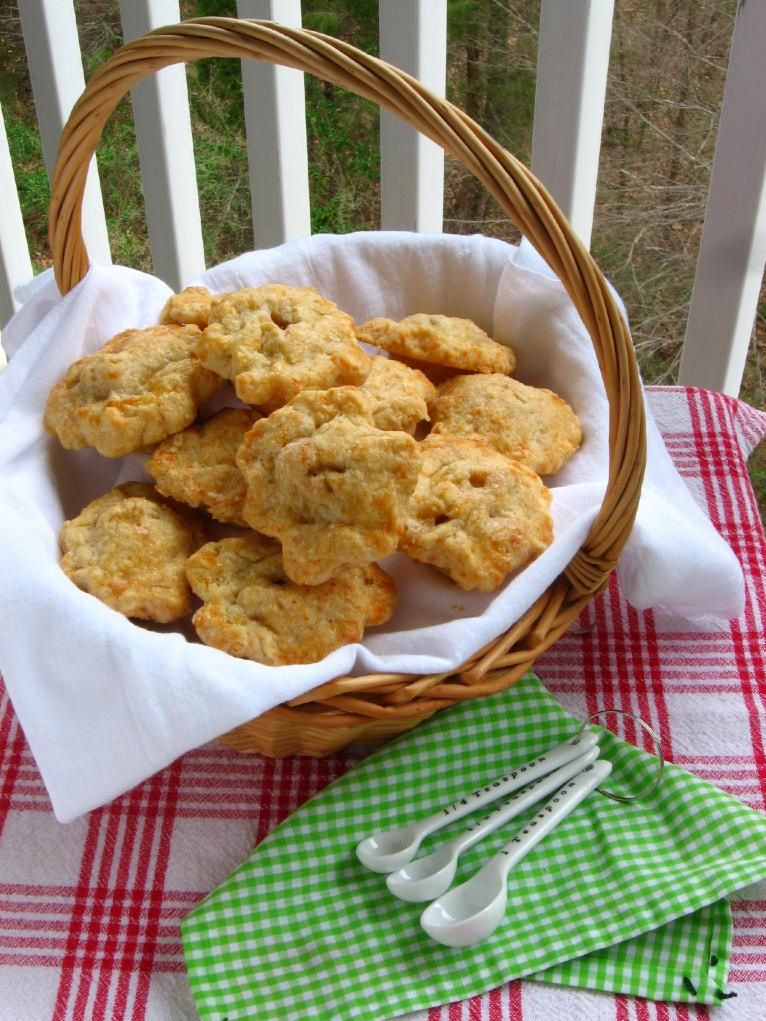
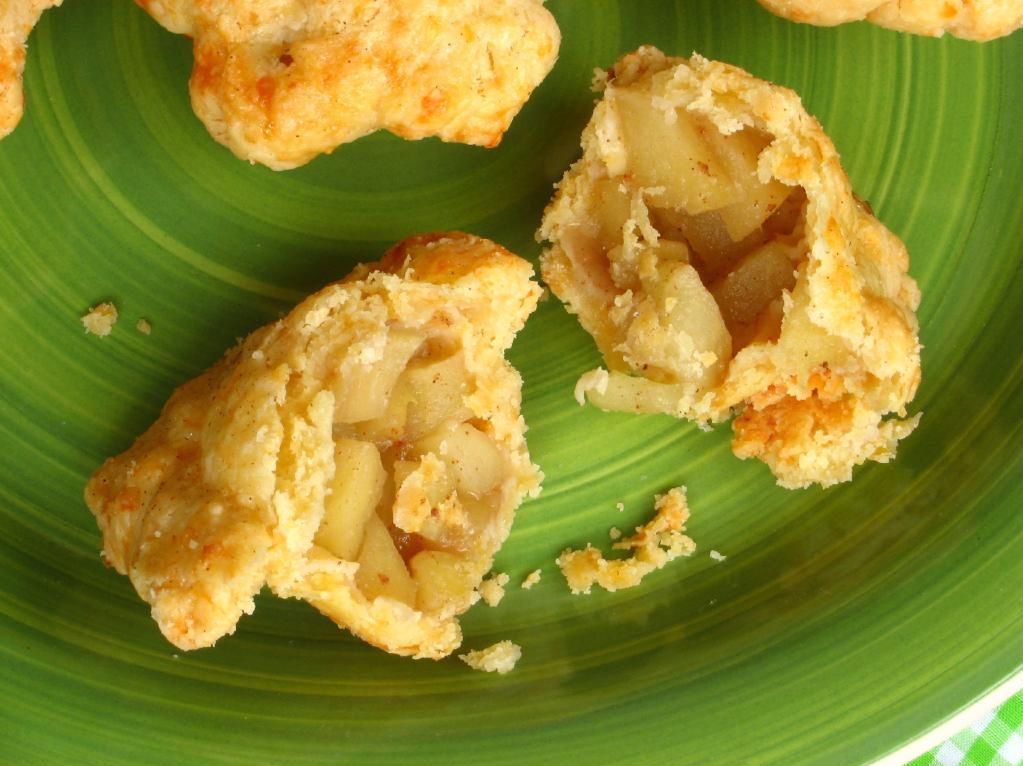
Natalie Made: Apple Pie Cupcakes (see more at her blog Life Made Simple)

Comments: “Since it’s fall and the husband and I both love pie but baking an entire one is just too much for us, I thought I’d make a cupcake version of an apple pie! Perfect, right?! I started off by using a cinnamon spiced cake, filling it with soft apples and topping it with some vanilla ice cream frosting and a crust crisp. These cupcakes are absolutely to die for!”


Ready for Challenge #5?

Last night, Erin, Trudy, and Kelly jumped on Google Hangout with me to introduce the final challenge, Challenge #5, and here it is!

You can find some cheesecake recipes here to get you started! And here is my video tutorial on cheesecakes. Send a photo and some comments to me at julie ‘at’ willowbirdbaking ‘dot’ com by next weekend. Let’s get baking!

Congratulations to all of the participants of Challenge #4 for their fantastic work!

If you liked this post, please:
Subscribe to Willow Bird Baking
Follow Willow Bird Baking on Twitter
Follow Willow Bird Baking on Facebook

Apple Cinnamon Monkey Bread Sundaes (using leftover yeast dough!)

While we’re on the subject of getting used to failure and letting yourself take shortcuts, I have a confession to make. Growing up as a perfectionist sometimes meant I was a very, very poor sport.

In 6th grade, I was determined to accumulate every possible accolade available to me. I tore through novels at a frantic pace to be the top Electronic Bookshelf reader. I drew up posters to campaign for a student council position. I left class each day to run the controls for the entire school’s closed circuit news station. I assisted the computer teacher setting up technology for special events. I wrote columns for the 6th grade newsletter, The Leopard’s Roar. I slaved over every assignment as part of my neverending quest for perfect grades. I practiced endlessly to execute the perfect flip over the monkey bars on the playground. Life was juuuust about perfect.

One cool spring morning, though, things changed. I’d been eagerly awaiting an announcement from my teacher, Mrs. McRae. She was looking for a few trustworthy students with integrity and strong academic performance to appoint to the coveted position of safety patrol. Being on the safety patrol would add another shiny pip to my starched, pristine collar, and I was absolutely rabid over it.

The morning was packed with independent work. I was absorbed in completing my math worksheet while folks milled about the room attending to their own tasks. At one point, I realized Mrs. McRae was calling out the answers to the worksheet, but since I wasn’t finished, I tuned her out and continued working without much thought. I didn’t think twice about doing so until one of my classmates piped up with a whine, “Mrs. McRae, Julie’s cheating! She’s writing down answers while we’re checking it!” I looked up, shocked.

Just to bandage my wounded pride a little (15 years later, because you know, that’s normal), I was not cheating. I was calculating the answer to every problem and hadn’t heard or recorded a single answer that was called out. I was just trying to finish my worksheet, y’all! Nevertheless, Mrs. McRae called me out of the classroom.

I explained my situation to her in a panic. Surely she couldn’t possibly think that what that little twerp said about me was true?! Her bespectacled face stared down at me with doubt. You could see the wheels turning in her head: Well, Julie does care an awful lot about grades. Maybe…

Confronted with what felt like the greatest injustice I’d ever suffered, I began to have a full-on anxious meltdown. As I restated my case and pleaded with her to believe me, I started crying tears of frustration. Finally, I stormed into the bathroom beside our mobile classroom to flip out in private. A few minutes later, Mrs. McRae followed me. She told me that she didn’t know if I’d cheated or not, but considering the situation, she did not feel it was appropriate to appoint me to safety patrol.

Oh my goodness, y’all. Oh my goodness.

My little 6th grade life flashed before my eyes. I cried some more in the bathroom. I cried at home that night. I glared daggers at the safety patrol students when I passed them in the hallways in the following weeks. I’d love to say, “And then I got over it!” but here I am writing an entire blog post about it as an adult, so uh. That’s probably kind of unhealthy, right? Whatev. It scarred me, people!

But ultimately, even though it was hard to swallow, I can honestly say I appreciate the lesson in dealing with unfairness and disappointment. Getting used to the fact that things don’t always go your way (and sometimes, aren’t even fair!) is part of being a healthy human being.

Talking about disappointments is an apt opening to a monkey bread post on Willow Bird Baking. Don’t worry; these Apple Cinnamon Monkey Bread Sundaes aren’t disappointing! They’re gorgeous, rich fall treats. Monkey bread in general, though, has always been a total fail for me. It typically falls apart, overflows its pan, or ends up doughy in the middle. Even when I tried straight up convenience monkey bread with canned biscuit dough I managed to use too many cans and create quite the underbaked mess (stop laughing!) I can’t explain this phenomenon — monkey bread should be so darn easy. What’s the matter with me?!

Anyhow, instead of throwing a fit in the bathroom, I’ve kept trying new monkey bread recipes. I love the stuff, so even the “failures” get devoured in short order. And these Apple Cinnamon Monkey Bread Sundaes were quite the little success. With one batch of yeast dough, you can make some Taco Pockets and a quick dessert — two dishes for the effort of one! The “recipe” that follows outlines this simple method for dressing up your leftovers. Next time you’re making some yeast rolls or dinner pockets, save some dough for monkey bread!

What’s an injustice you remember experiencing?

Apple Cinnamon Monkey Bread Sundaes (using leftover yeast dough!)


Recipe by: Bits and pieces adapted from What’s Cookin’, Chicago?, All Recipes
Yield: depends on your leftover dough

This recipe is actually just a method of dolling up leftover dough to make monkey bread sundaes. Using this little technique, you can save some dough from any dinner recipe and create a dessert to enjoy at the end of the meal with no extra fuss. Even if you only have a small amount of leftover dough, you can bake your monkey bread in the wells of a cupcake pan and serve the warm, gooey pieces over vanilla bean ice cream!

To make Apple Cinnamon Monkey Bread with leftover dough, grab:

Leftover yeast dough* that has already completed one rise. Maybe you used the first half for some Taco Pockets? You sly devil, you.
Sauce: You can use 1/2 cup (1 stick) melted butter mixed with 1 cup brown sugar to form a caramelly sauce. For more apple flavor, you could also try mixing 1/2 cup butter and 1/2 cup brown sugar over the stove, removing it from heat, and adding 1/2 cup apple butter.
Cinnamon and sugar mixture: 1/2 cup sugar whisked together with 1 1/2 teaspoons cinnamon.
Melted butter: about 1/2 cup.
Apples: 1 peeled, cored, and chopped apple (or more if you have lots of leftover dough)
Nuts: about 1 cup of chopped nuts like pecans or walnuts. I chose pecans because I love them.

Then do this:
Set up each of your items in a row to form an assembly line: an apple station, a melted butter station, a cinnamon/sugar station, and then a greased bundt pan (or greased cupcake pan if you only have a bit of leftover dough). Set your sauce and nuts to the side for now.

With floured fingers, take a ping-pong-ball-sized pinch of leftover yeast dough (you can change this to smaller pinches if you’re baking in a cupcake pan). First, place some apples in the middle of the ball of dough and pinch the dough closed around them. Then drop the dough ball in melted butter, tossing gently to coat with a fork. Next, drop it in the cinnamon and sugar mixture and toss gently to coat (use a separate fork in this bowl). Drop your coated dough ball in the greased pan.

Once you have a single layer covering the bottom of the pan you’re using, spoon a layer of sauce over the dough balls and sprinkle on a layer of nuts. Continue pinching, filling, and coating dough balls to form another layer, and then spoon sauce and sprinkle nuts over this, too. Keep going until you’ve used all your dough.

When you’ve used all of your dough, distribute a last bit of sauce and nuts over the top. Cover the pan with plastic wrap and let the dough rise for about an hour in a draft-free place. In the meantime, preheat the oven to 350 degrees F. When risen, bake the bread for 20-35 minutes (this can vary depending on the size of your dough balls and the size pan you used, but look for a dark golden brown color on top. If you take it out when it’s just golden brown, it’ll likely still be raw inside, so let it get dark.) Let cool in the pan for 5 minutes and then invert onto a plate (or pick out the monkey bread pieces with a fork like I did, to serve over vanilla bean ice cream!)

*Note: You can use this technique with canned biscuit dough, too — just cut out the rise time.

If you liked this post, please:
Subscribe to Willow Bird Baking
Follow Willow Bird Baking on Twitter
Follow Willow Bird Baking on Facebook
Give this post a thumbs up on StumbleUpon


ShareOther ways to share this post with friends!

Apple Cinnamon Cream Cupcakes: NOT Back-to-School Cupcakes!

It’s Cupcake Week on Willow Bird Baking! Cupcake Capers was a 5-day summer camp I conducted last week wherein 5 middle school girls learned to bake, fill, and frost cupcakes. We eschewed pedestrian cupcake flavors in favor of creative combinations that I now get to share with you! Every day this week I’ve been posting fun memories and recipes from Cupcake Camp.


No really, they’re not Back-to-School Cupcakes.

Like all good things, Cupcake Camp had to eventually come to an end. Day 5 arrived and so did the campers, eager to pack in one last day of cake pops and cupcakes. At the end of the day they would finally carry home their aprons, recipe notebooks, and colorful bakery boxes filled with the cupcakes we’d made all week (the ones they hadn’t already devoured, that is) to share with their families.

But first, we sat down to complete the cutest decorating job of the week: turning cupcakes into apples! We baked these apple cupcakes in bright red liners to begin creating the effect. Once they were cooled and frosted, we dipped the tops in red sanding sugar, used bits of pretzel for their “stems,” and cut “leaves” from green fruit roll-ups.

These cupcakes weren’t just adorable, though — they were also one of the girls’ favorite recipes all week long. The spice cake, creamy cinnamon mousse, and brown sugar buttercream frosting melded into a delicious preview of fall flavors. Bright smiles broke out all around as the campers first tasted one of their “apples.” Even though they had already ranked their favorite cupcakes, several of them went back and added Apple Cinnamon Cream Cupcakes right at the top of their lists!

After tasting, we sat back and admired our handiwork. Meticulous Mary Rood made the comment that these looked like Back-to-School cupcakes. She’s right, of course. Isn’t it funny how just as soon as August peeks around the corner, stores everywhere roll out the red plaid, apples, mini chalkboards, and school supplies in an array of primary colors? These cupcakes fit right in.

Her comment sunk in for a moment before our summer spirit rebelled. We still have a few weeks of freedom! The temperature still climbs to 100 degrees each day! We still have beach trips, pool trips, and sprints through the sprinkler planned!

I don’t care what the stores might have you believe, it’s still SUMMER! We’ll go back to school when our parents drag us, kicking and screaming, and not one second before!

(Okay, I guess I can’t quite wait until my parents drag me . . . )

So these may look like Back-to-School cupcakes. They may taste like Back-to-School cupcakes. I may have gotten carried away and photographed them surrounded by a bunch of the brightly colored school supplies I just made fun of.

But these are NOT Back-to-School cupcakes. These are IT’S-STILL-SUMMER-AND-I-DON’T-CARE-WHAT-YOU-SAY-LA-LA-LA cupcakes.

Now that we’re clear on that, you should go make them and eat about twenty.

What summer plans do you still have to accomplish before summer ends? Or, for readers on the tail end of winter, what exciting things do you have lined up for the spring?

Apple Cinnamon Cream Cupcakes


Recipe by: adapted from Baked Bree
Yields:about 24-28 cupcakes

Cupcake Ingredients:
2 cups flour
2 teaspoons ground cinnamon
1 teaspoon baking soda
3/4 teaspoon salt
1/2 teaspoon fresh nutmeg
1/8 teaspoon ground cloves
2 sticks butter at room temperature
1 cup sugar
1/2 cups brown sugar
4 large eggs
1 1/2 cups applesauce
1 cup toasted pecans, chopped (optional)

Cinnamon Mousse Ingredients:
1 cup milk
1 cup heavy cream
1 (4 serving) package vanilla Instant Pudding Mix (not Cook & Serve)
1 1/2 teaspoons cinnamon
3/4 teaspoon nutmeg

Brown Sugar Buttercream Frosting Ingredients:
1 stick room temperature butter
1/4 cup shortening
1/3 cup brown sugar
1/2 teaspoon cinnamon
3 cups of powdered sugar (depends on consistency desired)
3 tablespoons of heavy cream (depends on consistency desired)

Directions:
*Note: This recipe makes twice as much mousse as you need for filling the cupcakes. If you want to use half the pudding pack and save the rest for later, just measure it out and do so. Or use the extra mousse for another project (you know, like eating it with a spoon).

Make cupcakes: Line two muffin tins with paper liners. Preheat oven to 350°F. In a medium bowl, whisk together dry ingredients. In a separate, large bowl, cream together butter, sugar, and brown sugar until light and fluffy (several minutes). Add the eggs in one at a time, beating after each addition, and then mix in the applesauce. Finally, mix in the dry ingredients until just combined.

Fill each cupcake liner about 3/4 full of batter. Bake for 15-20 minutes and let cool completely.

Make mousse: To make the cinnamon mousse, combine milk, cream, and pudding mix, and spices in a medium bowl. Beat with a mixer until you reach soft peaks, or a thick whipped cream consistency (this takes a few minutes). Refrigerate mousse until you’re ready to use it.

Make frosting: To make the frosting, beat butter and shortening together until light and fluffy. Add the brown sugar and cinnamon and mix. Gradually add the powdered sugar, 1/2 cup at a time, and alternately add the cream. Adjust these items until desired consistency is reached.

Assemble cupcakes: To fill the cupcakes, use the Cone Method: cut an upside-down cone out of the top of each one. Cut off the tip of the cone (and eat it, if you wish) leaving just the “lid.” Fill the cavity with mousse using a piping bag or zip-top bag with the corner cut off, and then replace the “lid” to give you a relatively smooth surface to frost. Don’t overfill these, or they’ll be hard to frost.

Use the back of a spoon, a knife, or an offset spatula to cover the cupcakes with a layer of frosting. To ensure you don’t accidentally shift your “lid,” use a pretty thick layer of frosting and just gently pull it out toward the sides of the cupcake to achieve full coverage — that way you’re never pulling your spoon/spatula straight up and pulling the lid off. Dip frosted cupcakes into a bowl of red sanding sugar or sprinkles. Add a piece of a pretzel stick for a stem. Add a leaf cut from a green fruit roll up (I made a little indentation in my frosting with the tip of a knife to stick the tip of the leaf into). Enjoy!

All Cupcake Week Recipes:
Day One: Chocolate Pistachio Cream Cupcakes
Day Two: Banana Split Cupcakes and Cake Pops
Day Three: Creamsicle Cupcakes
Day Four: Strawberry & Cream Cupcakes and Cake Pops
Day Five: Apple Cinnamon Cream Cupcakes

If you liked this post, please:
Subscribe to Willow Bird Baking
Follow Willow Bird Baking on Twitter
Follow Willow Bird Baking on Facebook
Give this post a thumbs up on StumbleUpon


ShareOther ways to share this post with friends!

Mini Apple Pies with Cheddar Crusts

On car trips when I was younger, one of my favorite things to do was to torment my little brother. He would be tucked safely into his car seat minding his own business when I would attack. There was no tickling or hitting or poking involved — that’s just not my style. Instead, I launched a calculated verbal and psychological assault.

Despite the fact that we were usually in Tennessee or Kentucky at the time, I’d point out the window and scream, “HEY, look, it’s Disney World!” His hopeful little face would whip around to see the happiest place on earth, only to be confronted with cornfields and the occasional disinterested cow. “Oh, you just missed it,” I’d say, consoling him with a pat on the arm.

After he’d missed a few more Disney Worlds and a Sea World or two, he was about as frustrated as a hornet in a mason jar. His spluttering protests were met with one of those smug-big-sister shrugs on my part. “What?” I’d say, “I can’t help it if you’re turning around too slow.”

Okay, so I was kind of a punk. In my defense, I was little. And he was usually a pill, I promise.

Anyway, huge counterexample aside, I’m actually a pretty trustworthy person. I don’t know if Alex will ever trust me again, but you can.

One thing you should certainly trust me about is the fact that apple pies and cheddar cheese were made for each other. Some folks — especially in my part of the world, it seems — have never heard of this combo. People can be downright skeptical when you mention it.

I first heard about pairing apple pie and cheddar cheese only a few years ago. I was shocked to find out that this odd couple was an established and beloved tradition in some places. How had I missed out on this my entire life? I promptly ran to the grocery store, bought a mini apple pie and a block of sharp cheddar, and gave it a try. Turns out all those crazy New Englanders (love you guys!) weren’t wrong: the sweet filling with the sharp cheese was a perfect match.

So what would be better than a slice of apple pie with a slice of cheddar cheese on top? How about a pie that fully integrates the apply and cheddary goodness? I created these mini apple pies with cheddar crusts to do just that. The cheddar crust is phenomenal — I think I ate more of it raw than I used in the pies — and I chose a sweet apple filling to balance it out. The result is a buttery, sweet-and-salty piece of heaven.

If this is the first time you’ve heard of the apple pie and cheddar combo, trust me — all Disney Worlds and Sea Worlds aside — when I say you have to try it. And if you’ve enjoyed a slice of apple pie with a hunk of cheddar on top, back me up: tell us how much you love it.

P.S.: Some folks have apparently been known to say, “An apple pie without the cheese is like a hug without the squeeze.”

P.S. 2: Happy Pi Day — only one day late. These little guys are worth the wait.

Mini Apple Pies with Cheddar Crusts


Recipe by: Adapted from my own pie crust and Betty Crocker’s filling
Yield: 4 cupcake-sized apple pies and 10-12 mini apple-pies

Crust Ingredients:
4 cups flour
1 teaspoon salt
10 ounces extra-sharp cheddar, grated
3/4 cup cold lard (non-hydrogenated if available)*
3/4 cup cold butter, chopped
6-8 tablespoons cold water
1 egg beaten with 1 tablespoon water for egg wash
1/4 cup white sugar mixed with 1 teaspoon cinnamon for sprinkling
*you can substitute vegetable shortening here if you wish, but I highly recommend the lard!

Filling Ingredients:
1/4 cup sugar
1/8 cup all-purpose flour
1/2 teaspoon ground cinnamon
1/2 teaspoon ground nutmeg
pinch salt
4 cups mixed apples, peeled and chopped (4 medium — I used Gala, Fuji, Granny Smith, and Golden Delicious)
1 tablespoon butter

Directions: Pulse flour and salt together to combine. Add scoops of lard and pulse into the mixture has the texture of coarse sand, about 10 seconds. Add in chunks of butter and cheese and pulse until butter pieces are no larger than small peas, about 10 pulses. Add minimum amount of water and pulse on low. If dough remains crumbly and doesn’t come together, add another 2 tablespoons of water. Add as little as is required to enable the dough to be rolled into a ball. Form the dough into 2 disks, wrap in plastic, and refrigerate for 20-30 minutes while preparing your filling.

Prepare filling: Mix all ingredients together except for butter.

Preheat your oven to 400 degrees F. Use cupcake pans, mini-cupcake pans or both for your pies, as desired. After crust has chilled, roll it out between two sheets of parchment paper until it’s relatively thin — a little thinner than 1/4 inch. Pull the parchment paper off the dough every now and then (flipping to do this on both sides) to ensure your dough isn’t sticking. Use a big round cookie cutter or a knife to cut out a piece of dough about 2 inches larger around than your cupcake wells (or about 1 inch larger around than your mini-cupcake wells). Fit this dough down into a well as a bottom crust. Fill it with filling, top it with a few bits of butter, and use another circle of dough to form the top crust. Crimp the edges (careful not to make your crimping too elaborate — if your edge is too big, your pies can be top-heavy and pull apart. You may just want to use a fork to create decorative edges instead of traditional “crimping.”) Repeat this process until all of your mini pies are ready for the oven. Brush them all with egg wash and sprinkle cinnamon and sugar mixture over the top.

Bake mini pies at 400 degrees for 15 minutes (for cupcake-sized) or 10 minutes (for mini-cupcake sized). Turn temperature down to 375 degrees F, open the oven to rotate your pans and cool it off for a few seconds, and turn temperature down to 375 degrees F. Bake cupcake-size pies for 7-9 minutes longer, and mini-cupcake sized pies for 6-7 minutes longer. Remove from the oven and let pies cool completely in the pan — then gently “twist” the pies in their wells to be sure they aren’t sticking and pull them out. Serve immediately or store in an air-tight container in the refrigerator.

P.S. Don’t forget about the Cheesecake Challenge! Choose any one of 9 cheesecake recipes to prepare within the next month. Email a photo to me by 4/5/2011 to be featured on Willow Bird Baking! Get more details about the challenge here.

If you liked this post, please:
Subscribe to Willow Bird Baking
Follow Willow Bird Baking on Twitter
Follow Willow Bird Baking on Facebook
Give this post a thumbs up on StumbleUpon


ShareOther ways to share this post with friends!

Easy Apple Puff Pastry Tarts with Almond Whipped Cream (Voting Now Open in Project Food Blog!)

Willow Bird Baking is a contestant in Project Food Blog, a contest comprised of a series of 10 challenges to find the next food blog star. Voting for Challenge #7 is now open! I would be SO grateful if you’d consider voting for me in this round! Just sign in to your Foodbuzz account (or register if you don’t already have one). Then go to my cheesecake video entry here and vote by clicking the heart next to the words “Vote for this Entry.” I appreciate your support so much!

I just arrived in Orlando after 9 hours in a car (thankfully, I was accompanied by a fun coworker, Kyle). I’m in town to give a presentation at the National Council of Teachers of English convention, but after that road trip, I’m not even sure I can still speak English, much less teach others how to teach it.

I kind of expect the next few days to be a blur. Wayyy too much Coke Zero, wayyy too much work done this week, and wayyy too much bustling around this morning means that I’m currently feeling crumpled and headachy.

Kyle and I spent the last 45 minutes of the trip searching for food in a starvation-induced trance. We’d already ruled out Steak ‘n Shake, but every exit had one (and almost nothing else), as if taunting us. Lots of hotels, lots of outlet malls, lots of big-neon-lit-Orlandoy places — but no normal, honest-to-goodness FOOD. Lulled by hunger delirium and the soporific British accent of Kyle’s GPS, I had almost lost touch with reality when we finally spotted a Chick-fil-a. We definitely needed one of those easy buttons you see on TV. Easy dinner for people with currently confuzzled brains, please!

Well, an easy dinner didn’t happen, but here’s an “easy button” for dessert, at least. These apple puff pastry tarts are truly painless in addition to being warm and comforting. I served these treats at my parents’ anniversary dinner. Before beginning dinner prep, I made sure my puff pastry was thawed, cut into squares, and ready to go. After dinner, the family retired to the living room to relax while I mixed my apples and spices and baked up the tarts. Just before serving, we topped each tart with almond whipped cream, which turned out to be my favorite component.

The entire dessert was fancy-looking enough for company, but easy enough for any busy weeknight (easier, obviously, than my food quest with Kyle).

Okay, enough bleary-eyed blogging. Before I say anything too silly, I’m signing off and heading to bed (in the condo bedroom that’s decorated entirely in Disney characters — no confusion about what city I’m in!)

Make some tarts, y’all!

Easy Apple Puff Pastry Tarts with Almond Whipped Cream


Recipe by: Pioneer Woman
Yields: about 6 individual tarts

Tart Ingredients:
homemade or store-bought puff pastry sheets, thawed and cut into rectangles
4 apples, cored and sliced but not peeled
1 cup brown sugar
1/4 teaspoon salt
optional spices to taste: cinnamon, nutmeg, etc.

Almond Whipped Cream Ingredients:
2 cups heavy whipping cream
5-6 tablespoons confectioners’ sugar (to taste)
1 teaspoon almond extract

Directions:
Preheat your oven to 415 degrees. Put the puff pastry rectangles on a greased baking pan (with edges, so the juices don’t run down and caramelize on your oven, or on your mom’s freshly cleaned oven . . . not that I’m speaking from experience, or anything. Combine apple slices, sugar, salt, and any spices you’re using in a bowl and allow them to sit for a few minutes. Then arrange the apple slices on the puff pastry in a straight line, overlapping.

Bake 18 – 20 minutes, or until pastry is puffy and golden brown. While pastry is baking, whip together cream, sugar, and almond extract in a medium bowl to soft peaks. Place this in the fridge until you’re ready to use it.

Remove pastries from the oven and immediately serve with a dollop of cold almond whipped cream (allow diners to place this on their own tarts to ensure it doesn’t melt before it gets to them!)

If you liked this post, please:
Subscribe to Willow Bird Baking
Follow Willow Bird Baking on Twitter
Follow Willow Bird Baking on Facebook
Give this post a thumbs up on StumbleUpon


ShareOther ways to share this post with friends!

1 2 3 4