Pumpkin Cheesecake Stuffed Snickerdoodles

A few evenings ago I was driving home on Harris Boulevard straight into the hot-gold sunset. The windows were rolled down — enough so that the tepid autumn air rushed into the car across my forehead, but not enough to assault me with a face full of blonde tangles. My favorite 80s song tumbled out of the speakers and vibrated the swirling air around me.

I acquiesced: okay, fall.
I’m a summer girl. Cold air feels like a heavy restraint: every trip outside with Byrd involves shrugging on two coats, two pairs of pajama pants, a scarf, and some mittens. I have to wrangle her into her snuggie (what? don’t act like you don’t own a dog snuggie) and wrap her in my scarf. It feels like I’ve doubled in weight as I lumber down the stairs like an abominable snowperson (with an abominable — but adorable — little snowdog in my arms).

It’s harder to move. The ice-edged air is harder to breathe. It takes longer to get up the gumption to do something as simple as take a walk.

Besides the discomfort, there’s that slate winter sky. Every day is a sloshy gray, and the sky seems lower somehow. Some summer days breeze in with mountainous clouds; their enormity makes the ocean of blue sky seem endless. In winter, though, the clouds form a heavy wool blanket that seems to sit just overhead. All summer we drift about in miles of free space; all winter we’re squashed like heavily-clothed little bugs.

I dislike winter so strongly that even on the most oppressively hot days this summer, I refused to complain. Sweat? Okay. Sunburn? No problem. Heat stroke? I’ll deal. Because the alternative is disgusting, wet, despicable, muddy, gray, depressing winter.

Facebook friends pined all summer for cooler weather and it was all I could do to avoid responding, “If you wish away my summer, I will find a way to haunt you all. winter. long.”
I dislike winter so strongly that every year, I initially dislike fall. Fall is a premonition of winter’s evil, marching stolidly across the globe toward us, indifferent to our terrified screams–

Okay, well that’s a little much. But fall means winter’s coming, and that makes me sad. Instead of accepting the advent of cooler air, I hang on to summer as long as possibly.
Others get out their boots while I stubbornly continue wearing my bohemian beach flip flops. I wear tiny sundresses, budging in my resolve only to slip on a sweater with a scowl when the temperature drops to 40 degrees each evening. I heat my house like the tropics and continue wearing my beloved nightgowns. I eat ice cream sundaes.

But every year, things start to happen that weaken my resolve. I’ll realize that I can light my fir tree and cinnamon spice candles at the same time and make my apartment smell like Christmas. I’ll see that the Southern Christmas Show (only my favorite event of the year!) is coming to town. I’ll remember the awesome sweater I was sad to put away last spring.

And finally, most importantly of all, I’ll realize there’s a whole new season of recipes to be created. Y’all know I bake anything and everything with pumpkin as soon as the first can hits the shelf. I love apples and nuts and cranberries, but there is no ingredient that winterizes the summery cockles of my heart (wait, that doesn’t sound like a good thing?) as much as that gourd.

Eventually there comes a moment when I accept the inevitable. Jamming out in my car a few evenings ago, I finally welcomed fall. And you know, I might have even been a little joyful to do so.

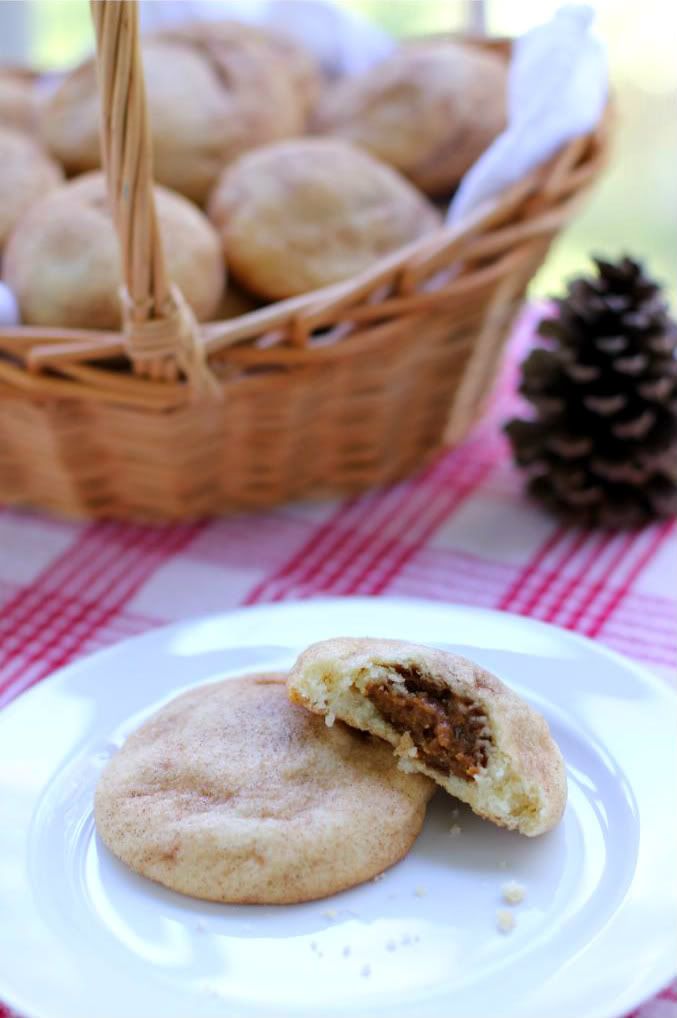
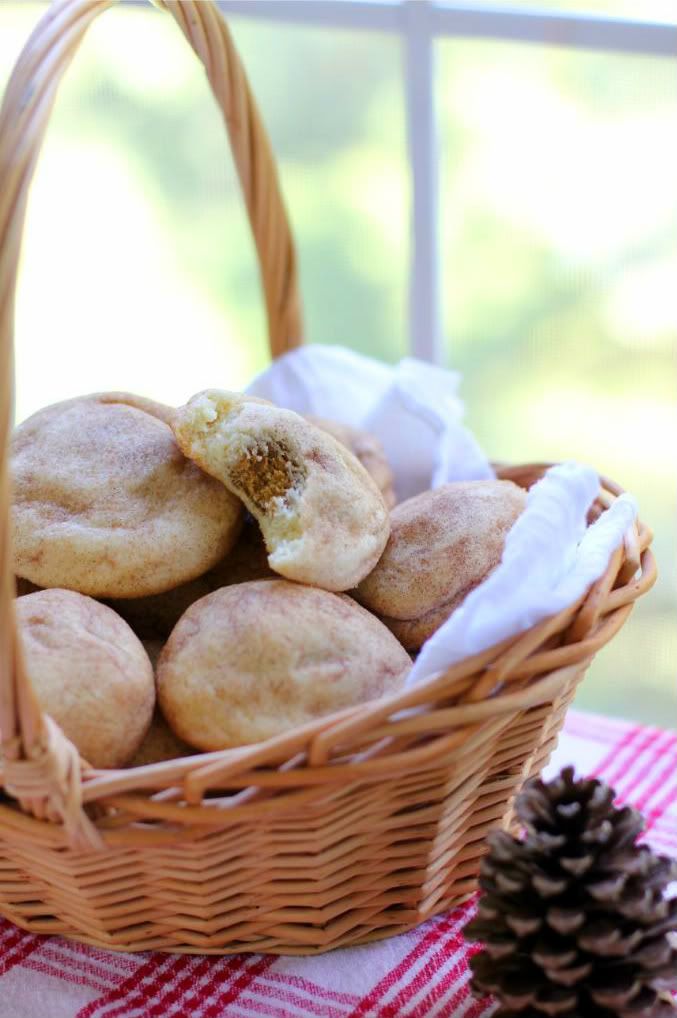
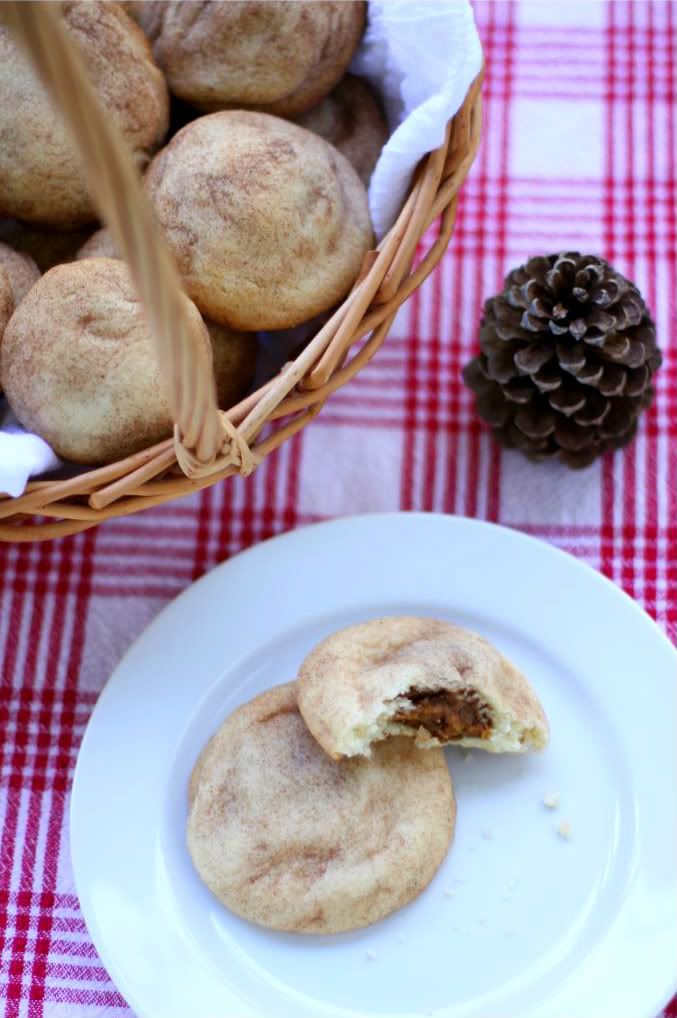
Whether you’re still having trouble accepting the change of seasons or not, these cookies will make you joyful. I don’t say this often because it totally ruins your street cred if you just throw it out there about every recipe you create, but these cookies are one of the best things I’ve ever made. Warm snickerdoodles are already the cinnamony, sugary bees’ knees, but when you stuff them plumb full of an autumn-spiced pumpkin cheesecake mixture, they become otherwordly. Who needs summer?

What’s your favorite season?

Pumpkin Cheesecake Stuffed Snickerdoodles


Recipe by: Willow Bird Baking, cobbled together from Whole Foods (filling) and Sunset, 1998 (via Bakergirl) (cookies)
Yield: about 30-35 large cookies

Make these cookies as soon as you can — they are incredible! Warm, cinnamon-sugar snickerdoodles surround a creamy ball of pumpkin cheesecake spiced with graham cracker and gingersnap crumbs. These cookies are crumbly, buttery, melt-in-your-mouth nuggets of autumn love. Sure, they have a lot of fat and a lot of sugar — so reserve them for a special occasion. But don’t skimp! They’re worth it. Also, while the cookies look fancy, they’re quite simple to make. Store leftovers in an airtight container in the fridge and heat them for 20-30 seconds or so before serving them with a tall glass of milk.

Snickerdoodle Ingredients:
1 cup butter, softened
1 cup vegetable oil
3/4 cup granulated sugar
1 cup powdered sugar
2 large eggs
4 1/4 cups all-purpose flour
1 teaspoon baking soda
1 teaspoon cream of tartar
1/2 teaspoon salt
1/2 cup granulated sugar + 1 tablespoon cinnamon for rolling cookies

Filling Ingredients:
2 cups white chocolate chips (about 10 ounces)
1 cup pumpkin puree
1 1/2 cups finely ground gingersnaps
1 1/2 cups graham cracker crumbs
4 tablespoons powdered sugar
1/2 teaspoon ground cinnamon
Pinch of orange zest (I used a dash of orange extract)
1 (8-ounce) package cream cheese, softened

Directions:
First, make the pumpkin spice truffle filling. Melt the white chocolate chips in the microwave on half power. Start with 1 minute and stir. Continue to heat the chocolate in 15 second intervals, stirring well after each to aid the melting, until it is smooth (be careful not to overheat). Set this aside to cool slightly. In the meantime, mix the pumpkin, gingersnap and graham cracker crumbs, confectioners’ sugar, cinnamon, orange zest or extract, and cream cheese together. Add the white chocolate and mix well until thoroughly combined. Transfer the mixture to the refrigerator to chill and firm up. In the meantime, make the snickerdoodle dough.

Mix together the butter, vegetable oil, granulated sugar, powdered sugar, and eggs in a large bowl. In a separate large bowl, whisk together the flour, baking soda, cream of tartar, and salt. Add the flour mixture into the butter mixture in 3-4 additions, mixing until just combined between each. Place the finished dough in the refrigerator to chill. While the cookie dough chills, roll pumpkin mixture into balls and place the balls on a wax paper lined baking sheet. Cover, and freeze until firm (about 1 hour).

In a small bowl, whisk together 1/2 cup granulated sugar and cinnamon. Preheat oven to 375 degrees F. Take a few pumpkin balls out of the freezer at a time to work in small batches (so they stay firm). Scoop out about a tablespoon of chilled cookie dough. Press a frozen pumpkin cheesecake ball into the center, then cover with another bit of dough, working the dough around the whole ball. Roll in cinnamon-sugar and place on a greased baking sheet. Repeat the process, placing cookies 3-4 inches apart. If cookie dough gets too soft, re-chill it for a bit and continue working. I made sure to stick it back in the fridge during any downtime (like when the cookies were in the oven).

Bake for 12-15 minutes, or until edges are slightly browned. Let the cookies cool on the pan for a few minutes before removing them to a cooling rack to cool completely.

If you liked this post, please:
Subscribe to Willow Bird Baking
Follow Willow Bird Baking on Twitter
Follow Willow Bird Baking on Facebook
Give this post a thumbs up on StumbleUpon


ShareOther ways to share this post with friends!

Apple Cinnamon Monkey Bread Sundaes (using leftover yeast dough!)

While we’re on the subject of getting used to failure and letting yourself take shortcuts, I have a confession to make. Growing up as a perfectionist sometimes meant I was a very, very poor sport.

In 6th grade, I was determined to accumulate every possible accolade available to me. I tore through novels at a frantic pace to be the top Electronic Bookshelf reader. I drew up posters to campaign for a student council position. I left class each day to run the controls for the entire school’s closed circuit news station. I assisted the computer teacher setting up technology for special events. I wrote columns for the 6th grade newsletter, The Leopard’s Roar. I slaved over every assignment as part of my neverending quest for perfect grades. I practiced endlessly to execute the perfect flip over the monkey bars on the playground. Life was juuuust about perfect.

One cool spring morning, though, things changed. I’d been eagerly awaiting an announcement from my teacher, Mrs. McRae. She was looking for a few trustworthy students with integrity and strong academic performance to appoint to the coveted position of safety patrol. Being on the safety patrol would add another shiny pip to my starched, pristine collar, and I was absolutely rabid over it.

The morning was packed with independent work. I was absorbed in completing my math worksheet while folks milled about the room attending to their own tasks. At one point, I realized Mrs. McRae was calling out the answers to the worksheet, but since I wasn’t finished, I tuned her out and continued working without much thought. I didn’t think twice about doing so until one of my classmates piped up with a whine, “Mrs. McRae, Julie’s cheating! She’s writing down answers while we’re checking it!” I looked up, shocked.

Just to bandage my wounded pride a little (15 years later, because you know, that’s normal), I was not cheating. I was calculating the answer to every problem and hadn’t heard or recorded a single answer that was called out. I was just trying to finish my worksheet, y’all! Nevertheless, Mrs. McRae called me out of the classroom.

I explained my situation to her in a panic. Surely she couldn’t possibly think that what that little twerp said about me was true?! Her bespectacled face stared down at me with doubt. You could see the wheels turning in her head: Well, Julie does care an awful lot about grades. Maybe…

Confronted with what felt like the greatest injustice I’d ever suffered, I began to have a full-on anxious meltdown. As I restated my case and pleaded with her to believe me, I started crying tears of frustration. Finally, I stormed into the bathroom beside our mobile classroom to flip out in private. A few minutes later, Mrs. McRae followed me. She told me that she didn’t know if I’d cheated or not, but considering the situation, she did not feel it was appropriate to appoint me to safety patrol.

Oh my goodness, y’all. Oh my goodness.

My little 6th grade life flashed before my eyes. I cried some more in the bathroom. I cried at home that night. I glared daggers at the safety patrol students when I passed them in the hallways in the following weeks. I’d love to say, “And then I got over it!” but here I am writing an entire blog post about it as an adult, so uh. That’s probably kind of unhealthy, right? Whatev. It scarred me, people!

But ultimately, even though it was hard to swallow, I can honestly say I appreciate the lesson in dealing with unfairness and disappointment. Getting used to the fact that things don’t always go your way (and sometimes, aren’t even fair!) is part of being a healthy human being.

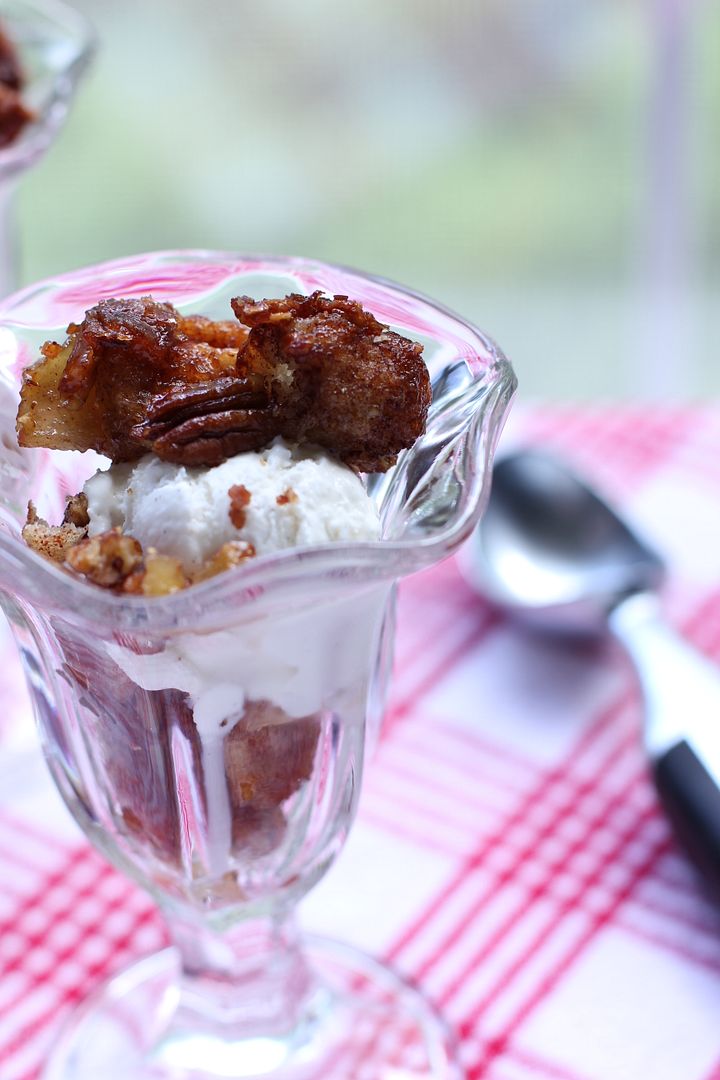
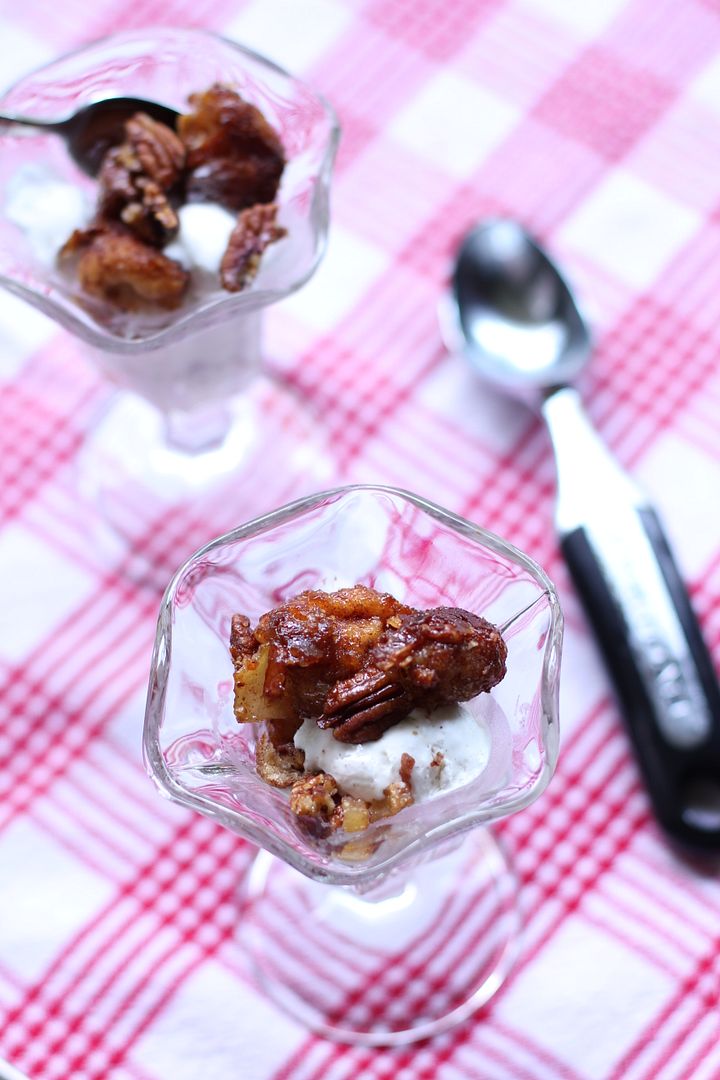
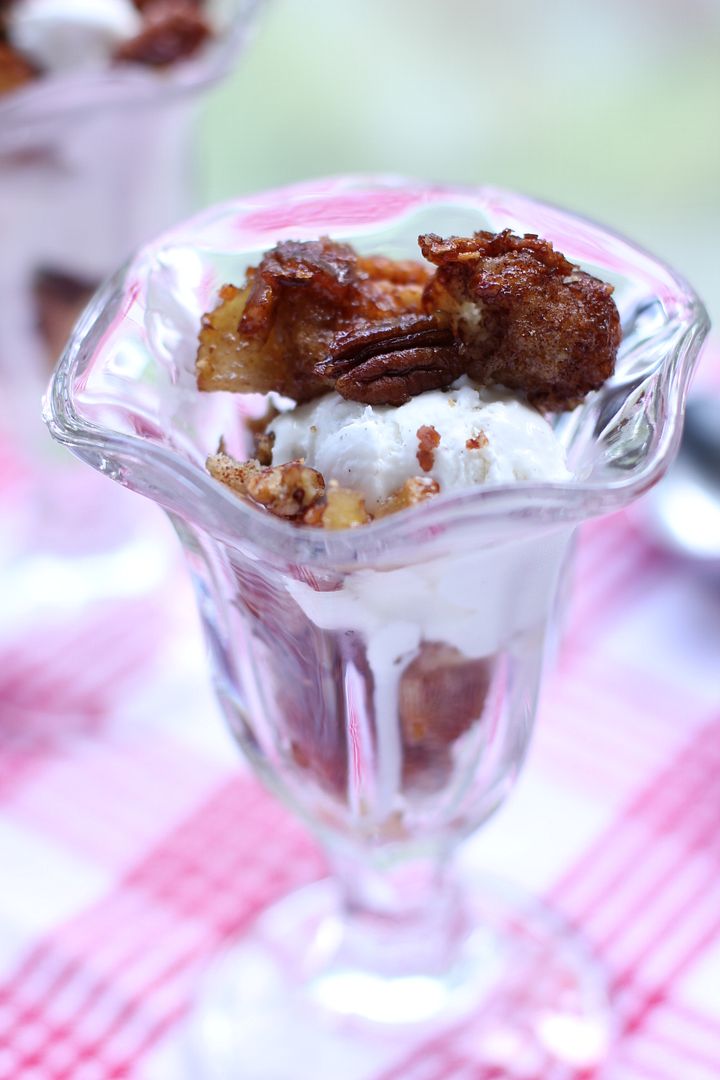
Talking about disappointments is an apt opening to a monkey bread post on Willow Bird Baking. Don’t worry; these Apple Cinnamon Monkey Bread Sundaes aren’t disappointing! They’re gorgeous, rich fall treats. Monkey bread in general, though, has always been a total fail for me. It typically falls apart, overflows its pan, or ends up doughy in the middle. Even when I tried straight up convenience monkey bread with canned biscuit dough I managed to use too many cans and create quite the underbaked mess (stop laughing!) I can’t explain this phenomenon — monkey bread should be so darn easy. What’s the matter with me?!

Anyhow, instead of throwing a fit in the bathroom, I’ve kept trying new monkey bread recipes. I love the stuff, so even the “failures” get devoured in short order. And these Apple Cinnamon Monkey Bread Sundaes were quite the little success. With one batch of yeast dough, you can make some Taco Pockets and a quick dessert — two dishes for the effort of one! The “recipe” that follows outlines this simple method for dressing up your leftovers. Next time you’re making some yeast rolls or dinner pockets, save some dough for monkey bread!

What’s an injustice you remember experiencing?

Apple Cinnamon Monkey Bread Sundaes (using leftover yeast dough!)


Recipe by: Bits and pieces adapted from What’s Cookin’, Chicago?, All Recipes
Yield: depends on your leftover dough

This recipe is actually just a method of dolling up leftover dough to make monkey bread sundaes. Using this little technique, you can save some dough from any dinner recipe and create a dessert to enjoy at the end of the meal with no extra fuss. Even if you only have a small amount of leftover dough, you can bake your monkey bread in the wells of a cupcake pan and serve the warm, gooey pieces over vanilla bean ice cream!

To make Apple Cinnamon Monkey Bread with leftover dough, grab:

Leftover yeast dough* that has already completed one rise. Maybe you used the first half for some Taco Pockets? You sly devil, you.
Sauce: You can use 1/2 cup (1 stick) melted butter mixed with 1 cup brown sugar to form a caramelly sauce. For more apple flavor, you could also try mixing 1/2 cup butter and 1/2 cup brown sugar over the stove, removing it from heat, and adding 1/2 cup apple butter.
Cinnamon and sugar mixture: 1/2 cup sugar whisked together with 1 1/2 teaspoons cinnamon.
Melted butter: about 1/2 cup.
Apples: 1 peeled, cored, and chopped apple (or more if you have lots of leftover dough)
Nuts: about 1 cup of chopped nuts like pecans or walnuts. I chose pecans because I love them.

Then do this:
Set up each of your items in a row to form an assembly line: an apple station, a melted butter station, a cinnamon/sugar station, and then a greased bundt pan (or greased cupcake pan if you only have a bit of leftover dough). Set your sauce and nuts to the side for now.

With floured fingers, take a ping-pong-ball-sized pinch of leftover yeast dough (you can change this to smaller pinches if you’re baking in a cupcake pan). First, place some apples in the middle of the ball of dough and pinch the dough closed around them. Then drop the dough ball in melted butter, tossing gently to coat with a fork. Next, drop it in the cinnamon and sugar mixture and toss gently to coat (use a separate fork in this bowl). Drop your coated dough ball in the greased pan.

Once you have a single layer covering the bottom of the pan you’re using, spoon a layer of sauce over the dough balls and sprinkle on a layer of nuts. Continue pinching, filling, and coating dough balls to form another layer, and then spoon sauce and sprinkle nuts over this, too. Keep going until you’ve used all your dough.

When you’ve used all of your dough, distribute a last bit of sauce and nuts over the top. Cover the pan with plastic wrap and let the dough rise for about an hour in a draft-free place. In the meantime, preheat the oven to 350 degrees F. When risen, bake the bread for 20-35 minutes (this can vary depending on the size of your dough balls and the size pan you used, but look for a dark golden brown color on top. If you take it out when it’s just golden brown, it’ll likely still be raw inside, so let it get dark.) Let cool in the pan for 5 minutes and then invert onto a plate (or pick out the monkey bread pieces with a fork like I did, to serve over vanilla bean ice cream!)

*Note: You can use this technique with canned biscuit dough, too — just cut out the rise time.

If you liked this post, please:
Subscribe to Willow Bird Baking
Follow Willow Bird Baking on Twitter
Follow Willow Bird Baking on Facebook
Give this post a thumbs up on StumbleUpon

ShareOther ways to share this post with friends!

Easy Sopapilla Pumpkin Cheesecake Bars

There’s a banner that hangs above the whiteboard at the front of my classroom. It’s about six feet long and so high that you can see it from anywhere in the room — unless you’re hiding under my desk, I guess, but why would you be doing that? You’re just asking for a behavior tally.

I made the banner by hand, writing its message (which comes from a book I read before I started teaching) in huge blue block letters: THERE ARE NO SHORTCUTS.

For most of my students, middle school is just the right time to be confronted with this reality. New 6th graders walk into my classroom fresh from the cottony, comforting cocoon of elementary school. Their elementary school teachers did a little more hand-holding, offered a little more amnesty. It’s not because they were softies; rather, it’s because students aren’t typically ready to be independent learners at that point in their development. Some of my 6th graders aren’t ready when they first meet me, either — but it’s my job over the course of two years to get them there.

Sometimes it happens the hard way. I can see the surprise in their eyes when I give them their first zero on a homework assignment. They stammer, “But my printer was broken! I couldn’t print it!” I ask if they followed the advice given at the beginning of the year to find a “printer buddy,” a classmate willing to print for them in case of technical difficulties. The blank stare I get in response speaks volumes. I pencil in the zero, and as I move along briskly to the next student, there’s a heavy lesson being learned in my wake.

They don’t quite know what hit them, but if they asked, I could tell them: it’s responsibility. The whole weight of it just fell on their little shoulders! It feels like a heavy load, but actually, they can manage that zero. In doing so, in fact, they get used to managing (and working to prevent) discomfort, disappointment, and failure. They get used to making their own choices and experiencing the results. They become independent learners.


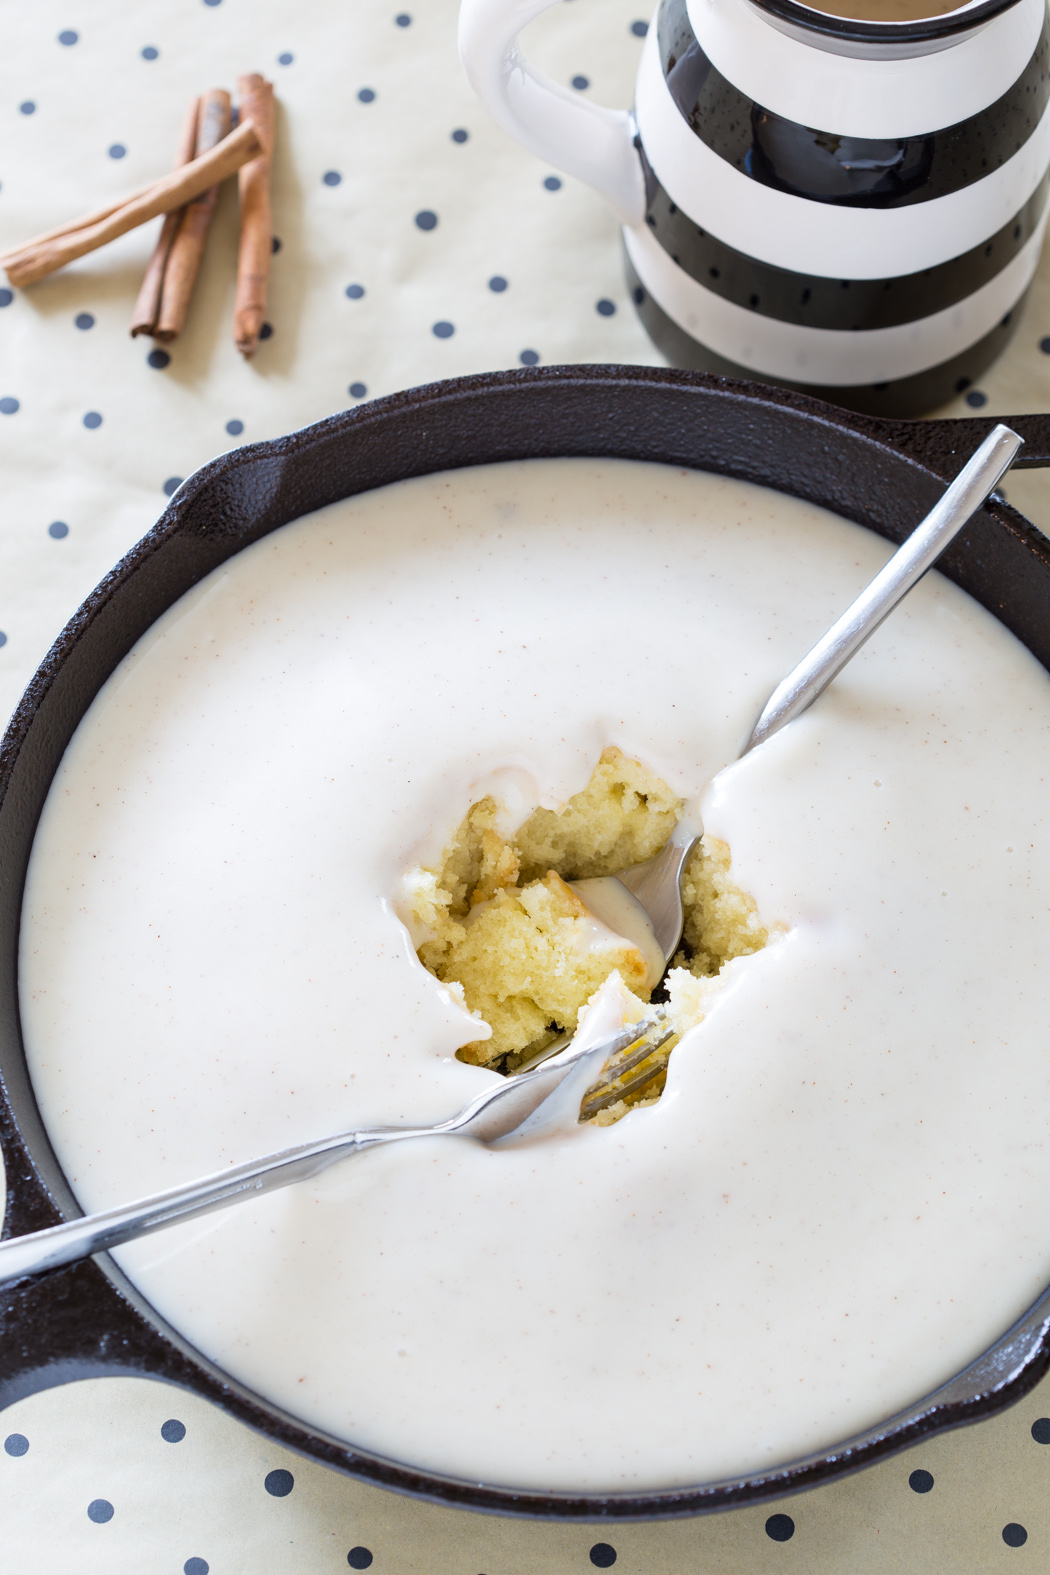
This was supposed to be a drizzle, but I got carried away.

Teaching them that there are no shortcuts (you just have to buckle down and complete the work, study for the tests, take ownership of your learning experience) is invaluable, but I also work with some kids who need a different message.

There are a few kids every year who come in with everything color coded. Their handwriting is perfect. They create mile-high stacks of flashcards before every quiz. It’s a teacher’s dream — until you notice the tiny cracks in their morale that are widening under pressure. You hear that they’re agonizing over their homework for hours to make it perfect, or you see them tearing up over a few missed points on a quiz. You feel their tension when you confer with them about their essay. These kids are the perfectionists. I empathize with them because I’m a perfectionist, too. I know what a heavy load it is to bear.


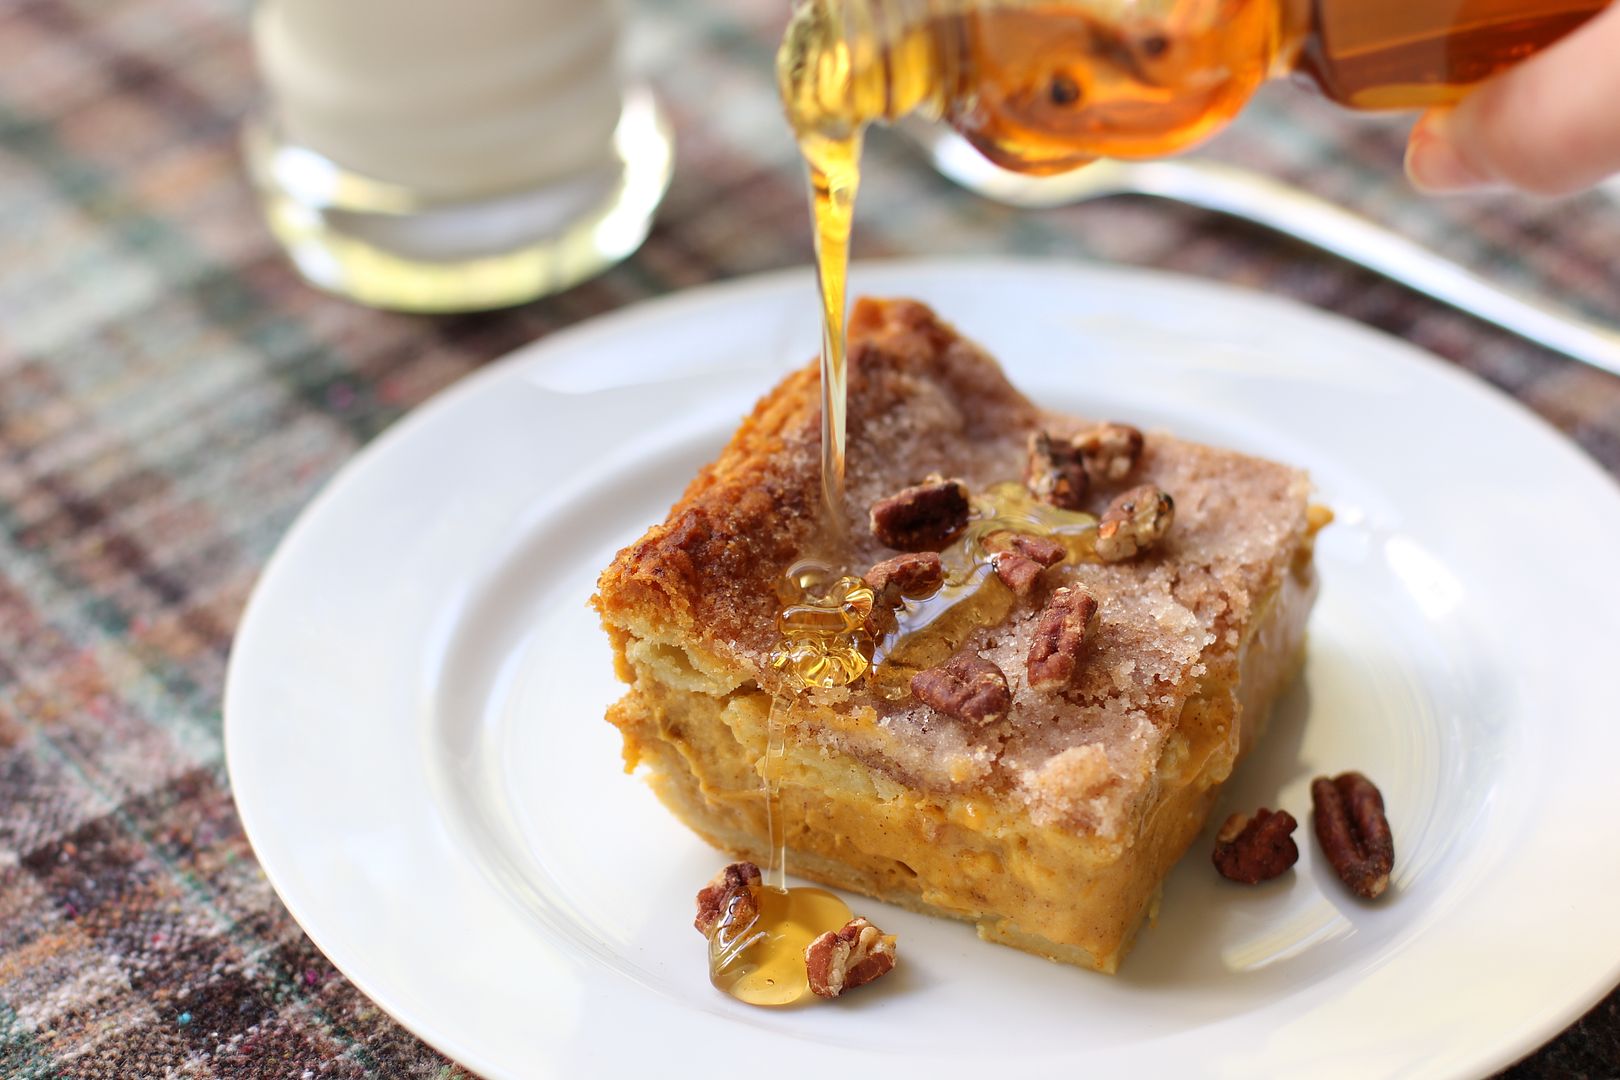
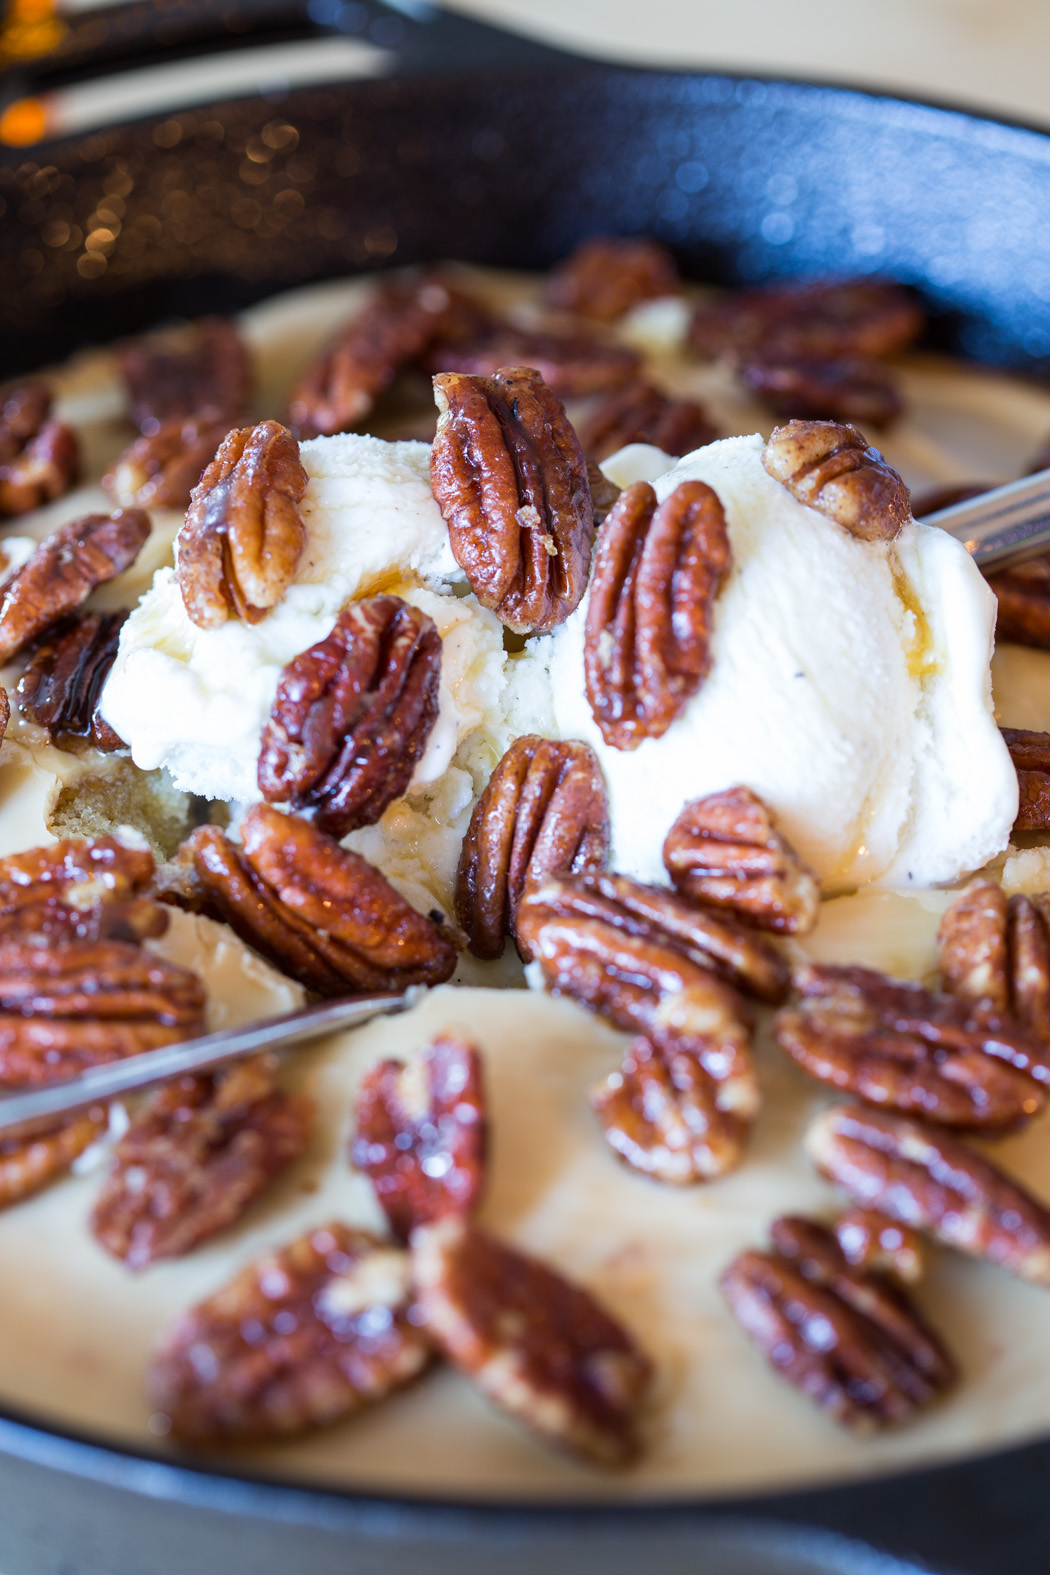
Drenched. This is too much honey, but it looks nice.

Perhaps this sounds hypocritical considering the first half of this post, but for the perfectionists, my message is often: THERE ARE SHORTCUTS. While it’s not a message I’d want to post on the wall of my classroom (the perfectionists are a small minority, after all), it’s a crucial one to convey.

These are children who need to be given permission to give 80% rather than trying their “best,” which is often overkill. They need help scaling their efforts down for smaller assignments with lower point values, and saving their ardor for important endeavors. They sometimes need advice, believe it or not, on how to relax.

One of my college English professors said it best — and I repeat this to my students every year — when he said something to the effect of, “Your cat will still love you if you don’t make an A.” The perfectionists need to know that there’s life beyond working hard for the sake of working hard. This literally didn’t sink in for me until after college, when I tried my hardest at something and for the first time, failed miserably — but that’s a story for another day. For now, I just want to tell you: THERE ARE SHORTCUTS.


I ate this.

Last winter I bought some pumpkins to chop in half, seed, roast, and strip for pumpkin puree. It was lovely to work with the pumpkins, but I did it mostly for the sake of having made the dish completely from scratch. I was in the middle of Project Food Blog and certainly didn’t want to take any unnecessary shortcuts. There’s nothing wrong with that — except that it was another hour in the kitchen, another mess to clean up. Did I really have to do all of that just to be “perfect”? Probably not: America’s Test Kitchen determined with taste tests that people can’t really differentiate between canned and fresh pumpkin in a recipe.

It’s not that there’s no point in ever making things from scratch. Apart from being able to fully control how you nourish your body, you gain confidence by making something beautiful from a collection of raw ingredients. Every now and then, though, when a simple and satisfying dessert is your primary goal, there are shortcuts. In this recipe, for instance, two cans of premade crescent roll dough and some canned pumpkin make a gorgeous autumn treat in 40 minutes flat. Enjoy a restful recipe now and then.

Where do you take shortcuts?

Easy Sopapilla Pumpkin Cheesecake Bars


Recipe by: Willow Bird Baking, using adapted versions of Pillsbury’s Sopapilla Cheesecake Bars and Philadelphia’s No-Bake Pumpkin Cheesecake
Yield: about 15-20 bars

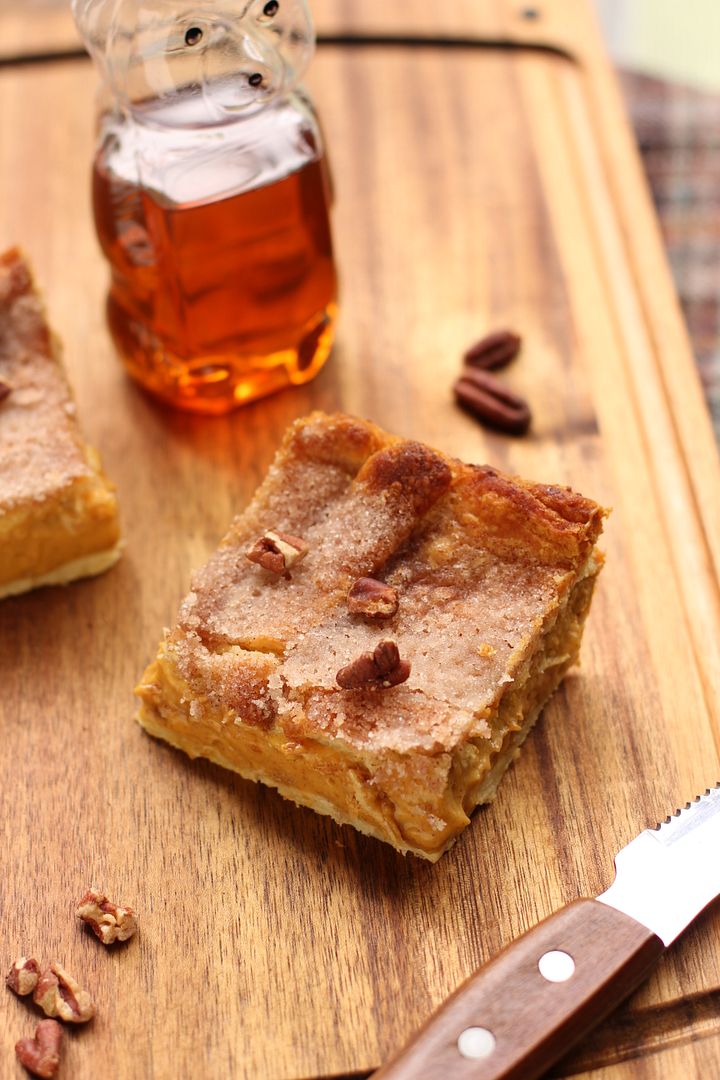
I first saw the recipe for Sopapilla Cheesecake Bars on Cookies and Cups and decided to give them some pumpkin love. In these bars, two layers of premade crescent roll dough sandwich a thick layer of simple pumpkin cheesecake — it couldn’t get easier and quicker! The top bakes into a crisp, buttery cinnamon-sugar “sopapilla.” I served the bars heated up a few seconds (just to remove the chill), sprinkled with toasted pecans, and drizzled with a little honey.

Bar Ingredients:
2 cans crescent rolls
2 (8-ounce) package cream cheese, softened
2 cup canned pumpkin
5/8 cup sugar
2 teaspoon vanilla extract
2 teaspoons ground cinnamon*
1/4 teaspoon ground allspice*
1/2 teaspoon nutmeg*
1/2 teaspoon ginger*
*or substitute 2 teaspoons of pumpkin pie spice for these spices.

Topping Ingredients:
6 tablespoons butter, melted (for topping)
1/2 cup sugar (for topping)
1 teaspoon cinnamon (for topping)

Optional Extras:
honey
toasted pecans (see directions below)

Directions:
Preheat oven to 350 degrees F. Grease a glass 9×13 inch baking dish. Unroll one can of crescent roll dough (all in one piece) and lay it in the dish, pressing it out to cover the bottom and pinching any seams together.

In a large mixing bowl, beat together the cream cheese and sugar until light and fluffy. Add pumpkin, vanilla, cinnamon, ginger, nutmeg, and allspice, and beat to combine. Spread this mixture over the crescent roll dough in your pan. Unroll the other can of crescent roll dough and lay it over top of the pumpkin cheesecake mixture (I actually found it easier to lay it on some plastic wrap secured over a cutting board — this gave me a surface on which to pinch the seams closed and make it into one big rectangular sheet. I then used the plastic wrap to “flip” it carefully over onto the cheesecake mixture).

In a small bowl, whisk together 1/2 cup sugar with 1 teaspoon cinnamon. Pour melted butter over top of crescent roll dough and sprinkle cinnamon and sugar mixture evenly across the surface. Bake for 30 minutes or until golden brown. While the bars bake, you can also toast the pecans on another rack — just spread them out in a single layer on a baking sheet and toast for about 6 minutes or until fragrant, stirring about halfway through the cook time. Transfer nuts to a plate to cool.

Let bars cool completely before covering them and placing them in the refrigerator to chill for at least a couple of hours (I left mine overnight). Cut into squares, heat for just about 20 seconds to take off the chill, and serve with a drizzle of honey and a sprinkle of toasted pecans.

If you liked this post, please:
Subscribe to Willow Bird Baking
Follow Willow Bird Baking on Twitter
Follow Willow Bird Baking on Facebook
Give this post a thumbs up on StumbleUpon


ShareOther ways to share this post with friends!

Foodbuzz 24×24: Cheap and Simple Taco Pockets

i sat watching a flower as it was withering;
i was embarrassed by its honesty.

-bright eyes

This is not a diary. I can’t smudge ugly, unfiltered thoughts into this blog and tuck it deep under a virtual mattress. This is a place for tidy stories that have fully played out in my life — or at least enough to have lost the raw, unfinished edge of uncertainty.

Otherwise, things just get sloppy.

But I’m going to get a little sloppy here for a bit: this has been the hardest year of my life.

I feel embarrassed saying that, because I know some of you are dealing with things that are so much harder, things that make my year look like a fairy tale. There are people right now losing their homes and carefully rationing their cash to afford the week’s groceries. So I hope you’ll forgive me my lesser struggle — that we can have the grace of being in different places and loving each other where we are.

For me, this year has been a mountain to climb — the air is thinning, and I’m not sure I ever wanted to reach the top in the first place.

Last November, as you may remember, I broke up with Mike, my boyfriend of almost 12 years. It took me two months to get up the gumption to write to you about it, but the struggle wasn’t over.

Month after month went by and I found I couldn’t get used to my new world, which had turned inside out and taken on a pallor. Daily life felt like stumbling through a thick wall of cotton. My grief became a dressing room in which I tried on all different Julies, searching for who I was without Mike. Everything I put on was too tight, too abrasive, too loose, too heavy.

Recently, though, a couple of you noticed and commented that I’ve been mentioning Mike here and there. It’s true — we’re slowly, carefully spending time together again. Feeling out the next steps. There’s just not time to waste when you love someone, and it feels like we’ve already wasted so much.

So there it is. This isn’t exactly a great time to tell you what’s up. This is not a diary, like I said, and I’m hesitant to share such a new, uncertain development. But first off, I know I’m among friends. Second off, Foodbuzz issued a 24×24 challenge this month that I knew I wanted to dedicate to Mike.

The 24×24 is usually an opportunity to showcase 24 fun dinner party ideas, but this month, Foodbuzz challenged us to create a meal using only pantry staples. Scraping together something passable from the pantry wouldn’t have been too hard; people do it every day for their families. But as I thought about what I usually have available — some ground meat, cheese, salsa, baking supplies — I realized I wanted to create something truly special.

One of Mike’s favorite dishes during our time together was a silly convenience meal. These Taco-Stuffed Crescent Rolls are delicious, but also based on a can of crescent rolls, for goodness’ sake. Nevertheless, I made them for him throughout our relationship as a quick way of saying, “I love you (and I want some carbs.)”

For the Foodbuzz 24×24, I invited Mike over and recreated this meal — this time with a homemade yeast dough. I wanted to turn my quick I love you into an earnest I love you. The things I took for granted, I can’t take for granted anymore, and I think he feels the same. What we’re working on between us is worth more than a can of crescent rolls. It’s worth adding flour bit by bit. It’s worth waiting the hour for the dough to breathe and rise. It’s worth the messy counter, the sticky shaping, the extra step of egg washing. I would slice avocados for years. I would clean my dough hook a million times over.

The beauty of this meal is that it’s homemade from scratch, but still simple and convenient. The recipe made plenty of dough for taco pockets with enough leftover to dress up as Apple Cinnamon Monkey Bread Sundaes (I’ll share how I did this in an upcoming post). Also, since you can prepare both dishes a day in advance, you have enough time to floof your hair and vacuum the apartment the day your long-lost boyfriend is coming over. Nice.

Oh, by the way, your fear of yeast called and told me to tell you it’s not working out. You’re just going to have to get over him. I’m stocking you up with simple yeast dough recipes so you’ll have a good place to start.

Speaking of good places to start, for me and Mike, this is as good a place as any. I don’t know how things will go, but no one ever does. I’m just going to hitch up my skirts and petticoats and keep on climbing.

I told you my secrets, now tell me yours. What new developments are coming your way these days?


Me and Mike via photobooth, a couple of years ago.

Cheap and Simple Taco Pockets


Recipe by: Willow Bird Baking (yeast dough recipe from Our Best Bites)
Yield: about 26 3-inch long crescent pockets, or 5-6 servings (or you can use half for pockets and half for making monkey bread!)

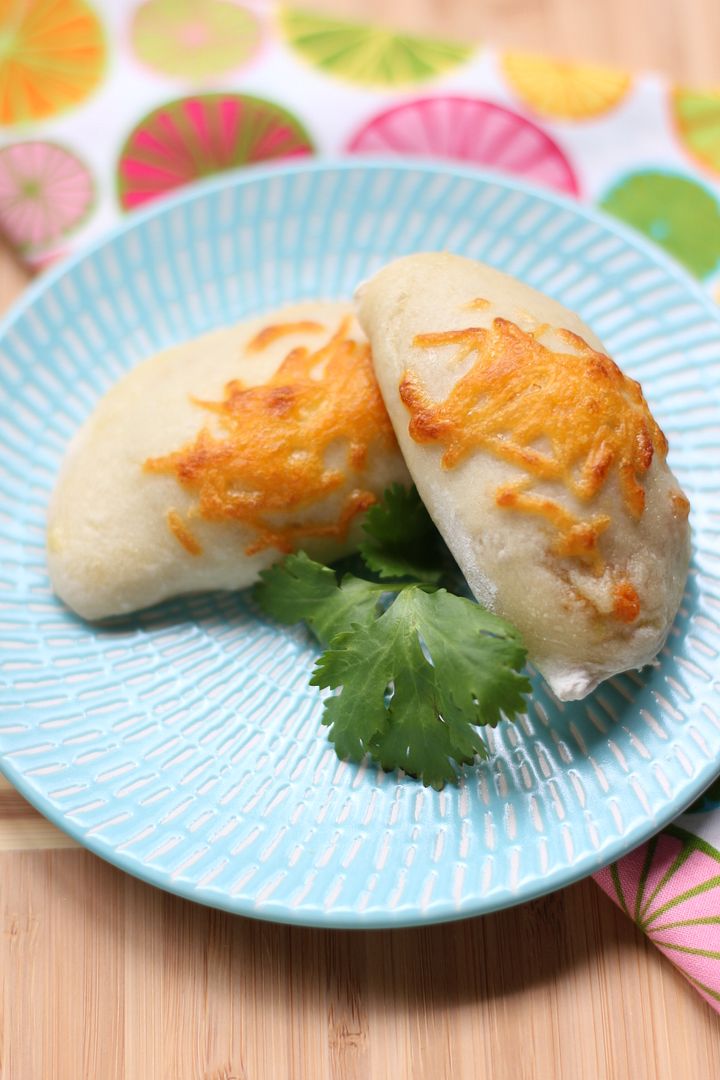
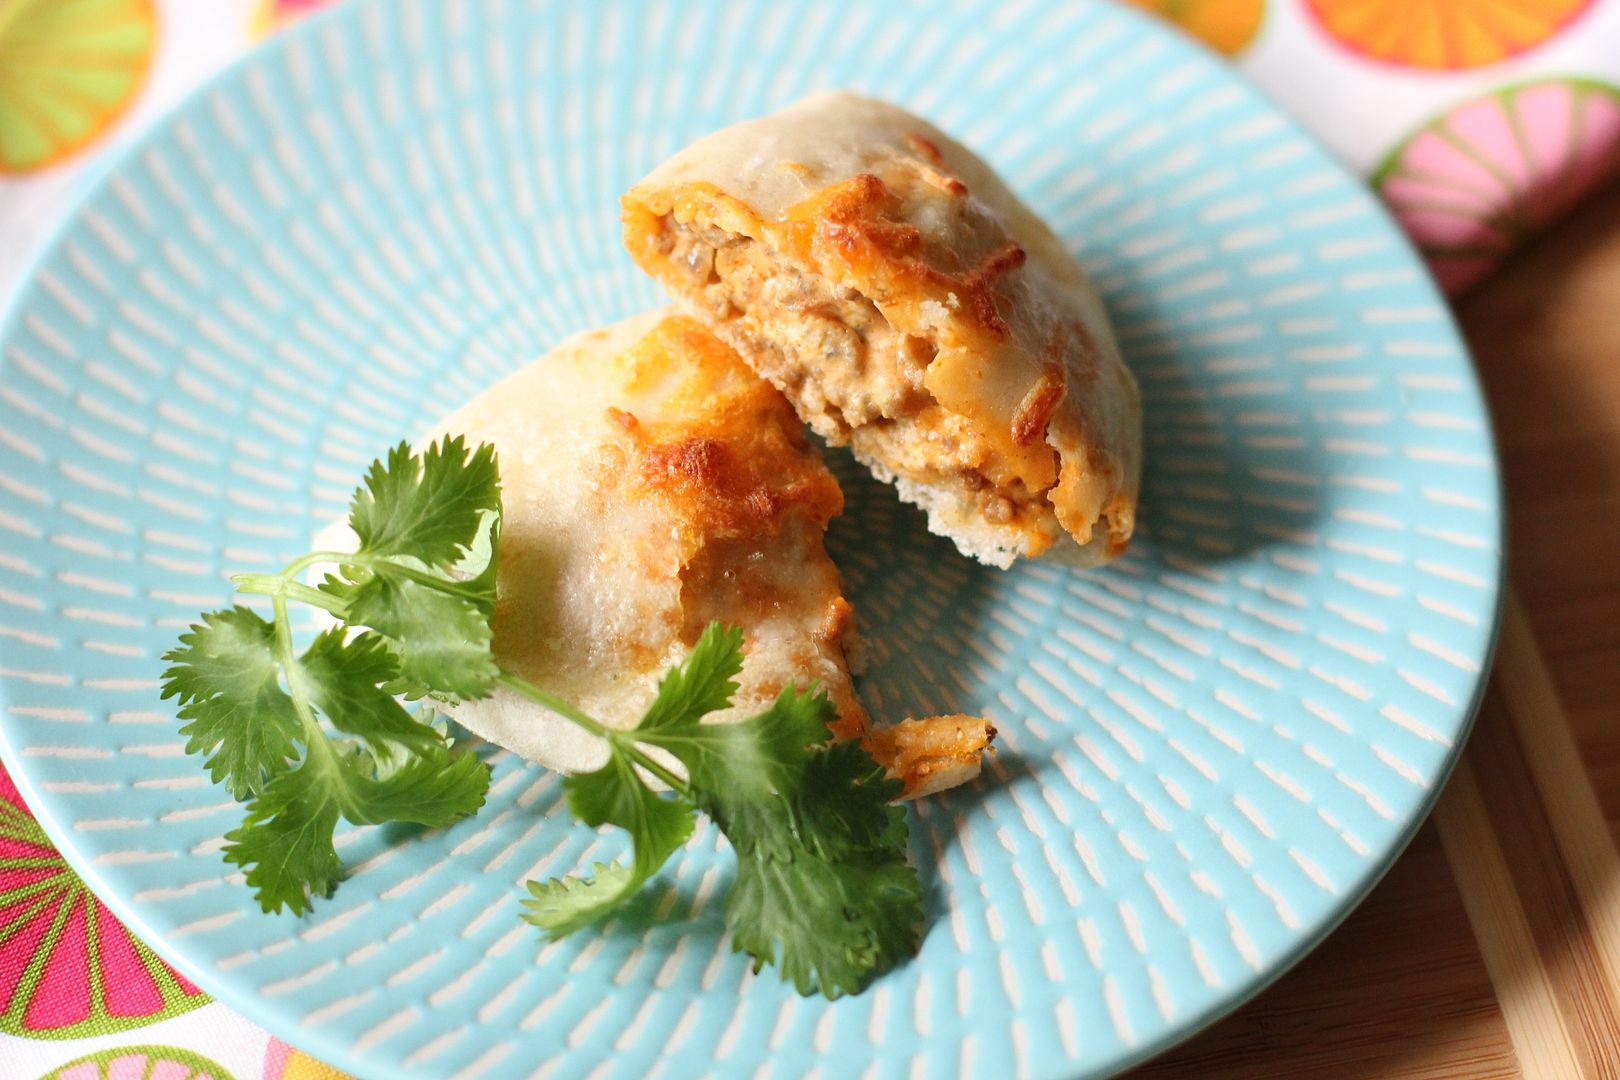
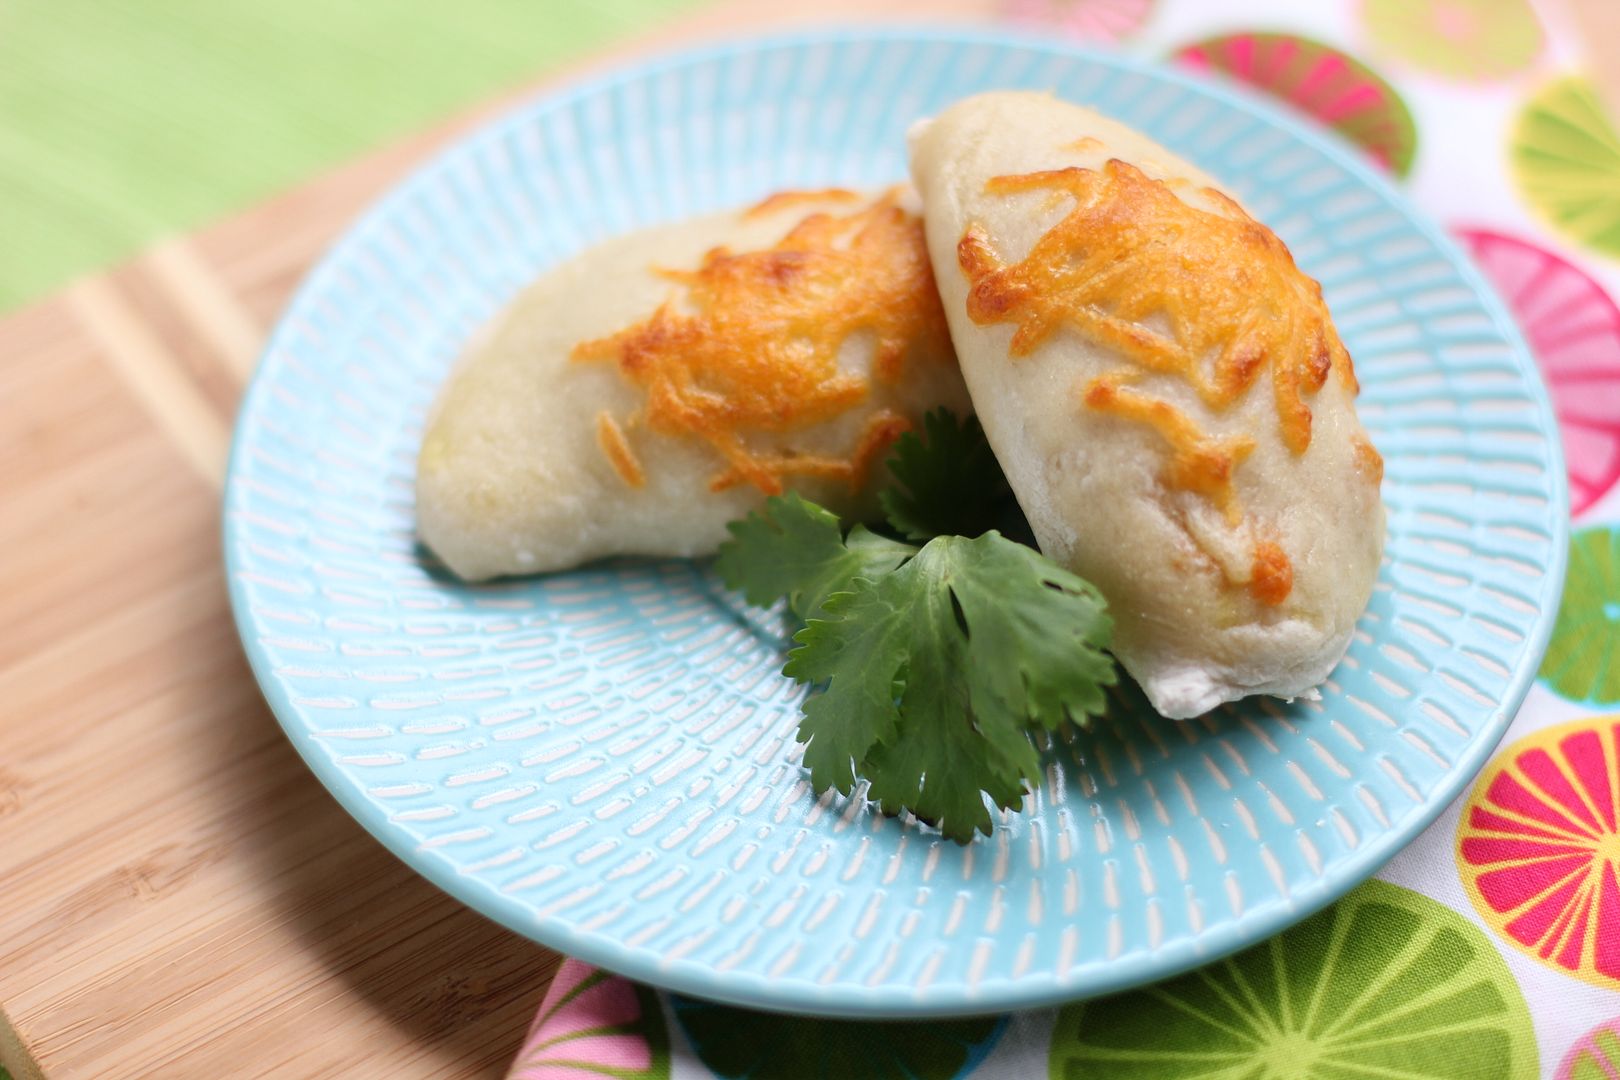
These Taco Pockets are pillowy yeast rolls filled with a creamy, cheesy, spicy Tex-Mex filling. I like to serve them with an array of accoutrements — sour cream, guacamole, salsa, and fresh cilantro. As a time-saver, you can wrap this cheesy filling in premade crescent rolls and bake per the package instructions, but don’t do it just because you’re afraid of yeast! This is a simple yeast dough that’ll help you conquer your fears. If you’d like, make taco pockets with half the dough and use the rest to make simple Monkey Bread Sundaes for dessert — two dishes for the price of one!

Dough Ingredients:
1 1/2 cups warm water (105-115 degrees – use a candy thermometer to check)
1 tablespoon sugar
1 tablespoon yeast
1/2 teaspoons salt
3-4 1/2 cups flour
1 egg and a splash of water (for egg wash)

Filling Ingredients:
1 pound ground beef
1 packet McCormick’s cheesy taco seasoning (or taco seasoning of your choice)
6 ounces cream cheese, softened
2-3 heaping tablespoons salsa
1/4 cup shredded cheddar cheese
sprinkle of cheddar cheese for the top of pockets

Directions:
Notes on making this in advance: There are two points at which you can stop this recipe and refrigerate it overnight. The first is just before the first proof. Instead of letting the dough proof, cover the bowl with plastic wrap and then a clean, damp cloth. Place it in the refrigerator for 1-5 days, keeping the cloth damp. When ready to roll, let it sit out until it comes to room temperature and doubles (about 2 hours). Another point at which you can leave the recipe overnight is after the pockets are filled and shaped. Instead of allowing them to rise another 30 minutes, cover them and refrigerate them overnight. In the morning, allow them to come to room temperature and rise (about 2 hours) before egg washing and baking.

Make dough: Mix the warm water, sugar, and yeast in a large bowl (such as in the bowl of your stand mixer, if you have one) and let it sit for 5-10 minutes until it foams. Add the salt and 1.5 cups of flour and mix. While kneading on a low speed, gradually add more flour (I added about 1 1/2 more cups) until the dough is pulling away from the sides of the bowl and barely sticks to your finger.

Spray a large bowl with cooking spray and place dough in the bowl for the first proof. Cover and place the dough in a draft-free place (many use the inside of a turned-off oven) to rise for 45 minutes or until doubled in bulk.

Make filling: While dough rises, brown ground beef, drain, and return to pan. Add packet of taco seasoning with a bit of water and cook until combined. In a separate bowl, combine cream cheese, salsa, and cheddar cheese. Add ground beef mixture to the bowl (which will melt the mixture a bit) and stir to combine.

Shape and Bake: Spray a cookie sheet with cooking spray or line it with parchment paper. Remove dough from bowl and place on a lightly-floured surface. I placed a damp, clean cloth over some of the dough while I tore off pieces to work with. Tear off golf ball sized portions (or maybe a little larger) and roll each portion out to about 1/4-inch thick (moving it around as you roll to ensure it’s not sticking, and reflouring your surface as needed). Use a large round cookie cutter (or a knife) to cut out circles about 3 or 4 inches in diameter. Spoon about 1-2 tablespoons of ground beef mixture onto each circle. Fold the circle over on itself, wetting and pressing the edges to seal. Poke each pocket with a knife to give it a steam vent, dust the excess flour off of it with a dry pastry brush, and place it on the prepared baking sheet.

Once all pockets are shaped, cover them with a clean dish towel and let them rise for another 30 minutes. When you have about 20 minutes left, preheat oven to 350 degrees F. Whisk egg and water together and brush over pockets just before baking. Sprinkle each pocket with a bit of shredded cheddar cheese. Bake pockets for 15-20 minutes or until golden. Let cool on sheet pan for a few minutes and serve warm.

Note: I received a stipend from Foodbuzz for creating this meal.

If you liked this post, please:
Subscribe to Willow Bird Baking
Follow Willow Bird Baking on Twitter
Follow Willow Bird Baking on Facebook
Give this post a thumbs up on StumbleUpon

ShareOther ways to share this post with friends!

Thanks a Million

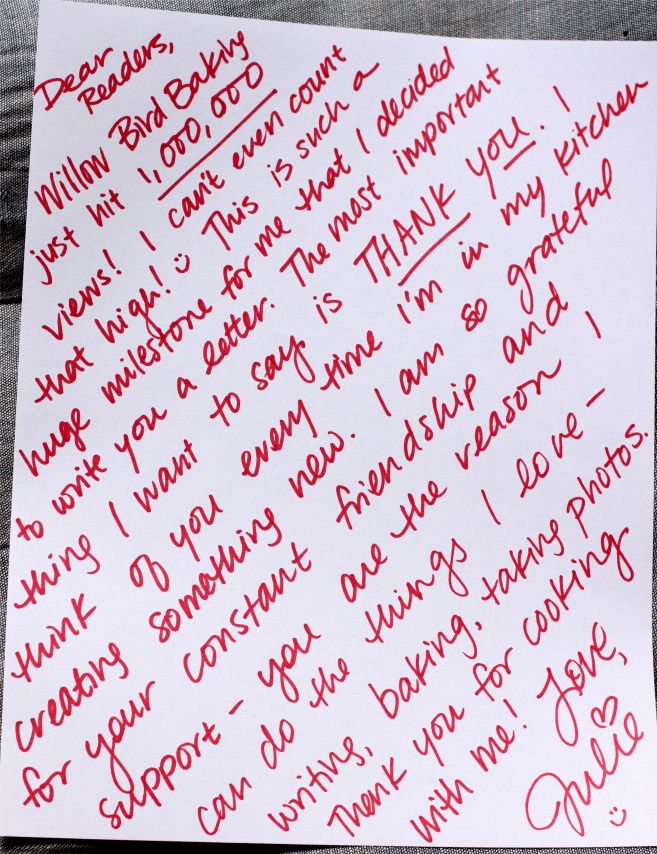
Willow Bird Baking just hit 1,000,000 all-time views. Typing something to you just didn’t feel like enough. Instead, I got out my sharpie-of-a-regrettable-color and wrote you a letter.

…A letter that you kind of have to be sideways to read. Okay, so I didn’t think through all the details. What can I say — I was filled with emotion!

Basically: Each and every comment, each and every visit, each and every kitchen triumph you’ve shared with me and with your families — each one has meant so much to me. Thank you so, so much.

If you liked this post, please:
Subscribe to Willow Bird Baking
Follow Willow Bird Baking on Twitter
Follow Willow Bird Baking on Facebook
Give this post a thumbs up on StumbleUpon


ShareOther ways to share this post with friends!

1 84 85 86 87 88 127