3.14159265358979323846…

Happy Pi Day! My math geek boyfriend had never heard of it, so go figure.

Here are my favorite pie recipes (and okay, some tarts for good measure). Whether you’re a math nerd or just want another excuse to eat pie, you have my blessing.


Fresh Blueberry Pie


Red Berry Pie


Mini-Pies! Pumpkin, Sour Cream Apple, Peach Crisp


Raspberry Cream Cheese Tart


Chocolate Tart


Peach Crisp Pie

Apparently there’s also a Pie — er, I mean Pi — Approximation Day in July?! Score!


Share Share this post with friends!

Red Berry Pie — Version 2.0

Once upon a time, there was lovely confection by the name of Little Red Berry Pie. Little Red Berry Pie was tasty and appeared beautiful on the outside, but carried a dark, depressing secret within her shell. You see, in her fruity little pie heart, she was weepy and sad.

Very weepy. Like, soggy. Sort of like a puddle o’ fruit, actually.

She hadn’t been made with the best thickener, hadn’t been stuffed with enough berries, hadn’t cooled before being sliced, and was just an all-around mess. One fateful day, though . . . her prince arrived. No white horse was required, and no sword to slay her enemies — in fact, all she needed was him. His name? Err, well. We’ll call him Granny Smith. What?! Never met a prince named Granny?

Boy, that bright green prince was a harbinger of happiness! Little Red Berry Pie was reborn — a better version of herself!


Version 2.0

This Sweetie Pie followed the grand tradition of all fairy tales and definitely lived happily ever after. Until she was digested by gastric juices, that is. Oh, don’t look so surprised. Fairy tales are full of kidnapping, cannibalism, and violence!

You’ll have to forgive me. I spent weeks reading fairy tales to my adorable sixth grade students and discussing the elements of fiction — characters, plot, setting, theme, point of view. We marveled together that these “child-friendly” tales contained the kid-eating witch; the parents who left their kids in the middle of the woods; the multiple attempts to curse, poison, or slay enemies. And that’s not even considering the clueless, helpless, victimized princesses just waiting for a Man-with-a-capital-M to save their beautiful bustles. But I digress! I think we all agree pie is more pressing than fairy tales at the moment.

. . . But biting into this pie did feel a bit like living happily ever after. Let’s just say I’ve finally perfected my Red Berry Pie recipe with a little help from America’s Test Kitchen. In their blueberry pie, they use a brilliant thickening agent: tapioca plus a big ol’ grated Granny Smith apple, which releases its natural pectin while baking. It worked so well for the blueberry, I decided to use it to tweak my previously flawed Red Berry filling.

To say it worked perfectly is an understatement. This is the best pie I’ve ever had! The best pie I’ve ever eaten, y’all! Are you listening?! That’s saying a lot — I’ve eaten and swooned over some amazing pies (Peach Crisp Pie, for instance). The proportion of strawberries to raspberries was ideal: the raspberries lent their rich, deep fruity flavor to the brightness of the strawberries. The filling was thick, juicy, and hearty. The crust . . . well, okay, it was still difficult to work with, but practice must make perfect, because it was a little simpler than last time (hence the not-as-hideous pie, perhaps?) And of course it was tender and flaky.

Serve each piece with a dollop of freshly whipped, lightly sweetened cream for a true fairy tale dessert — minus the cannibalism. Or grab the vanilla bean ice cream, if that’s your style! Regardless of the accompaniments, make this pie.


Mmm, hello, big ol’ juicy berry!!

Red Berry Pie


Recipe by: Adapted from America’s Test Kitchen‘s Blueberry Pie
Yields: one 9-in, double-crust pie

Crust Ingredients:
2 1/2 cups unbleached all-purpose flour (12 1/2 ounces)
1 teaspoon table salt
2 tablespoons sugar
12 tablespoons cold unsalted butter (1 1/2 sticks), cut into 1/4-inch slices
1/2 cup chilled solid vegetable shortening, cut into 4 pieces (I use butter flavor)
1/4 cup vodka, cold
1/4 cup cold water
1 large egg, lightly beaten with 1 teaspoon water

Red Berry Filling Ingredients:
3 cups frozen raspberries*
3 cups frozen whole strawberries*
1 Granny Smith apple, peeled and grated on large holes of box grater
2 teaspoons juice from 1 lemon
3/4 cup sugar (5 1/4 ounces)
2 tablespoons quick-cooking tapioca, ground*
Pinch table salt
2 tablespoons unsalted butter, cut into 1/4-inch pieces

Directions:
1. For The Pie Dough: Process 1 1/2 cups flour, salt, and sugar in food processor until combined, about two 1-second pulses. Add butter and shortening and process until homogenous dough just starts to collect in uneven clumps, about 15 seconds; dough will resemble cottage cheese curds and there should be no uncoated flour. Scrape bowl with rubber spatula and redistribute dough evenly around processor blade. Add remaining cup flour and pulse until mixture is evenly distributed around bowl and mass of dough has been broken up, 4 to 6 quick pulses. Empty mixture into medium bowl.

2. Sprinkle vodka and water over mixture. With rubber spatula, use folding motion to mix, pressing down on dough until dough is slightly tacky and sticks together. Divide dough into 2 even balls and flatten each into 4-inch disk. Wrap each in plastic wrap and refrigerate at least 45 minutes or up to 2 days.

3. Remove 1 disk of dough from refrigerator and roll out on generously floured (up to 1/4 cup) work surface to 12-inch circle, about 1/8 inch thick. Roll dough loosely around rolling pin and unroll into pie plate, leaving at least 1-inch overhang on each side. Working around circumference, ease dough into plate by gently lifting edge of dough with one hand while pressing into plate bottom with other hand. Leave dough that overhangs plate in place; refrigerate while preparing filling until dough is firm, about 30 minutes.

4. For The Filling: Adjust oven rack to lowest position, place rimmed baking sheet on oven rack, and heat oven to 400 degrees. Place 2 cups frozen whole strawberries and about 1 cup frozen raspberries in medium saucepan and set over medium heat. Cook, stirring frequently, until many of the raspberries have broken down and mixture is thickened and reduced to 1 1/2 cups, about 12-15 minutes. Let cool slightly.

5. Place grated apple in clean kitchen towel and wring dry. Transfer apple to large bowl. Add cooked berries, remaining 3 cups uncooked berries, lemon zest, juice, sugar, tapioca, and salt; toss to combine. Transfer mixture to dough-lined pie plate and scatter butter pieces over filling.

6. Roll out second disk of dough on generously floured (up to 1/4 cup) work surface to 11-inch circle, about 1/8 inch thick. Using 1 1/4-inch round biscuit cutter, cut round from center of dough. Cut another 6 rounds from dough, 1 1/2 inches from edge of center hole and equally spaced around center hole. Roll dough loosely around rolling pin and unroll over pie, leaving at least 1/2-inch overhang on each side.

7. Using kitchen shears, trim bottom layer of overhanging dough, leaving 1/2-inch overhang. Fold dough under itself so that edge of fold is flush with outer rim of pie plate. Flute edges using thumb and forefinger or press with tines of fork to seal. Brush top and edges of pie with egg mixture. If dough is very soft, chill in freezer for 10 minutes.

8. Place pie on heated baking sheet and bake 30 minutes. Reduce oven temperature to 350 degrees and continue to bake until juices bubble and crust is deep golden brown, 30 to 40 minutes longer. Transfer pie to wire rack; cool to room temperature, at least 4 hours. Cut into wedges and serve.

*I made this recipe using unthawed frozen berries, but fresh would probably work as well if the berries in step 4 were mashed and cooked only for 8 minutes. I used whole strawberries which made the pie so succulent! Grind the tapioca to a powder in a spice grinder or mini food processor. If using pearl tapioca, reduce the amount to 5 teaspoons. Vodka is essential to the texture of the crust and imparts no flavor; do not substitute.


Best wishes for your happily ever after!


Share Share this post with friends!

Fresh Blueberry Pie

…with a surprising crust. No, the surprise is not the vodka — y’all have all heard about the vodka crust trick by now.

Adding too much water to pie dough makes it tough, whereas adding too little results in a dry, crumbly mess (that was supposed to be a pie pocket. Ahem). Adding vodka and water to your pie dough instead of just water allows you to incorporate more liquid, making your dough workable without making it tough. The alcohol vaporizes while cooking so the final pie doesn’t taste like vodka. This was my first trial of this nice little trick, but it’s old news for many of you.

This was also, incidentally, the first time I’d ever encountered vodka first hand (being a teetotaler). I just want to know why someone would drink something that smells exactly like rubbing alcohol? I guess taste is really not the point? Please fill me in.

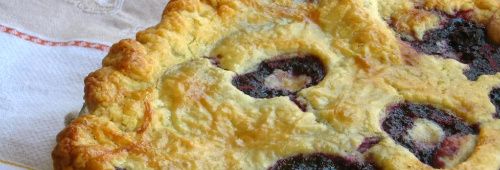
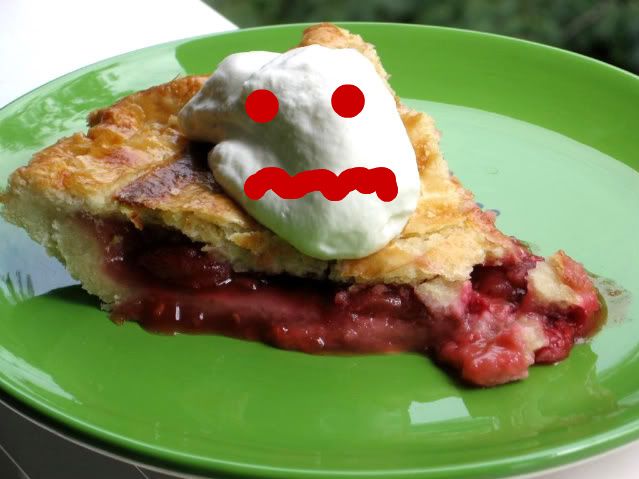
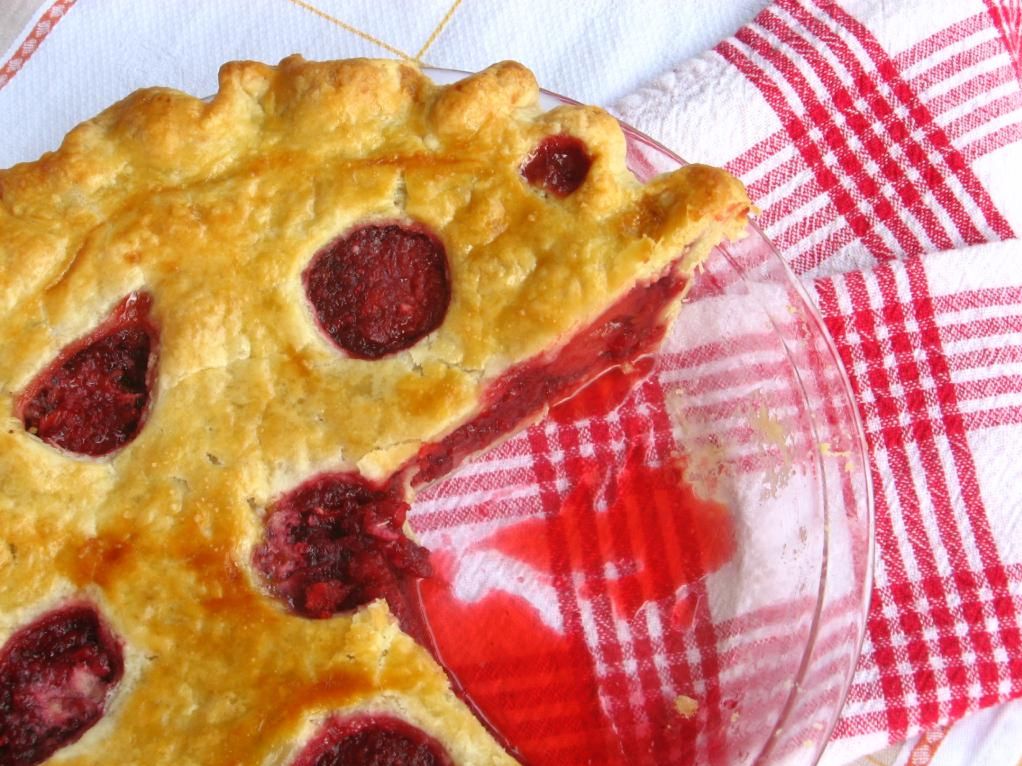
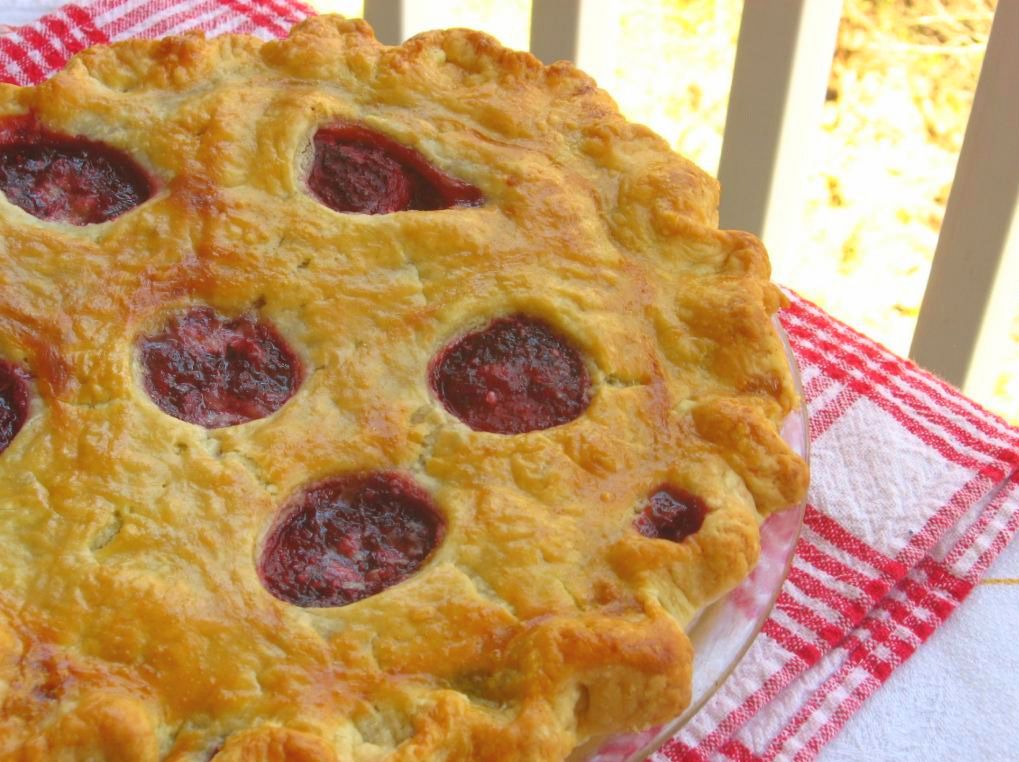
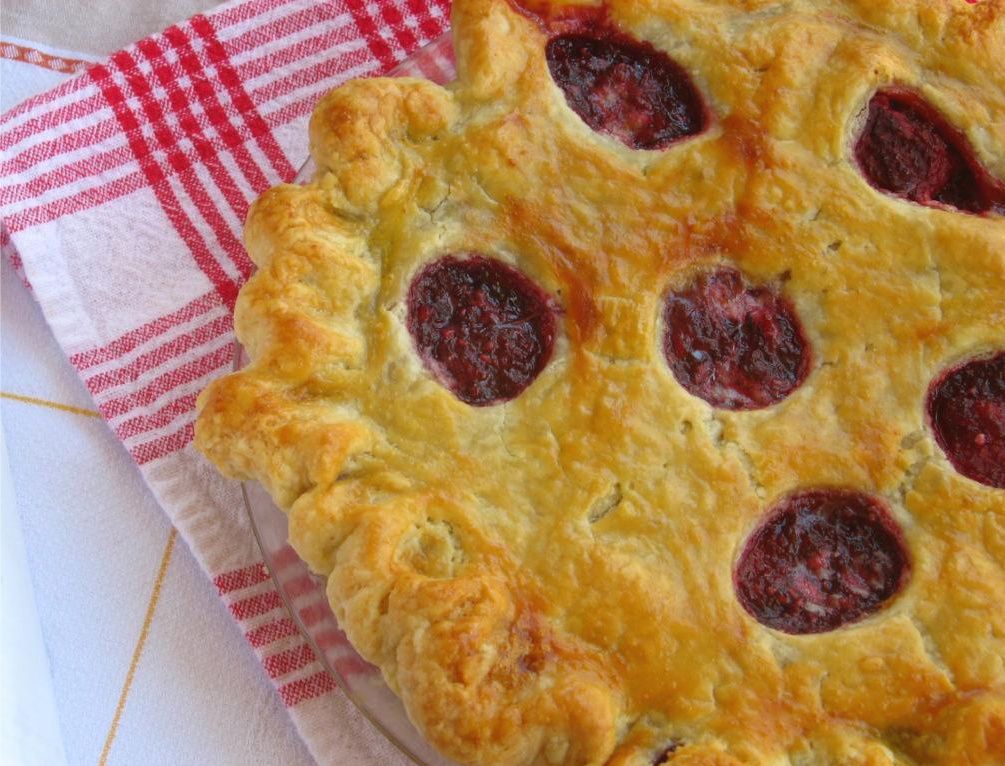
Anyway, vodka’s not the surprise. The surprise is how seriously I debated throwing this pie over my balcony, pie plate and all. It’s not because the pie wasn’t delicious . . . because WOW, it was! It’s a gorgeous flaky, tender crust with a thick filling full of plump, juicy berries. In fact, it’s not because of the finished pie at all. It’s because of what America’s Test Kitchen ironically calls their foolproof pie dough.

Ohhh this dough was a sticky, frustrating mess until I finally got it shoved into the oven with a huff! Despite the utter gobs of flour strewn all over my counter, my cute apron, my cute dog, and my cute boyfriend, the dough stuck to everything it could get its doughy little tentacles on. Even more fun, it tore apart rebelliously whenever moved. If you’re wondering why this pie looks like it got in a fight with an unruly pastry cutter . . . that’s why.

My attempts to crimp the edges resulted in dough-covered fingers and one ragged pie. Let’s just say this kitchen disaster was not weathered gracefully. There may have been some apron throwing. At least I didn’t chuck the pie into the woods behind my apartment after struggling for the umpteenth time trying to roll out the dough, right? Honestly, if it hadn’t been Mike’s mom’s pie plate . . . who knows what could’ve happened!

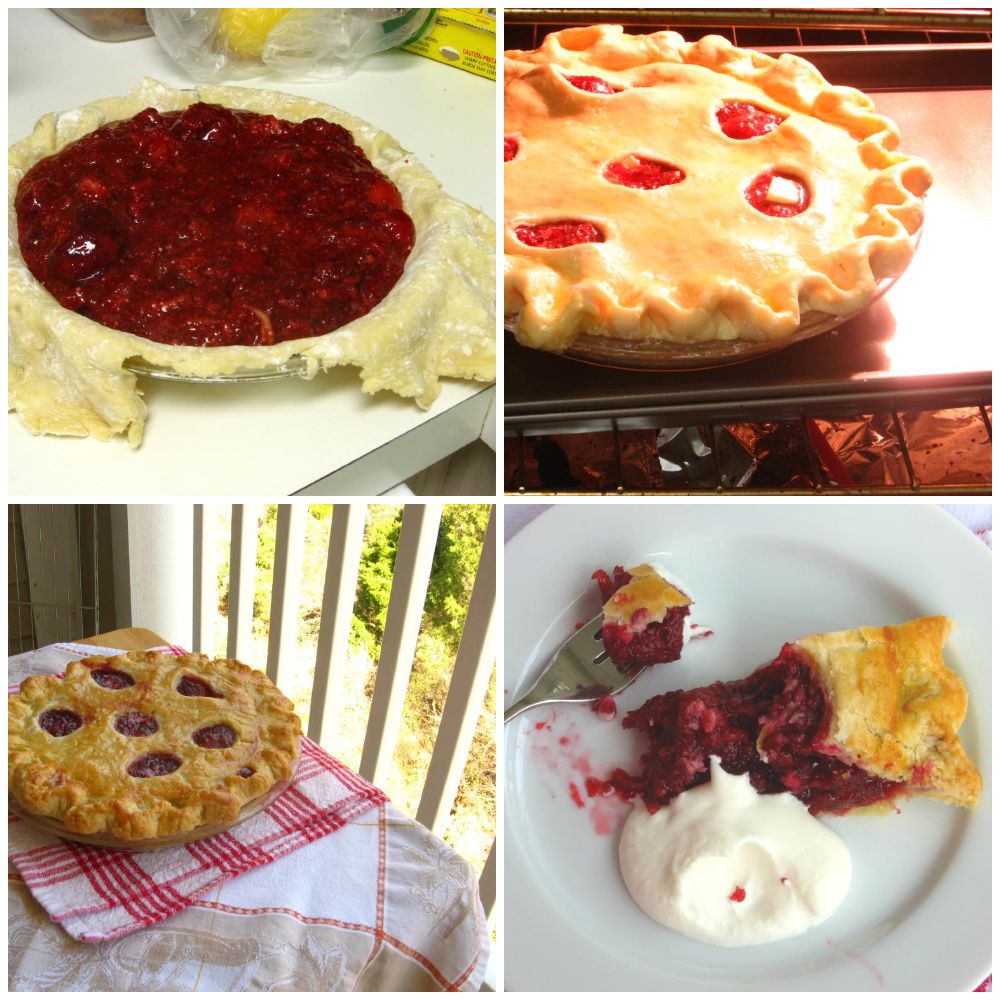
After eyeing the evil pie dough and the trash can a few times, I finally decided to buckle down and see my recipe through to the end. I rechilled, refloured, griped about America’s Test Kitchen, rechilled again, cried, switched to rolling on parchment, yelled a little, switched back to flour . . . and held my breath every time I moved that pie dough anywhere.

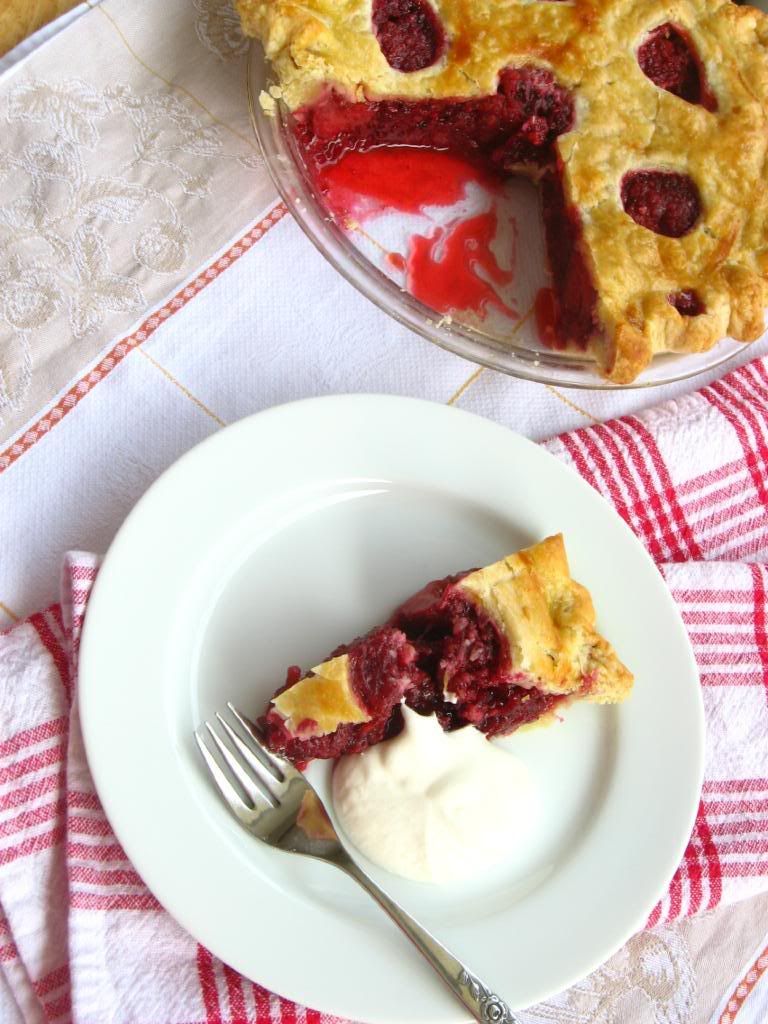
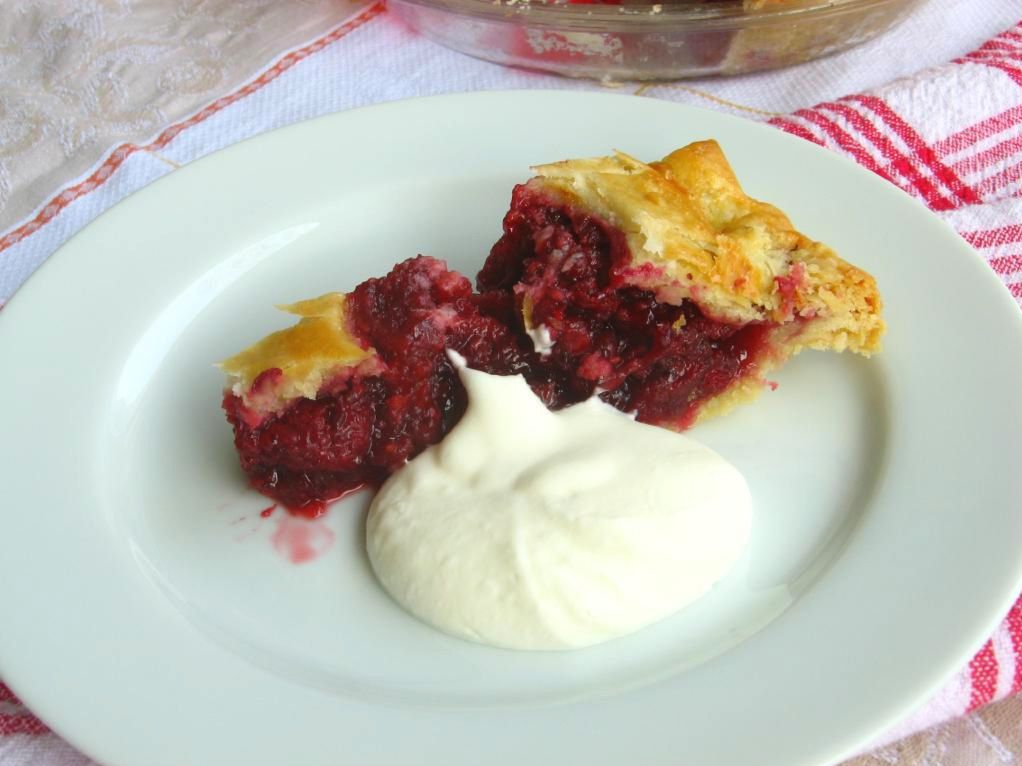
I’m glad I stuck it out. The crust, as I mentioned, is delicious and the perfect texture. I may switch back to my standard lard/butter vodkaless crust next time to avoid a kitchenpocalypse and protect my typically reasonable blood pressure, but it was very good. And let me tell you about these BLUEBERRIES!!

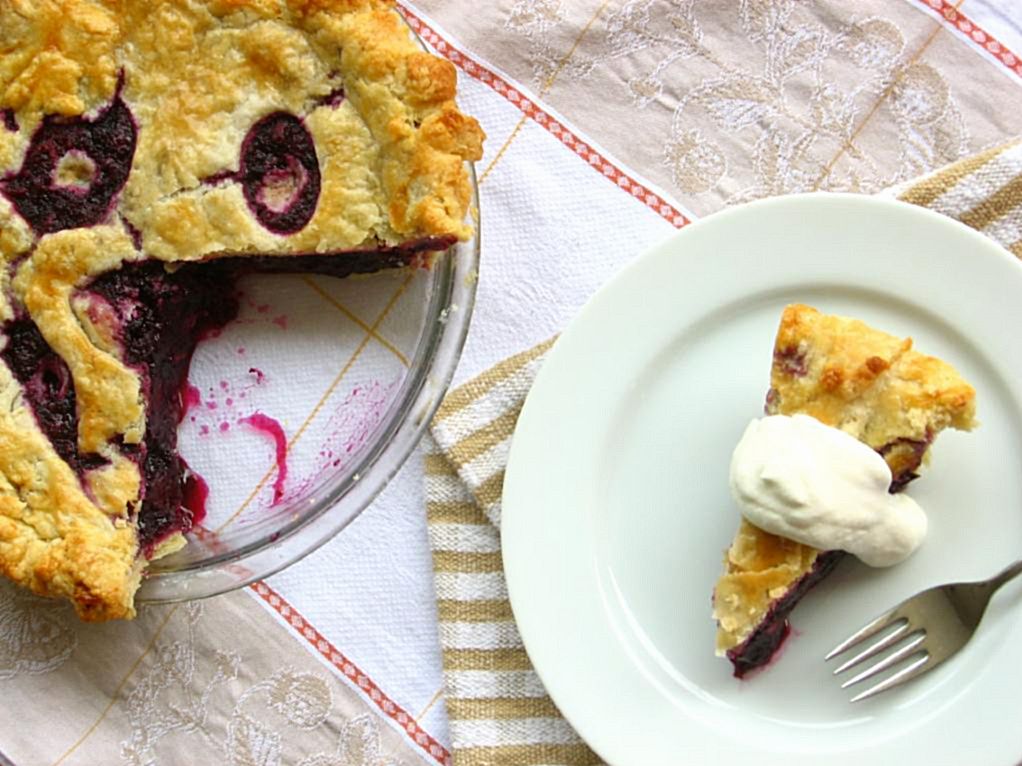
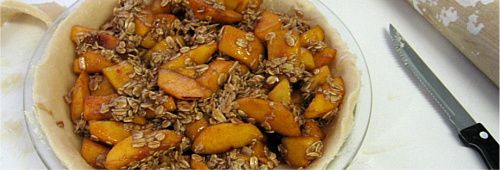
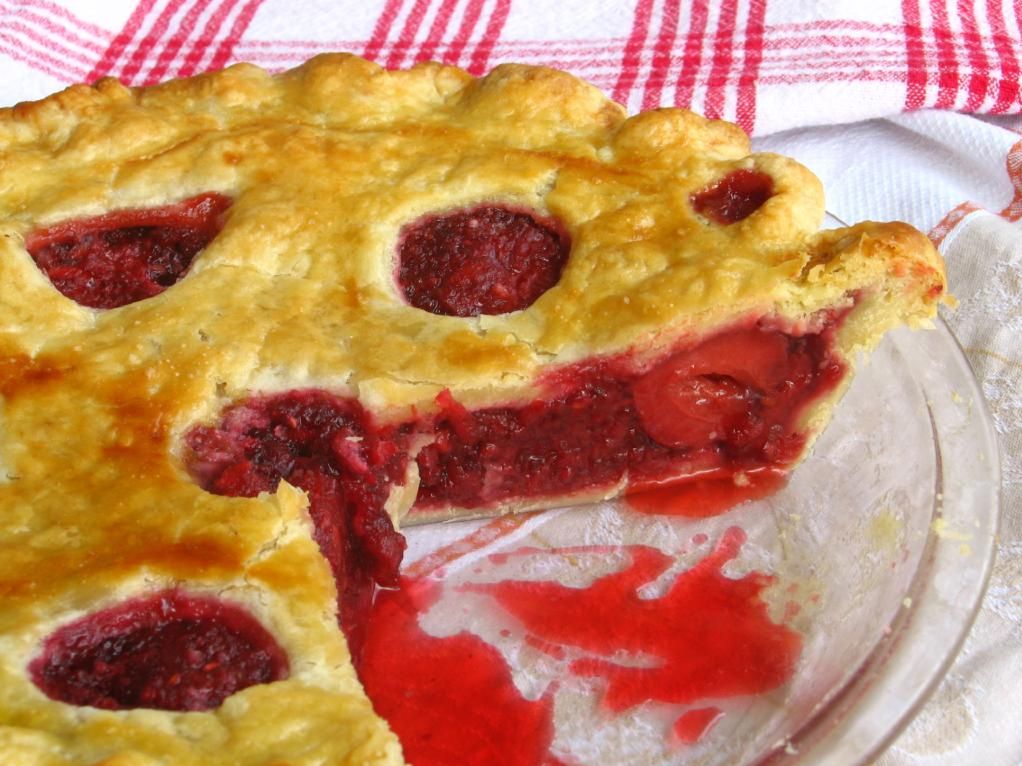
One of the reasons this pie is beautiful to me despite its decidedly Quasimodo-esque appearance is because it has the perfect consistency, bright flavor, and is full of plump, rich berries! ATK, redeeming themselves for now, formulated a recipe for blueberry pie filling thickened with tapioca and a grated apple, which releases its pectin upon being cooked. No runny filling or smushed berries here — just the perfect blueberry pie. It even has a tangy complexity to the blueberry flavor imparted by Ms. Granny Smith. I was such a fan of every bite I took.

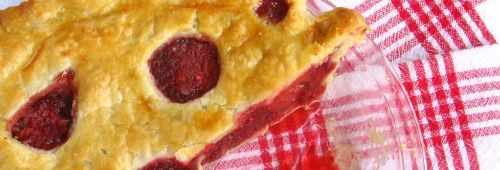
So perfect, in fact, that I tried the same nifty apple trick with another sort of pie. A pie that actually turned out pretty and even tastier than this one — but you’ll have to wait until the next post to hear more! For now, here are some tips on managing this beastly dough (that, in all fairness, many cooks on the interwebs apparently loved working with. Go figure):

-Let it chill for a long time. At least overnight, but two days might be even better.
-Don’t be timid about flouring your surface and rolling pins generously. That’s the point of having a wet dough, and you’re gonna need it.
-Rechill any time you (or your dough) are losing your cool.
-Imagine the final product. While struggling with my dough, I was already drafting a post in my head telling you about how the final pie wasn’t worth the trouble, but truthfully . . . it was.

What’s your favorite pie crust trick? Anyone ever actually chucked their dough into the garbage? Tell me your pie secrets!

Best Blueberry Pie with Foolproof Pie Dough


Recipe by: America’s Test Kitchen
Yields: one 9-in, double-crust pie

Crust Ingredients:
2 1/2 cups unbleached all-purpose flour (12 1/2 ounces)
1 teaspoon table salt
2 tablespoons sugar
12 tablespoons cold unsalted butter (1 1/2 sticks), cut into 1/4-inch slices
1/2 cup chilled solid vegetable shortening, cut into 4 pieces (I use butter flavor)
1/4 cup vodka, cold
1/4 cup cold water
1 large egg, lightly beaten with 1 teaspoon water

Blueberry Filling Ingredients:
6 cups fresh blueberries (about 30 ounces)*
1 Granny Smith apple, peeled and grated on large holes of box grater
2 teaspoons grated zest and 2 teaspoons juice from 1 lemon
3/4 cup sugar (5 1/4 ounces)
2 tablespoons quick-cooking tapioca, ground*
Pinch table salt
2 tablespoons unsalted butter, cut into 1/4-inch pieces

Directions:
1. For The Pie Dough: Process 1 1/2 cups flour, salt, and sugar in food processor until combined, about two 1-second pulses. Add butter and shortening and process until homogenous dough just starts to collect in uneven clumps, about 15 seconds; dough will resemble cottage cheese curds and there should be no uncoated flour. Scrape bowl with rubber spatula and redistribute dough evenly around processor blade. Add remaining cup flour and pulse until mixture is evenly distributed around bowl and mass of dough has been broken up, 4 to 6 quick pulses. Empty mixture into medium bowl.

2. Sprinkle vodka and water over mixture. With rubber spatula, use folding motion to mix, pressing down on dough until dough is slightly tacky and sticks together. Divide dough into 2 even balls and flatten each into 4-inch disk. Wrap each in plastic wrap and refrigerate at least 45 minutes or up to 2 days.

3. Remove 1 disk of dough from refrigerator and roll out on generously floured (up to 1/4 cup) work surface to 12-inch circle, about 1/8 inch thick. Roll dough loosely around rolling pin and unroll into pie plate, leaving at least 1-inch overhang on each side. Working around circumference, ease dough into plate by gently lifting edge of dough with one hand while pressing into plate bottom with other hand. Leave dough that overhangs plate in place; refrigerate while preparing filling until dough is firm, about 30 minutes.

4. For The Filling: Adjust oven rack to lowest position, place rimmed baking sheet on oven rack, and heat oven to 400 degrees. Place 3 cups berries in medium saucepan and set over medium heat. Using potato masher, mash berries several times to release juices. Continue to cook, stirring frequently and mashing occasionally, until about half of berries have broken down and mixture is thickened and reduced to 1 1/2 cups, about 8 minutes. Let cool slightly.

5. Place grated apple in clean kitchen towel and wring dry. Transfer apple to large bowl. Add cooked berries, remaining 3 cups uncooked berries, lemon zest, juice, sugar, tapioca, and salt; toss to combine. Transfer mixture to dough-lined pie plate and scatter butter pieces over filling.

6. Roll out second disk of dough on generously floured (up to 1/4 cup) work surface to 11-inch circle, about 1/8 inch thick. Using 1 1/4-inch round biscuit cutter, cut round from center of dough. Cut another 6 rounds from dough, 1 1/2 inches from edge of center hole and equally spaced around center hole. Roll dough loosely around rolling pin and unroll over pie, leaving at least 1/2-inch overhang on each side.

7. Using kitchen shears, trim bottom layer of overhanging dough, leaving 1/2-inch overhang. Fold dough under itself so that edge of fold is flush with outer rim of pie plate. Flute edges using thumb and forefinger or press with tines of fork to seal. Brush top and edges of pie with egg mixture. If dough is very soft, chill in freezer for 10 minutes.

8. Place pie on heated baking sheet and bake 30 minutes. Reduce oven temperature to 350 degrees and continue to bake until juices bubble and crust is deep golden brown, 30 to 40 minutes longer. Transfer pie to wire rack; cool to room temperature, at least 4 hours. Cut into wedges and serve.

*This recipe was developed using fresh blueberries, but unthawed frozen blueberries (our favorite brands are Wyman’s and Cascadian Farm) will work as well. In step 4, cook half the frozen berries over medium-high heat, without mashing, until reduced to 1 1/4 cups, 12 to 15 minutes. Grind the tapioca to a powder in a spice grinder or mini food processor. If using pearl tapioca, reduce the amount to 5 teaspoons. Vodka is essential to the texture of the crust and imparts no flavor; do not substitute.


Want a slice?


Share Share this post with friends!

Vegan Pumpkin Nut Bread

Babies have an uncanny ability to make you silly. We’ve all experienced the strange, instantaneous transformation: you’re walking along, the picture of respectability, when you spot bright eyes and baby CHEEKS! It’s always the cheeks that really push you over the edge. Suddenly, you’re cooing, peekabooing, vroooooming airplane spoons . . . anything for a smile, or best of all, a baby giggle!

My friend Amelia knows all too well what one will do for a baby. Her little Rowan (now 6 months old) wasn’t tolerating dairy very well, so mama had to give it up! No tall glasses of milk, no cheesy pizzas, no gooey lasagnas — and worst of all, hubby was still able to chow down! I’m going to be honest (with apologies to vegans out there): I would not be a fan of a dairy-free lifestyle. I enjoy meat, but I’d be much quicker to give it up than my beloved cheese, butter, and milk! Amelia’s a champ, though; with nary a complaint, she’s gone almost completely dairy-free for months. She deserves a mommy medal, but perhaps she’d settle for a loaf of vegan pumpkin bread?

I first spotted this beauty on Joy the Baker awhile back, when Joy admitted to sometimes searching for vegan recipes just because she’s out of butter or eggs. I love the honesty, not to mention the resourcefulness. A girl after my own heart. Gotta have sweets and gotta avoid the mid-recipe grocery store run.

This pumpkin bread was nice and moist, with a deep caramel-esque flavor from the brown sugar and maple. I added oats for more heartiness. One loaf went to Amelia, and Mike and I kept one for breakfasting. We defiled our loaf by slathering it with butter (more apologies to the vegans!), but it’d be delicious spread with cream cheese (oh wait! sorry vegans!), peanut butter, pumpkin, maple syrup, vegan margarine, mud . . . it’s just good! Just spread it with something creamy and suited to your dietary leanings, and consume!

I will say that it wasn’t as grand, in my tastebuds’ opinions, as regular old pumpkin quick bread. I think I prefer a brighter pumpkin spice flavor to the depth of the maple and brown sugar combo in this recipe. Nevertheless, if you’re out of eggs, following a vegan lifestyle, or simply avoiding dairy for a cute little imp of a babe, this is a nice, hearty option. We have the last bit of our loaf sitting in our freezer waiting for Saturday morning breakfast!

Vegan Pumpkin Walnut Bread


Recipe by: Joy the Baker, slightly adapted by Willow Bird Baking
Yields: 2 loaves

Ingredients:
2 cups all-purpose flour
1 1/2 cups white whole wheat flour (or whole wheat flour, or use only all-purpose flour)
2 cups light brown sugar, packed
1/3 cups granulated sugar
2 teaspoons baking soda
1 teaspoon baking powder
1 teaspoon salt
1 teaspoon freshly grated nutmeg
1 teaspoon cinnamon
1 teaspoon allspice
1/2 teaspoon cloves
1 15-ounce can pumpkin puree, or just under two cups
1 cup vegetable oil
1/3 cup maple syrup
1/3 cup water
1 cup chopped walnuts
1/2 cup oats

Directions:
Preheat oven to 350 degrees F. Place a rack in the center of the oven. Grease and flour two loaf pans and set aside.

In a large bowl, whisk together flours, sugars, baking soda, baking powder, salt and spices.

In a medium bowl, carefully whisk together pumpkin puree, oil, maple syrup and water. Add the wet ingredients to the dry ingredients and use a spatula to fold all of the ingredients together. Make sure to scrape the bottom of the bowl well, finding any stray flour bits to mix in. Fold in most of the chopped walnuts and oats, reserving some to sprinkle on top of the batter once in the pan.

Divide the dough between the two greased pans and sprinkle with a few walnut pieces. Bake for 1 hour to 1 hour and 15 minutes, or until a skewer inserted in the center comes out clean. Remove from the oven. Let rest in the pans for 20 minutes, then invert onto a cooling rack.

Serve warm. To freeze, double wrap in plastic wrap and then wrap in foil.


Enjoy!


Share Share this post with friends!

Clementine Cake

I’m getting really good at u-turns. You can’t make a left turn out of my apartment complex, so a few times a week I’ll find myself sitting at a traffic light, tapping my steering wheel in a bored rhythm, waiting to make my u-turn. If the turn lane light turns red just as I get there, I’m crafty enough to stay in the straight lane for a bit and make a u-turn just up the street. If I time it right, it’s a tad bit faster than waiting for another green arrow. Because that 30 seconds really matters, y’all.

I’m also apparently the queen of the culinary u-turns lately. You remember last week’s shenanigans, right? I wasn’t overwhelmed enough with my two-day Valentine’s dessert recipe, and needed to add, oh, handmade pasta to the mix. Ridiculous.

This week there was another switch, although thankfully not as intense: I was shuffling along, planning to make some personal ice cream cakes when a post showed up in my Google Reader that I could not ignore. Whaaat — a gorgeous citrus cake appears JUST when I’m about to toss out my leftover clementines, which are getting a little squishy? Just like that, my weekend plans slammed on their brakes, put on their turn signal (because unlike the drivers around here, my plans always use their turn signal), and changed direction entirely! Clementine Cake was born!

Mike liked this sweet dessert — but I loved it. It was a beautifully simple, dense, bright citrus cake with that lovely crackling glaze to break your fork into. No fussy frosting, so I found myself cutting slabs of it here and there to eat with my fingers!

I will say the cake itself was a bit dry (I overbaked, which could be the issue), but I had a few tricks up my sleeve to fix that. I poked holes in the cake as it cooled so the glaze would seep into the it when poured. We also served hunks of the cake with a smear of gorgeous clementine curd and a pluff of barely sweetened fresh whipped cream. I can’t recommend this serving suggestion enough — in fact, I’m going to make it a serving command (can I do that?), because the cake and fixins tasted just like a homey creamsicle!

My poor dad has been on a diet for weeks now and this is his “break” weekend. He’s not technically supposed to have cake, but I fixed him up a small slice (I promise I’m not a diet saboteur). He and my little brother both enjoyed it, so I left them a hunk for later. I may also have hidden away a bit in my own fridge! Something about refrigerating fruity baked goods always enhances the flavor, and this cake was no exception.

Clementine Cake


Recipe by: Adapted by Willow Bird Baking, Lick the Bowl Good, and Technicolor Kitchen from Jill Dupleix
Yields: one 9-inch cake

Cake Ingredients:
1 cup (2 sticks) unsalted butter, room temperature
1 cup granulated sugar
4 eggs, room temperature
1 1/2 teaspoon grated clementine zest
2 cups all purpose flour
1 tablespoon baking powder
1 teaspoon salt
7 tablespoons fresh squeezed clementine juice (I needed about 7 clementines total to make the cake and glaze)

Glaze Ingredients:
1 1/2 – 2 cups powdered sugar
4 tablespoons fresh squeezed orange juice
grated clementine zest

Fresh Whipped Cream Ingredients:
2 cups heavy whipping cream
2 tablespoons icing sugar

Directions:
Heat the oven to 350 degrees F. Butter a 9-inch cake pan and line the bottom with parchment paper. Butter the paper and set aside (I use Wilton’s Cake Release).

Cream the butter and sugar well for several minutes, until it is very pale and thick.

Add the eggs one by one, beating well after each addition, then add the zest. Add the flour, baking powder and salt all at once, and beat well, then slowly add the clementine juice until it is incorporated.

Pour the batter into the prepared cake tin, and bake for 35-40 minutes – or until an inserted skewer comes out clean (If it starts to brown too much on the top, cover loosely with a sheet of foil.) I baked mine for 40 or 45 minutes, which proved to be too long.

Allow cake to cool in pan for 15-20 minutes on a wire rack. Then invert onto a plate, remove the parchment paper and allow to cool completely before glazing.

To make the icing, stir the clementine juice into the icing sugar until you have the right spreading consistency. Using a skewer, dowel, or toothpick, poke holes through entire cake to allow glaze to seep down into it. Pour the icing onto the cake and spread with a spatula or butter knife, allowing the icing to drip down the sides of the cake.

To make fresh whipped cream, whip cream and icing sugar together until the mixture forms soft peaks. Store in an airtight container in the refrigerator.

Leave the icing to set before cutting the cake into wedges or storing in an airtight container. Serve with a smear of clementine curd, and a dollop of fresh whipped cream (and optional candied clementine peel).


Enjoy your citrus squeezin’!


Share Share this post with friends!

1 113 114 115 116 117 127